Articles
How To Crochet A Granny Square Blanket
Modified: January 6, 2024
Learn how to crochet a beautiful granny square blanket with these helpful articles. Step-by-step instructions and expert tips for beginners.
(Many of the links in this article redirect to a specific reviewed product. Your purchase of these products through affiliate links helps to generate commission for Storables.com, at no extra cost. Learn more)
Introduction
Welcome to the wonderful world of crochet! If you’re looking for a fun and rewarding project, crocheting a granny square blanket is just what you need. Granny squares are a classic crochet pattern consisting of small, square motifs that are joined together to create a larger piece. Not only are granny squares versatile and customizable, but they are also perfect for beginners and experienced crocheters alike.
In this article, we will guide you through each step of the process, from selecting your materials to finishing off your beautiful blanket. So grab your crochet hook, choose your favorite yarn colors, and let’s get started on creating a cozy and timeless granny square blanket.
Note: This tutorial assumes basic knowledge of crochet stitches such as the chain stitch, slip stitch, and double crochet. If you’re new to crochet, we recommend learning these stitches first before diving into the granny square blanket project.
Key Takeaways:
- Crocheting a granny square blanket is a delightful and rewarding project suitable for both beginners and experienced crocheters. With basic stitches and colorful yarn, you can create a cozy and timeless masterpiece.
- The granny square blanket project allows for endless creativity and personalization, making it a perfect way to showcase your craftsmanship and create a cherished heirloom. Enjoy the soothing rhythm of crochet and the satisfaction of completing a beautiful blanket.
Read more: How To Connect Granny Squares Into A Blanket
Materials Needed
Before you begin crocheting your granny square blanket, gather the following materials:
- A crochet hook: Choose a hook size that is suitable for the weight of yarn you will be using. Typically, a 5mm (US H-8) or 6mm (US J-10) hook works well with worsted weight yarn.
- Yarn: Select yarn in your desired colors. Worsted weight acrylic or cotton yarn is commonly used for granny square blankets. Depending on the size of your blanket, you may need several skeins of yarn in various colors.
- Scissors: You’ll need a pair of sharp scissors for cutting the yarn.
- Tapestry needle: This will be used for weaving in the loose ends of yarn as you work.
- Measuring tape: To ensure your blanket is the desired size, a measuring tape is essential.
- Stitch markers (optional): If you find it helpful to mark your stitches, stitch markers can come in handy.
Once you have gathered all the necessary materials, find a comfortable and well-lit space to start your crochet journey. Make sure to have a flat surface to work on, like a table or lap tray, and a cozy chair to sit in. Having everything ready and organized will make the crocheting process much more enjoyable and efficient.
Now that you have your materials prepared, let’s move on to the first step: starting the granny square.
Step 1: Starting the Granny Square
To begin crocheting your granny square, you’ll start by creating a small center circle. This circle will serve as the foundation for the rest of your square.
Here’s how to start your granny square:
- Make a slip knot by creating a loop with your yarn tail.
- Insert the crochet hook through the loop and tighten the knot around the hook.
- Create a foundation chain of four stitches. To do this, yarn over and pull through the loop on the hook four times.
- Slip stitch into the first chain stitch to form a ring.
Now that you have your ring, you can move on to the next step of creating the center circle.
By starting with a small center circle, you have laid the foundation for your granny square. This circle will serve as the base for the subsequent rounds of your square. As you progress, you’ll work stitches into this circle to create the classic granny square pattern.
Now that you have successfully started your granny square, it’s time to move on to the next step: creating the center circle.
Step 2: Creating the Center Circle
Now that you have your foundation ring, it’s time to create the center circle of your granny square. This circle will serve as the starting point for the subsequent rounds.
Here’s how to create the center circle:
- Chain three stitches. This will act as your first double crochet stitch.
- Work two more double crochet stitches into the center of the ring. To do this, yarn over, insert the hook into the center of the ring, yarn over again, and pull up a loop. Yarn over once more and pull through the first two loops on the hook. Yarn over again and pull through the last two loops on the hook. Repeat this step two more times to have a total of three double crochet stitches in the center.
- Chain two stitches.
- Work three more double crochet stitches into the center of the ring.
- Chain two stitches.
- Repeat the previous step two more times to have a total of four groups of three double crochet stitches separated by chain two spaces.
- Slip stitch into the top of the starting chain three to join the round.
After completing these steps, you will have a circular motif formed by double crochet stitches and chain spaces in the center of your granny square. This forms the basis for building the rest of the square in subsequent rounds.
Now that you have created the center circle, you’re ready to move on to the next step: working the first round.
Step 3: Working the First Round
With the center circle of your granny square completed, it’s time to move on to working the first round. This round will expand the square and create additional stitches around the center circle.
Follow these instructions to work the first round:
- Start by chaining three stitches. This will act as your first double crochet stitch.
- Work two more double crochet stitches into the chain two space from the previous round.
- Chain two stitches.
- In the same chain two space, work three double crochet stitches. This creates a corner of your granny square.
- Chain one stitch.
- Repeat steps 2-4 in the next chain two space. This will create another corner of the square.
- Continue repeating steps 2-5 in each of the remaining chain two spaces until you reach the beginning of the round.
- End the round by joining with a slip stitch into the top of the starting chain three.
By following these steps, you are building the first round of your granny square. The corners created with the chain two spaces will help shape the square, while the double crochet stitches and chain one spaces will create the characteristic texture of the granny square.
Now that you have completed the first round, it’s time to move on to adding additional rounds to expand your granny square.
When crocheting a granny square blanket, be sure to weave in your ends as you go to save time and prevent a tangled mess at the end.
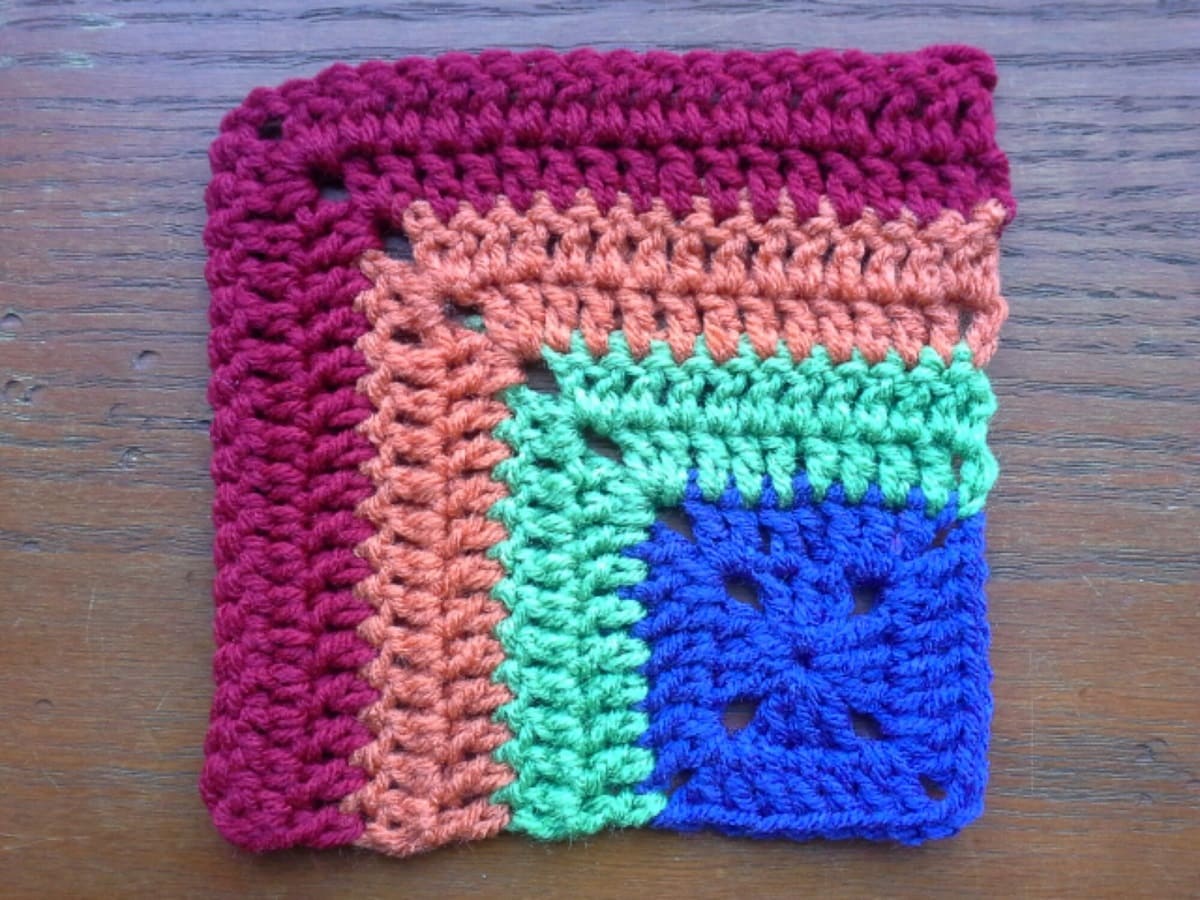
Step 4: Adding Additional Rounds
After completing the first round of your granny square, it’s time to add additional rounds to expand the size of the square and create the iconic granny square pattern.
Follow these steps to add more rounds:
- Start each new round by chaining three stitches. This will serve as your first double crochet stitch.
- In the corner space from the previous round, work three double crochet stitches, chain two stitches, and three more double crochet stitches. This creates a corner of your square.
- In the chain one space from the previous round, work three double crochet stitches. This forms the side of your square.
- Repeat step 3 in each chain one space around the square.
- In the corner space, work three double crochet stitches, chain two stitches, and three more double crochet stitches.
- Repeat steps 2-5 for each additional round, increasing the number of double crochet stitches and chain spaces as you progress.
- Continue adding rounds until your granny square reaches the desired size.
- End each round by joining with a slip stitch into the top of the starting chain three.
By following these steps, you will create multiple rounds of double crochet stitches and chain spaces, gradually expanding the size of your granny square. Each round will add more texture and depth to your square, giving it that classic granny square look.
Now that you know how to add additional rounds, it’s time to move on to the next step: joining granny squares together.
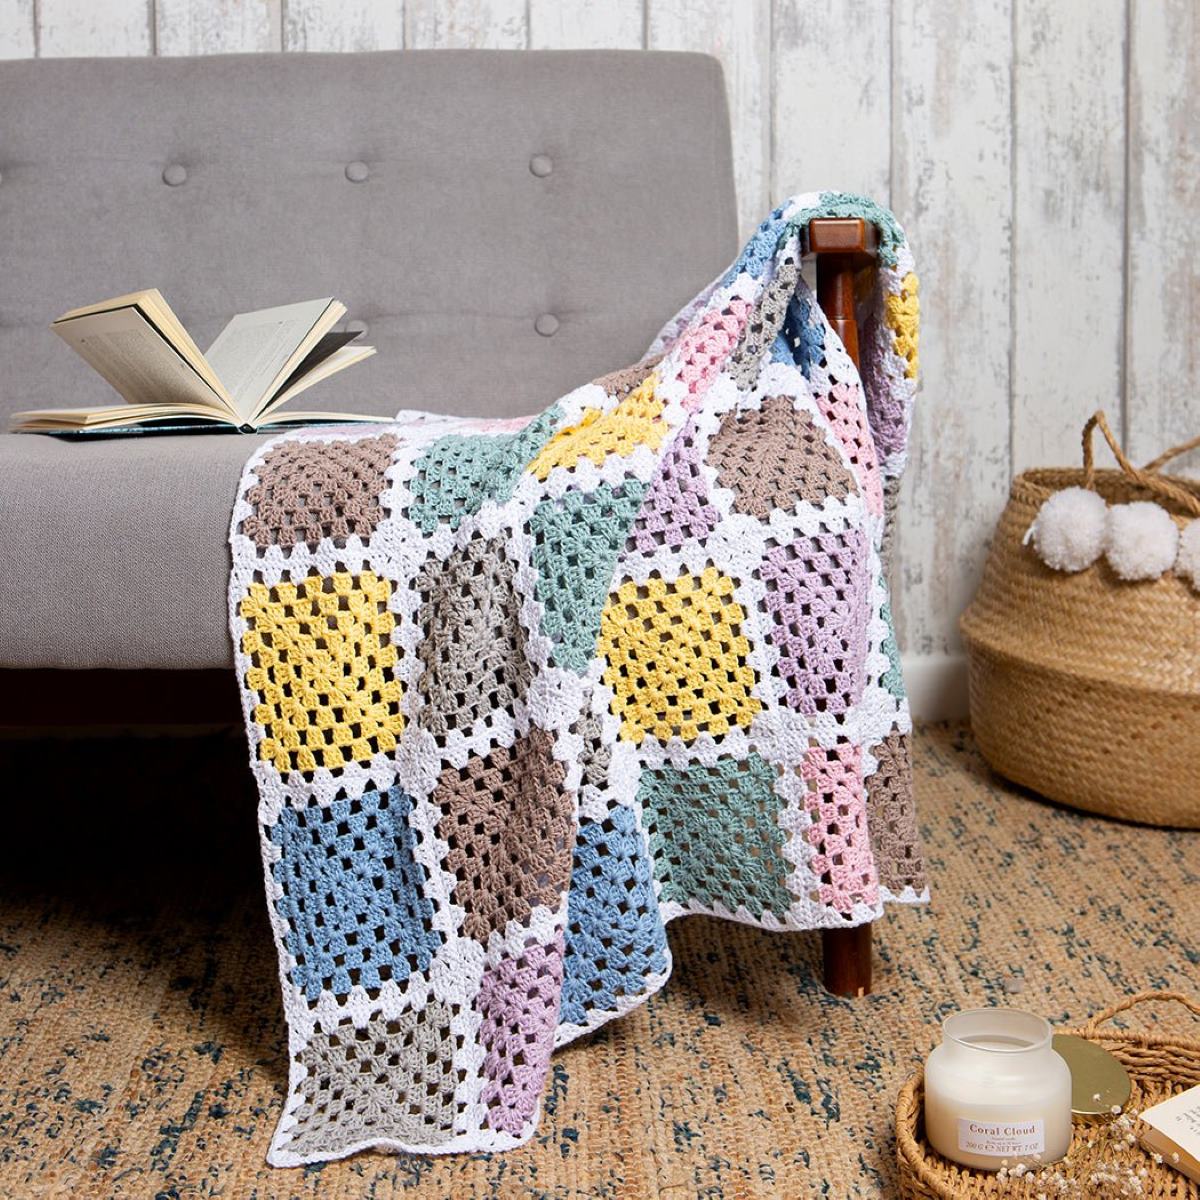
Step 5: Joining Granny Squares
Once you have crocheted multiple granny squares, it’s time to join them together to form your blanket. There are several methods for joining granny squares, but we’ll focus on the popular slip stitch join.
Follow these steps to join your granny squares:
- Lay out your granny squares in the desired arrangement.
- Begin with two adjacent squares that you wish to join together.
- Hold the two squares with the right sides facing each other.
- Insert your crochet hook into the corner space of both squares.
- Yarn over and pull the yarn through both corner spaces, creating a slip stitch.
- Continue slip stitching along the edges of the squares, working one slip stitch into each stitch or chain space. This will join the squares together.
- When you reach the next corner, work a slip stitch in the corner space of both squares, just as before.
- Continue slip stitching the remaining edges of the squares together until they are fully joined.
- Repeat the process to join the rest of your granny squares together, following your desired pattern or layout.
By using the slip stitch join method, you can seamlessly connect your granny squares, creating a cohesive and beautiful blanket. This method creates a flat and sturdy join that doesn’t add too much bulk to the finished piece.
Now that you know how to join your granny squares, it’s time to move on to the final step: finishing your blanket.
Step 6: Finishing the Blanket
Congratulations on reaching the final step of creating your granny square blanket! Now it’s time to give your blanket the finishing touches.
Follow these steps to complete your blanket:
- Weave in the loose ends: Use a tapestry needle to weave in any loose yarn ends that were created during the crocheting and joining process. This will give your blanket a neat and polished look.
- Block your blanket (optional): If you want to achieve a more professional look and ensure that your blanket lies flat, you can block it. Blocking involves gently wetting your blanket and then reshaping and stretching it to your desired dimensions. Place it on a flat surface to dry completely.
- Add an edging (optional): To add an extra touch of flair to your blanket, you can add an edging. There are countless edging patterns to choose from, such as picot, scallop, or shell stitch. Select an edging that complements the style of your blanket and crochet it around the edges.
- Clean and care for your blanket: Remember to follow the washing instructions for the yarn you used to ensure that your blanket stays in great condition. Most acrylic or cotton yarns can be machine washed on a gentle cycle, but it’s always best to check the label for specific instructions.
Once you have completed these final steps, your granny square blanket is ready to be enjoyed! Whether it’s for personal use, to give as a gift, or to snuggle up with on colder days, your blanket is a beautiful testament to your crochet skills and creativity.
Remember, every granny square blanket is unique, reflecting the colors and patterns you chose and the effort you put into it. Enjoy the cozy warmth and satisfaction that comes with completing a handmade blanket.
Thank you for joining us on this crochet journey. We hope you found this tutorial helpful and inspiring. Happy crocheting!
Conclusion
Creating a granny square blanket through crochet is not only a rewarding and enjoyable experience but also a fantastic way to showcase your creativity and craftsmanship. With a few basic crochet stitches and some colorful yarn, you can transform these small, square motifs into a stunning and cozy blanket that will be cherished for years to come.
Throughout this article, we have walked you through each step of crocheting a granny square blanket, from starting the center circle to joining the squares together and finishing off your masterpiece. By following these steps and experimenting with different yarn colors and patterns, you can personalize your blanket to reflect your unique style and preferences.
Whether you’re a seasoned crocheter or a beginner, the granny square blanket project is perfect for honing your crochet skills and exploring different stitch combinations. It allows you to express your creativity, as there are endless possibilities for color combinations and patterns.
So gather your materials, find a comfortable spot, and embark on the journey of creating your very own granny square blanket. Enjoy the soothing rhythm of the crochet hook and the satisfaction of watching your squares come together to form a beautiful and meaningful piece.
Not only will your granny square blanket keep you warm and cozy, but it will also be a cherished heirloom that can be passed down through generations. So grab your crochet hook and let your imagination run wild as you embark on this delightful crochet adventure.
Happy crocheting!
Frequently Asked Questions about How To Crochet A Granny Square Blanket
Was this page helpful?
At Storables.com, we guarantee accurate and reliable information. Our content, validated by Expert Board Contributors, is crafted following stringent Editorial Policies. We're committed to providing you with well-researched, expert-backed insights for all your informational needs.