Articles
How To Start Crocheting A Blanket
Modified: November 1, 2024
Learn the essentials of crocheting a cozy blanket with our informative articles. Start your crochet journey today and create beautiful designs.
(Many of the links in this article redirect to a specific reviewed product. Your purchase of these products through affiliate links helps to generate commission for Storables.com, at no extra cost. Learn more)
Introduction
Welcome to the wonderful world of crochet! If you’re looking for a relaxing and fulfilling hobby, crocheting a blanket is a perfect choice. Not only does it allow you to express your creativity, but it also results in a beautiful and functional item that can be enjoyed for years to come.
Crocheting a blanket may seem like a daunting task, especially for beginners, but fear not! With a little bit of patience and practice, you’ll be able to create a cozy and stylish blanket that you can be proud of.
In this article, we will guide you through the step-by-step process of crocheting a blanket. We’ll cover everything from choosing the right yarn and hook size, selecting a stitch pattern, and starting the foundation chain to creating the first row, continuing with additional rows, and adding borders and edgings. We’ll also touch on adjusting the size of the blanket, blocking, and finishing techniques.
So, grab your crochet hook, a cup of tea, and let’s get started on this exciting crochet adventure!
Note: For the purpose of this tutorial, we’ll focus on crocheting a basic rectangular blanket. However, feel free to experiment with different shapes, colors, and stitch patterns to make your blanket unique.
Before we dive in, let’s discuss the importance of choosing the right yarn and hook size.
Key Takeaways:
- Choosing the right yarn and hook size is crucial for crocheting a beautiful and functional blanket. Experiment with different options to find the perfect combination that suits your style and needs.
- Crocheting a blanket is a fulfilling journey that allows you to unleash your creativity. Embrace the learning process, enjoy every stitch, and take pride in creating a cozy, one-of-a-kind masterpiece.
Read more: How To Crochet A Star Into A Blanket
Choosing the Right Yarn and Hook
When it comes to crocheting a blanket, selecting the right yarn and hook size is crucial. The yarn you choose will determine the look, feel, and durability of your blanket, while the hook size will affect the overall tension and gauge of your stitches.
First, consider the type of yarn you want to work with. There are various options available, such as acrylic, cotton, wool, or a blend of different fibers. Each type of yarn has its own characteristics and benefits. For a beginner-friendly project like a blanket, acrylic yarn is a popular choice. It’s affordable, easy to work with, and comes in a wide range of colors. Cotton yarn is durable and has a lovely drape, making it suitable for warmer climates. Wool yarn is warm and cozy, perfect for snuggling up on chilly nights.
Next, consider the weight or thickness of the yarn. Yarn is categorized into different weights, ranging from super fine to super bulky. The weight you choose will determine the size and weight of your blanket. Lighter weight yarns are ideal for creating intricate stitch patterns and lacy designs, while heavier weight yarns will result in a thicker and warmer blanket.
When it comes to hook sizes, they are typically indicated on the yarn label. The recommended hook size will depend on the yarn weight you’ve chosen. It’s important to match the hook size to the yarn weight to achieve the desired tension and gauge. However, keep in mind that everyone’s crocheting style is different, so you may need to adjust the hook size based on your personal tension. If your stitches feel too tight and rigid, try using a larger hook. On the other hand, if your stitches appear loose and floppy, switch to a smaller hook.
Remember, the goal is to achieve consistent and even stitches throughout your blanket. Take the time to experiment with different yarns and hook sizes to find the perfect combination that works for you. Don’t be afraid to ask for recommendations at your local yarn store or seek inspiration from online crochet communities.
In the next section, we’ll discuss selecting a stitch pattern to bring your blanket to life.
Selecting a Stitch Pattern
One of the most exciting parts of crocheting a blanket is choosing a stitch pattern. The stitch pattern you select will determine the overall texture and design of your blanket. There are countless stitch patterns to choose from, ranging from simple to intricate.
If you’re a beginner or prefer a straightforward pattern, consider using the classic single crochet stitch. This stitch creates a sturdy and dense fabric, perfect for warm and cozy blankets. Alternatively, you can try the double crochet stitch, which works up faster and produces a slightly looser texture.
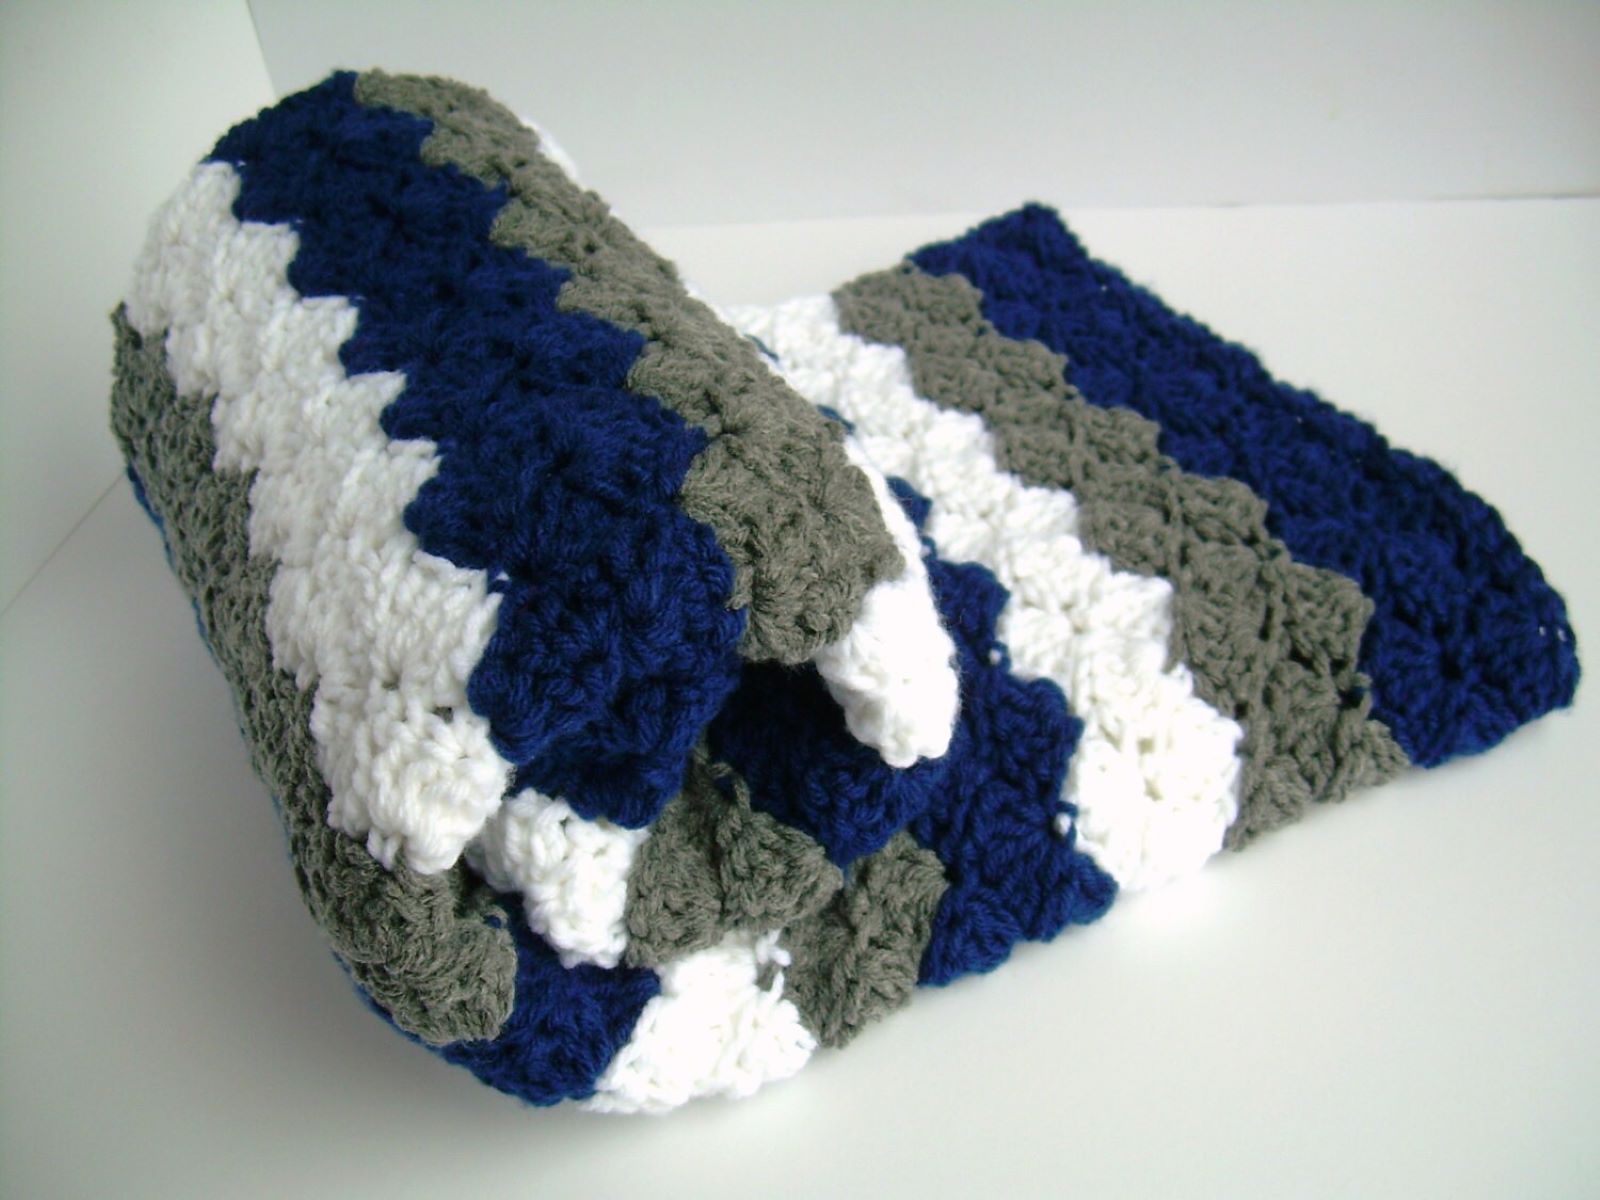
For those looking to add more visual interest to their blanket, explore different stitch patterns, such as the ripple stitch, granny square, or chevron stitch. These patterns create beautiful waves, squares, or zigzag designs, adding a touch of elegance to your project.
When selecting a stitch pattern, think about the functionality of the blanket. If you want a lightweight and breathable blanket, opt for an openwork stitch pattern that allows air to flow through the fabric. If you prefer a warmer and cozier blanket, go for a denser stitch pattern that traps heat.
Another factor to consider is the skill level required for the stitch pattern. Some patterns are more beginner-friendly, while others may require advanced techniques or knowledge. Don’t be afraid to challenge yourself and learn new stitches, but also remember to keep it enjoyable and within your skill level.
As you explore different stitch patterns, gather inspiration from crochet books, websites, and social media platforms. You can also create a swatch using a small amount of yarn to see how the stitch pattern looks and feels before committing to the entire blanket.
Lastly, consider the visual impact of the stitch pattern. Think about the color combination of your yarn and how it will interact with the chosen stitch pattern. Some stitch patterns may showcase variegated yarns beautifully or highlight the color changes in gradient yarns.
Ultimately, selecting a stitch pattern is a personal choice that allows you to infuse your creativity into your blanket. Find a pattern that speaks to you and resonates with the style and purpose of your project.
In the next section, we’ll dive into the practical steps of starting the foundation chain.
Starting the Foundation Chain
Now that you have chosen your yarn and stitch pattern, it’s time to start crocheting your blanket! The first step is to create the foundation chain, which serves as the base for your stitches.
To start the foundation chain, begin by making a slip knot. Form a loop with the yarn, leaving a tail, and insert your crochet hook through the loop. Pull the working end of the yarn through the loop to create a slip knot that can slide along the hook.
Next, hold the crochet hook in your dominant hand and the slip knot in your non-dominant hand. With the slip knot on the hook, yarn over by wrapping the yarn from the back to the front around the hook. Hold the yarn securely with your non-dominant hand to maintain tension.
To create the first chain stitch, pull the wrapped yarn through the slip knot, forming a loop on your hook. Congratulations, you’ve just made your first chain stitch!
Continue to make chain stitches until you reach the desired length for your blanket. To maintain consistency in your chain stitches, pay attention to the tension and size of each stitch. Avoid making the stitches too tight or too loose, as this can affect the overall appearance of your blanket.
As you work on your foundation chain, take breaks to check the length against your desired measurements. This will ensure that you’re creating a blanket of the right size. If you need to adjust the length, simply add or subtract chain stitches accordingly.
Once you have completed the foundation chain, take a moment to admire your progress. You now have a solid base upon which you will build the rest of your blanket.
In the next section, we’ll move on to creating the first row of stitches.
Creating the First Row
With the foundation chain in place, it’s time to move on to the exciting part of creating the first row of stitches in your blanket. This is where your chosen stitch pattern starts to take shape!
Before you begin, make sure your crochet hook is still inserted in the last chain stitch of the foundation chain. This will serve as the starting point for your first row.
Refer to your stitch pattern instructions to determine which stitch you need to use for the first row. For example, if you’re using the single crochet stitch, insert your hook into the second chain stitch from the hook. Yarn over and pull the yarn through both loops on the hook, creating a single crochet stitch.
Continue working along the foundation chain, repeating the stitches according to the stitch pattern instructions. Each stitch should be worked into the appropriate chain stitch, ensuring that your stitches align properly.
As you work your way across the foundation chain, pay attention to the tension of your stitches. Aim for even tension, neither too tight nor too loose. This will help maintain a consistent size and appearance throughout your first row.
Periodically pause to check your progress and make any necessary adjustments. Make sure the edges of your blanket remain straight and flat as you continue to create the first row. If you notice any unevenness or gaps, go back and fix them before proceeding.
Be patient with yourself, especially if you’re new to crocheting. Like any skill, it takes time to develop precision and consistency. Don’t be discouraged by imperfections – they can add character to your finished blanket!
Once you’ve completed the first row, take a step back and admire your work. You have now successfully begun the journey of crocheting your very own blanket.
In the next section, we’ll discuss how to continue with additional rows to build upon your blanket.
Start by choosing a simple stitch like single or double crochet. Then, decide on the size and color scheme for your blanket. Finally, gather the necessary materials such as yarn and a crochet hook.
Read more: How To Repair A Crochet Blanket
Continuing with Additional Rows
Now that you’ve successfully created the first row of stitches, it’s time to continue building your blanket by working on additional rows. This is where your crochet project starts to take shape and grow in size.
To begin the second row, you’ll typically need to turn your work. This means flipping your piece over so that the front side is facing you. Hold the crochet hook in your dominant hand and hold the blanket in your non-dominant hand, making sure to keep the yarn taut but not too tight.
Refer to your stitch pattern instructions to determine the specific stitch you need to work for the second row and beyond. Insert your hook into the first stitch of the previous row or into the chain space, depending on the stitch pattern. Yarn over and pull the yarn through, creating a loop on your hook.
Continue working across the row, following the stitch pattern instructions. Each stitch you make should be worked into the corresponding stitch of the previous row, ensuring that your stitches align properly. Remember to maintain consistent tension and avoid making your stitches too tight or too loose.
As you complete each row, take a moment to check your progress. Ensure that the edges of your blanket are straight and even. If you notice any inconsistencies or gaps, adjust your tension or make any necessary corrections.
Continue working additional rows until your blanket reaches the desired length. This may require repeating the same stitch pattern for several rows or alternating between different stitch patterns, depending on your design and preferences.
For a neat and professional-looking blanket, be mindful of the yarn ends as you work through each row. Make sure to weave in the loose ends as you go to prevent them from becoming tangled or visible in the finished piece.
Remember that crocheting a blanket is a labor of love and requires time and patience. Take breaks, stretch your hands and fingers, and enjoy the process. Embrace the rhythm of your stitches and the meditative quality of crochet.
Once you’ve reached the final row, take a moment to appreciate the growth and progress you’ve made. Your blanket is now taking shape and becoming a beautiful and functional work of art.
In the next section, we’ll explore methods for adjusting the size of your blanket if needed.
Adjusting the Size of the Blanket
While working on your crochet blanket, you may find that you want to adjust its size. Whether you want to make it larger or smaller, don’t worry – it’s entirely possible to modify the size of your blanket to fit your needs.
If you want to make your blanket larger, you have a few options. Firstly, you can add more rows to increase the length. Simply continue working additional rows using the same stitch pattern until you reach the desired size. Remember to maintain consistent tension and check the edges for straightness as you go.
If you want to increase the width of your blanket, you can add more stitches to each row. This can be done by either increasing the number of stitches in the foundation chain or by adding stitches evenly across each row. Be mindful of the stitch pattern you’re using and ensure that the increases are evenly distributed to maintain the integrity of the pattern.
On the other hand, if you want to make your blanket smaller, the process is similar. To decrease the length, you can simply work fewer rows until you achieve the desired size. Pay attention to the stitch pattern and make any necessary adjustments to maintain consistency.
To decrease the width of your blanket, you can either decrease the number of stitches in the foundation chain or decrease stitches evenly across each row. Decreasing stitches evenly can be done by skipping stitches in a specific pattern or by working stitches together in a single stitch, as indicated by your stitch pattern.
When making size adjustments, it’s important to consider the overall balance of your blanket. If you’re altering the stitch pattern or the stitch count significantly, it may affect the drape, texture, and visual appeal of the finished piece. It’s a good idea to create a swatch and test the changes before applying them to the entire blanket.
Remember that crochet is a flexible and forgiving craft, so don’t be afraid to experiment and make adjustments as you go. It’s all part of the creative process and will result in a blanket that is perfectly suited to your preference and needs.
In the next section, we’ll explore how to add borders and edgings to your blanket for a polished finish.
Adding Borders and Edgings
Adding borders and edgings to your crocheted blanket is a wonderful way to give it a polished and finished look. Borders not only enhance the aesthetic appeal of the blanket but also provide stability and structure to the edges.
When selecting a border or edging, consider the overall design and style of your blanket. You can choose a simple border, such as a round of single crochet or double crochet stitches, to add a clean and classic finish. Alternatively, you can explore more elaborate options, such as lace patterns or shell stitches, to create a decorative and intricate border.
Before you begin, take a moment to measure the sides of your blanket. This will help determine the number of stitches or the length of the border needed to go around the entire blanket evenly. Depending on the size of your blanket, you may need to make adjustments to ensure that the border is symmetrical.
To start, attach your yarn to any stitch along one edge of the blanket. Work the selected border stitch across the edge, making sure to maintain consistent tension and spacing. As you reach the corners, you may need to work additional stitches or create corner motifs to ensure a smooth transition around the corners of the blanket.
Continue working the border stitch around all sides of the blanket until you reach the starting point. To join the border, slip stitch into the first stitch or use a seamless join technique for a seamless finish.
After completing the border, take a moment to evaluate the overall appearance of your blanket. Check for any loose ends that need to be woven in and trim them neatly. If desired, block your blanket by gently wetting it and laying it flat to dry. This will help even out the stitches and give your blanket a professional and polished look.
Adding an edging to your blanket is optional but can elevate the overall design and provide an extra touch of elegance. Edgings are typically worked along the top and bottom edges of the blanket, such as the border between the body of the blanket and the border itself. You can use the same stitch pattern as the border or choose a different stitch pattern or motif for contrast.
Remember to take your time and enjoy the process of adding a border and edging to your crocheted blanket. It’s an opportunity to add your personal creativity and make your blanket truly unique.
In the next section, we’ll discuss how to block and finish your blanket for a final touch.
Blocking and Finishing the Blanket
After all the hard work and creativity you’ve put into crocheting your blanket, it’s time to give it the final touch by blocking and finishing. Blocking is a process that helps even out the stitches, shape the blanket, and enhance its overall appearance.
To begin, gently wet your blanket by soaking it in lukewarm water or spraying it with water using a spray bottle. Avoid agitating or rubbing the blanket to prevent stretching or damaging the fibers.
Once your blanket is wet, carefully remove the excess water by gently pressing it between layers of a clean towel or rolling it up in the towel and applying light pressure. Never wring or twist the blanket as this can distort the stitches.
Lay your blanket flat on a clean surface, such as a blocking mat or thick towels. Pin the edges of the blanket using rustproof T-pins to hold it in place and maintain its shape. Make sure the corners are square and the sides are straight.
If you wish to adjust any uneven stitches or rows, gently tug or manipulate them while the blanket is damp. This is the time to adjust any inconsistencies or irregularities to achieve a more uniform appearance.
Allow your blanket to air dry completely. This may take a day or longer, depending on the yarn and the thickness of the blanket. Avoid drying it in direct sunlight or using artificial heat sources, as this can cause fading or damage to the fibers.
Once your blanket is dry, remove the blocking pins and evaluate the final result. You will notice how blocking has helped to even out the stitches, define the patterns, and give your blanket a professional finish.
The last step in finishing your blanket is to weave in any remaining loose ends. Use a tapestry needle and thread the loose yarn ends through several stitches on the backside of the blanket, ensuring they are secure and not visible from the front.
Take a moment to appreciate your completed masterpiece. Your crocheted blanket is ready to be displayed, snuggled under, or gifted to a loved one. It’s a testament to your creativity and skill as a crocheter, and something that will bring warmth and joy for years to come.
Congratulations on finishing your beautiful crocheted blanket!
If you have any questions or need further guidance, feel free to reach out to the crochet community or explore online resources for inspiration and support.
Happy crocheting!
Read more: How To Crochet A Letter Into A Blanket
Conclusion
Crocheting a blanket is a fulfilling and rewarding journey that allows you to unleash your creativity while creating a beautiful and functional piece. Throughout this article, we have explored the essential steps and considerations for crocheting a blanket, from choosing the right yarn and hook size to selecting stitch patterns, starting the foundation chain, creating the first row, continuing with additional rows, and adding borders and edgings. We have also discussed how to adjust the size of your blanket and finish it off with blocking and final touches.
As a crocheter, you have the power to make a cozy, one-of-a-kind blanket that will bring warmth and comfort to yourself or a loved one. Embrace the learning process, be patient with yourself, and enjoy the journey. Crocheting is not just about the end result but the joy found in every stitch.
Remember to explore different stitch patterns, experiment with color combinations, and make the blanket your own. Don’t be afraid to make mistakes, as they can often lead to unique design elements. Join crochet communities, share your progress, and draw inspiration from other talented crocheters along the way.
Whether you choose to crochet a blanket for yourself, as a gift, or for a charitable cause, the time and effort you put into each stitch will be evident in the final product. The sense of accomplishment and pride that comes with completing a handcrafted blanket is unmatched.
So, gather your materials, find a comfortable spot, and let your creativity flow as you start your next crochet adventure. Embrace the joy and relaxation that crocheting brings, and may every stitch bring you closer to a beautiful and cherished blanket.
Wishing you happy crocheting and cozy blanket-making!
Frequently Asked Questions about How To Start Crocheting A Blanket
Was this page helpful?
At Storables.com, we guarantee accurate and reliable information. Our content, validated by Expert Board Contributors, is crafted following stringent Editorial Policies. We're committed to providing you with well-researched, expert-backed insights for all your informational needs.