Articles
How To Connect Granny Squares Into A Blanket
Modified: January 6, 2024
Learn how to connect granny squares into a beautiful blanket with our informative articles. Expert tips, techniques, and step-by-step tutorials.
(Many of the links in this article redirect to a specific reviewed product. Your purchase of these products through affiliate links helps to generate commission for Storables.com, at no extra cost. Learn more)
Introduction
Blankets made from granny squares are a beloved and timeless crochet project. Granny squares are small, individual crochet motifs that are crocheted in different colors and patterns. Once you have completed a collection of granny squares, the next step is to connect them together to create a beautiful and cozy blanket.
In this article, we will guide you through the process of connecting granny squares into a blanket. Whether you are an experienced crocheter or a beginner, this step-by-step tutorial will help you achieve a professional-looking result. So, grab your crochet hooks and let’s get started!
Key Takeaways:
- Connecting granny squares into a beautiful blanket is a creative and rewarding process that requires preparation, arrangement, joining, bordering, and finishing touches. Embrace the imperfections and enjoy the journey of creating a cherished heirloom.
- By patiently connecting granny squares with various crochet techniques and adding personalized touches, you can create a cozy masterpiece that brings warmth, comfort, and joy to yourself and your loved ones. Happy crocheting!
Read more: How To Crochet A Granny Square Blanket
Materials Needed
Before you begin connecting your granny squares, gather the following materials:
- Crochet hooks in the appropriate size for your yarn
- Yarn in various colors
- Tapestry needle
- Scissors
Make sure to choose a yarn that is soft and durable, suitable for creating a cozy blanket. Additionally, select crochet hooks that are comfortable to hold and match the recommended hook size for your yarn.
Having all the necessary materials at hand will ensure a smooth and enjoyable crochet experience as you connect your granny squares into a beautiful blanket.
Step 1: Preparing Granny Squares
Before we can start connecting the granny squares, it’s important to prepare them for joining. This involves blocking and arranging the squares to ensure they are ready for seamless connection.
Firstly, you’ll want to block your granny squares. Blocking is the process of shaping and sizing your squares to ensure they are all uniform in size. Lay your squares flat on a blocking mat or a towel, and gently stretch them to their intended dimensions. Pin them in place and leave them to dry completely. Blocking will help your squares lay flat and make the joining process much easier.
Next, arrange your granny squares in the desired layout. This is the time to get creative and experiment with different combinations to find the pattern you like best. You can lay out your squares in a grid pattern or create a more organic arrangement.
It’s also a good idea to take a photo or sketch a diagram of your layout. This will serve as a reference as you begin to connect the squares, ensuring that you don’t disrupt the arrangement of your design.
Once your squares are blocked and arranged, you’re ready to move on to the next step – joining the squares together to form the blanket.
Step 2: Arranging the Squares
Now that your granny squares are prepared, it’s time to begin arranging them in the desired pattern for your blanket. This step allows you to get a visual representation of how the final product will look and make any necessary adjustments before joining.
Start by laying out all of your granny squares on a flat surface. Take note of the colors and patterns on each square, as well as their orientation. This will help you create a harmonious and balanced arrangement.
There are several different ways you can arrange your granny squares:
- Grid pattern: Arrange the squares in a regular grid formation, with an equal number of rows and columns. This creates a clean and symmetrical look.
- Random pattern: Mix and match the squares in a random order for a more eclectic and whimsical design.
- Color gradient: Arrange the squares in a gradual transition of colors, creating a beautiful ombre effect.
- Motif placement: If your granny squares have specific motifs or patterns, you can arrange them strategically to create a focal point or highlight certain designs.
Remember to take a step back and evaluate your arrangement from different angles. Make any necessary adjustments until you are satisfied with the overall look and feel of the pattern.
Once you are happy with the arrangement, you’re ready to move on to the next step – joining the squares together using various crochet techniques.
When connecting granny squares into a blanket, use the whip stitch or single crochet method for a sturdy and seamless join. Be sure to lay out your squares in the desired pattern before starting to connect them.
Step 3: Joining the Squares
Now comes the exciting part – joining the granny squares together to create your blanket! There are several popular methods for joining granny squares, each with its own unique look and level of complexity.
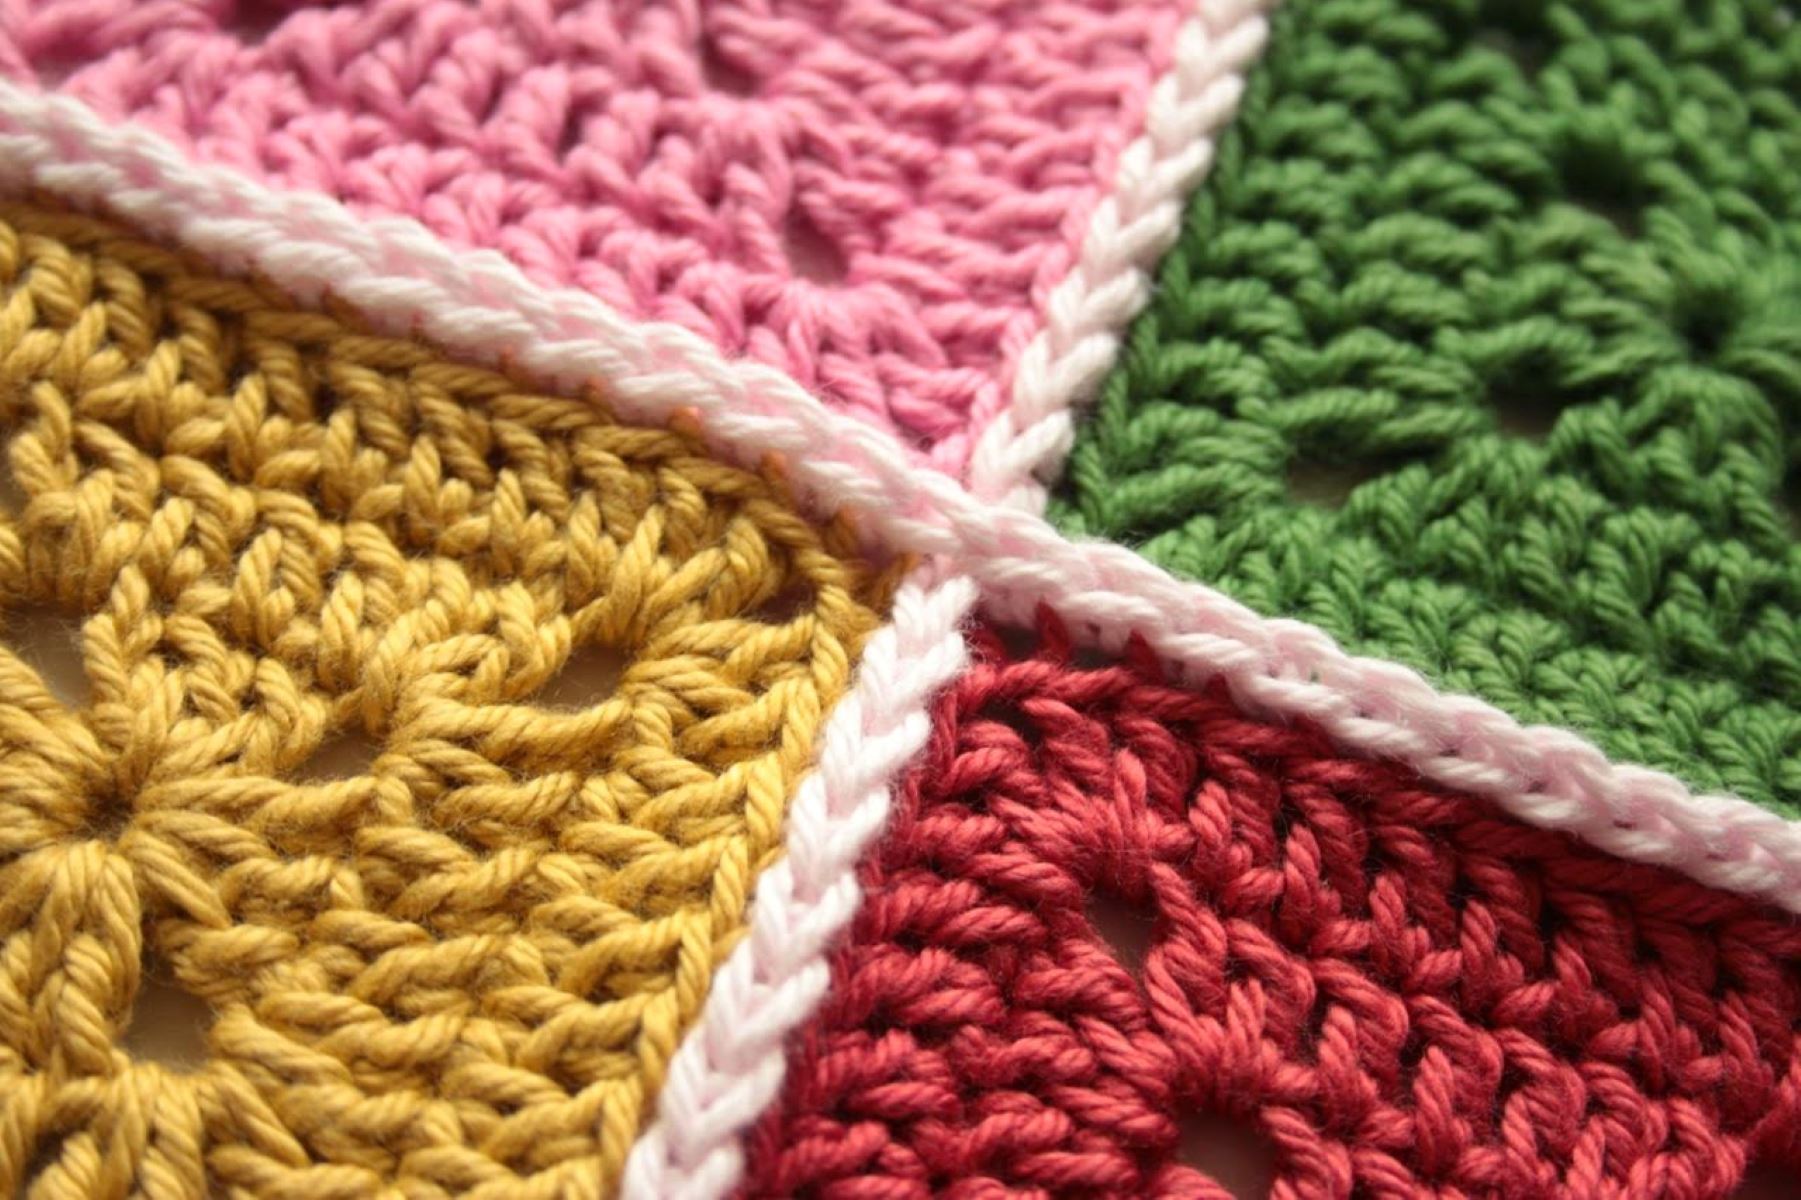
1. Whip Stitch Join: This is the simplest and most common method for joining granny squares. With a tapestry needle and matching yarn, you will sew the squares together using a whip stitch. Start by aligning two squares, right sides facing, and insert the needle under both loops of the corresponding stitches. Work your way along the edge, joining each stitch with a whip stitch until the two squares are securely connected.
2. Slip Stitch Join: This method creates a more seamless and invisible connection between squares. With a crochet hook, slip stitch through both loops of the corresponding stitches on two squares. This technique is great for creating a flat and smooth join.
3. Single Crochet Join: If you prefer a more decorative and textured join, the single crochet join is a great option. With a crochet hook, single crochet through both loops of the corresponding stitches on two squares. This method adds a row of single crochet stitches along the edges, creating a sturdy and visually appealing join.
Whichever method you choose, remember to maintain an even tension throughout the joining process for a professional finish. Take your time, especially when aligning the squares and transitioning from one stitch to the next.
Continue joining your squares according to your chosen layout until all the squares are connected. Once complete, step back and admire your progress – your beautiful granny square blanket is beginning to take shape!
Step 4: Bordering the Blanket
After successfully joining all the granny squares together, it’s time to add a border to your blanket. The border not only adds a finishing touch but also helps to stabilize the edges and give the blanket a polished look.
Here are a few options for bordering your granny square blanket:
- Simple Single Crochet Border: A simple border made of single crochet stitches can provide a clean and neat edge to your blanket. Choose a contrasting or coordinating color yarn to highlight the squares.
- Wave Border: If you want to add some visual interest to your blanket, consider a wave border. This border involves creating a ripple effect with alternating increases and decreases in stitches.
- Scalloped Border: For a dainty and feminine look, try a scalloped border. By crocheting multiple stitches into the same stitch, you can create beautiful scallops along the edges of your blanket.
- Picot Border: Picots are small loops of chain stitches that can add a delicate and decorative touch to your blanket’s border. The picot border is created by chaining a few stitches and then slip stitching back into the original stitch.
When choosing a border, consider the overall style and design of your blanket. You want the border to complement the granny squares and enhance the overall aesthetic.
Take your crochet hook and begin working the border stitches evenly around all four edges of the blanket. Make sure to maintain consistent tension and stitch size to create a cohesive and professional-looking border.
Once you have completed the border, weave in any loose ends and trim excess yarn. Congratulations! Your granny square blanket is now complete, and it’s ready to provide warmth and comfort.
Step 5: Finishing Touches
As you near the completion of your granny square blanket, there are a few final touches you can add to make it truly special and personalized. These finishing touches will add an extra level of charm and uniqueness to your beautiful creation.
1. Blocking: Once the blanket is fully assembled and bordered, consider giving it a final blocking. Blocking will help to even out the stitches, relax the fabric, and give the blanket a professional finish. Simply dampen the blanket with water or a steam iron, then lay it flat and reshape it to your desired dimensions. Allow it to dry completely before using or gifting.
2. Appliques or Embellishments: If you want to further customize your blanket, consider adding appliques or embellishments. These can be crochet flowers, hearts, stars, or any other design that resonates with you. Sew them onto your blanket in strategic locations to add a pop of color and texture.
3. Personalized Label: To add a personal touch or make the blanket a memorable gift, consider attaching a personalized label. You can create a custom label with your name or initials, the date of completion, or a special message. Sew the label onto a corner or the back of the blanket as a cherished keepsake.
4. Care Instructions: Don’t forget to include care instructions with your blanket. Make a small card or tag with information on how to properly care for the blanket, including washing and drying recommendations. This will help the recipient maintain the blanket’s beauty and longevity.
With these finishing touches, your granny square blanket will become a treasured heirloom, ready to be enjoyed for years to come. Remember to take pride in your handiwork and share your accomplishment with others.
Conclusion
Congratulations on successfully connecting your granny squares into a beautiful blanket! Through the process of preparing the squares, arranging them in a pleasing pattern, joining them together, adding a border, and adding those final finishing touches, you have created a stunning and cozy masterpiece.
Working with granny squares not only allows you to unleash your creativity but also provides a sense of accomplishment as you see the individual pieces come together into a unified whole. It’s a labor of love that results in a cherished item that can be passed down through generations.
Remember, the process of connecting granny squares may seem daunting at first, but with patience and practice, you can achieve stunning results. The key is to take your time, enjoy the journey, and embrace the imperfections that make each square unique.
Whether you make the blanket for yourself or as a gift for someone dear, it will undoubtedly become a cherished possession. Just imagine the warmth and comfort it will provide on chilly nights or the smiles it will bring to the faces of your loved ones.
So, don’t hesitate to dive into the wonderful world of connecting granny squares. With a little creativity, a selection of beautiful yarn, and the techniques you’ve learned, you can create a blanket that will be treasured for years to come.
Happy crocheting!
Frequently Asked Questions about How To Connect Granny Squares Into A Blanket
Was this page helpful?
At Storables.com, we guarantee accurate and reliable information. Our content, validated by Expert Board Contributors, is crafted following stringent Editorial Policies. We're committed to providing you with well-researched, expert-backed insights for all your informational needs.


0 thoughts on “How To Connect Granny Squares Into A Blanket”