Articles
How To Crochet A Zigzag Pattern Blanket
Modified: January 9, 2024
Learn how to crochet a beautiful zigzag pattern blanket with our helpful articles. Find step-by-step instructions and tips for creating your own cozy masterpiece.
(Many of the links in this article redirect to a specific reviewed product. Your purchase of these products through affiliate links helps to generate commission for Storables.com, at no extra cost. Learn more)
Introduction
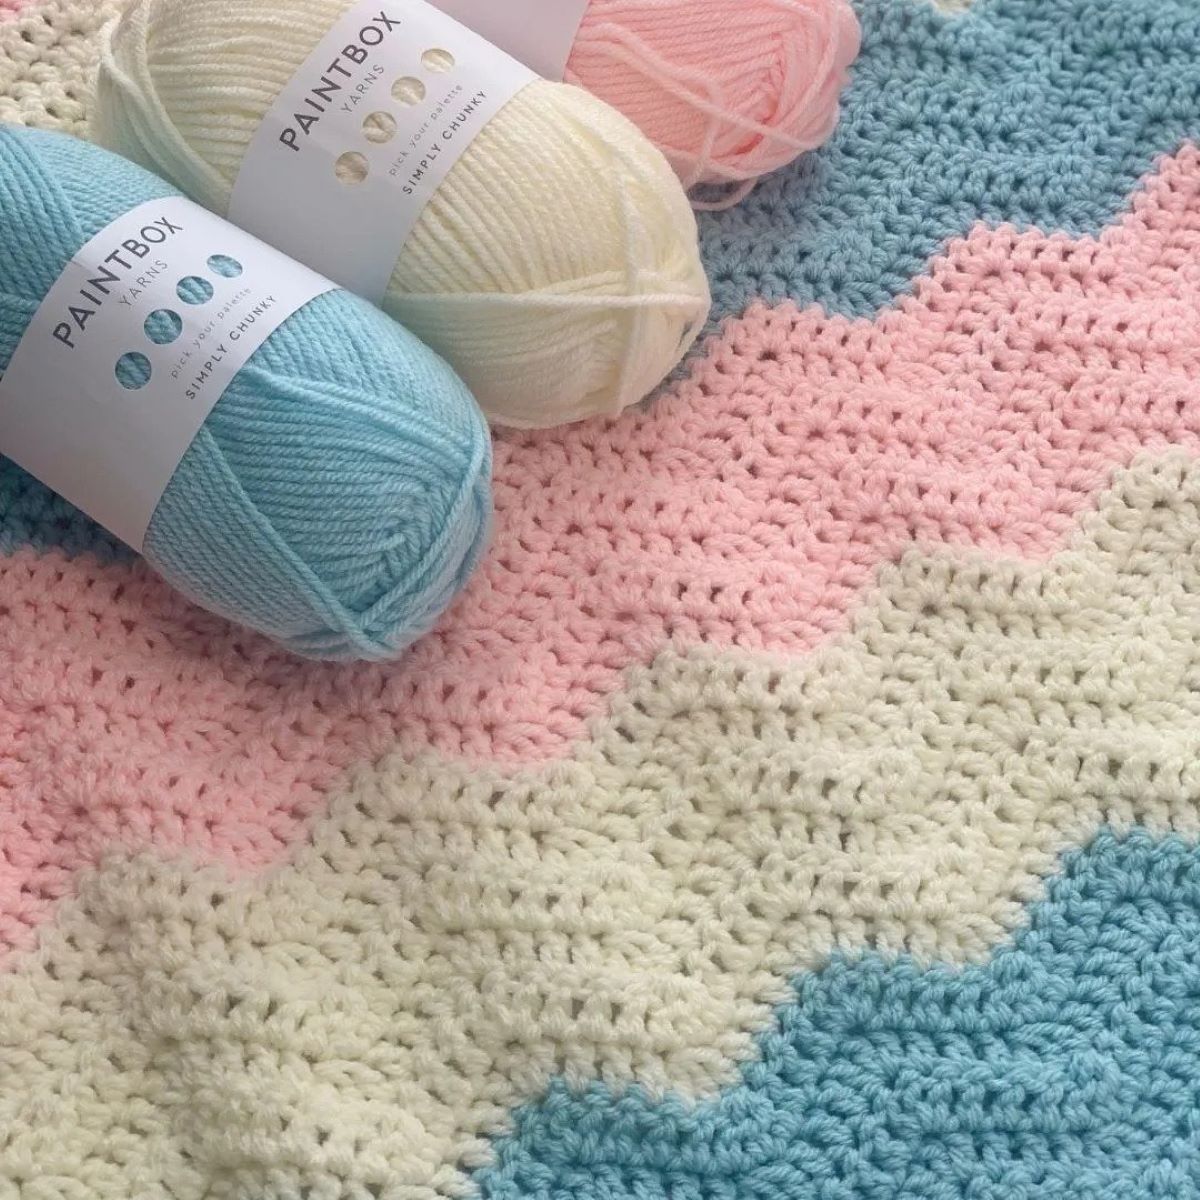
Everyone loves a cozy and stylish blanket, especially one that has a unique and eye-catching pattern. If you’re a crochet enthusiast or someone looking to try their hand at crochet, you’ll be thrilled to learn how to crochet a zigzag pattern blanket. This versatile pattern is perfect for adding a pop of color and texture to your home decor or as a thoughtful gift for a loved one.
In this comprehensive guide, we’ll take you through the step-by-step process of creating a stunning zigzag pattern blanket. From gathering the materials to the finishing touches, you’ll gain all the information you need to successfully complete this crochet project.
Not only will you learn how to create the zigzag pattern, but we’ll also explore different color variations to allow you to customize the blanket to suit your personal style. So, grab your crochet hooks, some beautiful yarn, and let’s get started on this exciting and rewarding crochet journey!
Key Takeaways:
- Crocheting a zigzag pattern blanket is a creative and rewarding experience that allows for self-expression and the creation of a functional and beautiful piece of art. The process involves selecting materials, choosing color variations, and adding personal touches to reflect your unique style and craftsmanship.
- Completing a zigzag pattern blanket is a testament to your crochet skills and creativity. It’s a labor of love that brings warmth and comfort, whether kept for yourself or given as a cherished gift. Enjoy the satisfaction of creating a stunning and eye-catching blanket!
Read more: How To Start Crocheting A Blanket
Materials Needed
Before diving into the crochet process, let’s gather all the materials you’ll need to create your very own zigzag pattern blanket:
- Crochet hooks in various sizes (depending on the desired thickness of the blanket)
- High-quality yarn in your preferred colors (make sure to choose a soft and durable yarn for maximum comfort)
- Scissors
- Tapestry needle (for weaving in loose ends and finishing touches)
- Measuring tape (to ensure accurate sizing)
- Stitch markers (optional, but useful for keeping track of stitches)
Make sure to invest in materials that are comfortable to work with and suitable for the type of blanket you want to create. The quality of the yarn will greatly impact the end result, so choose wisely.
Once you have gathered all the necessary materials, find a comfortable and well-lit space where you can work on your crochet project without any interruptions. Creating a cozy and inviting environment will make the crochet process even more enjoyable!
Getting Started
Now that you have all your materials ready, it’s time to get started on your zigzag pattern blanket. Here are a few essential steps to help you begin:
- Choose the size of your blanket: Before you begin crocheting, decide on the desired dimensions of your blanket. This will determine how many stitches and rows you need to complete. Consider the purpose of the blanket and whether it will be a throw blanket or a larger-sized blanket for the bed.
- Select the color palette: Decide on the color scheme you want for your zigzag pattern blanket. You can opt for a monochromatic color palette for a minimalist look or go bold with a vibrant mix of colors. This is where your creativity can truly shine.
- Understand the stitch pattern: The zigzag pattern consists of repeating rows of stitches that create a wave-like effect. Depending on your skill level, you may choose to use basic crochet stitches like single crochet or experiment with more intricate stitches like double crochet or treble crochet. Familiarize yourself with the stitch pattern and practice a few rows before starting your blanket.
Once you have decided on the size, color palette, and stitch pattern, you are ready to begin the crocheting process. Take your time, relax, and enjoy the therapeutic nature of crochet as you create your own beautiful zigzag pattern blanket.
Creating the Foundation Chain
The foundation chain is the starting point of your blanket and determines the width of your zigzag pattern. Follow these steps to create the foundation chain:
- Make a slip knot: Begin by creating a slip knot. Leave a long tail of yarn for weaving in later.
- Hold the crochet hook: Grasp the crochet hook firmly in your dominant hand, with the slip knot on the hook.
- Yarn over and pull through: Yarn over the hook by wrapping the yarn from the back to the front. With the yarn still on the hook, pull it through the slip knot loop, creating your first chain stitch.
- Continue the chain: Yarn over again and pull through the loop on the hook. Repeat this step until you reach the desired length for your blanket.
Remember to keep your chains evenly spaced and avoid making them too tight or too loose. Practice a consistent tension to ensure your foundation chain is uniform and neat.
If you’re a beginner, it’s helpful to count your chains periodically to ensure you have the correct number. You can use stitch markers to mark every tenth or twentieth chain, making counting easier.
Once you have completed your foundation chain, give it a gentle tug to straighten it out. Congratulations, you have successfully created the foundation for your zigzag pattern blanket! Now, it’s time to move on to the next steps and bring your blanket to life.
Crocheting the Base Rows
Now that you have created the foundation chain, it’s time to start crocheting the base rows of your zigzag pattern blanket. Follow these steps:
- Create a turning chain: Turn your work around and create a turning chain. The turning chain provides height to the first row of stitches. The number of chains in the turning chain will depend on the stitch pattern you are using.
- Choose your stitch: Determine the stitch you want to use for the base rows. Single crochet, double crochet, or half double crochet stitches are commonly used for the zigzag pattern.
- Insert your hook: Insert your hook into the second chain from the hook for single crochet, or into the third chain for double crochet. This will vary depending on the stitch you are using.
- Complete the first row: Work your way across the foundation chain, making sure to complete the required number of stitches. This will create the first row of your base for the zigzag pattern.
- Turn your work: Once you reach the end of the first row, turn your work around to begin the next row.
- Create the turning chain: Make a turning chain to match the height of the stitch you are using.
- Continue crocheting: Repeat the process of working the stitches across the row until you have completed the desired number of base rows for your blanket.
The base rows serve as the foundation for the zigzag pattern. Take your time and ensure that your stitches are even and consistent. This will create a solid base for the following zigzag rows.
Once you have completed the required number of base rows, you’re ready to move on to the exciting part of creating the zigzag pattern itself. Stay tuned for the next steps!
Read more: How To Crochet A Star Into A Blanket
Starting the Zigzag Pattern
Now that you have crocheted the base rows of your blanket, it’s time to start the zigzag pattern. This pattern adds a dynamic and visually appealing design element to your blanket. Follow these steps to begin:
- Choose the starting point: Decide where you want the first zigzag to begin on your blanket. This will determine the placement and number of stitches for the pattern.
- Create a turning chain: Turn your work around and create a turning chain. The turning chain helps maintain the height and consistency of the stitches in the zigzag pattern.
- Choose the stitch pattern: Decide on the stitch pattern you want to use for the zigzag. Common options are double crochet, treble crochet, or a combination of stitches.
- Work the stitches: Begin working the stitches according to the stitch pattern you have chosen. Follow the pattern instructions carefully to create the desired zigzag effect.
- Transition to the next row: Once you reach the end of the row, make a turning chain to begin the next row of the zigzag pattern.
- Continue the pattern: Repeat the process of working the stitches and transitioning to the next row. Each row will build on the previous one, creating a stunning zigzag pattern.
It’s important to pay attention to the pattern instructions and ensure the stitches align correctly to maintain the zigzag effect. Take your time, count your stitches, and adjust as needed to keep the pattern consistent.
The zigzag pattern is where your creativity can truly shine. You can experiment with different stitch combinations, vary the height of the stitches, or even incorporate multiple colors to make your blanket truly unique. Enjoy the process of creating the zigzag pattern and watch as your blanket takes shape!
When crocheting a zigzag pattern blanket, be sure to keep your tension consistent to maintain the shape of the zigzag. This will help ensure that your blanket turns out even and professional-looking.
Crocheting the Zigzag Rows
As you continue crocheting your zigzag pattern blanket, you’ll enter the phase of creating the zigzag rows. These rows will build upon the base rows and create the distinctive zigzag design. Here’s how to crochet the zigzag rows:
- Set the stitch pattern: Determine the stitch pattern you’ll use for the zigzag rows. This can be a repeat of the same stitch used in the base rows or a different stitch for added texture and visual interest.
- Create a turning chain: Turn your work and create a turning chain of the appropriate height for the stitch pattern you’re using.
- Work the stitches: Follow the stitch pattern instructions to create the first row of the zigzag. Make sure to align the stitches with the corresponding stitches from the previous row.
- Transition to the next row: Once you finish the first row of the zigzag, make a turning chain to start the next row. Remember to maintain consistency in stitch height.
- Continue the zigzag pattern: Repeat the process of working the stitches, turning, and transitioning to the next row. The zigzag design will gradually take shape as you progress.
Keep in mind that precision and attention to detail are crucial when crocheting the zigzag rows. Take your time to ensure the stitches align correctly, and count your stitches periodically to maintain the pattern’s integrity.
Feel free to experiment with different stitch combinations or color variations to add your personal touch to the zigzag pattern. The beauty of crochet is that you can customize your project to reflect your own style and creativity.
Continue crocheting the zigzag rows until you reach the desired length for your blanket. Once you’re satisfied with the size, it’s time to move on to the next step: adding color variations to further enhance the visual appeal of your blanket.
Adding Color Variations
Adding color variations to your zigzag pattern blanket can elevate its visual appeal and make it truly unique. Here are some ways to incorporate color variations:
- Choose your color scheme: Decide on the color palette you want to use for your blanket. You can opt for a harmonious blend of colors, a gradient effect, or a bold contrasting combination.
- Plan your color changes: Determine where you want to introduce the color changes in your zigzag pattern. This could be at the beginning of each row, after a certain number of rows, or a specific pattern repeat.
- Transition smoothly between colors: When changing colors, work the last stitch of the old color until two loops remain on the hook, then yarn over with the new color and complete the stitch. This creates a clean and seamless transition.
- Weave in loose ends: As you change colors, you’ll have loose ends to secure. Use a tapestry needle to weave them into the stitches of your blanket to keep them hidden.
Color variations allow you to play with different effects and create a blanket that aligns with your personal style. It can be helpful to create a color chart or draw out a design plan before you start crocheting to ensure you achieve the desired color pattern.
Remember to have fun with the color choices and experiment with different combinations. The beauty of crochet is the ability to customize and create something truly unique.
Once you have added the color variations, you’re ready to move on to the final steps of finishing the zigzag pattern and completing your blanket.
Finishing the Zigzag Pattern
As you near the completion of your zigzag pattern blanket, it’s important to give attention to the finishing touches. Here are the final steps to wrap up the zigzag pattern:
- Complete the final row: Continue crocheting the zigzag pattern rows until you reach the desired length for your blanket. Ensure that your stitches align with the previous rows and maintain the integrity of the pattern.
- Create a border (optional): Consider adding a border to your blanket to give it a polished and finished look. You can choose a simple single crochet or a more intricate stitch pattern to complement the zigzag design.
- Weave in loose ends: Take the time to weave in all the loose ends of yarn throughout your blanket. Use a tapestry needle to thread the ends through the stitches to secure them. This will help prevent any unraveling and give your blanket a clean and professional finish.
- Block your blanket (optional): Blocking your blanket involves wetting it, shaping it, and allowing it to dry flat. This process can help even out your stitches and give your blanket a more polished appearance.
As you finish the zigzag pattern, take a moment to admire your work and appreciate the effort you put into creating a beautiful and unique blanket. It’s a testament to your crochet skills and creativity.
Now that you have completed the zigzag pattern, it’s time to finalize your blanket and prepare it for its intended use or as a thoughtful gift for someone special.
Read more: How To Repair A Crochet Blanket
Finalizing the Blanket
Congratulations! You’ve reached the final stage of completing your zigzag pattern blanket. Here’s what you’ll need to do to finalize your masterpiece:
- Inspect your work: Take a moment to examine your blanket and check for any loose stitches or areas that may require reinforcement. Make any necessary adjustments or repairs before moving forward.
- Add decorative touches (optional): If you desire, you can enhance your blanket further by adding additional embellishments such as appliques, tassels, or pom-poms. These decorative accents can add an extra touch of style and personality to your finished creation.
- Block your blanket (optional): Blocking your blanket, especially if it’s made of natural fibers, can help set the stitches and give it a more professional and refined look. Follow the instructions for blocking based on the type of yarn you used.
- Clean and care for your blanket: Before showcasing or using your blanket, gently hand wash or follow the care instructions specific to your yarn to ensure it stays clean and looking its best for years to come. Use a mild detergent and lay it flat to dry.
Once you’ve taken care of these final steps, your zigzag pattern blanket is ready for use or display. Wrap yourself in the warmth and comfort of your creation, or present it as a cherished gift to someone special.
Remember, creating a handmade blanket is a labor of love and a testament to your creativity and craftsmanship. Take pride in your work and continue to explore new crochet techniques and patterns to further develop your skills.
Enjoy the satisfaction of completing your zigzag pattern blanket and relish in the joy it brings to your life or the recipient’s life. Happy crocheting!
Conclusion
Congratulations on completing your journey to crochet a stunning zigzag pattern blanket! Through this comprehensive guide, we’ve covered the essential steps and techniques required to create this eye-catching and stylish blanket. From selecting materials and creating the foundation chain to crocheting the base rows and zigzag pattern, you’ve learned the skills needed to bring your vision to life.
Throughout the process, you’ve had the opportunity to exercise your creativity by choosing color variations, stitch patterns, and adding your personal touch. This blanket is a true reflection of your unique style and craftsmanship.
Crocheting a zigzag pattern blanket is not only a joyful and rewarding experience, but it also allows for self-expression and the creation of a functional and beautiful piece of art. Whether you’re keeping the blanket for yourself or giving it as a gift, you can be proud of the time and effort you’ve invested in this project.
Remember to care for your blanket by following appropriate washing and storing instructions to ensure its longevity. Properly maintained, your zigzag pattern blanket will bring warmth and comfort for many years.
Now that you’ve successfully completed this crochet project, take the skills and knowledge you’ve gained and apply them to future projects. Explore new patterns, experiment with different stitches, and continue to grow as a crochet artist.
Thank you for joining us on this crochet journey to create a zigzag pattern blanket. We hope you’ve enjoyed the process and that your finished creation brings you joy and inspiration. Happy crocheting!
Frequently Asked Questions about How To Crochet A Zigzag Pattern Blanket
Was this page helpful?
At Storables.com, we guarantee accurate and reliable information. Our content, validated by Expert Board Contributors, is crafted following stringent Editorial Policies. We're committed to providing you with well-researched, expert-backed insights for all your informational needs.