Articles
How To Cut A Chain Link Fence
Modified: August 27, 2024
Learn how to easily cut a chain link fence with our informative articles. Explore step-by-step instructions and helpful tips to make the process quick and efficient.
(Many of the links in this article redirect to a specific reviewed product. Your purchase of these products through affiliate links helps to generate commission for Storables.com, at no extra cost. Learn more)
Introduction
A chain link fence is a popular choice for many homeowners and businesses due to its durability, affordability, and low maintenance requirements. However, there may be situations where you need to cut a chain link fence, such as when making modifications to the layout or removing a section for access purposes. While it may seem like a daunting task, with the right tools and techniques, you can easily cut a chain link fence without damaging the remaining sections.
In this article, we will guide you through the step-by-step process of cutting a chain link fence. We will also highlight the tools and materials you need to successfully complete the job. So, let’s dive in and learn how to cut a chain link fence like a pro!
Key Takeaways:
- Cutting a chain link fence requires the right tools, preparation, and safety measures. By following the step-by-step process and prioritizing safety, you can successfully modify or remove sections without damaging the remaining fence.
- After cutting the chain link fence, it’s crucial to inspect, repair, and secure the remaining sections. By taking the necessary finishing touches and safety measures, you can ensure the integrity and stability of the fence while prioritizing the well-being of everyone in the area.
Read more: How To Stretch A Chain Link Fence
Required Tools and Materials
Before you start cutting a chain link fence, you will need to gather the necessary tools and materials. Here is a list of what you will need:
- Measuring tape
- Marker or chalk
- Safety gloves
- Safety glasses
- Powerful wire cutters or bolt cutters
- Wire tensioner tool
- Hammer
- Pliers
- Wrench (if needed for removing tension bands)
It is important to prioritize safety when working with tools and equipment. Make sure to wear safety gloves and glasses to protect your hands and eyes from potential hazards.
Wire cutters or bolt cutters are essential for cutting through the chain link fence. Choose a pair that is durable and capable of cutting through thick wires. If you are working with a larger fence or thicker wires, bolt cutters may be more effective.
A wire tensioner tool will come in handy when adjusting the tension of the fence once the cutting is done. This tool allows you to tighten or loosen the fence to ensure it remains secure after modification.
Lastly, have a hammer and pliers on hand for any additional adjustments or repairs that may be necessary during the process. A wrench may also be required if you need to remove tension bands before cutting the fence.
Now that you have gathered all the necessary tools and materials, you are ready to move on to the next steps of cutting a chain link fence.
Step 1: Prepare the Work Area
Before you begin cutting the chain link fence, it is important to ensure that the work area is free from any obstructions and that you have enough space to safely maneuver around the fence. Here are the steps to prepare the work area:
- Clear the Area: Remove any plants, debris, or objects that may be in the way of the fence or could potentially cause accidents during the cutting process.
- Secure the Fence: If the fence is still in use, secure it by tying it to sturdy posts or using clamps to prevent it from swinging or moving while you work.
- Identify Power Lines: Before cutting the fence, make sure you are aware of any nearby power lines. It is crucial to keep a safe distance to avoid any electrical hazards.
- Turn Off Power: If there are any electrical wires in close proximity to the fence, turn off the power to eliminate the risk of electric shocks or accidents.
By taking the time to prepare the work area, you can ensure a safe and efficient cutting process. Once you have completed these steps, you can move on to the next step of measuring and marking the cutting line.
Step 2: Measure and Mark the Cutting Line
After preparing the work area, the next step is to measure and mark the cutting line on the chain link fence. This is an important step to ensure precision and accuracy in your cuts. Follow these steps:
- Measure the Length: Use a measuring tape to determine the length of the section you want to cut from the chain link fence. Take accurate measurements to avoid any errors.
- Mark the Cutting Line: Once you have measured the desired length, mark the cutting line on the fence using a marker or chalk. Make sure the mark is clear and easily visible.
- Consider Safety Buffer: It is advisable to leave a safety buffer of a few inches on either side of the marked cutting line. This will allow for easier maneuverability and prevent any accidental damage to the adjacent sections of the fence.
Remember to double-check your measurements and marks before proceeding to the next step. Taking your time to accurately measure and mark the cutting line will help ensure a clean and precise cut on the chain link fence.
Now that you have measured and marked the cutting line, you are ready to move on to the actual cutting process in the next step.
When cutting a chain link fence, use a bolt cutter for the wire and a reciprocating saw for the posts. Wear gloves and eye protection for safety.
Step 3: Cut the Chain Link Fence using a Cutting Tool
With the cutting line marked on the chain link fence, it’s time to proceed with actually cutting through the fence. Follow these steps to safely and effectively cut the chain link fence:
- Put on Safety Gear: Before you begin cutting, ensure that you are wearing safety gloves and glasses to protect yourself from any sharp edges or flying debris.
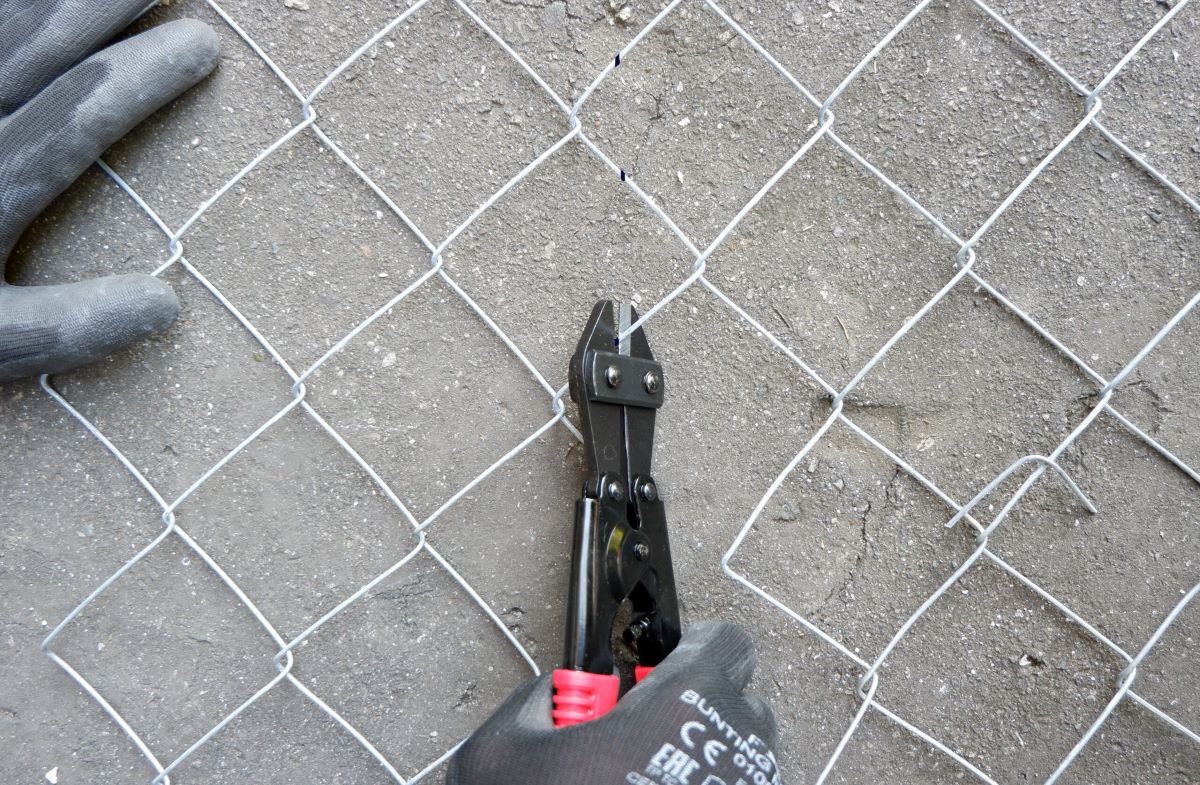
- Determine Cutting Technique: Depending on the type of cutting tool you have, there are a couple of techniques you can use. If you have powerful wire cutters, position them on one of the marked cutting lines and squeeze the handles firmly to cut through the wires. If you’re using bolt cutters, place the cutting jaws around one of the wires on the marked cutting line and apply pressure by squeezing the handles together until the wire is cut. Repeat this process for each wire along the cutting line.
- Take it Slow and Steady: While cutting through the fence, remember to do it slowly and steadily to ensure a clean cut. Rushing the process may result in jagged edges or damage to the remaining sections of the fence.
- Trim Any Remaining Wires: After cutting through the majority of the wires along the marked cutting line, you may find that some wires are still connected. Use the cutting tool to trim these remaining wires, ensuring a smooth and even cut.
Remember to take breaks as needed and inspect your progress to ensure you are cutting along the marked line accurately. Safety should always be your top priority during this step.
Once you have successfully cut the chain link fence, move on to the next step of removing the cut section of the fence.
Read more: How To Cover A Chain Link Fence
Step 4: Remove the Cut Section of the Fence
After cutting the chain link fence, the next step is to remove the cut section. Here’s how to do it:
- Inspect the Cut: Take a moment to examine the cut section of the fence to ensure that it’s fully separated from the rest of the fence.
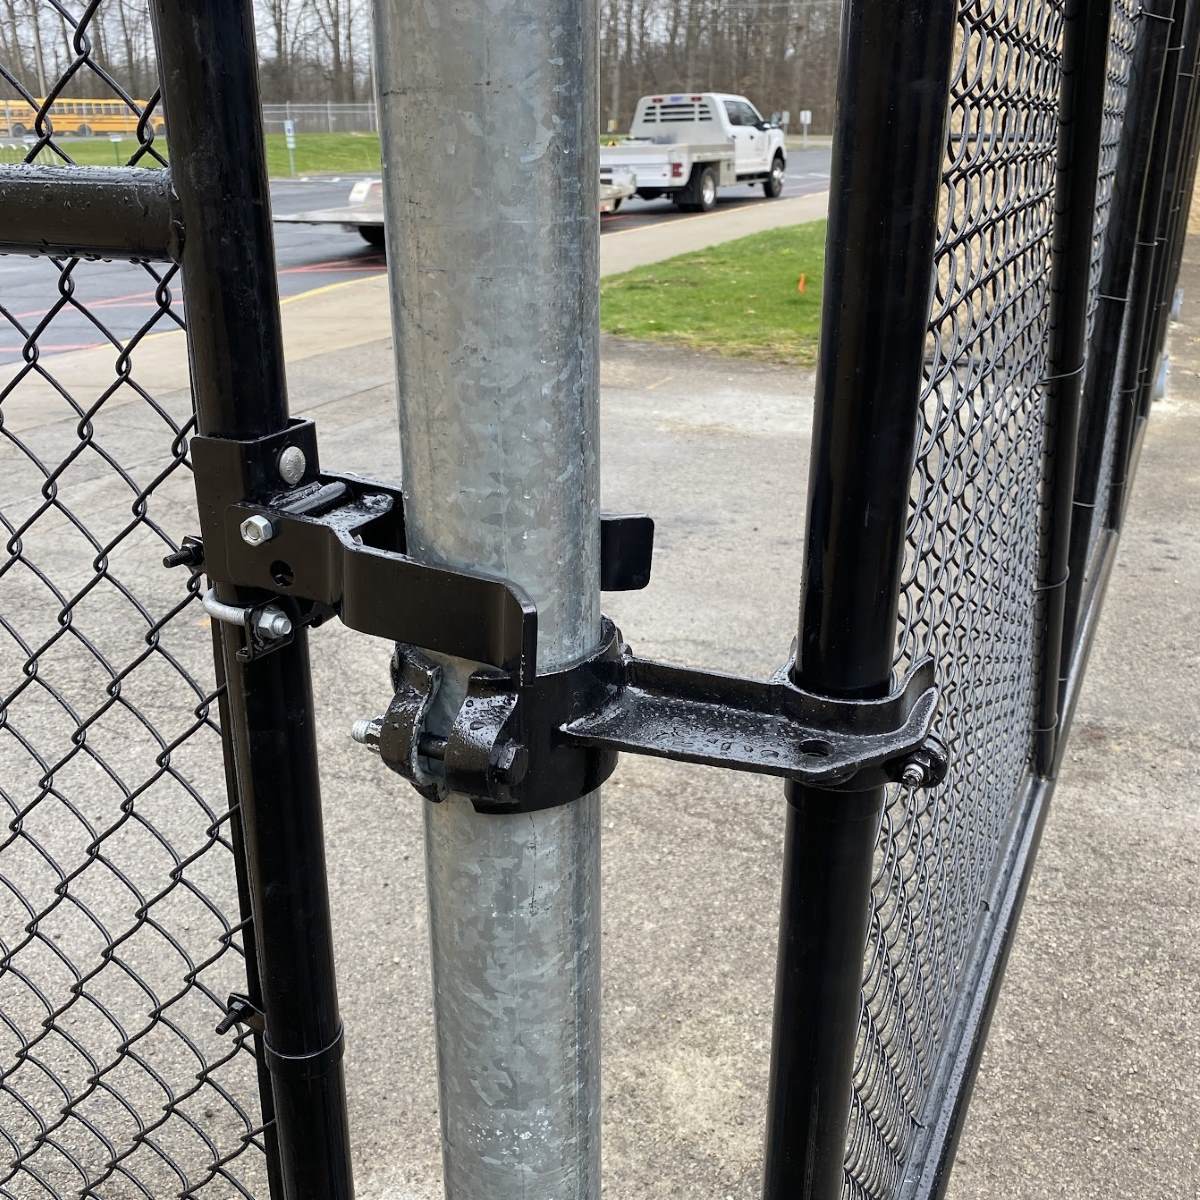
- Remove Any Connectors: If there are any connectors, such as tension bands or hooks, that are still attached to the cut section, use pliers or a wrench to remove them.
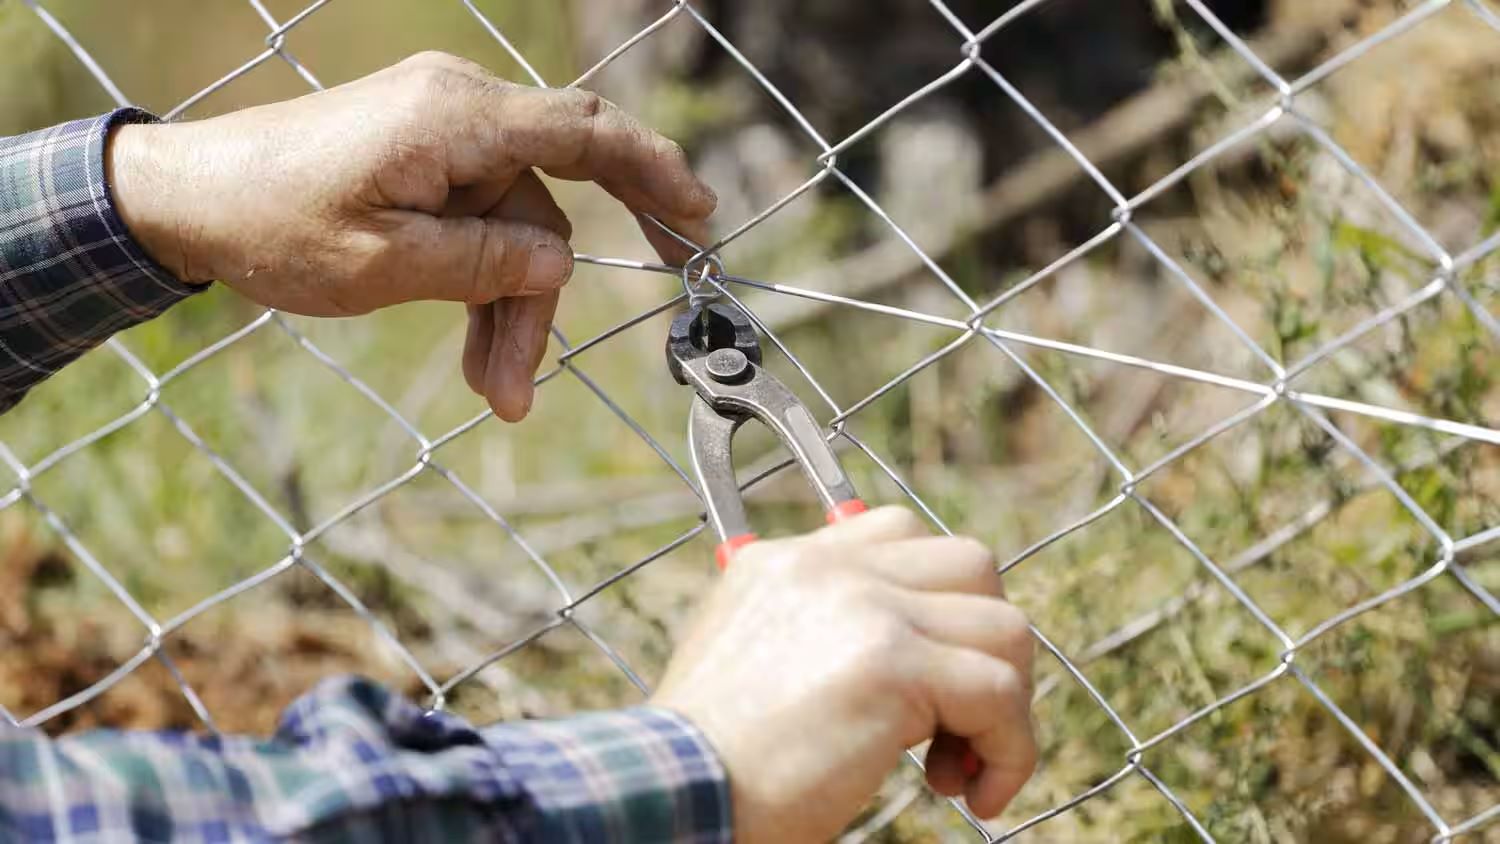
- Detach the Wires: Along the cut edge of the fence, you will find wires that were connected to the adjacent sections. Use pliers to bend and detach these wires, making sure to remove them completely.
- Store or Dispose of the Cut Section: Depending on your needs, you can either store the cut section of the fence for future use or dispose of it properly. If you plan to reuse it, keep it in a safe place to prevent any damage or entanglement.
Make sure to handle the cut section of the fence with care to avoid any injuries or damage. Remember, sharp edges may still be present, so wear safety gloves to protect your hands.
With the cut section removed, you can proceed to the next step to add finishing touches and ensure the safety of the remaining fence.
Step 5: Finishing Touches and Safety Measures
After removing the cut section of the chain link fence, it’s important to take some additional steps to ensure the remaining fence is secure and safe. Follow these finishing touches and safety measures:
- Inspect the Remaining Sections: Take a close look at the remaining sections of the fence to check for any damage or loose connections. Make any necessary repairs or adjustments using pliers, a hammer, or a wire tensioner tool.
- Reattach Tension Bands: If you had to remove any tension bands before cutting the fence, now is the time to reattach them. Use a wrench to tighten them securely.
- Tighten the Fence: Use a wire tensioner tool to adjust the tension of the fence and make sure it is secure. This will prevent any sagging or movement that could compromise its effectiveness.
- Remove Excess Wire: Trim any excess wire using wire cutters or pliers to avoid any potential hazards or obstructions.
- Ensure Safety Protocols: If the fence is located on your property, it’s important to inform anyone residing or working in the area about the modifications and any safety precautions they need to take.
By performing these finishing touches and safety measures, you can maintain the integrity of the remaining fence while ensuring the safety of yourself and others.
Now that you have completed all the necessary steps, take a moment to appreciate your work. You have successfully cut a chain link fence!
Conclusion
Cutting a chain link fence may seem like a daunting task, but with the right tools, materials, and techniques, it can be accomplished smoothly and safely. Whether you need to modify the layout of your fence or simply remove a section for access purposes, the step-by-step process outlined in this article will guide you through the process.
Remember to prioritize safety throughout the entire cutting process. Wear safety gloves and glasses to protect yourself from sharp edges and flying debris. Take your time to accurately measure and mark the cutting line, ensuring precision in your cuts.
By following the steps outlined in this article, you can successfully cut a chain link fence without damaging the remaining sections. Inspect the cut section, remove any connectors or wires, and decide whether to store or dispose of it.
After removing the cut section, perform the necessary finishing touches to ensure the security and stability of the remaining fence. Inspect and repair any damages, reattach tension bands if required, tighten the fence, and remove excess wires.
Lastly, educate others about the modifications made to the fence and any necessary safety precautions. By doing so, you can ensure the well-being of everyone in the area.
Now that you have the knowledge and know-how to cut a chain link fence, you can proceed with confidence and make the necessary modifications to meet your needs.
Frequently Asked Questions about How To Cut A Chain Link Fence
Was this page helpful?
At Storables.com, we guarantee accurate and reliable information. Our content, validated by Expert Board Contributors, is crafted following stringent Editorial Policies. We're committed to providing you with well-researched, expert-backed insights for all your informational needs.


0 thoughts on “How To Cut A Chain Link Fence”