Articles
How To Install Chain Link Fence On A Slope
Modified: October 18, 2024
Looking for articles on how to install a chain link fence on a slope? Find step-by-step instructions and expert tips for a successful installation.
(Many of the links in this article redirect to a specific reviewed product. Your purchase of these products through affiliate links helps to generate commission for Storables.com, at no extra cost. Learn more)
Overview
Installing a chain link fence on a slope can be a challenging task, but with the right techniques and tools, it can be done successfully. Whether you need to install a fence on a hilly landscape or a gentle slope, this guide will provide you with step-by-step instructions to help you tackle the project.
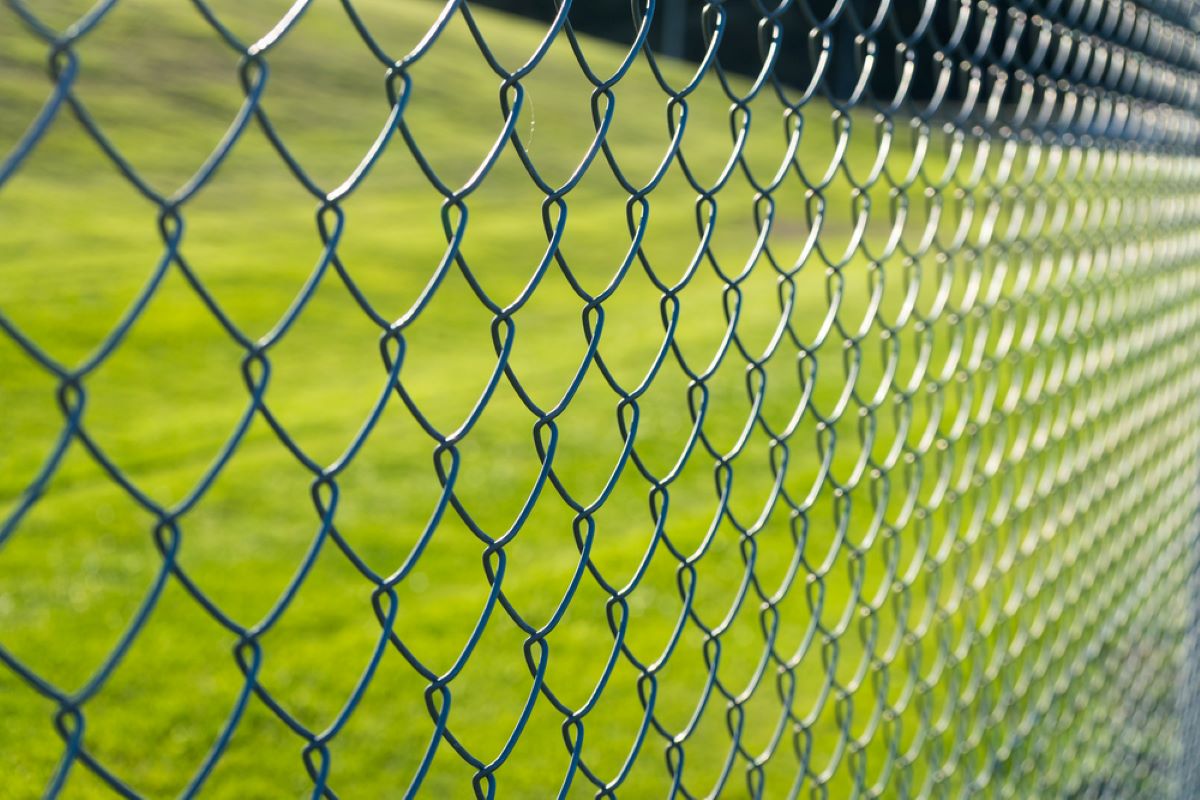
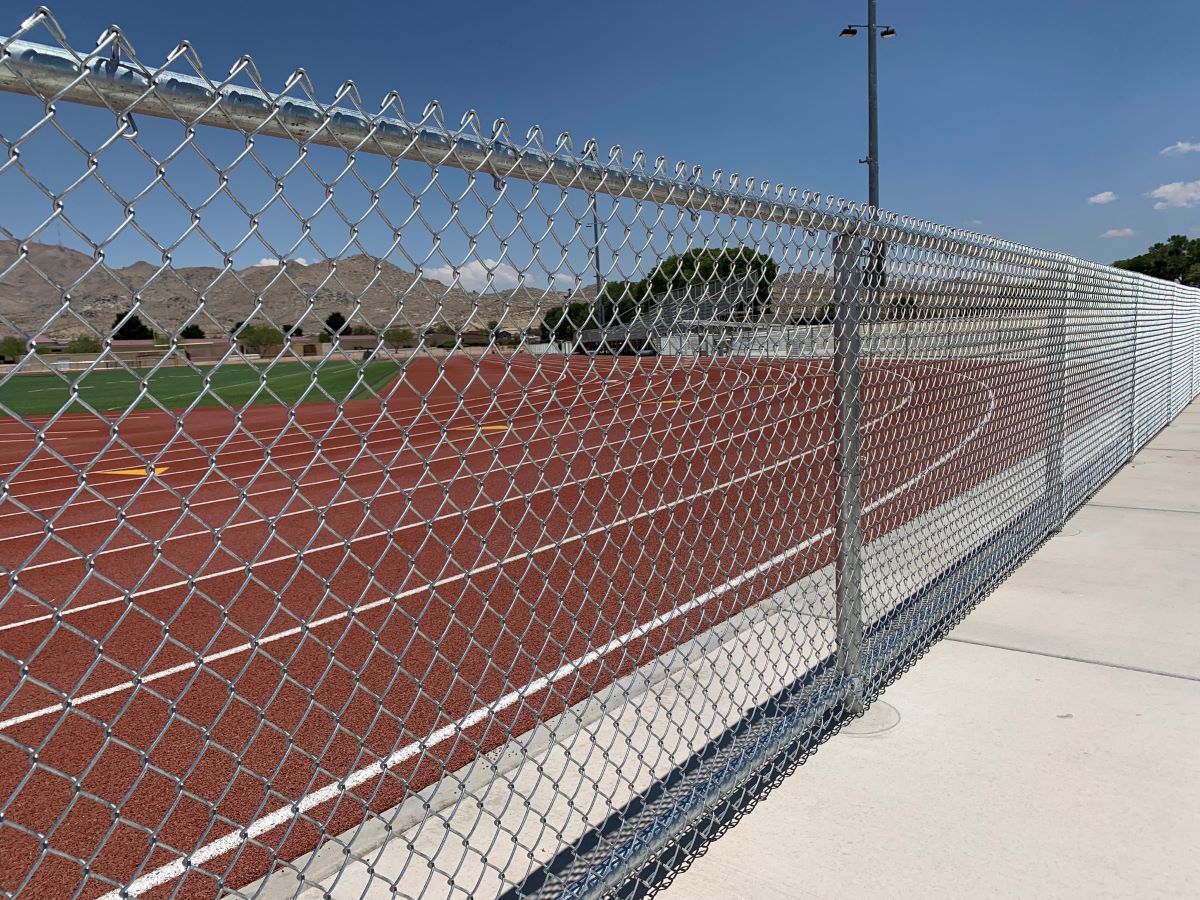
Chain link fences are popular for their durability, affordability, and transparency. They are commonly used for residential, commercial, and industrial purposes and are known for their ability to withstand harsh weather conditions. By following these installation steps, you can ensure that your chain link fence will be sturdy, secure, and aesthetically pleasing.
Before you begin the installation process, gather the necessary materials and tools. You will need:
- Chain link fence fabric
- Terminal posts
- Line posts
- Top rail
- Tension wire
- Gates (if applicable)
- Concrete
- Post hole digger
- Level
- Measuring tape
- String
- Wrench
- Clamps
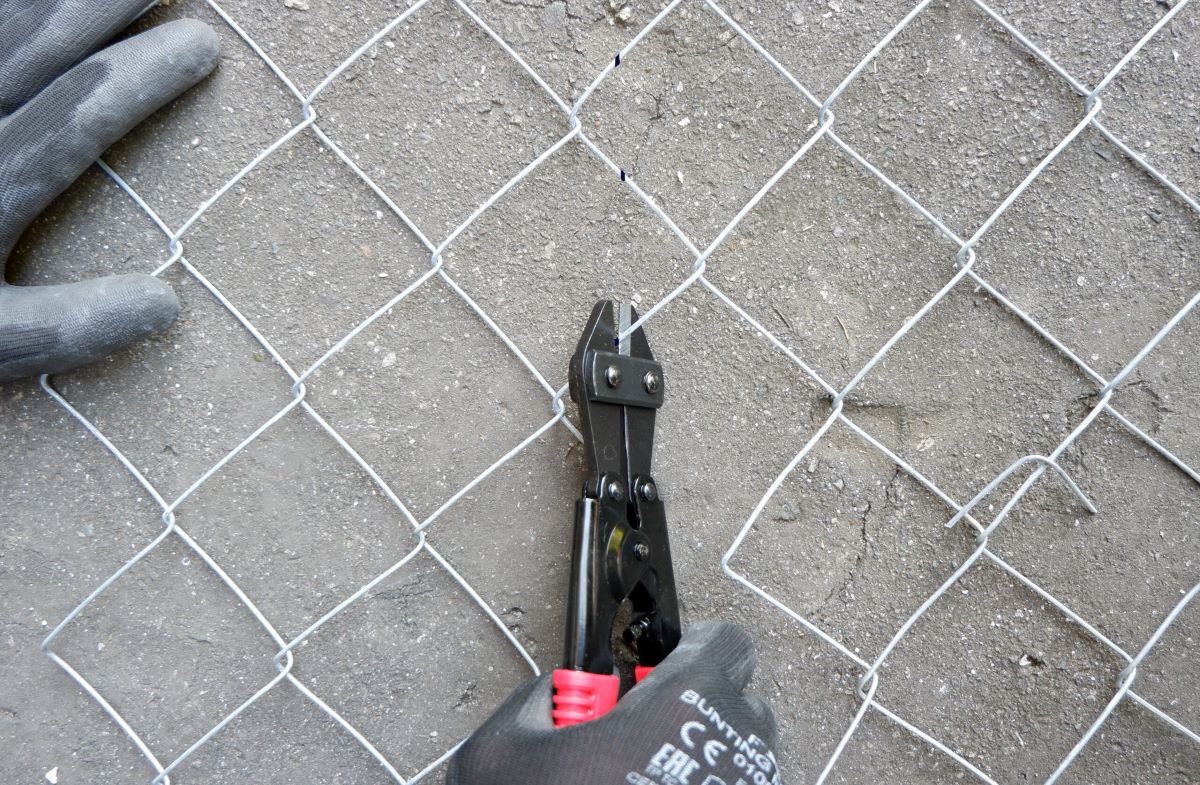
- Wire cutters
- Gloves
- Safety glasses
Once you have all the necessary materials and tools, you can proceed with the following steps:
Key Takeaways:
- Installing a chain link fence on a slope requires careful consideration of the terrain, accurate measurements, and proper adjustments to accommodate the changing elevation. By following the step-by-step guide, you can ensure a sturdy, secure, and visually appealing fence.
- Regular maintenance and upkeep are essential for prolonging the lifespan of your chain link fence on a slope. By addressing minor issues promptly and following recommended maintenance practices, you can keep your fence in excellent condition for years to come.
Read more: How To Stretch A Chain Link Fence
Materials and Tools Needed
Before embarking on the installation of a chain link fence on a slope, it is essential to gather all the necessary materials and tools. Having everything prepared in advance will streamline the installation process and ensure that you have everything you need on hand. Here is a list of materials and tools you will need:
Materials:
- Chain link fence fabric: This is the main component of the fence and comes in various heights and gauges.
- Terminal posts: These are the corner, end, and gate posts that provide stability and support for the fence.
- Line posts: These are the intermediate posts that are installed between the terminal posts and help keep the fence fabric in place.
- Top rail: This horizontal rail runs along the top of the fence fabric, providing additional support and stability.
- Tension wire: This wire is used to reinforce the bottom of the fence, adding strength and preventing animals from pushing under the fence.
- Gates (if applicable): If you plan to have an entry point in your chain link fence, you will need gates of the appropriate size and hardware to install them.
- Concrete: This is used to secure the fence posts in the ground.
Tools:
- Post hole digger: This tool is used to dig holes for the fence posts. You can choose between a manual or mechanized post hole digger.
- Level: A level is essential to ensure that the fence is straight and level during the installation process.
- Measuring tape: This tool will help you measure and mark the fence line accurately.
- String: A string line is useful for creating a straight and level guideline for installing the fence.
- Wrench: A wrench is required to tighten the nuts and bolts on the fence hardware.
- Clamps: Clamps are useful for holding the fence fabric in place while you attach it to the posts.
- Wire cutters: These are necessary for cutting the chain link fence fabric and tension wire to the required lengths.
- Gloves: Safety gloves will protect your hands from sharp edges, splinters, and potential injuries.
- Safety glasses: It is important to protect your eyes from debris and potential hazards during the installation process.
By ensuring that you have all the necessary materials and tools, you can proceed with confidence and efficiency when installing your chain link fence on a slope.
Step 1: Determine the Slope of the Area
Before beginning the installation of a chain link fence on a slope, it is crucial to accurately determine the slope of the area. The slope will impact the positioning of the fence posts and the overall stability of the fence. Here is how you can determine the slope:
- Start by placing stakes at the highest and lowest points of the fence line.
- Stretch a string tightly between the two stakes, ensuring it is level.
- Using a tape measure, measure the distance between the ground and the string at various points along the fence line.
- Record the measurements and calculate the difference in height between the highest and lowest points. This will give you the overall slope of the area.
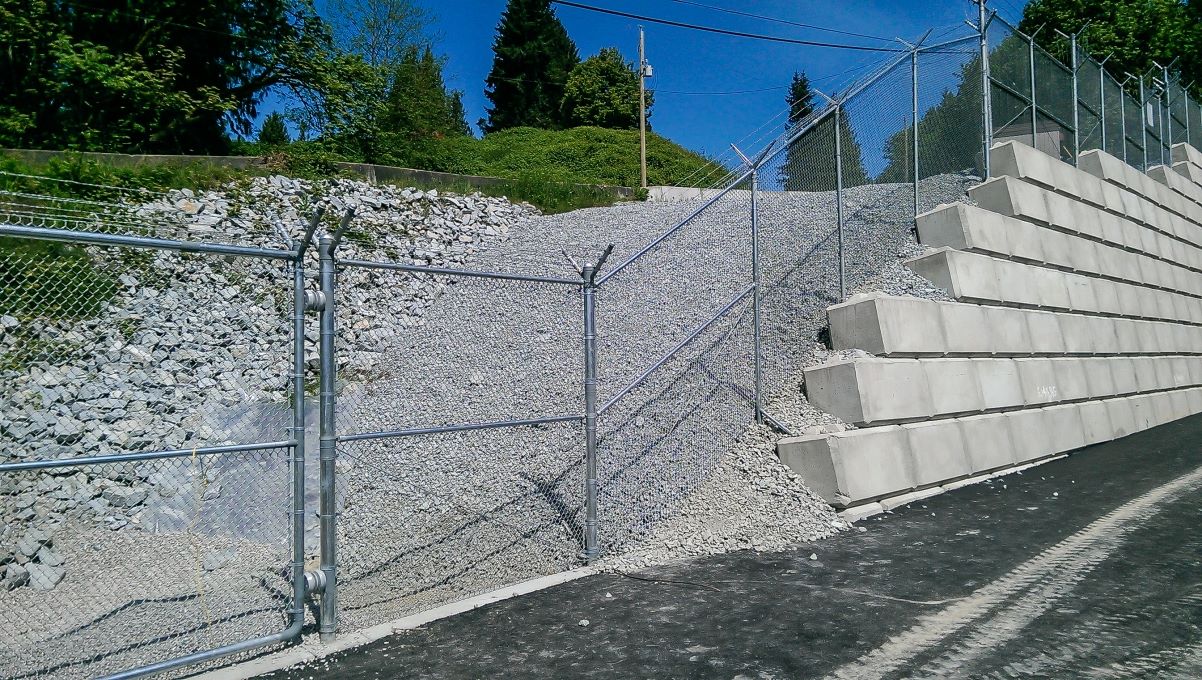
It is important to note that installing a chain link fence on a steep slope may require additional measures, such as using longer posts or adjusting the positioning of the fence fabric. Understanding the slope of the area will guide you in making informed decisions throughout the installation process.
If the slope is minimal, you may be able to install the fence as you would on a level surface. However, if the slope is significant, you will need to make specific adjustments to accommodate the incline. These adjustments may include installing taller posts at certain intervals or angling the fence fabric to follow the slope of the ground.
By accurately determining the slope of the area, you can ensure that your chain link fence is installed correctly and will provide the necessary security and functionality for your property.
Step 2: Measure and Mark the Fence Line
After determining the slope of the area, the next step in installing a chain link fence on a slope is to measure and mark the fence line. This involves mapping out the exact path where the fence will be installed. Here is how you can do it:
- Starting from one end of the fence line, use a measuring tape to determine the desired width and length of the fence.
- Using wooden stakes, mark the corners and any changes in direction along the fence line.
- Connect the stakes with a string, creating a clear guideline for the placement of the fence.
- Ensure that the string is pulled taut and straight, taking into account the slope of the area.
- Use a level to verify that the string is perfectly horizontal.
- Walk along the string line, making any necessary adjustments to ensure it is straight and properly aligned.
- Once satisfied with the position of the string, mark the ground at regular intervals to indicate the placement of the fence posts.
It is important to note that when marking the fence line on a slope, the distance between the posts may vary due to the changing elevation. It is recommended to space the posts closer together on steeper slopes to maintain the structural integrity of the fence. This will provide additional stability and prevent sagging or leaning.
When marking the fence line, consider the location of any gates you plan to install. Make sure to account for the size of the gates and leave enough space for them to swing open freely. Additionally, consider any local regulations or building codes that may dictate specific requirements for fence placement and setbacks.
By carefully measuring and marking the fence line, you can ensure that the chain link fence will be installed in the desired location, following the contours of the slope, and providing the necessary boundary for your property.
Step 3: Install the Terminal Posts
Once you have measured and marked the fence line, the next step in installing a chain link fence on a slope is to install the terminal posts. These are the corner, end, and gate posts that provide stability and support for the entire fence. Follow these steps to install the terminal posts:
- Start at one end of the fence line and dig a hole for the first terminal post. The depth of the hole should be determined by the height of the fence and the local building codes.
- Place the terminal post into the hole, ensuring it is plumb and level. A level can help you achieve the correct positioning.
- Fill the hole with concrete and pack it tightly to secure the post in place. Follow the manufacturer’s instructions for mixing and applying the concrete.
- Repeat the process for the remaining terminal posts, ensuring that they are evenly spaced along the fence line and properly aligned.
- Once all the terminal posts are installed, allow the concrete to cure according to the manufacturer’s instructions. This usually takes 24-48 hours.
- Inspect the terminal posts to ensure they are sturdy and secure. Make any necessary adjustments or reinforcements before proceeding to the next step.
Terminal posts are crucial for anchoring the chain link fence and providing stability, especially on a slope where there may be added pressure and tension. It is important to ensure that the terminal posts are installed correctly and firmly in the ground to prevent any shifting or leaning over time.
When installing the terminal posts on a slope, make sure to account for the changes in elevation. You may need to adjust the height of the posts or the depth of the holes to maintain a consistent fence line. Additionally, consider the slope of the ground and angle the terminal posts accordingly to follow the contour of the slope.
By properly installing the terminal posts, you will lay the foundation for a sturdy and reliable chain link fence that can withstand the challenges of a slope while providing security and aesthetic appeal to your property.
Read more: How To Cover A Chain Link Fence
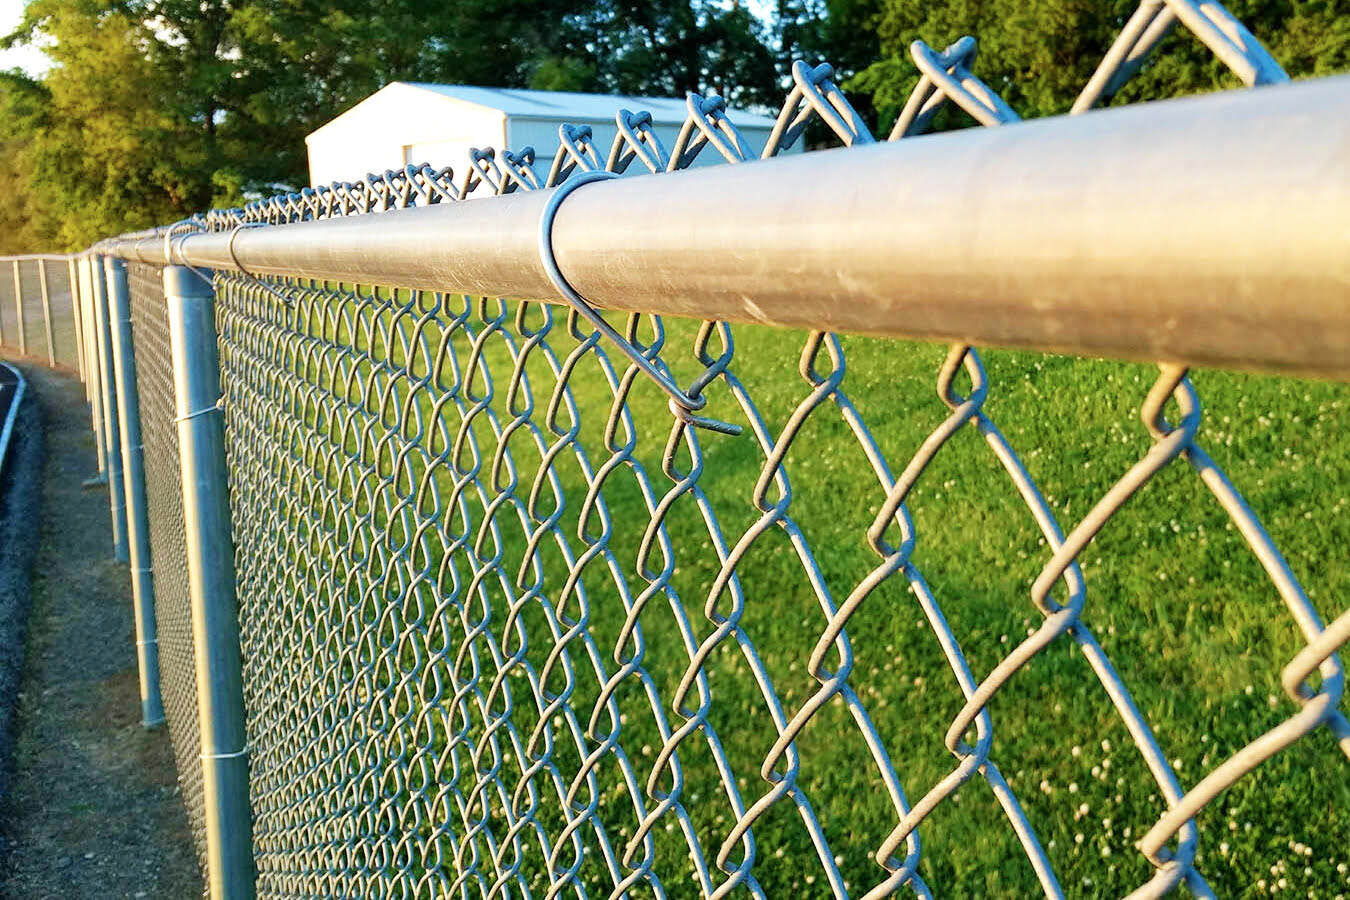
Step 4: Stretch and Install the Top Rail
After installing the terminal posts, the next step in installing a chain link fence on a slope is to stretch and install the top rail. The top rail provides horizontal support and stability to the fence fabric. Follow these steps to properly stretch and install the top rail:
- Begin at one end of the fence line and secure the top rail to the first terminal post using tension bands and bolts. Ensure that the rail is level and aligned with the top of the post.
- Attach a come-along or a fence stretcher to the end of the top rail opposite the terminal post. This tool will help you stretch the rail to the next terminal post.
- Move to the next terminal post and secure the come-along or fence stretcher to the post. Gradually pull the top rail towards the post until it is taut. Use a tension bar to hold the rail in place.
- Secure the top rail to the terminal post with tension bands and bolts, ensuring it is level and properly aligned.
- Repeat this process for each section of the fence, stretching and securing the top rail to each terminal post along the slope.
Stretching and installing the top rail properly is essential to maintain the structural integrity of the chain link fence. The rail should be tight and securely fastened to each terminal post, providing stability and preventing sagging or bowing.
When working on a slope, make sure to account for the changes in elevation and adjust the position of the top rail accordingly. You may need to cut the rail at an angle to follow the contour of the slope and ensure a seamless installation.
It is important to note that the spacing between the top rail and the ground may vary on a slope. Aim for a consistent gap of about 2-4 inches to allow for proper clearance and prevent debris from accumulating under the fence.
By properly stretching and installing the top rail, you will ensure that your chain link fence is secure, visually appealing, and able to withstand the challenges of a sloped terrain.
When installing a chain link fence on a slope, use adjustable tension bands and tension bars to ensure the fence fabric stays taut and follows the contour of the slope.
Step 5: Install the Line Posts
Once the top rail is in place, the next step in installing a chain link fence on a slope is to install the line posts. Line posts provide additional support and stability to the fence fabric, ensuring it remains in position. Follow these steps to properly install the line posts:
- Starting at one end of the fence line, dig a hole for the first line post. The depth of the hole should be determined by the height of the fence and local building codes.
- Place the line post into the hole, making sure it is plumb and level. Use a level to check the alignment.
- Fill the hole with concrete, making sure to pack it tightly around the post. Follow the manufacturer’s instructions for mixing and applying the concrete.
- Move to the next designated location for a line post and repeat the process, ensuring appropriate spacing along the fence line.
- Once all the line posts are in position, allow the concrete to cure according to the manufacturer’s instructions. This usually takes 24-48 hours.
- Inspect the line posts to ensure they are secure and properly aligned. Make any necessary adjustments or reinforcements before proceeding to the next step.
When installing line posts on a slope, it is important to align them with the contour of the slope. This means that the height of the line posts may vary, with some posts being taller than others due to the changing elevation. This is necessary to ensure the fence fabric remains taut and properly aligned along the slope.
Spacing between line posts will also vary based on the slope. In general, line posts should be spaced closer together on steeper slopes to prevent the fence fabric from sagging or bowing. Refer to local building codes or manufacturer recommendations for guidance on the appropriate spacing for line posts.
By properly installing the line posts, you will ensure that your chain link fence is sturdy, secure, and capable of withstanding the challenges of a sloped terrain.
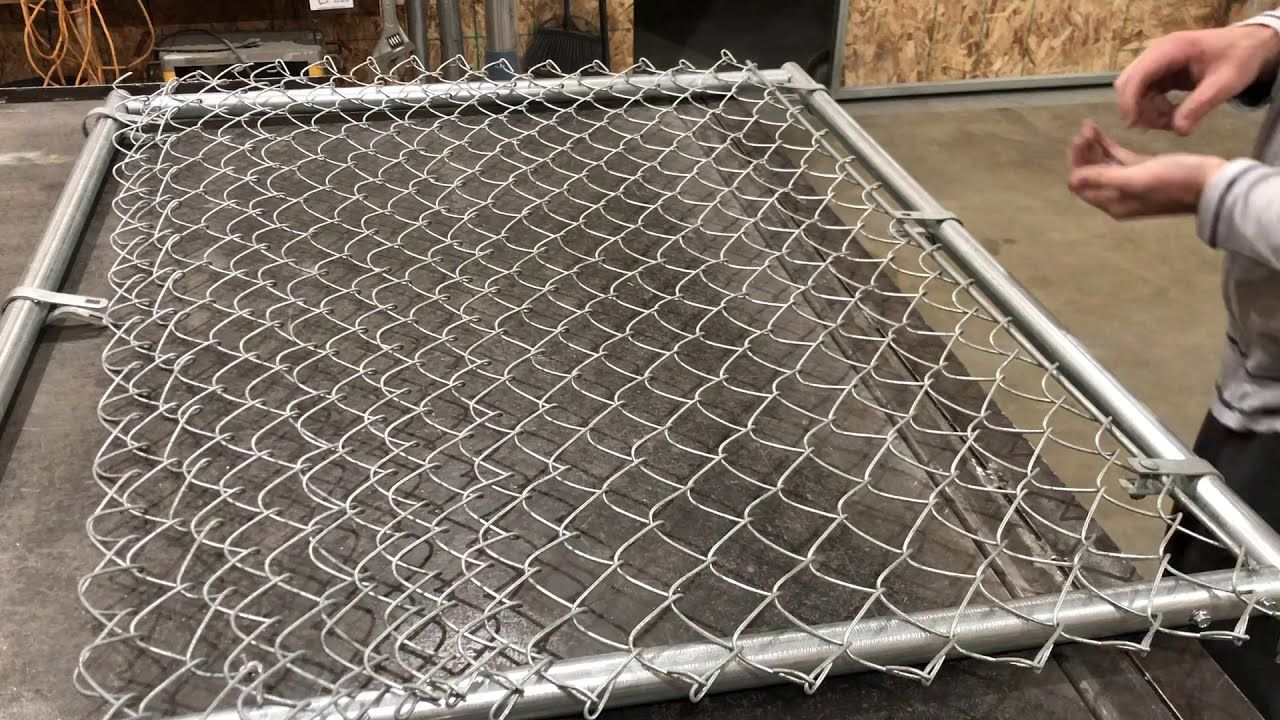
Step 6: Attach the Chain Link Mesh to the Posts
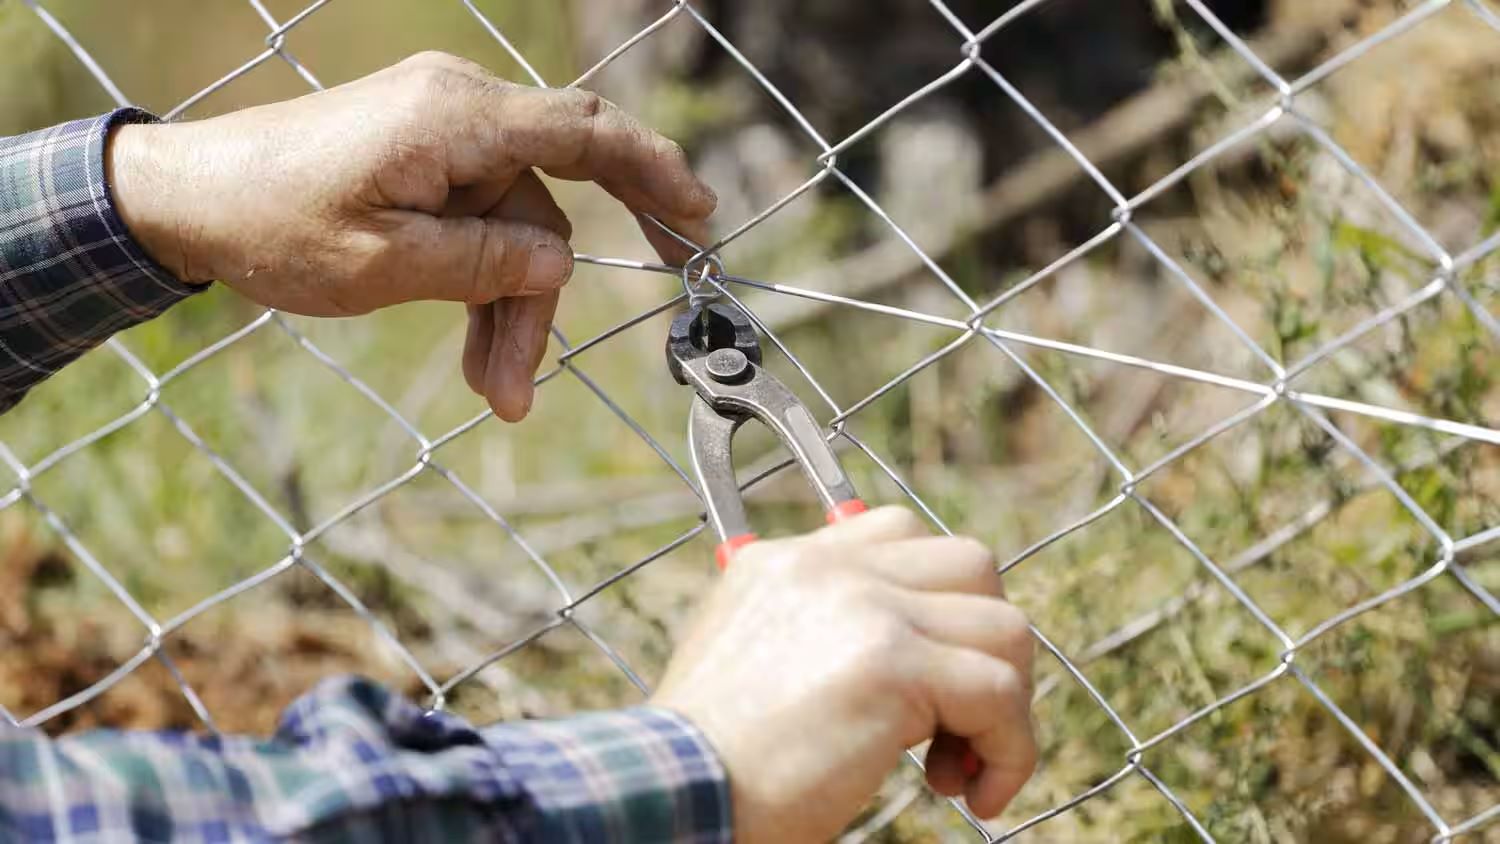
After installing the line posts, it’s time to attach the chain link mesh to the posts. This step will bring your chain link fence to life and provide the desired level of security and privacy. Follow these steps to properly attach the chain link mesh:
- Start at one end of the fence line and unroll the chain link mesh along the length of the fence, ensuring it is aligned with the posts and the top rail.
- Secure the chain link mesh to the first line post using tension bands and bolts, making sure it is taut and properly aligned both vertically and horizontally.
- Continue unrolling the chain link mesh along the fence line, attaching it to each line post using tension bands and bolts.
- Use a rubber mallet or a wooden block to tap the tension bands tightly around the line posts, ensuring a secure and snug fit.
- Inspect the chain link mesh to make sure it is free from any wrinkles or sagging. Adjust and tighten the tension bands as needed.
- Once the mesh is securely attached to the line posts, move on to attaching it to the terminal posts using the same method.
When installing the chain link mesh on a slope, it is crucial to adjust its positioning accordingly. As the slope changes, the height of the mesh will vary, requiring you to adapt and maintain a consistent height and tension. This will ensure the fence fabric remains level and visually appealing.
During the attachment process, be careful to avoid over-tightening the tension bands, as this may cause the chain link mesh to warp or become distorted. Ensure a balanced tension along the entire length of the fence to maintain its integrity.
By properly attaching the chain link mesh to the posts, you will not only enhance the security and privacy of your property but also create a visually pleasing and structurally sound fence that can withstand the demands of a slope.
Step 7: Install the Tension Wire
Installing the tension wire is an important step in ensuring the stability and strength of your chain link fence on a slope. The tension wire helps prevent the fence fabric from sagging and adds an extra layer of support. Follow these steps to properly install the tension wire:
- Start at one end of the fence line and attach the tension wire to the bottom of the terminal post using tension bands and bolts.
- Unroll the tension wire along the bottom of the fence, following the contour of the slope.
- Secure the tension wire to the line posts and terminal posts using tension bands spaced at regular intervals.
- Use a wire tensioning tool to pull the tension wire taut, removing any slack or sagging.
- Secure the tension wire at the end of the fence line using additional tension bands and bolts.
- Inspect the tension wire to ensure it is properly tensioned and securely attached to the posts.
When installing the tension wire on a slope, it is important to adjust the height and placement of the wire to accommodate the changing elevation. The tension wire should be installed parallel to the ground, following the contour of the slope to maintain a level fence fabric.
Take care when tensioning the wire to avoid overstretching, which can cause it to snap or lose its effectiveness. Strike a balance between a taut wire and avoiding excessive tension that may damage the fence fabric or posts.
The tension wire adds an extra layer of support, preventing animals from pushing under the fence and reinforcing the overall strength of the chain link fence. Proper installation and tensioning are crucial to maintain the integrity and longevity of your fence on a slope.
By installing the tension wire correctly, you will enhance the stability and durability of your chain link fence, ensuring it can withstand the challenges of a sloped terrain.
Read more: How Tall Is A Chain Link Fence
Step 8: Install Gate (if applicable)
If you plan to have an entry point in your chain link fence on a slope, it is important to install a gate that provides easy access while maintaining the security of your property. Follow these steps to properly install a gate:
- Determine the location and size of the gate based on your needs and the layout of your fence line. Ensure there is enough space for the gate to open and close freely without obstruction.
- Install the gate posts at the desired location, following the same process as the terminal and line posts. Make sure the posts are aligned and securely anchored in the ground.
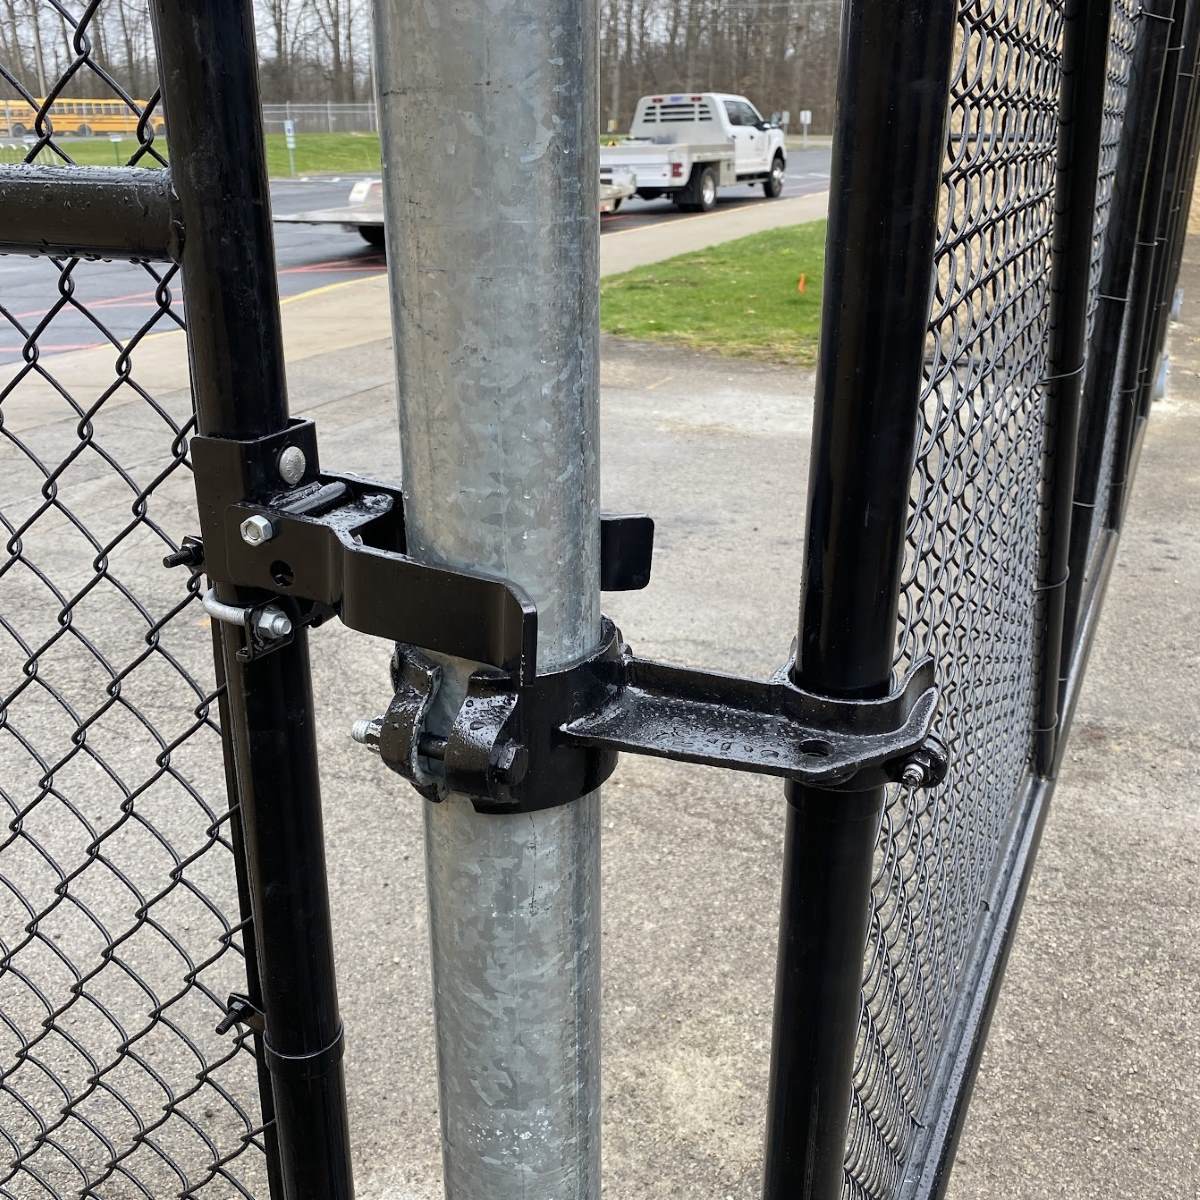
- Attach hinges to one side of the gate, ensuring they are properly aligned and sturdy. The hinges should be installed at a suitable height, allowing the gate to swing open smoothly.
- Hang the gate on the hinges and check that it swings freely and closes securely.
- If needed, install a latch or lock mechanism to ensure the gate remains closed and secure when not in use.
- Adjust the gate as necessary to ensure it aligns with the fence line, is level, and functions properly. Double-check the tension of the hinges and make any necessary adjustments.
It is important to choose a gate size and design that complements your chain link fence and meets your specific requirements. Consider factors such as the level of security needed, the type of entrance (pedestrian or vehicle), and any local building codes or regulations that may dictate gate specifications.
When installing a gate on a slope, be mindful of the changing elevation and adjust the gate posts accordingly to maintain a level and functional gate. You may need to use longer or adjustable hinges to accommodate the slope and ensure proper gate operation.
An effectively installed gate provides convenient access to your property while maintaining the security and integrity of your chain link fence. Take the time to ensure the gate is properly aligned, swings freely, and closes securely to maximize its functionality and value.
By installing a gate in your chain link fence on a slope, you will create a seamless and functional entry point that enhances the overall usability and convenience of your fencing system.
Step 9: Finishing Touches and Maintenance Tips
After completing the installation of your chain link fence on a slope, there are a few finishing touches and maintenance tasks to consider. These will ensure that your fence remains in optimal condition and continues to serve its purpose effectively. Follow these steps for the finishing touches and maintenance:
- Inspect the entire fence to ensure that all components are secure and properly aligned. Check for any loose bolts or hardware and tighten them as needed.
- Trim any vegetation or overgrown grass near the fence to prevent it from interfering with the fence line or causing damage.
- Consider adding a protective coating or paint to the chain link fence to help protect it from rust and corrosion.
- Regularly inspect the fence for any signs of damage or wear, such as broken wires, bent posts, or sagging fabric. Repair any issues promptly to maintain the integrity of the fence.
- Check the tension of the chain link fabric and tension wire periodically. If any sagging or slack is noticed, tighten the tension bands or wire accordingly.
- Keep the fence clean by removing dirt, debris, and leaves that may accumulate over time. This will help prevent moisture retention and reduce the risk of corrosion.
- During winter months, clear snow and ice from the fence to prevent excessive weight and potential damage.
- Inspect gates regularly to ensure they are functioning properly, and make any necessary adjustments or repairs.
- Consider adding privacy slats, wind screens, or other accessories to increase privacy or enhance the appearance of your chain link fence.
- Be aware of any local regulations or restrictions regarding fence maintenance, repairs, or modifications. Follow all applicable guidelines to remain compliant.
Regular maintenance and upkeep are essential for prolonging the lifespan of your chain link fence and ensuring it continues to provide security and functionality. By taking the time to inspect and maintain your fence on a regular basis, you can address any minor issues before they become major problems and extend the longevity of your investment.
By following these finishing touches and maintenance tips, you can keep your chain link fence on a slope in excellent condition for years to come, providing security, privacy, and aesthetic appeal to your property.
Conclusion
Installing a chain link fence on a slope may present some unique challenges, but with the right techniques and careful planning, it can be a successful project. By following the step-by-step guide outlined in this article, you can confidently install a chain link fence that is sturdy, secure, and visually appealing on uneven terrain.
Throughout the installation process, it is important to consider the slope of the area and make necessary adjustments to accommodate the changing elevation. This includes correctly determining the slope, measuring and marking the fence line, and installing the terminal and line posts at appropriate heights and angles. Stretching the top rail and attaching the chain link mesh while ensuring proper tension and alignment is also crucial.
Additionally, gate installation, finishing touches, and regular maintenance are essential to maintain the integrity of the fence over time. By following recommended maintenance practices and addressing any issues promptly, you can ensure that your chain link fence remains in optimal condition for years to come.
A chain link fence on a slope offers durability, affordability, and functionality. It provides a reliable and secure barrier for residential, commercial, and industrial properties, allowing for visibility while still providing a level of privacy and containment.
Remember to check with local regulations and building codes before undertaking any fence installation project. Each municipality may have specific guidelines or restrictions regarding fence height, setback requirements, and other parameters.
By following the guidelines and tips outlined in this article, you can successfully install a chain link fence on a slope that enhances the security, aesthetic appeal, and value of your property.
Take the time to plan carefully, gather the necessary materials and tools, and execute each step with precision. With patience and attention to detail, your chain link fence on a slope will not only serve its practical purpose but also add an attractive and functional element to your outdoor space.
Ready to tackle more DIY projects after mastering chain link fence installation on slopes? Dive into our collection of inspiring outdoor projects. From simple builds to more involved endeavors, these ideas are perfect for enhancing any outdoor space. Whether you're sprucing up the garden or adding functional flair to your yard, our guide offers plenty of projects to get your hands dirty and creativity flowing.
Frequently Asked Questions about How To Install Chain Link Fence On A Slope
Was this page helpful?
At Storables.com, we guarantee accurate and reliable information. Our content, validated by Expert Board Contributors, is crafted following stringent Editorial Policies. We're committed to providing you with well-researched, expert-backed insights for all your informational needs.


0 thoughts on “How To Install Chain Link Fence On A Slope”