Articles
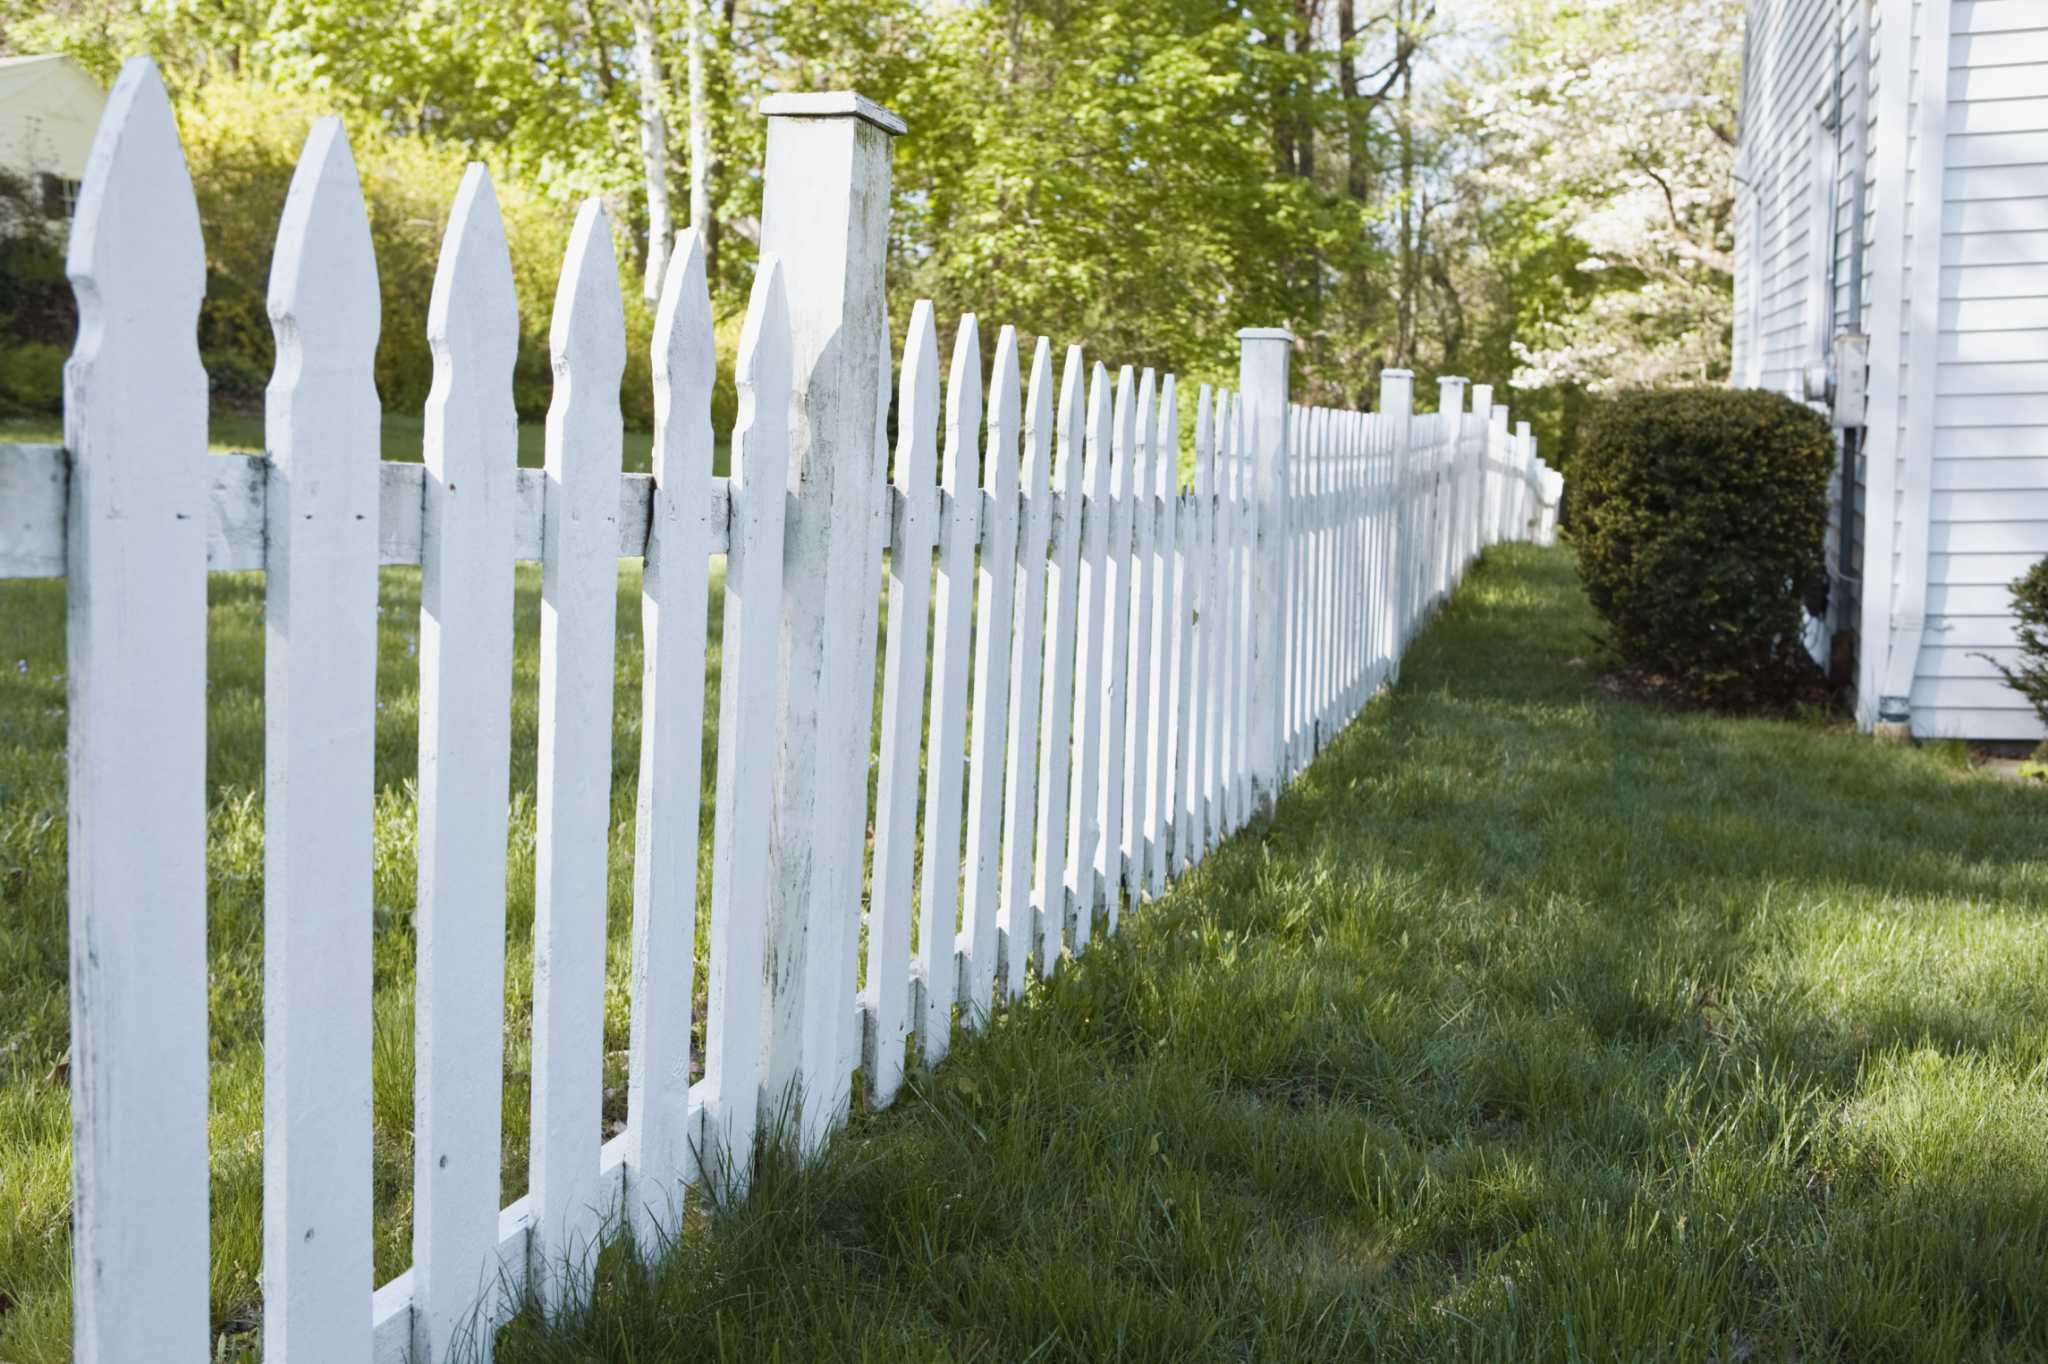
How To Fill Gaps Under Fence
Modified: May 6, 2024
Looking for articles on how to fill gaps under a fence? Discover effective techniques and step-by-step instructions to seal those openings for a more secure and visually appealing fence.
(Many of the links in this article redirect to a specific reviewed product. Your purchase of these products through affiliate links helps to generate commission for Storables.com, at no extra cost. Learn more)
Introduction
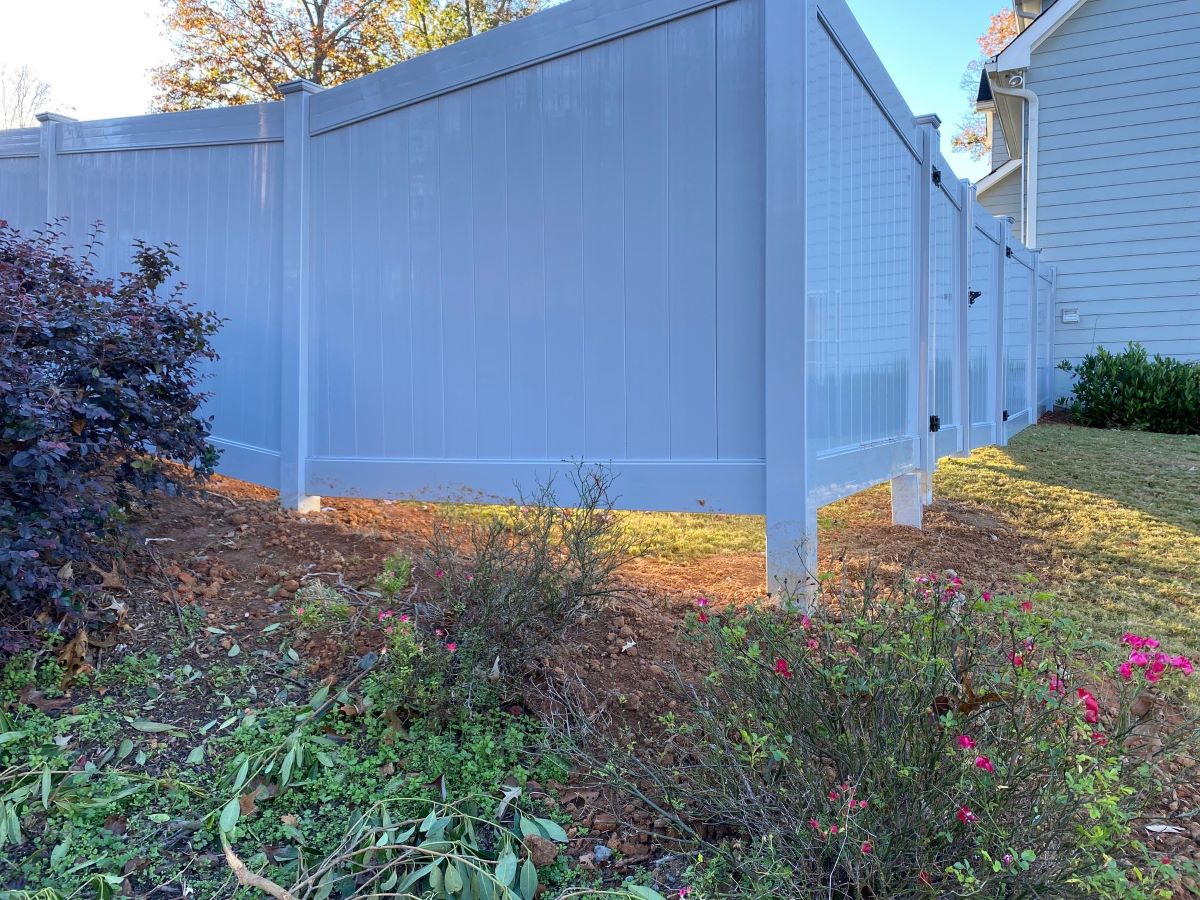
Having gaps under your fence can be a frustrating problem. Not only does it compromise the security and privacy of your property, but it can also allow unwanted critters to enter your yard. Fortunately, filling these gaps is a relatively simple and straightforward task that you can do yourself with the right tools and materials.
In this article, we will guide you through the process of filling the gaps under your fence, ensuring that your yard remains secure and well-contained. We will discuss the importance of understanding the problem, the tools and materials you will need, and the step-by-step process for filling the gaps effectively.
Before we begin, it’s essential to note that the approach to filling gaps under a fence may vary depending on the type of fence and the size of the gap. It’s recommended to assess your specific situation and adjust the methods accordingly.
Now, let’s dive into the details of filling the gaps under your fence!
Key Takeaways:
- Understanding the root causes of gaps under your fence, choosing the right fill material, and properly preparing the ground are crucial for a successful DIY gap-filling project.
- Adding finishing touches, such as cleaning up the area, considering additional support, and conducting regular maintenance, enhances the appearance and functionality of your fence while preventing future gaps.
Read more: How To Fill Gaps In A Driveway
Understanding the Problem
Before you begin filling the gaps under your fence, it’s crucial to understand the underlying causes of the problem. There are several reasons why gaps may occur, including:
- Settling of the ground: Over time, the ground beneath your fence may settle, causing gaps to form.
- Weathering and deterioration: Exposure to the elements can weaken the materials of your fence, leading to gaps and cracks.
- Wood warping: If your fence is made of wood, it is susceptible to warping due to moisture and temperature changes, creating gaps.
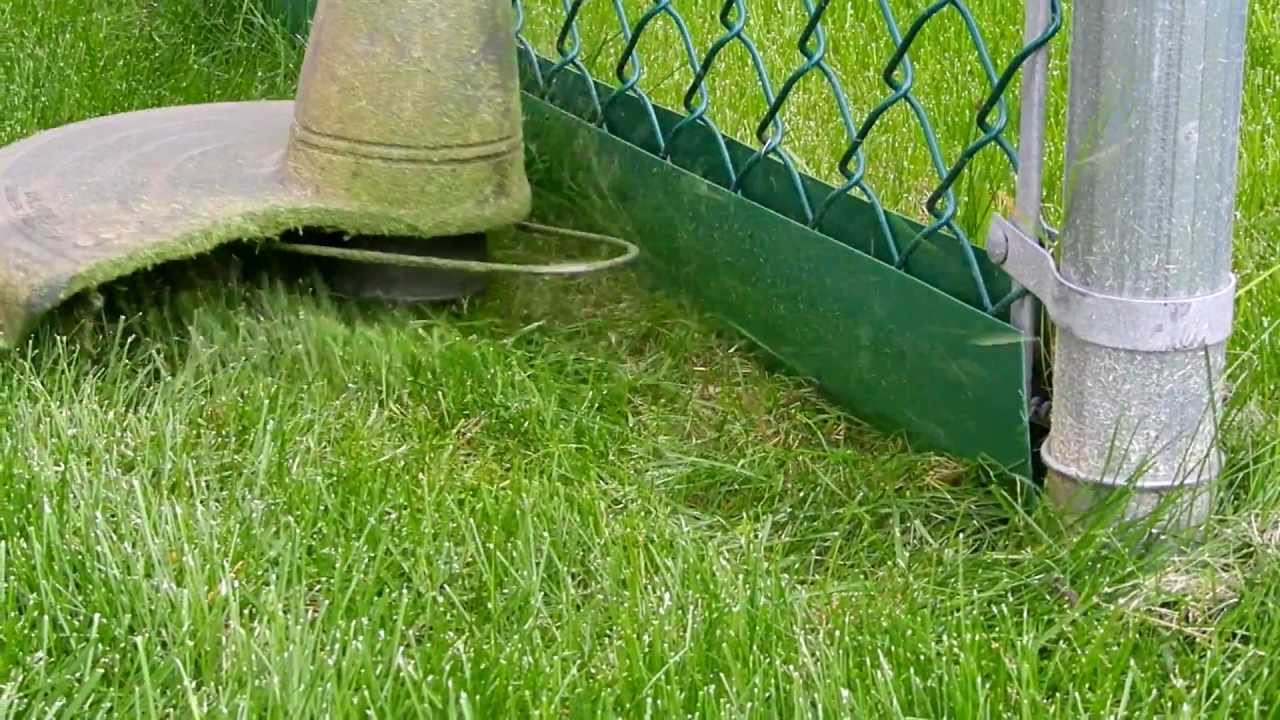
- Animal burrowing: Small animals, such as rodents, may dig under your fence, causing gaps to form.
By understanding the root cause of the problem, you can better determine the appropriate approach to filling the gaps. For example, if the gaps are due to settling ground, you may need to focus on stabilizing the soil before filling the gap. If the gaps are a result of deteriorated materials, you may need to replace or repair sections of the fence.
Additionally, it’s essential to assess the size and location of the gaps. Are they small cracks or significant openings? Are they concentrated in one area or spread throughout the fence? These factors will inform your choice of fill material and the techniques you’ll use to ensure a proper and long-lasting solution.
Before you start filling the gaps, inspect your fence thoroughly. Look for any signs of damage or weaknesses that may need to be addressed in conjunction with filling the gaps. This will help you ensure the overall integrity and stability of your fence while addressing the immediate issue of the gaps.
Now that you have a better understanding of the problem, let’s move on to the next section to explore the tools and materials you’ll need for the job.
Tools and Materials Needed
Before you begin filling the gaps under your fence, gather the necessary tools and materials. Here’s a list of what you’ll need:
Tools:
- Measuring tape or ruler
- Shovel
- Tamping tool or tamper
- Wheelbarrow or bucket
- Level
Materials:
- Fill material (such as soil, gravel, or concrete)
- Wooden boards or plywood (if needed for additional support)
- Nails or screws (if needed for securing additional support)
The specific materials required may vary depending on the size, location, and cause of the gaps. For example, if the gaps are small and due to settling ground, filling them with soil might be sufficient. On the other hand, if the gaps are larger or caused by animal burrowing, you may need to use gravel or concrete for a more robust solution.
If you’re unsure about the appropriate materials for your situation, consult with a professional or a knowledgeable employee at your local hardware store. They can provide guidance based on the specific characteristics of your fence and the gaps you’re dealing with.
Once you have gathered all the necessary tools and materials, you’re ready to move on to the next steps. In the following sections, we will guide you through the process of measuring the gaps and filling them effectively.
Before you start, ensure your safety by wearing appropriate protective gear, such as gloves and safety goggles. Also, consider the weather conditions and choose a suitable time to work on your fence, preferably when the ground is dry and stable.
Now that you have everything you need, let’s proceed to the next step: measuring the gap under your fence!
Read more: How To Fill Hardwood Floor Gaps
Step 1: Measuring the Gap
Before you can effectively fill the gaps under your fence, you’ll need to accurately measure their width and depth. This measurement will determine the amount of fill material you’ll need and help you plan the best approach for filling the gap.
To measure the gap, follow these steps:
- Begin by measuring the width of the gap. Use a measuring tape or ruler to measure from one side of the gap to the other.
- Record the width measurement. This will help you determine the amount of fill material required to fill the gap adequately.
- Next, measure the depth of the gap. Insert a measuring tape or ruler into the gap and measure from the bottom of the fence to the ground level.
- Record the depth measurement. This will help you determine the amount of fill material needed to bring the gap level with the bottom of the fence.
It’s important to make precise measurements to ensure an accurate fill. Repeat the process for each gap along the fence, as gap sizes may vary. Remember to account for any variations in the width and depth and adjust your measurements accordingly.
Once you have measured the gaps, you can proceed to the next step of preparing the ground for filling. By taking accurate measurements, you’ll have a better understanding of the scope of the project and be able to gather the necessary fill materials accordingly.
Now that you know how to measure the gaps, let’s move on to step 2: preparing the ground beneath the fence.
Step 2: Preparing the Ground
Before you can fill the gaps under your fence, it’s essential to prepare the ground beneath it. Proper preparation will ensure a stable foundation for the fill material and help prevent future gaps from forming. Follow these steps to prepare the ground:
- Clear any debris or vegetation from the area around the gap. Use a rake or shovel to remove any loose soil, rocks, or plants.
- Ensure that the ground is level and even. Use a shovel or rake to smooth out any uneven areas and remove any bumps or high spots.
- Compact the soil to create a solid base. Use a tamping tool or tamper to firmly pack down the soil. This will provide a stable foundation for the fill material.
- If the gaps are caused by settling ground, you may need to address the underlying issue by adding soil or compacting it further. Consult with a professional if necessary to ensure a long-lasting solution.
By preparing the ground beneath the fence, you create a stable base that will support the fill material and prevent future gaps from forming. Take your time to ensure that the ground is level and compacted properly, as this will contribute to the overall stability and effectiveness of the fill.
Once the ground is prepared, you’re ready to move on to step 3: choosing the appropriate fill material for your gaps. The choice of fill material will depend on the size, location, and cause of the gaps, and we will discuss the various options in the next section.
Step 3: Choosing the Fill Material
When it comes to filling the gaps under your fence, there are various fill materials to choose from. The selection of the fill material depends on the size of the gaps, the underlying cause, and your specific needs. Here are some common fill materials to consider:
1. Soil:
If the gaps under your fence are relatively small and caused by settling ground or erosion, using soil as fill material can be a cost-effective solution. Ensure that the soil is loose and can be easily compacted. Fill the gaps with soil and pack it down firmly to create a solid foundation.
Read more: How To Fill Gaps In Brick Walls
2. Gravel:
For larger gaps or areas prone to erosion, using gravel as fill material can provide better stability and drainage. Choose a type of gravel that is suitable for your specific needs, such as crushed stone or pea gravel. Fill the gaps with gravel, ensuring that it is firmly packed to prevent shifting.
3. Concrete:
If the gaps under your fence are significant or caused by animal burrowing, filling them with concrete can provide a durable and long-lasting solution. Prepare concrete mix according to the manufacturer’s instructions and fill the gaps, ensuring that it is level and smooth. Allow the concrete to dry and cure before proceeding.
It’s important to note that the choice of fill material may vary depending on your specific situation. Consider factors such as the climate, soil conditions, and desired aesthetic. Additionally, consult with a professional if you’re unsure which fill material would be most suitable for your fence.
Once you have chosen the appropriate fill material, you can move on to the next step: filling the gaps under your fence. In the following steps, we will guide you through the process of filling the gaps using different fill materials, providing you with a comprehensive solution.
Step 4: Filling the Gap with Soil
If the gaps under your fence are relatively small and caused by settling ground or erosion, filling them with soil can be a simple and effective solution. Follow these steps to fill the gaps with soil:
- Ensure that the ground beneath the fence is prepared and level, as discussed in Step 2: Preparing the Ground.
- Using a shovel or your hands, carefully fill the gap with soil. Start from the bottom of the gap and work your way up, ensuring that the soil is evenly distributed.
- Compact the soil as you fill the gap. Use a tamping tool or tamper to firmly pack down the soil. This will create a solid foundation and prevent shifting or settling.
- Add more soil as needed to completely fill the gap, ensuring that it is level with the bottom of the fence. Continue compacting the soil to ensure stability.
- Smooth out the surface of the filled gap by raking or using the backside of a shovel. This will provide a neat and tidy finish.
It’s important to note that if the gaps are large or caused by significant settling ground, using soil alone may not provide a long-lasting solution. In such cases, you may need to consider using other fill materials, such as gravel or concrete, for added stability and durability.
Once you have filled the gap with soil, take a step back and assess the result. Ensure that the soil is firmly packed and level with the bottom of the fence. If needed, add more soil and compact it further to achieve the desired stability.
With the gap filled using soil, you can move on to the next step: filling the gap with gravel or concrete, which we will explain in the following steps.
Step 5: Filling the Gap with Gravel
If the gaps under your fence are larger or prone to erosion, filling them with gravel can provide better stability and drainage. Follow these steps to fill the gaps with gravel:
- Ensure that the ground beneath the fence is prepared and level, as discussed in Step 2: Preparing the Ground.
- Select the type of gravel that is suitable for your specific needs, such as crushed stone or pea gravel. Consider factors such as drainage, aesthetics, and availability.
- Using a shovel or your hands, carefully fill the gap with gravel. Start from the bottom of the gap and work your way up, ensuring that the gravel is evenly distributed.
- As you fill the gap, periodically compact the gravel to create a solid foundation. Use a tamping tool or tamper to firmly pack down the gravel, ensuring that it is stable and does not shift.
- Add more gravel as needed to completely fill the gap, ensuring that it is level with the bottom of the fence. Continue compacting the gravel to ensure stability.
- Smooth out the surface of the filled gap by raking or using the backside of a shovel. This will provide a neat and uniform finish.
By filling the gap with gravel, you provide a stable and well-draining solution. The gravel allows for proper water drainage and prevents the soil beneath the fence from eroding or settling further.
Ensure that the gravel is firmly packed and evenly distributed throughout the gap. Take a step back and assess the result, making any necessary adjustments. If needed, add more gravel and compact it further to achieve the desired level of stability.
With the gap filled using gravel, make sure that the gravel extends slightly above the ground level to prevent water from pooling around the fence. This will further enhance the effectiveness of the fill and prevent erosion around the gap.
Next, we will move on to Step 6, which covers filling the gap with concrete, providing a durable and long-lasting solution.
You can fill gaps under a fence by using gravel, concrete, or installing a barrier like chicken wire or landscaping fabric. Make sure to choose a method that suits your specific needs and the type of fence you have.
Read more: How To Cover Fence Gaps
Step 6: Filling the Gap with Concrete
If the gaps under your fence are significant or caused by animal burrowing, filling them with concrete can provide a strong and durable solution. Follow these steps to fill the gaps with concrete:
- Ensure that the ground beneath the fence is prepared and level, as discussed in Step 2: Preparing the Ground.
- Prepare the concrete mix according to the manufacturer’s instructions. This typically involves combining cement, sand, and aggregate with water, following the recommended ratios.
- Using a shovel or your hands, carefully fill the gap with the concrete mix. Start from the bottom of the gap and work your way up, ensuring that the concrete is evenly distributed and fills the entire gap.
- Use a trowel or a wooden board to smooth out the surface of the filled gap, creating a level and uniform finish. Ensure that the concrete is level with the bottom of the fence.
- Allow the concrete to dry and cure according to the manufacturer’s instructions. This typically involves keeping it moist and protected from excessive heat or cold during the curing process.
Filling the gap with concrete provides a strong and long-lasting solution, effectively preventing animal burrowing and ensuring the structural stability of the fence. The concrete forms a solid barrier that is resistant to shifting and erosion.
Check the filled gap periodically during the curing process and make any necessary adjustments to ensure a smooth and level finish. Once the concrete has fully cured, it will provide a durable and low-maintenance fill solution.
After completing Step 6, move on to Step 7 to add the finishing touches that will enhance the overall appearance and functionality of the filled gaps.
Step 7: Finishing Touches
Now that you have filled the gaps under your fence, it’s time to add the finishing touches to ensure a polished and functional result. Follow these steps to complete the project:
- Clean up the surrounding area. Remove any excess fill material or debris from the ground and ensure that the area around the fence looks tidy.
- Inspect the filled gaps. Check for any unevenness or gaps that may have formed during the filling process. Use additional fill material, such as soil or gravel, to fill in any gaps or level out any uneven areas.
- Consider additional support. If needed, you can install wooden boards or plywood along the bottom of the fence to provide added support and prevent future gaps from forming. Secure the boards or plywood to the fence using nails or screws.
- Apply a protective coating (optional). Depending on the type of fence material, you may choose to apply a protective sealant or paint to prolong its lifespan and enhance its appearance. Follow the manufacturer’s instructions for the specific coating you choose.
- Regular maintenance. To ensure the longevity of your fence and prevent any further gaps from forming, conduct regular inspections and maintenance. Look for signs of damage, such as rotting wood or loose components, and address them promptly.
By completing these finishing touches, you give your fence a polished and professional look while ensuring its structural integrity. Regular maintenance will help to prolong the lifespan of your fence and minimize any future gaps or damages.
Now that you have finished the project, take a step back and admire your work. You have successfully filled the gaps under your fence, enhancing its security, privacy, and aesthetic appeal. Congratulations!
Remember, depending on the type of fence and the specific gaps you were dealing with, the process may vary. Always adapt the steps to suit your unique situation and seek professional advice if needed.
With the completion of Step 7, you have successfully filled the gaps under your fence and added the necessary finishing touches. Enjoy the newfound stability and peace of mind that comes with a well-maintained and secure fence!
Conclusion
Filling the gaps under your fence is an important task that helps to improve the security, privacy, and aesthetics of your property. By understanding the problem, gathering the necessary tools and materials, and following the step-by-step process, you can effectively fill these gaps and prevent future issues.
Throughout this article, we have discussed the underlying causes of gaps under fences, the tools and materials needed for the job, and the detailed steps involved in filling the gaps. We explored different fill materials, such as soil, gravel, and concrete, depending on the size and nature of the gaps.
Remember to accurately measure the gaps, properly prepare the ground, and choose the most suitable fill material for your specific situation. Take the time to ensure that the fill is properly compacted, level, and stable, to achieve long-lasting results.
Adding finishing touches, such as cleaning up the area, considering additional support, applying protective coatings, and conducting regular maintenance, will further enhance the appearance and functionality of your fence.
By successfully filling the gaps under your fence, you have improved the overall security, privacy, and appeal of your property. Enjoy the peace of mind that comes with a well-maintained fence and take pride in your DIY accomplishment.
Remember, adapt the steps to suit your specific circumstances and consult with professionals if needed. Regularly inspect your fence for any signs of damage or future gaps, and address them promptly to ensure its continued functionality.
Thank you for reading this comprehensive guide on filling gaps under fences. We hope it has provided you with the knowledge and confidence to tackle this task effectively. Happy fencing!
Now that you've mastered filling gaps under fences, why not spruce up your garden's perimeter with some creative landscaping ideas? Our article on garden fence ideas offers inspiration that can transform any outdoor space. If unwelcome guests are ruining your pantry's peace, dive into our expert advice on pest control to reclaim your kitchen. For those who love crafting and creating, don't miss out on exploring why DIY projects are so rewarding and how they can add a personal touch to your home.
Frequently Asked Questions about How To Fill Gaps Under Fence
Was this page helpful?
At Storables.com, we guarantee accurate and reliable information. Our content, validated by Expert Board Contributors, is crafted following stringent Editorial Policies. We're committed to providing you with well-researched, expert-backed insights for all your informational needs.


0 thoughts on “How To Fill Gaps Under Fence”