Articles
How To Use Hem Tape On Curtains
Modified: December 7, 2023
Learn how to use hem tape on curtains in this informative article. Discover the step-by-step guide to easily hemming your curtains with hem tape.
(Many of the links in this article redirect to a specific reviewed product. Your purchase of these products through affiliate links helps to generate commission for Storables.com, at no extra cost. Learn more)
Introduction
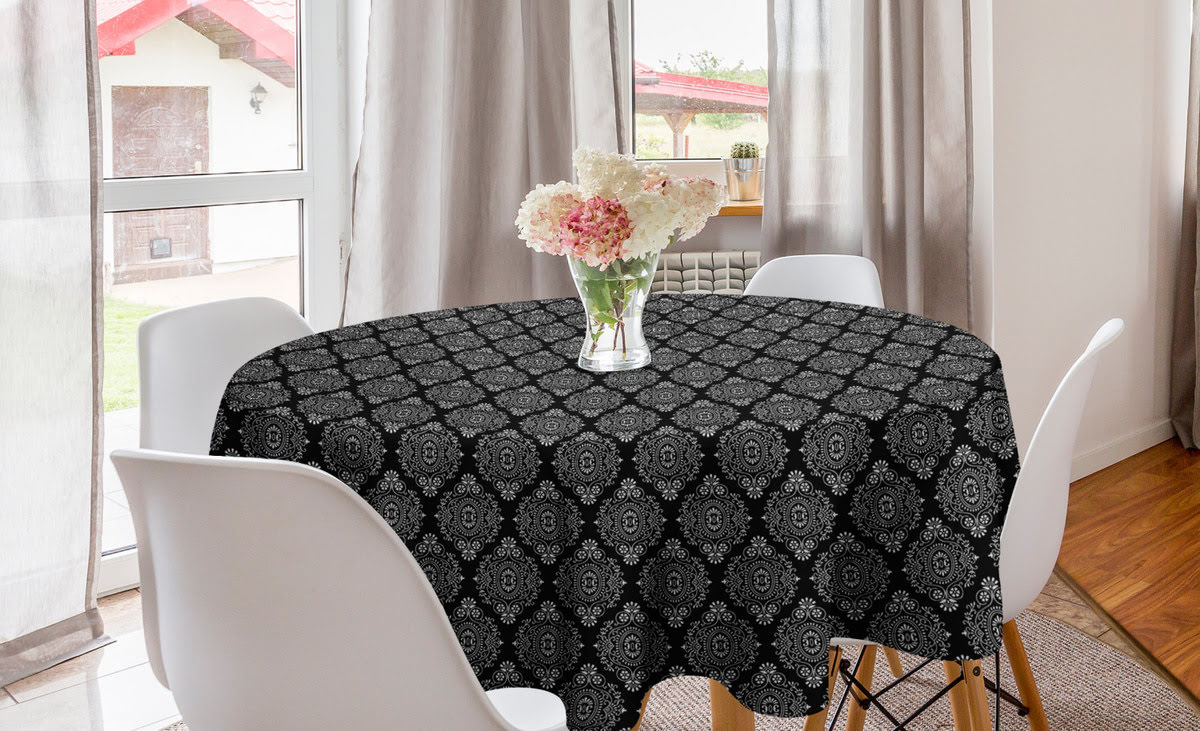
When it comes to home decor and interior design, curtains play a crucial role in setting the tone and ambiance of a room. Whether you’re aiming for a cozy, rustic charm or a sleek and modern aesthetic, the right curtains can make all the difference. However, finding the perfect length for your curtains can be a challenge, especially when you need to make adjustments to ensure they fit just right.
That’s where hem tape comes in. Hem tape is a versatile and convenient tool that allows you to easily alter the length of your curtains without the need for sewing. It provides a simple and fuss-free solution for adjusting the hem to your desired length, ensuring your curtains hang perfectly.
In this article, we will delve into the world of hem tape and explore how it can be effectively used on curtains. We will discuss the benefits of using hem tape, how to choose the right type for your curtains, and the step-by-step process of applying and ironing the hem tape. By the end of this article, you’ll be equipped with the knowledge and confidence to use hem tape like a pro.
Key Takeaways:
- Hem tape offers a convenient, time-saving, and professional alternative to sewing for adjusting curtain length. It’s versatile, easy to use, and suitable for a wide range of fabrics, making it a DIY enthusiast’s best friend.
- While hem tape simplifies the curtain hemming process, it’s important to consider fabric compatibility and potential drawbacks such as heat sensitivity and limited flexibility for adjustments. Choose high-quality tape and follow instructions for best results.
Read more: How To Hem Sheer Curtains
What is Hem Tape?
Hem tape, also known as fusible hem tape or fabric tape, is a double-sided adhesive strip specifically designed for hemming fabric without the need for sewing. It is typically made from a combination of polyester and adhesive material, providing a strong and durable hold.
Hem tape comes in different widths and lengths to accommodate various fabric thicknesses and hem widths. It is available in both clear and colored options, allowing for seamless blending with the fabric or adding a decorative touch.
The adhesive on the hem tape is activated by heat, usually from an iron, which creates a bond between the fabric layers, effectively hemming them together. This eliminates the need for needle and thread, making it an ideal solution for those who don’t have sewing skills or access to a sewing machine.
With hem tape, you can easily alter the length of your curtains, pants, skirts, or any other fabric item that requires hemming. It is a quick and convenient alternative to traditional hemming methods that saves both time and effort.
Why Use Hem Tape on Curtains
Using hem tape on curtains offers several advantages that make it a popular choice among DIY enthusiasts and those who want to avoid sewing. Here are some compelling reasons why you should consider using hem tape on your curtains:
- No sewing required: One of the main benefits of using hem tape is that it eliminates the need for sewing. Not everyone has sewing skills or access to a sewing machine, so hem tape provides a simple and accessible solution for hemming curtains without the hassle of needle and thread.
- Time-saving: Hemming curtains with traditional sewing methods can be time-consuming, especially if you have a large number of curtains to hem. Hem tape allows you to quickly and efficiently alter the length of your curtains, saving you valuable time.
- Ease of use: Hem tape is incredibly easy to use, even for beginners. With just a few simple steps, you can achieve professional-looking results. There’s no need to worry about uneven stitches or puckered hems – hem tape ensures a clean and neat finish every time.
- Fabric compatibility: Hem tape is suitable for use on a wide range of fabrics, including cotton, polyester, silk, and linen. It adheres securely to the fabric fibers, ensuring a strong and long-lasting bond.
- Temporary or permanent solution: Depending on your needs, hem tape can provide a temporary or permanent solution. If you want to make a temporary adjustment to your curtain length, you can easily remove the hem tape without leaving any residue. For a more permanent alteration, the hem tape will withstand regular use and washing.
Overall, using hem tape on curtains offers a versatile and practical solution for adjusting the length without the need for sewing. It is a time-saving and user-friendly option that delivers professional-looking results, making it an excellent choice for DIY enthusiasts and those looking to refresh their home decor.
Choosing the Right Hem Tape
When it comes to selecting the appropriate hem tape for your curtains, there are a few factors to consider. Taking these factors into account will ensure that you choose the right tape that suits the fabric type and provides the desired results. Here are some key considerations:
- Width: Hem tape comes in various widths, so it’s important to choose a tape that matches the width of your curtain hem. If your curtains have a wide hem, opt for a wider hem tape to ensure proper adhesion and coverage. Alternatively, for narrower hems, a narrower tape will work just fine.
- Fabric compatibility: Different hem tapes are designed to work with specific fabric types. Some tapes may adhere better to lightweight fabrics, while others are better suited for heavy or textured materials. Check the packaging or product description to ensure that the hem tape is compatible with the type of fabric you’re working with.
- Adhesive strength: Consider the level of adhesive strength you need for your curtains. If you want a temporary adjustment or plan to frequently change the curtain length, opt for a hem tape with a lower adhesive strength. For a more permanent alteration, look for a tape with a strong adhesive that can withstand regular use and washing.
- Color: Hem tapes are available in both clear and colored options. Clear tape is a great choice if you want it to blend seamlessly with the fabric. However, colored tapes can be used creatively to add a decorative touch or create a contrast with the fabric.
- Quality: Invest in a good quality hem tape to ensure optimal results. Cheaper tapes may have a weaker adhesive or not hold up well over time. Read reviews or ask for recommendations to find a reliable and durable hem tape brand.
By considering these factors, you can choose the right hem tape that matches the specific requirements of your curtains. Taking the time to select the appropriate tape will result in a successful hemming process and curtains that look professionally tailored.
Preparing Your Curtains
Before applying hem tape to your curtains, it’s essential to properly prepare them to ensure the best results. Following these steps will help ensure a smooth and successful hemming process:
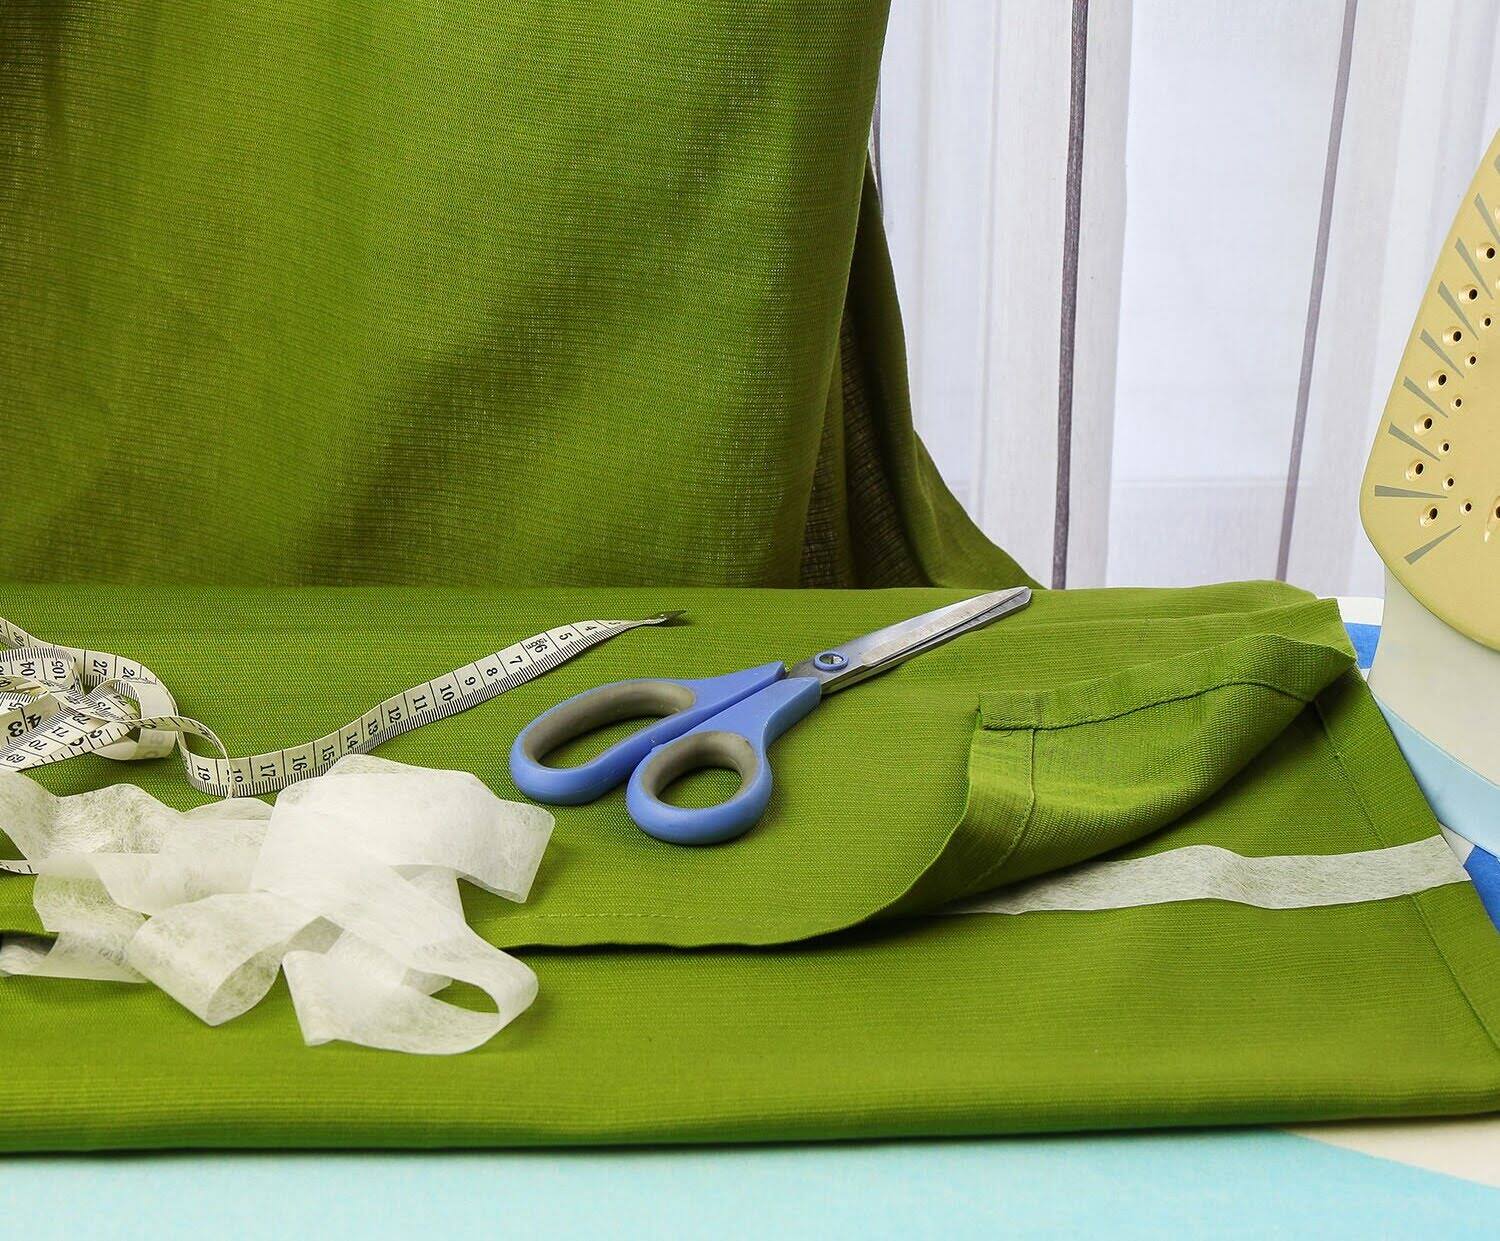
- Clean and iron the curtains: Start by thoroughly cleaning your curtains according to their specific care instructions. This will remove any dirt, dust, or wrinkles that could affect the hemming process. Once cleaned, iron the curtains to create a smooth surface for applying the hem tape.
- Measure and mark the desired hem length: Use a tape measure to determine the desired length for your curtains. Whether you want a slight adjustment or a significant hem, measure and mark the appropriate distance from the existing hem. Use fabric chalk or pins to mark the measurement accurately.
- Trim excess fabric: If your curtains have an excessive amount of fabric below the desired hem length, consider trimming the excess before applying the hem tape. Use fabric scissors to carefully cut along the marked line, leaving enough fabric for the desired hem width.
- Prewash the hem tape (if needed): Some types of hem tape require prewashing before use. This helps activate the adhesive and ensures better bonding with the fabric. Refer to the instructions on the hem tape packaging to determine if prewashing is necessary.
By prepping your curtains in this way, you create an optimal surface for applying the hem tape and ensure that your curtains will hang evenly and cleanly after the hemming process.
When using hem tape on curtains, make sure to measure and mark the desired hem length before applying the tape. Use a hot iron to activate the adhesive and ensure a secure bond.
Applying Hem Tape to the Curtain Hem
Now that your curtains are prepared, it’s time to apply the hem tape to the curtain hem. Follow these steps to ensure a successful application:
- Position the hem tape: Start by unfolding the hem tape and positioning it along the edge of the curtain hem, ensuring it covers the marked line. The adhesive side should be facing down, touching the curtain fabric.
- Secure the hem tape: Use straight pins or clips to secure the hem tape in place along the entire length of the curtain hem. This will prevent the tape from shifting or moving during the next steps.
- Trim the hem tape: If the hem tape extends beyond the width of the curtain hem, use fabric scissors to carefully trim any excess tape. This ensures a neat and precise finish.
- Remove the pins or clips: Double-check that the hem tape is securely positioned before removing the pins or clips. This will prevent any shifting or misalignment during the next step.
It’s important to note that the specific instructions for applying hem tape may vary slightly depending on the brand or type of tape you are using. Always refer to the packaging or product instructions for any additional guidelines or recommendations.
By following these steps, you can effectively apply the hem tape to the curtain hem, setting the stage for the final step of the hemming process.
Ironing the Hem Tape
After the hem tape has been applied to your curtain hem, the next step is to activate the adhesive by ironing. This step is crucial in ensuring a secure and long-lasting bond between the fabric layers. Follow these steps to iron the hem tape:
- Set up your iron: Start by setting your iron to the appropriate heat setting for the fabric type of your curtains. Refer to the care instructions on the curtain label or packaging to determine the correct temperature.
- Protect the curtain fabric: Place a clean, thin cotton cloth or pressing cloth over the hem tape and curtain fabric. This provides a protective layer and prevents direct contact between the iron and the fabric, minimizing the risk of scorching or damage.
- Apply heat and pressure: Gently press the iron onto the pressing cloth, directly over the area where the hem tape is located. Apply even pressure and move the iron in a slow, continuous motion. Be sure to cover the entire length of the hem tape to ensure that the adhesive fully activates.
- Iron from both sides: To ensure a strong bond, flip the curtains over and repeat the ironing process on the reverse side. This helps evenly distribute the heat and further reinforces the adhesive bond.
- Allow the hem to cool and set: After ironing, give the curtains some time to cool down and allow the adhesive to fully set. This will ensure that the hem tape securely bonds the fabric layers together.
It’s important to follow the instructions provided with the hem tape, as different brands might have specific ironing guidelines and recommendations. Always refer to the packaging or product instructions for any additional guidance.
By properly ironing the hem tape, you activate the adhesive and ensure a strong bond between the fabric layers, resulting in a professionally hemmed curtain.
Finishing Touches
Once you have ironed the hem tape and allowed it to cool and set, it’s time to add the finishing touches to your newly hemmed curtains. Follow these final steps to complete the process:
- Inspect the hem: Carefully examine the hemmed area to ensure that the hem tape has securely bonded the fabric layers together. Check for any loose edges or areas that may require additional pressing.
- Trim any loose threads: If there are any loose threads or excess fabric along the hem, use fabric scissors to carefully trim them. This will give your curtains a clean, polished look.
- Hang the curtains: Attach the curtain panels to the curtain rod or hardware, following the manufacturer’s instructions. Take a step back and admire your newly hemmed curtains as they hang beautifully at the desired length.
- Optional: Add decorative touches: If desired, you can further enhance the appearance of your curtains by adding decorative elements. Consider adding curtain tiebacks, trim, or embellishments that complement your style and decor.
With these finishing touches, your curtains are ready to transform your space with their newly adjusted length. Enjoy the clean and tailored look that hem tape provides without the need for sewing.
Remember, it’s essential to periodically check the hem for any signs of wear or loosening. If necessary, you can reapply hem tape or consider permanent hemming methods if you want a long-term solution.
By completing these final steps, you can achieve a professionally finished look for your curtains, adding a touch of elegance and sophistication to your space.
Benefits and Drawbacks of Using Hem Tape on Curtains
Using hem tape on curtains comes with its own set of advantages and disadvantages. Understanding these benefits and drawbacks will help you make an informed decision on whether hem tape is the right solution for your curtain hemming needs. Here are some key points to consider:
- Benefits:
- Ease of use: Hem tape is incredibly easy to use, making it a convenient option for those who are not skilled in sewing or do not have access to a sewing machine. It offers a simple and straightforward way to achieve a professional-looking hem.
- Time-saving: Hem tape allows you to quickly and efficiently alter the length of your curtains without the time-consuming process of traditional sewing. This can be especially beneficial if you have numerous curtains to hem or if you need a quick alteration.
- No visible stitches: With hem tape, there are no visible stitches on the curtain fabric. This creates a clean and seamless finish, enhancing the overall appearance of your curtains.
- Temporary or permanent solution: Hem tape provides flexibility in terms of its longevity. It can be used as a temporary solution, allowing you to adjust the curtain length as needed. Alternatively, it can be used as a permanent alteration if you desire a more permanent change.
- Wide fabric compatibility: Hem tape is suitable for use on a variety of fabrics, including cotton, polyester, silk, and linen. It works well with most fabric types, offering a versatile solution for different curtain materials.
- Drawbacks:
- Heat sensitivity: Hem tape relies on heat for activation, which can pose a challenge for certain delicate fabrics that are sensitive to high temperatures. It’s important to carefully consider the fabric type and follow the manufacturer’s guidelines to avoid any potential damage.
- Limited flexibility: Once the hem tape is applied and activated, it can be challenging to make further adjustments to the curtain length. Unlike traditional sewing methods, there is limited flexibility to easily modify the hem after the tape has been applied.
- Possible adhesive residue: Depending on the quality of the hem tape or the fabric type, there is a potential for the adhesive to leave residue on the fabric. This is why it’s essential to select high-quality hem tape and follow proper care instructions for your curtains.
Considering these benefits and drawbacks will help you determine whether hem tape is the right choice for your specific curtain hemming needs. It offers a convenient and efficient alternative to traditional sewing methods, but it’s important to weigh the advantages and disadvantages before making a decision.
Read more: How To Hem Blackout Curtains Without Sewing
Conclusion
Hem tape is a versatile and accessible tool that allows you to easily adjust the length of your curtains without the need for sewing. It offers numerous benefits, such as convenience, time-saving, and a professional-looking finish. Hem tape is suitable for a variety of fabrics and provides the flexibility of temporary or permanent alterations.
By choosing the right hem tape and properly preparing your curtains, you can seamlessly apply the tape to the curtain hem. Ironing the hem tape activates the adhesive, ensuring a strong and durable bond. After completing the hemming process, you can add finishing touches, such as trimming loose threads and hanging the curtains to instantly transform your space.
While hem tape offers many advantages, it’s important to consider the drawbacks, such as the heat sensitivity of some fabrics and the limited flexibility for further adjustments. Pay attention to the fabric compatibility, choose high-quality hem tape, and follow the manufacturer’s instructions to ensure the best results.
In conclusion, hem tape is a valuable tool for anyone looking to hem their curtains without sewing. It simplifies the process, saves time, and delivers a professional finish. Whether you’re a DIY enthusiast or someone who simply wants to update their curtains, hem tape provides a convenient and accessible solution. Give it a try and enjoy beautifully hemmed curtains that enhance the aesthetics of your space.
Frequently Asked Questions about How To Use Hem Tape On Curtains
Was this page helpful?
At Storables.com, we guarantee accurate and reliable information. Our content, validated by Expert Board Contributors, is crafted following stringent Editorial Policies. We're committed to providing you with well-researched, expert-backed insights for all your informational needs.


0 thoughts on “How To Use Hem Tape On Curtains”