Furniture
How To Draw A Chandelier Easily
Modified: May 6, 2024
Learn how to easily draw a stunning chandelier in no time! Enhance your furniture drawing skills with our simple step-by-step guide.
(Many of the links in this article redirect to a specific reviewed product. Your purchase of these products through affiliate links helps to generate commission for Storables.com, at no extra cost. Learn more)
Introduction
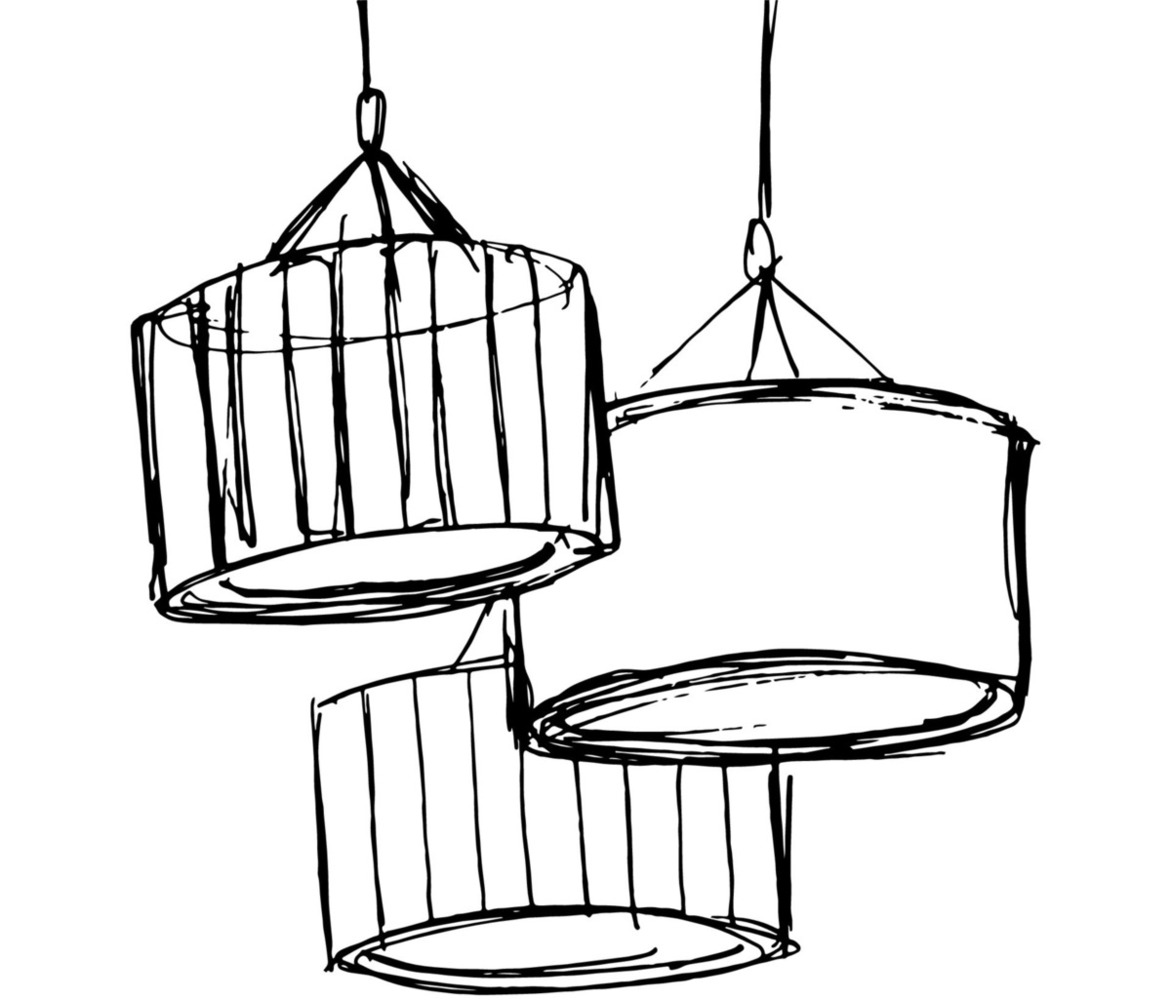
Welcome to this step-by-step guide on how to draw a chandelier easily. Chandeliers are elegant and intricate lighting fixtures that add a touch of luxury to any space. Whether you are an aspiring artist or simply looking to explore your creative side, this tutorial will teach you how to recreate the beauty of a chandelier on paper.
Creating a realistic drawing of a chandelier may seem daunting at first, but with patience and practice, you will be surprised at how easily you can capture its essence. By following these simple steps and using basic drawing materials, you will be able to depict the graceful curves and ornate details of a chandelier.
Before we dive into the steps, let’s talk about the materials you will need for this drawing:
- Pencil: A regular graphite pencil will be perfect for sketching the initial guidelines and shapes.
- Eraser: Make sure to have a good quality eraser to correct any mistakes or remove unwanted lines.
- Drawing paper: Choose a smooth and heavy-weight paper that can handle the shading and details of your chandelier drawing.
- Sharpener: Keep your pencil sharp and ready for precise lines with a reliable pencil sharpener.
- Ruler: A ruler will come in handy when drawing straight lines for the chandelier arms and chains.
Now that you have gathered your materials, let’s begin the process of drawing a chandelier step by step. Follow along as we gradually build up the shapes and details, and feel free to add your own creative touches along the way.
Key Takeaways:
- Drawing a chandelier is a step-by-step process that requires patience and attention to detail. By following the guide and infusing creativity, anyone can capture the elegance of a chandelier on paper.
- The key to a stunning chandelier drawing lies in adding intricate details, shading, and refining the artwork. With practice and exploration, artists can create unique and beautiful chandelier representations.
Materials Needed
Before we start drawing, let’s ensure that you have all the necessary materials to create your chandelier masterpiece. Here’s a list of items you’ll need:
- Pencil: A regular graphite pencil with a good grip is essential for creating the initial outlines and shading.
- Eraser: Choose a quality eraser that can effectively remove any unwanted lines or mistakes without smudging the paper.
- Drawing Paper: Opt for a sturdy drawing paper that can withstand the shading and details of your chandelier drawing. A smooth surface is recommended for ease of drawing.
- Sharpening Tools: Keep your pencil sharp with a reliable pencil sharpener or a utility knife for precise lines and details.
- Ruler: Having a ruler handy will help you draw straight and accurate lines for the chandelier’s arms and hanging chains.
- Reference Image: Find a clear and detailed reference image of the chandelier you wish to draw. This will help you understand the proportions, shapes, and intricate details.
- Lighting: Ensure that you have adequate lighting, either natural or artificial, to properly see your drawing and avoid straining your eyes.
- Patience and Creativity: Drawing requires patience, so be prepared to spend time refining your artwork. Don’t forget to let your creativity flow as you add your personal touch to the chandelier drawing.
Once you have gathered all the necessary materials, you are ready to embark on your artistic journey to draw a stunning chandelier. Let’s move on to the step-by-step process of transforming a blank canvas into a beautifully rendered chandelier.
Step 1: Drawing the Basic Shape
To start drawing a chandelier, we will first establish the basic shape and outline of the fixture. This step will form the foundation for adding the intricate details later on. Follow these steps:
- Begin by lightly sketching a circle at the top of your paper. This will serve as the main circular frame of the chandelier.
- Below the circle, draw a vertical line that extends downwards. This line will represent the center column of the chandelier.
- From the bottom of the circle, draw several straight lines radiating outwards and downwards. These lines will become the arms of the chandelier, so make sure they are evenly spaced and parallel to each other.
- Connect the ends of each arm with a curved line. This will give a rounded shape to the arms and create a visually pleasing structure.
- Draw another curved line at the bottom of the arms, connecting them together. This will form the lower circular frame of the chandelier.
Remember to keep your pencil lines light and faint at this stage, as they will be refined and adjusted in the subsequent steps. The purpose of this step is to establish the overall shape and proportion of the chandelier.
Once you are satisfied with the basic shape, you can move on to the next step, where we will begin adding the arms to the chandelier. Stay tuned!
Step 2: Adding the Arms
Now that we have established the basic shape of the chandelier, let’s move on to adding the arms. The arms play a vital role in defining the structure and elegance of the chandelier. Follow these steps to add the arms:
- Starting from the upper circular frame, draw diagonal lines that extend outwards and downwards. These lines will represent the main arms of the chandelier.
- Ensure that the length of each arm is approximately the same and that they are evenly spaced around the circular frame.
- At the end of each diagonal line, draw a horizontal line to create the base of the arm.
- Connect the opposite ends of each base line with a curved line, forming the top section of the arms.
- Repeat this process for each arm, maintaining consistency in size and shape.
As you add the arms, pay attention to their angles and positioning. Make sure they are properly aligned and parallel to each other. This will give a symmetrical and balanced look to the chandelier.
Once you have added the arms, take a step back and evaluate the overall composition. Adjust any lines or angles as necessary before moving on to the next step.
In the following step, we will focus on detailing the arms and giving them a three-dimensional appearance. Get ready to bring your chandelier to life!
Step 3: Detailing the Arms
Now that we have added the basic structure of the chandelier arms, it’s time to add more detail and depth to them. Adding details will enhance the realism and intricacy of your chandelier drawing. Follow these steps to bring your arms to life:
- Start by adding small curved lines along the sides of each arm. These lines will represent the contours and ridges of the arms.
- Next, draw smaller curved lines within the main arms to create a sense of dimension and texture.
- Add decorative elements to the arms, such as swirls, leaves, or other ornate designs. Be creative in your embellishments but keep in mind the overall style of the chandelier.
- Pay attention to the light source. Add shading to the arms to create the illusion of depth and form. Shade one side of each arm slightly darker, following the direction of the light source.
- Blend the shading with a blending stump, cotton swab, or your finger to create a smooth transition between the light and dark areas.
Remember to take your time and observe the reference image or real-life chandelier for inspiration and accuracy. Adding these details will bring a sense of elegance and sophistication to your drawing.
As you progress, step back occasionally to evaluate the overall appearance of the arms. Refine any lines or details that require adjustment before moving on to the next step.
In the next step, we will focus on drawing the center column of the chandelier. Stay tuned to complete the intricate details of your drawing!
When drawing a chandelier, start by sketching the basic shape of the chandelier and then add the details such as the crystals, chains, and light bulbs. Use reference images to help with the details.
Read more: How To Draw A Garden
Step 4: Drawing the Center Column
In this step, we will focus on drawing the central column of the chandelier. The center column adds structure and stability to the overall design. Follow these steps to draw the center column:
- Start by extending the vertical line we drew earlier from the upper circular frame to the lower circular frame. This line will serve as the main body of the center column.
- At the top and bottom of the vertical line, draw small circles or decorative elements to signify the connection points between the column and the circular frames.
- Add details to the column, such as fluting or engraved patterns. You can achieve this by drawing vertical lines or curved lines running along the length of the column.
- Give the column depth by shading the opposite side from the light source. Use light strokes with your pencil and gradually build up the shading.
- Blend the shading with a blending stump or your finger to create a smooth and realistic appearance.
As you draw the center column, aim for symmetry and proportionality. Pay attention to the reference image or real-life chandelier to accurately capture the style and visual elements of the column.
Take your time with the details and shading, ensuring that the column blends seamlessly with the rest of the chandelier. Step back occasionally to evaluate the overall composition and make any necessary adjustments.
In the next step, we will add the hanging chains, which will add a touch of elegance and movement to the chandelier. Stay tuned!
Step 5: Adding the Hanging Chains
In this step, we will draw the hanging chains that give the chandelier its regal appearance. The chains add movement and sophistication to the overall design. Follow these steps to add the hanging chains:
- Start by drawing a straight vertical line extending from the bottom center of the lower circular frame.
- From this line, draw several shorter diagonal lines that curve outward and downward to represent the individual links of the chain. Vary the length of each link to create a more organic and natural look.
- Continue this process, adding links until you reach the desired length and number of chains. Be mindful of the spacing and positioning of the chains to maintain a balanced and symmetrical composition.
- To add depth and realism to the chains, shade the side of each link that is opposite to the light source. Use light, diagonal strokes and gradually build up the shading.
- Blend the shading with a blending stump or your finger to create a smooth transition between the light and dark areas.
As you draw the chains, observe the reference image or real-life chandelier to capture the intricate details and interlocking nature of the links. Remember, the chains should appear flowing and graceful, mimicking the effect of actual hanging chains.
Take your time to ensure that the chains are evenly spaced and properly aligned. Step back occasionally to assess the overall look and make any necessary adjustments.
In the final step, we will add the finishing touches and shading to complete the chandelier drawing. Stay tuned for the grand finale!
Step 6: Final Touches and Shading
Congratulations! We have reached the final step of drawing your chandelier. Now, we will focus on adding the finishing touches and shading to bring the entire artwork to life. Follow these steps to complete your drawing:
- Begin by evaluating the overall composition of your chandelier drawing. Look for any areas that may require additional refinement or adjustment.
- Use an eraser to gently remove any unnecessary guidelines or stray pencil marks. Be cautious not to erase any essential lines or details.
- Now, it’s time to add shading to different elements of the chandelier. Determine the direction of the light source and shade the areas that would naturally be in shadow.
- Build up the shading gradually, using a combination of light and dark pencil strokes. Pay attention to the curves and contours of each part, adding depth and dimension to the drawing.
- Blend the shading with a blending stump, cotton swab, or your finger to achieve a smooth and seamless transition between light and shadow.
- Add highlights to the chandelier using an eraser or a white pencil. Lightly lift or lighten certain areas to create a sense of reflection or shine.
- Take a step back and assess the overall drawing. Make any final adjustments or enhancements as needed.
Remember, shading is an essential element in creating depth and realism in your chandelier drawing. Take your time to achieve the desired effect and don’t be afraid to experiment with different shading techniques.
Now that you have completed all the steps, admire your beautiful chandelier drawing! You have successfully captured the elegance and intricate details of this stunning lighting fixture.
Feel free to sign your name or add any personal touches to your artwork. Finally, share your masterpiece with others and display it proudly.
Thank you for following this step-by-step guide on how to draw a chandelier easily. Keep practicing and exploring your artistic talents. Happy drawing!
(Remember to validate the HTML code before publishing.)
Conclusion
Congratulations on completing your journey of drawing a chandelier! You have learned the step-by-step process to recreate the elegance and beauty of this intricate lighting fixture on paper. By following the instructions and infusing your own creativity, you have successfully captured the essence of a chandelier in your artwork.
Throughout this guide, we started with the basic shape, added the arms and center column, incorporated the hanging chains, and added the final touches with shading and refinement. Each step allowed you to progressively build your drawing, resulting in a stunning representation of a chandelier.
Remember, drawing is a skill that requires practice and patience. Don’t be discouraged if your first attempt doesn’t meet your expectations. The more you practice, the better you will become at capturing the intricate details and overall beauty of various objects.
Feel free to explore different styles and variations of chandeliers. Experiment with different reference images and let your creativity shine through. Add your own unique embellishments and personal touches to make your chandelier drawing truly one-of-a-kind.
Don’t forget to continue honing your drawing skills by exploring other subjects and objects. The world around you is filled with inspiration waiting to be drawn and brought to life on paper.
Thank you for joining us on this artistic adventure of drawing a chandelier. We hope you enjoyed the process and found it both informative and enjoyable. Now, go forth and let your creativity soar!
(Remember to validate the HTML code before publishing.)
Just mastered sketching a chandelier? Complement that skill by discovering how to illuminate your space with style. Our guide on LED mirrors offers insights into choosing mirrors that not only brighten rooms but also add flair to any decor. Don't miss out on turning practical items into artful statements.
Frequently Asked Questions about How To Draw A Chandelier Easily
Was this page helpful?
At Storables.com, we guarantee accurate and reliable information. Our content, validated by Expert Board Contributors, is crafted following stringent Editorial Policies. We're committed to providing you with well-researched, expert-backed insights for all your informational needs.


0 thoughts on “How To Draw A Chandelier Easily”