Home>Furniture>Office Furniture>How To Build Bookshelves Around A Fireplace
Office Furniture
How To Build Bookshelves Around A Fireplace
Modified: December 7, 2023
Learn how to build beautiful bookshelves around your fireplace with our step-by-step guide. Create a functional and stylish office space with our office furniture collection.
(Many of the links in this article redirect to a specific reviewed product. Your purchase of these products through affiliate links helps to generate commission for Storables.com, at no extra cost. Learn more)
Introduction
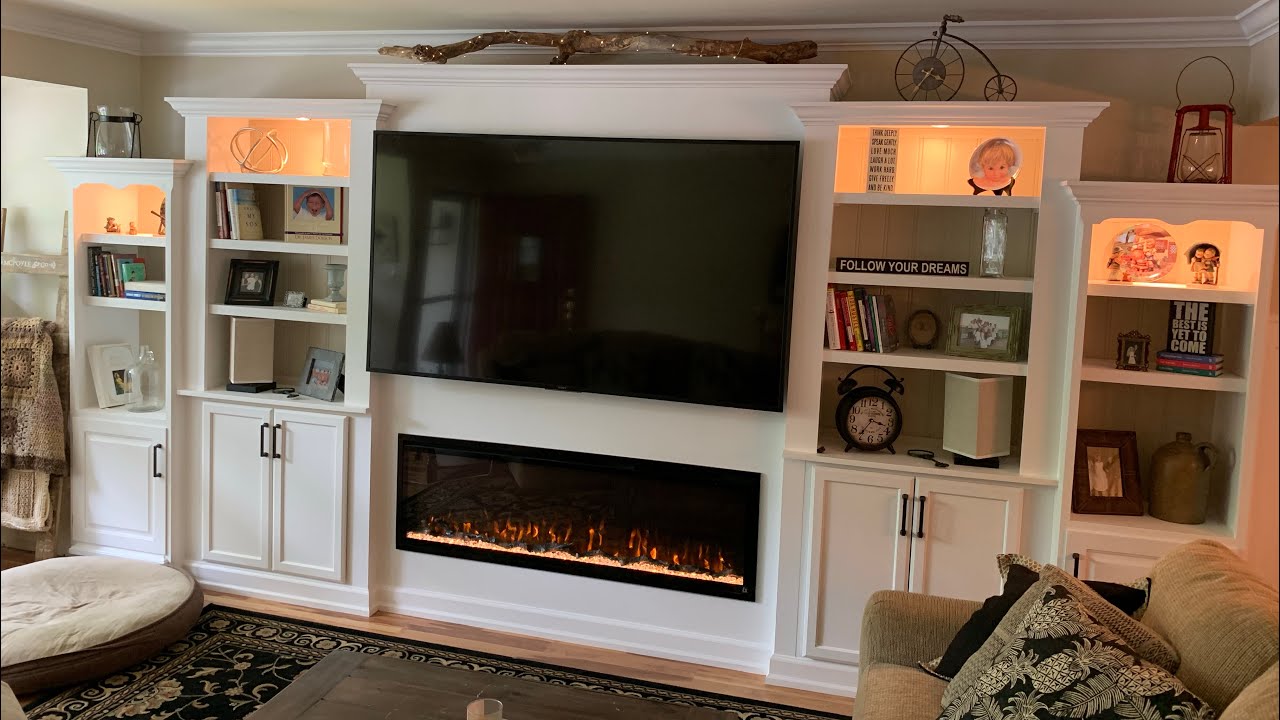
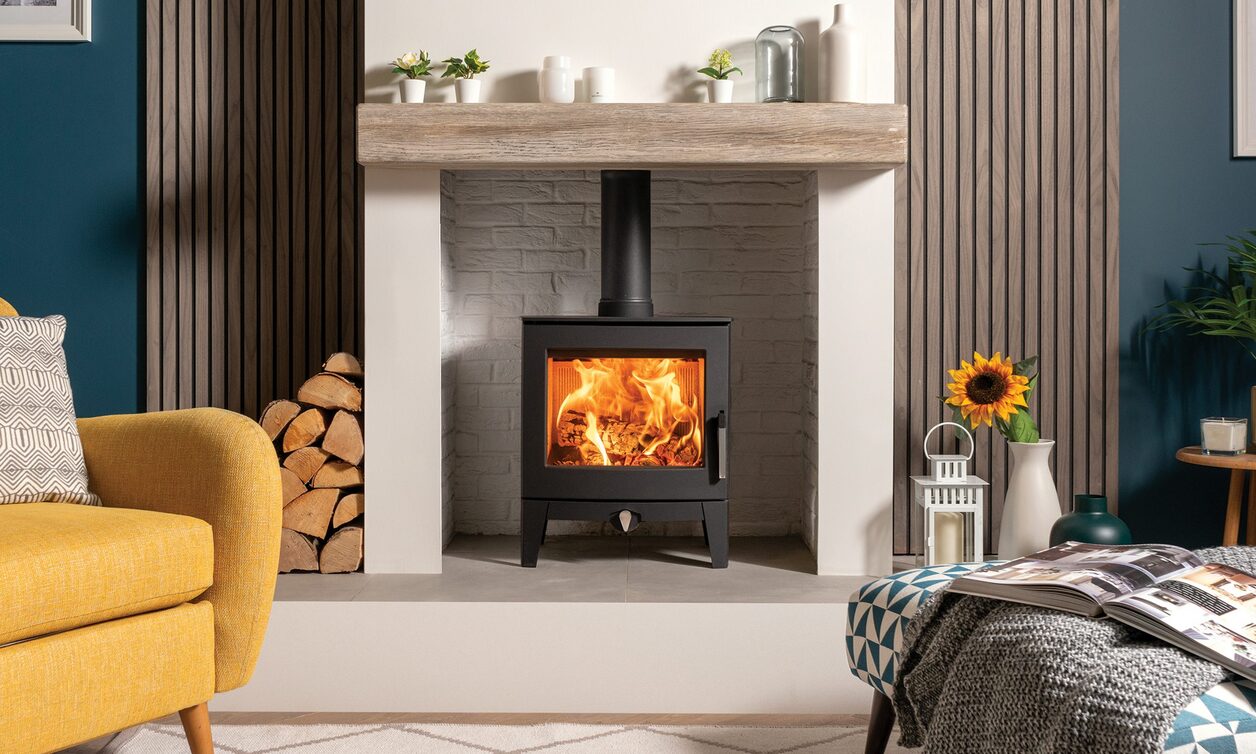
Welcome to the world of beautifully crafted and functional bookshelves! If you have a fireplace in your home, you’ve probably found yourself dreaming of an elegant and practical solution to transform the space around it. Building bookshelves around a fireplace not only adds a stunning focal point to your living room but also maximizes storage and display opportunities.
Whether you’re an avid book collector, a lover of interior design, or simply in need of more storage, this comprehensive guide will walk you through the process of building bookshelves around your fireplace. With just a little bit of planning, some basic tools, and a touch of creativity, you’ll have a customized and stylish bookshelf fit for all your treasures.
Before we dive into the building process, it’s important to note that building bookshelves around a fireplace requires some basic carpentry skills. If you’re not confident in your abilities, it may be wise to consult with a professional or enlist the help of a skilled friend or family member. Safety should always be a top priority, so make sure to follow all safety guidelines and wear protective gear when necessary.
Are you ready to embark on this exciting project? Let’s get started by evaluating the space and envisioning the perfect bookshelf design!
Key Takeaways:
- Transform your living room with elegant and functional bookshelves around your fireplace. Carefully evaluate the space, gather materials, and follow safety guidelines for a rewarding DIY project.
- Create a stunning focal point and maximize storage and display opportunities with custom-built bookshelves. From measuring and marking to adding trim and finishing touches, elevate your living space with craftsmanship and creativity.
Step 1: Evaluate the Space
Before you start building bookshelves around your fireplace, it’s essential to evaluate the space and consider a few factors. This step will help you determine the overall design and dimensions of your bookshelves.
The first thing to consider is the size and shape of your fireplace. Take measurements of the width, height, and depth of the fireplace, as well as any protrusions such as a mantel or hearth. These measurements will serve as a guide when designing your bookshelves.
Next, think about the style and aesthetic you want to achieve. Are you looking for a traditional and elegant design, or do you prefer a modern and minimalist look? Consider the existing decor in your living room and choose a design that complements it seamlessly.
Additionally, think about the purpose of your bookshelves. Will they primarily serve as book storage, or will you use them to display your favorite art pieces, family photographs, or other decorative items? Understanding the intended use will help you determine the number of shelves and the spacing needed.
Another important aspect to consider is the functionality of the bookshelves. Do you want adjustable shelves to accommodate different-sized items, or do you prefer fixed shelves for a more uniform look? Think about how you will use the bookshelves and what features will best suit your needs.
Lastly, don’t forget to take into account the overall dimensions of the room. Make sure the bookshelves won’t overpower the space or make it feel cramped. Balancing the size of the bookshelves with the rest of the room will ensure a harmonious and visually pleasing result.
By carefully evaluating the space and considering these factors, you’ll have a clear vision of the design, dimensions, and functionality of your bookshelves. Once you have a solid plan, you’re ready to move on to the next step: gathering materials and tools!
Step 2: Gather Materials and Tools
Now that you have a clear vision of your bookshelf design, it’s time to gather all the necessary materials and tools. Having everything prepared beforehand will make the building process smoother and more efficient.
Here’s a list of materials you’ll need for building your bookshelves:
- Wood boards or plywood: Choose a high-quality wood that suits your design and budget. Hardwoods like oak, maple, or cherry are popular choices for their durability and aesthetics.
- Shelving brackets or supports: These will depend on the type of shelving system you’re using. Options include adjustable shelf brackets or fixed shelf supports.
- Screws or nails: Use appropriate-sized screws or nails to secure the bookshelf frame and attach the shelves.
- Wood glue: This is essential for creating strong joints and ensuring the stability of your bookshelves.
- Sanding materials: Sandpaper or a sanding block will be needed to smooth out any rough edges or surfaces.
- Primer and paint or stain: Choose the desired finish for your bookshelves, whether it’s a paint color that matches your room decor or a stain that enhances the natural beauty of the wood.
- Measuring tape and level: Accurate measurements and checking for levelness are crucial for a precise and professional-looking result.
- A saw: Depending on your design, you may need a circular saw, miter saw, or jigsaw to cut the wood boards to the desired dimensions.
- A drill or screwdriver: Essential for drilling holes, driving screws, and attaching the bookshelf components.
It’s important to note that the specific materials and tools required may vary based on your chosen design and personal preferences. Take the time to research and gather all the necessary items before proceeding with the building process.
Once you have everything you need, you’re ready to move on to the next step: measuring and marking the wall for the bookshelf installation. Get your measuring tape and level ready as we dive into the details of creating the perfect fit!
Step 3: Measure and Mark the Wall
With your materials and tools gathered, it’s time to move on to the next crucial step: measuring and marking the wall where your bookshelves will be installed. Accurate measurements are essential to ensure a precise fit and a professional-looking result.
Start by measuring the width and height of the space where you plan to install the bookshelves. Use a measuring tape and take precise measurements, accounting for any obstacles such as electrical outlets or light switches. These measurements will serve as a guide for cutting and assembling the bookshelf components.
Once you have the measurements, use a pencil to mark the desired height and width of the bookshelves on the wall. Make sure your marks are level by using a level tool. This will help ensure that your bookshelves are straight and properly aligned.
Next, mark the positions of the shelves on the wall. Consider the spacing and adjust it based on the items you plan to display or store. Aim for an equal distance between shelves for a balanced look.
When marking the wall, take into account the size of the bookshelf framework as well. This will determine the overall dimensions of the marked area.
Double-check your measurements and marks to ensure accuracy before proceeding to the next step. Making adjustments at this stage will save you time and effort in the long run.
Remember to take safety precautions when using a ladder or step stool to reach higher areas. Always be mindful of your surroundings and work in a well-lit and well-ventilated area.
Once you’ve measured and marked the wall, you’re ready to move on to the exciting part: building the bookshelf framework. Get your tools and materials ready as we dive into step 4!
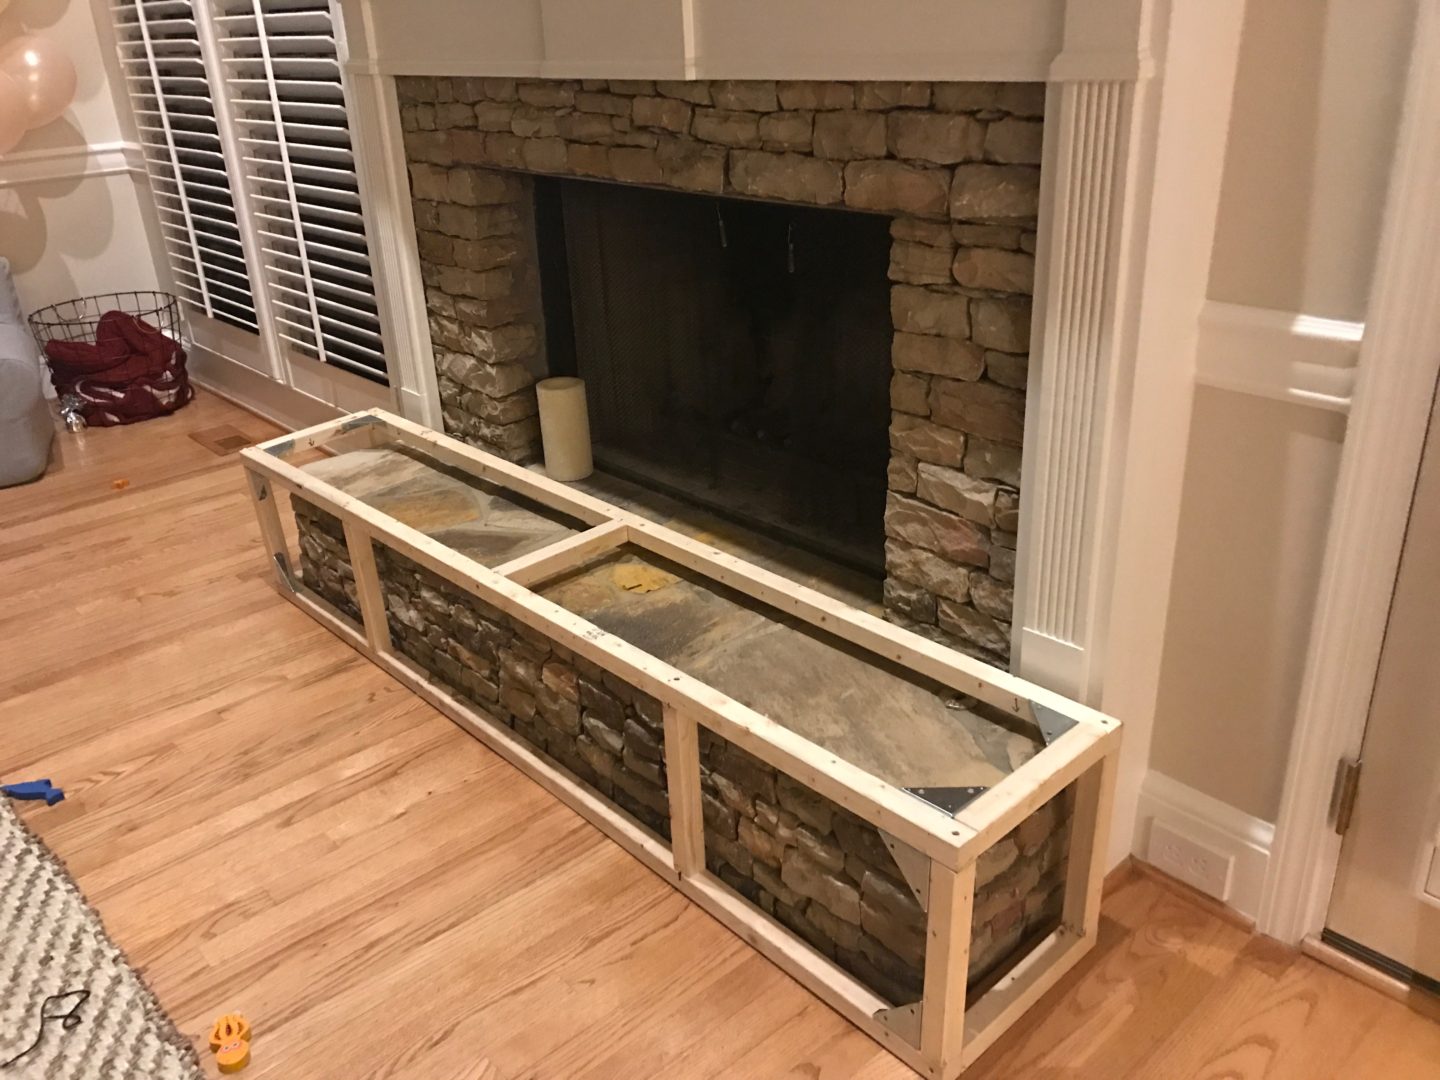
Step 4: Build the Bookshelf Framework
Now that you have measured and marked the wall, it’s time to start building the framework for your bookshelves. The framework provides the structure and support for the shelves and ensures their stability and durability.
Follow these steps to build the bookshelf framework:
- Cut the wood boards or plywood to the desired dimensions. Use a saw that is appropriate for the type of cuts you need, such as a circular saw or miter saw. Remember to follow your marked measurements and double-check for accuracy.
- Start by building the sides of the bookshelves. Attach longer vertical boards to shorter horizontal boards to create a rectangular frame. Use wood screws or nails and ensure a secure connection by pre-drilling holes and applying wood glue.
- Repeat the process for the other side of the bookshelves.
- Connect the two side frames by attaching horizontal boards as shelves. Remember to double-check the levelness of each shelf before securing it in place. Use a measuring tape and level to ensure consistency.
- Once the shelves are in place, reinforce the structure by adding vertical supports between the shelves. This will provide additional stability and prevent sagging over time.
- If desired, you can also add a back panel to the bookshelf framework. This can be achieved by attaching plywood or hardboard to the back of the frame. It will add visual appeal and improve the overall stability of the bookshelves.
- Double-check all connections and make any necessary adjustments before moving on to the next step.
Remember to wear safety goggles and appropriate protective gear when working with power tools. Take your time and work carefully to ensure accuracy and a professional result.
Once the bookshelf framework is complete, you’re ready to move on to the next step: securing the bookshelves to the wall. This step will ensure that your bookshelves are securely attached and able to withstand the weight of your books and other items.
When building bookshelves around a fireplace, make sure to leave enough space between the shelves and the fireplace to prevent any fire hazards. Also, consider using heat-resistant materials for the shelves near the fireplace.
Read more: How To Build A Wall Of Bookshelves
Step 5: Secure the Bookshelves to the Wall
Now that you have built the bookshelf framework, it’s time to secure it to the wall. This step is crucial for the stability and safety of your bookshelves, especially when they are loaded with books and other items.
Follow these steps to securely attach the bookshelves to the wall:
- Locate wall studs: Use a stud finder or knock on the wall to find the studs behind the drywall. Studs are vertical wooden supports in the wall that provide strong anchoring points.
- Mark the stud locations: Use a pencil to mark the locations of the studs on the back of the bookshelf frame. Make sure the marks are visible, as they will guide you during the installation process.
- Secure the bookshelves to the wall: Enlist the help of a friend or family member to hold the bookshelves in place against the wall. Use a level to ensure they are straight and level. Then, drive screws through the bookshelf frame and into the wall studs at the marked locations. This will provide secure and stable anchoring for the bookshelves.
- Double-check the alignment and stability: Once the bookshelves are secured to the wall, verify that they are level and stable. Give them a gentle shake to ensure they are firmly attached and not wobbly.
- Make any necessary adjustments: If the bookshelves are not level or aligned, remove the screws and make the necessary adjustments. Then, reattach the bookshelves to the wall.
Remember to use appropriate-length screws that penetrate the bookshelf frame and anchor securely into the wall studs. The number of screws needed will depend on the size of your bookshelves and the weight they will bear. It’s always better to err on the side of caution and use more screws for added stability.
Take your time during this step to ensure the bookshelves are properly attached. Safety should be a top priority, so it’s important to follow all instructions and guidelines for securing the bookshelves to the wall.
With the bookshelves securely attached, you’re almost ready to complete your project! The next step will focus on adding trim and finishing touches to enhance the aesthetic appeal of your bookshelves.
Step 6: Add Trim and Finishing Touches
Now that your bookshelves are securely attached to the wall, it’s time to add some trim and finishing touches to enhance their appearance. Trim not only adds a decorative element but also helps cover any gaps between the bookshelves and the wall, giving them a polished and professional look.
Follow these steps to add trim and finishing touches to your bookshelves:
- Measure and cut the trim: Using a measuring tape and a miter saw or a miter box with a handsaw, measure and cut the trim pieces to the appropriate lengths. Cut the trim at a 45-degree angle for clean and seamless corners.
- Attach the trim pieces: Apply a thin bead of wood glue to the back of each trim piece and press it firmly against the bookshelf frame. Secure the trim in place with finishing nails or a brad nailer, ensuring that they are countersunk into the trim for a smooth and flush finish.
- Fill any gaps and holes: Use wood putty or filler to fill any small gaps or nail holes in the trim. Smooth out the filler with a putty knife and allow it to dry according to the manufacturer’s instructions.
- Sand the trim: Once the filler is dry, use sandpaper or a sanding block to smooth out any rough edges or surfaces. Sand the trim until it is smooth and blends seamlessly with the bookshelf frame.
- Clean the bookshelves: Use a damp cloth to wipe down the bookshelves, removing any dust or debris from the construction process. This will prepare them for the finishing touch: paint or stain.
- Apply paint or stain: Choose the desired finish for your bookshelves based on your room’s aesthetic and personal preference. Apply a primer if necessary, and then follow with multiple coats of paint or stain, allowing each layer to dry before applying the next.
Remember to work in a well-ventilated area and wear appropriate safety gear, including a dust mask and goggles, when sanding or working with paint or stain.
Once the paint or stain is dry, step back and admire your beautifully built and finished bookshelves. They are now ready to be filled with your favorite books, decorative items, and personal touches.
With the trim and finishing touches complete, you’ve come to the final step. Let’s move on to step 7: painting or staining the bookshelves to create a cohesive look.
Step 7: Paint or Stain the Bookshelves
The final step in creating your perfect bookshelves is to apply paint or stain. This step will add the finishing touch and tie the entire design together, creating a cohesive and visually appealing look.
Follow these steps to paint or stain your bookshelves:
- Prepare the surface: If you haven’t done so already, make sure the bookshelves are clean and free of any dust or debris. Wipe them down with a damp cloth and allow them to dry completely.
- Protect surrounding areas: Use painter’s tape to cover and protect any surrounding areas that you don’t want to get paint or stain on, such as the walls or the floor.
- Choose your finish: Determine whether you want to paint the bookshelves with a specific color or stain them to enhance the natural beauty of the wood. Consider the overall aesthetic of your room and select a finish that complements the existing decor.
- Apply primer (if necessary): If you are painting the bookshelves, you may want to apply a coat of primer first. Primer helps create a smooth and even surface for the paint and promotes better adhesion.
- Paint or stain application: Use a brush, roller, or sprayer to apply the paint or stain in even strokes, following the manufacturer’s instructions. Apply multiple thin coats, allowing each layer to dry before applying the next. This will ensure a consistent and professional finish.
- Dry and cure: Allow the paint or stain to dry and cure completely. This process may take several hours or even days, depending on the specific product used. It’s important to exercise patience and avoid placing any objects on the bookshelves until the finish is fully cured.
- Remove tape and admire your work: Once the finish is dry and cured, carefully remove the painter’s tape from the surrounding areas. Step back and take a moment to admire your beautifully painted or stained bookshelves.
Remember to clean your brushes and tools properly according to the instructions provided by the paint or stain manufacturer. This will help prolong the life of your tools and ensure optimal performance in future projects.
With the paint or stain dry and the bookshelves complete, you can now proudly showcase your newly built and stylish bookshelves. Arrange your books, display your cherished items, and enjoy the functional and aesthetic upgrade they bring to your living space.
Congratulations on completing your bookshelf project! Now sit back, relax, and dive into a good book as you admire the beautiful addition to your home.
Conclusion
Congratulations on successfully building bookshelves around your fireplace! From evaluating the space and gathering materials, to measuring, cutting, and securing, you’ve followed each step with precision and creativity. The end result is a stunning and functional addition to your living room.
By carefully evaluating the space, considering the design and functionality, and using the right tools and materials, you’ve created bookshelves that not only provide ample storage for your books and belongings but also enhance the overall aesthetics of the room.
Throughout the process, you’ve exercised caution and prioritized safety, wearing protective gear and following guidelines. This ensured that you achieved a professional and secure installation.
Adding trim and finishing touches brought elegance and polished the look of your bookshelves. Finally, applying paint or stain tied everything together, creating a cohesive and beautiful piece of furniture that seamlessly blends with your existing decor.
Remember to regularly maintain your bookshelves by dusting and cleaning them to keep them looking their best. You can also periodically rearrange and refresh the items displayed to bring a new feel to your living space.
Pat yourself on the back for a job well done! Not only have you created a practical solution to store and display your beloved books, but you’ve also embarked on a rewarding DIY project that showcases your craftsmanship and creativity.
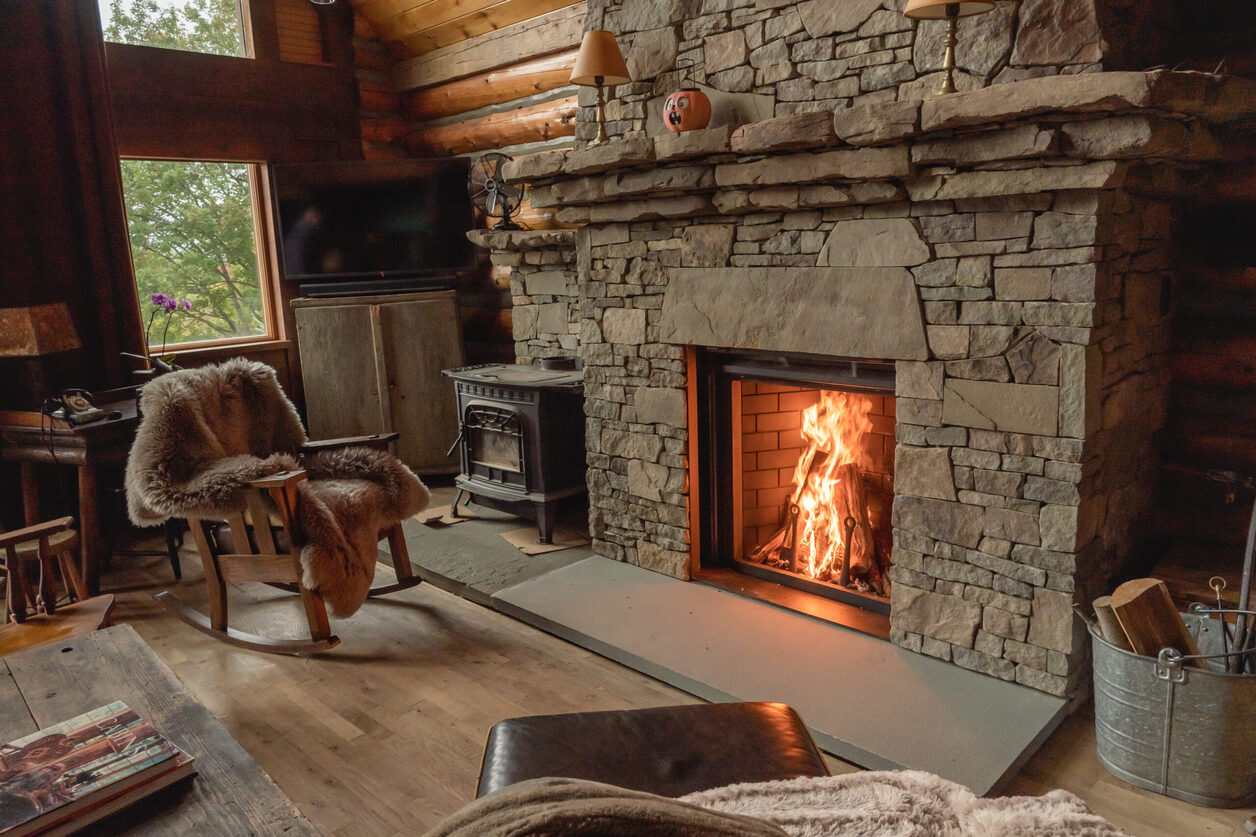
Now, it’s time to sit back, relax, and enjoy your cozy fireplace and the beauty of your new bookshelves. Curl up with a good book, surround yourself with your favorite decorative items, and take pride in your newly transformed living room.
Thank you for following this guide, and we hope you find joy and inspiration in the years to come with your custom-built bookshelves around your fireplace.
Frequently Asked Questions about How To Build Bookshelves Around A Fireplace
Was this page helpful?
At Storables.com, we guarantee accurate and reliable information. Our content, validated by Expert Board Contributors, is crafted following stringent Editorial Policies. We're committed to providing you with well-researched, expert-backed insights for all your informational needs.


0 thoughts on “How To Build Bookshelves Around A Fireplace”