Home>Articles>How To Excavate For A Patio, Walk, Or Wall Footing
Articles
How To Excavate For A Patio, Walk, Or Wall Footing
Modified: September 1, 2024
Learn helpful techniques and tips for excavating a patio, walkway, or wall footing with our comprehensive articles. Enhance your construction skills and achieve impressive results.
(Many of the links in this article redirect to a specific reviewed product. Your purchase of these products through affiliate links helps to generate commission for Storables.com, at no extra cost. Learn more)
Introduction
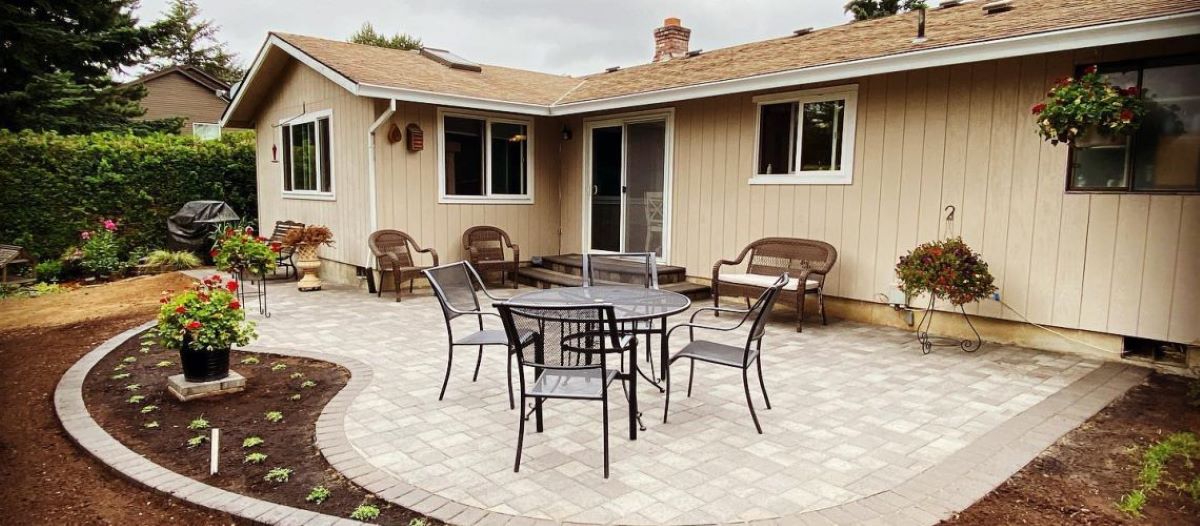
Welcome to a comprehensive guide on how to excavate for a patio, walkway, or wall footing. Whether you are a seasoned DIY enthusiast or a homeowner looking to expand your outdoor living space, understanding the process of excavation is crucial for a successful project.
Excavation is the first step in creating a stable foundation for your patio, walkway, or wall footing. It involves the careful removal of soil and the creation of a trench where the structure will be built. Proper excavation ensures proper drainage, stability, and longevity of your outdoor feature.
In this article, we will take you through the planning and preparation phase, gathering necessary equipment and materials, the actual excavation process, dealing with different soil conditions, protecting the excavated area, testing and inspections, and finally backfilling and compaction. By the end of this guide, you will have the knowledge and confidence to tackle your excavation project.
Before we dive into the nitty-gritty details, it is important to note that safety should always be a top priority. Excavation work can be physically demanding and potentially hazardous. Make sure you are wearing the appropriate safety gear and familiarize yourself with any relevant local codes and regulations.
So, whether you are looking to create a cozy patio space for entertaining guests, a stunning walkway to enhance your curb appeal, or a sturdy wall footing for added security, let’s get started on the exciting journey of excavation!
Key Takeaways:
- Excavation is a crucial first step for a stable outdoor feature. From planning to backfilling, proper techniques, safety measures, and soil management are essential for a successful project.
- Protecting the excavated area, conducting thorough testing and inspections, and ensuring proper backfilling and compaction are vital for a strong and stable foundation. Safety, compliance, and attention to detail are key.
Read more: How To Machine Quilt With A Walking Foot
Planning and Preparation
Before you start excavating for your patio, walkway, or wall footing, proper planning and preparation is essential. Taking the time to carefully consider a few key factors will ensure a successful outcome for your project.
Choosing the Location
The first step is to decide where you want your patio, walkway, or wall footing to be located. Consider factors such as the overall design and layout of your outdoor space, the functionality of the area, and any existing structures or landscaping you want to work around. Think about how the project will fit into the overall aesthetic of your home and outdoor environment.
Obtaining Necessary Permits
Depending on where you live, you may need to obtain permits before starting the excavation process. Building codes and regulations vary from area to area, and it’s important to check with your local municipality or building department to determine what permits are required. Obtaining the proper permits will ensure that your project complies with safety standards and any zoning restrictions.
Marking the Area
Once you have chosen the location and obtained the necessary permits, it’s time to mark the area where the excavation will take place. Use stakes, string, or spray paint to outline the boundaries of the project. This will help you visualize the size and shape of the excavation area and ensure that you stay within the designated space throughout the process.
It is also a good idea to mark any existing utility lines, such as water, gas, or electric lines, to avoid accidentally damaging them during the excavation. Contact a local utility locating service or your utility providers to help identify the location of underground lines.
By carefully planning the location, obtaining the necessary permits, and properly marking the area, you are laying the foundation for a successful excavation project. Taking the time to complete these initial steps will help ensure that your patio, walkway, or wall footing is positioned in the right place and complies with local regulations.
Read more: Top Of Foot Pain When Walking Down Stairs
Gathering Equipment and Materials
Once you have completed the planning and preparation phase, it’s time to gather the necessary equipment and materials for your excavation project. Having the right tools and safety equipment on hand will make the process smoother and more efficient, ensuring a successful outcome.
Excavation Tools
There are a variety of tools that are commonly used for excavation. Here are some essential ones to consider:
- Shovels: A sturdy shovel is a must-have for digging and moving soil. Choose a shovel with a sharp edge and a comfortable handle for easier use.
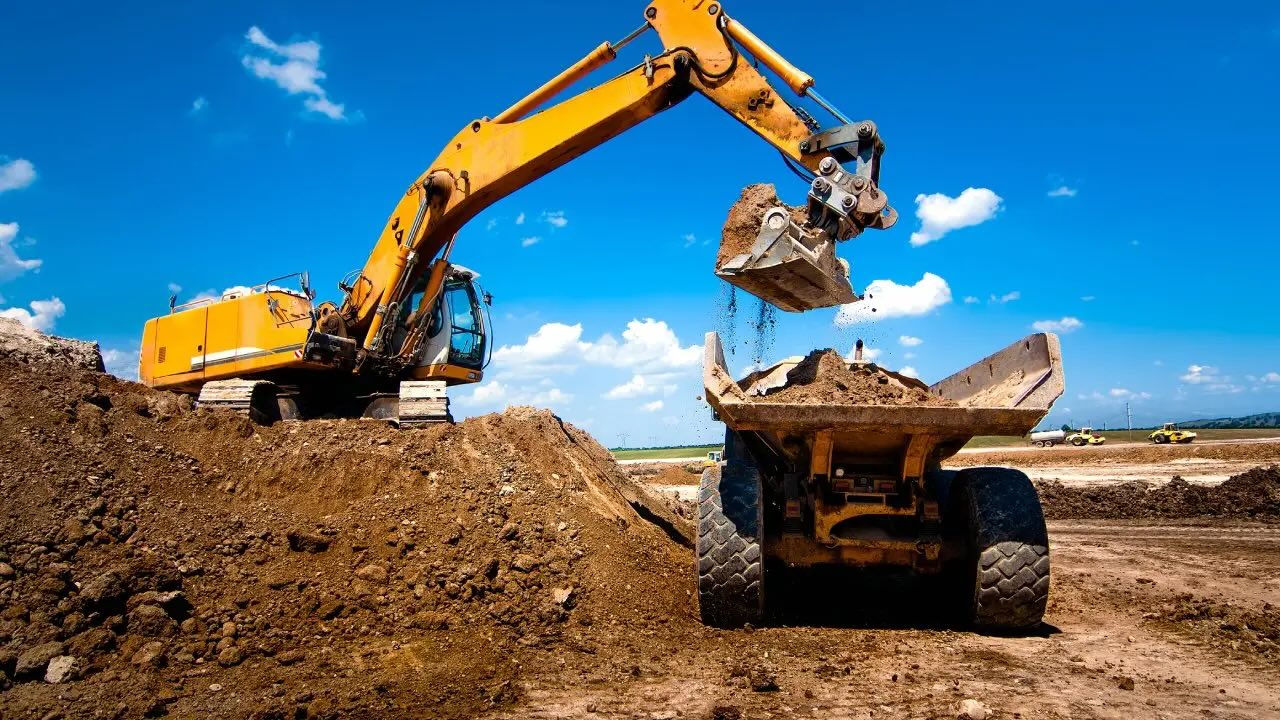
- Excavator or Backhoe: For larger projects, renting or hiring an excavator or backhoe can significantly speed up the excavation process.
- Trenching Shovel: A trenching shovel has a long, narrow blade that is ideal for digging trenches and removing soil in tight spaces.
- Pickaxe or Mattock: These tools are used for breaking up rocky or compacted soil, making it easier to remove.
- Tamping Tool: A tamping tool is used to compact the soil after excavation, ensuring a stable foundation.
Safety Equipment
Excavation work can be physically demanding and potentially dangerous. Therefore, it is crucial to prioritize safety and have the appropriate equipment on hand. Some essential safety equipment includes:
- Hard Hat: Protect your head from falling objects or debris by wearing a durable hard hat.
- Safety Glasses: Shield your eyes from dust, soil particles, and other potential hazards with safety glasses.
- Gloves: Heavy-duty gloves will provide protection and improve your grip when handling tools or materials.
- Steel-Toe Boots: Protect your feet from injuries caused by heavy objects by wearing steel-toe boots.
- Ear Protection: If using loud machinery, such as an excavator, wear ear protection to minimize the risk of hearing damage.
- Dust Mask: Prevent inhalation of dust and other airborne particles with a dust mask, especially in dusty environments.
Required Materials for Footings
Depending on the type of outdoor feature you are constructing, you may need specific materials for the footings. Common materials for footings include:
- Concrete: Footings are often made with concrete, which provides a solid base for the structure. Make sure to calculate the amount of concrete needed based on the depth and width of the footings.
- Reinforcing Bars: In some cases, you may need to reinforce the footings with steel bars, also known as rebar. This helps add strength and stability to the structure.
- Gravel or Aggregate: Adding a layer of gravel or aggregate at the bottom of the footing can improve drainage and prevent water buildup.
By gathering the necessary equipment and materials ahead of time, you will save time and effort during the excavation process. Having the right tools and safety equipment on hand will ensure a smooth and safe excavation, setting the stage for a successful project.
Read more: How To Make Footing For A Brick Wall
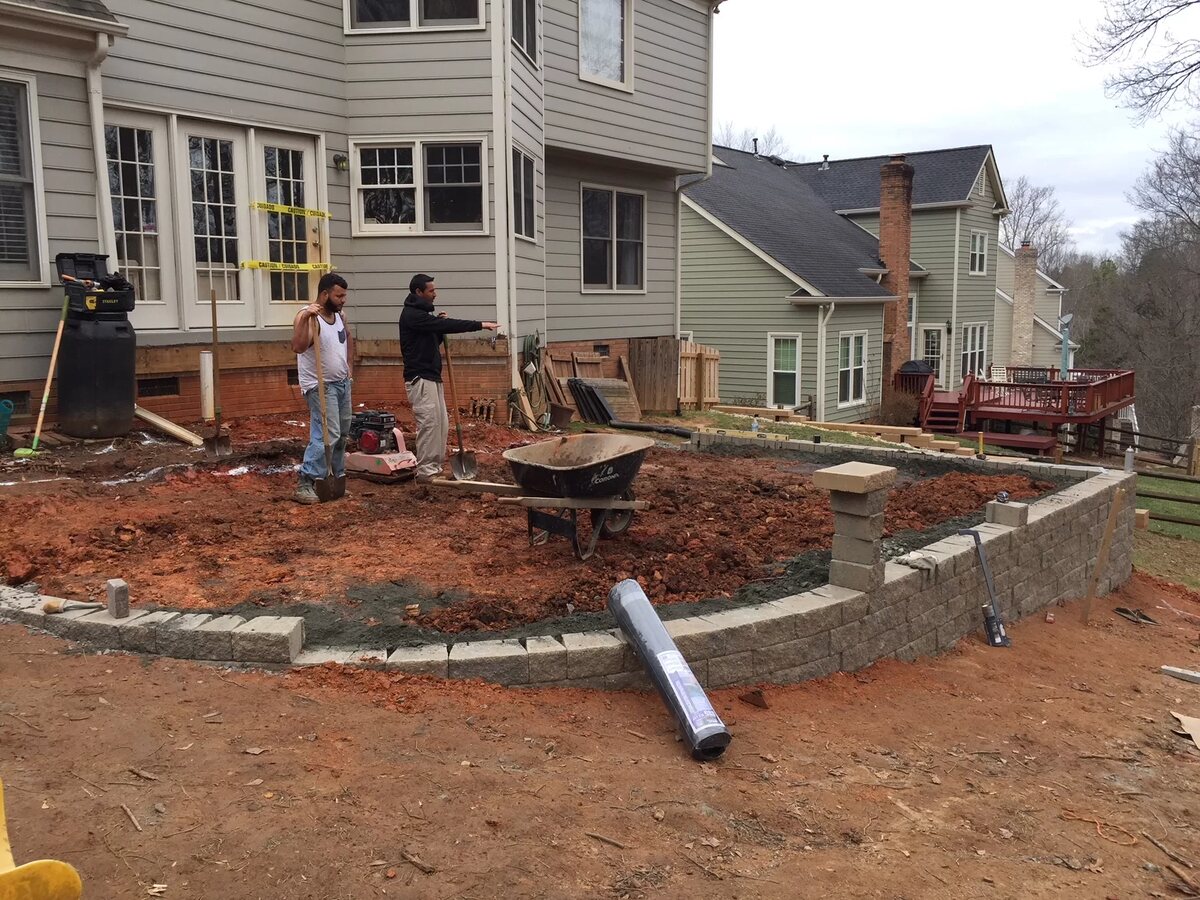
Site Excavation
With the planning, preparation, and gathering of equipment and materials completed, it’s time to move on to the site excavation phase of your project. This is where the actual digging and removal of soil to create the foundation for your patio, walkway, or wall footing takes place.
Clearing the Area
The first step in site excavation is to clear the area of any vegetation, debris, or objects that may hinder the excavation process. Remove any plants, rocks, or other obstacles from the designated excavation area. This will provide a clean slate for the rest of the excavation work.
Setting up Boundaries
Once the area is cleared, it’s important to set up boundaries to define the exact area where the excavation will occur. This can be done using stakes and string, or by marking the area with spray paint. Setting up boundaries ensures that you stay within the designated area and maintain the desired dimensions for your patio, walkway, or wall footing.
Removing Existing Structures or Obstacles
If there are any existing structures or obstacles within the excavation area, such as old concrete slabs, fences, or tree stumps, they need to be removed before digging can commence. Use appropriate tools, such as a jackhammer or saw, to break down or cut through these structures. Make sure to follow proper safety protocols and dispose of the debris in accordance with local regulations.
It is important to approach the removal of existing structures or obstacles with caution to avoid damaging any nearby utilities or causing any harm to yourself or others. If you are unsure about how to safely remove a structure, it is recommended to consult with a professional or contractor who can provide guidance.
By properly clearing the area, setting up boundaries, and removing existing structures or obstacles, you can ensure a clean and safe environment for the excavation work to commence. These initial steps are vital in creating a solid foundation for your patio, walkway, or wall footing.
Read more: How To Build A Patio Wall
Digging the Footing
Now that the site is prepared and ready for excavation, it’s time to dig the footing for your patio, walkway, or wall. This step involves accurately measuring and marking the depth of the footing, starting the excavation process, and creating a level trench that will serve as the foundation for your structure.
Measuring and Marking the Depth
Before you start digging, it’s crucial to determine the appropriate depth for your footing. This will depend on the type of structure you are building and local building codes. Measure and mark the depth of the footing using a tape measure and stakes. It’s important to ensure that the depth is consistent throughout the excavation area.
When marking the depth, consider factors such as the desired height of the finished structure, any necessary slope for proper drainage, and the type of soil you will be excavating. If in doubt, consult with an engineer or a professional contractor to determine the ideal depth for your project.
Starting the Excavation Process
With the depth marked, it’s time to start the excavation process. Begin by breaking ground at one end of the marked area using a shovel or excavator. Work systematically, digging out the soil in layers while keeping the sides of the excavation area as vertical as possible. Make sure to maintain the designated depth as you progress.
Keep in mind that safety is crucial during the excavation process. Stay clear of the excavation area while operating machinery, and always exercise caution when working near the edges. If using an excavator or backhoe, familiarize yourself with the controls and operate the equipment according to manufacturer guidelines and safety precautions.
Creating a Level Trench
As you dig the footing, it’s important to create a level trench at the bottom. Use a level or a straight board to check the flatness of the trench. Make any necessary adjustments to ensure that the entire trench is level. A level trench provides a stable and even foundation for your structure, preventing any uneven settling in the future.
Throughout the excavation process, make sure to remove any roots, rocks, or other debris that may interfere with the integrity of the trench. Keep the excavation area clean and free from excess soil to facilitate the later stages of the project.
By carefully measuring and marking the depth, starting the excavation process with safety in mind, and creating a level trench, you are well on your way to establishing a solid footing for your patio, walkway, or wall. This meticulous attention to detail will contribute to the overall stability and durability of your project.
Read also: 14 Best 7 Foot Patio Umbrella For 2025
Dealing with Soil Conditions
When undertaking an excavation project for your patio, walkway, or wall footing, it’s important to understand and address different soil conditions that may be encountered. Different soil types can present unique challenges during the excavation process. By identifying these soil types and employing proper techniques, you can effectively handle clay or sandy soil, as well as rock or hard soil.
Identifying Different Soil Types
The first step in dealing with soil conditions is to identify the type of soil you are working with. The most common soil types encountered during excavation projects include clay, sandy soil, and rock or hard soil.
Clay soil is dense and compact, known for its low permeability and tendency to retain moisture. Sandy soil, on the other hand, is loose and granular, characterized by its high drainage capability. Rock or hard soil consists of compacted or solid rock formations, which can be difficult to excavate through.
Handling Clay or Sandy Soil
When dealing with clay soil, it’s important to manage its high moisture content. Clay soil tends to become more compact when wet, making excavation challenging. To handle clay soil effectively:
- Consider using a mechanical compactor or water to soften the soil before excavation.
- Remove excess moisture by using drainage techniques, such as installing perforated pipes or adding gravel at the bottom of the footing.
- If necessary, incorporate amendments such as sand or organic matter to improve the soil’s drainage and stability.
For sandy soil, proper drainage becomes a concern due to its high permeability. To handle sandy soil effectively:
- Consider incorporating clay or silt to improve the soil’s ability to retain moisture.
- Ensure proper compaction during the excavation process to prevent settling in the future.
- Consider adding organic matter or mulch to increase the soil’s fertility and stability.
Dealing with Rock or Hard Soil
Excavating through rock or hard soil can be challenging and time-consuming. To deal with these soil conditions:
- Use heavy machinery, such as an excavator or backhoe, equipped with the appropriate attachments for breaking through the rock.
- Consider hiring a professional contractor with expertise in rock excavation if the soil conditions are particularly challenging.
- Use special tools, such as a rock breaker or jackhammer, to break up the rock before removing it.
It may be necessary to adapt your excavation techniques based on the specific soil conditions encountered during your project. Consulting with a geotechnical engineer or a professional contractor can provide valuable guidance in dealing with challenging soil conditions and ensuring a successful excavation process.
By understanding the different soil types, implementing the appropriate techniques, and seeking professional advice when needed, you can effectively handle various soil conditions and achieve a stable foundation for your patio, walkway, or wall.
Protecting the Excavated Area
During the excavation process for your patio, walkway, or wall footing, it’s crucial to take steps to protect the excavated area. Safeguarding the area not only ensures the safety of workers and passersby but also helps prevent erosion, water damage, or collapse of the excavation walls. Here are some measures you can take to protect the excavated area:
Installing Soil Retention Measures
One of the primary concerns during excavation is preventing the collapse or cave-in of the excavation walls. To ensure the stability of the soil and retain the shape of the excavation, you can use soil retention measures such as:
- Sheet Piling: Installing interlocking steel or vinyl sheet piles along the excavation walls to provide temporary stability and prevent soil movement.
- Trench Boxes: Utilizing trench boxes or trench shields to support and reinforce the excavation walls, providing a safe working space for workers.
- Soldier Piles and Lagging: Installing vertical steel piles or wooden beams (soldier piles) along the excavation walls, and installing horizontal wooden planks (lagging) between the piles to support the soil and prevent collapse.
Using Shoring or Slope Protection
In some cases, shoring or slope protection may be necessary to prevent soil erosion or instability. This is particularly important when working on slopes or excavating in areas with loose or sandy soil. Some methods of shoring or slope protection include:
- Shoring: Using braces, struts, or walls to support the sides of the excavation and prevent soil movement.
- Slope Stabilization: Implementing measures such as terracing, soil nailing, or geotextiles to reinforce the slope and stabilize the excavated area.
Preventing Erosion or Water Damage
Another crucial aspect of protecting the excavated area is preventing erosion and water damage. Exposed soil is vulnerable to erosion due to rain or runoff. To prevent erosion and water damage:
- Utilize erosion control measures such as straw or hay bales, geotextile erosion control blankets, or silt fences around the perimeter of the excavation to trap sediment and prevent it from washing away.
- Implement proper drainage systems to redirect water away from the excavation area, ensuring that water does not accumulate and cause instability.
- Reinforce the excavation walls with shotcrete or other erosion-resistant materials to protect against water damage and soil erosion.
By installing soil retention measures, using shoring or slope protection techniques, and implementing erosion control measures, you can effectively protect the excavated area and maintain a safe and stable working environment. These measures help prevent accidents, maintain the integrity of the excavation, and ensure the success of your patio, walkway, or wall footing project.
Read more: What Is Excavation Work In Construction
Testing and Inspections
As you progress with the excavation for your patio, walkway, or wall footing, it’s essential to conduct thorough testing and inspections to ensure that the excavation meets proper standards and requirements. Testing and inspections help verify the correct depth and width of the excavation, determine soil compaction, and ensure compliance with regulations. Here are some key aspects to consider:
Checking for Proper Depth and Width
Once the excavation is complete, it’s crucial to verify that the depth and width of the footing align with the intended design. Use a tape measure or other accurate measuring tool to confirm that the excavation meets the specified dimensions. Pay attention to any variations or deviations that may require adjustments before proceeding with further construction.
Determining Soil Compaction
Soil compaction is vital for the stability and load-bearing capacity of your patio, walkway, or wall footing. Test the soil compaction by using a soil compaction meter or performing a Proctor test on a soil sample. This will help determine if the soil is adequately compacted and meet the required standards for your project. If needed, adjust the compaction by adding or removing soil and retest as necessary.
Scheduling Required Inspections
Depending on your local regulations and the size of your project, you may be required to schedule inspections with the appropriate authorities. Inspections help ensure that the excavation and subsequent construction adhere to safety codes and building standards. Contact your local building department or regulatory agency to determine the specific inspections required and schedule them accordingly. Typical inspections may include inspections for depth, compaction, footings, and utility connections.
It’s important to follow the necessary approval process and obtain the required permits before proceeding with the construction phase. Failure to comply with inspection requirements may lead to costly delays or potential safety hazards. Always make sure to have the necessary documentation and certificates available for the inspectors to review.
By conducting thorough testing and inspections, you can ensure that the excavation meets the required depth and width, verify soil compaction, and comply with regulations. These steps help to build a strong and stable foundation for your project, setting the stage for a successful and long-lasting patio, walkway, or wall footing.
Read more: When Is A Ladder Required In An Excavation
Backfilling and Compaction
After completing the excavation for your patio, walkway, or wall footing, it’s time to focus on backfilling and compaction. Backfilling involves filling the excavated area with suitable materials, while compaction ensures the stability and strength of the foundation. Here are the key steps to consider during backfilling and compaction:
Adding Gravel or Drainage Materials
Before backfilling, it’s essential to add a layer of gravel or other drainage materials at the bottom of the excavation. This layer promotes proper drainage and prevents the accumulation of water around the structure. It helps to prevent water damage and ensure the stability of the foundation. A layer of drainage material also acts as a barrier between the soil and the structure, reducing the risk of soil settling.
Installing Reinforcing Bars (Rebar)
Depending on the design and load-bearing requirements of your project, you may need to install reinforcing bars, commonly known as rebar. Rebar provides additional strength and stability to the structure. Place the rebar within the excavated area according to the design specifications, ensuring proper spacing and alignment. This reinforcement helps resist cracking, settling, and shifting of the structure over time.
Compacting the Soil Layers
Compaction is essential to minimize settling and improve the stability of the backfilled soil. Use a compactor, such as a plate compactor or a jumping jack, to compact the soil in layers. Start at the bottom of the excavation and work your way up, ensuring even and uniform compaction. Each layer should be compacted until it reaches the desired density. Follow manufacturer’s instructions and guidelines for the proper use of the compaction equipment.
As you compact each layer, check for any irregularities or voids and fill them with additional soil or compactible materials to maintain a solid and uniform surface. Pay close attention to the edges and corners, as these areas are more prone to settlement. Regularly check the compaction level using a compaction meter or performing a standard Proctor test to verify that the soil meets the required compaction standards.
Throughout the backfilling and compaction process, it’s important to monitor the sequence and thickness of each layer. Proper compaction ensures optimal load-bearing capacity, reduces future settlement issues, and improves the long-term stability of your patio, walkway, or wall footing.
By diligently backfilling with drainage materials, installing reinforcing bars (rebar), and properly compacting the soil layers, you are setting the stage for a solid and reliable foundation. These steps contribute to the overall strength and longevity of your project while minimizing potential issues caused by settling or soil instability.
Read more: How To Walk In An Attic
Conclusion
Congratulations on completing the comprehensive guide on excavating for a patio, walkway, or wall footing! By following the steps outlined in this article, you have gained valuable knowledge and skills necessary for a successful excavation project.
Throughout the planning and preparation phase, you learned the importance of choosing the right location, obtaining permits, and marking the excavation area. Gathering the necessary equipment and materials, including excavation tools and safety gear, ensured a smooth excavation process.
During the site excavation, you cleared the area, set up boundaries, and removed existing structures or obstacles. The careful digging of the footing, measuring the depth, and creating a level trench laid the groundwork for a stable foundation.
Dealing with different soil conditions, such as clay, sandy soil, or rock, required specific techniques and considerations. By identifying the soil type and implementing appropriate methods, you successfully managed the excavation process.
Protecting the excavated area was crucial to maintain safety and prevent erosion or water damage. Installing soil retention measures, using shoring or slope protection, and implementing erosion control methods ensured the stability and integrity of the excavation site.
Testing and inspections provided checkpoints to verify proper depth and width, determine soil compaction, and meet regulatory requirements. Scheduling required inspections with the appropriate authorities ensured compliance and adherence to safety and building codes.
Finally, backfilling and compaction completed the excavation project. Adding gravel or drainage materials, installing reinforcing bars (rebar), and proper compaction techniques resulted in a strong and stable foundation for your patio, walkway, or wall footing.
Remember, safety should always be a priority during the excavation process. Adhere to safety guidelines, wear appropriate protective gear, and consult professionals or contractors when needed.
By successfully completing the excavation process, you have laid the foundation for an exceptional outdoor space. Whether it’s a cozy patio to gather with friends, an inviting walkway to enhance your home’s curb appeal, or a sturdy wall footing for added security, your efforts will bring joy and functionality to your outdoor environment.
Now that you have acquired the knowledge and skills to undertake an excavation project, it’s time to put your newfound expertise to use. Enjoy the journey of transforming your vision into a reality with your beautifully excavated patio, walkway, or wall footing.
References
1. Construction Knowledge.net. (n.d.). How to Excavate Footings. Retrieved from https://www.constructionknowledge.net/public_htmlCK/w2a.htm
2. HomeTips. (2021). How to Excavate for Patio or Walkway. Retrieved from https://www.hometips.com/diy-how-to/patio-excavation.html
3. The Family Handyman. (2021). How to Build a Concrete Patio: Step by Step. Retrieved from https://www.familyhandyman.com/project/how-to-build-a-concrete-patio-step-by-step
4. The Spruce. (2021). How to Excavate a Trench for a Paver Patio. Retrieved from https://www.thespruce.com/how-to-excavate-trench-for-paver-patio-2131987
5. This Old House. (n.d.). How to Dig a Hole: Pro Tips. Retrieved from https://www.thisoldhouse.com/21106882/how-to-dig-a-hole-pro-tips
Remember to consult local building codes and regulations, as well as seek professional advice when undertaking any excavation project.
Frequently Asked Questions about How To Excavate For A Patio, Walk, Or Wall Footing
Was this page helpful?
At Storables.com, we guarantee accurate and reliable information. Our content, validated by Expert Board Contributors, is crafted following stringent Editorial Policies. We're committed to providing you with well-researched, expert-backed insights for all your informational needs.


0 thoughts on “How To Excavate For A Patio, Walk, Or Wall Footing”