Home>Furniture>Outdoor Furniture>How To Build A Paver Patio With A Retaining Wall
Outdoor Furniture
How To Build A Paver Patio With A Retaining Wall
Modified: March 7, 2024
Learn how to create a stunning outdoor space with a paver patio and retaining wall. Discover the best outdoor furniture to complete your backyard oasis.
(Many of the links in this article redirect to a specific reviewed product. Your purchase of these products through affiliate links helps to generate commission for Storables.com, at no extra cost. Learn more)
Introduction
Welcome to our comprehensive guide on how to build a paver patio with a retaining wall. If you’re looking to transform your outdoor space into a stunning and functional area, a paver patio with a retaining wall is an excellent choice. Whether you want to create a cozy seating area or an entertaining space, this project will not only add value to your property but also enhance your overall outdoor experience.
Building a paver patio with a retaining wall might seem like a daunting task, but with the right planning and preparation, it can be a rewarding DIY project. In this guide, we will take you through the step-by-step process of creating your own paver patio with a retaining wall, from the initial planning stages to the final finishing touches.
Before we dive into the details of each step, it’s important to note that safety should always be a top priority. Wear appropriate protective gear, such as gloves and safety goggles, and use caution when handling tools and materials. Additionally, consult local building codes and regulations to ensure compliance before starting your project.
Now, let’s get started on creating your dream outdoor space with a beautiful paver patio and retaining wall!
Key Takeaways:
- Planning and preparation are crucial for building a paver patio with a retaining wall. Consider design, materials, tools, and permits to ensure a smooth and successful DIY project.
- From excavating the area to sealing the patio, each step is essential for creating a beautiful and durable outdoor space. Attention to detail and proper maintenance will ensure your paver patio with a retaining wall lasts for years to come.
Read more: How To Build Stairs In A Retaining Wall
Step 1: Planning and Preparation
The first and most crucial step in building a paver patio with a retaining wall is proper planning and preparation. Taking the time to plan ahead will ensure that your project runs smoothly and yields the desired results. Here are some essential considerations for this step:
- Design and Layout: Determine the size, shape, and layout of your patio and retaining wall. Consider factors such as the intended use of the space, existing landscape features, and any functional requirements you may have. A well-thought-out design will help guide your construction process.
- Materials: Choose the right materials for your project, such as pavers, retaining wall blocks, and any additional elements like edging or steps. Consider the aesthetic appeal, durability, and compatibility of the materials with your specific climate and outdoor conditions.
- Tools and Equipment: Make a list of the tools and equipment you’ll need for the project. This may include shovels, wheelbarrows, levelers, a plate compactor, a saw for cutting pavers, and safety equipment. Rent or purchase any necessary items to ensure you have everything on hand before you begin.
- Site Preparation: Assess the area where your patio and retaining wall will be located. Ensure the area is clear of any obstructions, such as trees, plants, or debris. Consider any necessary drainage requirements and make adjustments to the site if needed.
- Permits and Regulations: Check with your local authorities to determine if any permits or approvals are required for your project. Familiarize yourself with any building codes or regulations that may apply to patio construction or retaining wall installation.
Taking the time to plan and prepare thoroughly will save you time and frustration during the construction process. It will also help you visualize the end result and make any necessary adjustments before you start building. Once you have completed the planning and preparation stage, you can move on to the next step in the process: excavating the area.
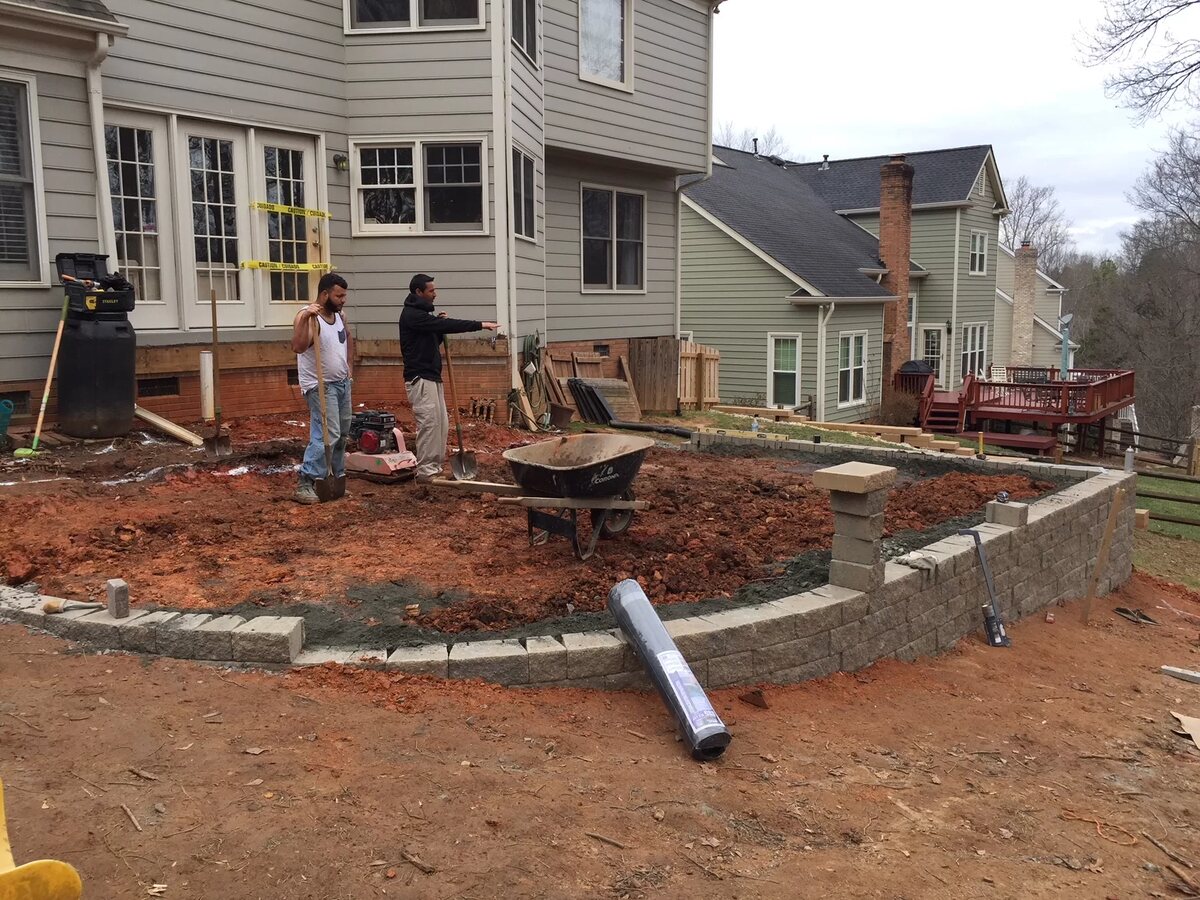
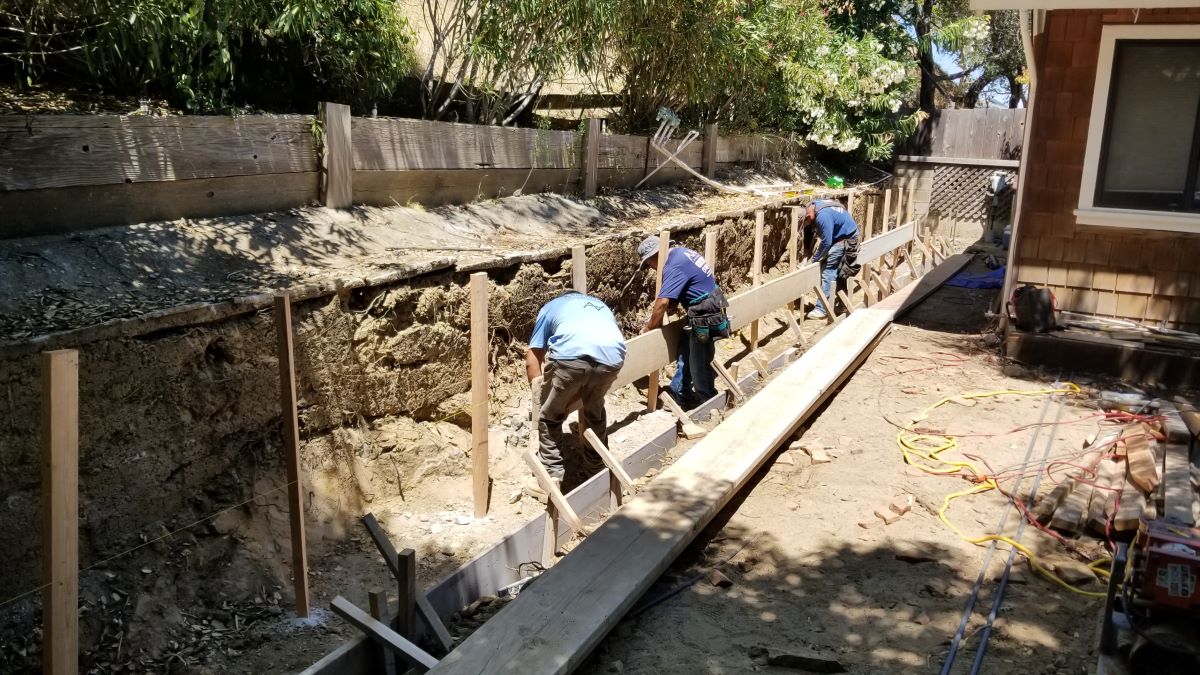
Step 2: Excavating the Area
Now that you have completed the planning and preparation stage, it’s time to start digging. Excavating the area is an essential step in creating a solid foundation for your paver patio with a retaining wall. Follow these steps to ensure a proper excavation process:
- Mark the Area: Use marking spray or stakes and string to outline the boundaries of your patio and retaining wall. This will serve as a guide during the excavation process and help ensure that you dig to the correct dimensions.
- Clear the Area: Remove any grass, plants, or other vegetation from the marked area using a shovel or a sod cutter. Ensure that you dig down to a depth that allows for the planned thickness of your patio base and retaining wall foundation.
- Check the Slope: Verify that the area has proper slope and drainage by using a level or a string line. This is important to prevent water pooling on your patio and ensure proper water runoff. Ideally, the slope should be towards adjacent areas of your yard or a designated drainage system.
- Remove Excess Soil: Excavate any excess soil or dirt from the area, creating a level and uniform surface. Use a wheelbarrow or a dump truck to transport the excavated material away from the worksite.
- Compact the Soil: Use a plate compactor or a hand tamper to compact the soil in the excavated area. This will help create a stable and solid foundation for your patio and retaining wall.
During the excavation process, it’s important to maintain the accuracy of the dimensions and slope you determined during the planning stage. Double-check your measurements to ensure that the excavated area aligns with your intended design. Once the area has been properly excavated, you can move on to the next step: installing the retaining wall.
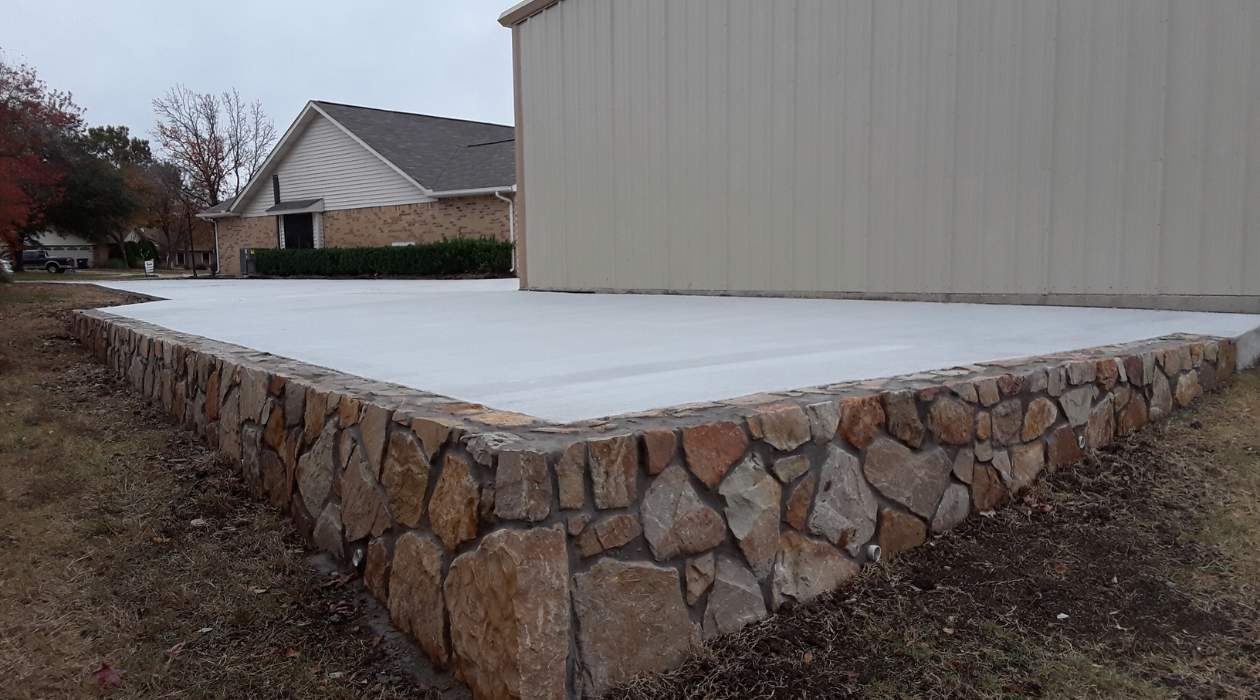
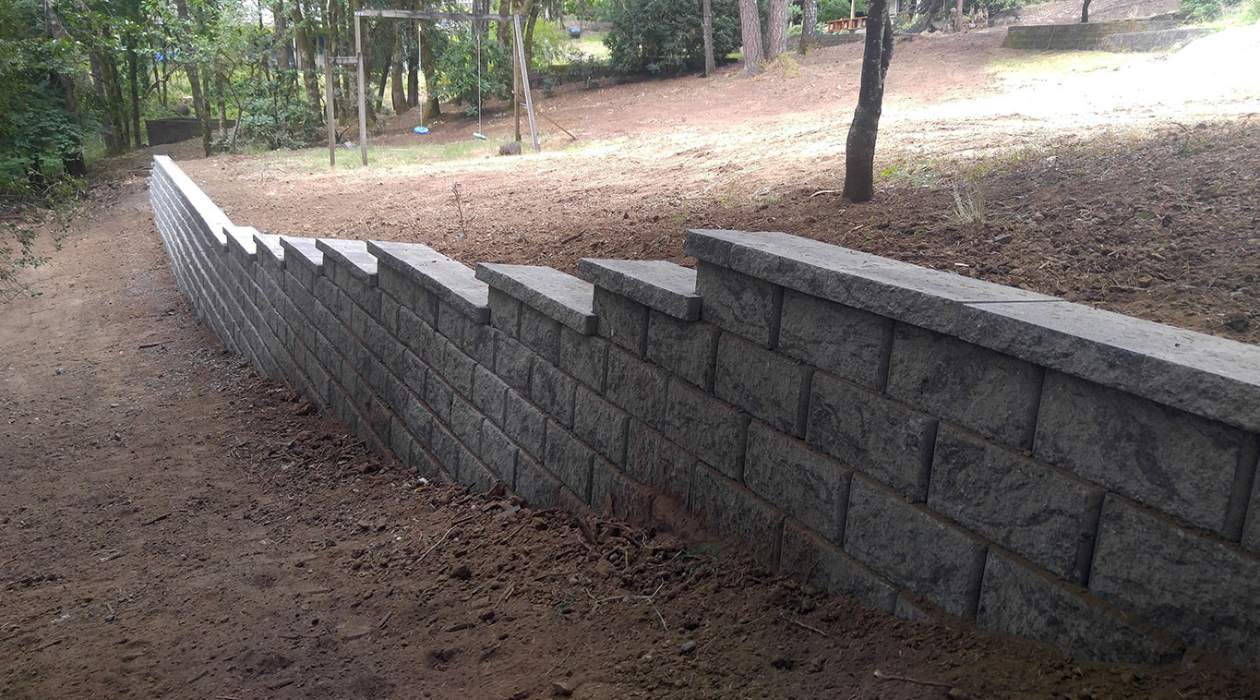
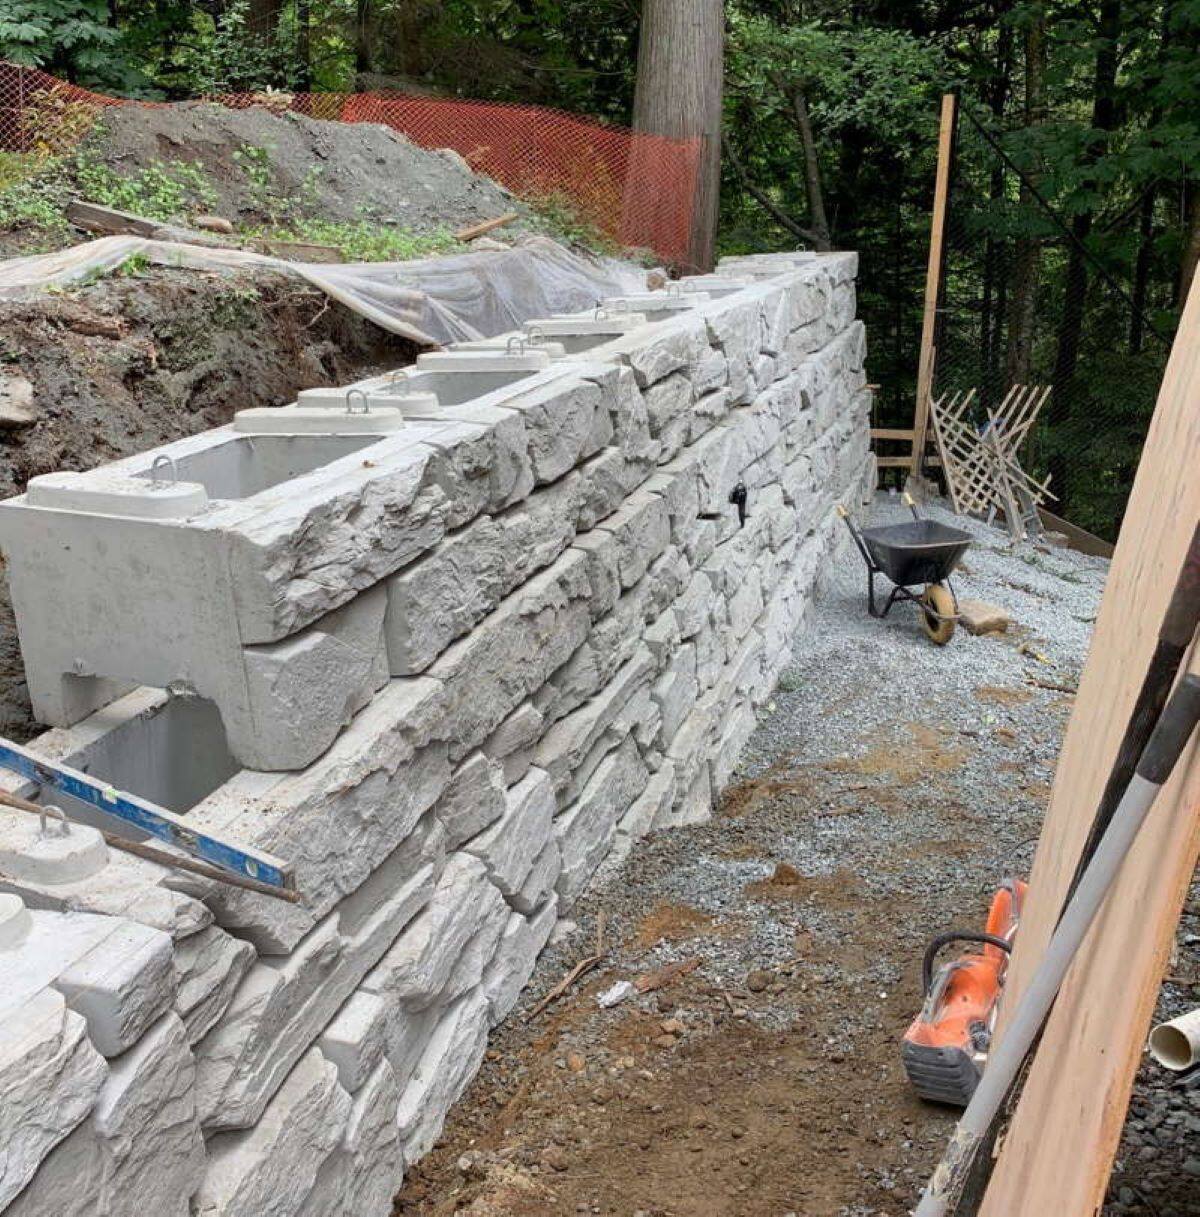
Step 3: Installing the Retaining Wall
With the excavation complete, it’s time to install the retaining wall for your paver patio. The retaining wall will not only add structural stability to your patio but also provide an aesthetic element to the overall design. Follow these steps to install the retaining wall:
- Prepare the Base: Before installing the retaining wall blocks, ensure that the base is leveled and compacted. Use a hand tamper or plate compactor to achieve a solid foundation.
- Start at the Corners: Start installing the retaining wall at the corners of your patio. Place the corner blocks first and use a level to ensure they are perfectly vertical and aligned. This will set the foundation for the rest of the wall.
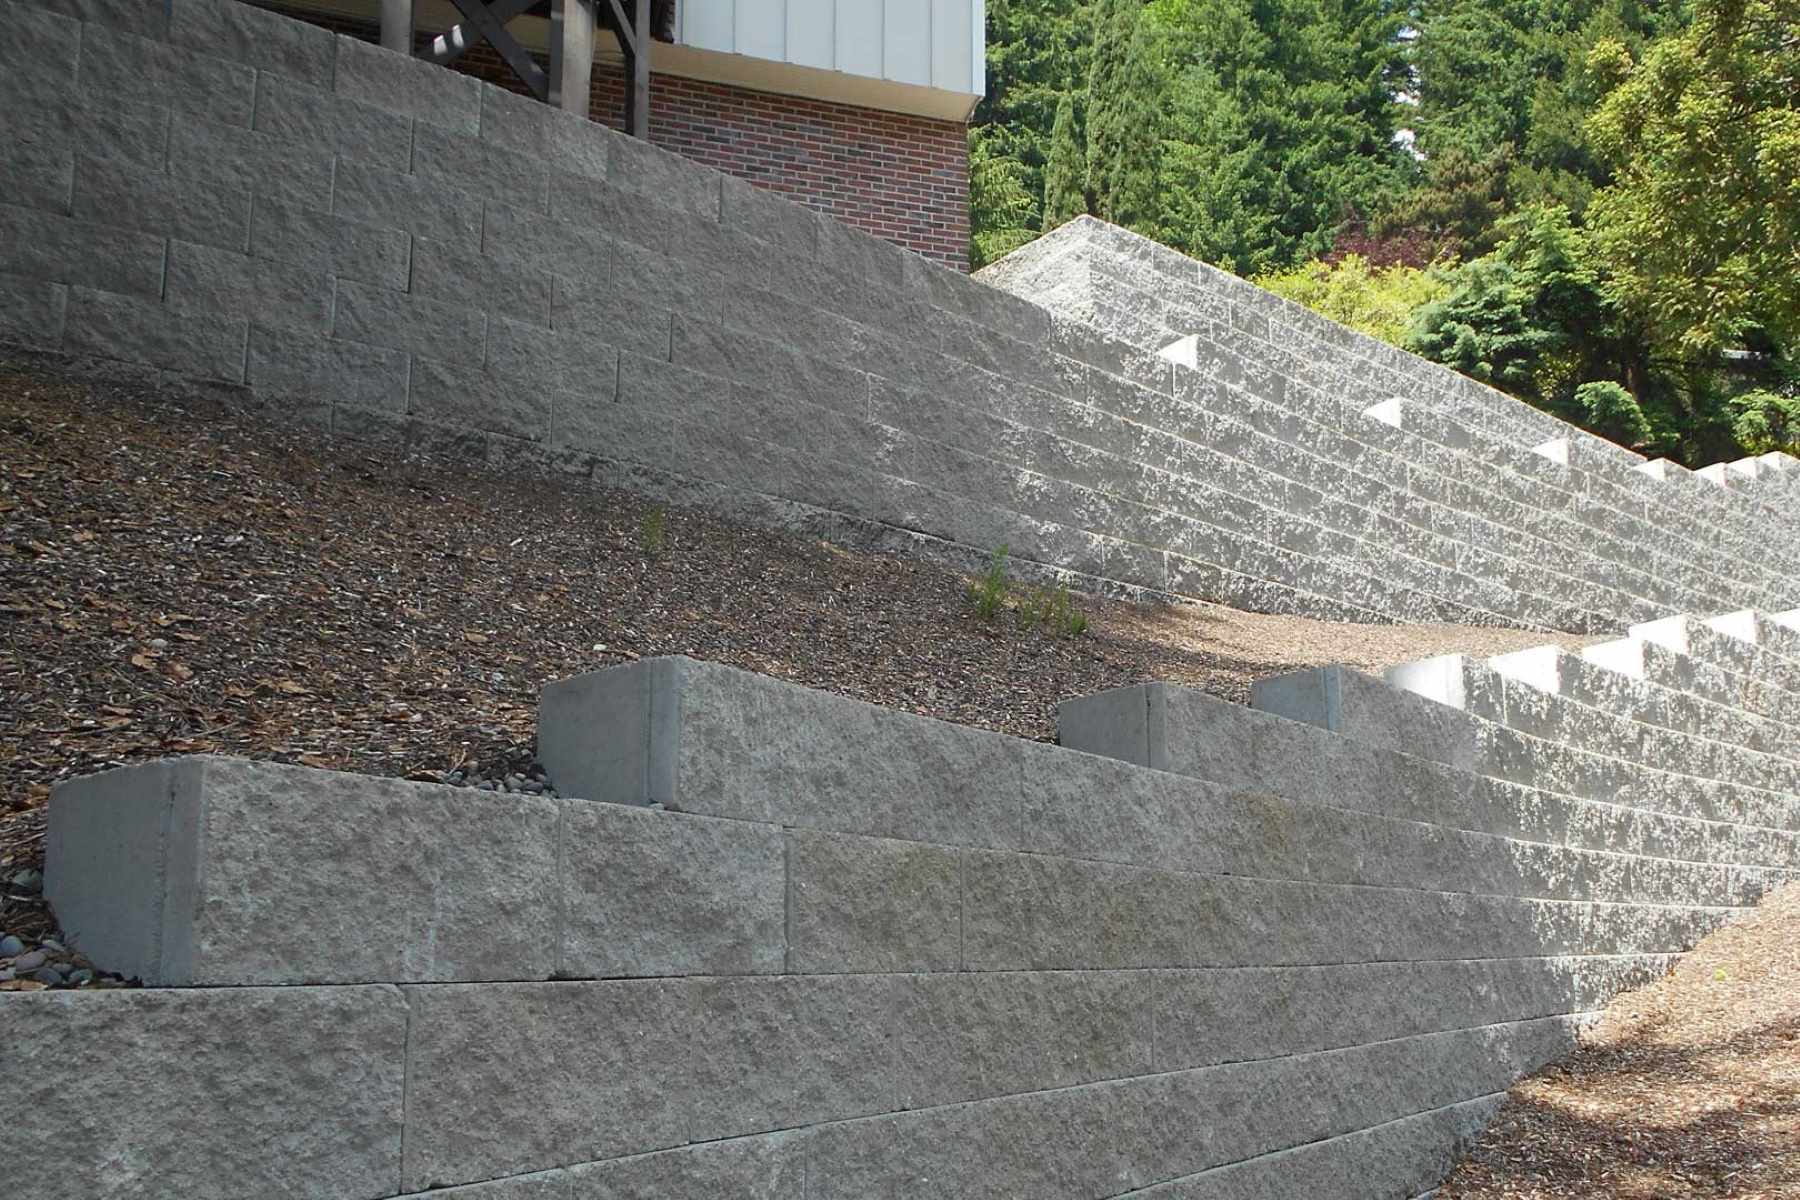
- Align and Level: As you continue installing the retaining wall blocks, make sure they are aligned and level. Use a rubber mallet to tap the blocks into position and a level to check for accuracy. Adjust as needed to maintain a straight and even wall.
- Interlock the Blocks: Most retaining wall blocks are designed to interlock, providing stability and strength to the wall. Make sure to follow the manufacturer’s instructions for proper interlocking, whether it involves a lip and groove system or a connector pin system.
- Add Drainage: Depending on the height and location of your retaining wall, you may need to incorporate drainage behind the wall to prevent water buildup. Install a perforated pipe or gravel-filled drainage system behind the wall to ensure proper water flow.
- Backfill and Compact: Once the retaining wall is installed, backfill the area behind it with gravel or backfill soil. Gradually compact the backfilled material to prevent settling and maintain the stability of the wall.
Installing the retaining wall requires attention to detail and precision. Take your time to ensure that each block is properly aligned and secured. Once the retaining wall is in place, you can proceed to the next step: preparing the base for the pavers.
Step 4: Base Preparation
Now that you have installed the retaining wall, it’s time to prepare the base for your paver patio. A properly prepared base is essential for a long-lasting and stable patio. Follow these steps to prepare the base:
- Excavate the Base: Using a shovel or a mini-excavator, excavate the area within the boundaries of your patio. Remove any remaining roots, rocks, or debris to ensure a clean and level base.
- Determine the Base Thickness: The base thickness will depend on the soil conditions and the expected load-bearing capacity of your patio. In most cases, a base thickness of 4-6 inches is recommended. However, consult local building codes or a professional to determine the appropriate thickness for your specific needs.
- Add a Base Material: Spread a layer of crushed stone or gravel over the excavated area. This base material will provide stability and drainage for the patio. Use a rake or a shovel to level and compact the base material to achieve a solid foundation.
- Create a Slope: To allow for proper water runoff, create a slight slope by angling the base material away from your home or any other structures. This will help prevent water from pooling on the patio surface.
- Compact the Base: Using a plate compactor, compact the base material to ensure it is tightly packed and stable. This will help prevent any settling or shifting once the pavers are installed.
- Check for Levelness: Before proceeding to the next step, use a level to check the levelness of the compacted base. Make any necessary adjustments to ensure a flat and even surface.
This step sets the foundation for your paver patio and ensures that it will be structurally sound and durable. Once the base is properly prepared, you are ready to move on to the exciting part—laying the pavers!
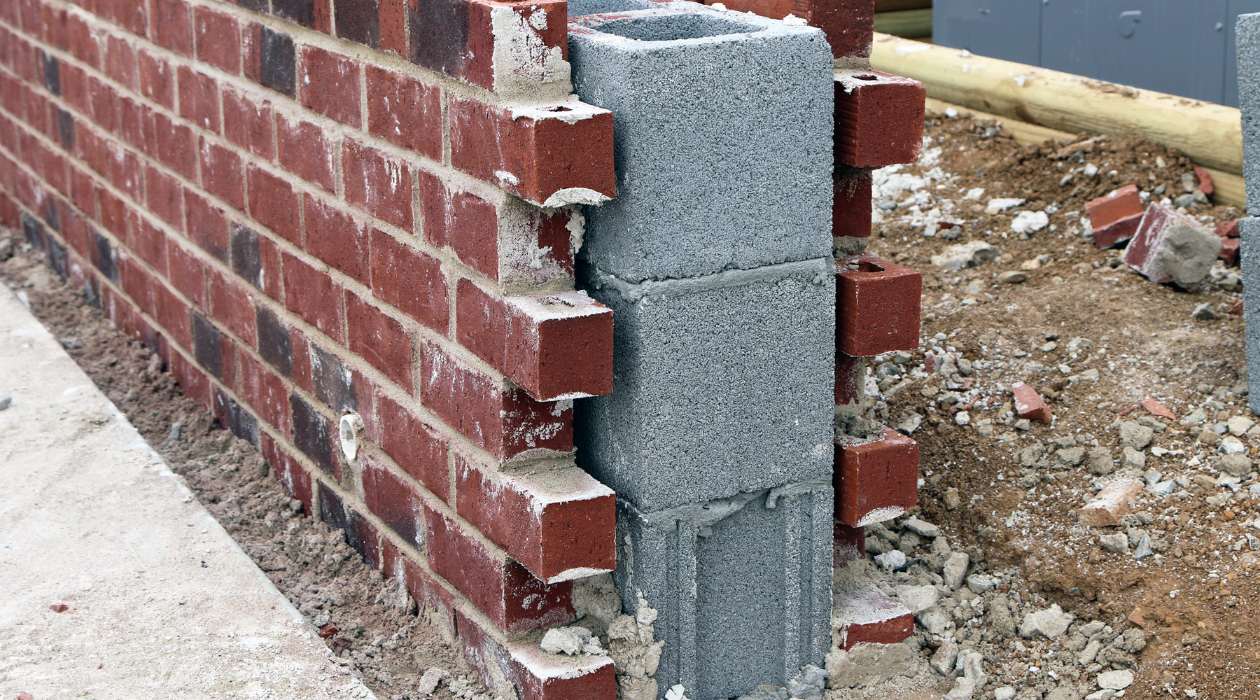
Read more: How To Build A Brick Retaining Wall
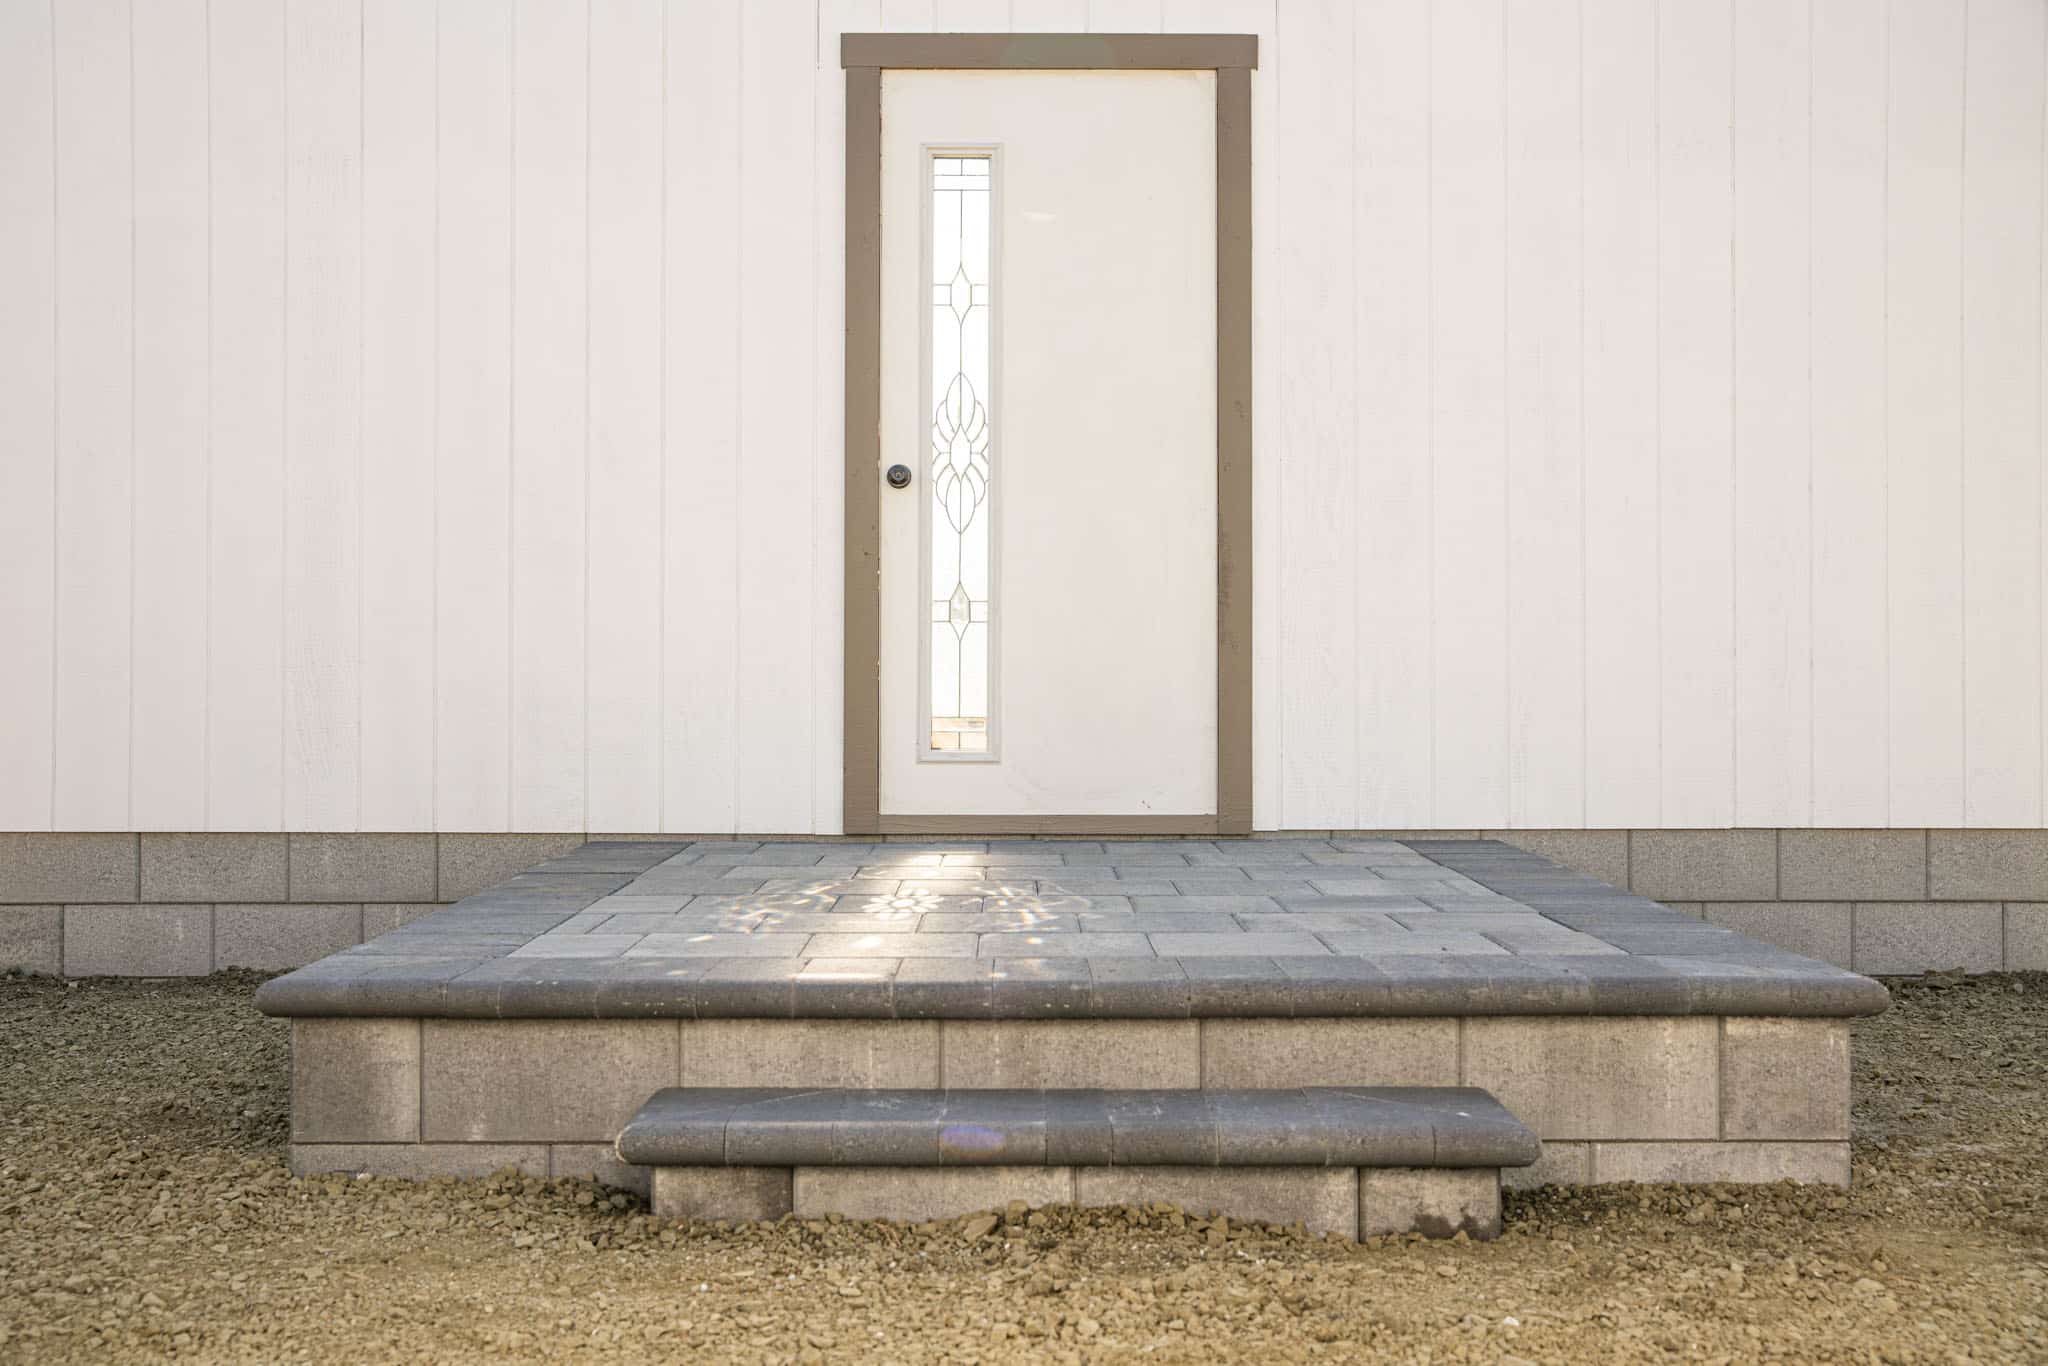
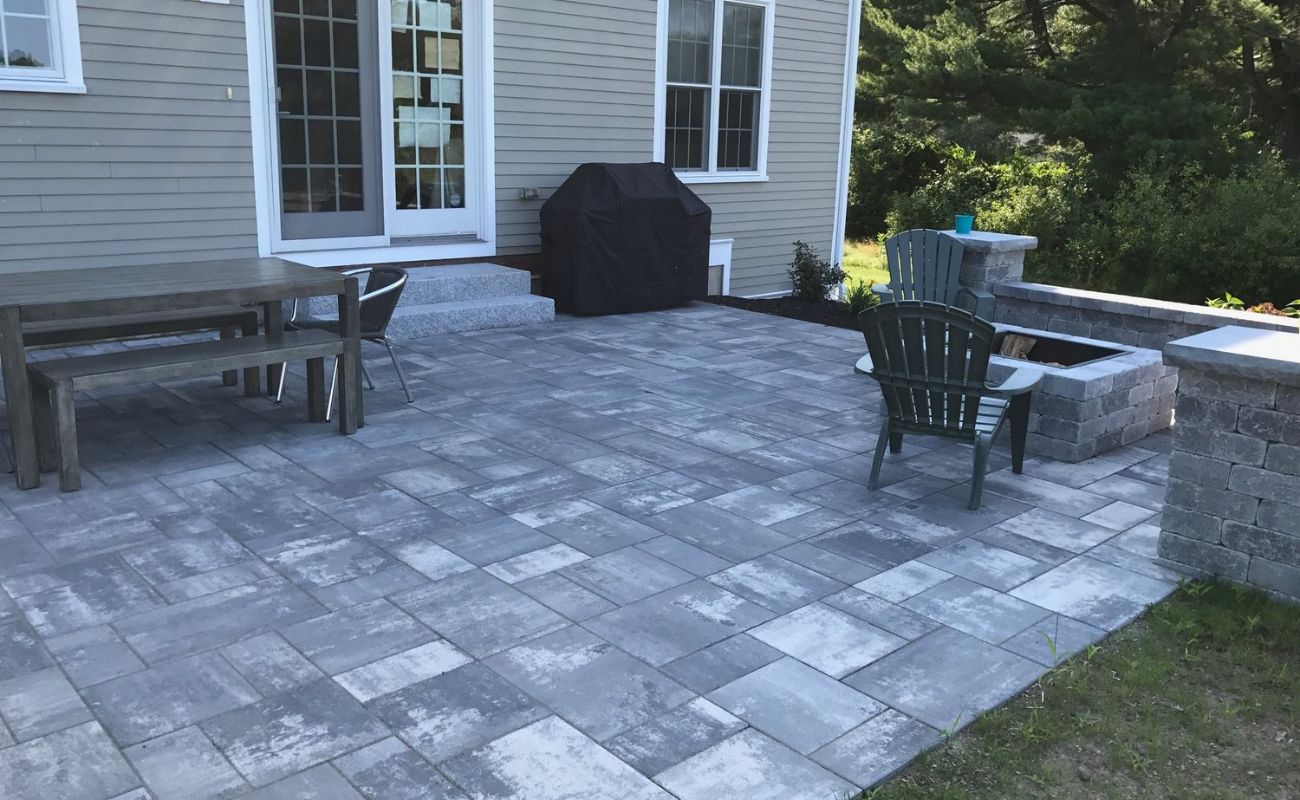
Step 5: Laying the Pavers
With the base prepared, it’s time to start laying the pavers for your patio. This step requires careful attention to detail to ensure a visually pleasing and structurally sound result. Follow these steps to lay the pavers:
- Begin in a Corner: Start in one corner of your patio area. This will give you a reference point to work from and ensure that the pavers are laid in a straight line.
- Place the Pavers: Lay the pavers one at a time, gently pressing them into the base material. Make sure each paver is snugly fitting against its neighboring pavers and that there are no gaps or uneven spaces between them.
- Use a Pattern: Consider using a specific pattern, such as a herringbone or running bond pattern, to create visual interest. Follow the pattern consistently throughout the patio for a cohesive look.
- Trim Pavers as Needed: Use a saw or a paver splitter to cut any pavers that need to be trimmed to fit along the edges or around obstacles. Measure and mark the pavers before cutting to ensure accuracy.
- Check for Levelness: Periodically use a level to check that the pavers are level and even. Adjust the base material as needed to achieve a uniform surface.
- Leave Room for Edging: Leave a small gap between the pavers and any surrounding landscape edging. This will allow for expansion and contraction of the pavers and prevent them from shifting or cracking.
Take your time during the paver installation process to ensure that they are properly aligned and secure. Keep a consistent joint width between the pavers for a professional look. Once all the pavers are laid, you are ready to move on to the next step—cutting and filling the edges.
When building a paver patio with a retaining wall, make sure to properly prepare the base by compacting the soil and adding a layer of gravel for drainage. This will help prevent shifting and settling over time.
Step 6: Cutting and Filling the Edges
When it comes to creating a polished and seamless finish for your paver patio, the edges play a crucial role. Step 6 involves cutting and filling the edges to ensure a clean and professional-looking result. Follow these steps:
- Measure and Mark: Measure the space at the edges of your patio where pavers need to be cut. Mark the pavers accordingly, ensuring accuracy for a precise fit.
- Cut the Pavers: Use a wet saw or a paver splitter to cut the marked pavers. Take your time and follow the manufacturer’s instructions for cutting pavers to ensure clean and accurate cuts.
- Fit the Edges: Place the cut pavers along the edges of the patio, making sure they align properly with the rest of the pavers. Use a rubber mallet to gently tap them into place if necessary.
- Fill the Gaps: Fill the gaps between the pavers using polymeric sand or fine gravel. This will help stabilize the pavers, prevent weed growth, and improve the overall appearance of the patio.
- Compact and Level: Once the gaps are filled, compact the entire patio surface using a plate compactor. This will help set the pavers in place and ensure a solid and stable patio.
- Clean Up: Remove any excess sand or debris from the patio surface using a broom or a leaf blower. This will give your patio a clean and finished look.
Taking the time to cut and fill the edges will give your paver patio a professional and refined appearance. Be patient and meticulous during this step to achieve the desired result. Once the edges are complete, you can move on to securing the pavers in the next step.
Step 7: Securing the Pavers
Once all the pavers are in place and the edges are completed, it’s time to secure them to ensure they stay in position over time. Step 7 involves securing the pavers to promote stability and prevent shifting. Follow these steps:
- Apply Joint Sand: Begin by applying joint sand over the entire surface of the patio. Spread the sand evenly using a broom, making sure it fills the gaps between the pavers completely.
- Compact the Sand: Gently sweep the patio with a broom to remove any excess sand. Then, use a plate compactor to compact the sand into the joints. This will create a firm bond between the pavers and help prevent movement.
- Repeat the Process: After compacting the sand, repeat the joint sand application and compaction process. This will ensure that all gaps are properly filled and the pavers are securely locked in place.
- Remove Excess Sand: Once the sand has settled, sweep the patio surface again to remove any remaining excess sand. Ensure that the surface is clean and free of any loose material.
Securing the pavers with joint sand is an essential step in maintaining the integrity of your patio. The sand acts as a stabilizer, preventing the pavers from shifting and settling. Take care to apply the sand evenly and compact it thoroughly to achieve the desired results.
With the pavers securely in place, you’re almost finished with your paver patio project. The final step involves sealing the patio, which not only enhances its appearance but also provides protection against stains and weathering. Let’s move on to Step 8!
Step 8: Adding Joint Sand
Adding joint sand is a crucial step in the construction of a paver patio. Joint sand not only stabilizes the pavers but also helps prevent weed growth, improves the longevity of the patio, and enhances its overall appearance. Follow these steps to add joint sand:
- Choose the Right Sand: Select a high-quality polymeric sand specifically designed for paver joints. This type of sand contains polymer additives that harden when activated by water.
- Clean the Patio Surface: Before applying the joint sand, ensure that the patio surface is clean and free of any debris. This will facilitate proper sand application and interlock between the pavers.
- Spread the Sand: Pour the joint sand onto the patio surface, focusing on the gaps between the pavers. Use a broom or a brush to spread the sand evenly, ensuring that it fills each joint completely.
- Compact the Sand: After spreading the joint sand, use a plate compactor to lightly compact the sand into the joints. This will help settle the sand and create a solid and stable surface.
- Prevent Sand Overflow: To avoid excess sand spilling onto the paver surface, angle the plate compactor away from the pavers and maintain a steady and controlled motion.
- Sweep and Repeat: Once the initial compaction is complete, sweep the patio surface to remove any excess sand. Then, reapply more joint sand if necessary and repeat the compacting and sweeping process until all the gaps are filled.
It’s important to note that the joint sand needs to be activated with water to fully set and harden. Follow the manufacturer’s instructions regarding the specific water activation process and drying time. This will ensure that the joint sand forms a durable bond between the pavers, creating a stable and long-lasting patio.
With the joint sand added, your paver patio is almost complete. The final step involves sealing the patio, which provides an additional layer of protection and enhances its visual appeal. Let’s move on to Step 9!
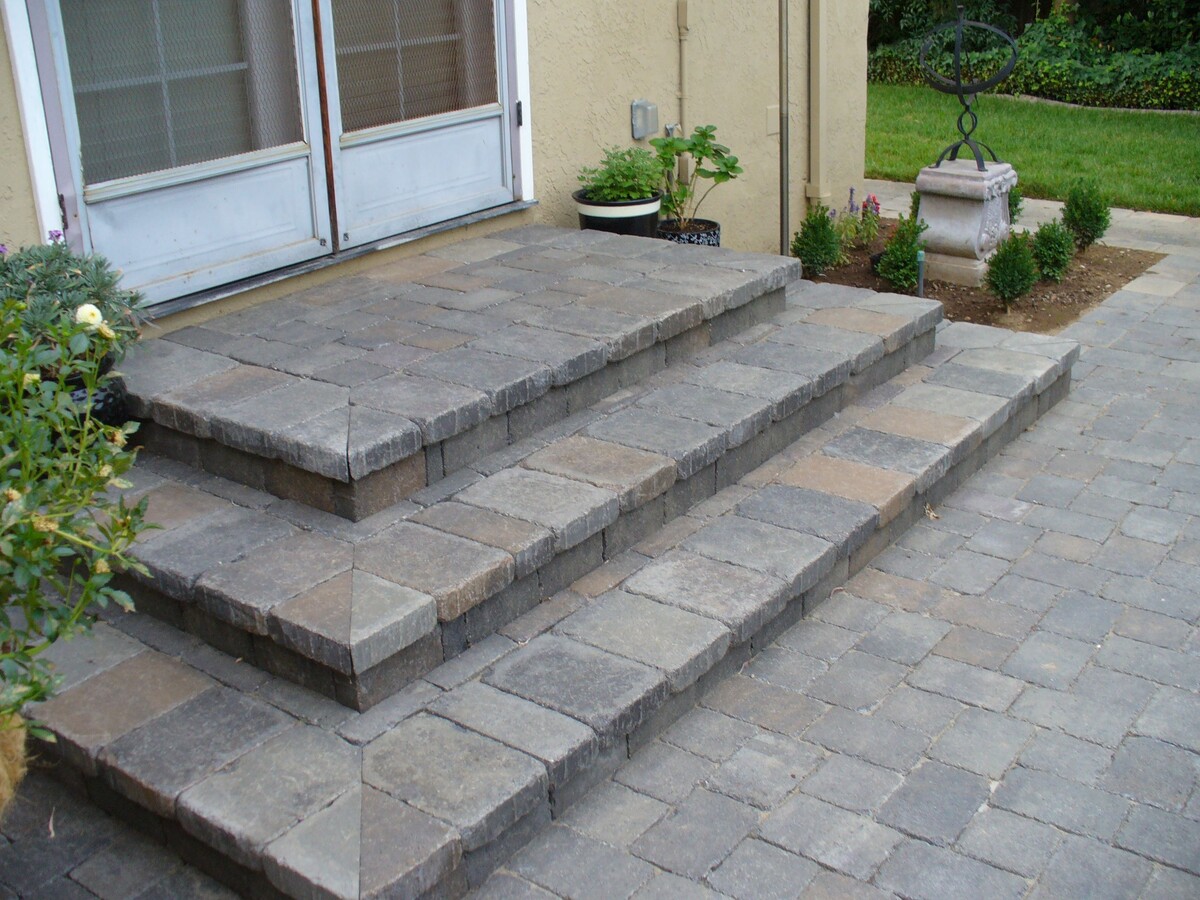
Read more: How To Build Patio Paver Stairs
Step 9: Sealing the Patio
Sealing your paver patio is the last step in the construction process. Sealing not only enhances the overall aesthetics of the patio but also provides protection against stains, fading, and weathering. Here’s how to seal your patio:
- Choose the Right Sealer: Select a high-quality sealer that is specifically formulated for pavers. Consider factors such as the type of pavers, the desired finish (glossy or matte), and the level of protection required.
- Clean the Patio: Thoroughly clean the patio surface to remove any dirt, debris, or stains. Use a pressure washer or a cleaning solution specifically designed for pavers. Allow the patio to dry completely before applying the sealer.
- Mask Off Adjacent Surfaces: Use plastic sheeting or painter’s tape to mask off any adjacent surfaces, such as walls or plants, to protect them from the sealer overspray.
- Apply the Sealer: Use a roller or a sprayer to apply the sealer evenly over the entire patio surface. Start from one corner and work your way across, ensuring complete coverage. Be mindful of any instructions or recommendations provided by the sealer manufacturer.
- Allow Drying Time: Allow the sealer to dry according to the manufacturer’s instructions. This may require several hours or even a day, depending on the type of sealer and the weather conditions.
- Apply Additional Coats: Depending on the desired level of protection, you may need to apply additional coats of sealer. Follow the recommended drying time between each coat and ensure proper ventilation during the application process.
Sealing your paver patio not only enhances its appearance but also makes it easier to clean and maintain in the long run. Regularly reapplying the sealer every few years will help maintain and extend the life of your patio.
With Step 9 completed, your paver patio construction is finished! Step back and admire your hard work and enjoy your beautiful outdoor space. Remember to follow proper maintenance practices to keep your patio in pristine condition for years to come.
Congratulations on successfully building a paver patio with a retaining wall!
Conclusion
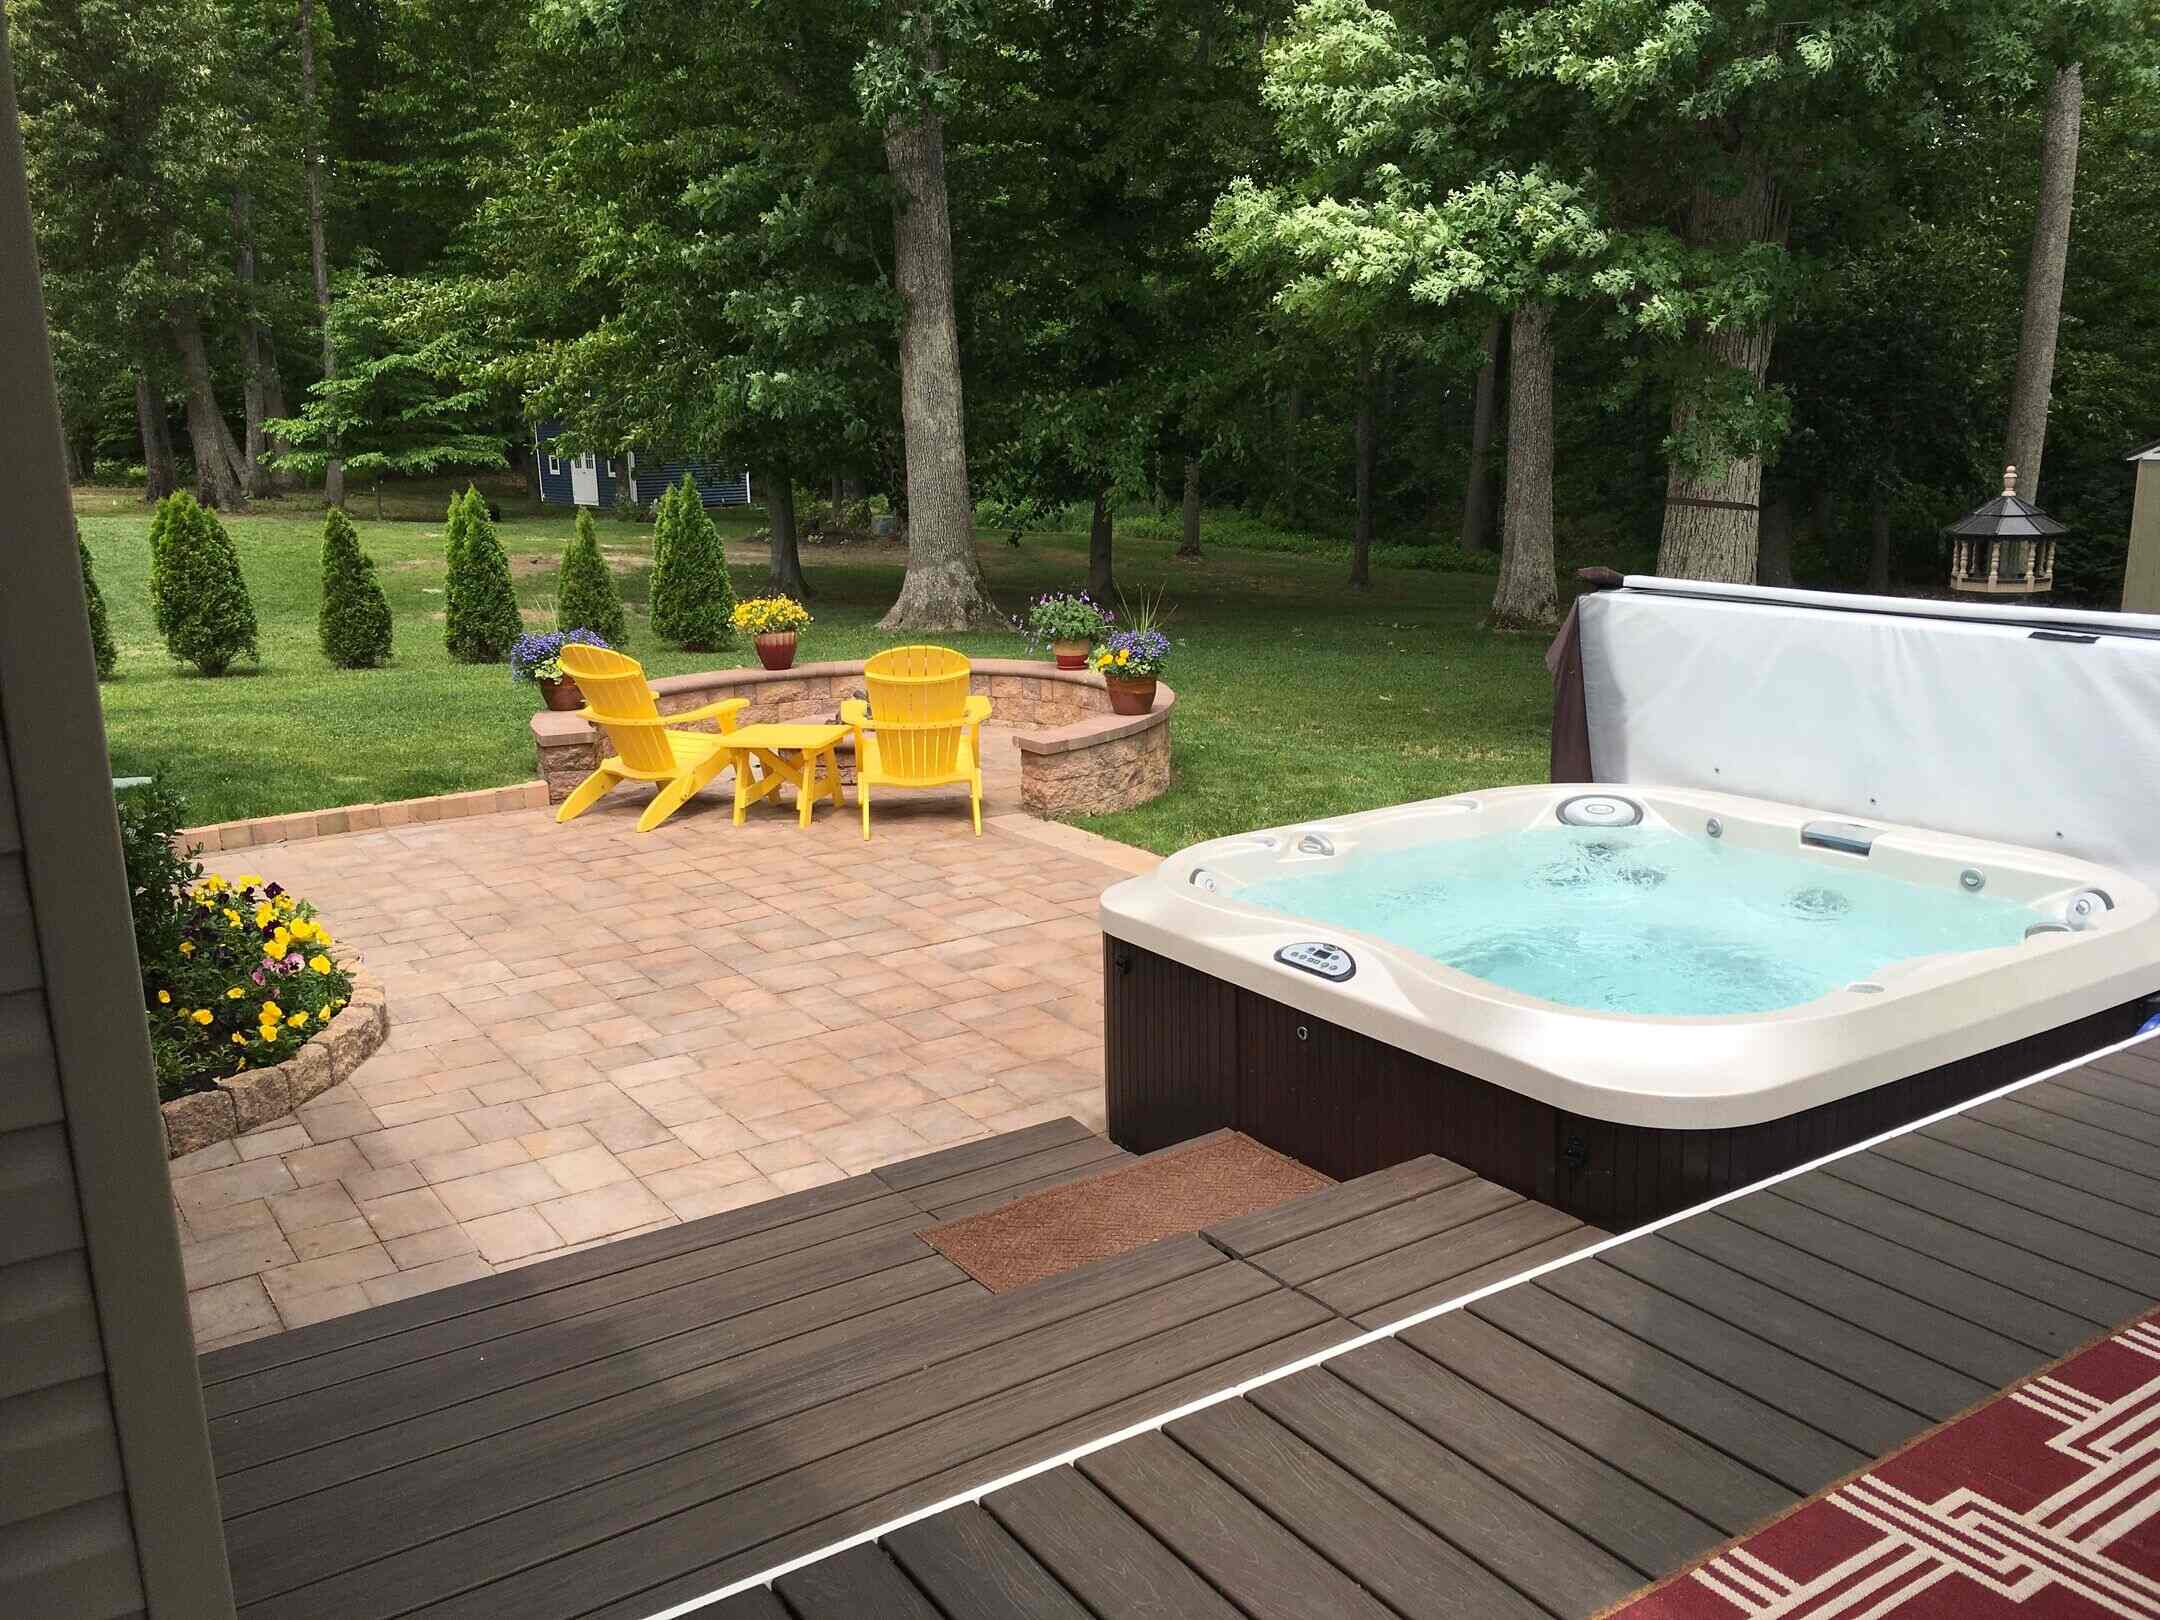
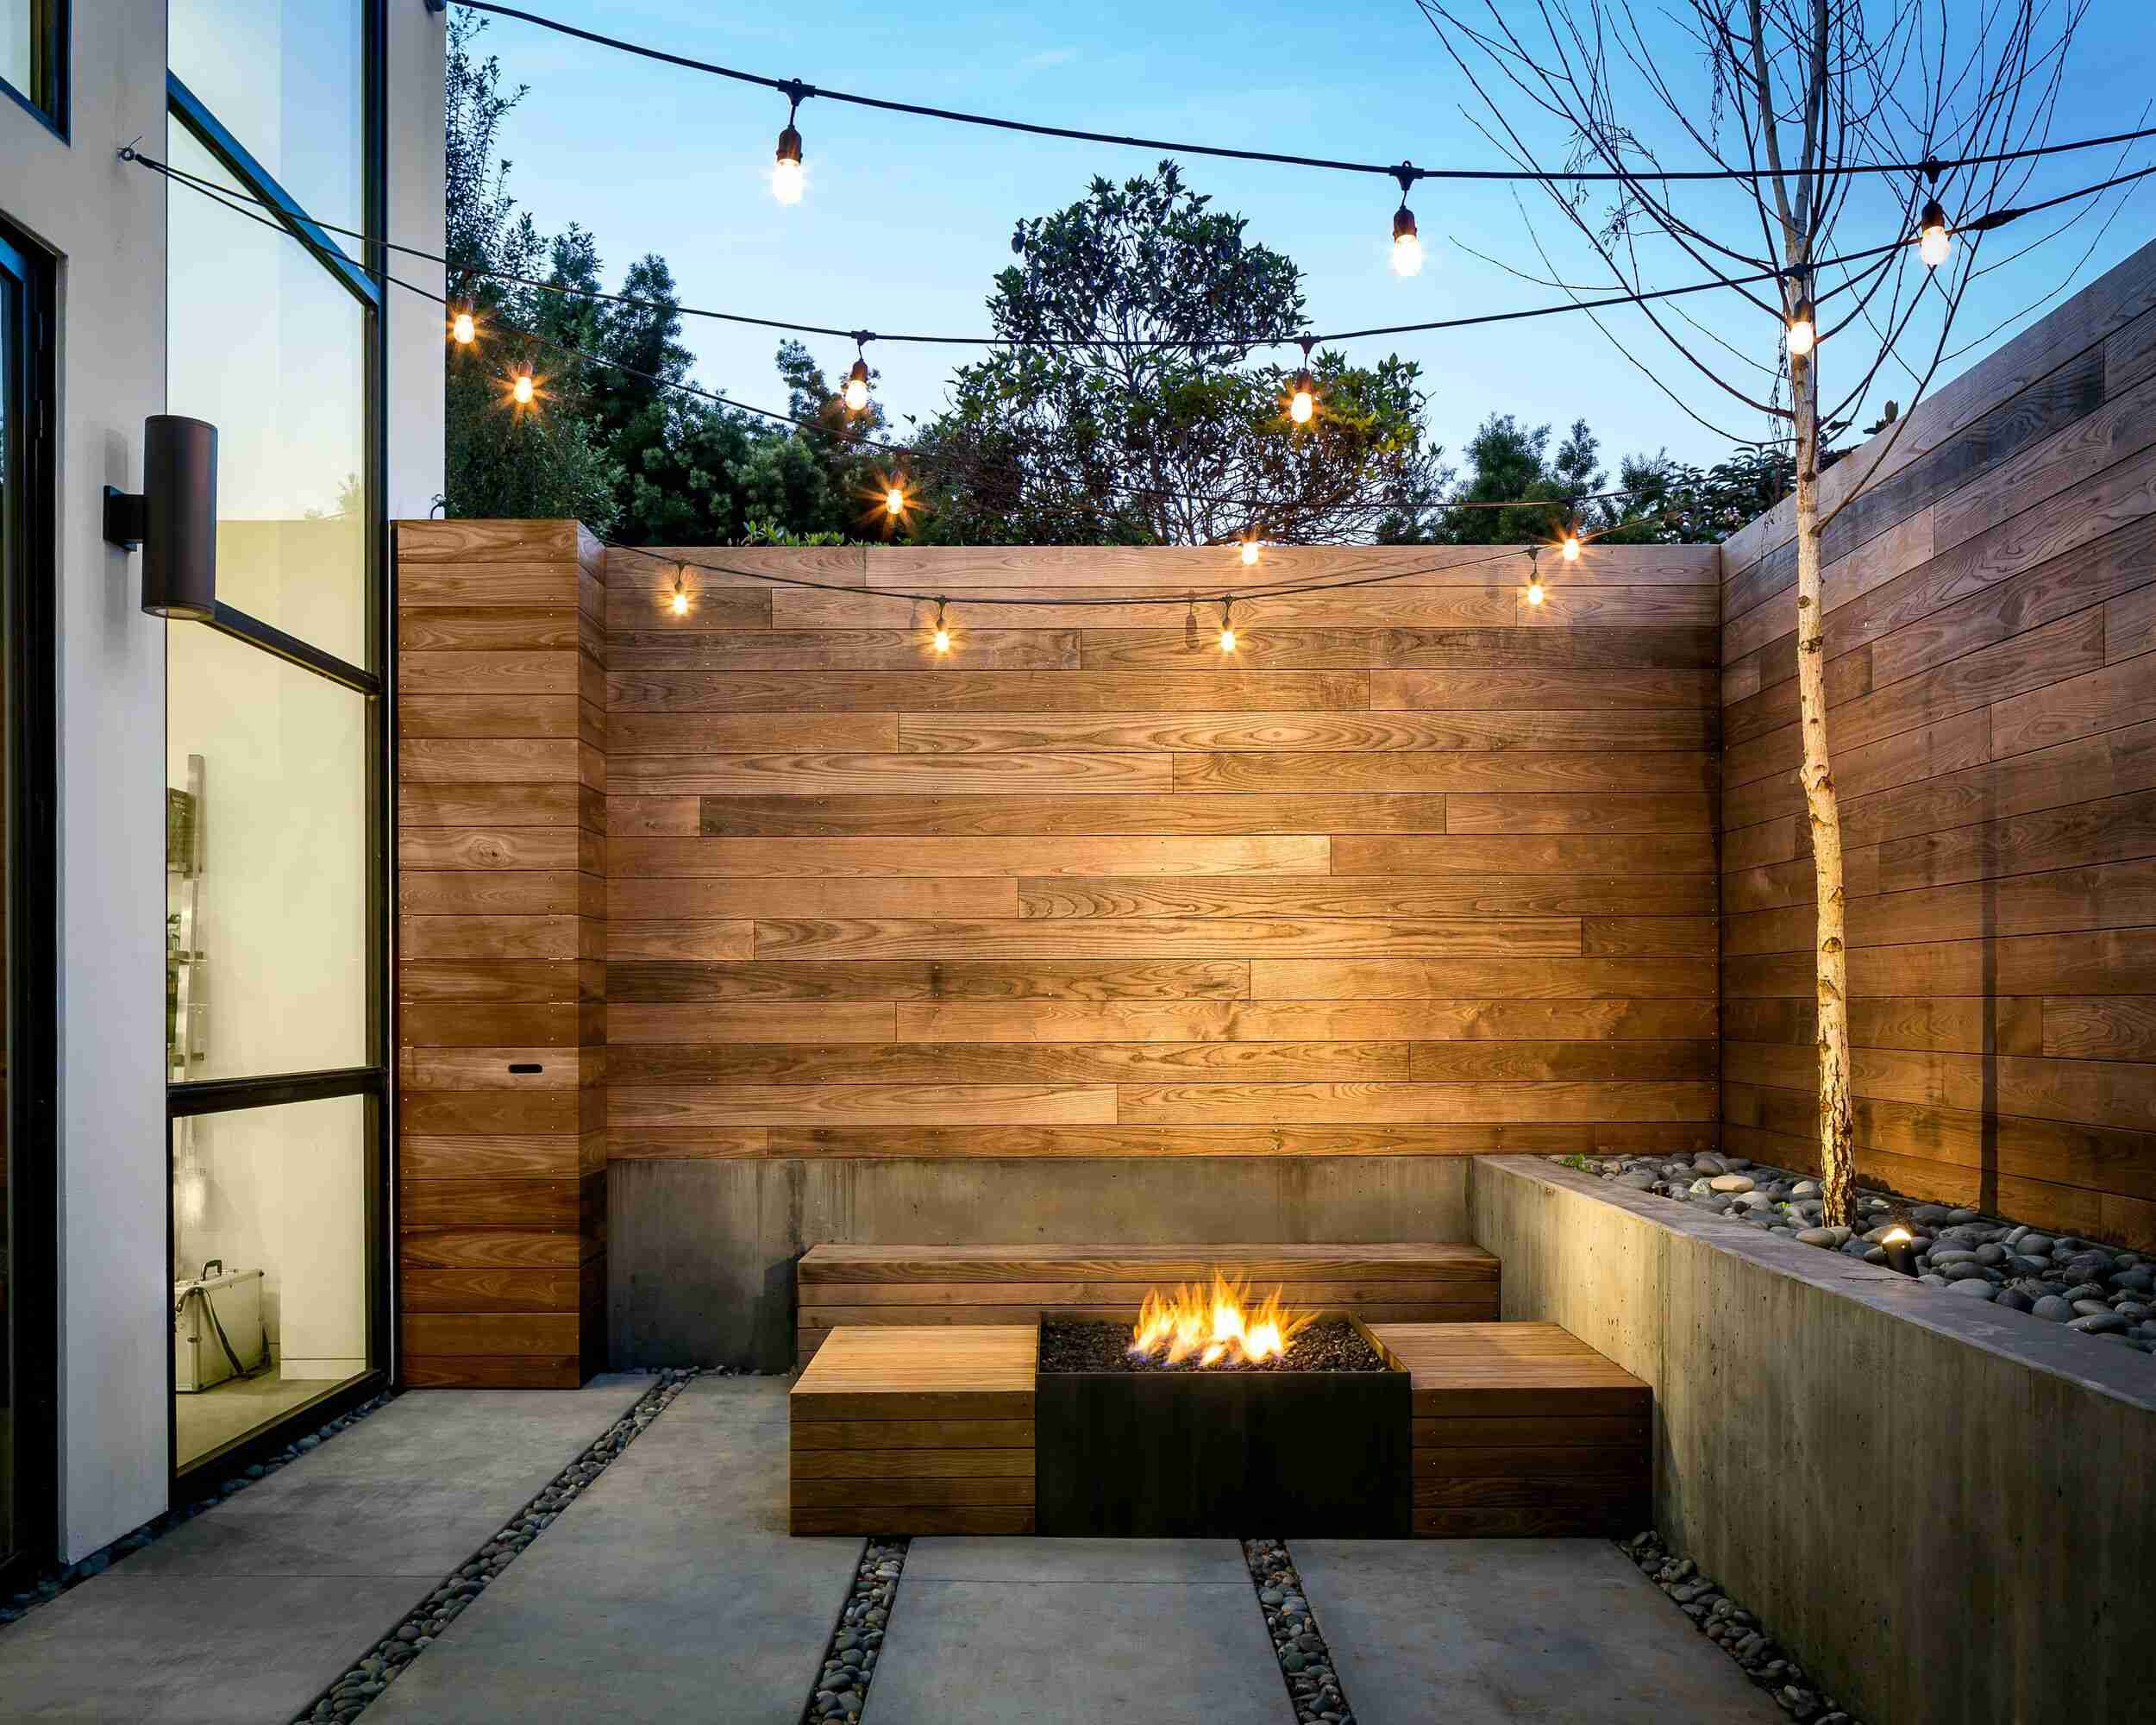
Congratulations on completing the construction of your paver patio with a retaining wall! This comprehensive guide has walked you through each step of the process, from planning and preparation to sealing the patio. By following these steps, you have created an outdoor space that is not only visually appealing but also functional and durable.
A well-constructed paver patio with a retaining wall can transform your outdoor area into a welcoming and enjoyable space for relaxation and entertainment. Whether you’re hosting a backyard barbecue, gathering around a fire pit, or simply enjoying a cup of coffee in the morning, your new patio will provide a delightful setting for any occasion.
Remember to regularly maintain and care for your patio to ensure its longevity. This includes sweeping away debris, keeping the joints filled with sand, and reapplying the sealer every few years. By properly maintaining your patio, you can enjoy its beauty and functionality for many years to come.
We hope this guide has empowered you to take on the task of building your own paver patio with a retaining wall. With careful planning, attention to detail, and a little bit of elbow grease, you have created a stunning outdoor space that will be the envy of your friends and neighbors.
Now it’s time to sit back, relax, and enjoy your new paver patio masterpiece!
Frequently Asked Questions about How To Build A Paver Patio With A Retaining Wall
Was this page helpful?
At Storables.com, we guarantee accurate and reliable information. Our content, validated by Expert Board Contributors, is crafted following stringent Editorial Policies. We're committed to providing you with well-researched, expert-backed insights for all your informational needs.


0 thoughts on “How To Build A Paver Patio With A Retaining Wall”