Home>Furniture>Outdoor Furniture>How To Build A Retaining Wall For A Patio
Outdoor Furniture
How To Build A Retaining Wall For A Patio
Modified: March 7, 2024
Learn how to build a stunning patio retaining wall to enhance your outdoor furniture setup. Step-by-step guide and expert tips for a durable and aesthetically pleasing structure.
(Many of the links in this article redirect to a specific reviewed product. Your purchase of these products through affiliate links helps to generate commission for Storables.com, at no extra cost. Learn more)
Introduction
Welcome to the world of outdoor furniture where beautiful patios come to life. Whether you’re a seasoned DIY enthusiast or a beginner looking to embark on a new project, building a retaining wall for your patio can be a rewarding and fulfilling experience. Not only does a retaining wall add structural support to your outdoor space, but it also enhances the overall aesthetics and functionality of your patio.
In this article, we will guide you through the process of building a retaining wall specifically designed for a patio. We’ll cover everything from understanding the basics of retaining walls to the step-by-step construction process. So, grab your tools, put on your safety goggles, and let’s dive in!
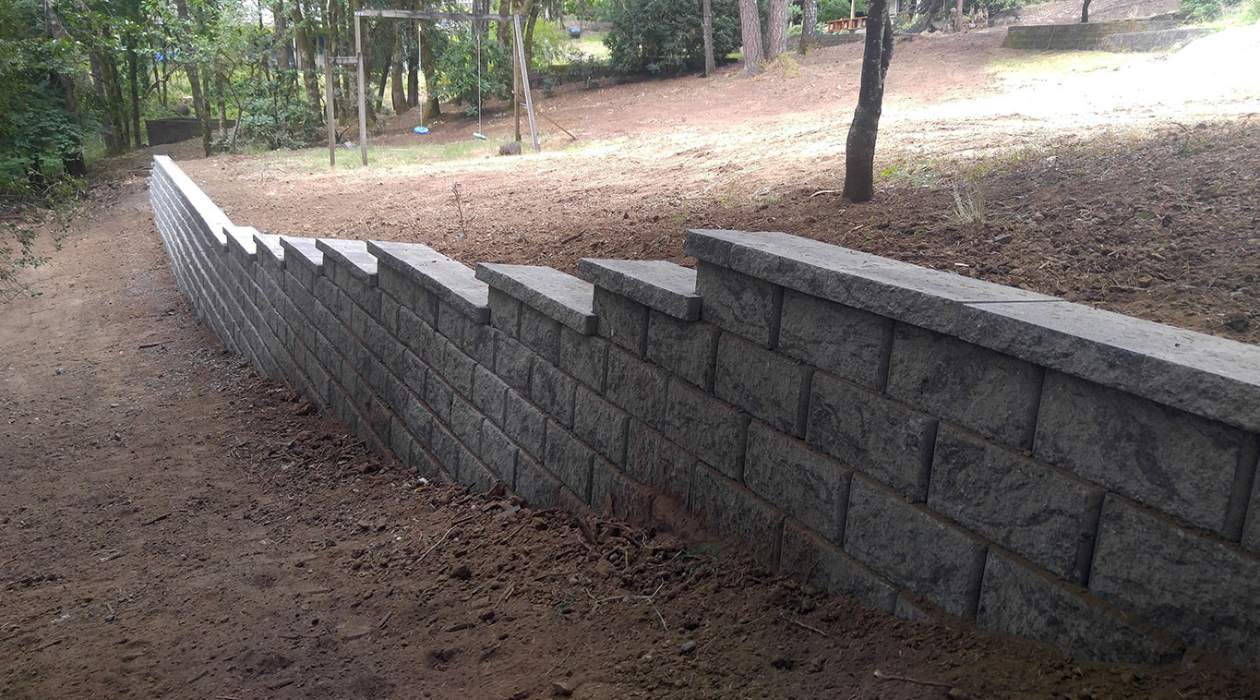
A retaining wall is a structure designed to hold back soil and prevent erosion. It serves as a barrier that retains the soil, creating a level surface for your patio while providing stability and preventing the surrounding soil from collapsing.
Before embarking on your patio project, it’s essential to understand the different types of retaining walls available. The most common types include gravity walls, cantilever walls, sheet pile walls, and anchored walls. Each type has its own set of advantages and considerations, depending on factors such as the height of the wall, the type of soil, and the desired aesthetic.
Now that you have a basic understanding of retaining walls, let’s move on to planning and designing your Patio retaining wall.
Key Takeaways:
- Building a retaining wall for your patio requires careful planning, proper drainage, and attention to detail. It adds structural support and enhances the aesthetics of your outdoor furniture area.
- Understanding the purpose of retaining walls, gathering the right materials and tools, and incorporating finishing touches are essential for creating a sturdy and visually appealing patio retaining wall.
Understanding Retaining Walls
Before you start building your retaining wall, it’s important to have a clear understanding of its purpose and how it functions. Retaining walls are essential for providing structural support, preventing soil erosion, and creating level areas for your patio. They are typically constructed from durable materials such as concrete, stone, or timber.
Retaining walls work by utilizing the concept of gravity. They rely on their own weight and the friction between the materials to resist the pressure exerted by the soil behind them. This allows them to maintain stability and prevent the soil from collapsing or sliding.
One key factor to consider when designing your retaining wall is the angle of repose, which refers to the natural slope at which a material will rest. The angle of repose varies depending on the type of soil or material used. It’s important to take this into account as it will affect the height and design of your retaining wall.
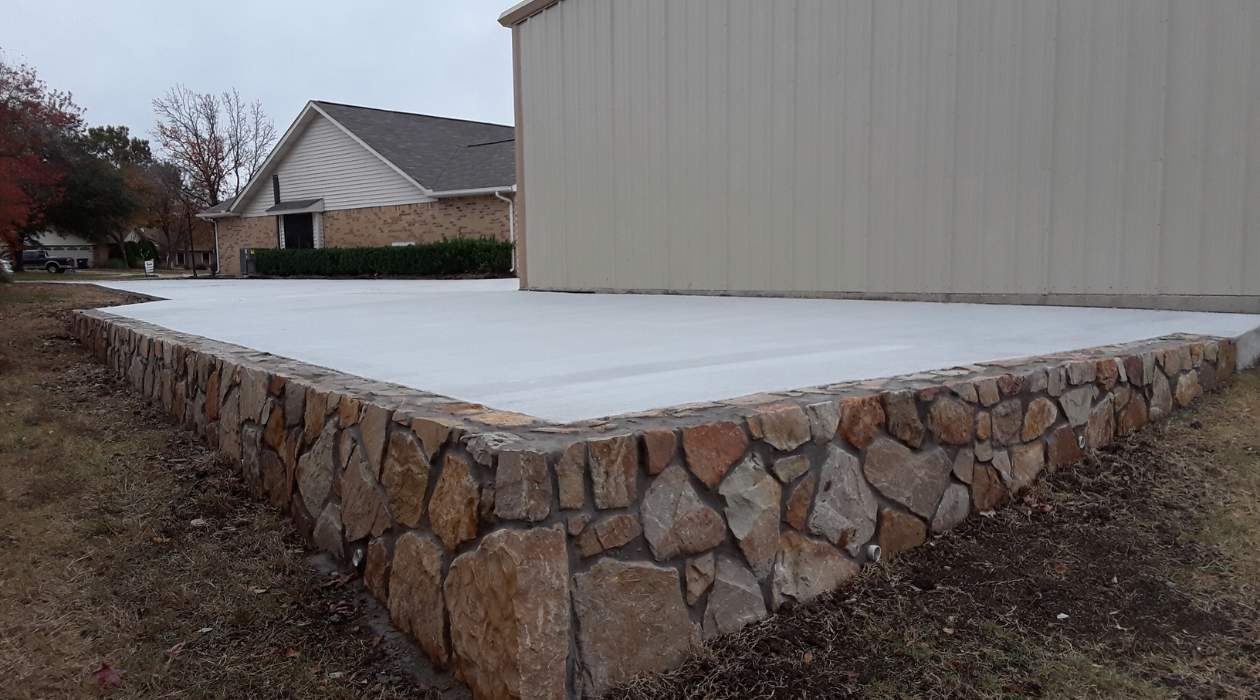
In addition to providing structural stability, retaining walls can also enhance the aesthetic appeal of your patio. With a variety of materials, colors, and textures available, you can choose a design that complements your outdoor furniture and creates a visually pleasing environment.
When planning your retaining wall, consider factors such as the height of the wall, the type of soil, and the drainage requirements. It’s crucial to ensure proper drainage to prevent water buildup behind the wall, which can lead to instability and damage.
Understanding the purpose and functionality of retaining walls will not only help you make informed decisions during the planning and construction process but also ensure the long-term durability and effectiveness of your patio’s retaining wall.
Planning and Design
Once you have a clear understanding of retaining walls and their purpose, it’s time to start planning and designing your patio’s retaining wall. A well-thought-out plan will lay the foundation for a successful construction process.
The first step in planning is to determine the dimensions and layout of your retaining wall. Consider the height and length of the wall, as well as any curves or angles you want to incorporate. Take into account the slope of the ground and the desired elevation of your patio. This will help you create a design that is both functional and visually appealing.
Next, assess the soil conditions in your patio area. Different types of soil have different drainage and stability characteristics. It’s important to understand the type of soil you’re working with, as this will influence the construction and drainage strategies. If you’re unsure about the soil type or its properties, it’s recommended to consult with a professional engineer or geotechnical expert.
Consider incorporating proper drainage into your retaining wall design. Drainage is crucial for preventing water buildup behind the wall, which can cause pressure and compromise its stability. Install drainage pipes or gravel-filled weep holes at the base of the wall to allow water to drain away freely.
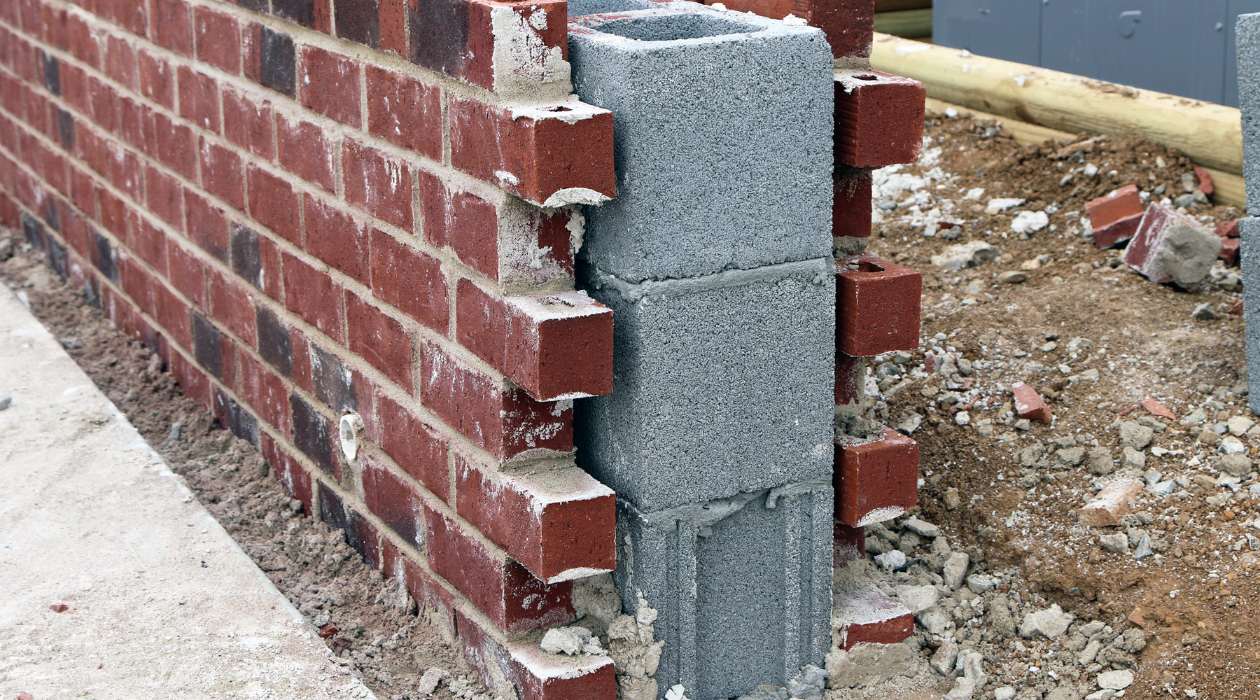
When it comes to materials, there are various options available, including concrete blocks, natural stone, or timber. Each material has its own aesthetic appeal and durability. Consider the overall style of your outdoor furniture and choose a material that complements it. Also, take into account factors such as budget, maintenance requirements, and availability.
Remember to check with your local building codes and obtain any necessary permits before starting the construction. Compliance with regulations and codes will ensure the safety and legality of your retaining wall project.
Lastly, it’s essential to create a detailed construction plan. Break down the process into sequential steps and ensure you have all the necessary tools and equipment. Having a clear plan will streamline the construction process and help you stay organized. It’s also a good idea to allocate a sufficient budget for the project, taking into account material costs, labor expenses, and any unforeseen contingencies.
By carefully planning and designing your patio’s retaining wall, you’ll set the stage for a smooth construction process and end up with a functional and visually appealing addition to your outdoor space.
Gathering Materials and Tools
Now that you have a solid plan and design in place, it’s time to gather the materials and tools needed for constructing your patio’s retaining wall. Having all the necessary supplies at hand will ensure a smooth and efficient construction process.
The materials you’ll need depend on the design and type of retaining wall you’ve chosen. Common materials include concrete blocks, natural stone, or timber. In addition to the main materials, you’ll also need gravel or crushed stone for the foundation, geotextile fabric for drainage, and mortar or adhesive for securing the blocks or stones together.
When purchasing your materials, make sure to consider the dimensions and quantity needed for your specific project. It’s always a good idea to account for extra materials in case of any errors or additional requirements that may arise during construction.
Along with the materials, you’ll need a set of tools to aid in the construction process. Here’s a list of essential tools you’ll likely need:
- Shovel or excavator: for digging the foundation and trench
- Level: to ensure the wall is straight and level
- Tape measure: for accurate measurements
- Masonry saw or chisel: for cutting blocks or stones
- Trowel: for applying mortar or adhesive
- Rubber mallet: for tapping blocks or stones into place
- Wheelbarrow: for transporting materials
- Safety equipment: including gloves, safety goggles, and a dust mask
Before starting the construction, ensure that all your tools are in good working condition and that you have any additional safety equipment required.
If you don’t already have access to these tools, consider borrowing or renting them from a local hardware store. Renting can be a cost-effective option, especially if you don’t anticipate using the tools regularly. Alternatively, you may choose to purchase them if you plan to take on more DIY projects in the future.
Remember, having the right materials and tools on hand will not only make the construction process more efficient, but it will also ensure the quality and durability of your patio’s retaining wall.
Preparation and Excavation
Now that you have all your materials and tools ready, it’s time to prepare the area and excavate for your patio’s retaining wall. Proper preparation and excavation are crucial for creating a solid foundation and ensuring the stability of the wall.
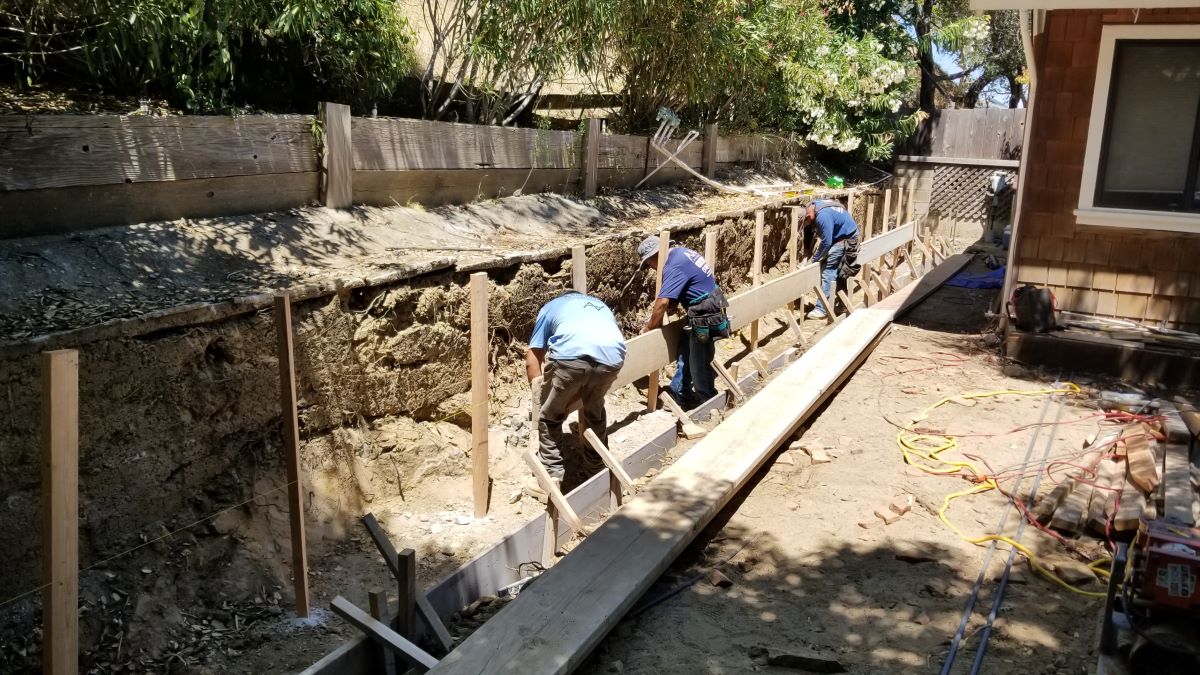
The first step is to mark the area where the retaining wall will be constructed. Use stakes and string to outline the desired shape and dimensions of the wall. This will serve as a guide during the excavation process.
Before you start digging, it’s important to call your local utility companies to mark any underground utilities such as gas lines, electrical wires, or water pipes. This will help prevent any accidents or damage during excavation.
Using a shovel or excavator, start digging the trench for the foundation of your retaining wall. The depth and width of the trench will depend on the height and type of retaining wall you’re building. Typically, the trench should be at least 8-12 inches deep and wide enough to accommodate the base material and the first course of blocks or stones.
While excavating, ensure that the trench is level by periodically checking with a level tool. A level foundation is crucial for the stability and proper alignment of the retaining wall.
Once the trench is excavated, remove any debris or loose soil from the area. This will prevent uneven settling and ensure a solid foundation for the retaining wall.
After the excavation is complete, it’s time to lay the base material. This can be gravel or crushed stone, which will provide proper drainage and stability for your retaining wall.
Add a layer of geotextile fabric on top of the base material. This fabric will act as a barrier to prevent the migration of fine particles into the drainage material, ensuring long-term functionality and minimizing the risk of clogging.
Compact the base material and geotextile fabric using a tamper or plate compactor. This will prevent settling and ensure a stable base for your retaining wall.
With the preparation and excavation complete, you’re now ready to start building the foundation of your patio’s retaining wall. The sturdy foundation will provide the necessary support for the wall and ensure its long-term durability.
Read more: How To Build A Garden Retaining Wall
Building the Foundation
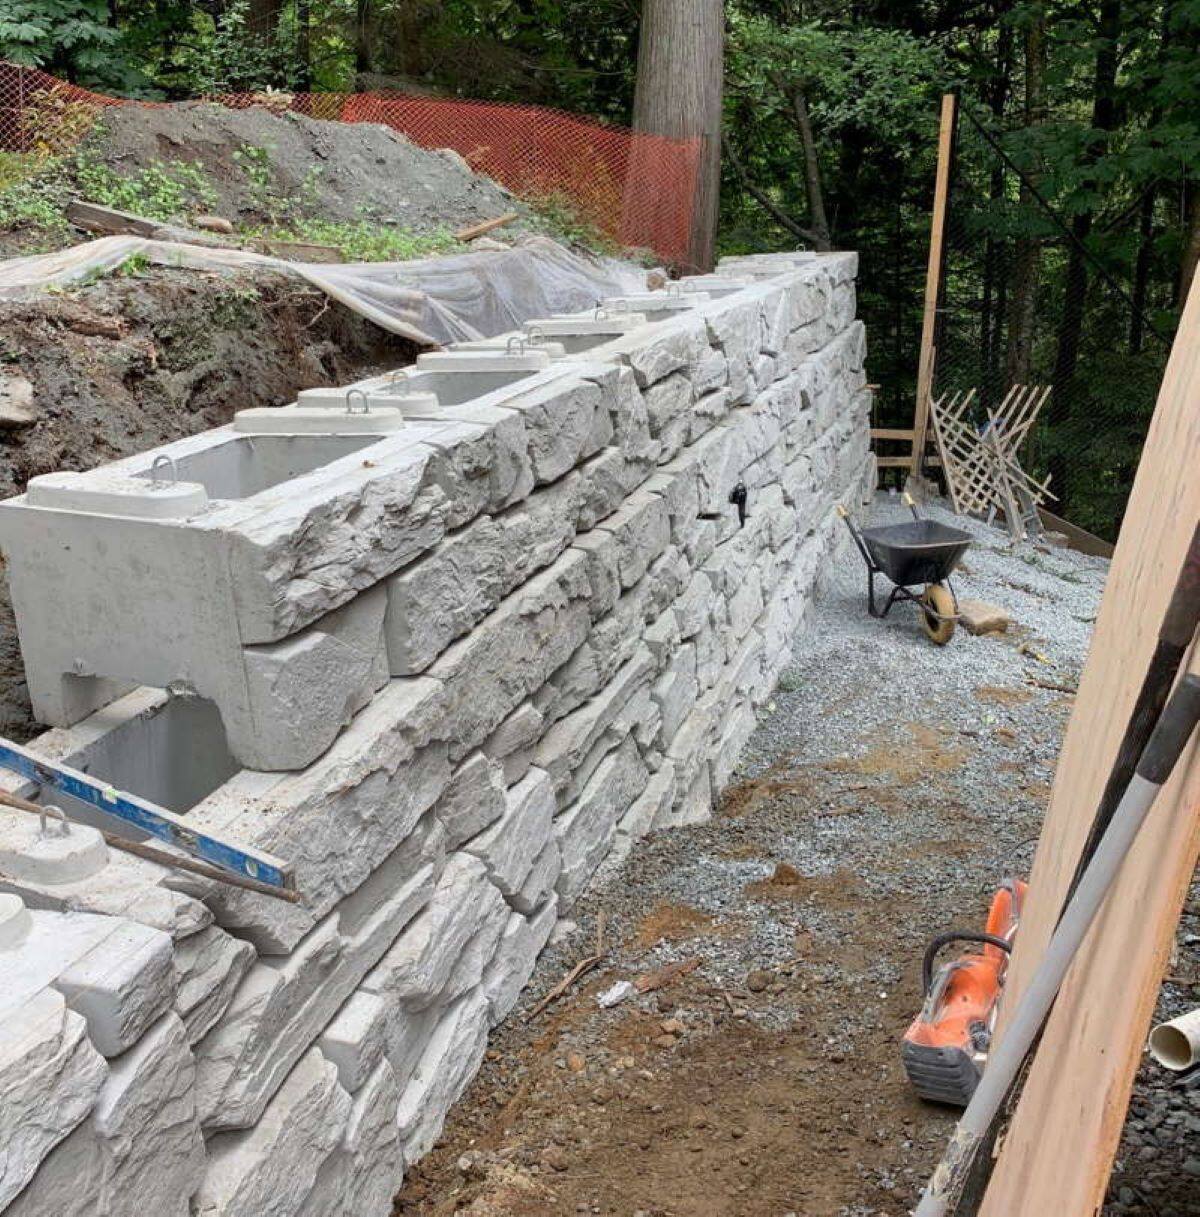
With the preparation and excavation complete, it’s time to begin building the foundation of your patio’s retaining wall. The foundation is essential for providing stability and support to the structure, ensuring its longevity.
The first step in building the foundation is to lay a leveled layer of concrete or mortar mix along the trench. This will serve as a solid base for the first course of blocks or stones. You can use a trowel to spread and level the concrete or mortar mix evenly.
Place the first course of blocks or stones on top of the concrete or mortar mix. Position them tightly together, ensuring they are level and aligned. Use a level tool to check for accuracy. Adjust the blocks or stones as needed.
As you lay the blocks or stones, use a rubber mallet to tap them gently into place. This will help secure them to the foundation and create a stable base for the rest of the wall. Check the alignment and levelness of each block or stone as you go along.
Continue laying the first course of blocks or stones until you have covered the entire length of the trench. Make sure to leave spaces for drainage by using block spacers or leaving small gaps between the blocks or stones.
If you are using interlocking blocks, make sure to follow the manufacturer’s instructions for proper installation. This may include interlocking the blocks with built-in pins or using adhesive between the blocks for added stability.
Once the first course is complete, check that it is level and aligned. Adjust as necessary before proceeding to the next course.
Depending on the height of your retaining wall, you may need to incorporate reinforcement. This can be done by inserting rebar or steel rods into the first course and extending them into the ground. This will provide additional strength to the wall and prevent shifting or collapsing.
After the first course is set and aligned, allow the concrete or mortar mix to cure according to the manufacturer’s instructions. This will ensure that the foundation is strong and ready to support the weight of the retaining wall.
With a solid foundation in place, you’re now ready to move on to building the subsequent courses of your patio’s retaining wall. The foundation sets the stage for a structurally sound and visually appealing wall that will enhance your outdoor furniture area for years to come.
When building a retaining wall for a patio, make sure to properly compact the base material to prevent settling. Use a level to ensure the wall is straight and backfill with gravel for drainage.
Laying the First Course
Now that you’ve built the foundation for your patio’s retaining wall, it’s time to lay the first course of blocks or stones. The first course serves as the base and provides stability for the rest of the wall, so it’s important to take your time and ensure it is properly aligned and level.
Start by mixing the mortar according to the manufacturer’s instructions, if you are using mortar to secure your blocks or stones. A good consistency is similar to thick peanut butter. If you’re using adhesive, skip the mortar mixing step.
Using a trowel, spread a layer of mortar or adhesive along the top of the foundation. Make sure to cover the area where you’ll be placing the first course of blocks or stones.
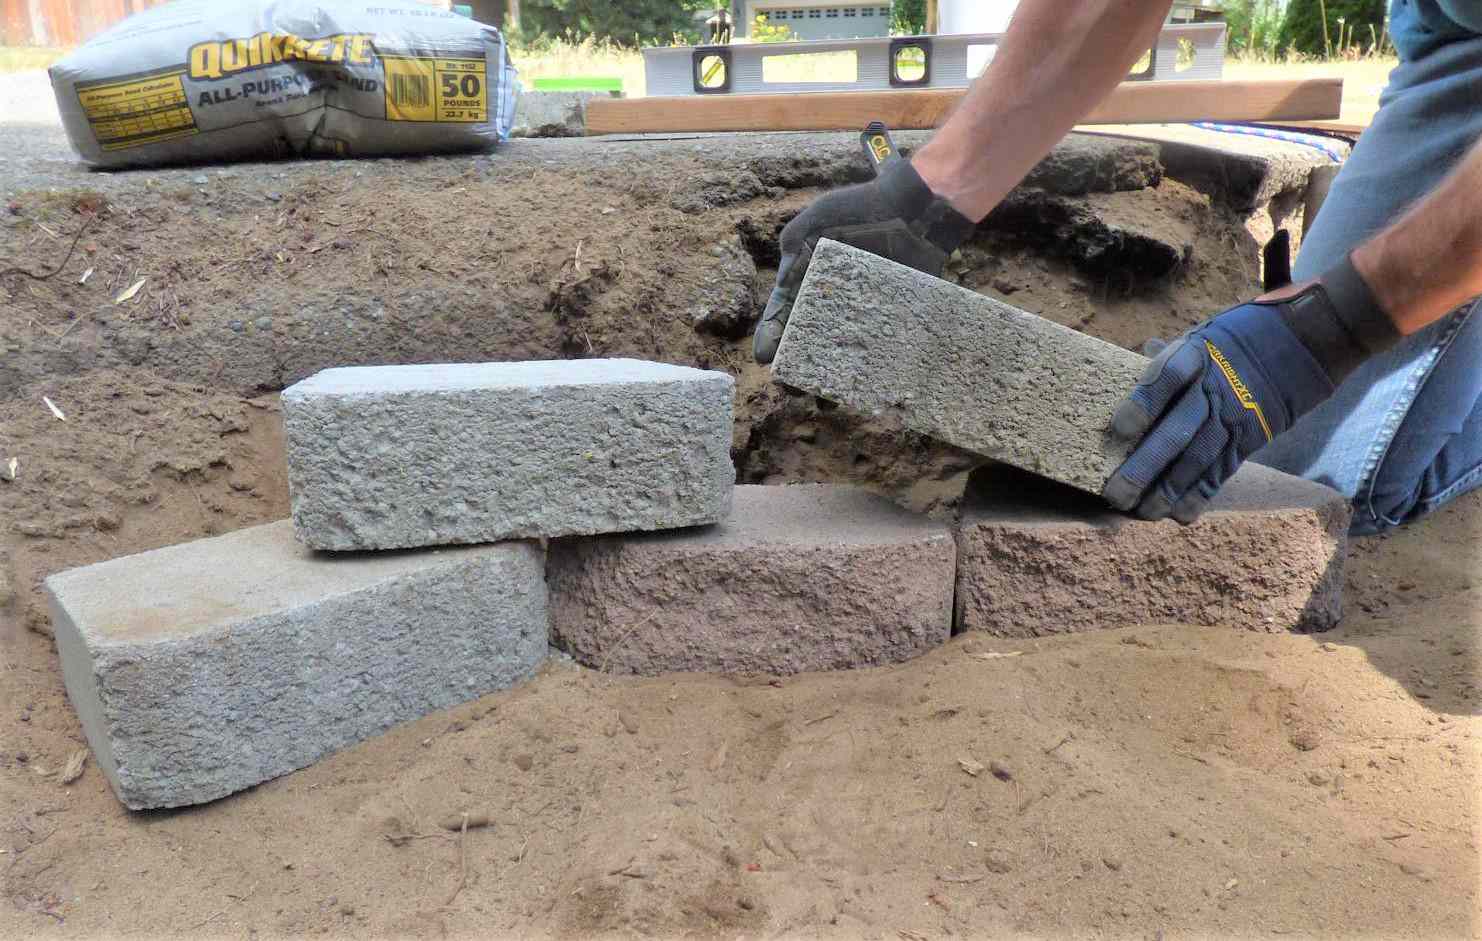
Begin placing the blocks or stones on top of the mortar or adhesive, pressing them firmly into place. Make sure each block or stone is touching the one next to it and there is no excessive mortar or adhesive oozing out between them.
Use a level tool to check for both vertical and horizontal alignment. Adjust the blocks or stones as needed, tapping them gently with a rubber mallet to ensure they are level and secure. This is especially important for maintaining the integrity of the wall throughout the construction process.
During the first course, it may be necessary to cut some blocks or stones to fit the desired layout. Use a masonry saw or chisel to carefully trim the blocks or stones to the required size. Remember to wear safety goggles and follow proper cutting techniques to avoid accidents.
Continue laying and aligning the blocks or stones until the first course is complete. Take your time to double-check the levelness and alignment of each piece.
As you work, periodically check the vertical alignment of the wall using a string or level tool attached to a stake at each end. This will help ensure that the wall remains straight and plumb as you continue building.
Once the first course is complete, allow the mortar or adhesive to dry and cure according to the manufacturer’s instructions. This will provide a strong bond and support for the subsequent courses.
Remember to clean any excess mortar or adhesive from the face of the blocks or stones as you go along. It’s easier to remove them when they are still wet rather than waiting for them to harden.
Laying the first course of your patio’s retaining wall is a crucial step in building a stable and visually appealing structure. Take your time, be meticulous in your alignment, and make any necessary adjustments before moving on to the subsequent courses.
Building Subsequent Courses
With the first course of your patio’s retaining wall in place, it’s time to build the subsequent courses. These courses will add height and strength to your wall, creating a sturdy and visually appealing structure.
Start by applying a layer of mortar or adhesive to the top of the first course. This will act as a bonding agent for the blocks or stones in the next course. Make sure to spread the mortar or adhesive evenly and minimize excess that may seep out.
Place the blocks or stones for the second course on top of the mortar or adhesive, ensuring they are aligned and tightly fitted. Use a level tool to check for both vertical and horizontal alignment, adjusting as necessary.
As you build each subsequent course, it’s important to stagger the joints. This means that the blocks or stones in each course should not line up directly with those in the course below. Staggering the joints provides additional strength and stability to the retaining wall.
Continue adding courses, applying mortar or adhesive to each one and aligning the blocks or stones carefully. Remember to periodically check for levelness and alignment throughout the process.
If your retaining wall requires reinforcement, such as the use of rebar or steel rods, make sure to place them in the appropriate courses as you build. Follow the manufacturer’s recommendations and local building codes for proper reinforcement placement.
As you progress with each course, it’s important to periodically step back and assess the overall appearance and alignment of the wall. This will help you identify any issues early on and make necessary adjustments to maintain the integrity of the structure.
Remember to clean any excess mortar or adhesive from the face of the blocks or stones as you go along. This will prevent unsightly residue from marring the appearance of your retaining wall.
Continue adding courses until you reach the desired height for your patio’s retaining wall. Make sure to allow sufficient time for the mortar or adhesive to dry and cure before applying additional weight or pressure to the wall.
Building the subsequent courses of your retaining wall requires attention to detail and careful alignment. Take your time, adjust as needed, and aim for a sturdy and visually pleasing structure that will enhance your outdoor furniture area for years to come.
Adding Drainage
Proper drainage is essential for the long-term stability and functionality of your patio’s retaining wall. It helps prevent the buildup of excess water behind the wall, which can cause pressure and compromise its integrity. Adding drainage components to your retaining wall is a critical step in ensuring its longevity.
One common method of drainage is installing perforated drainage pipes. These pipes are placed behind the retaining wall, allowing water to flow away freely. Start by digging a trench behind the wall, sloping it slightly away from the wall’s base. The depth and width of the trench will depend on the height and size of your retaining wall.
Place the perforated drainage pipes in the trench, ensuring they are positioned with the perforations facing downwards. Connect the pipes using appropriate fittings and connectors to create a continuous drainage system.
Cover the drainage pipes with a layer of crushed stone or gravel. This will help facilitate water flow and prevent the pipes from clogging. Make sure to compact the crushed stone or gravel to ensure stability.
To prevent soil from entering the drainage system and clogging the pipes, line the back of the retaining wall with geotextile fabric. This fabric allows water to pass through while trapping soil particles and preventing them from reaching the drainage system.
Once the geotextile fabric is in place, backfill the area behind the retaining wall with soil, ensuring a slight slope away from the wall. This will further promote proper drainage by allowing water to drain naturally downwards.
In addition to drainage pipes, you can also incorporate weep holes into your retaining wall. Weep holes are small openings or gaps left between the blocks or stones of the wall to allow water to escape. These holes should be strategically placed throughout the wall at regular intervals for optimal drainage.
It’s important to inspect and maintain the drainage system regularly. Check for any signs of clogging or blockage in the drainage pipes and weep holes. Clean out any accumulated debris to ensure proper water flow.
Remember, effective drainage is crucial for the long-term stability and functionality of your patio’s retaining wall. By implementing proper drainage measures, you can prevent potential issues related to water buildup and protect the integrity of your outdoor furniture area.
Read more: How To Build Stairs In A Retaining Wall
Finishing Touches
As you near the completion of your patio’s retaining wall, it’s time to add the finishing touches that will enhance the overall appearance and functionality of your outdoor space. These final details will give your retaining wall a polished and professional look.
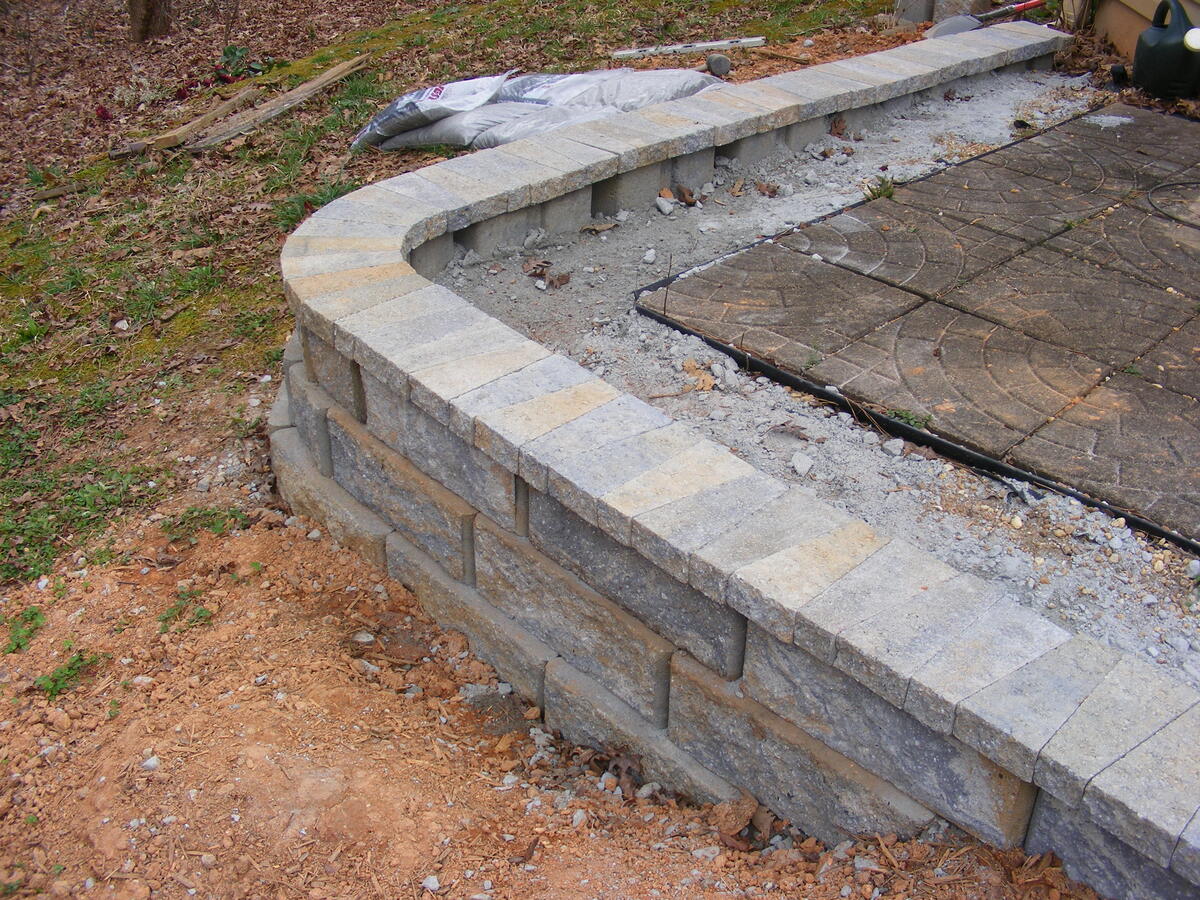
One important finishing touch is to cap the top of the retaining wall. The cap provides a finished edge, adds an extra layer of protection, and helps to prevent water and debris from seeping into the wall. You can choose from various materials such as concrete, stone, or specialty caps made specifically for retaining walls. Ensure that the cap is securely installed and level to maintain the structural integrity and aesthetic appeal of the wall.
Consider adding decorative elements to your retaining wall to enhance its visual appeal. This may include incorporating colored blocks or stones, intricate patterns, or even mosaic designs. Be creative and choose elements that complement your outdoor furniture and personal style. However, make sure that the decorative elements do not compromise the structural integrity of the wall or impede proper drainage.
Landscaping around the retaining wall is another key aspect to consider. Planting shrubs, flowers, or other greenery can soften the appearance of the wall and integrate it seamlessly into the surrounding environment. Choose plants that are suitable for your climate and that will not interfere with the stability of the wall. Additionally, consider adding mulch or decorative gravel to create a clean and aesthetically pleasing border around the wall.
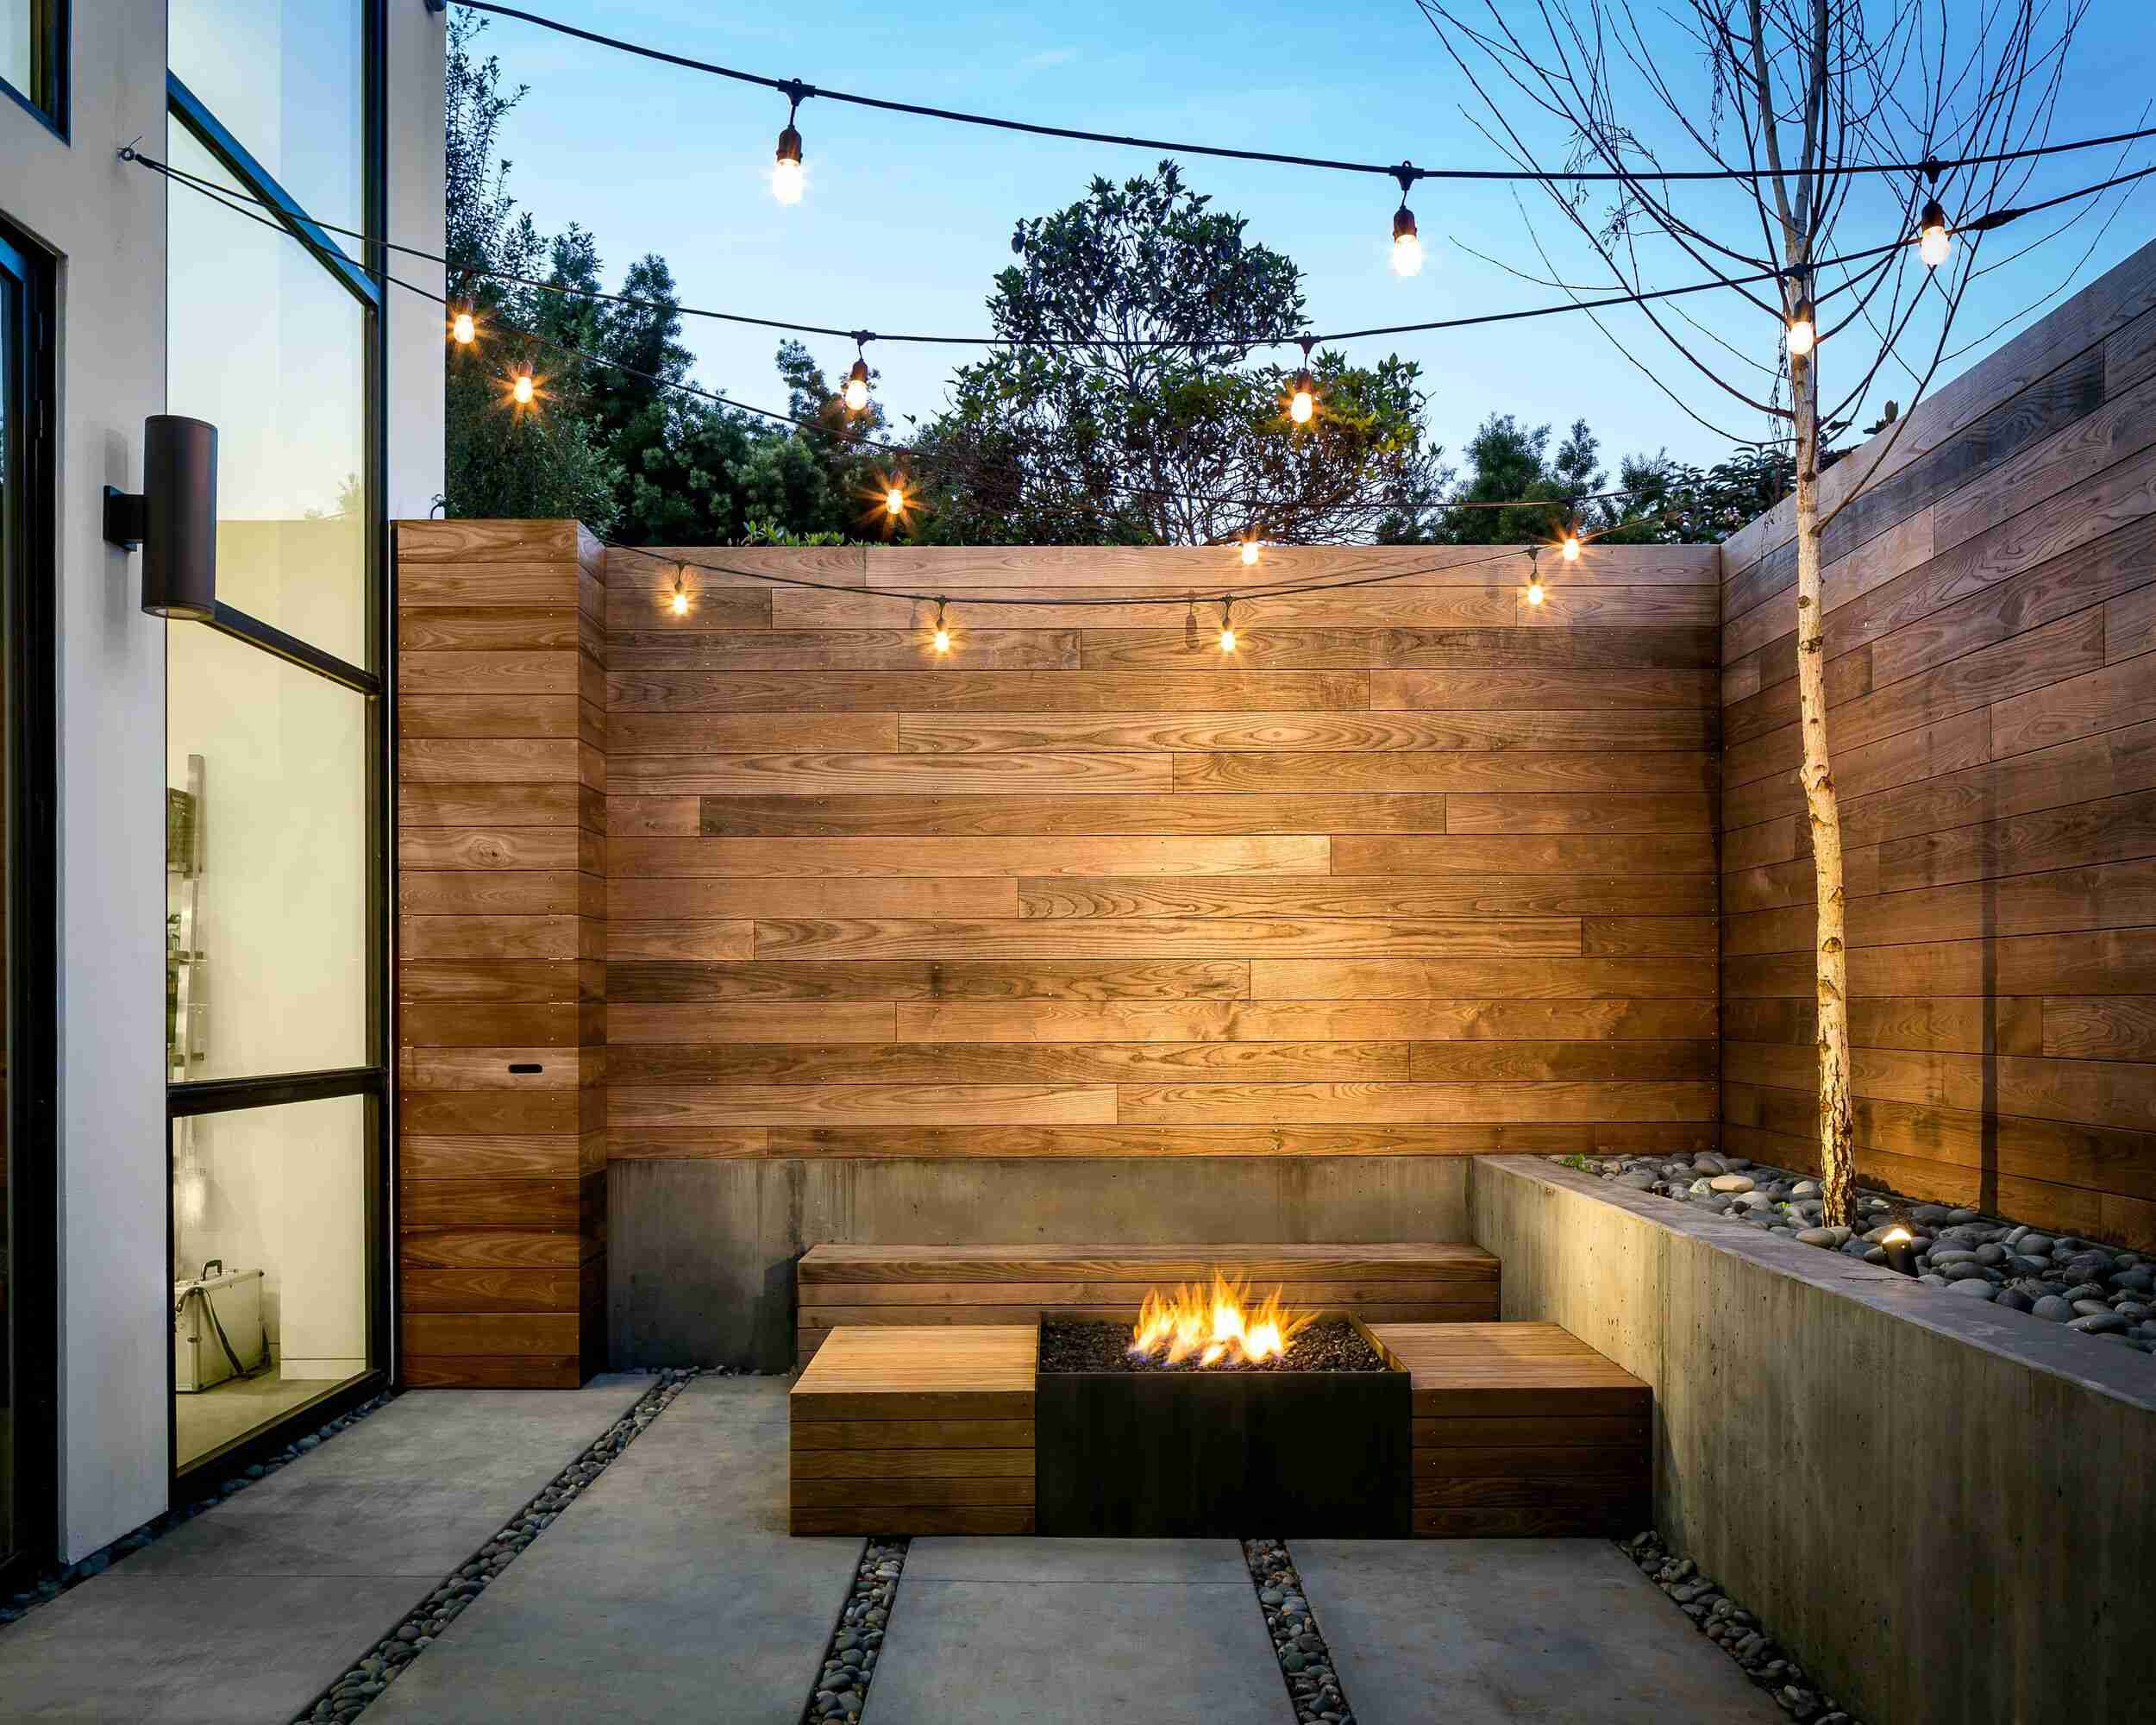
Installing proper lighting can dramatically enhance the nighttime ambiance of your patio. Consider incorporating outdoor lighting fixtures, such as LED spotlights or solar-powered lights, to highlight the retaining wall and create a warm and inviting atmosphere. Lighting not only adds a functional aspect to your outdoor space but also emphasizes the beauty of the wall’s design and materials.
Regular maintenance is essential to keep your retaining wall in excellent condition. Inspect the wall periodically for any signs of damage, such as cracks or shifting. Address any issues promptly to prevent further deterioration. Also, clear any debris that may accumulate behind the wall or on the cap to maintain its integrity and appearance.
Lastly, take pride in your completed retaining wall and enjoy the fruits of your labor. It not only adds structural support and functionality to your patio but also becomes a beautiful focal point that complements your outdoor furniture and creates a welcoming and enjoyable outdoor space.
By giving attention to these finishing touches, you can elevate the look and functionality of your patio’s retaining wall, creating a space that will be admired and enjoyed for years to come.
Conclusion
Congratulations! You have successfully completed the construction of your patio’s retaining wall. With careful planning, diligent execution, and attention to detail, you have created a sturdy and visually appealing structure that enhances the functionality and aesthetics of your outdoor furniture area.
Throughout the process, you learned the importance of understanding retaining walls and their purpose. You explored the planning and design stages, gathering the necessary materials and tools, and properly preparing the area for construction. Building the foundation, laying the first course, and constructing subsequent courses required careful alignment and attention to detail. Adding drainage components and incorporating finishing touches provided the final touches that elevate the overall look and longevity of your retaining wall.
Remember, proper maintenance is crucial for the continued durability and stability of your retaining wall. Regular inspections and prompt repairs will help preserve its integrity and functionality for years to come.
As you enjoy your outdoor furniture area, take pride in the accomplishment of building your own retaining wall. It not only adds structural support but also serves as a beautiful backdrop, enhancing the ambiance of your patio and creating a welcoming outdoor space for relaxation and entertainment.
Whether you’re hosting gatherings, enjoying quiet moments outdoors, or simply admiring your handiwork, your patio’s retaining wall will be a lasting testament to your DIY skills and creativity.
So, sit back, relax, and enjoy the fruits of your labor. Your patio’s retaining wall has transformed your outdoor furniture area into a functional and visually stunning oasis that you can enjoy for years to come.
Frequently Asked Questions about How To Build A Retaining Wall For A Patio
Was this page helpful?
At Storables.com, we guarantee accurate and reliable information. Our content, validated by Expert Board Contributors, is crafted following stringent Editorial Policies. We're committed to providing you with well-researched, expert-backed insights for all your informational needs.


0 thoughts on “How To Build A Retaining Wall For A Patio”