Home>Home Maintenance>How To Find A Leak In Air Conditioning System
Home Maintenance
How To Find A Leak In Air Conditioning System
Modified: October 20, 2024
Learn how to effectively find and fix a leak in your air conditioning system with our comprehensive home maintenance guide. Ensure your home stays cool and comfortable all year round.
(Many of the links in this article redirect to a specific reviewed product. Your purchase of these products through affiliate links helps to generate commission for Storables.com, at no extra cost. Learn more)
Introduction
Welcome to our guide on how to find a leak in your air conditioning system. If you’ve noticed a decrease in cooling performance or ice buildup on your AC unit, there’s a good chance it could be due to a refrigerant leak. Finding and fixing leaks promptly is crucial for maintaining your AC’s efficiency, reducing energy consumption, and extending its lifespan. In this article, we’ll discuss the importance of leak detection, signs that indicate a leak, and various methods to identify and repair leaks in your air conditioning system.
Having a well-functioning air conditioning system is essential, especially during hot summers or in regions with a warmer climate. Not only does it keep your living space comfortable and enjoyable, but it also helps maintain indoor air quality by filtering out dust, allergens, and pollutants. However, an AC unit with a refrigerant leak can not only lead to inadequate cooling but also impact its overall performance and efficiency.
It is crucial to identify and address a leak as soon as possible. Ignoring a refrigerant leak can lead to more severe issues such as system breakdowns, costly repairs, or even complete system replacement. Additionally, leaking refrigerant is harmful to the environment, contributing to ozone layer depletion and climate change. By promptly detecting and repairing leaks, you can minimize these negative impacts, save money on energy bills, and do your part to protect the environment.
Now that you understand the importance of finding a leak in your air conditioning system, let’s move on to the next section to learn about the signs that indicate a potential leak.
Key Takeaways:
- Don’t ignore signs of a refrigerant leak in your AC – it affects cooling, energy bills, and the environment. Prompt detection and repair are crucial for efficiency and comfort.
- Use visual inspection, UV dye test, electronic detection, pressure test, and soap bubble test to find and repair leaks. Regular maintenance is key to preventing future issues.
Read more: How To Find A Leak In An Air Conditioner
Importance of Finding a Leak in Air Conditioning System
When it comes to your air conditioning system, finding and fixing a leak is of utmost importance. A refrigerant leak not only compromises the cooling performance but can also have several other negative consequences. Let’s explore why it is crucial to detect and address leaks in your AC system:
- Efficiency and Performance: A refrigerant leak can significantly impact the efficiency and performance of your air conditioning system. Refrigerant is the key component responsible for cooling the air. When there is a leak, the refrigerant escapes, leading to a decrease in cooling capacity. This means your AC will have to work harder and consume more energy to maintain the desired temperature, resulting in higher electricity bills.
- System Lifespan: Leaks can put excessive strain on your AC’s compressor, leading to premature wear and tear. The compressor is the heart of your air conditioning system, and if it is overworked, it can result in costly repairs or even the need for a complete replacement. Detecting and repairing leaks promptly can help prolong the lifespan of your AC system, saving you money in the long run.
- Environmental Impact: Refrigerant leaks have a significant environmental impact. Most air conditioners use a type of refrigerant called hydrofluorocarbons (HFCs), which contribute to climate change when released into the atmosphere. These HFCs can deplete the ozone layer and contribute to global warming. By fixing leaks and preventing the release of refrigerant, you can play an active role in reducing your carbon footprint and protecting the environment.
- Comfort: An air conditioning system with a refrigerant leak may struggle to achieve and maintain the desired temperature. You may notice that some rooms are not as cool as others or that the overall cooling performance has decreased. By promptly addressing leaks, you can ensure optimal comfort in your living space and avoid the inconvenience of inconsistent cooling.
- Safety: Refrigerant leaks can pose safety risks, as some refrigerants are toxic when inhaled or come into contact with skin. If you suspect a refrigerant leak, it is essential to take appropriate precautions and avoid direct exposure. Hiring a professional technician to handle the leak detection and repair process ensures your safety and reduces the risk of accidents.
By understanding the importance of finding and fixing a leak in your air conditioning system, you can take proactive steps to maintain its efficiency, prolong its lifespan, reduce environmental impact, and ensure optimal comfort for your home or office.
Signs of a Leak
Identifying the signs of a refrigerant leak in your air conditioning system is crucial for prompt detection and repair. Here are some common indicators that may suggest a potential leak:
- Inadequate Cooling: One of the most prominent signs of a refrigerant leak is reduced cooling performance. If you notice that your AC isn’t reaching or maintaining the desired temperature despite proper settings, there’s a possibility of a leak.
- Ice Buildup: Another telltale sign of a refrigerant leak is ice buildup on the evaporator coils or refrigerant lines. When there isn’t enough refrigerant present, it causes the coils or lines to become overly cold, leading to ice formation. If you notice frost or ice on these components, it’s a strong indication of a leak.
- Hissing or Bubbling Noises: If you hear hissing or bubbling sounds coming from your air conditioning unit, it could be due to refrigerant escaping through a leak. The sound is often more noticeable near the indoor or outdoor unit and indicates a significant leak that needs immediate attention.
- Increased Energy Bills: A refrigerant leak forces your air conditioning system to work harder to maintain the desired temperature, resulting in increased energy consumption. If you notice a sudden rise in your energy bills without any other apparent cause, it’s worth investigating for a possible refrigerant leak.
- Strong Odor: Some refrigerants have a distinct smell. If you detect an unusual, sweet, or chemical-like odor near your air conditioning unit or in the vicinity, it could indicate a refrigerant leak. In such cases, it’s essential to contact a professional technician to assess and resolve the issue.
- Detection of Oily Residue: Refrigerant leaks can sometimes leave behind oily residue on the refrigerant lines, coils, or nearby components. If you notice any greasy or oily substance around your air conditioning system, it’s a clear indication of a leak that requires immediate attention.
If you observe any of these signs, it’s crucial to take action promptly. Ignoring a refrigerant leak can lead to more significant problems and potential damage to your air conditioning system. Contacting a trained HVAC technician to perform a thorough inspection and leak detection is recommended to accurately diagnose and repair the issue.
Now that we’ve covered the signs of a refrigerant leak, let’s move on to the tools required for effective leak detection in your air conditioning system.
Tools Required for Leak Detection
When it comes to detecting a refrigerant leak in your air conditioning system, having the right tools is essential. Here are some of the commonly used tools for effective leak detection:
- Leak Detection Solution: A leak detection solution is a liquid or spray specifically designed to detect refrigerant leaks. It contains a fluorescent dye that becomes visible under UV light when it comes into contact with the refrigerant. This solution helps identify the exact location of the leak.
- UV Light: A UV light, also known as a blacklight, is used in conjunction with the leak detection solution. The UV light illuminates the fluorescent dye, making it easier to spot and pinpoint the leak. UV lights are available in handheld or flashlight-style designs for convenience.
- Electronic Leak Detector: An electronic leak detector is a device that uses advanced sensing technology to detect refrigerant leaks. These detectors can sense trace amounts of refrigerant in the air and alert the user with visual or auditory signals. Electronic leak detectors are highly accurate and efficient in locating leaks.
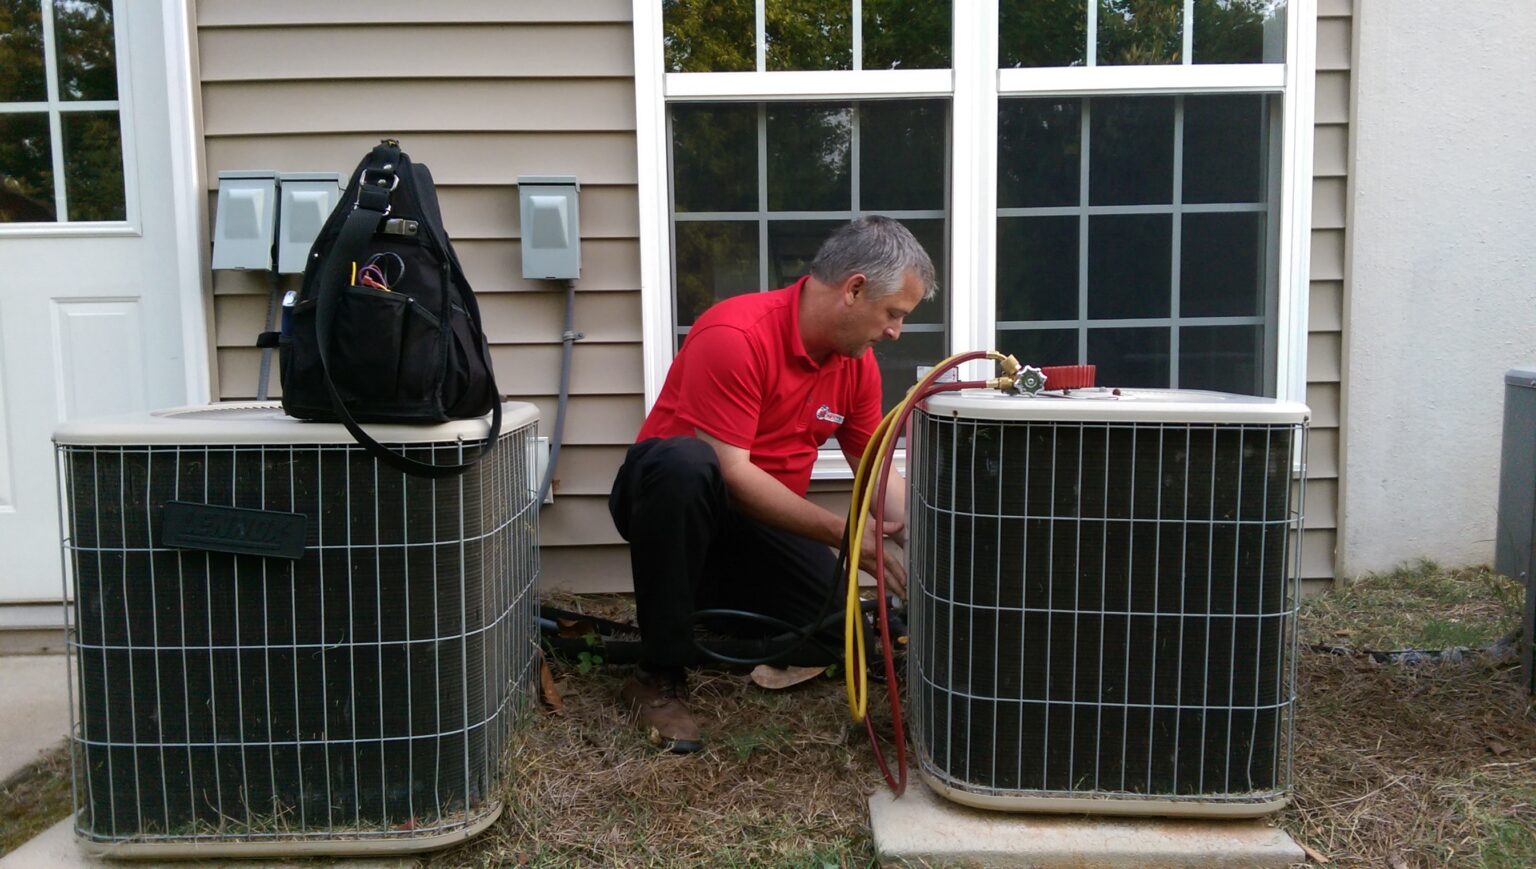
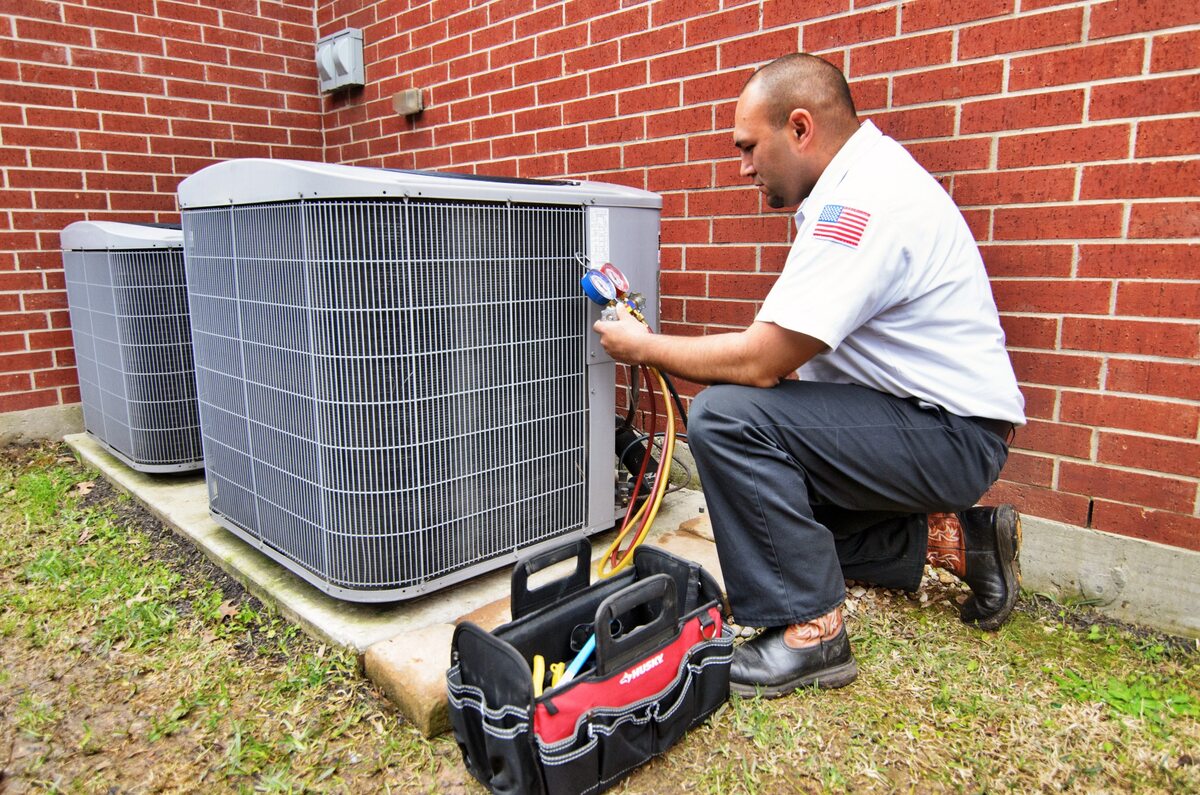
- Pressure Gauges: Pressure gauges are essential for leak detection and HVAC system diagnostics. By measuring the pressure levels in the air conditioning system, you can identify abnormal readings, which may indicate a refrigerant leak. Pressure gauges come in analog or digital formats and are available in various sizes to fit different system configurations.
- Bubble Solution: A bubble solution, also known as a soap bubble solution, is used for the soap bubble test. This solution is typically a mixture of water and a small amount of dish soap. When applied to the suspected leak area, the solution forms bubbles if there is an air or refrigerant leak present.
- Manifold Gauge Set: A manifold gauge set is a valuable tool for leak detection and HVAC system maintenance. It consists of pressure gauges, valves, and hoses that allow you to measure and control the pressure levels in the system. Manifold gauge sets are primarily used for pressure testing, which helps identify leaks and assess system performance.
Before using these tools, it’s essential to read and follow the manufacturer’s instructions for proper usage and safety precautions. It’s also worth noting that some leak detection methods, such as electronic leak detection, may require additional training or expertise to ensure accurate results.
Now that we’ve covered the essential tools for leak detection, let’s move on to explore different methods of finding leaks in your air conditioning system.
Method 1: Visual Inspection
A visual inspection is the first step in leak detection and can often reveal obvious signs of a refrigerant leak. Here’s how you can perform a visual inspection of your air conditioning system:
- Turn Off the Power: Before starting any inspection or maintenance work, ensure that the power to your air conditioning system is turned off. This will prevent any accidental electric shocks or injuries.
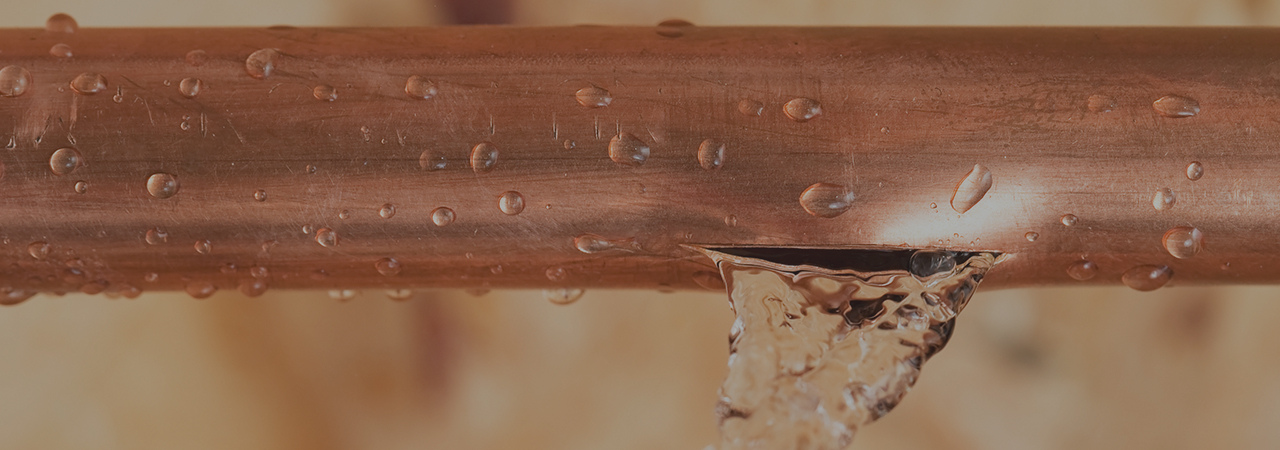
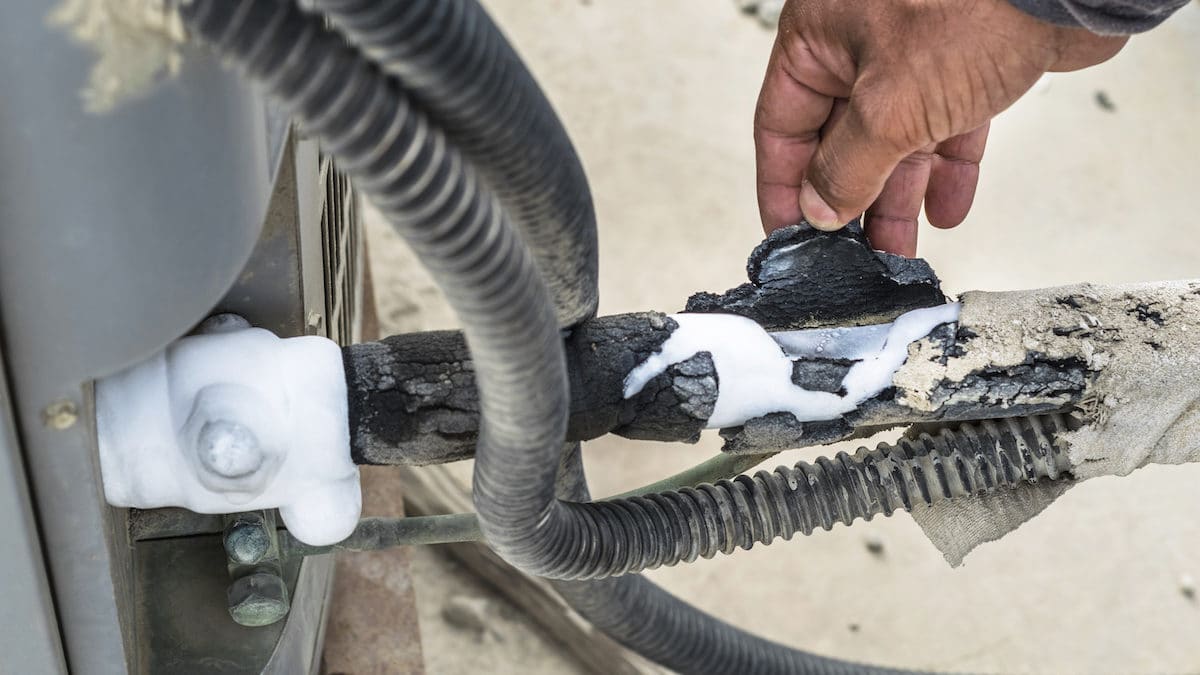
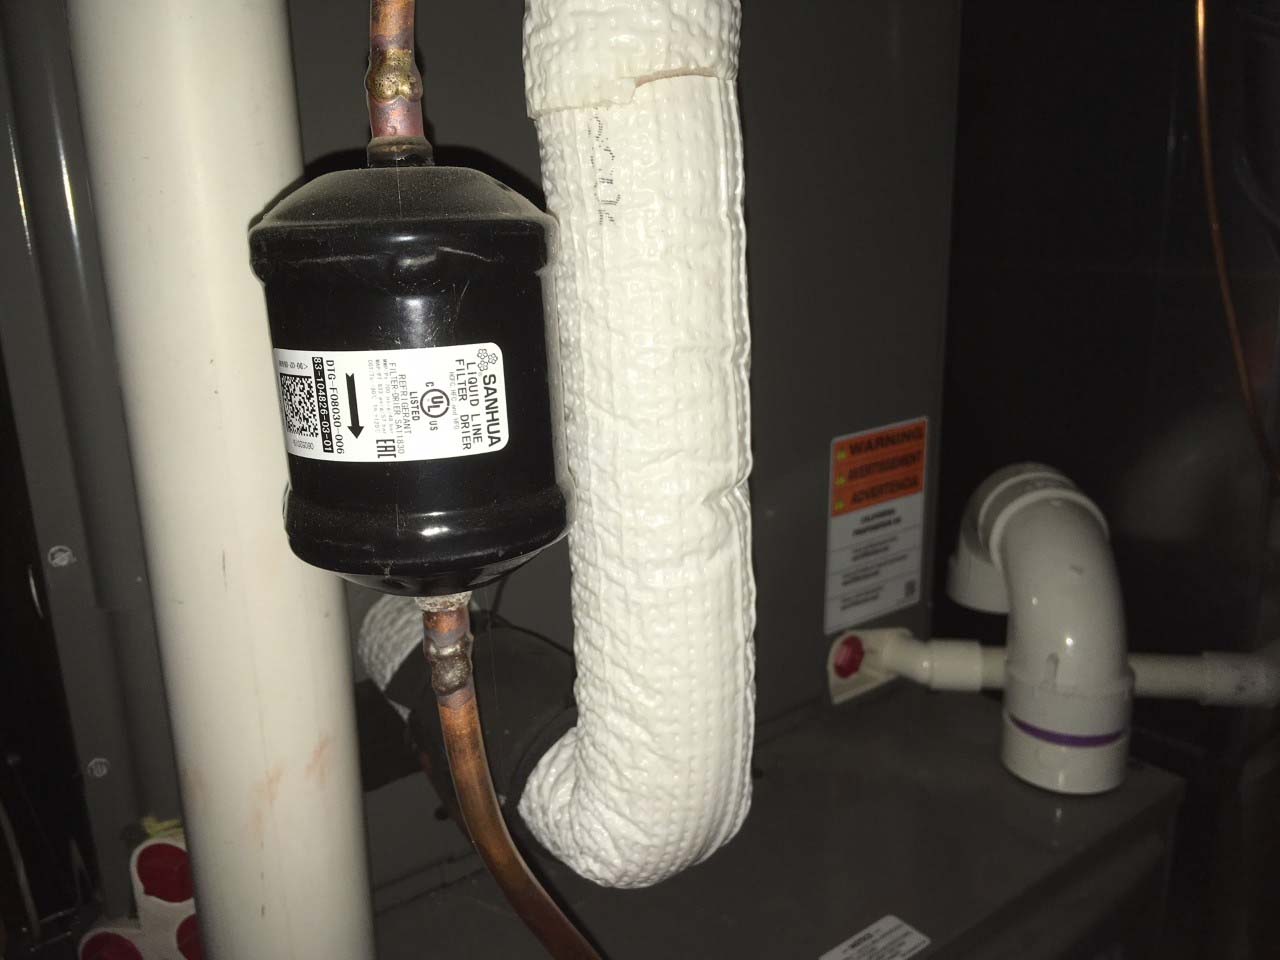
- Examine the Refrigerant Lines: Inspect the refrigerant lines that connect the outdoor unit (condenser) to the indoor unit (evaporator). Look for any visible signs of oil or greasy residue on the lines, fittings, or connectors. This oily residue is an indication of a refrigerant leak.
- Check the Evaporator Coil: Remove the access panel from the indoor unit to access the evaporator coil. Examine the coil for any signs of frost, ice buildup, or wet spots. These can be indications of a refrigerant leak. Additionally, look for any visible damage or corrosion on the coil surface.
- Inspect the Condenser Unit: Check the outdoor condenser unit for any signs of damage or corrosion. Look for oil stains or wet spots around the unit, which may suggest a refrigerant leak. Also, examine the refrigerant lines and fittings for any signs of leakage or loose connections.
- Check for Bent Fins: Inspect the condenser and evaporator fins for any bent or damaged fins. Bent fins can restrict airflow and impact the cooling efficiency of the system.
- Inspect the Drain Pan and Drainage System: Ensure that the drain pan located under the indoor unit is clean and free of any debris. Check for signs of water leakage or mold growth, as these can indicate issues with the drainage system.
- Observe Unusual Sounds or Smells: While visually inspecting your air conditioning system, pay attention to any unusual sounds, strong odors, or hissing/bubbling noises. These can be warning signs of a refrigerant leak and should not be ignored.
During the visual inspection, if you come across any visible signs of a refrigerant leak or suspect a leak based on the observations, it is recommended to contact a professional HVAC technician. They have the expertise and necessary tools to perform a more in-depth and accurate leak detection process.
Now that you have completed the visual inspection, let’s move on to the next method of leak detection: the UV dye test.
Read more: How To Flush Air Conditioning System
Method 2: UV Dye Test
The UV dye test is a widely used method to detect refrigerant leaks in air conditioning systems. It involves the use of a fluorescent dye and a UV light to identify the exact location of the leak. Here’s how you can perform a UV dye test:
- Purchase a UV Dye Kit: Start by obtaining a UV dye kit from your local HVAC supply store or online. These kits typically include a fluorescent dye that is compatible with the refrigerant used in your air conditioner and a UV light.
- Add the UV Dye: First, turn off your air conditioning system. Then, carefully add the UV dye into the refrigerant system. This is usually done by injecting the dye into the service port using a syringe or specialized tool. Consult the instructions provided with the UV dye kit for the specific procedure and dosage.
- Allow the Dye to Circulate: After adding the UV dye, turn on your air conditioning system and let it run for a sufficient period. The dye will circulate along with the refrigerant throughout the system.
- Inspect with UV Light: Once the dye has had enough time to circulate, use the UV light included in the kit to inspect the various components of your air conditioning system. Start by examining the refrigerant lines, fittings, and connectors. The UV dye will fluoresce under the UV light, making it easier to spot any leaks. Pay close attention to areas where you suspect a leak based on previous visual inspections or signs.
- Note the Location of the Leak: If you observe any fluorescence around a particular area, it indicates the presence of a refrigerant leak. Use a marker or make a note of the exact location for further repair work.
- Consult a Professional Technician: While the UV dye test can help identify leaks, it’s important to remember that it only reveals visible leaks. Some leaks may be too small or in hard-to-reach areas, making them difficult to detect with this method alone. In such cases, it’s best to seek the assistance of a trained HVAC technician who can use other leak detection methods to uncover hidden leaks.
The UV dye test is a straightforward and effective method for locating refrigerant leaks. However, it’s important to adhere to safety precautions and follow the instructions provided with the UV dye kit. If you’re unsure about performing the test yourself, it’s always wise to seek professional assistance to ensure accurate results.
Now that you’ve learned about the UV dye test, let’s move on to explore another method of leak detection: electronic leak detection.
Check for any visible signs of leaks, such as oil or refrigerant stains around the AC system. Use a UV dye and a black light to help identify the source of the leak.
Method 3: Electronic Leak Detection
Electronic leak detection is a precise and efficient method used to detect refrigerant leaks in air conditioning systems. It involves the use of specialized electronic leak detectors that can sense and pinpoint even the smallest leaks. Here’s how you can perform electronic leak detection:
- Prepare the Area: Ensure that the air conditioning system is turned off before starting the electronic leak detection process. Clear the area around the unit for easy access and better maneuverability during the detection process.
- Choose the Right Detector: There are different types of electronic leak detectors available, including heated diode, infrared, ultrasonic, and corona discharge detectors. Research and choose the detector that is most suitable for your AC system and the refrigerant used. Refer to the manufacturer’s instructions for the specific detector model.
- Calibrate the Detector: Before using the electronic leak detector, it’s essential to calibrate it following the manufacturer’s instructions. Calibration ensures accurate readings and enhances the detector’s sensitivity.
- Select a Search Pattern: It’s recommended to use a systematic search pattern while scanning for leaks. Start from one point and move the detector slowly over the various components of the air conditioning system, including the refrigerant lines, fittings, connections, valves, and the evaporator and condenser coils. Pay extra attention to areas where visual inspections or other signs suggest a possible leak.
- Interpret Detector Readings: Electronic leak detectors provide visual or audible signals to indicate the presence of a refrigerant leak. Be attentive to any fluctuations, increases, or spikes in the readings. Some detectors may also provide a numerical indication of the leak intensity. A higher reading indicates a stronger leak, guiding you towards the location of the leak.
- Mark the Leak Location: When the electronic leak detector detects a leak, mark the specific location using a marker or make a note for further investigation and repair. Repeat the scanning process to ensure all leaks are identified.
- Consult a Professional Technician: While electronic leak detection is a reliable method, it’s important to remember that proper training and expertise are required to operate the detectors effectively. If you have limited experience or are unsure of the results, it’s best to consult a professional HVAC technician who has the necessary skills and knowledge to accurately interpret the findings and perform the needed repairs.
Electronic leak detection is highly effective in locating refrigerant leaks, including small or hard-to-reach leaks. It helps to identify leaks with precision, allowing for prompt repairs and minimizing potential damage to the air conditioning system.
Now that you’ve learned about electronic leak detection, let’s move on to explore another method of leak detection: the pressure test.
Method 4: Pressure Test
A pressure test is a common method used to detect refrigerant leaks in air conditioning systems. It involves pressurizing the system and monitoring pressure levels to identify any leaks. Here’s how you can perform a pressure test:
- Turn Off the Power: Before starting the pressure test, ensure that the power to your air conditioning system is turned off. This will prevent any potential accidents or injuries during the process.
- Connect Pressure Gauges: Connect pressure gauges to the service ports of both the high-side and low-side of your air conditioning system. The high-side port is typically located on the smaller refrigerant line near the condenser, while the low-side port is usually located near the larger refrigerant line going into the evaporator.
- Evacuate the System: Use a vacuum pump to remove any existing air and moisture from the system. This step is essential to ensure accurate pressure readings during the test.
- Pressurize the System: Once the system is evacuated, use a refrigerant recovery machine or manifold gauge set to introduce a controlled amount of refrigerant into the system. Pressurize the system to a level higher than the normal operating pressure.
- Monitor Pressure Levels: After pressurizing the system, close the service valves and monitor the pressure levels on both gauges. In an ideal scenario, the pressure should remain steady without any significant drop. If you notice a gradual decrease in pressure, it indicates a refrigerant leak.
- Inspect for Leaks: While monitoring the pressure levels, visually inspect the air conditioning system for any signs of leakage. Pay attention to the refrigerant lines, connections, valves, and other components. Look for hissing sounds, bubbling, oil stains, or oily residue, as these are indications of a refrigerant leak.
- Locate and Repair the Leak: If a leak is detected during the pressure test, note the location and perform a more detailed inspection to identify the exact source of the leak. Common areas to check include the service valves, fittings, connections, and the evaporator and condenser coils. Once the leak is located, consult a professional HVAC technician to properly repair or replace the affected component.
It’s important to note that pressure testing must be done with caution to avoid over-pressurizing the system, which can lead to further damage. If you’re unsure of performing a pressure test yourself, it’s recommended to seek the assistance of a trained HVAC technician who has the expertise and knowledge to conduct the test safely and accurately.
Now that you’ve learned about the pressure test, let’s move on to explore another method of leak detection: the soap bubble test.
Method 5: Soap Bubble Test
The soap bubble test is a simple and effective method to detect refrigerant leaks in air conditioning systems. It involves the use of a soap solution to create bubbles at the suspected leak areas. Here’s how you can perform a soap bubble test:
- Prepare the Soap Solution: Start by preparing a soap solution by mixing water and a small amount of liquid dish soap in a spray bottle or container. Ensure that the solution is well-mixed to create a soapy consistency.
- Turn Off the Power: Before starting the test, make sure to turn off the power to your air conditioning system to avoid any accidental electrical issues.
- Spray the Soap Solution: Spray the soap solution onto the areas suspected of having a refrigerant leak. Common areas to check include the refrigerant lines, fittings, connections, valves, and the evaporator and condenser coils.
- Observe and Look for Bubbles: After applying the soap solution, carefully observe the sprayed areas. If there is a refrigerant leak, the escaping refrigerant will cause the soap solution to form bubbles at the leak site. Keep an eye out for any bubbles or foam formation.
- Double-check Suspected Areas: If you didn’t notice any bubbles initially, it’s worth double-checking suspected leak areas by reapplying the soap solution and observing for any changes. Sometimes, leaks can be slow or intermittent, making them harder to detect.
- Mark the Leak Location: When you observe bubbles or suspect a leak, mark the location using a marker or make a note for further investigation and repair. This will help you or a professional technician easily locate the leak during the repair process.
- Consult a Professional Technician: While the soap bubble test can be a useful method for identifying leaks, it’s important to note that it may not detect very small or hard-to-spot leaks. If you suspect a leak or notice any signs of a refrigerant issue, it’s recommended to consult a professional HVAC technician who can perform a more thorough and accurate leak detection process.
The soap bubble test is a cost-effective and accessible method for detecting refrigerant leaks in air conditioning systems. It can be performed by homeowners or as an initial step before seeking professional assistance.
Now that you are familiar with the soap bubble test, you have learned various methods to detect refrigerant leaks. The next step is to address and repair the identified leaks to ensure optimal performance and efficiency of your air conditioning system.
Read more: How To Find Roof Leak
Repairing the Leak
Once you have successfully detected a refrigerant leak in your air conditioning system, it’s crucial to take immediate action and repair the leak. Here are the steps involved in repairing a leak:
- Turn Off the Power: Before starting any repair work, make sure to turn off the power to your air conditioning system to avoid any electrical hazards.
- Assess the Severity of the Leak: Evaluate the severity of the leak based on its size and location. Small leaks may be repairable, while larger or more complex leaks may require professional assistance or component replacement.
- Contact a Professional Technician: If you are uncertain about the repair process or the leak is beyond your capabilities, it is recommended to contact a professional HVAC technician. They have the expertise, tools, and experience to repair refrigerant leaks safely and effectively.
- Follow Manufacturer Guidelines: If you choose to repair the leak yourself, refer to the manufacturer’s guidelines and instructions specific to your air conditioning system. These guidelines will provide you with the necessary steps and precautions to follow during the repair process.
- Repair Small Leaks: For smaller leaks, you may be able to use specialized leak-sealing products or refrigerant leak repair kits. Follow the product instructions carefully to seal the leak properly. Keep in mind that these products may not be suitable for all types of leaks or system components, so it’s important to choose the right product for the specific repair needed.
- Replace Damaged Components: In some cases, leaking may be caused by damaged or worn-out components such as valves, seals, gaskets, or refrigerant lines. If the leak is originating from one of these components, it’s necessary to replace the affected part to ensure a proper repair.
- Test for System Integrity: After the repair, it’s crucial to test the system for integrity and any remaining leaks. You can use the previously mentioned leak detection methods, such as the UV dye test or electronic leak detection, to ensure that the repaired area is leak-free.
- Recharge the System: Once you have confirmed that the leak has been repaired successfully, you may need to recharge the system with the specified amount of refrigerant. It’s important to follow the correct procedures and refrigerant charging guidelines provided by the manufacturer or consult a professional technician for assistance.
- Regular Maintenance: To prevent future leaks and ensure the longevity of your air conditioning system, it’s essential to prioritize regular maintenance. Schedule annual maintenance inspections with a professional technician to identify and address any potential issues before they turn into major problems.
Remember, refrigerant leaks can compromise the performance, efficiency, and lifespan of your air conditioning system. Whether you choose to repair the leak yourself or seek professional help, it’s important to address the issue promptly to avoid further damage and maintain optimal cooling in your home or office.
Now that you understand the repair process, you’re equipped to take action and safeguard the performance and efficiency of your air conditioning system.
Conclusion
Detecting and repairing a leak in your air conditioning system is crucial for maintaining its efficiency, performance, and longevity. By promptly identifying and addressing refrigerant leaks, you can prevent further damage, reduce energy consumption, and contribute to environmental preservation.
In this guide, we explored the importance of leak detection and the signs that indicate a potential leak. We discussed various methods of leak detection, including visual inspection, the UV dye test, electronic leak detection, pressure testing, and the soap bubble test. Each method has its advantages and can be useful in different scenarios. However, it’s important to remember that some methods, like the electronic leak detector, may require professional expertise for accurate results.
Once a leak is detected, it’s essential to take immediate action. Depending on the severity and complexity of the leak, you can attempt the repair yourself using refrigerant leak repair kits or seek the assistance of a professional HVAC technician. Proper repair techniques, following manufacturer guidelines, and testing for system integrity are necessary to ensure a successful repair.
To prevent future leaks and maintain the efficiency of your air conditioning system, regular maintenance is key. Scheduling annual maintenance inspections with a professional technician will help identify potential issues and address them before they escalate into major problems.
By being proactive in leak detection and repair, you can enjoy optimal cooling performance, lower energy costs, and a more sustainable environment. Remember, when it comes to your air conditioning system, early detection and timely repair are crucial for long-lasting comfort and efficiency.
Thank you for reading our comprehensive guide on how to find and repair a leak in your air conditioning system. We hope this information has been helpful in assisting you with maintaining a functional and effective cooling system in your home or office.
Frequently Asked Questions about How To Find A Leak In Air Conditioning System
Was this page helpful?
At Storables.com, we guarantee accurate and reliable information. Our content, validated by Expert Board Contributors, is crafted following stringent Editorial Policies. We're committed to providing you with well-researched, expert-backed insights for all your informational needs.