Articles
How To Find Roof Leak
Modified: October 20, 2024
Learn how to find roof leaks with our informative articles. Discover effective methods and tips to identify and fix leaks in your roof.
(Many of the links in this article redirect to a specific reviewed product. Your purchase of these products through affiliate links helps to generate commission for Storables.com, at no extra cost. Learn more)
Introduction
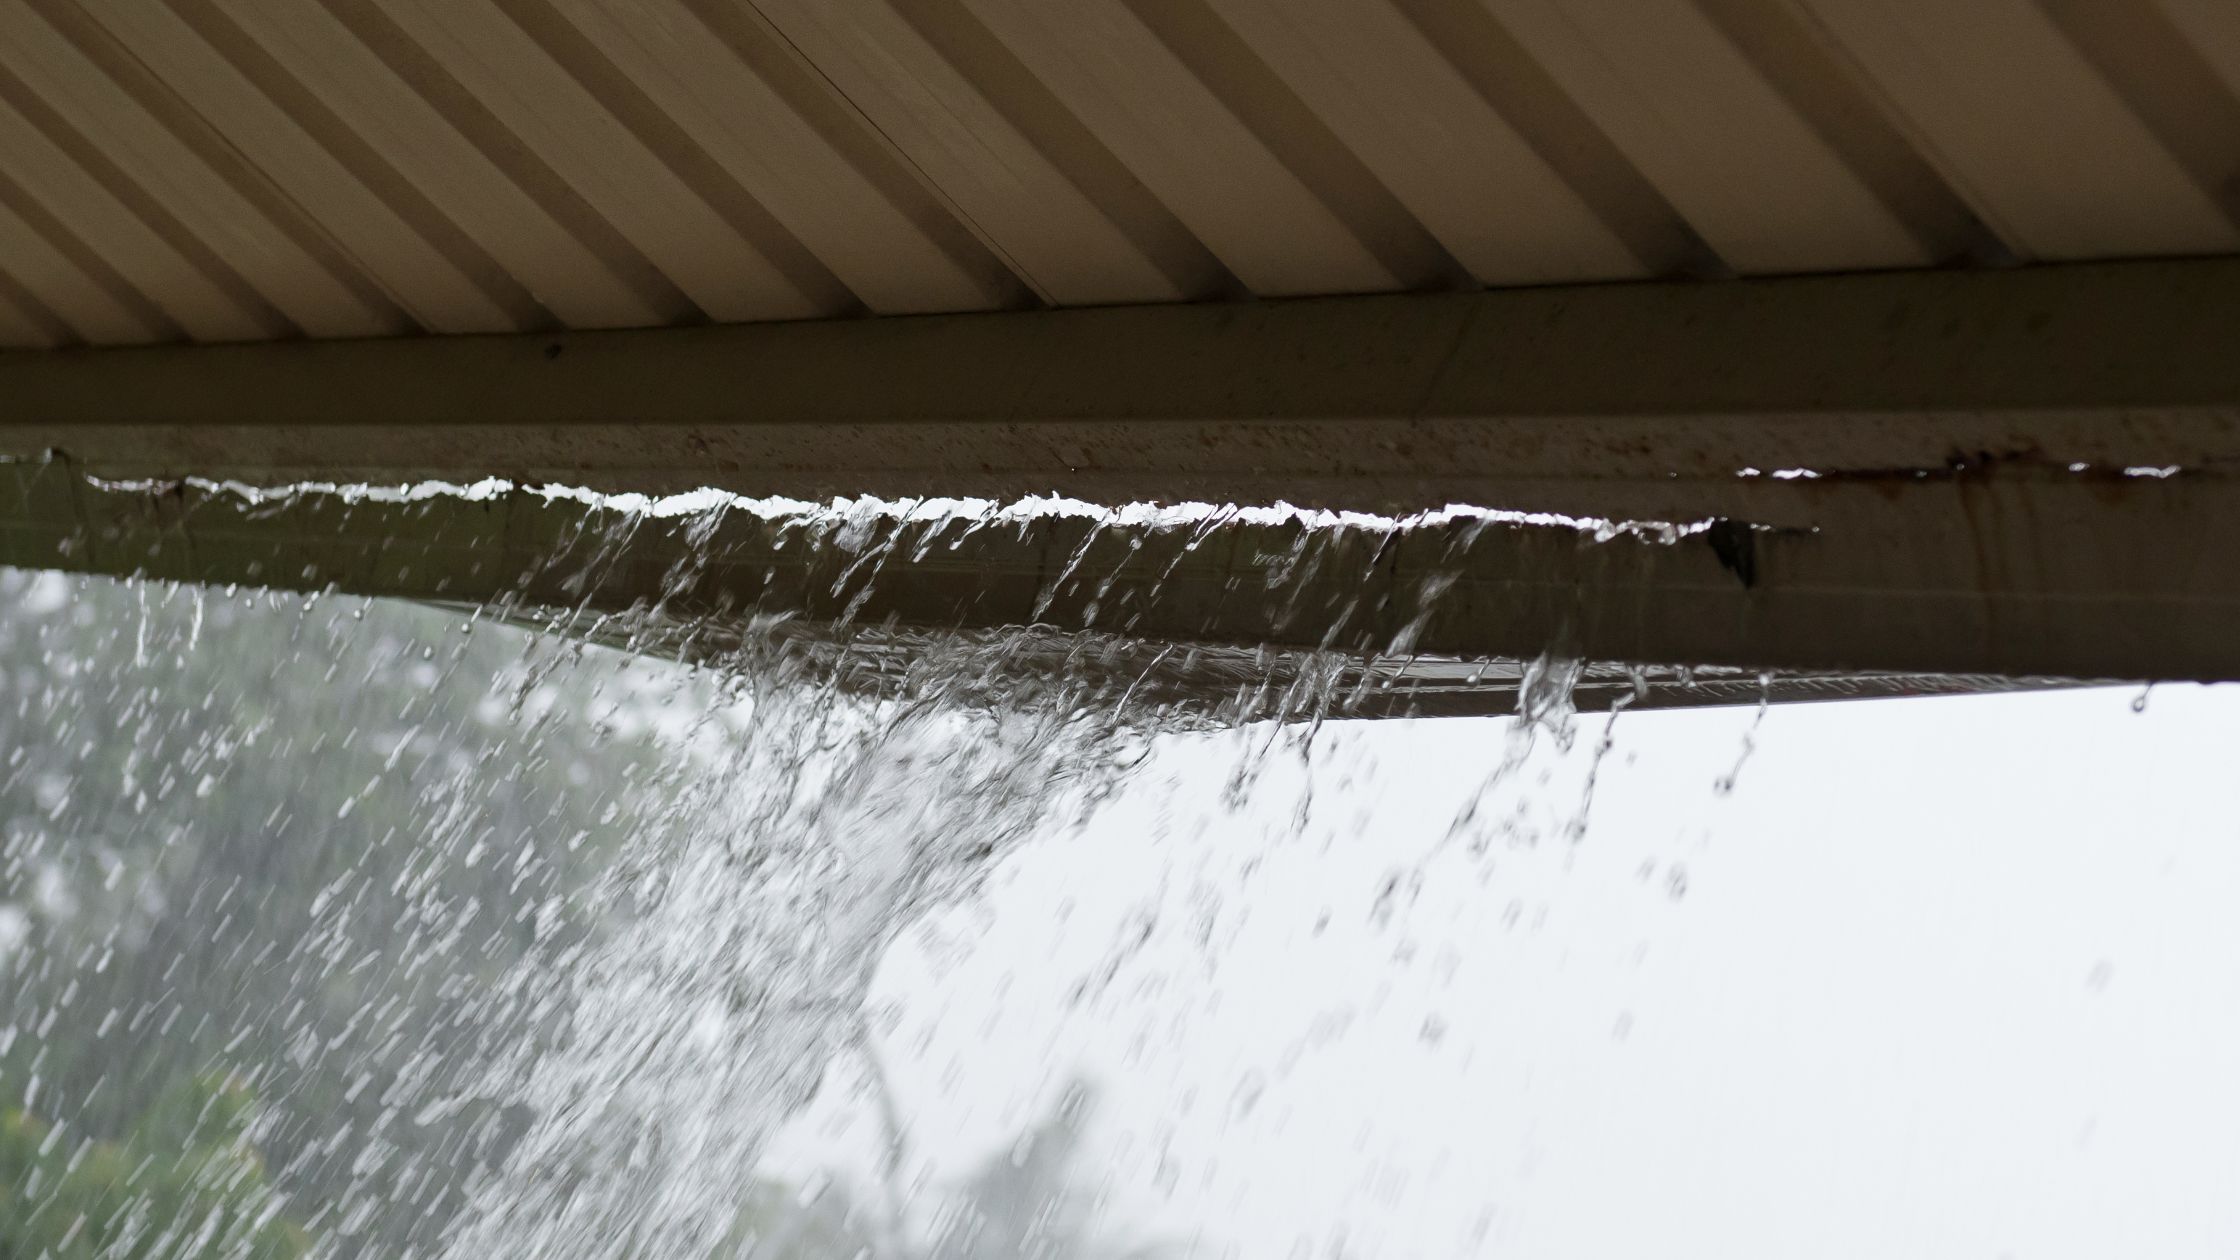
Dealing with a roof leak can be a homeowner’s worst nightmare. Not only can it cause significant damage to your property, but it can also be a frustrating and time-consuming problem to fix. However, by quickly identifying the source of the leak and taking appropriate steps to address it, you can prevent further damage and minimize the inconvenience it causes.
In this article, we will guide you through the process of finding a roof leak and provide you with tips on how to fix it. Whether you have a shingle roof, a flat roof, or any other type of roofing system, the methods outlined here can help you locate the source of the leak and effectively repair it.
So, if you’re ready to tackle that pesky roof leak head-on, let’s dive in and learn how to find and fix it!
Key Takeaways:
- Quickly identify the source of a roof leak by starting from the inside, inspecting the attic, and checking the roof for obvious signs. Utilize a hose to simulate rain and document your findings for future reference.
- Thoroughly inspect the shingles, flashing, ventilation system, chimney, and skylights to identify potential issues contributing to roof leaks. Promptly address any problems and consult a professional if needed to prevent further damage.
Read more: How To Find A Roof Leak With No Attic
Identifying the Source of Roof Leak
When you notice a water stain on your ceiling or experience a drip during a rainstorm, it’s important to act quickly to identify the source of the roof leak. Here are some steps you can take to successfully locate the source:
- Start from the inside: Begin your investigation by inspecting the area from inside your home. Look for water stains on the ceiling or walls, as these can indicate the general location of the leak. Keep in mind that the point where water enters your home may not be directly below the leak, as water can travel along structural elements before finding its way inside.
- Inspect the attic: Head up to your attic with a flashlight and closely examine the area near the water stains or damp spots. Look for signs of water, such as wet insulation or discolored wood. Follow the trail of the water to try and determine the entry point of the leak.
- Check the roof for obvious signs: Once you have an idea of the general area where the leak may be originating, it’s time to head outside and inspect your roof. Keep an eye out for missing or damaged shingles, as these can often be the culprits behind roof leaks. Pay close attention to areas where the roof meets other structures such as chimneys, vents, or skylights, as these are common areas for leaks to occur.
- Utilize a hose: If you’re unable to locate the source of the leak visually, you can simulate rain by using a hose. Start at the lowest point of the roof and gradually work your way up, saturating different sections of the roof with water. Have someone inside the attic monitoring for any signs of water penetration. This can help you pinpoint the exact location of the leak.
- Document your findings: As you investigate, it’s important to take photos or notes to document your findings. This can be helpful if you need to consult with a professional roofer or insurance company later on.
By following these steps and carefully inspecting your roof, you should be able to identify the source of the leak. Once you know where it’s coming from, you can move on to the next steps of fixing the issue.
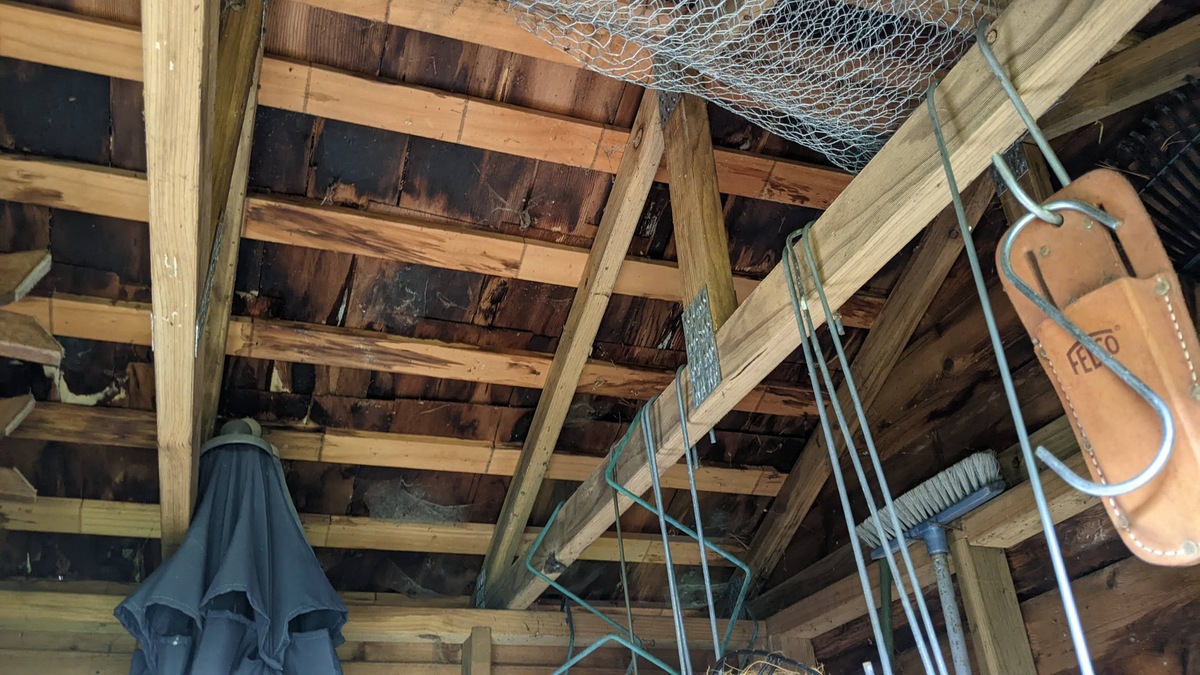
Inspecting the Attic
When it comes to finding a roof leak, inspecting the attic is an important step in the process. The attic can provide valuable clues about the origin and extent of the leak. Here’s what you need to do:
- Bring a flashlight: Before entering the attic, make sure you have a reliable and bright flashlight to help you navigate through the space. Attics are often dark and cramped, so proper lighting is essential for a thorough inspection.
- Look for water stains: Once inside the attic, scan the area for any signs of water stains or discoloration. Water stains on the underside of the roof decking or on the attic floor can indicate the presence of a roof leak. Pay attention to the area directly above the water stains, as this is likely the location of the leak.
- Check for mold or mildew: If there has been a longstanding roof leak, there’s a chance that mold or mildew may have started to grow. Look for any signs of mold or mildew on the attic walls, insulation, or ceiling. Mold growth indicates a persistent moisture issue that needs to be addressed promptly.
- Inspect the insulation: Wet or damp insulation can be a clear indication of a roof leak. Check the insulation carefully, especially around the suspected leak area. If you find spongy or wet insulation, it’s a strong indicator that water is penetrating through the roof and into the attic space.
- Examine roof penetration points: Pay close attention to areas where the roof meets different structures such as vents, chimneys, or skylights. Inspect the flashing around these penetration points, as it is a common area for leaks to occur. Look for any signs of damage, such as cracked or deteriorated flashing, and note any potential issues you find.
By thoroughly inspecting your attic, you can gather important information about the roof leak and its extent. This information will be helpful when you move on to fixing the leak and preventing further damage to your home.
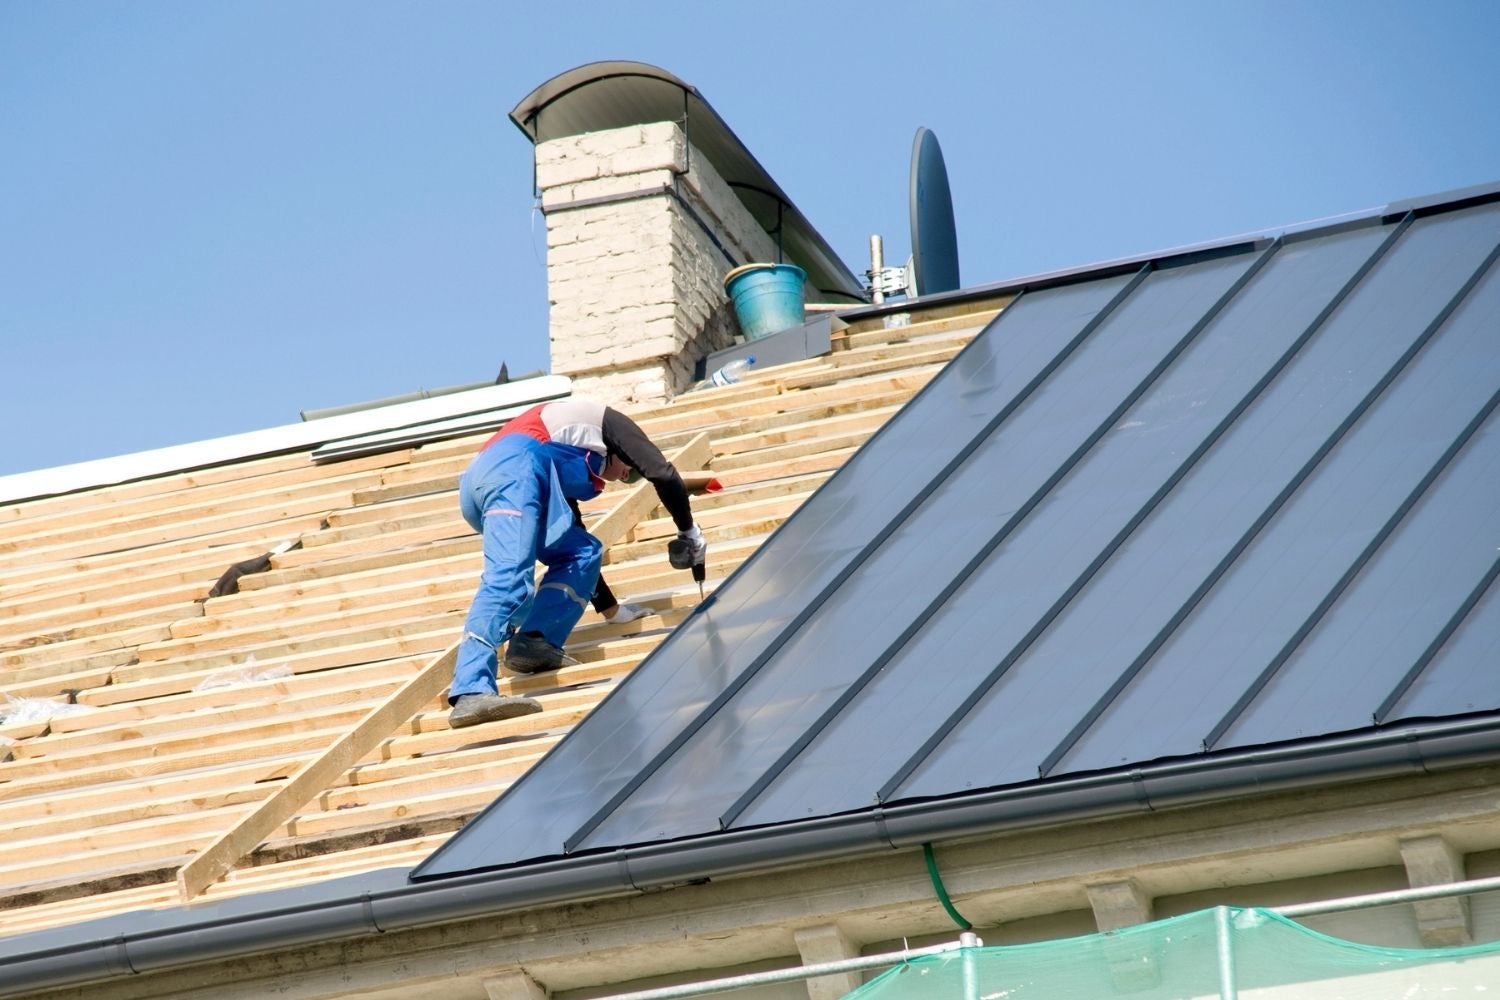
Examining the Shingles
When it comes to finding the source of a roof leak, examining the shingles is a crucial step. Shingles can become damaged or deteriorated over time, leading to water infiltration. Here’s how you can inspect your shingles to identify any issues:
- Inspect from a safe distance: Start by examining your roof from the ground or a safe vantage point using binoculars. Look for any obvious signs of damage, such as missing or cracked shingles. Take note of any areas that warrant a closer look.
- Climb onto the roof: If it is safe to do so, carefully climb onto your roof using a ladder. Ensure that you follow proper safety precautions and have someone nearby to assist you. Once on the roof, walk carefully and avoid placing excessive weight on any single spot.
- Check for missing or damaged shingles: Inspect the entire roof surface, paying close attention to the condition of the shingles. Look for any missing, cracked, or curled shingles. These can all potentially allow water to enter your home.
- Examine the flashing: Flashing is the metal or rubber material that is installed around roof penetrations such as chimneys, vents, and skylights. Inspect the flashing to ensure it is securely in place and free from any damage or deterioration. Damaged flashing can be a common cause of roof leaks.
- Look for granule loss: Asphalt shingles often have protective granules on their surface. Over time, these granules can become loose or deteriorate, which can leave the shingles vulnerable to water infiltration. Check for excessive granule loss, indicating shingle deterioration.
- Check for sagging or uneven areas: A sagging or uneven roof surface can indicate structural issues or water damage. Carefully walk the roof and look for any areas that appear uneven or sunken. These areas may require further inspection to determine the cause of the problem.
By carefully examining the shingles on your roof, you can identify any areas of concern that may be contributing to the roof leak. Keeping a close eye on the condition of your shingles and promptly addressing any issues can help prevent future leaks and extend the lifespan of your roof.
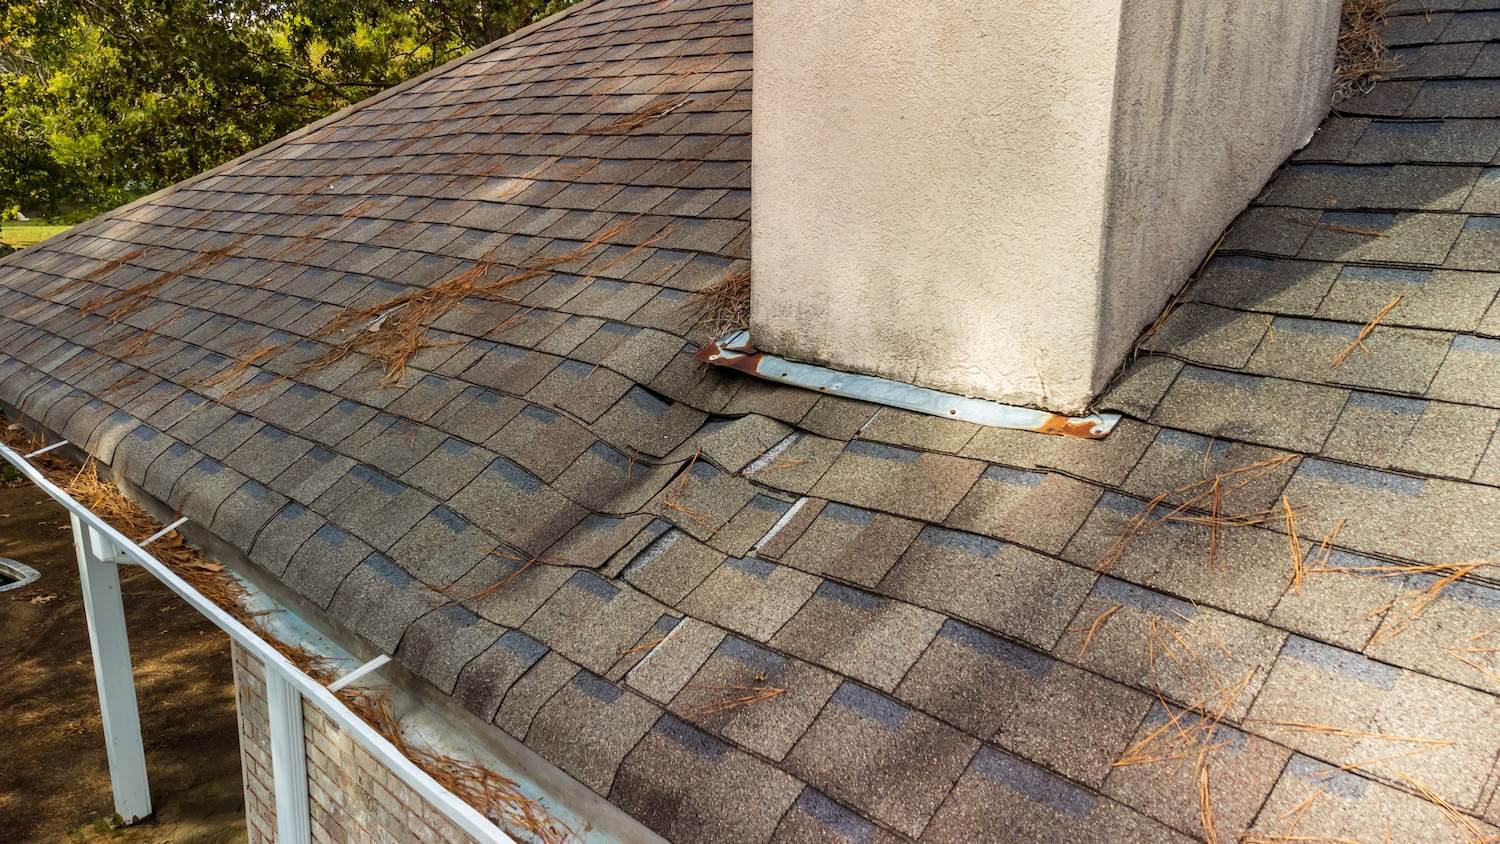
Checking for Cracked Flashing
When it comes to finding the source of a roof leak, cracked flashing is a common culprit. Flashing is a material, often made of metal or rubber, that is used to seal and protect the areas where the roof meets other structures such as chimneys, vents, and skylights. Over time, flashing can become damaged or deteriorated, leading to water infiltration. Here’s how you can check for cracked flashing:
- Inspect the flashing visually: Start by visually inspecting the flashing around your roof penetrations from a safe vantage point, such as the ground or a ladder. Look for any obvious signs of damage, such as cracks, gaps, or lifting. Take note of any areas that require a closer look.
- Climb onto the roof: If it is safe to do so, carefully climb onto your roof using a ladder and follow proper safety precautions. Pay attention to your footing and avoid placing excessive weight on any single spot. Once on the roof, carefully walk to the areas where the flashing needs closer inspection.
- Check for cracks or gaps: Carefully examine the flashing around roof penetrations such as chimneys, vents, and skylights. Look for any cracks, gaps, or separations in the flashing material. These can allow water to seep in and cause roof leaks.
- Inspect the condition of the sealant: Flashing is often sealed with a waterproof sealant to provide an additional layer of protection. Check the condition of the sealant and look for any signs of cracking, peeling, or deterioration. Damaged sealant can compromise the effectiveness of the flashing and lead to leaks.
- Pay attention to dislodged flashing: In some cases, flashing can become dislodged or pulled away from the roof surface. Inspect the flashing to ensure it is securely in place and properly fastened. If you notice any loose or displaced flashing, take note of it as it may need to be repaired or replaced.
By checking for cracked flashing and addressing any issues promptly, you can prevent water from entering your home and causing further damage. If you are unsure about the condition of your flashing or how to repair it, it is recommended to consult with a professional roofer for assistance.
Inspect your roof regularly for any signs of damage such as missing shingles, cracked flashing, or water stains. Addressing these issues promptly can help prevent a roof leak.
Read more: How To Find A Leak In An Air Conditioner
Examining the Ventilation System
When it comes to finding the source of a roof leak, the ventilation system can sometimes be overlooked. Proper ventilation is essential for maintaining a healthy and functional roof. Improper ventilation can lead to moisture buildup, which can contribute to roof leaks and other issues. Here’s how to examine your ventilation system:
- Check the intake vents: Start by inspecting the intake vents on your roof, which allow fresh air to enter the attic. Look for any signs of blockage, such as debris, leaves, or animal nests. A blocked intake vent can hinder proper airflow and lead to moisture buildup.
- Inspect the exhaust vents: Exhaust vents allow hot air and moisture to escape from the attic. Check for any obstructions, such as bird nests or debris, that may be blocking the exhaust vents. Restricted airflow can lead to excess moisture being trapped in the attic, potentially causing roof leaks.
- Ensure proper venting: It’s important to ensure that your ventilation system is properly balanced. This means having an equal number of intake and exhaust vents to allow for adequate airflow. If you notice an imbalance, it may be necessary to adjust or install additional vents to ensure proper ventilation.
- Look for signs of moisture: During your inspection, keep an eye out for any signs of moisture or condensation in the attic. This can indicate poor ventilation and potential roof leak issues. Moisture can cause the wood and insulation in the attic to rot, leading to structural damage and the growth of mold and mildew.
- Check for damaged or missing vent caps: Vent caps are protective covers located on the tops of exhaust vents. These caps are designed to keep out rain and debris while allowing for proper airflow. Inspect the vent caps for any damage or missing pieces, as this can compromise their effectiveness.
By examining your ventilation system and ensuring it is functioning properly, you can help prevent moisture buildup and the associated issues that can lead to roof leaks. If you notice any problems with your ventilation system or are unsure about how to inspect it, it’s recommended to consult with a professional roofer for guidance.
Inspecting the Chimney and Skylights
When it comes to finding the source of a roof leak, chimneys and skylights are common areas where issues can arise. These structures have unique flashing and sealing requirements that, if compromised, can lead to water intrusion. Here’s how you can inspect your chimney and skylights:
- Examine the chimney flashing: Start by visually inspecting the flashing around your chimney. Look for any signs of damage, such as cracks, gaps, or lifting. Pay close attention to the intersection between the chimney and the roof, as this is a common area for leaks to occur. If you notice any issues with the flashing, it may need to be repaired or replaced.
- Check for cracked or damaged chimney bricks: Inspect the bricks or masonry around your chimney for any cracks or signs of damage. Damaged bricks can allow water to seep in and cause leaks. If you notice any issues, it’s important to address them promptly to prevent further damage.
- Inspect the chimney cap and crown: The chimney cap and crown are designed to protect the chimney from water intrusion. Check for any cracks or deterioration in these components. Additionally, make sure that the chimney cap is securely fastened and free from debris, as a blocked chimney cap can cause water to back up and enter the home.
- Examine the skylight flashing: Inspect the flashing around your skylights for any signs of damage or deterioration. Look for cracks, gaps, or lifting that may compromise the waterproofing of the skylight. Additionally, check the sealant around the skylight to ensure it is intact and providing proper protection.
- Inspect the skylight for cracks or leaks: Carefully examine the skylight itself for any cracks or signs of water infiltration. Look for condensation or water stains around the edges of the skylight, as these can indicate a leak. If you suspect a problem with your skylight, it may be necessary to consult a professional for repairs or replacement.
By thoroughly inspecting your chimney and skylights, you can identify any issues that may be contributing to roof leaks. Promptly addressing any problems will help prevent further damage to your home and ensure the longevity of your roofing system.
Identifying Roof Leaks on Flat Roofs
Flat roofs have unique characteristics and require specific methods for identifying and locating roof leaks. Due to the lack of slope, water can accumulate and pool on the surface, leading to potential leaks. Here are some steps to help you identify roof leaks on flat roofs:
- Inspect the roof membrane: The roof membrane is the key waterproofing layer on a flat roof. Inspect the entire surface for any visible signs of damage, such as punctures, cracks, or tears. Look for areas of bubbling or blistering, as they can indicate moisture beneath the membrane.
- Check roof seams: Roof seams are vulnerable points where leaks can commonly occur. Inspect the seams carefully for any separations, gaps, or deterioration in the roofing material or sealant. These areas may require additional attention and maintenance.
- Examine rooftop drains and scuppers: Flat roofs are equipped with drains and scuppers to facilitate proper water drainage. Inspect these areas for any blockages or debris that may be impeding water flow. Clogged drains or scuppers can cause water to back up and lead to leaks.
- Look for damaged flashing: Flashing is an essential component of a flat roof system, especially around rooftop penetrations such as vents, HVAC units, or pipes. Inspect the flashing for any signs of damage, deterioration, or separation. Damaged flashing can create entry points for water and contribute to leaks.
- Check for ponding water: Flat roofs can experience ponding water, which occurs when water collects and does not drain properly. Inspect the roof for areas where water tends to pool and stagnate. Ponding water can accelerate the deterioration of the roof membrane and increase the likelihood of leaks.
- Utilize a moisture meter: In some cases, roof leaks on flat roofs may not be visually noticeable. To detect hidden moisture and potential leaks, consider using a moisture meter. This tool can help identify areas with elevated moisture levels beneath the roofing material.
By closely inspecting the various components of your flat roof, you can identify problem areas and address them promptly. Regular maintenance and inspection are crucial for flat roofs to ensure their durability and prevent leaks from occurring.
Fixing a Roof Leak
Once you have identified the source of a roof leak, it’s important to take prompt action to fix it and prevent further damage to your home. The specific steps required to repair a roof leak will depend on the type of roofing system you have and the underlying cause of the leak. However, here are some general guidelines to help you fix a roof leak:
- Temporary measures: If you discover a roof leak during rainy weather and are unable to immediately repair it, you can take temporary measures to minimize the damage. Use a bucket or container to collect dripping water and place it under the leak. You can also use a tarp or plastic sheet to cover the affected area, preventing further water intrusion.
- Replace damaged shingles or tiles: If your leak is caused by damaged or missing shingles or tiles, you will need to replace them. Carefully remove the damaged pieces and replace them with new ones, ensuring they are securely fastened in place. It may be necessary to lift the surrounding shingles to properly install the new ones.
- Repair cracked flashing: If the flashing around roof penetrations or along roof seams is cracked or damaged, it will need to be repaired or replaced. Remove the old flashing and install new flashing using the appropriate techniques and materials. Ensure that the flashing is properly sealed to prevent water infiltration.
- Seal roof seams: Leaks on flat roofs often occur at the seams between the roofing materials. Clean the seam area thoroughly and apply a high-quality roofing sealant or adhesive to seal the seam. This will provide an additional layer of protection against water intrusion.
- Clear blocked drains or scuppers: If your flat roof has drainage systems such as drains or scuppers, ensure they are clear from any debris or blockages. Remove any accumulated leaves, branches, or other obstructions that prevent proper water flow. This will help prevent water from ponding and causing leaks.
- Consult a professional: In some cases, roof leaks may require the expertise of a professional roofer. If you are unsure about the cause of the leak or how to repair it, it is recommended to consult with a professional. They can assess the situation, provide expert guidance, and ensure the leak is properly resolved.
Remember, safety should always be a priority when working on your roof. If you are uncomfortable with heights, lack the necessary tools, or are unsure about any aspect of the repair process, it is best to seek professional assistance.
By promptly addressing roof leaks and conducting necessary repairs, you can safeguard your home from further damage and ensure the longevity of your roofing system.
Read more: How To Find AC Leak
Conclusion
Roof leaks can be a frustrating challenge for homeowners, but with proper identification and timely action, they can be resolved effectively. By following the steps outlined in this article, you can successfully identify the source of a roof leak and take the necessary steps to fix it.
Start by identifying the general area of the leak from inside your home, then inspect the attic to gather more information and check for signs of water damage. From there, carefully examine the shingles, flashing, ventilation system, chimney, and skylights for any visible issues that may contribute to leaks. For flat roofs, be sure to inspect the roof membrane, seams, and drainage systems.
Once you have located the source of the leak, it’s crucial to take prompt action to fix it. Replace damaged shingles, repair cracked flashing, seal roof seams, clear blocked drains or scuppers, and consult with professionals if needed. Temporary measures can be taken during rainy weather to minimize damage until a proper repair can be performed.
Remember to prioritize safety when working on your roof and seek professional help if you are unsure or uncomfortable with any aspect of the repair process.
By addressing roof leaks promptly and effectively, you can prevent further damage to your home, protect its structural integrity, and maintain the longevity of your roofing system.
Frequently Asked Questions about How To Find Roof Leak
Was this page helpful?
At Storables.com, we guarantee accurate and reliable information. Our content, validated by Expert Board Contributors, is crafted following stringent Editorial Policies. We're committed to providing you with well-researched, expert-backed insights for all your informational needs.

0 thoughts on “How To Find Roof Leak”