Articles
How To Fix An Attic Ladder
Modified: December 7, 2023
Learn how to fix an attic ladder with our informative articles. Find step-by-step instructions and helpful tips to ensure a safe and sturdy repair.
(Many of the links in this article redirect to a specific reviewed product. Your purchase of these products through affiliate links helps to generate commission for Storables.com, at no extra cost. Learn more)
Introduction
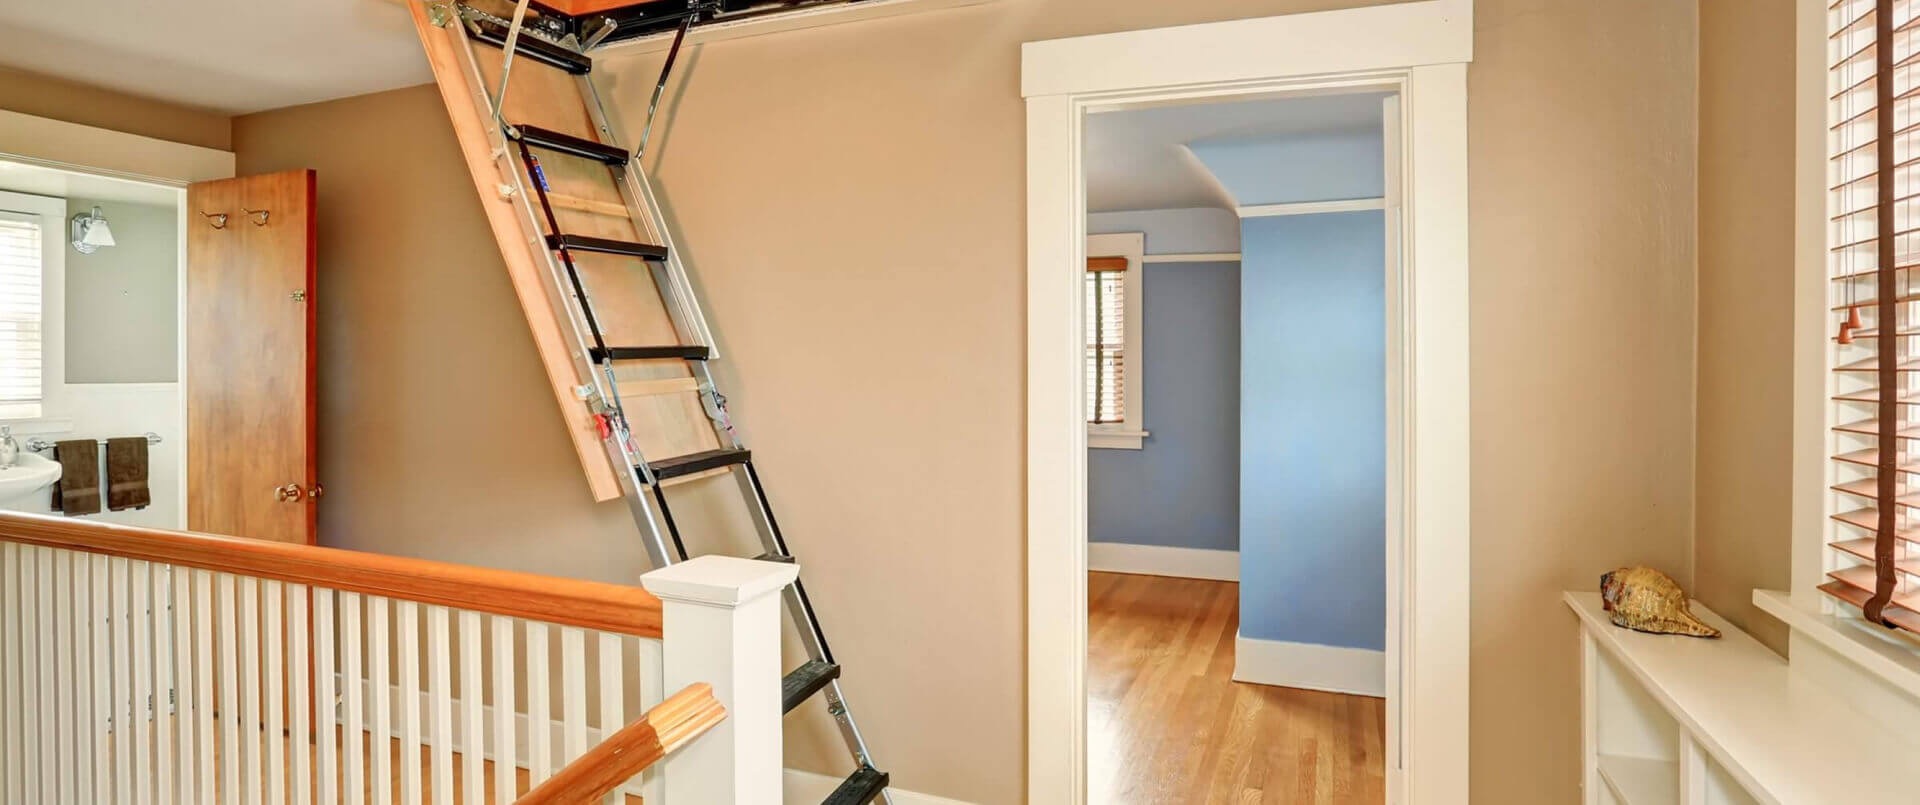
Welcome to this comprehensive guide on how to fix an attic ladder. If you have an attic in your home, then having a properly functioning attic ladder is essential for easy access to this extra storage space. However, over time, attic ladders can become worn out, unstable, or even completely broken.
Fixing an attic ladder may seem like a daunting task, but with the right knowledge and tools, you can successfully restore it to its former functionality. In this guide, we will take you through the step-by-step process of assessing the condition of your attic ladder, removing the old ladder, preparing the opening for installation, installing a new ladder, securing it in place, testing its stability, and applying finishing touches.
By following these steps, you’ll be able to fix your attic ladder and regain easy access to your attic space. So let’s get started!
Key Takeaways:
- Easily assess, remove, and install a new attic ladder by following a step-by-step guide. Prioritize safety, gather tools, and apply finishing touches for a fully functional and secure access to your attic space.
- Thoroughly test and secure the new attic ladder to ensure stability and functionality. Apply finishing touches for a polished and professional finish, enhancing both safety and appearance.
Read more: How To Fix Attic Ladder Spring
Step 1: Assess the Condition of the Attic Ladder
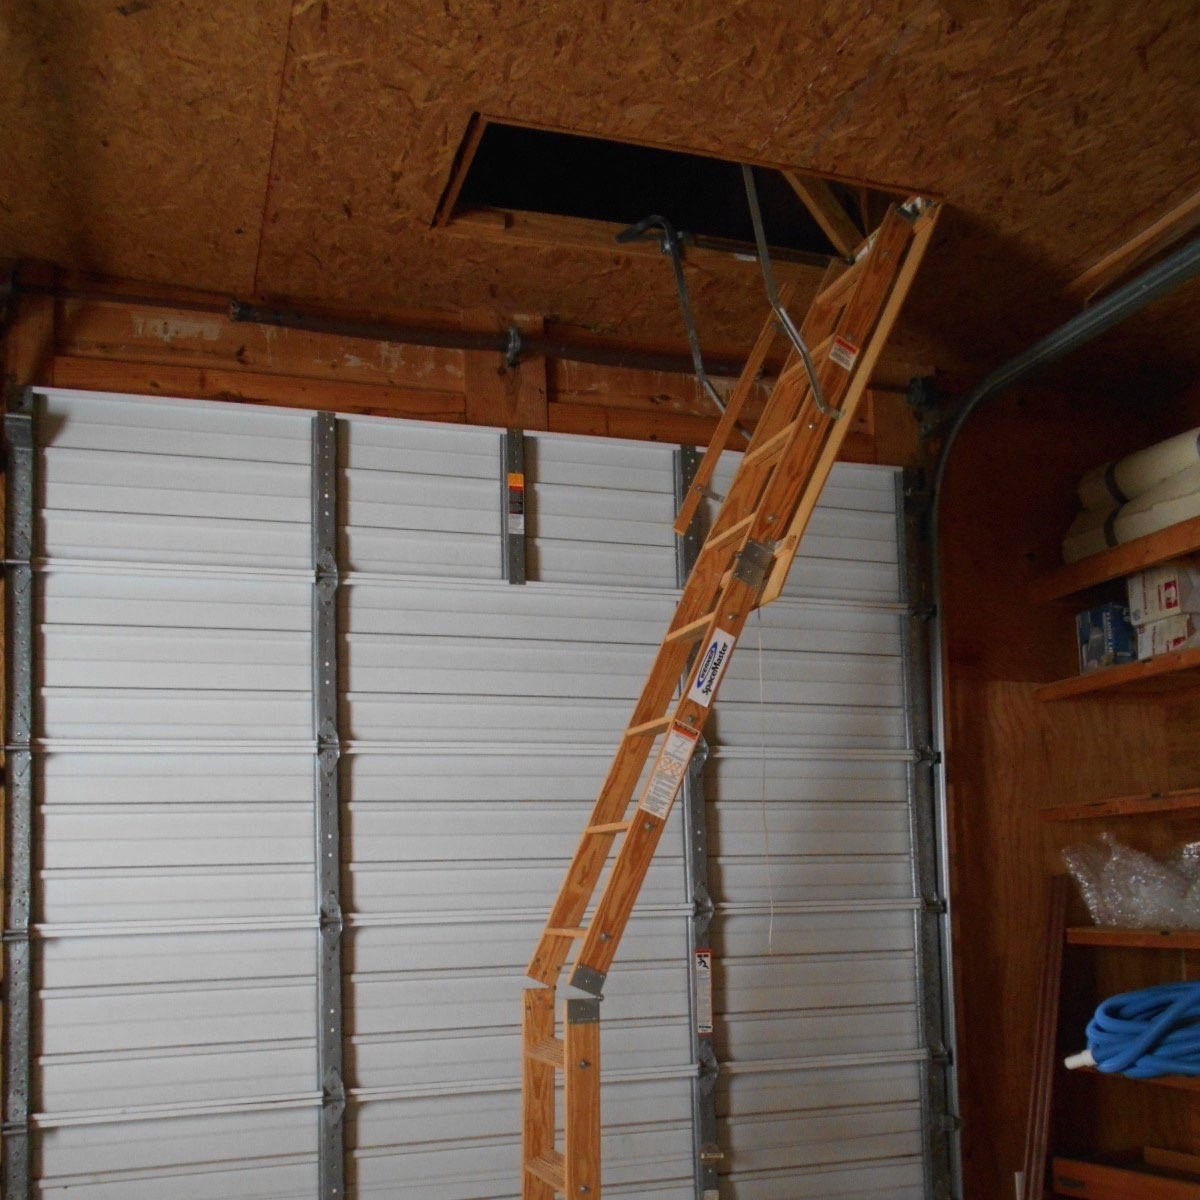
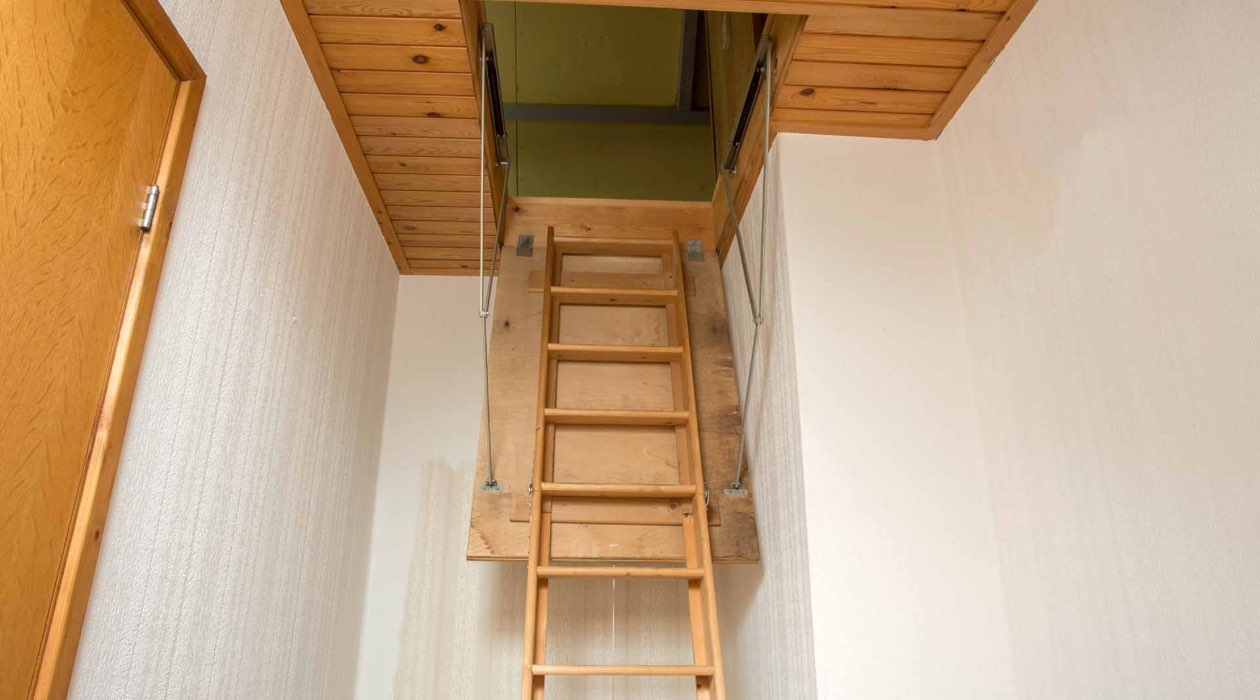
The first step in fixing an attic ladder is to assess its condition. Carefully inspect the ladder to identify any visible signs of damage, such as loose or missing screws, broken hinges, sagging steps, or worn-out rails. It’s important to address these issues before proceeding with any repairs or replacements.
Start by fully extending the ladder and ensuring that it locks securely in place. Test the ladder by putting weight on each step and checking for any wobbling or instability. If you notice any movement or hear creaking sounds, this may indicate loose or damaged components that need attention.
Next, check the hinges that connect the ladder to the attic opening. These hinges should be sturdy and in good condition, allowing the ladder to fold and unfold smoothly. If you find any cracks or broken parts, it’s necessary to replace them.
Inspect the ladder steps for any signs of wear and tear. Look for splintered wood, cracked plastic, or loose fasteners. If the steps are damaged, it’s crucial to repair or replace them to ensure safe and comfortable use of the ladder.
While assessing the condition of your attic ladder, take note of its measurements, such as the height, width, and depth. These measurements will be useful when selecting a replacement ladder, ensuring a proper fit in your attic space.
Remember, if you are uncertain about the severity of the issues or lack the necessary tools and expertise, it’s always best to consult a professional. They can provide a thorough assessment and recommend the appropriate course of action.
Once you have completed a thorough assessment of the condition of your attic ladder, you can move on to the next step: gathering the necessary tools and materials.
Step 2: Gather the Necessary Tools and Materials
Before you begin the process of fixing your attic ladder, it is important to gather all the necessary tools and materials. Having everything ready beforehand will streamline the repair process and prevent any unnecessary delays. Here is a list of the tools and materials you will need:
- Screwdriver set: A set of screwdrivers with various sizes and types, such as a Phillips head and a flathead screwdriver, will be handy for removing and installing screws.
- Wrench: A wrench will be necessary for tightening or loosening nuts and bolts.
- Measuring tape: This tool will help you accurately measure the dimensions of your existing ladder and the opening in your attic.
- Safety goggles and gloves: It is crucial to protect your eyes and hands during the repair process, so make sure you have a pair of safety goggles and work gloves.
- Replacement parts: Depending on the condition of your attic ladder, you may need to replace certain components, such as hinges, screws, or ladder steps. Make sure you have the necessary replacement parts on hand.
- Sanding block or sandpaper: If there are any rough or splintered areas on the ladder steps, a sanding block or sandpaper can help smooth them out.
- Paint or finish: If you plan to refinish or repaint your attic ladder after repairing it, be sure to have the appropriate paint or finish ready.
- Caulking gun and caulk: If there are any gaps or cracks around the attic ladder or the opening, a caulking gun and caulk can help seal them properly.
- Drop cloth or tarp: To protect the surrounding area from debris or paint, lay down a drop cloth or tarp before you start the repair process.
By having all these tools and materials organized and within reach, you can efficiently tackle the task of fixing your attic ladder without any interruptions.
Now that you have gathered everything you need, it’s time to move on to step 3: removing the old attic ladder.
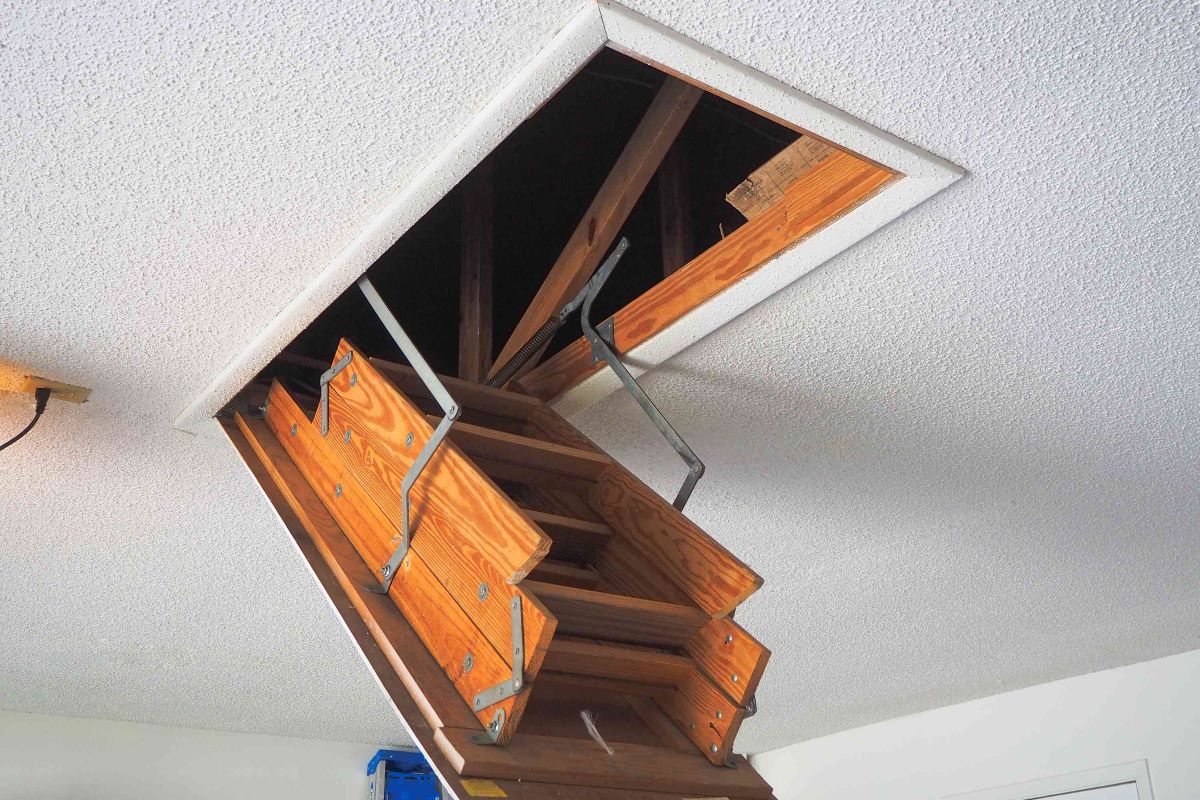
Step 3: Remove the Old Attic Ladder
In order to fix your attic ladder, you first need to remove the old one. Follow these steps to safely remove the old attic ladder:
- Clear the area: Before you begin, make sure the surrounding area is clear of any obstacles or debris. This will give you enough space to work and prevent any accidents.
- Secure the ladder in place: Double-check that the ladder is securely locked in its extended position. This will prevent any sudden movements or collapses while you are working on removing it.
- Remove any attachments: If there are any attachments, such as handrails or supports, remove them first. This may require loosening screws or bolts using a screwdriver or wrench.
- Remove the ladder step by step: Starting from the topmost step, remove the screws or bolts that secure the ladder to the attic opening frame. Gradually work your way down, removing screws or bolts at each step until the ladder is fully detached.
- Enlist a helper: Depending on the size and weight of your attic ladder, you may need assistance to safely remove it. It is recommended to have someone assist you in holding and lowering the ladder to the ground.
- Clear the space: Once the old attic ladder is removed, clear any remaining debris or fragments of the ladder from the attic opening.
Keep in mind that attic ladders can be heavy and cumbersome, so it is important to use proper lifting techniques and take necessary safety precautions. If the ladder seems too heavy or you are unsure about removing it on your own, consider seeking assistance from a professional to ensure your safety.
With the old attic ladder successfully removed, you are now ready to move on to step 4: preparing the opening for installation.
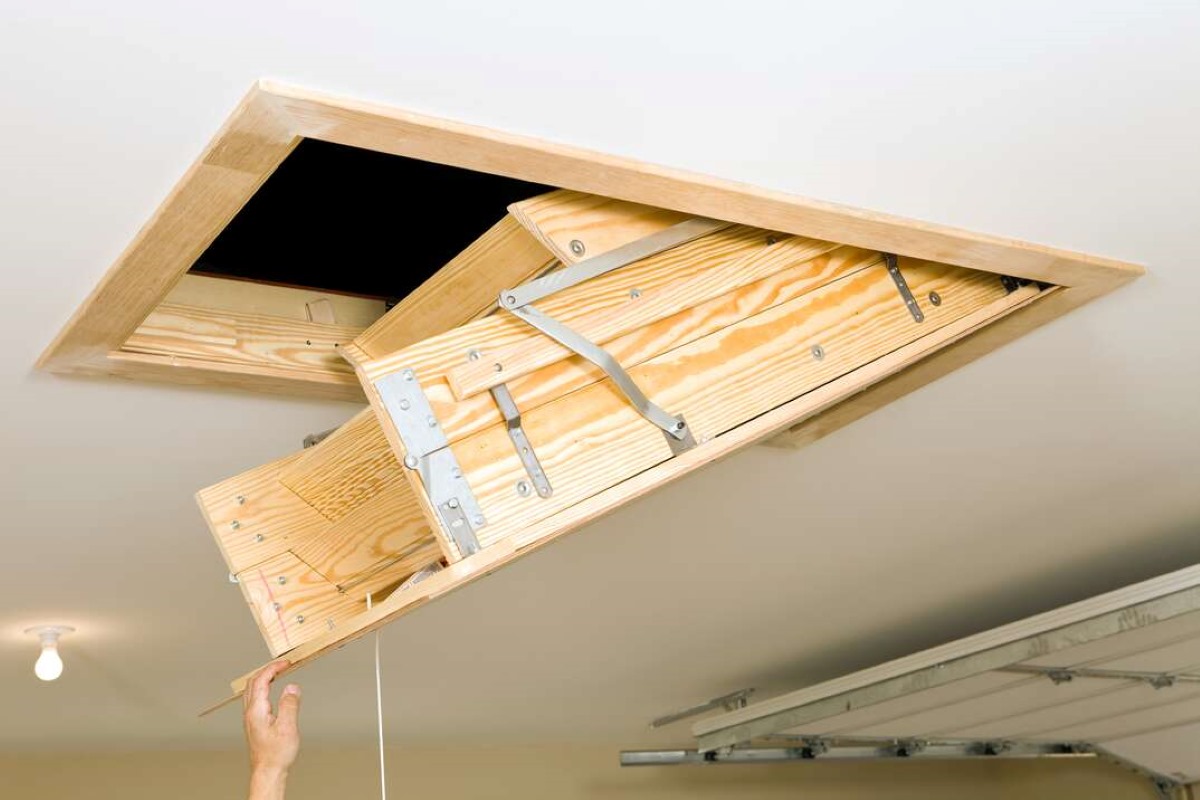
Step 4: Prepare the Opening for Installation
Now that you have removed the old attic ladder, it’s time to prepare the opening for the installation of the new ladder. Follow these steps to ensure a proper fit and secure installation:
- Clean the opening: Thoroughly clean the attic opening, removing any dirt, dust, or debris. This will provide a clean and smooth surface for the new ladder to be installed.
- Measure the opening: Use a measuring tape to obtain precise measurements of the attic opening. Record the height, width, and depth of the opening. These measurements will help you select the right size of ladder for your needs.
- Check for level: Use a level tool to ensure that the attic opening is level and not slanted. If you notice any unevenness, you may need to make adjustments or use shims to create a level surface for the new ladder.
- Inspect the frame: Examine the attic opening frame for any signs of damage or rot. Repair or replace any compromised areas to ensure the new ladder has a solid and secure base.
- Apply insulation: If desired, you can improve energy efficiency by applying insulation around the attic opening. This can help prevent drafts and minimize temperature transfer between the attic and the rest of the house.
- Paint or finish the frame: If you have decided to refinish or repaint the attic ladder frame, now is the time to do so. Apply the appropriate paint or finish and allow it to dry completely before proceeding with the installation.
- Check clearances: Ensure there is enough clearance around the attic opening to comfortably accommodate the new ladder. Make any necessary adjustments to ensure a smooth and unobstructed operation.
By properly preparing the opening for installation, you are setting the foundation for a seamless and secure attachment of the new attic ladder. Once you have completed these steps, you are ready to move on to the exciting part: installing the new ladder!
When fixing an attic ladder, start by checking for any loose or damaged parts. Tighten any screws or bolts, and replace any broken or worn-out components. It’s also important to ensure that the ladder is properly aligned and lubricated for smooth operation.
Read more: How To Measure An Attic Ladder
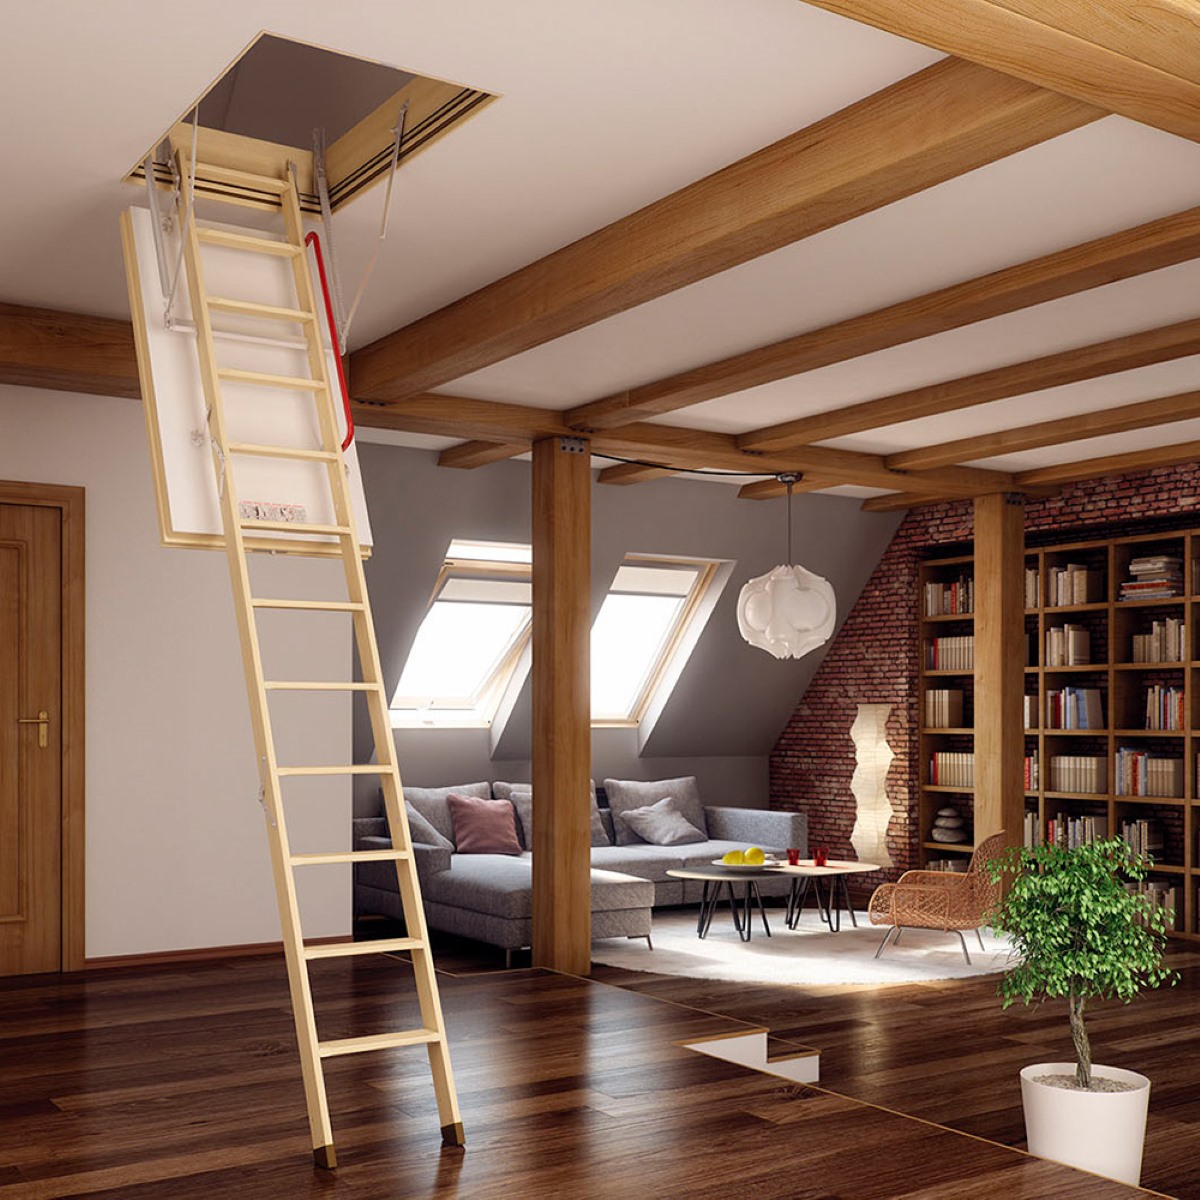
Step 5: Install the New Attic Ladder
Now that you have prepared the opening, it’s time to install the new attic ladder. Follow these steps to ensure a proper and secure installation:
- Read the instructions: Carefully read the manufacturer’s instructions that come with the new attic ladder. Familiarize yourself with the steps and precautions provided.
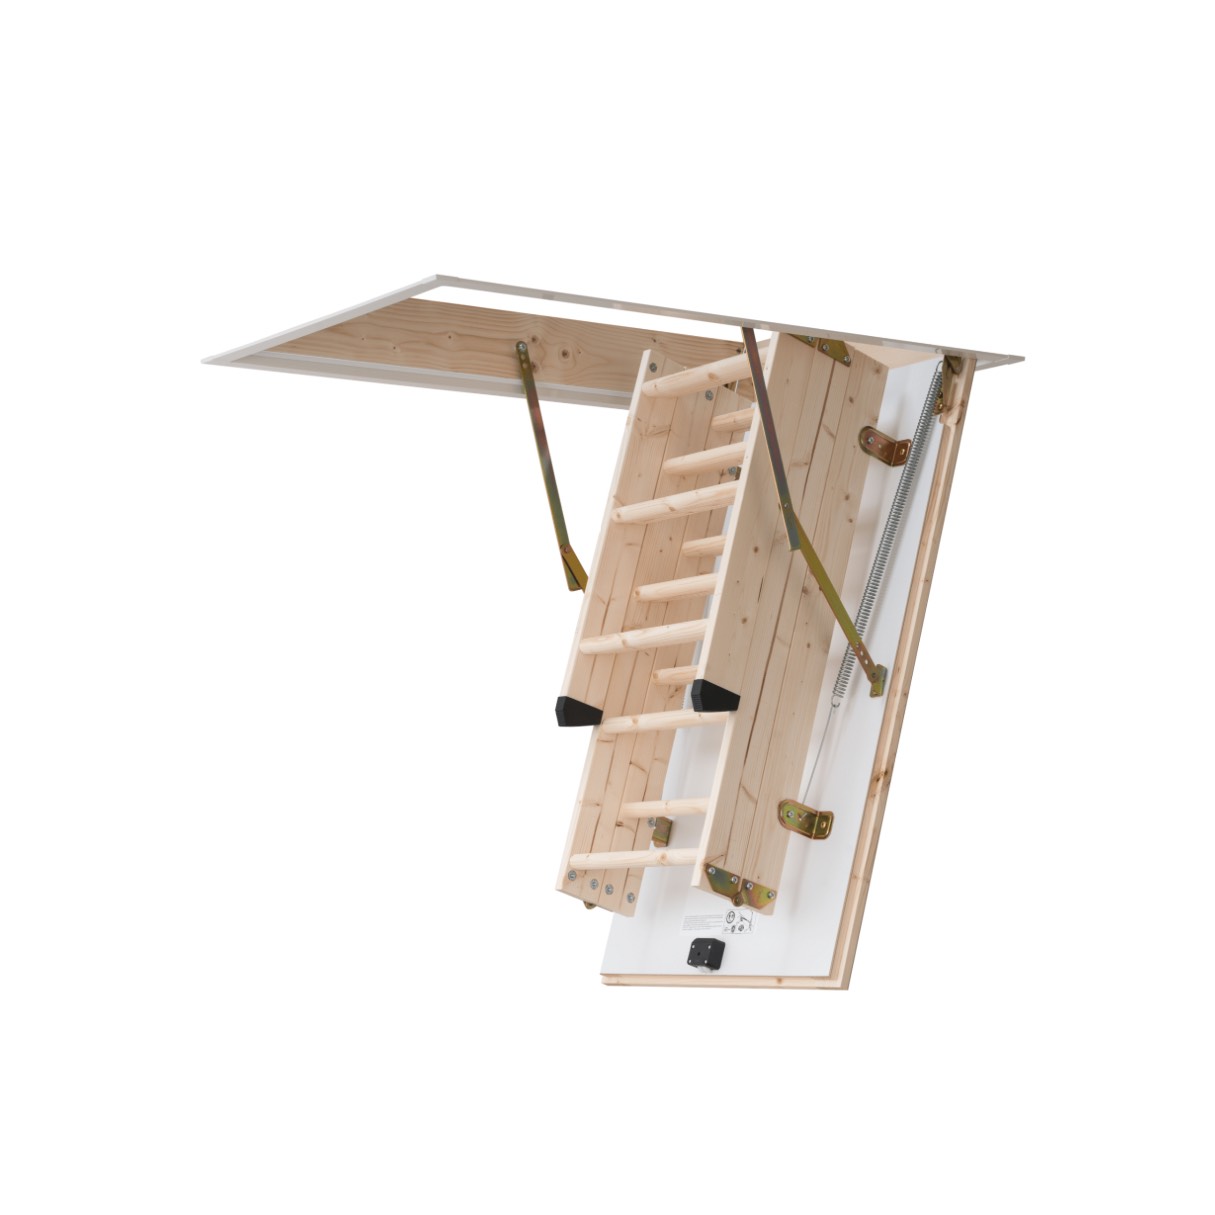
- Position the ladder: Position the new ladder inside the attic opening, aligning it properly with the frame. Ensure that the hinge-side of the ladder is facing the direction you want it to fold.
- Attach the hinge plates: Follow the manufacturer’s instructions to attach the hinge plates to the ladder and the attic opening frame. Use the provided screws or bolts to secure them in place. Ensure that the hinges are properly aligned for smooth folding and unfolding of the ladder.
- Test the operation: Once the hinge plates are attached, test the operation of the ladder. Fold and unfold it several times to ensure it moves smoothly and locks securely in both positions.
- Secure the ladder: Once you are satisfied with the operation, secure the ladder to the attic opening frame using the screws or bolts provided. Make sure to tighten them securely, but be careful not to overtighten and damage the ladder or the frame.
- Attach the ladder feet: Attach the ladder feet to the bottom of the ladder. Make sure they are securely fastened and provide stability when the ladder is in use.
During the installation process, it is important to exercise caution and follow the instructions provided by the manufacturer. Take your time to ensure that each step is completed accurately and securely.
Once the new attic ladder is installed, you are one step closer to having a fully functional and safe access to your attic. The next step is to secure the ladder in place, so let’s move on to step 6.
Step 6: Secure the Ladder in Place
Once you have installed the new attic ladder, it’s important to secure it in place to ensure stability and safety. Follow these steps to properly secure the ladder:
- Tighten the screws: Check all the screws or bolts that attach the ladder to the attic opening frame. Use a screwdriver or wrench to ensure they are tightened securely. This will prevent any unnecessary movement or wobbling during use.
- Inspect the hinges: Double-check the hinges that connect the ladder to the attic opening frame. Make sure they are properly aligned and securely fastened. Any loose or misaligned hinges should be adjusted and tightened.
- Test the ladder’s stability: To ensure the ladder is securely in place, give it a gentle shake or apply light pressure to different areas of the ladder. It should feel stable and not wobble or shift. If you notice any instability, revisit the previous steps to ensure everything is properly installed and secured.
- Add additional support: Depending on the design and weight capacity of your attic ladder, you may consider adding additional support brackets or straps for added stability and safety. Follow the manufacturer’s instructions to install these supports correctly.
- Trim any excess: If there is any excess material or protruding screws from the installation, trim or file them down to minimize any potential hazards and create a clean finish.
By taking the time to properly secure your attic ladder, you can have peace of mind knowing that it is safe to use and will provide reliable access to your attic space. Once the ladder is secure, it’s time to move on to the next step: testing the attic ladder for stability and functionality.
Step 7: Test the Attic Ladder for Stability and Functionality
After securing the attic ladder in place, it is important to thoroughly test it for stability and functionality. Follow these steps to ensure that your newly installed ladder is safe and operates smoothly:
- Check the locking mechanisms: Extend the ladder fully and test the locking mechanisms to ensure they engage properly. The ladder should lock securely in both the extended and folded positions.
- Step on each rung: While standing on the ladder, step on each rung one at a time. Pay attention to any wobbling or instability. The ladder should not sag or feel unstable when weight is applied evenly on each step.
- Test the folding function: Practice folding and unfolding the ladder multiple times. Make sure it moves smoothly and without any obstructions. The ladder should fold and unfold easily, without excessive force or resistance.
- Check for any abnormal sounds: Listen for any unusual noises or creaks while using the ladder. Squeaky sounds may indicate parts that need lubrication or adjustment.
- Perform a weight test: If the ladder is rated for a specific weight capacity, test it by gradually applying weight to each step. Ensure that the ladder remains stable and does not show signs of strain or excessive flexing.
- Inspect for any signs of damage: After testing the ladder, visually inspect all components for any signs of damage or wear. Look for loose screws, cracked steps, or any other issues that may compromise the ladder’s stability or functionality.
If you encounter any problems during the testing phase, recheck the previous steps to identify any installation or adjustment errors. It’s important to resolve these issues before relying on the ladder for regular use.
By thoroughly testing the attic ladder, you can ensure that it is secure, stable, and in perfect working condition. Once you are satisfied with the ladder’s performance, it’s time to move on to the final step: applying finishing touches.
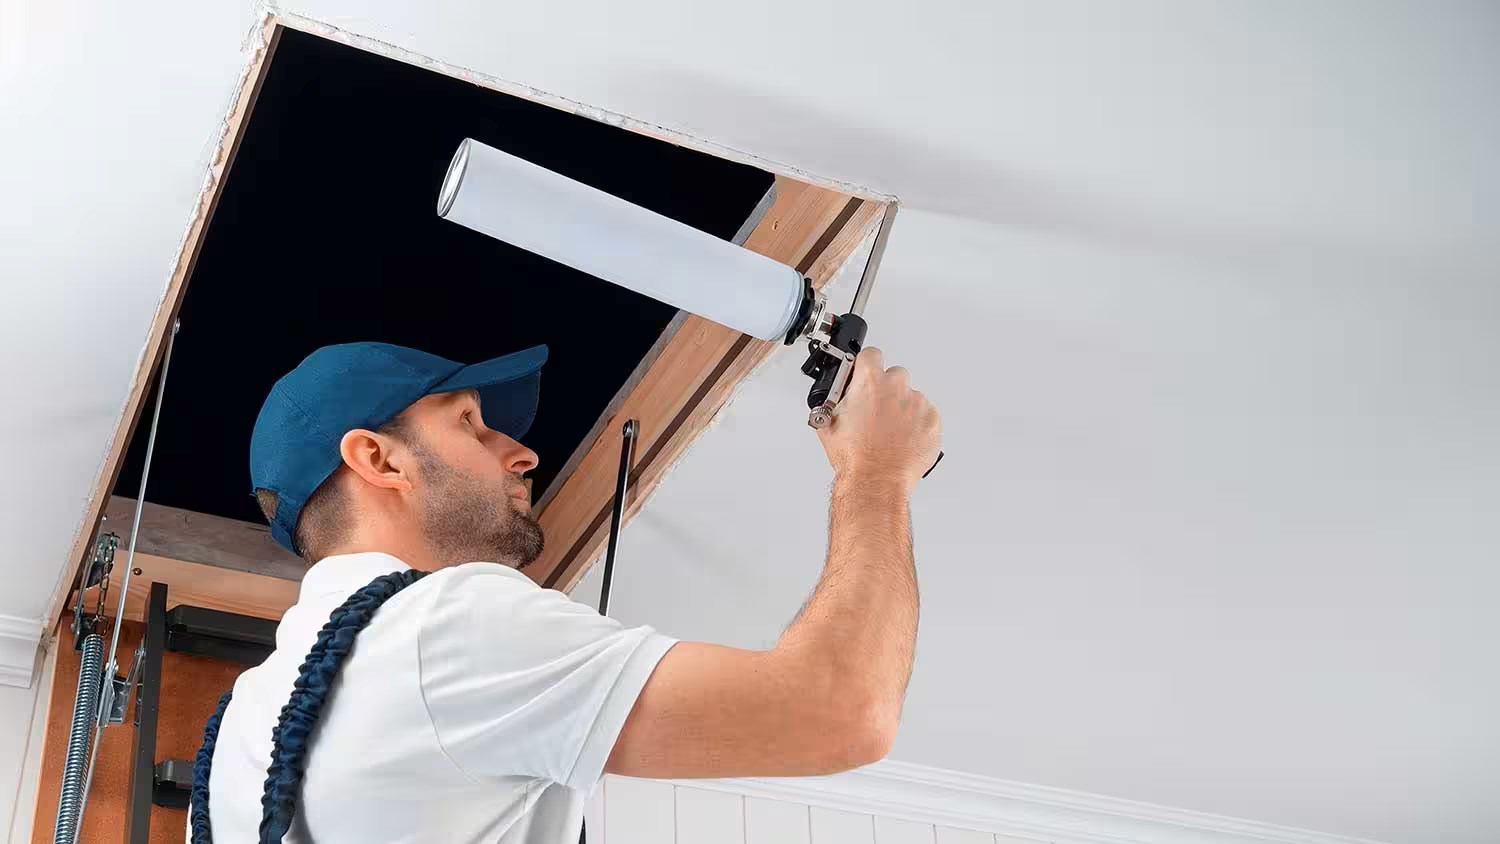
Step 8: Apply Finishing Touches
Now that your attic ladder is installed, secure, and functioning properly, it’s time to apply some finishing touches to ensure its longevity and aesthetic appeal. Follow these steps to complete the process:
- Trim any excess: Trim any excess material, such as overhanging screws or protruding edges. This will create a clean and finished look.
- Fill gaps and cracks: Use a caulking gun and caulk to fill any gaps or cracks around the attic ladder or the ceiling opening. This will help improve insulation and prevent drafts.
- Paint or stain: If desired, you can apply a fresh coat of paint or stain to the attic ladder to enhance its appearance. Choose a paint or stain that is suitable for the ladder material and apply it according to the manufacturer’s instructions.
- Apply a non-slip tread: To improve safety and traction, consider applying a non-slip tread or grip tape to the ladder steps. This will make using the ladder easier and reduce the risk of slipping.
- Install handrails: If your attic ladder does not already have handrails, you may consider adding them for additional safety and support. Make sure the handrails are securely attached and provide a comfortable grip.
- Label the ladder: For convenience, consider labeling the attic ladder with a sign or sticker indicating its purpose and any weight restrictions. This will help remind users of the ladder’s intended use and safety precautions.
By applying these finishing touches, you not only improve the functionality and safety of your attic ladder but also enhance its overall appearance. These final steps make a significant difference and give your ladder a polished and professional finish.
Congratulations! By following these eight steps, you have successfully fixed and installed an attic ladder in your home. Enjoy the convenience and accessibility it provides to your attic space, knowing that you have completed the task with care and attention to detail.
Remember to always prioritize safety when using the attic ladder, and if you have any doubts or concerns, it is always best to consult a professional for assistance.
Read more: How To Install An Attic Ladder
Conclusion
Fixing an attic ladder may seem like a daunting task, but with the right knowledge and tools, it is a manageable project that can greatly enhance the functionality of your attic space. By following the step-by-step guide in this article, you have learned how to assess the condition of the attic ladder, gather the necessary tools and materials, remove the old ladder, prepare the opening for installation, install the new ladder, secure it in place, test its stability and functionality, and apply finishing touches to complete the project.
Throughout the process, it is important to prioritize safety by using proper lifting techniques, wearing protective gear, and ensuring the ladder is secure and stable. If at any point you feel unsure or overwhelmed, it is always advisable to seek professional assistance to ensure the job is done correctly.
By fixing your attic ladder, you have regained convenient access to your attic space, allowing for extra storage or even potential living areas. The newly installed ladder will provide a safe and efficient means of reaching your attic while ensuring a secure and stable experience.
Remember, regular maintenance and inspection of your attic ladder are essential to keep it in optimal condition. Check for any signs of wear and tear, tighten screws and bolts periodically, and address any issues promptly to prevent further damage or accidents.
We hope that this comprehensive guide has provided you with the necessary knowledge and confidence to successfully fix and install an attic ladder in your home. Enjoy the convenience, accessibility, and functionality that your attic space now offers.
Frequently Asked Questions about How To Fix An Attic Ladder
Was this page helpful?
At Storables.com, we guarantee accurate and reliable information. Our content, validated by Expert Board Contributors, is crafted following stringent Editorial Policies. We're committed to providing you with well-researched, expert-backed insights for all your informational needs.


0 thoughts on “How To Fix An Attic Ladder”