Articles
How To Close An Attic Ladder
Modified: February 24, 2024
Learn the step-by-step process of closing an attic ladder with our informative articles. Ensure safety and maintain the integrity of your attic space.
(Many of the links in this article redirect to a specific reviewed product. Your purchase of these products through affiliate links helps to generate commission for Storables.com, at no extra cost. Learn more)
Introduction
The attic is a space in many homes that often goes underutilized. It’s typically used for storing old or rarely used items, but it can also serve as an additional living or recreational area with the right modifications. However, when it comes to closing an attic, whether temporarily or permanently, it requires careful planning and execution to ensure the process is done effectively and safely.
Closing an attic ladder is a common task that homeowners may face. Whether you need to seal off the attic for insulation purposes, storage, or to prevent heat loss, it’s important to follow the proper steps to ensure a secure closure. In this article, we will guide you through the process of closing an attic ladder, providing you with the necessary information to complete the task successfully.
Before jumping into the steps, it’s important to note that safety should be your top priority. Make sure to use proper protective equipment such as gloves, goggles, and a dust mask when working in the attic. Additionally, if you are uncomfortable or unsure about any step of the closing process, it is recommended to consult a professional for assistance.
Now that we have covered the basics, let’s dive into the steps required to close an attic ladder effectively. From clearing the attic space to securing the ladder stairs and adding insulation, we will go through each stage to ensure a thorough closure. By following this guide, you can confidently tackle the job and achieve a well-sealed attic ladder. So, let’s get started!
Key Takeaways:
- Properly closing an attic ladder involves steps such as clearing the space, securing the ladder stairs, and adding insulation. Following these steps ensures a well-sealed attic space for improved energy efficiency and storage.
- Safety, preparation, and attention to detail are crucial when closing an attic ladder. By prioritizing these factors and following the step-by-step guide, homeowners can confidently achieve a secure and effective closure.
Read more: How To Close Attic Ladder
Preparing for Attic Ladder Closure
Before you begin the process of closing your attic ladder, it’s important to prepare the area and gather the necessary tools and materials. Proper preparation will help ensure a smooth and efficient closure. Here are some key steps to take before starting the actual closure process:
1. Assess the condition of the attic ladder: Before proceeding with the closure, inspect the condition of your attic ladder. Look for any signs of damage or wear, such as loose steps, broken hinges, or damaged hardware. It’s important to address any necessary repairs or replacements before closing the ladder to prevent further issues down the line.
2. Gather the required tools and materials: To successfully close the attic ladder, you will need specific tools and materials. These may include a screwdriver or drill, screws or nails, insulation materials, a measuring tape, a utility knife, and a staple gun. Make sure to have these items on hand before starting the closure process.
3. Clear the area around the attic ladder: Before you can begin closing the attic ladder, it’s essential to clear the area surrounding it. Remove any furniture, boxes, or other items that may impede your access to the ladder or make the closure process more challenging. A cleared space will allow for smoother and safer work.
4. Ensure adequate lighting and ventilation: Attic spaces are often dim and poorly ventilated. It’s crucial to ensure you have sufficient lighting to see clearly while working in the attic. Consider using portable lighting, headlamps, or setting up additional light sources near the ladder to improve visibility. Additionally, ensure there is proper ventilation to prevent overheating or discomfort during the closure process.
5. Take safety precautions: Closing an attic ladder can involve working at heights and handling potentially heavy materials. To ensure safety throughout the process, use a sturdy ladder or platform to access the attic and take precautions to prevent falls or injuries. Consider having a spotter or helper, especially when working with large or heavy objects.
By taking these preparatory steps, you will set yourself up for success when closing your attic ladder. With the area cleared, the tools and materials ready, proper lighting and ventilation in place, and safety precautions in mind, you are now ready to move on to the actual closure process. Let’s dive into the next steps to effectively close your attic ladder.
Step 1: Clearing the Attic Space
Before you can proceed with closing your attic ladder, it’s important to clear the attic space to create a clean and accessible working area. This step is crucial as it allows you to move around freely, have a clear line of sight, and safely work on closing the ladder. Here are the key steps to clear the attic space:
1. Remove any stored items: If your attic contains any stored items, remove them carefully and organize them in a designated area. Sort through the items and decide whether you want to keep them, donate them, or dispose of them. This process will not only clear the attic space but also declutter and create more storage opportunities.
2. Dust and clean the attic space: Attics are often prone to dust accumulation. Take the time to dust and clean the attic before proceeding with the closure process. Use a broom, vacuum cleaner, or duster to remove any loose debris, cobwebs, or dirt. This will create a cleaner and more pleasant working environment.
3. Check for any electrical wiring or hazards: While clearing the attic space, be mindful of any electrical wiring or potential hazards. Ensure that all electrical connections are secure and properly insulated. If you come across any damaged wiring or exposed electrical components, it’s important to address them before closing the attic ladder to prevent any safety risks.
4. Inspect for signs of pests or infestations: Attics can sometimes be a haven for pests such as rodents or insects. Take the time to inspect for any signs of pests or infestations. Look for droppings, chewed wires, or nests. If you come across any evidence of pests, consider calling a professional pest control service to address the issue before proceeding with the closure.
5. Create temporary barriers, if necessary: If you need to temporarily close off certain areas of the attic during the closure process, use temporary barriers such as plastic sheeting or plywood to block off those sections. This will prevent dust and debris from spreading and provide a clear working area for the next steps.
By clearing the attic space, you create a safe and organized environment for closing your attic ladder. Remember to remove any stored items, dust and clean the area, check for electrical hazards, inspect for pests, and create temporary barriers if needed. With a clean and clear attic space, you are ready to move on to the next steps of closing the attic ladder.
Step 2: Removing Any Obstacles
Once you have cleared the attic space, the next step in closing your attic ladder is to remove any obstacles that may hinder the closure process. This step ensures a smooth and efficient closure while minimizing the risk of damage to the ladder or surrounding areas. Here are the key steps to remove any obstacles:
1. Identify and assess the obstacles: Take a careful look at the attic space and ladder area to identify any potential obstacles. These may include large furniture, storage containers, ductwork, or other items that may obstruct the closure process. Assess the size and weight of each obstacle to determine the best approach for removal or relocation.
2. Clear the path to the ladder: Start by creating a clear path to the attic ladder. Move any furniture, boxes, or other items that are directly blocking or near the ladder. Clearing the path will allow you to access the ladder easily and safely during the closure process.
3. Relocate or remove large obstacles: For larger items that cannot be easily moved, consider relocating or temporarily removing them from the attic. Use caution and proper lifting techniques, especially when dealing with heavy furniture or objects. If necessary, enlist the help of a friend or family member to assist with moving cumbersome items.
4. Adjust or move ductwork or pipes: If there are ductwork or pipes running near the attic ladder, check if they can be adjusted or moved to accommodate the closure process. It’s important to ensure that these components are not obstructing the closure or posing any safety hazards. If needed, consult a professional to help with any necessary adjustments or re-routing.
5. Secure loose wires or cables: Take the time to secure any loose wires or cables that may be hanging near the attic ladder. Use cable clips or ties to neatly fasten and organize them, preventing them from getting tangled or damaged during the closure process.
By removing obstacles in the attic space, you create a clear and unobstructed path for closing the ladder. Identifying and assessing obstacles, clearing the path, relocating or removing large items, adjusting ductwork or pipes, and securing loose wires or cables are crucial steps to ensure a smooth closure. With obstacles out of the way, you are ready to proceed to the next steps of securing the ladder stairs and closing the attic ladder door.
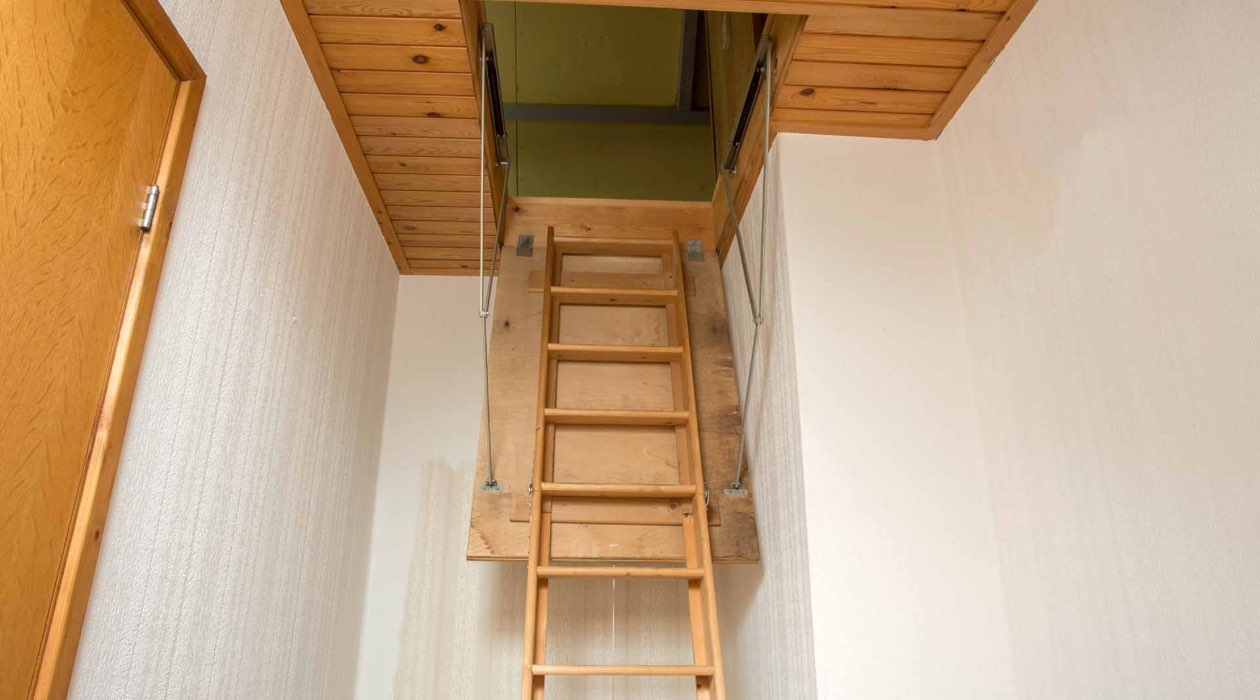
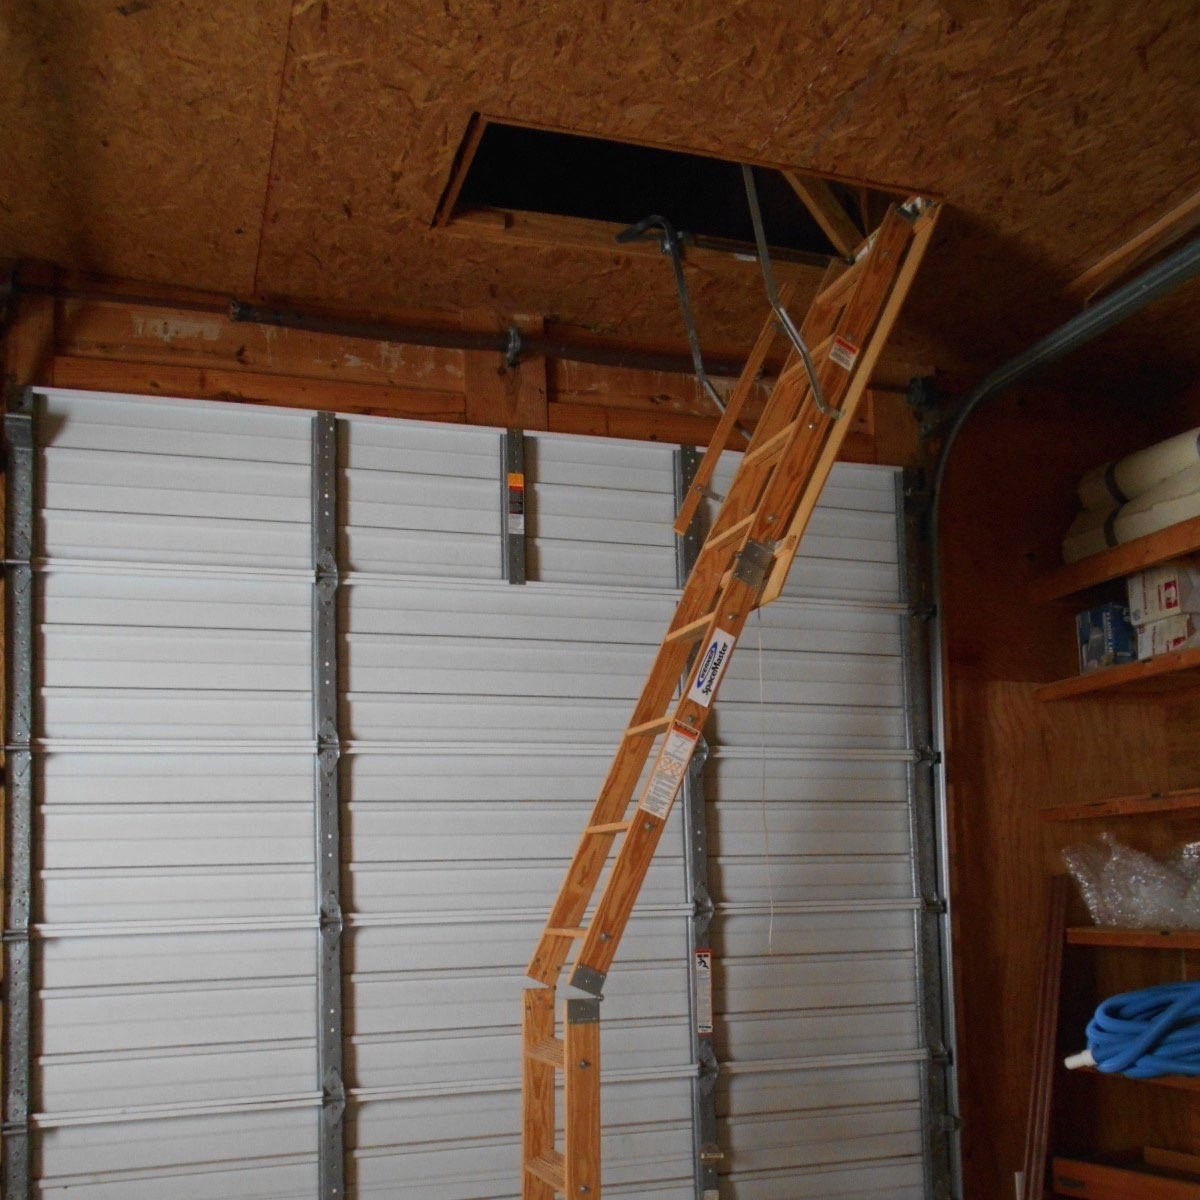
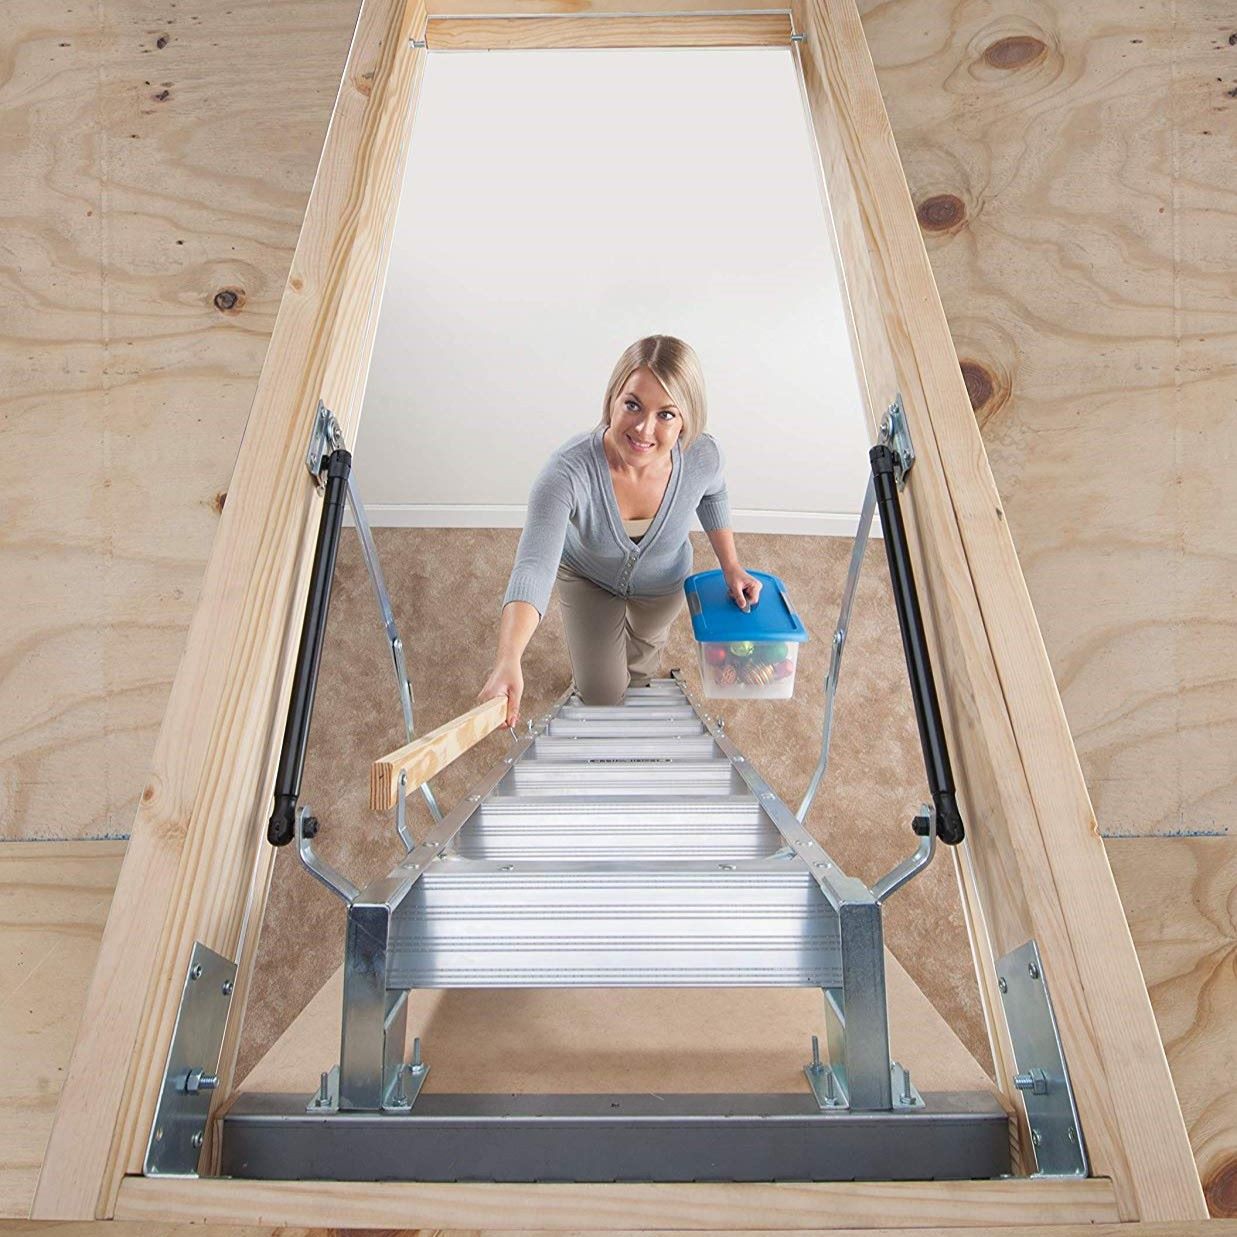
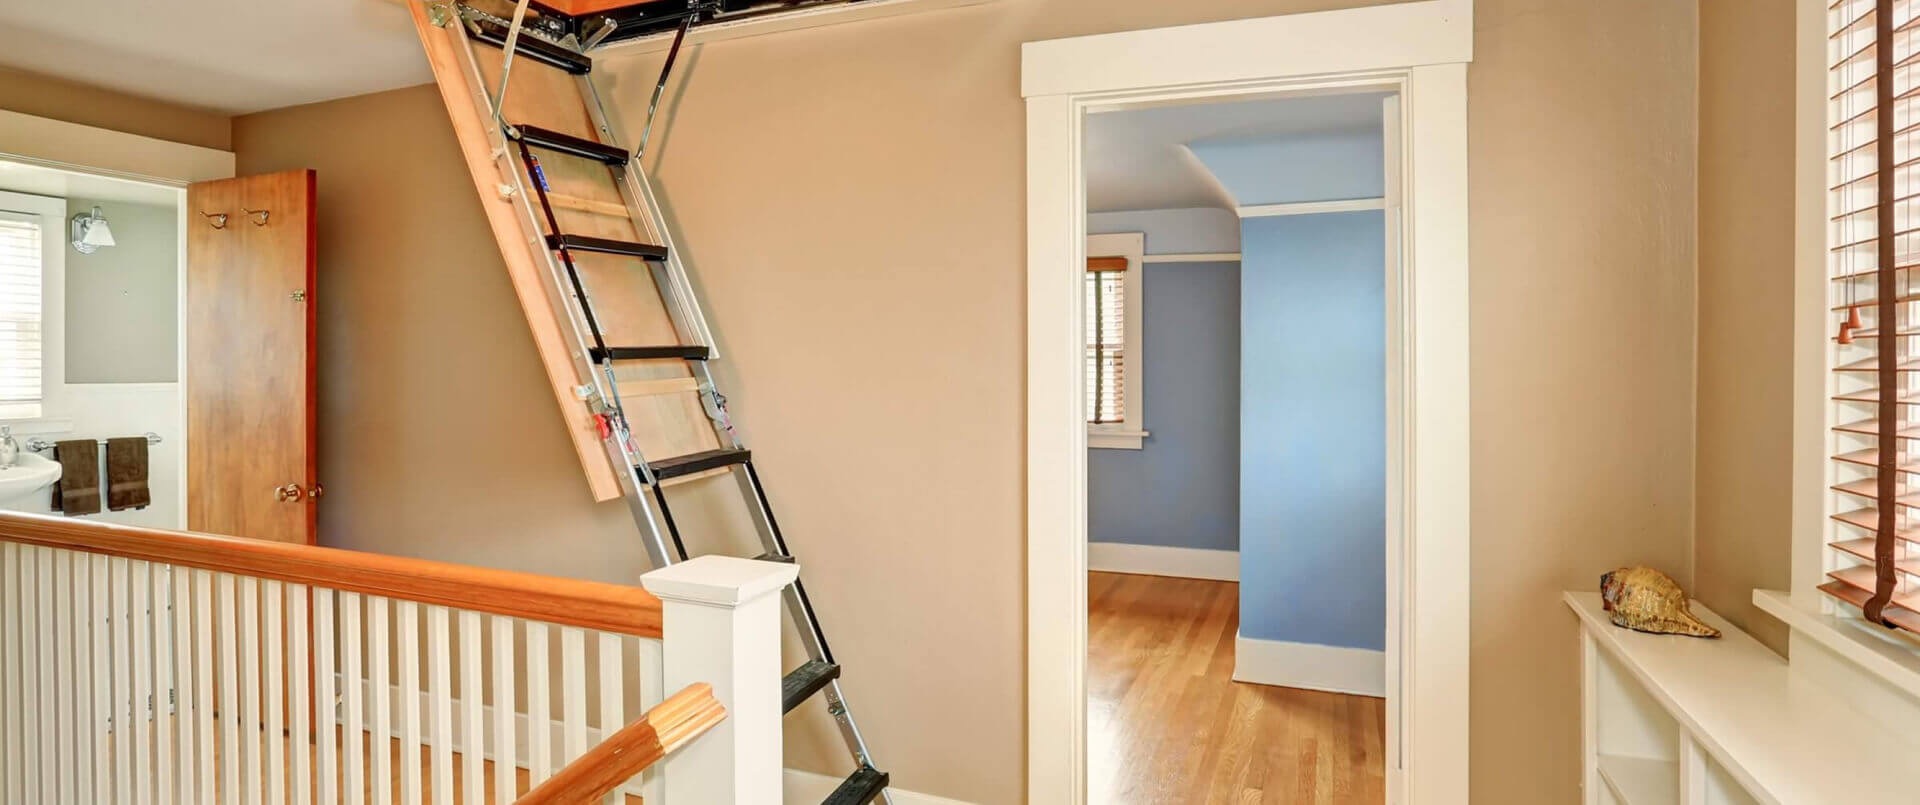
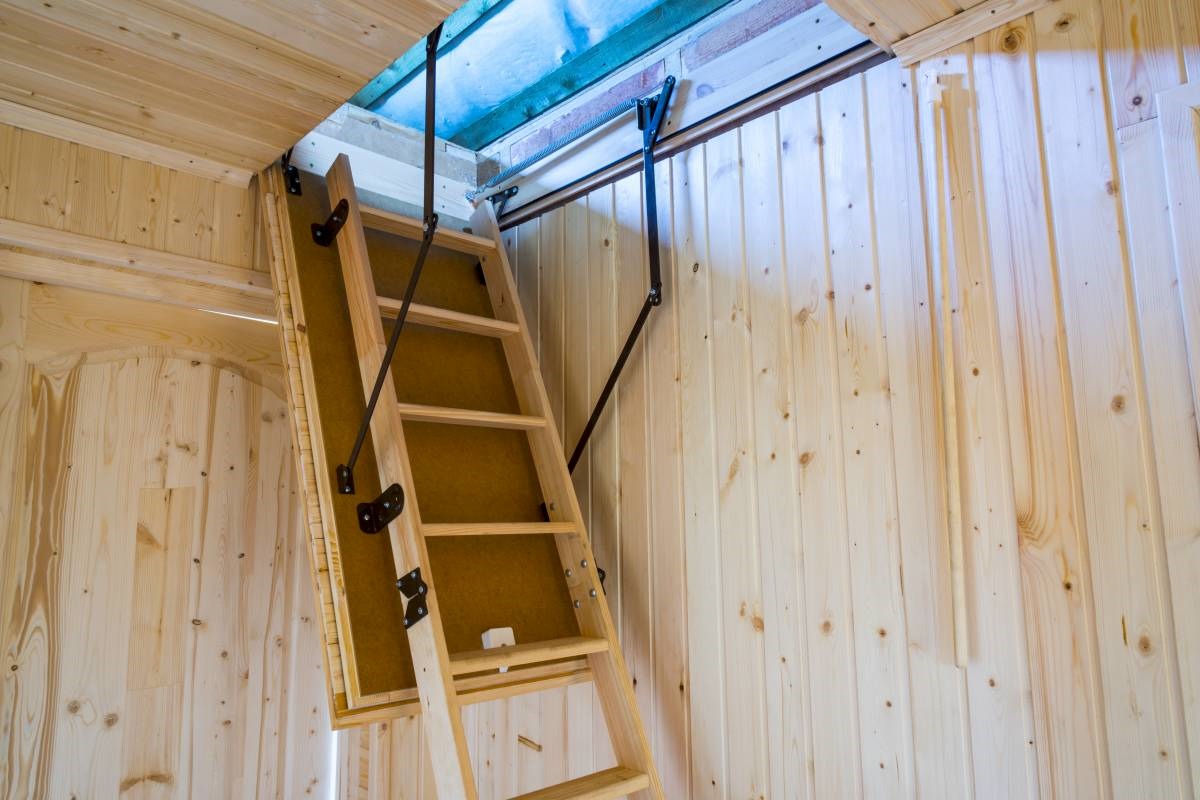
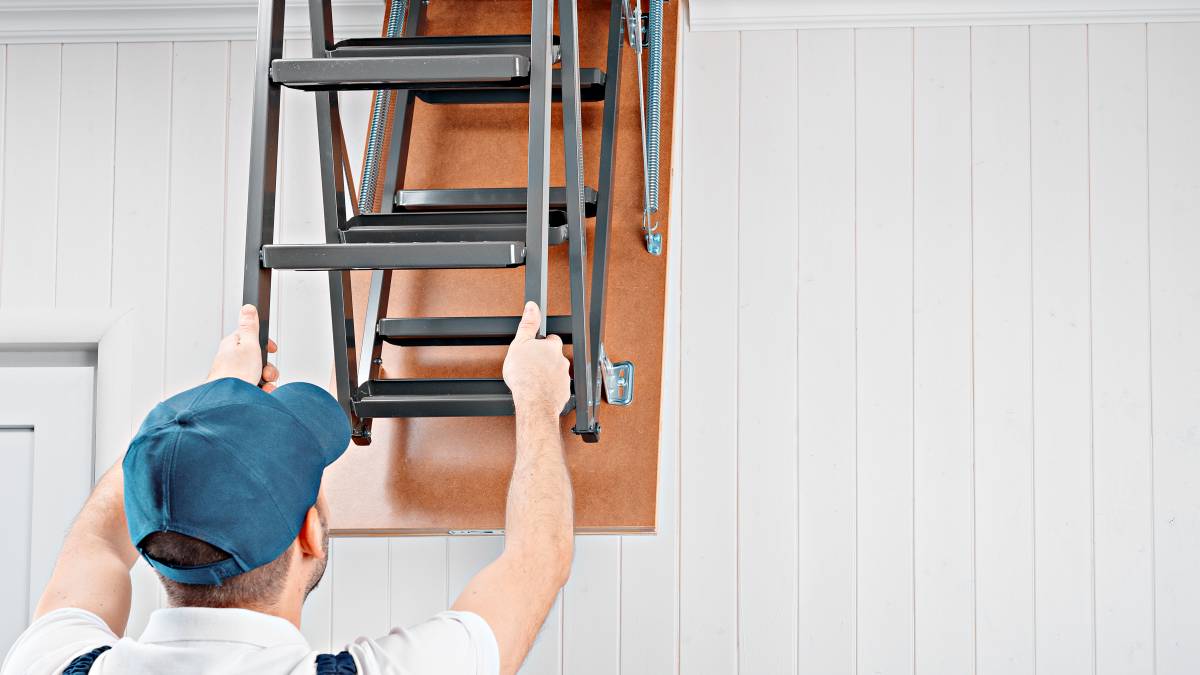
Step 3: Securing the Ladder Stairs
To effectively close your attic ladder, it’s important to secure the ladder stairs properly. This step ensures stability and prevents accidental opening or movement of the ladder. Securing the ladder stairs also helps maintain the integrity of the closure and minimizes the risk of injuries. Follow these steps to secure the ladder stairs effectively:
1. Extend the ladder fully: Start by fully extending the ladder to its maximum length. This will provide easy access to the ladder for securing the stairs. Make sure the ladder is properly aligned and stable before proceeding.
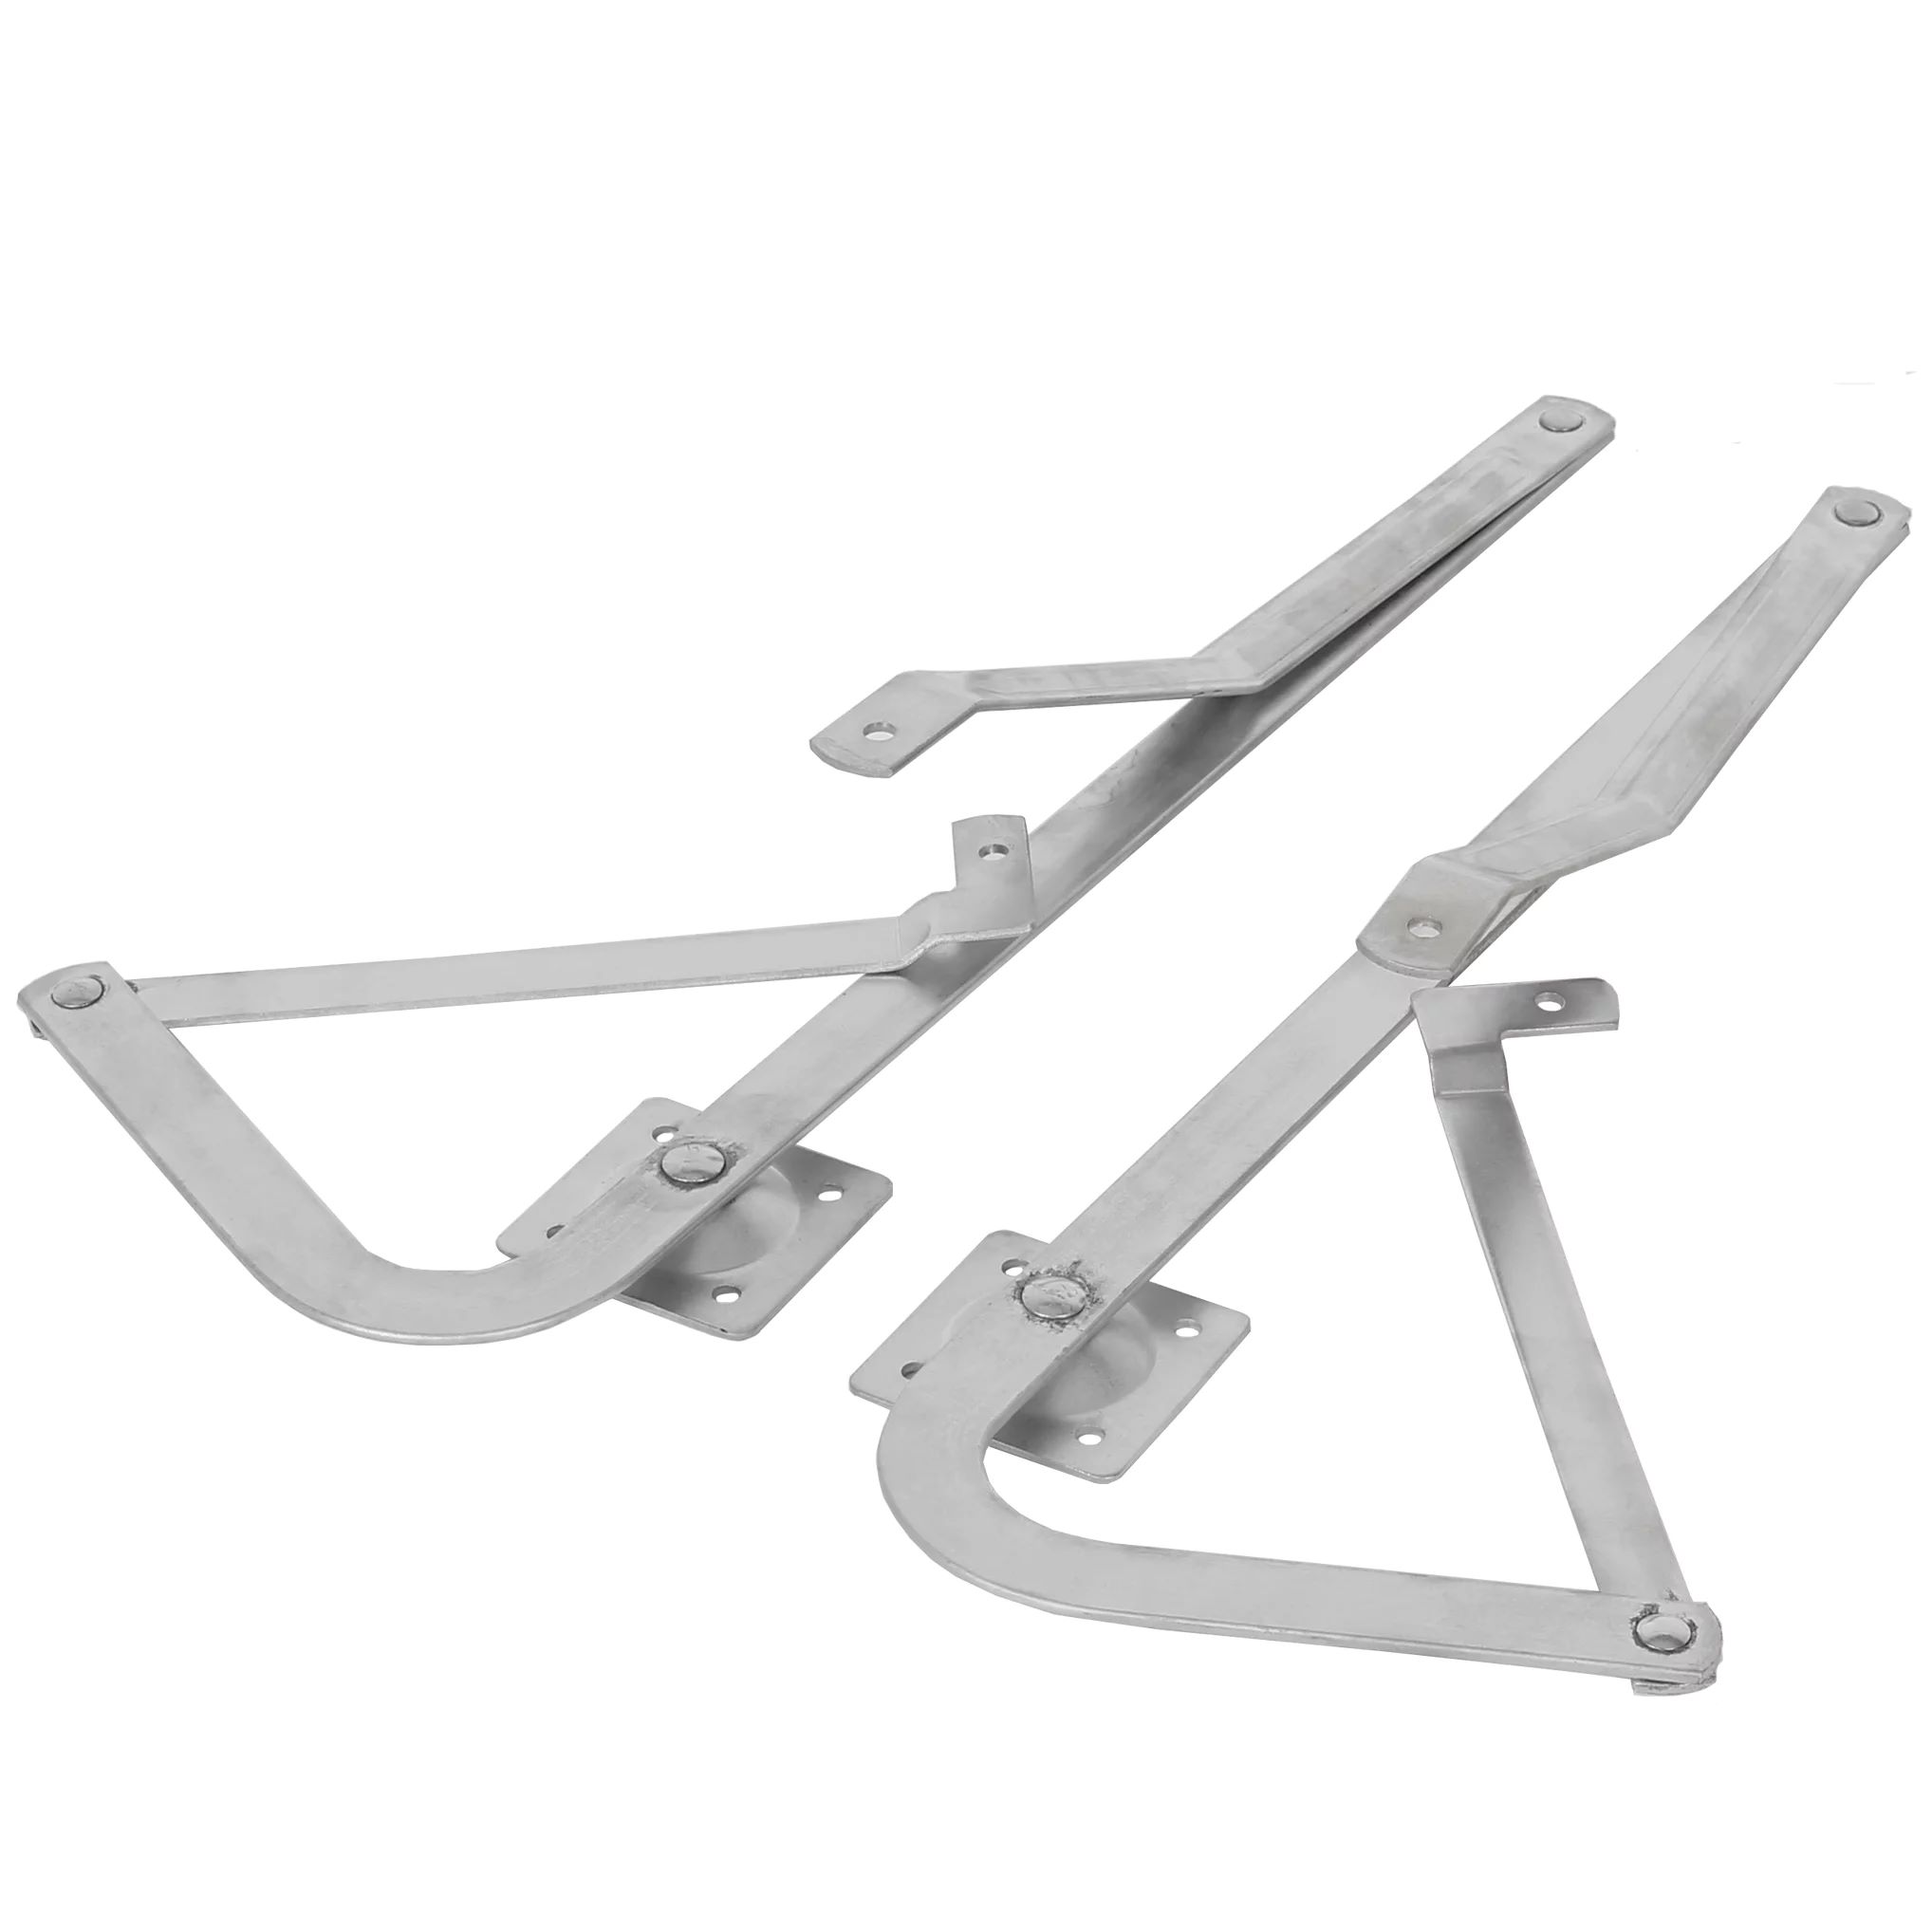
2. Locate the stairs locking mechanism: Every attic ladder will have a locking mechanism that holds the ladder stairs securely in place when in the closed position. Locate this mechanism, which is typically located near the hinge area of the ladder.
3. Engage the locking mechanism: Engage the locking mechanism by moving the latch or lever into the locked position. This will prevent the ladder stairs from moving or opening accidentally. Ensure that the mechanism is fully engaged and securely holding the stairs in place.
4. Test the stability: Once the locking mechanism is engaged, test the stability of the ladder stairs. Apply gentle pressure to check if the stairs remain secure and do not move or shift. If there is any instability or movement, double-check that the locking mechanism is properly engaged and adjusted.
5. Add additional support (if necessary): Depending on the type of attic ladder you have, you may consider adding additional support for extra stability. This can be achieved by using adjustable supports or braces that attach to the ladder and the attic floor. Consult the manufacturer’s instructions or a professional if you are unsure about adding additional support.
By securing the ladder stairs, you ensure that they are stable, locked, and not prone to accidental movement or opening. Engaging the locking mechanism, testing stability, and adding additional support if necessary are key steps in securing the ladder stairs effectively. With the ladder stairs secured, you are ready to move on to the next step, which involves closing and securing the attic ladder door.
When closing an attic ladder, make sure to securely lock it in place to prevent any accidents. Always double-check that the ladder is fully retracted and the hatch is closed before leaving the area.
Read more: How To Close Step Ladder
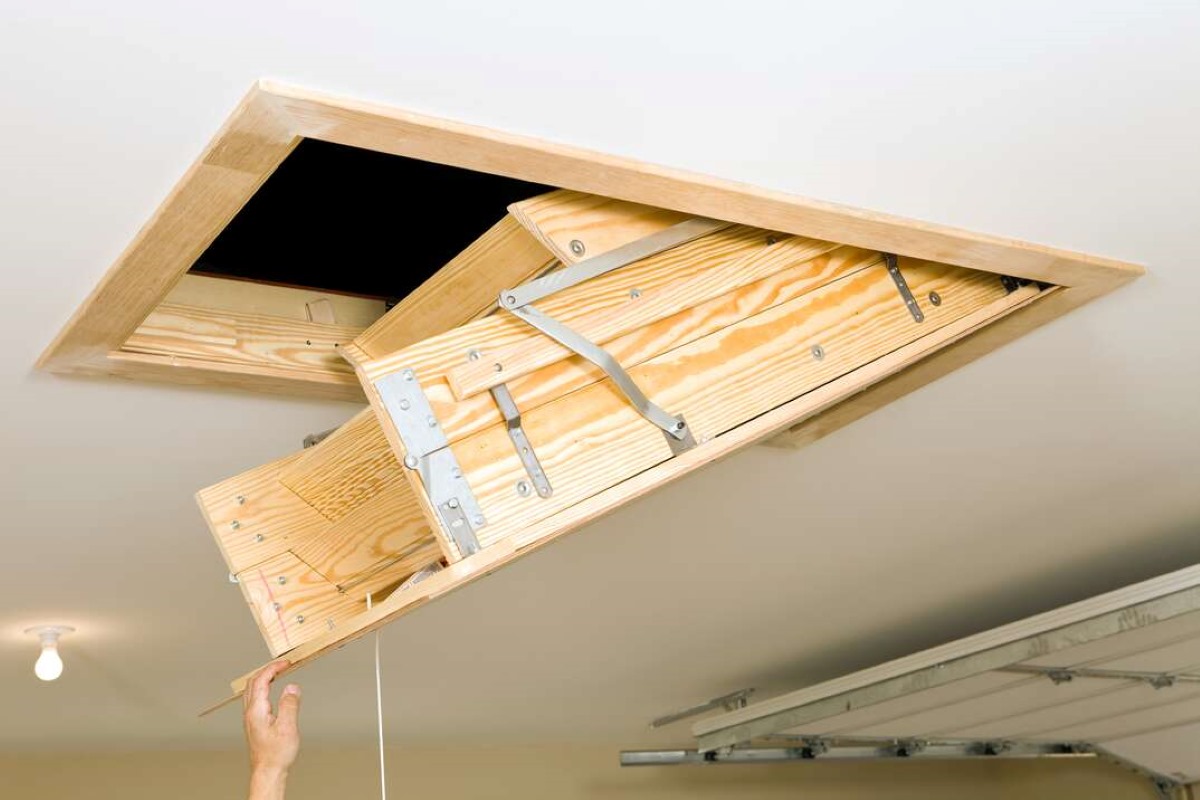
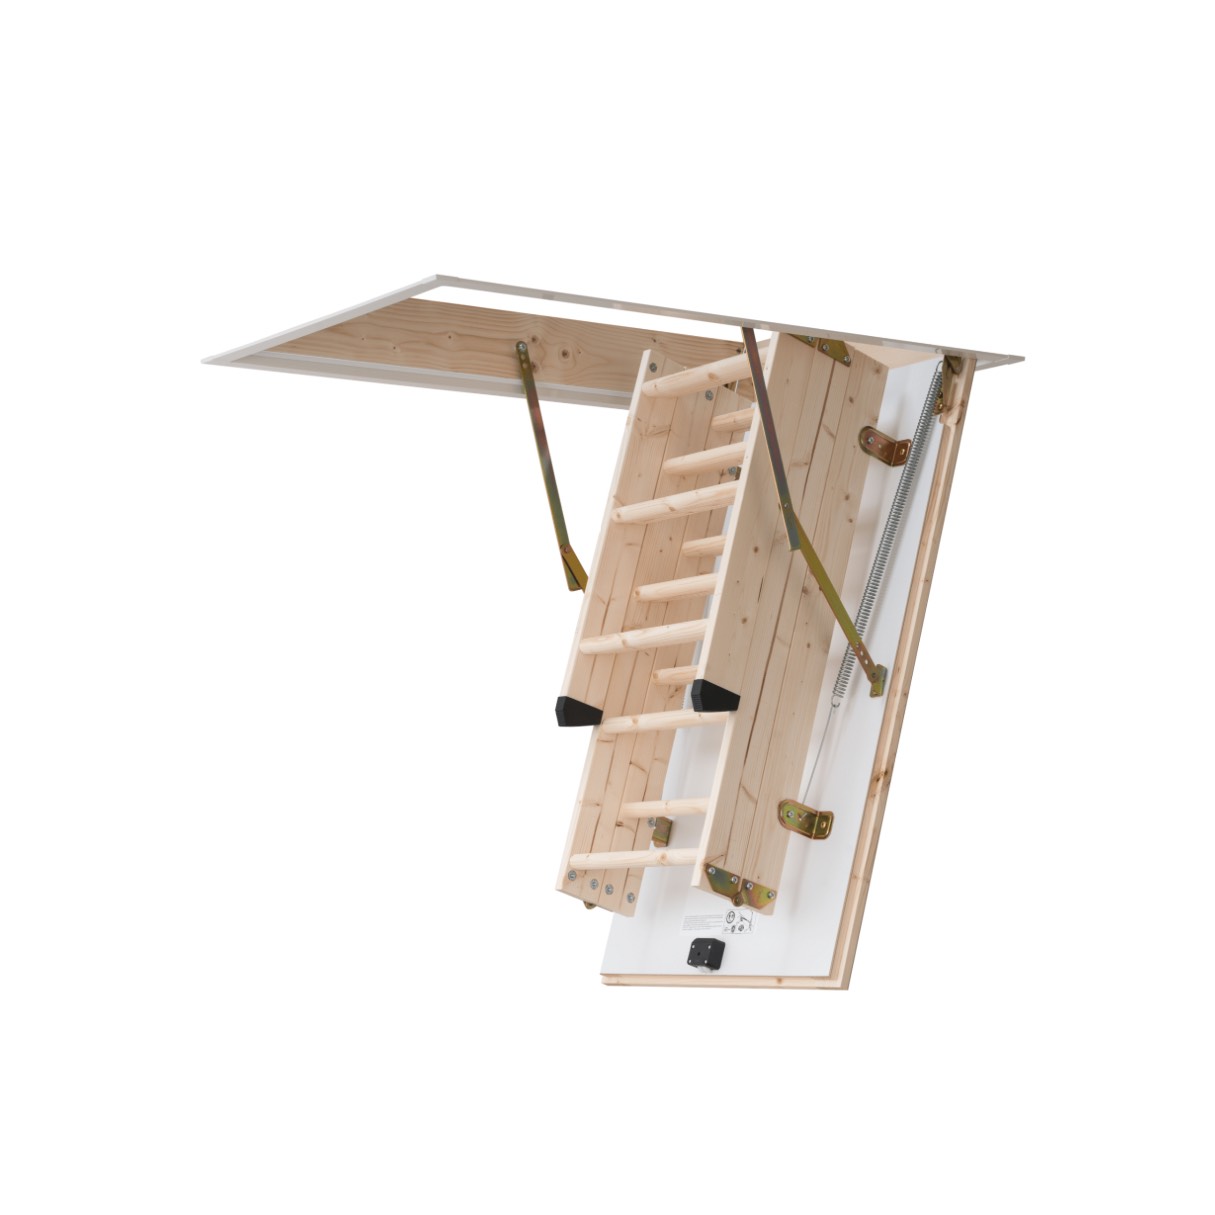
Step 4: Closing and Securing the Attic Ladder Door
Once you have secured the ladder stairs, the next step in closing your attic ladder is to close and secure the attic ladder door. This step ensures a tight seal, prevents drafts, and maintains the insulation of the attic space. Follow these steps to effectively close and secure the attic ladder door:
1. Position the ladder door: Start by carefully positioning the attic ladder door. Ensure that it is properly aligned with the opening and sits flush against the surrounding frame. Take your time to make any necessary adjustments to ensure a snug fit.
2. Inspect the door hinges and hardware: Check the condition of the door hinges and hardware. Ensure that they are in good working order, without any loose screws or damaged components. Tighten any loose screws and address any necessary repairs before proceeding.
3. Close the attic ladder door: Gently close the attic ladder door by lowering it down. Take care to avoid any sudden or forceful movements that may cause damage. Ensure that the door closes completely and sits securely in place.
4. Secure the door locking mechanism: Most attic ladder doors will have a locking mechanism or latch to keep them securely closed. Engage the locking mechanism by sliding the latch or turning the knob into the locked position, ensuring that it clicks into place. This will prevent the door from opening unintentionally.
5. Inspect the door seal: Check the door seal to ensure it is intact and in good condition. The door seal helps create a tight seal and prevents drafts or air leakage. Replace or repair the seal if it is damaged or worn out to maintain proper insulation.
6. Test the door closure: Once the attic ladder door is closed and secured, test the door closure to ensure it is tight and secure. Apply gentle pressure to the door to check for any air leaks or movement. If there are any issues, reposition the door, adjust the seal, or address any underlying problems before proceeding.
By effectively closing and securing the attic ladder door, you create a tight seal and insulation barrier for the attic space. Positioning the door, inspecting the hinges and hardware, closing the door, securing the locking mechanism, inspecting the door seal, and testing the closure are crucial steps to ensure a properly closed and secure attic ladder door. With the attic ladder door closed and secured, you are ready to move on to the next step, which involves adding insulation or covering to further seal the closure.
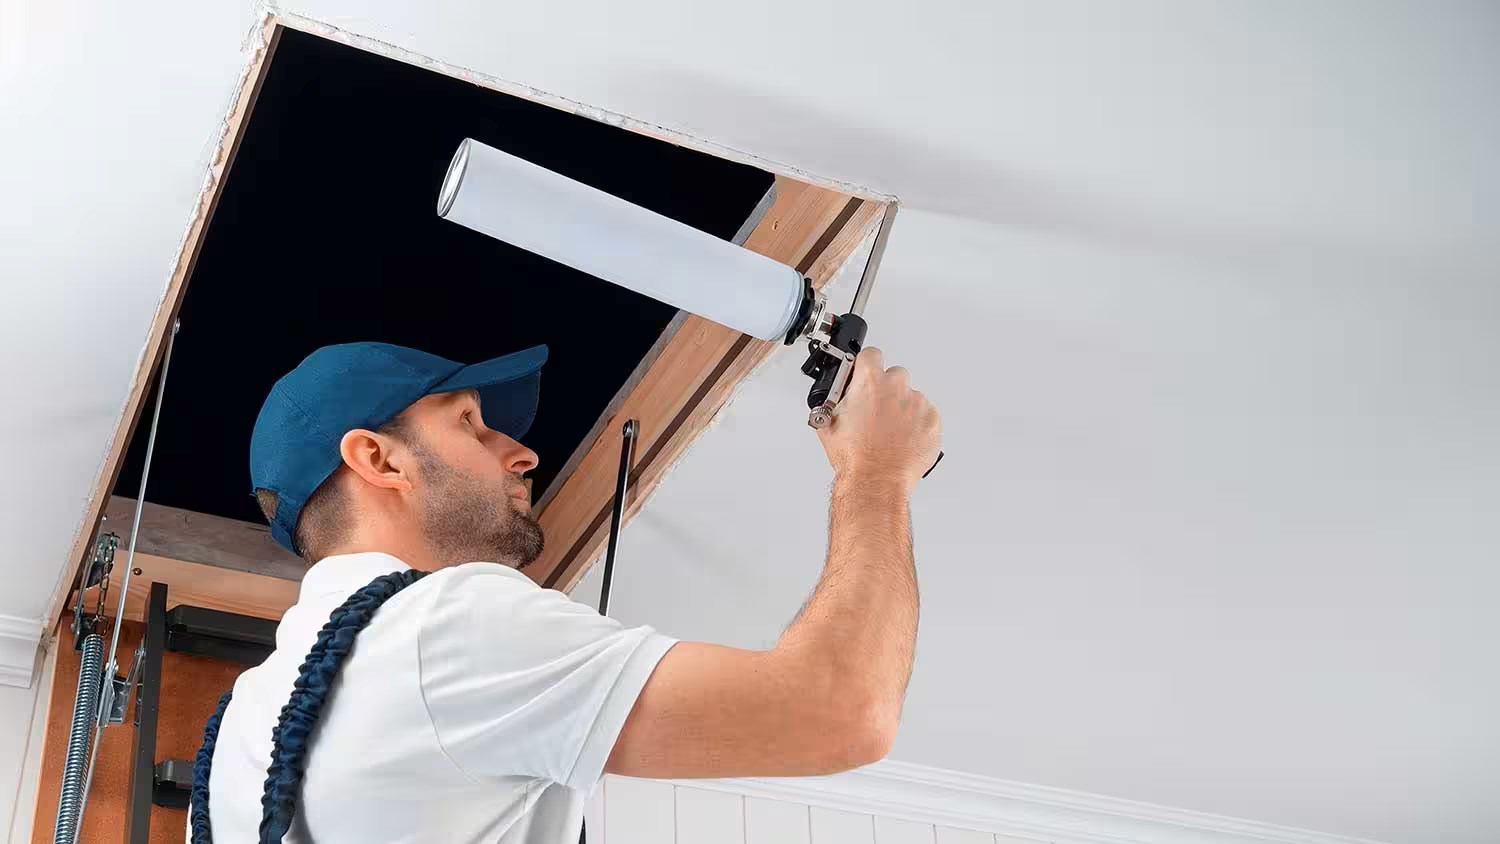
Step 5: Adding Insulation or Covering
Adding insulation or a covering to the closed attic ladder helps further seal the closure, providing additional insulation, energy efficiency, and protection against drafts. This step is particularly important for maintaining temperature control in your home and maximizing energy savings. Follow these steps to effectively add insulation or covering to your closed attic ladder:
1. Measure the dimensions: Begin by measuring the dimensions of the attic ladder and the surrounding area. This will help you determine the amount of insulation or covering material you will need. Use a measuring tape to accurately measure the length, width, and height of the door frame and surrounding walls.
2. Choose the insulation or covering material: Next, choose the appropriate insulation or covering material for your attic ladder closure. Options include insulation boards, foam panels, weatherstripping, or a combination of materials. Consider factors such as R-value (thermal resistance), ease of installation, and compatibility with your attic ladder structure.
3. Cut the insulation or covering material: Using the measurements taken in step 1, carefully cut the insulation or covering material to fit the dimensions of the attic ladder door. Follow the manufacturer’s instructions for cutting and shaping the material, using a utility knife or appropriate tool.
4. Install the insulation or covering: Place the cut insulation or covering material onto the attic ladder door, ensuring it fits snugly and covers the entire door area. If using multiple pieces of insulation or covering, make sure they are properly aligned and overlapping to provide a seamless barrier. Secure the insulation or covering material in place using appropriate adhesive, fasteners, or tape.
5. Seal any gaps or cracks: Inspect the area around the attic ladder and the door frame for any gaps or cracks that may allow air to leak through. Use weatherstripping or caulking to seal these areas, preventing drafts and improving the overall insulation efficiency of the closure.
6. Test for a tight seal: Once the insulation or covering is installed and any gaps are sealed, test for a tight seal by gently closing the attic ladder door. Check for any air leaks or movement. If you detect any issues, readjust or reinforce the insulation or covering to ensure a proper seal.
Adding insulation or covering to your closed attic ladder provides an extra layer of insulation, energy efficiency, and protection against drafts. By measuring the dimensions, choosing the appropriate material, cutting and installing the insulation or covering, sealing gaps, and testing for a tight seal, you can ensure an effective closure for your attic ladder. With insulation or covering in place, you are ready to move on to the final step of inspecting and testing the closure.
Step 6: Inspecting and Testing the Closure
After completing the closure process for your attic ladder, it’s important to perform a thorough inspection and test to ensure everything is secure and functioning properly. This final step will give you peace of mind that the closure is effective and will help identify any potential issues that need addressing. Follow these steps to inspect and test the closure:
1. Inspect the overall closure: Take a close look at the entire closure, including the ladder stairs, door, insulation or covering, and any added support or sealing materials. Check for any signs of damage, loose components, or gaps that may have been missed during the installation process.
2. Test the ladder stairs: Test the stability and security of the ladder stairs by applying gentle pressure and ensuring they remain locked in place. Verify that the stairs do not move or shift when weight is applied, ensuring their safety during usage.
3. Check the attic ladder door: Verify that the attic ladder door is securely closed and locked. Ensure there are no gaps or openings that may allow drafts or air leakage. Test the door’s movement and make any necessary adjustments to ensure it opens and closes smoothly.
4. Inspect the insulation or covering: Examine the insulation or covering material to ensure it is properly installed, covering the entire door area, and providing an effective barrier. Check for any loose or dislodged sections and reposition or secure them if necessary.
5. Test for drafts or air leakage: Close the attic ladder door and carefully run your hand along its edges, as well as around the ladder stairs and any gaps or joints. Detect any drafts or air leakage points. If you identify any areas of concern, apply additional weatherstripping or sealing materials to create a tighter and more efficient seal.
6. Perform a visual and functional check: Step back and visually inspect the closure as a whole, ensuring that it looks clean, secure, and well-finished. Open and close the attic ladder door several times to ensure smooth operation, proper alignment, and a secure closure.
By performing a comprehensive inspection and testing process, you can identify and address any issues with the closure of your attic ladder. Checking the overall closure, testing the ladder stairs, inspecting the door, examining the insulation or covering, testing for drafts or air leakage, and performing a visual and functional check will help ensure that the closure is effective and functioning as intended.
With a successfully completed inspection and testing process, you can now have confidence that your attic ladder closure is secure, well-insulated, and ready for use. Enjoy the benefits of a closed attic space, whether it’s for improved energy efficiency, additional storage, or creating a more comfortable living environment in your home.
Conclusion
Closing an attic ladder is a task that requires careful planning, preparation, and execution to ensure a secure and effective closure. By following the steps outlined in this guide, you can successfully close your attic ladder and enjoy the benefits of a sealed attic space.
Throughout the process, it is vital to prioritize safety by using proper protective equipment, working carefully at heights, and seeking professional assistance when needed. Clearing the attic space, removing obstacles, securing the ladder stairs, closing and securing the attic ladder door, adding insulation or covering, and inspecting and testing the closure are all key steps to achieve a well-sealed attic ladder.
Closing an attic ladder not only helps with insulation and energy efficiency but also provides added storage space and enhances the overall comfort of your home. Whether you are temporarily closing off the attic, preparing for renovations, or aiming to reduce heat loss, following these steps will give you the confidence and peace of mind that your attic ladder closure is securely in place.
Remember to assess the condition of your attic ladder, gather the necessary tools and materials, clear the attic space, and take safety precautions before diving into the closure process. Each step, from removing obstacles to adding insulation or covering, plays a crucial role in achieving a successful closure.
By investing time and effort in closing your attic ladder properly, you can enjoy a well-sealed attic space that provides benefits both in terms of energy efficiency and additional storage. Regularly inspect your closure, addressing any issues that may arise, to ensure its ongoing effectiveness.
Now that you have the knowledge and understanding of the steps involved, you can confidently take on the task of closing your attic ladder. Remember, if you are unsure or uncomfortable with any step, it is always wise to consult a professional for guidance and assistance. With a closed and secure attic ladder, you can experience improved energy efficiency, enhanced comfort, and a more organized living space in your home.
Frequently Asked Questions about How To Close An Attic Ladder
Was this page helpful?
At Storables.com, we guarantee accurate and reliable information. Our content, validated by Expert Board Contributors, is crafted following stringent Editorial Policies. We're committed to providing you with well-researched, expert-backed insights for all your informational needs.


0 thoughts on “How To Close An Attic Ladder”