Articles
How To Fix Frozen AC
Modified: October 31, 2024
Learn effective strategies to fix a frozen AC unit with these informative articles. Expert advice and step-by-step instructions on troubleshooting common issues to keep your cooling system running smoothly.
(Many of the links in this article redirect to a specific reviewed product. Your purchase of these products through affiliate links helps to generate commission for Storables.com, at no extra cost. Learn more)
Introduction
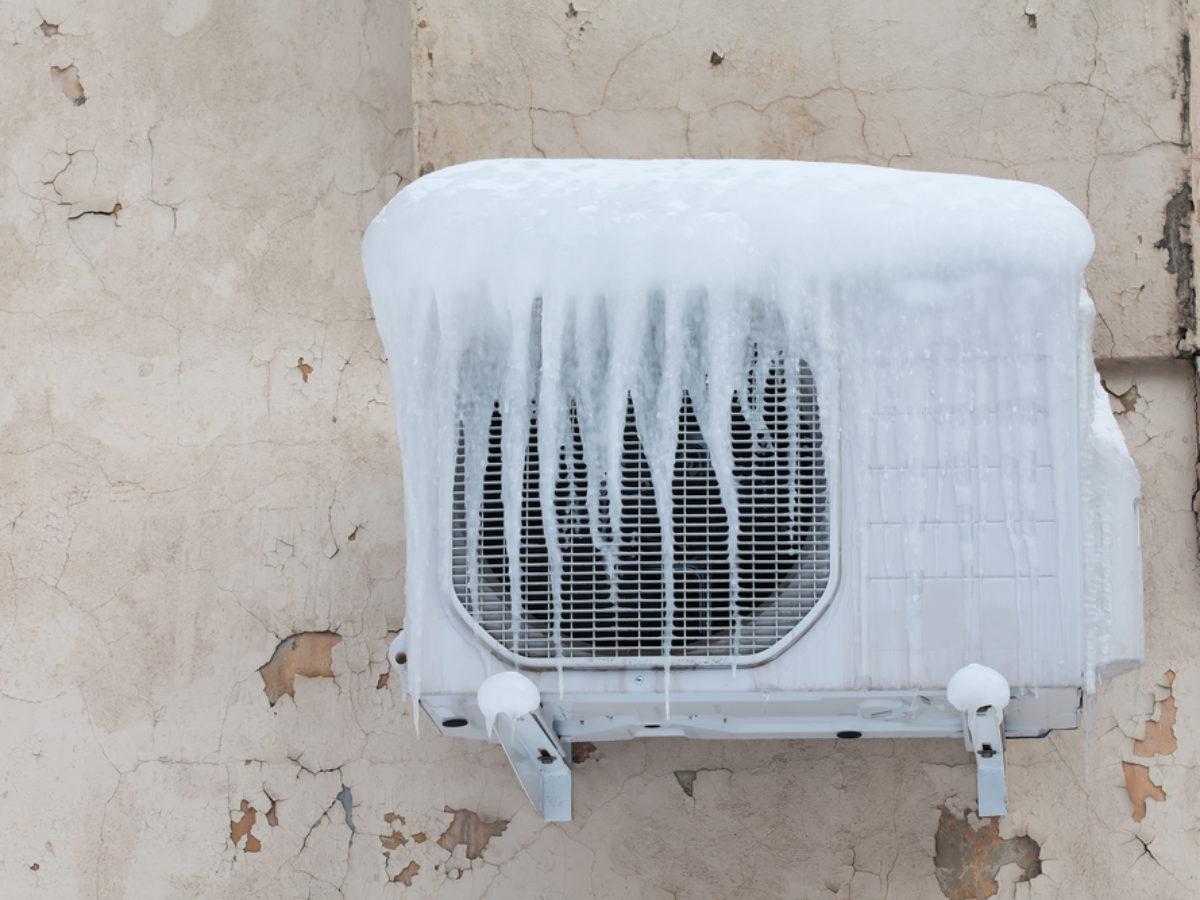
There’s nothing quite as frustrating as walking into a stuffy and uncomfortable home with a frozen air conditioning (AC) unit. Not only does it leave you hot and bothered, but a frozen AC can also lead to reduced cooling efficiency and potential damage to your system if not addressed promptly. Fortunately, many frozen AC issues can be resolved with a few simple steps.
In this article, we’ll explore common causes of a frozen AC, the tools and materials needed for troubleshooting, and a step-by-step guide on how to fix a frozen AC. Whether you’re a DIY enthusiast or simply want to understand the process before calling a professional, this article will provide you with the knowledge to tackle the problem head-on.
Before we dive into the troubleshooting steps, it’s important to understand why an AC unit may freeze up in the first place. One of the main causes is restricted airflow, which can be caused by clogged air filters or obstructed vents. Additionally, low refrigerant levels, a malfunctioning blower motor, or a faulty thermostat can also contribute to a frozen AC unit.
By addressing these issues promptly and taking the necessary steps, you can restore your AC unit to its optimal performance and keep your home cool and comfortable. So, let’s get started on fixing that frozen AC!
Key Takeaways:
- Regular maintenance, such as cleaning air filters, inspecting condensate drain lines, and checking refrigerant levels, can prevent and resolve common causes of a frozen AC, ensuring optimal cooling efficiency.
- When troubleshooting a frozen AC, it’s essential to prioritize safety, turn off the power, and seek professional assistance if issues persist. Proactive maintenance and expert help can keep your AC running smoothly.
Read more: How To Tell If Your AC Is Frozen
Common Causes of a Frozen AC
A frozen air conditioning (AC) unit is a common problem faced by many homeowners. Understanding the underlying causes can help you troubleshoot and prevent the issue from recurring. Here are some of the most common causes of a frozen AC:
- Clogged air filters: One of the primary culprits behind a frozen AC is a clogged air filter. When the air filter becomes dirty and congested, it restricts airflow, causing the evaporator coils to freeze. Regularly cleaning or replacing the air filter is essential to maintain proper airflow.
- Obstructed vents: Blocked or closed vents can limit the airflow in your home and lead to a frozen AC. Ensure all vents are open and free from any obstructions such as furniture, curtains, or decor.
- Low refrigerant levels: Insufficient refrigerant in your AC system can cause the evaporator coils to freeze. This can occur due to leaks or improper installation. If you suspect low refrigerant levels, it’s best to call a professional HVAC technician to diagnose and fix the issue.
- Malfunctioning blower motor: The blower motor is responsible for circulating air across the evaporator coils. If it’s not functioning correctly, the coils may become too cold and freeze. A faulty blower motor may need to be repaired or replaced by a professional.
- Faulty thermostat: A malfunctioning thermostat can cause an AC unit to run continuously without properly cycling on and off. This constant operation can lead to freezing of the coils. Check your thermostat settings and ensure it’s calibrated correctly.
- Lack of proper airflow: Inadequate airflow due to closed or blocked vents, damaged ductwork, or improper fan settings can result in a frozen AC. It’s important to ensure unrestricted and adequate airflow throughout your home.
Identifying the root cause of your frozen AC is crucial for effective troubleshooting. While some causes can be easily resolved with basic maintenance, others may require professional assistance. Now that you know the common causes, let’s move on to the tools and materials you’ll need to fix a frozen AC.
Tools and Materials Needed
Before you begin fixing a frozen air conditioning (AC) unit, it’s essential to gather the necessary tools and materials. Having these items on hand will help you navigate the troubleshooting process smoothly. Here’s what you’ll need:
- Safety gloves and goggles: Protect yourself by wearing safety gloves and goggles throughout the troubleshooting process.
- Screwdriver set: A set of screwdrivers, both flathead and Phillips, will come in handy for removing panels and accessing various components of your AC unit.
- Soft brush or air duster: Use a soft brush or air duster to gently remove dust and debris from the evaporator coils and other parts of the AC unit.
- Condensate drain line cleaner: To ensure proper drainage, have a condensate drain line cleaner or a mixture of vinegar and water prepared for cleaning the drain line.
- Refrigerant leak detector (optional): If you suspect low refrigerant levels and want to check for leaks, a refrigerant leak detector can help you locate any potential leaks.
- Clean air filter: If your air filter is dirty and clogged, have a clean replacement filter ready to install.
- Insulation materials: Insulating foam or tape can be used to insulate refrigerant lines to prevent condensation and freezing.
- Thermostat thermometer: A thermometer can be useful for checking the accuracy of your thermostat.
Having the above tools and materials readily available will ensure a smooth troubleshooting process. Now that you’re equipped let’s move on to the step-by-step guide on how to fix a frozen AC.
Step 1: Turn off the AC
When dealing with a frozen air conditioning (AC) unit, the first step is to turn off the AC completely. This is crucial to prevent further damage to the system and allow the unit to defrost. Here’s how to turn off the AC:
- Locate the thermostat: The thermostat is usually located on a prominent wall in your home. It controls the temperature settings for your AC system.
- Switch to the ‘Off’ position: Look for the ‘Off’ or ‘System Off’ setting on your thermostat and switch it to the off position. This will ensure that the AC unit stops running.
- Verify the AC is off: Check the condenser unit outside to ensure that it has stopped running. You can do this by listening for any sounds or vibrations coming from the unit.
It’s important to turn off the AC before proceeding with any troubleshooting steps to avoid any potential hazards or further damage. Once the unit is turned off, you can move on to the next steps to resolve the issue causing the freezing.
Now that you’ve turned off the AC, let’s move on to step 2: checking the air filter.
Step 2: Check the Air Filter
The air filter in your air conditioning (AC) system plays a vital role in maintaining proper airflow and preventing the unit from freezing. A clogged or dirty air filter can restrict airflow and cause the evaporator coils to freeze. Here’s how to check the air filter:
- Locate the air filter: The air filter is typically located in the return air duct or the air handler unit. It may be behind a removable panel or grille.
- Remove the air filter: Carefully remove the air filter from its housing. Note the direction of airflow marked on the filter for proper installation later.
- Inspect the air filter: Examine the air filter closely to determine if it is dirty or clogged with dust, debris, or pet hair. If it appears gray or black, it’s a sign that it needs to be replaced.
- Clean or replace the air filter: If the air filter is a reusable type, clean it according to the manufacturer’s instructions. If it is disposable or excessively dirty, replace it with a new one of the same size and type.
- Reinstall the air filter: Place the cleaned or new air filter back into its housing, ensuring it is properly oriented with the airflow direction marked on the filter.
Checking and maintaining a clean air filter is crucial for optimal airflow and efficient cooling. It’s recommended to inspect and clean or replace your air filter every one to three months, depending on usage and the manufacturer’s guidelines. This simple step can help prevent future freezing issues and improve the overall performance of your AC system.
With the air filter checked and taken care of, it’s time to move on to the next step: inspecting the condensate drain line.
Read more: How To Fix Overcharged AC
Step 3: Inspect the Condensate Drain Line
The condensate drain line in your air conditioning (AC) system is responsible for removing excess moisture that accumulates during the cooling process. If the drain line becomes clogged or blocked, it can cause water to back up and freeze around the evaporator coils. Here’s how to inspect the condensate drain line:
- Locate the condensate drain line: The condensate drain line is typically a PVC pipe that runs from the indoor air handler unit to the outside. It may be located near the air handler or in a basement or crawl space.
- Visually inspect the drain line: Look for any signs of blockage, such as water pooling around the drain line or visible debris obstructing the pipe. If you notice any blockages, it’s an indication that the drain line needs attention.
- Clean out the drain line: If the drain line is clogged, you can try using a condensate drain line cleaner or a mixture of equal parts vinegar and water to flush out the blockage. Insert the cleaner into the access point of the drain line and allow it to sit for a few minutes. Then, flush the line with water to remove any debris.
- Clear the condensate drain pan: While inspecting the drain line, also check the condensate drain pan located underneath the indoor air handler unit. Remove any standing water or debris from the pan using a sponge or towel.
Regularly inspecting and cleaning the condensate drain line helps prevent water backup and ice formation around the evaporator coils. This simple maintenance step can improve the overall efficiency and performance of your AC system.
Once you’ve finished inspecting and cleaning the condensate drain line, you can move on to step 4: cleaning the evaporator coils.
Step 4: Clean the Evaporator Coils
The evaporator coils in your air conditioning (AC) system play a crucial role in the cooling process. Over time, these coils can accumulate dust, dirt, and debris, hindering proper heat transfer and causing the AC unit to freeze. Cleaning the evaporator coils can help restore optimal performance and prevent future freezing. Here’s how to clean the evaporator coils:
- Turn off the power: Before proceeding with any cleaning, ensure that the power to the AC unit is turned off. You can do this by switching off the circuit breaker that supplies power to the unit.
- Access the evaporator coils: In most cases, the evaporator coils are located inside the air handler unit. Remove any necessary access panels or covers to gain access to the coils.
- Gently brush off dirt and debris: Use a soft brush or a coil cleaning brush to carefully remove loose dirt, dust, and debris from the evaporator coils. Be gentle to avoid damaging the coils.
- Clean with a coil cleaner: Apply a gentle coil cleaner or a mixture of mild detergent and warm water to a soft cloth or sponge. Wipe down the coils, paying attention to any areas with stubborn dirt or grime. Avoid using harsh chemicals or abrasive materials that could damage the coils.
- Rinse the coils: If applicable, rinse the evaporator coils with clean water to remove any remaining residue or cleaner. Be careful not to oversaturate the coils or let water seep into other components of the air handler.
- Allow the coils to dry: Once cleaned, leave the coils to air dry completely before reinstalling any access panels or covers. This will prevent the growth of mold or mildew.
Cleaning the evaporator coils is an important maintenance task that should be performed at least once a year or as needed. By keeping these coils clean, you can improve cooling efficiency, ensure proper heat transfer, and prevent your AC unit from freezing.
With the evaporator coils cleaned, it’s time to move on to step 5: checking the refrigerant levels.
Check the air filter and clean or replace it if it’s dirty. A dirty filter can restrict airflow and cause the AC to freeze up.
Step 5: Check the Refrigerant Levels
Proper refrigerant levels are essential for the effective and efficient operation of your air conditioning (AC) system. Low refrigerant levels can cause the evaporator coils to freeze, resulting in decreased cooling performance. Here’s how to check the refrigerant levels:
- Ensure safety precautions: Before checking the refrigerant levels, ensure that the power to the AC unit is turned off to prevent any potential accidents or injuries.
- Locate the refrigerant lines: The refrigerant lines are typically copper tubes that connect the indoor and outdoor units of your AC system. They can be found near the outdoor condenser unit.
- Inspect the refrigerant lines for leaks: Carefully examine the refrigerant lines for any signs of oil stains or debris around the connections. These can indicate refrigerant leaks, which should be addressed by a professional HVAC technician.
- Check the refrigerant levels: Checking the actual refrigerant levels requires specialized equipment and expertise. It is best left to a professional HVAC technician who can perform a proper refrigerant pressure test and ensure the levels are within the manufacturer’s recommended range.
If you suspect low refrigerant levels or notice signs of a refrigerant leak, it’s essential to contact a professional HVAC technician. They will have the necessary tools and knowledge to properly diagnose and address the issue. Attempting to handle refrigerant-related tasks without the appropriate expertise can be dangerous and may result in further damage to your AC system.
Now that you have checked the refrigerant levels, let’s move on to step 6: ensuring proper airflow.
Step 6: Ensure Proper Airflow
Proper airflow is crucial for the efficient and effective operation of your air conditioning (AC) system. Poor airflow can contribute to the freezing of the evaporator coils. Here’s how to ensure proper airflow:
- Check the vents: Ensure that all vents throughout your home are open and unobstructed. Blocked vents can limit the airflow, leading to an imbalance in temperature and potential freezing of the AC unit.
- Clear debris from the outdoor unit: The outdoor condenser unit should be free from any debris, such as leaves, grass, or dust. Clear away any obstructions to allow for proper airflow around the unit.
- Inspect the ductwork: Examine the ductwork for any visible damage, such as leaks, disconnected sections, or obstructions. Damaged or improperly connected ductwork can restrict airflow and contribute to a frozen AC. Seal any leaks or gaps using duct tape or contact a professional for further repairs.
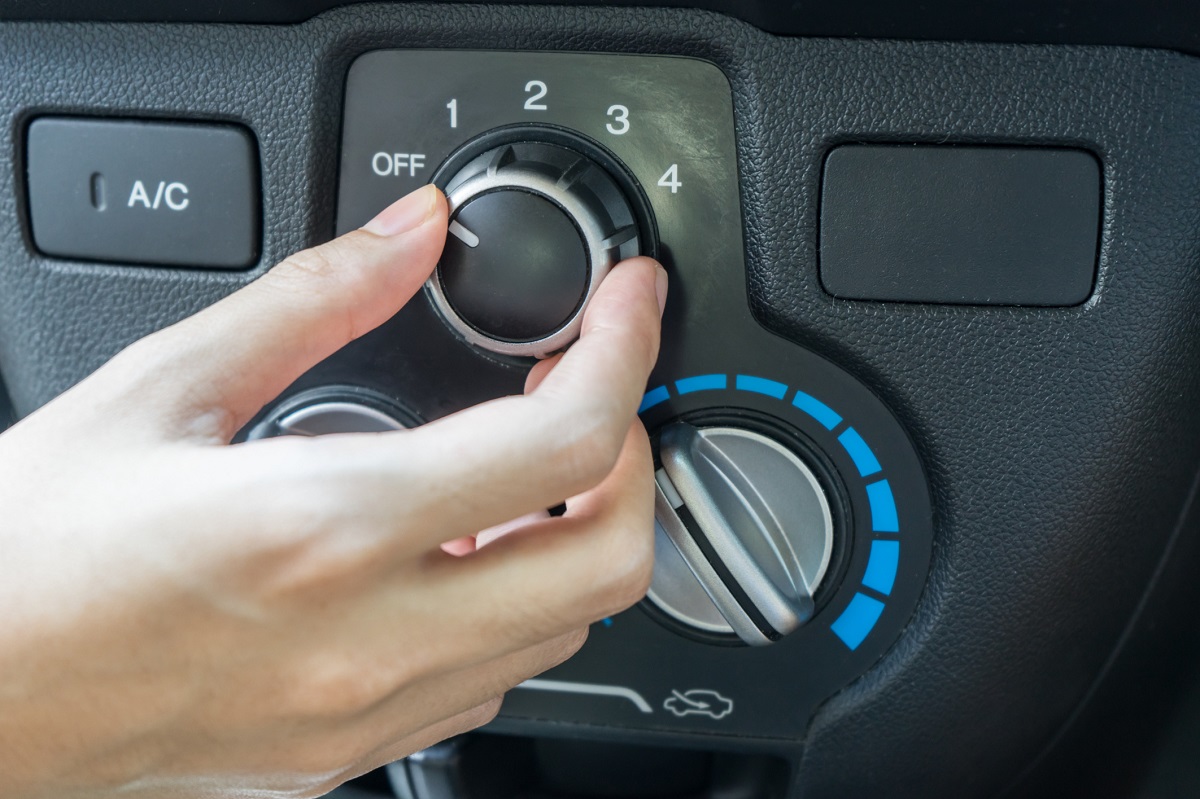
- Ensure proper fan settings: Check that the fan settings on your thermostat are set to “Auto” rather than “On”. Running the fan continuously can hinder the cooling process and potentially lead to freezing. The “Auto” setting allows the fan to cycle on and off as needed.
- Consider a fan speed adjustment: If your AC unit has adjustable fan speed settings, ensure it is set to the appropriate speed for your cooling needs. A higher fan speed can help improve airflow and prevent freezing.
By ensuring proper airflow, you can help maintain a balanced and functioning AC system. This step is vital in preventing the freezing of the evaporator coils and ensuring optimal cooling performance throughout your home.
With proper airflow taken care of, let’s move on to step 7: checking for issues with the blower motor.
Read more: How To Fix An AC Leak
Step 7: Check for Issues with the Blower Motor
The blower motor in your air conditioning (AC) system is responsible for circulating air across the evaporator coils to facilitate the cooling process. A malfunctioning blower motor can lead to insufficient airflow, causing the AC unit to freeze. Here’s how to check for issues with the blower motor:
- Turn off the power: Before inspecting the blower motor, ensure that the power to the AC unit is turned off. You can do this by switching off the circuit breaker that supplies power to the unit.
- Locate the blower motor: The blower motor is typically housed within the air handler unit, near the evaporator coils. You may need to remove panels or covers to access it.
- Visually inspect the blower motor: Look for any visible signs of damage, such as loose wires, worn belts, or excessive dust accumulation. Ensure that the blower fan is spinning freely without any obstructions.
- Listen for unusual sounds: Turn on the power to the AC unit and listen for any unusual sounds coming from the blower motor. Screeching, grinding, or rattling noises can indicate a problem that needs to be addressed by a professional.
- Check the blower motor capacitor: The blower motor capacitor is a small electrical component that helps start and run the motor. If the capacitor is faulty or has failed, it can cause issues with the blower motor’s performance. A professional technician can perform tests on the capacitor to diagnose and replace it if necessary.
If you notice any issues with the blower motor or suspect that it may be malfunctioning, it’s advisable to contact a professional HVAC technician. They have the expertise and tools to accurately diagnose and repair any problems with the blower motor.
With the blower motor checked, let’s move on to step 8: testing the thermostat.
Step 8: Test the Thermostat
The thermostat is the control center of your air conditioning (AC) system, regulating the temperature and ensuring proper operation. A malfunctioning thermostat can lead to issues such as continuous operation or inaccurate temperature readings, which can contribute to the freezing of the AC unit. Here’s how to test the thermostat:
- Check the thermostat settings: Ensure that the thermostat is set to the desired temperature and cooling mode. Make any necessary adjustments to ensure accuracy.
- Verify the temperature reading: Use a separate thermometer to measure the temperature in the vicinity of the thermostat. Compare this reading to the temperature displayed on the thermostat. If there is a significant difference, it may indicate a calibration issue that requires professional attention.
- Test the thermostat responsiveness: Adjust the temperature setting on the thermostat to a level higher or lower than the current room temperature. Observe whether the AC unit turns on and off as expected to maintain the desired temperature. This will help determine if the thermostat is accurately detecting temperature changes and sending the appropriate signals to the AC system.
- Replace the thermostat batteries (if applicable): Some thermostats are battery-operated. If your thermostat has replaceable batteries, check their status and replace them if necessary. Weak or dead batteries can cause the thermostat to malfunction.
If you suspect issues with the thermostat or are unable to diagnose the problem yourself, it’s recommended to consult a professional HVAC technician. They have the expertise to troubleshoot and repair or replace the thermostat if needed.
With the thermostat tested, let’s move on to step 9: insulating the refrigerant lines.
Step 9: Insulate the Refrigerant Lines
Insulating the refrigerant lines in your air conditioning (AC) system can help prevent condensation and freezing. The refrigerant lines carry the refrigerant between the indoor and outdoor units, and insulation acts as a barrier against external temperature fluctuations. Here’s how to insulate the refrigerant lines:
- Gather insulation materials: Purchase foam insulation sleeves or adhesive insulation tape suitable for insulating refrigerant lines. The insulation material should be wide enough to cover the entire length of the exposed refrigerant line.
- Clean the refrigerant lines: Before applying insulation, ensure that the refrigerant lines are clean and free from any dirt or debris. Wipe them down with a damp cloth if necessary.
- Measure and cut the insulation: Measure the length of the exposed refrigerant lines and cut the insulation material accordingly. Leave a slight overlap to ensure full coverage.
- Wrap the insulation around the lines: Open the foam insulation sleeves or adhesive insulation tape and wrap it tightly around the refrigerant lines. Ensure a secure and snug fit. If using tape, wrap it spirally along the length of the lines, overlapping each wrap slightly.
- Secure the insulation: Use tape or zip ties to secure the ends of the insulation and keep it in place. This will prevent it from slipping or coming loose over time.
Insulating the refrigerant lines can help maintain stable temperatures and prevent the formation of condensation that can lead to freezing. It’s especially beneficial for lines that run through areas with high humidity or fluctuating temperatures.
Once you’ve insulated the refrigerant lines, it’s time to move on to step 10: calling a professional if problems persist.
Step 10: Call a Professional if Problems Persist
If you’ve followed the previous steps and are still experiencing issues with a frozen air conditioning (AC) unit, it may be time to call in a professional HVAC technician. While many common causes of a frozen AC can be resolved with basic troubleshooting, some underlying issues may require professional expertise. Here’s why you should consider calling a professional:
- Complex repairs: If you’ve inspected the various components of your AC system and haven’t been able to identify or resolve the issue, it’s best to leave the repairs to a trained technician. They have the knowledge and experience to diagnose and fix complex problems, such as refrigerant leaks, compressor issues, or electrical malfunctions.
- Ensuring safety: HVAC systems involve electrical components and potentially hazardous refrigerants. Without proper training and safety precautions, attempting repairs can be dangerous. A professional technician is equipped with the necessary tools and knowledge to handle these potentially hazardous situations safely.
- Maintaining warranty: If your AC system is under warranty, attempting DIY repairs or hiring unqualified individuals may void the warranty. It’s best to consult a professional to ensure that any repairs are conducted in compliance with the manufacturer’s guidelines.
- Expert recommendations: A professional technician can provide valuable advice and recommendations for maintaining the longevity and efficiency of your AC system. They can also suggest preventative measures to prevent future freezing issues and optimize performance.
When contacting a professional HVAC technician, be sure to provide them with detailed information about the problem you’re facing, the steps you’ve already taken, and any observations you’ve made. This will help them diagnose and address the issue more effectively.
Remember, it’s always better to seek professional assistance if you’re unsure or unable to resolve the problem yourself. Their expertise and training will help ensure a proper and long-term solution to your AC issues.
With this final step, you’ve completed the process of troubleshooting and fixing a frozen AC. By following these steps, you have taken proactive measures to restore optimal cooling performance and prevent future freezing episodes.
Stay cool and enjoy the comfort of your properly functioning air conditioning system!
Read more: How Much Does It Cost To Fix AC In Car
Conclusion
A frozen air conditioning (AC) unit can be a frustrating and inconvenient problem to face, especially during hot summer months. However, with the right knowledge and troubleshooting steps, you can effectively fix the issue and restore your AC to its optimal performance. By following the steps outlined in this guide, you have taken proactive measures to identify and address common causes of a frozen AC.
Throughout the troubleshooting process, you have checked and cleaned the air filter, inspected the condensate drain line, cleaned the evaporator coils, checked the refrigerant levels, ensured proper airflow, tested the thermostat, insulated the refrigerant lines, and contacted a professional if needed. These steps have addressed common issues such as restricted airflow, low refrigerant levels, dirt and debris buildup, and malfunctioning components.
Remember, ongoing maintenance and regular inspections are essential for keeping your AC unit in top shape and preventing future freezing problems. It’s important to clean or replace your air filter regularly, clear the condensate drain line, inspect and clean the evaporator coils, and ensure proper airflow throughout your home. Additionally, maintaining a properly calibrated thermostat and insulating refrigerant lines can contribute to an efficient and reliable AC system.
If you’re unable to troubleshoot and resolve the issue on your own or if problems persist, it’s always recommended to seek professional assistance. Certified HVAC technicians have the expertise and tools to diagnose and fix complex AC problems, ensuring your system functions optimally and safely.
By taking the right steps and maintaining your AC system, you can enjoy a cool and comfortable indoor environment all year round. Be proactive, stay cool, and remember to perform routine maintenance to keep your AC in top shape.
Thank you for reading, and we hope this guide has been helpful in fixing your frozen AC!
Frequently Asked Questions about How To Fix Frozen AC
Was this page helpful?
At Storables.com, we guarantee accurate and reliable information. Our content, validated by Expert Board Contributors, is crafted following stringent Editorial Policies. We're committed to providing you with well-researched, expert-backed insights for all your informational needs.


0 thoughts on “How To Fix Frozen AC”