Articles
How To Get A Towel Bar Off The Wall
Modified: August 27, 2024
Learn how to remove a stubborn towel bar from your wall with these helpful articles. Get step-by-step instructions and tips for an easy and successful removal.
(Many of the links in this article redirect to a specific reviewed product. Your purchase of these products through affiliate links helps to generate commission for Storables.com, at no extra cost. Learn more)
Introduction
Having a towel bar on the wall of your bathroom is not only functional but also adds a touch of elegance to the space. However, there may come a time when you want to change the towel bar or simply remove it for renovation purposes. Removing a towel bar may seem daunting at first, but with the right tools and knowledge, it can be a straightforward process.
In this article, we will guide you on how to get a towel bar off the wall hassle-free. From gathering the necessary materials and tools to the step-by-step process of removing the towel bar and repairing any damage, we’ve got you covered. So, let’s jump right in!
Key Takeaways:
- Easily remove a towel bar from the wall by following simple steps, using basic tools, and repairing any damage. Enjoy the process and achieve a fresh look in your bathroom hassle-free!
- Gather the necessary materials and tools, unscrew mounting plates and set screws, remove the towel bar, patch any damage, and clean the wall surface for a successful towel bar removal. Achieve a revamped bathroom space with ease!
Materials and Tools Needed
Before you begin removing the towel bar from the wall, make sure you have the following materials and tools:
- Screwdriver (flathead or Phillips, depending on the screws)
- All-purpose cleaner
- Putty knife
- Sanding block
- Spackle or wall patching compound
- Sandpaper (medium grit)
- Paint (matching the color of your wall)
- Paintbrush or roller
These materials and tools will ensure that you have everything you need to safely remove the towel bar and repair any damage that may occur during the process. Now that you’ve gathered everything, let’s move on to the step-by-step instructions to remove the towel bar from the wall.
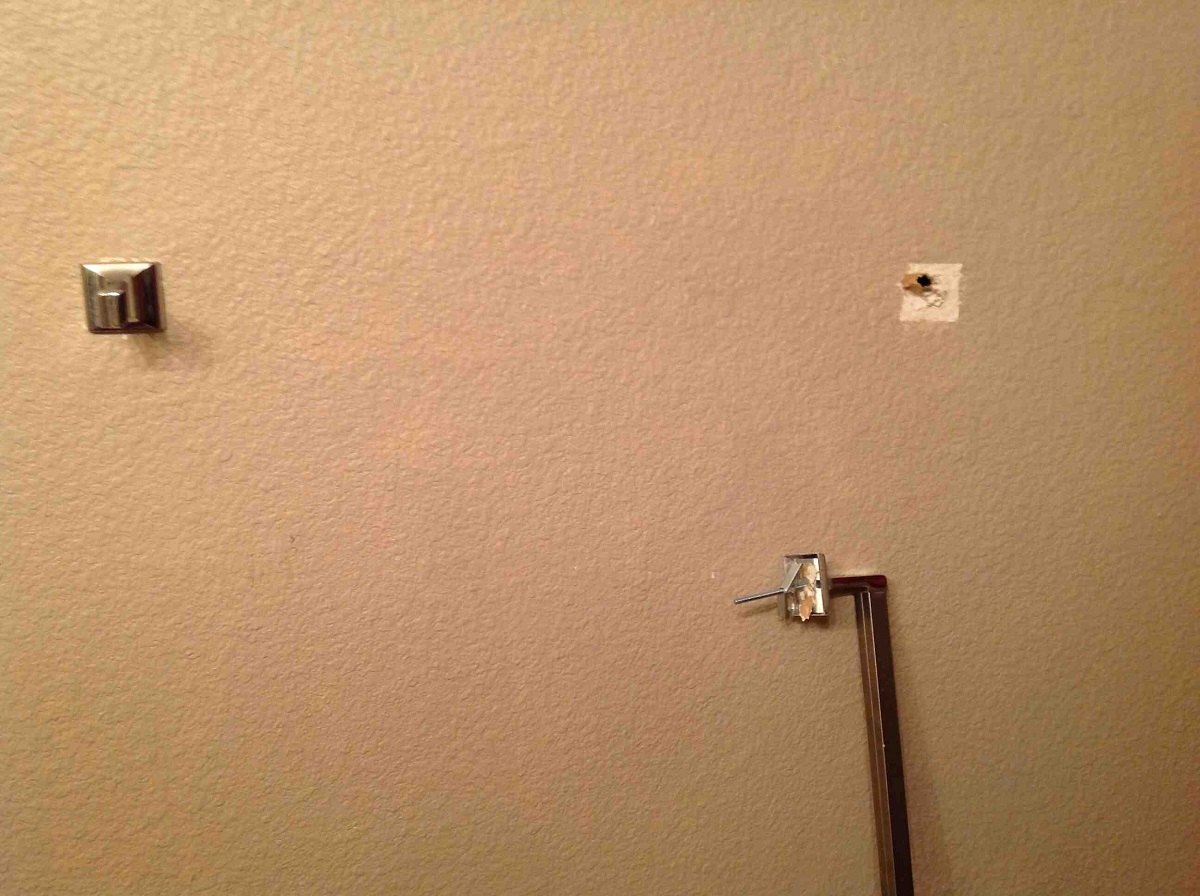
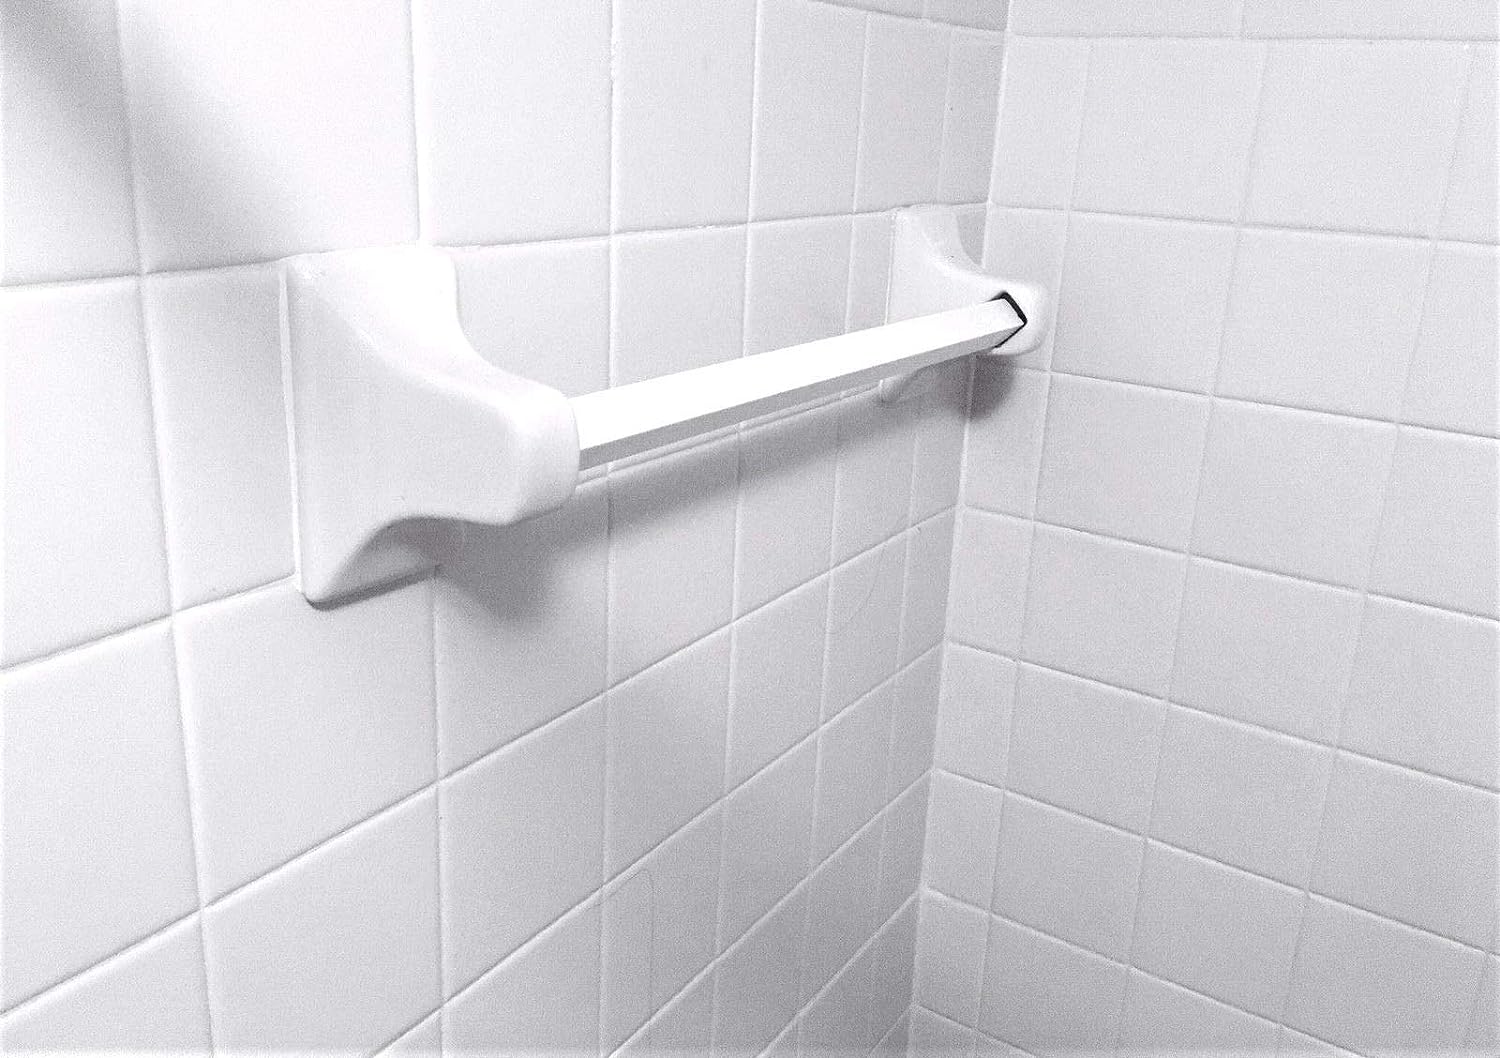
Step 1: Remove the Towel Bar’s Mounting Plates
The first step in removing the towel bar from the wall is to detach the mounting plates. These plates are typically located on each end of the towel bar, securing it to the wall. Here’s how to remove them:
- Inspect the mounting plates for any visible screws or covers.
- If there are covers, use a putty knife or your fingers to carefully pry them off.
- Using a screwdriver (flathead or Phillips), unscrew the mounting screws that hold the plates in place. Turn them counterclockwise to loosen and remove them.
- Once the mounting screws are removed, gently pull the mounting plates away from the wall. They should come off easily, revealing the bare ends of the towel bar.
By removing the mounting plates, you have now separated the towel bar from its attachment to the wall. However, there may still be additional supports or set screws holding the towel bar in place. Let’s move on to the next step to address those.
Step 2: Unscrew the Set Screws or Supports
After removing the mounting plates, the next step is to unscrew any set screws or supports that are securing the towel bar to the wall. Here’s what you need to do:
- Inspect the towel bar for any set screws or additional supports. These are typically located on the underside of the towel bar or on its sides.
- If there are set screws, use a screwdriver (usually a smaller size like a hex key) to loosen and remove them. Turn the set screws counterclockwise to unscrew them completely. Note: Some towel bars may not have set screws, so proceed to the next step in that case.
- If there are additional supports, use a screwdriver (flathead or Phillips) to unscrew them. Turn them counterclockwise to loosen and remove them.
- Once the set screws or supports are removed, you should be able to detach the towel bar completely from the wall.
By unscrewing the set screws or supports, you have now released the towel bar from its remaining attachments. The next step is to remove the towel bar from the wall entirely. Let’s continue to the next step to learn how.
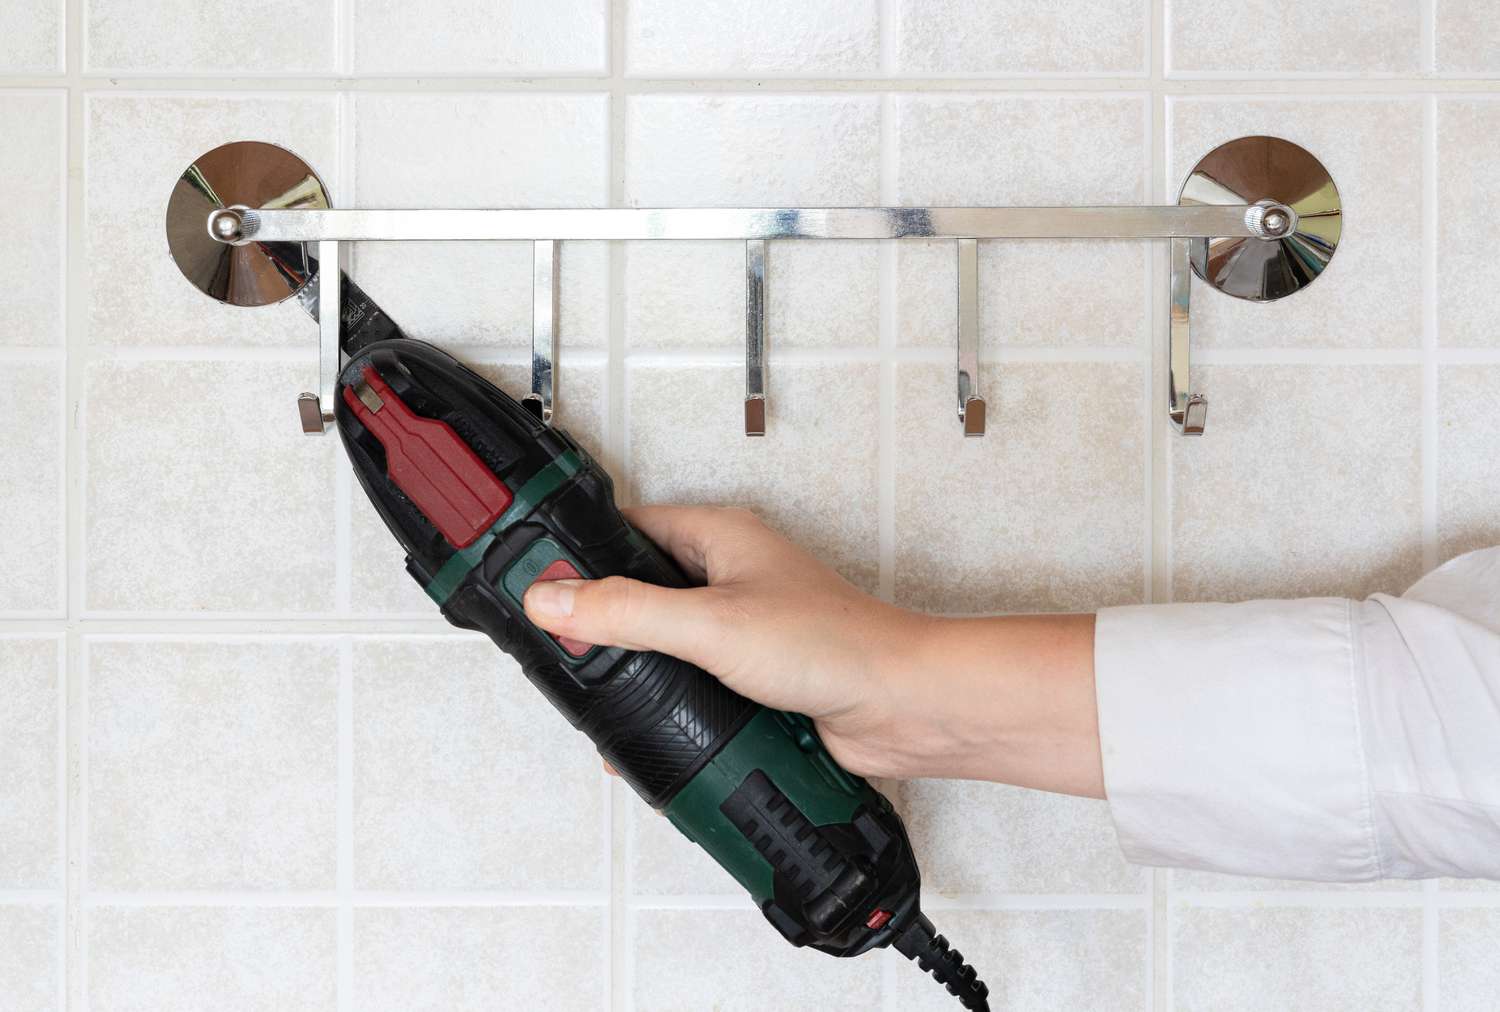
Use a screwdriver to remove the screws holding the towel bar in place. If the bar is glued, use a putty knife to gently pry it off the wall.
Step 3: Remove the Towel Bar from the Wall
With the mounting plates and set screws or supports removed, it’s now time to remove the towel bar from the wall. Here’s how you can do it:
- Gently lift the towel bar upwards or tilt it to one side to loosen it from the wall.
- If the towel bar is stuck, you may need to wiggle it back and forth or apply slight pressure to release it from any adhesive or caulking that may be holding it in place.
- Once the towel bar is loose, carefully pull it away from the wall. Be cautious not to apply excessive force to prevent damaging the wall surface or causing any further damage.
- Continue to remove the towel bar until it is completely detached from the wall.
By following these steps, you have successfully removed the towel bar from the wall. However, it’s important to note that removing the towel bar may leave behind some holes or damage on the wall surface. In the next step, we will guide you on how to patch and repair any remaining issues to restore the wall’s appearance.
Read more: How To Mount An Oar On A Wall As A Towel Bar
Step 4: Patch any Holes or Damage
After removing the towel bar, you may notice some holes or damage on the wall surface where it was previously attached. It’s important to patch and repair these areas to restore the wall’s appearance. Follow these steps to patch any holes or damage:
- Inspect the holes or damage on the wall. If there are any loose or peeling paint, gently scrape away the loose flakes with a putty knife.
- Using a sanding block or sandpaper (medium grit), smooth the edges around the holes or damaged areas to create a clean surface.
- Apply a small amount of spackle or wall patching compound to a putty knife, and fill the holes or damaged areas. Smooth the spackle or compound evenly across the surface, ensuring it is level with the surrounding wall.
- Allow the spackle or compound to dry according to the manufacturer’s instructions. This usually takes a few hours.
- Once dry, use sandpaper (medium grit) to gently sand down the patched areas, blending them with the surrounding wall surface. Wipe away any dust with a clean cloth.
By patching the holes and repairing any damage, you are taking the necessary steps to restore the wall’s appearance. However, there is still one more important step to consider: cleaning the wall surface before finalizing the removal process. Let’s move on to the next step to learn more.
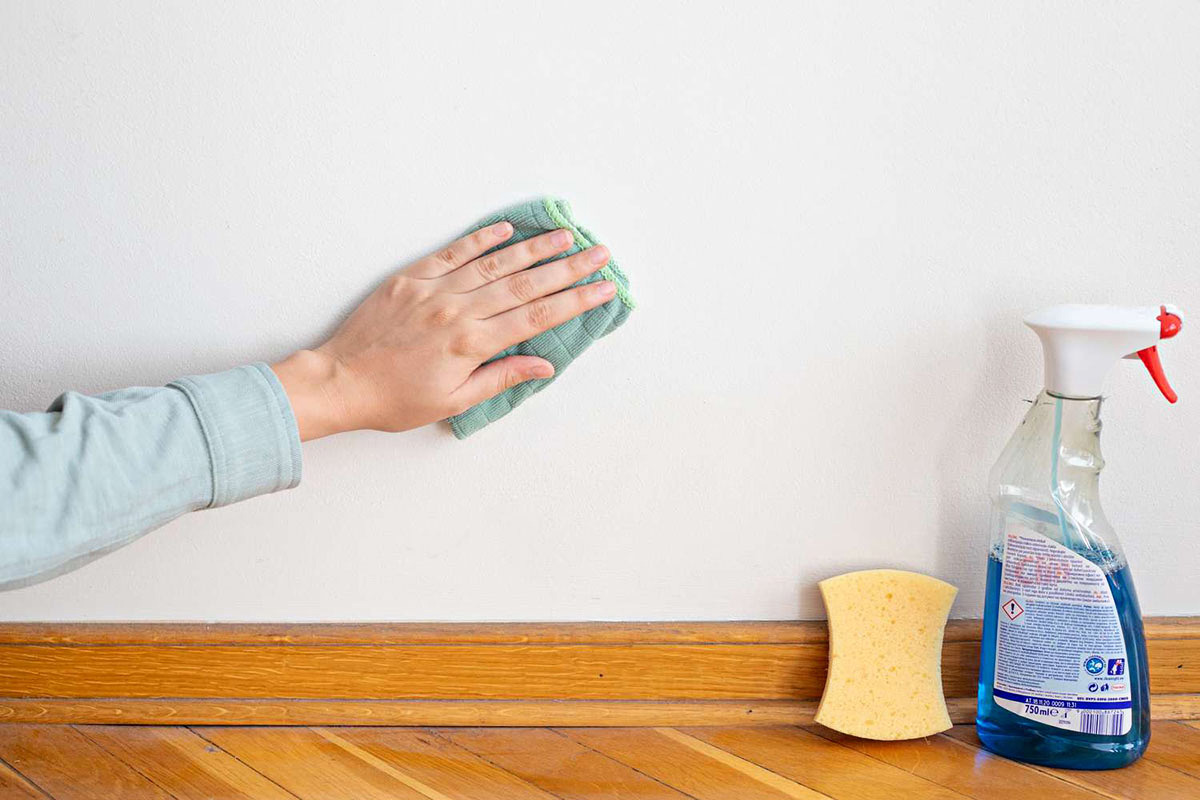
Step 5: Clean the Wall Surface
Once you have patched any holes or damage on the wall, it’s time to clean the wall surface to ensure it is free of any debris or residue. Follow these steps to clean the wall surface:
- Start by removing any loose dirt or dust from the wall using a soft cloth or duster.
- Prepare an all-purpose cleaner or a mixture of mild soap and warm water.
- Dampen a clean cloth or sponge with the cleaning solution, and gently wipe down the wall surface, paying attention to the area where the towel bar was previously attached.
- For tougher stains or residue, you may need to apply a bit of extra pressure while cleaning. However, be cautious not to damage the wall surface.
- Once you have thoroughly cleaned the wall surface, rinse the cloth or sponge with clean water and wipe down the wall again to remove any soap residue.
- Allow the wall to air dry completely before proceeding with any additional steps.
By cleaning the wall surface, you are ensuring that it is ready for any further touch-ups or painting if desired. Now that you have successfully removed the towel bar and cleaned the wall surface, you can proceed with the final steps to complete the process.
Remember, if you plan to install a new towel bar or make any other changes to the wall, make sure to follow the manufacturer’s instructions and take the necessary precautions to avoid any damage or accidents.
Conclusion
Removing a towel bar from the wall may seem like a daunting task, but with the right tools and knowledge, it can be a straightforward process. By following the step-by-step instructions provided in this article, you can successfully remove a towel bar and restore the wall’s appearance.
Start by gathering the necessary materials and tools, including a screwdriver, all-purpose cleaner, putty knife, sanding block, spackle or wall patching compound, sandpaper, and paint. These items will help you throughout the removal process and any necessary repairs.
Remove the towel bar’s mounting plates by unscrewing the mounting screws and gently pulling the plates away from the wall. Then, unscrew any set screws or supports that are securing the towel bar, allowing you to detach it completely from the wall.
Once the towel bar is removed, take the time to patch any holes or damage on the wall using spackle or wall patching compound. Sand down the patched areas to create a smooth surface, and clean the wall using an all-purpose cleaner or mild soap and water solution. This will ensure the wall surface is free of debris and ready for any further touch-ups or painting.
Remember to take caution throughout the process to avoid causing any additional damage to the wall or injuring yourself. If you plan to install a new towel bar or make any other changes to the wall, be sure to refer to the manufacturer’s instructions and take appropriate safety measures.
By following these steps, you can confidently remove a towel bar from the wall and achieve a fresh look in your bathroom. Enjoy the process and the satisfaction of revamping your space!
Frequently Asked Questions about How To Get A Towel Bar Off The Wall
Was this page helpful?
At Storables.com, we guarantee accurate and reliable information. Our content, validated by Expert Board Contributors, is crafted following stringent Editorial Policies. We're committed to providing you with well-researched, expert-backed insights for all your informational needs.


0 thoughts on “How To Get A Towel Bar Off The Wall”