Articles
How To Handle Fiberglass Insulation
Modified: December 7, 2023
Learn effective ways to handle fiberglass insulation with our informative articles. Discover helpful tips and techniques for a safe and efficient insulation installation process.
(Many of the links in this article redirect to a specific reviewed product. Your purchase of these products through affiliate links helps to generate commission for Storables.com, at no extra cost. Learn more)
Introduction
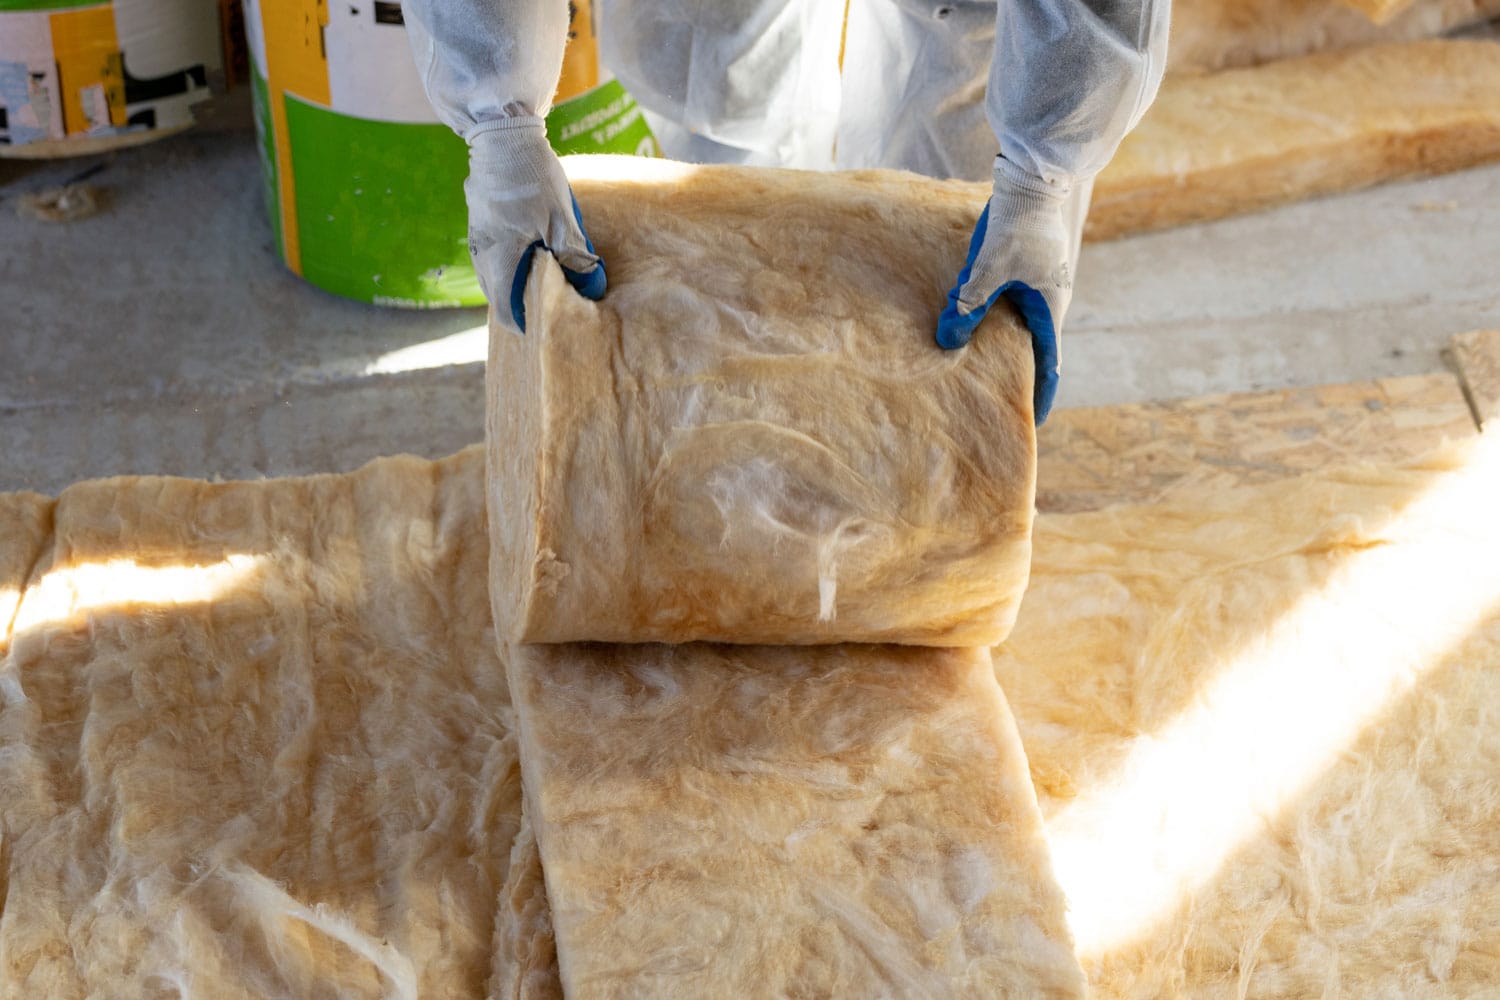
Fiberglass insulation is a commonly used material in residential and commercial buildings to provide thermal insulation. It is made from tiny glass fibers that trap air and create a barrier against heat transfer. This type of insulation is highly effective in improving energy efficiency and reducing heating and cooling costs.
While fiberglass insulation offers many benefits, it is essential to handle it with caution to avoid potential health hazards. The tiny glass fibers can cause skin irritation, respiratory issues, and eye discomfort if proper safety measures are not followed. Therefore, it is crucial to understand how to handle fiberglass insulation safely and carefully.
In this article, we will guide you through the process of handling fiberglass insulation effectively, ensuring your safety and the successful installation of the insulation. We will discuss the necessary tools and materials you will need, as well as the step-by-step procedure for cutting, installing, and sealing fiberglass insulation. By following these guidelines, you can confidently tackle your insulation project while safeguarding your well-being.
Key Takeaways:
- Safety First
When handling fiberglass insulation, prioritize safety by wearing protective gear, maintaining good ventilation, and properly disposing of waste. Following precautions ensures a successful and safe installation process. - Precision and Care
Accurate measurement, cutting, and installation of fiberglass insulation are crucial for effective thermal performance. Sealing gaps and joints and thorough clean-up contribute to maintaining energy efficiency and a safe environment.
Read more: How Much Is Fiberglass Insulation
Understanding Fiberglass Insulation
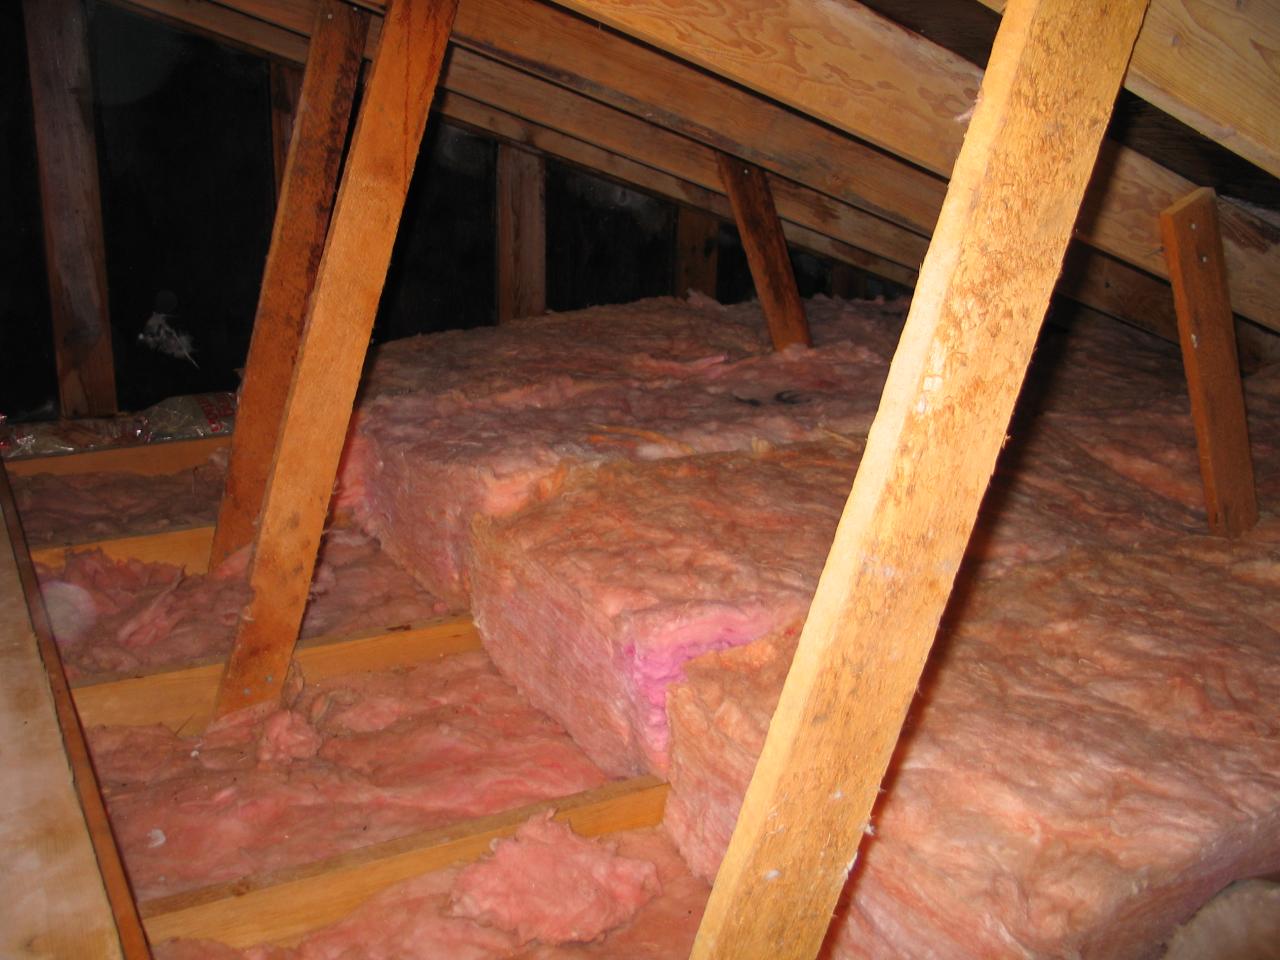
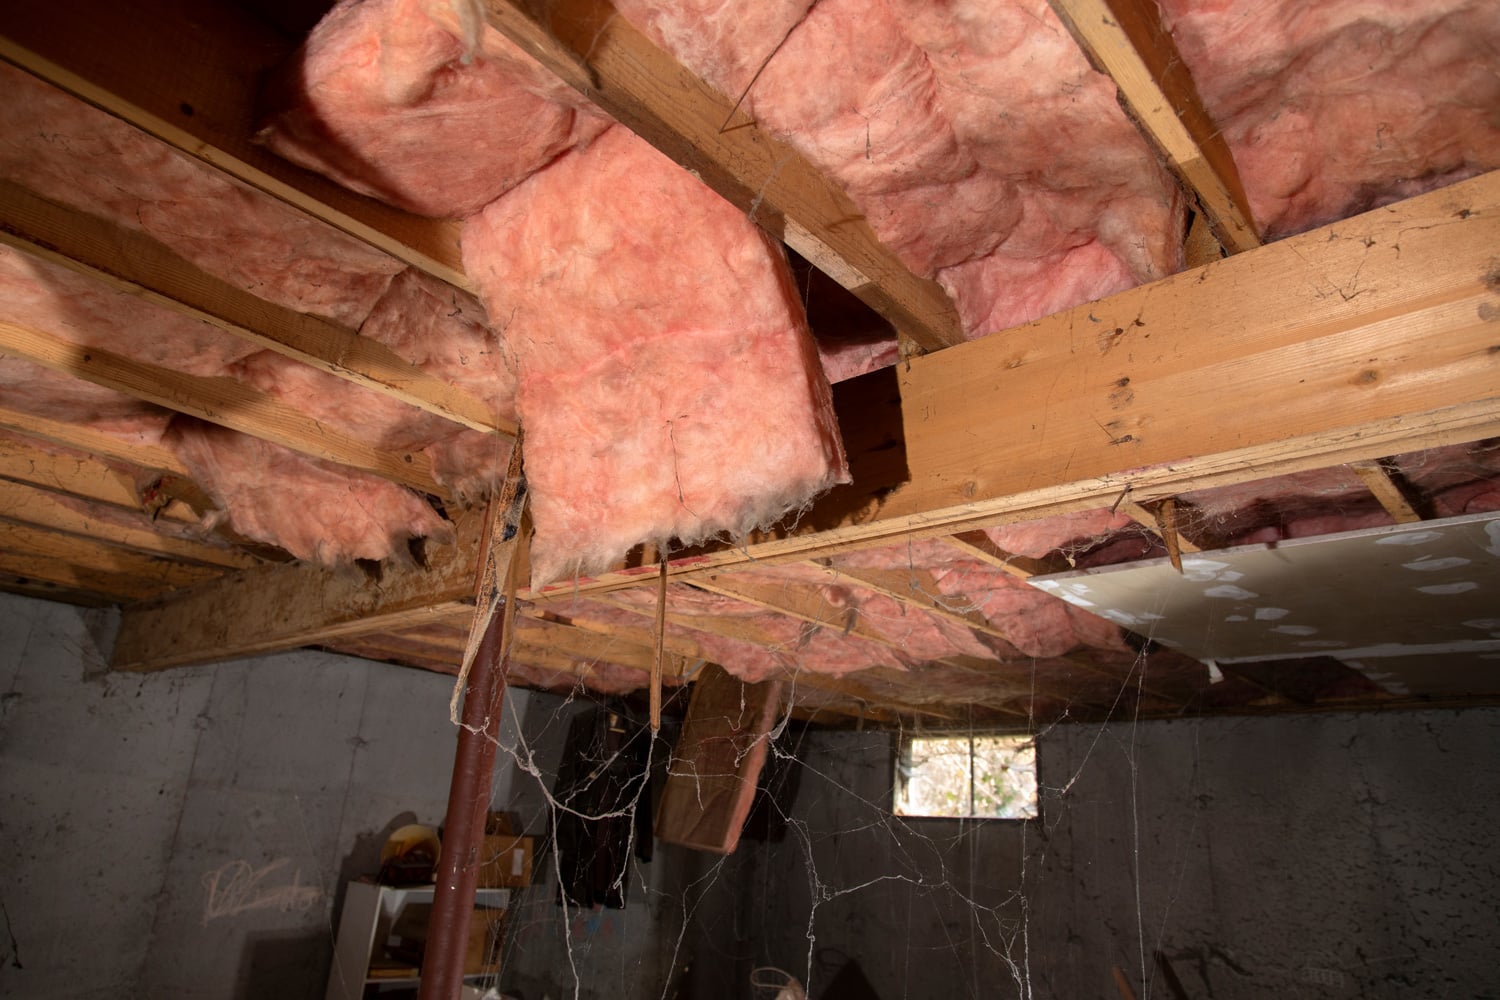
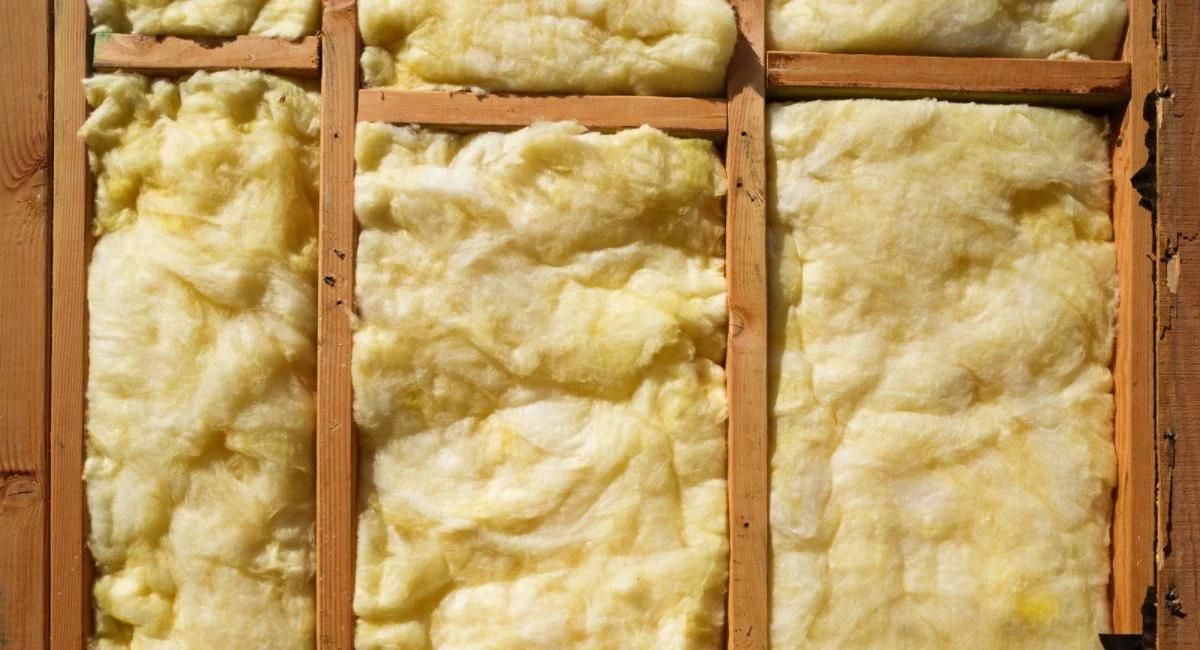
Fiberglass insulation consists of tiny glass fibers that are combined to form a fluffy and lightweight material. It is commonly used to insulate walls, ceilings, and attics in buildings to regulate temperature and improve energy efficiency.
The main principle behind fiberglass insulation is its ability to trap air within the tiny glass fibers. This trapped air acts as an insulating layer, slowing down heat transfer. Fiberglass insulation has a high R-value, which is a measure of its resistance to heat flow. The higher the R-value, the more effective the insulation is at preventing heat transfer.
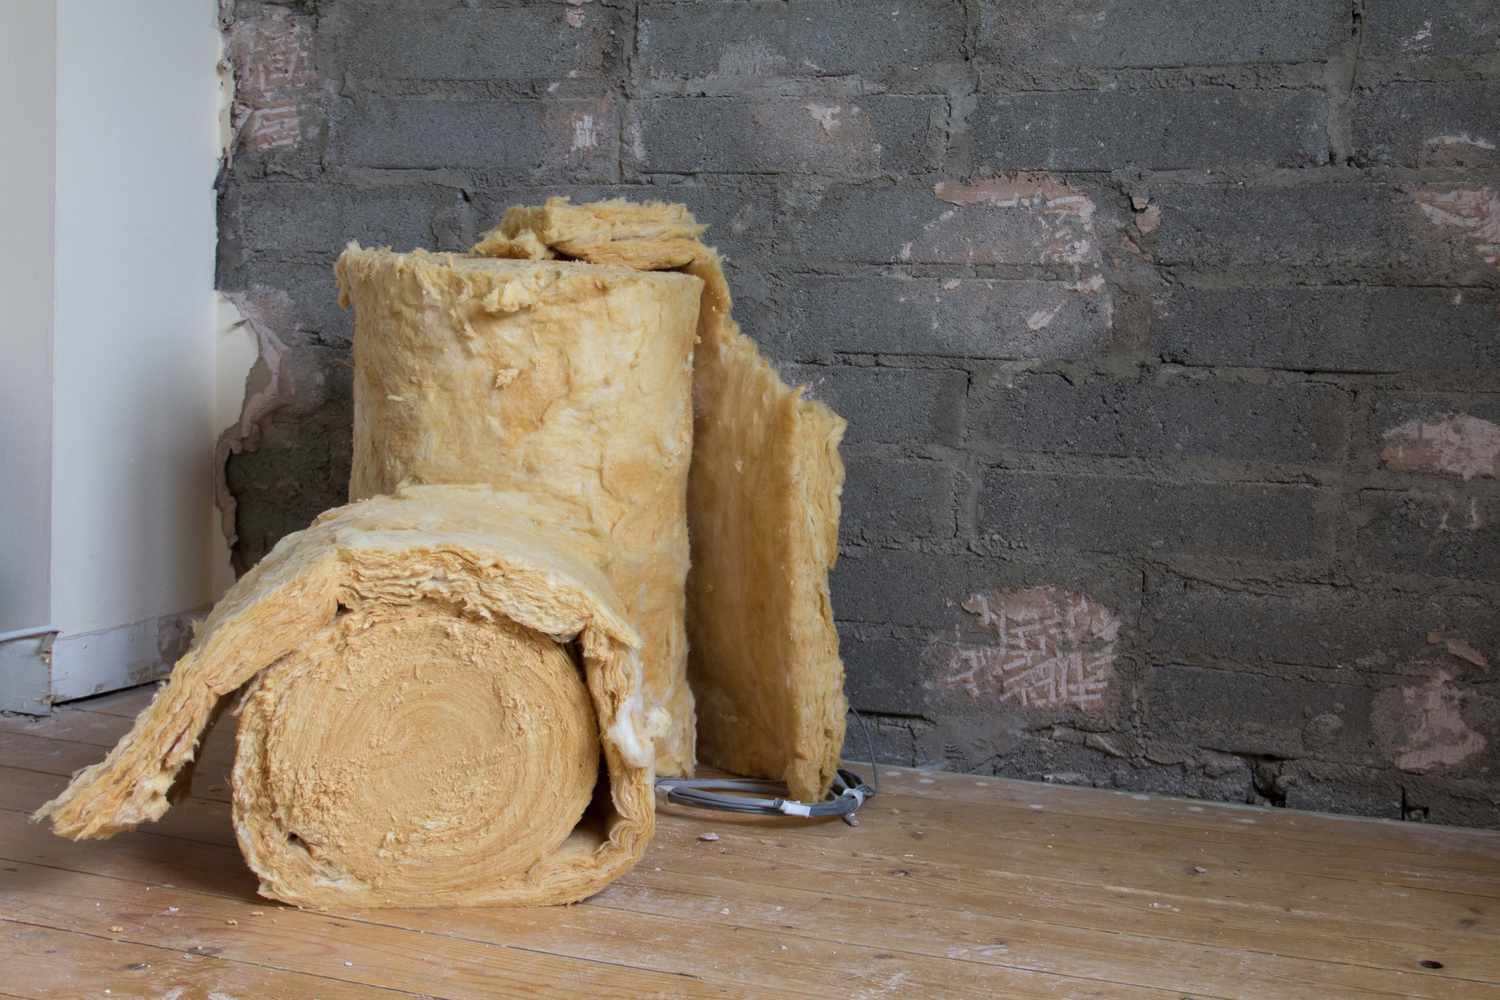
This type of insulation is available in different forms, including rolls, batts, and loose-fill. Rolls and batts are pre-cut into standard sizes that are easy to install between wall studs, floor joists, or ceiling rafters. Loose-fill insulation, on the other hand, is used for insulating hard-to-reach areas or places with irregular shapes.
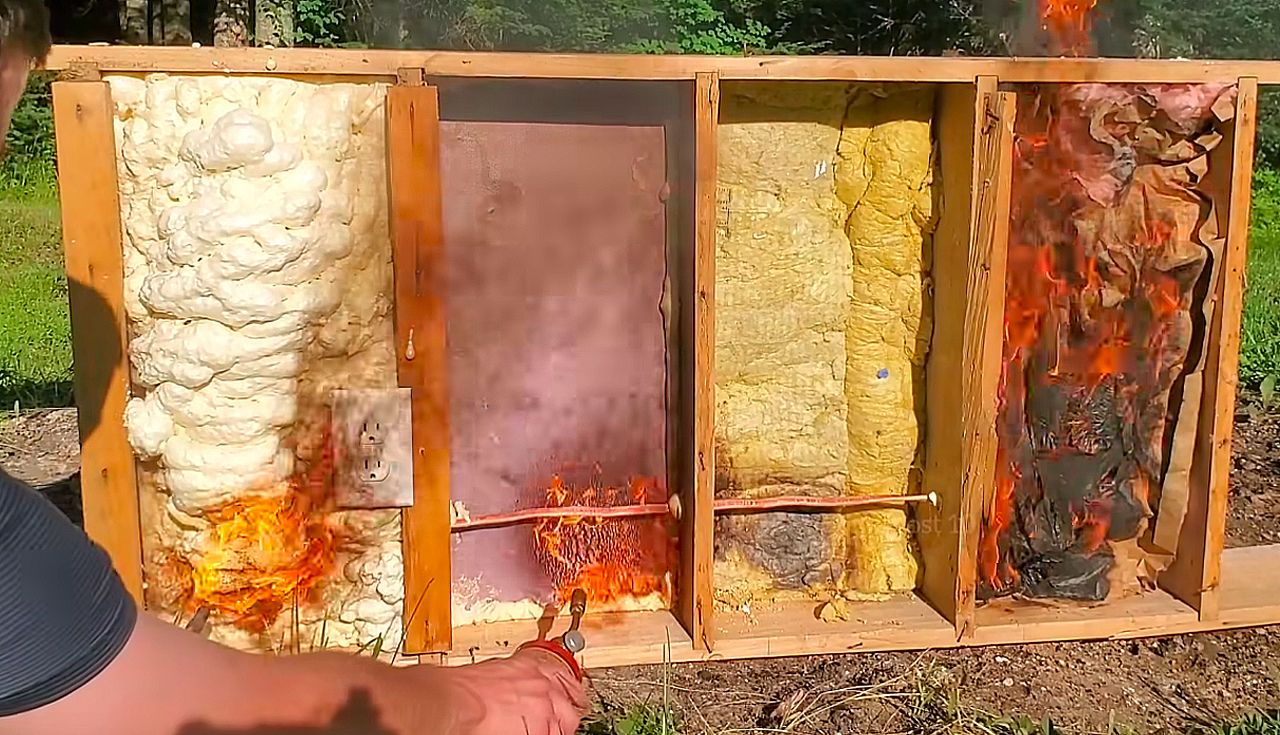
Fiberglass insulation is a popular choice for several reasons. It is cost-effective, readily available, and simple to install. It is also non-combustible, meaning that it does not contribute to the spread of fire.
However, when working with fiberglass insulation, it is important to take certain precautions. The tiny glass fibers can cause skin irritation and respiratory issues if they come into contact with your skin or are inhaled. Therefore, it is essential to wear protective gear and follow proper handling procedures to minimize the risk.
Now that you have a basic understanding of fiberglass insulation, let’s move on to the precautions and safety measures you should take before handling this material.
Handling Precautions
Before you begin working with fiberglass insulation, it is crucial to take the necessary precautions to protect your health and safety. Here are some key handling precautions to keep in mind:
- Wear Protective Gear: Always wear the appropriate protective gear when handling fiberglass insulation. This includes long-sleeved clothing, long pants, gloves, safety goggles, and a dust mask or respirator. These protective items will help prevent skin irritation and minimize exposure to airborne particles.
- Maintain Good Ventilation: Ensure that the work area is well-ventilated by opening windows or using fans. This will help dissipate any airborne particles and reduce the risk of inhaling fiberglass fibers.
- Avoid Direct Skin Contact: Avoid direct contact with fiberglass insulation to prevent skin irritation. If fiberglass fibers touch your skin, gently wash the affected area with mild soap and water. If irritation persists, seek medical attention.
- Avoid Inhaling Fiberglass Fibers: While working with fiberglass insulation, try to minimize the release of fibers into the air. Handle the insulation carefully, avoiding aggressive movements that may create dust or release fibers. It is also important to wear a dust mask or respirator to filter out any airborne particles.
- Keep Children and Pets Away: Ensure that children and pets are kept away from the work area to prevent accidental contact with fiberglass insulation.
- Properly Dispose of Waste: After completing the insulation project, dispose of any waste material properly. Place used insulation, scraps, and protective gear in sealed plastic bags or containers before disposing of them in accordance with local regulations.
By following these handling precautions, you can minimize the risk of skin irritation and respiratory issues associated with fiberglass insulation. Now that you are aware of the precautions, let’s move on to the tools and materials you will need for the insulation installation process.
Required Tools and Materials
Before you start installing fiberglass insulation, it’s important to gather the necessary tools and materials. Having everything ready will make the process smoother and more efficient. Here’s a list of the tools and materials you will need:
- Tape Measure: Use a tape measure to accurately measure the dimensions of the areas where you’ll be installing the insulation.
- Utility Knife or Insulation Cutter: A utility knife or insulation cutter will help you cut the fiberglass insulation to the desired size and shape.
- Straight Edge: A straight edge, such as a ruler or level, is useful for making precise cuts in the insulation.
- Protective Gear: As mentioned earlier, make sure you have the appropriate protective gear, including long-sleeved clothing, long pants, gloves, safety goggles, and a dust mask or respirator.
- Staple Gun or Adhesive: Depending on your preference, you can use a staple gun or adhesive to secure the insulation in place.
- Insulation Supports: Insulation supports, such as wire hangers or rods, are used to keep the insulation in position between studs or joists.
- Foam or Caulk: Foam or caulk can be used to seal any gaps or joints to ensure proper insulation and prevent air leakage.
- Bucket or Bag: Have a bucket or bag handy to collect any waste material, such as trimmed insulation.
Ensure that you have all the necessary tools and materials before you begin the installation process. Having these items readily available will save you time and allow you to work efficiently and effectively.
Now that you have everything prepared, let’s move on to the step-by-step process of installing fiberglass insulation.
Step 1: Preparation
Before you start installing fiberglass insulation, it’s important to prepare the work area properly. Follow these steps to ensure a smooth and successful insulation installation:
- Clean the Work Area: Clear any debris, dust, or existing insulation from the area where you’ll be installing the new fiberglass insulation. A clean and dry surface will allow the insulation to adhere properly.
- Measure and Plan: Use a tape measure to measure the dimensions of the space where you’ll be installing the insulation. Take accurate measurements of the length, width, and height of the walls, ceilings, or attic. Plan your installation layout accordingly, considering any obstacles such as electrical wires or plumbing pipes.
- Calculate the Required Insulation: Based on your measurements and the desired R-value, calculate the amount of insulation you’ll need. Keep in mind that fiberglass insulation is typically sold in rolls or batts with standardized widths and lengths. Round up your calculations to ensure you have enough material.
- Unroll or Unpack the Insulation: If you’re using rolled or packed fiberglass insulation, unroll or unpack it and allow it to expand for some time before installation. This will help the insulation regain its shape and ensure easier handling during installation.
- Read and Follow Manufacturer Instructions: Take the time to read and understand the manufacturer’s instructions provided with the insulation. Different products may have specific guidelines for installation, cutting, and handling.
By properly preparing the work area and familiarizing yourself with the measurements and installation requirements, you’ll be ready to move on to the next step: wearing the necessary protective gear.
Read more: Why Is Fiberglass Used In Insulation
Step 2: Wearing Protective Gear
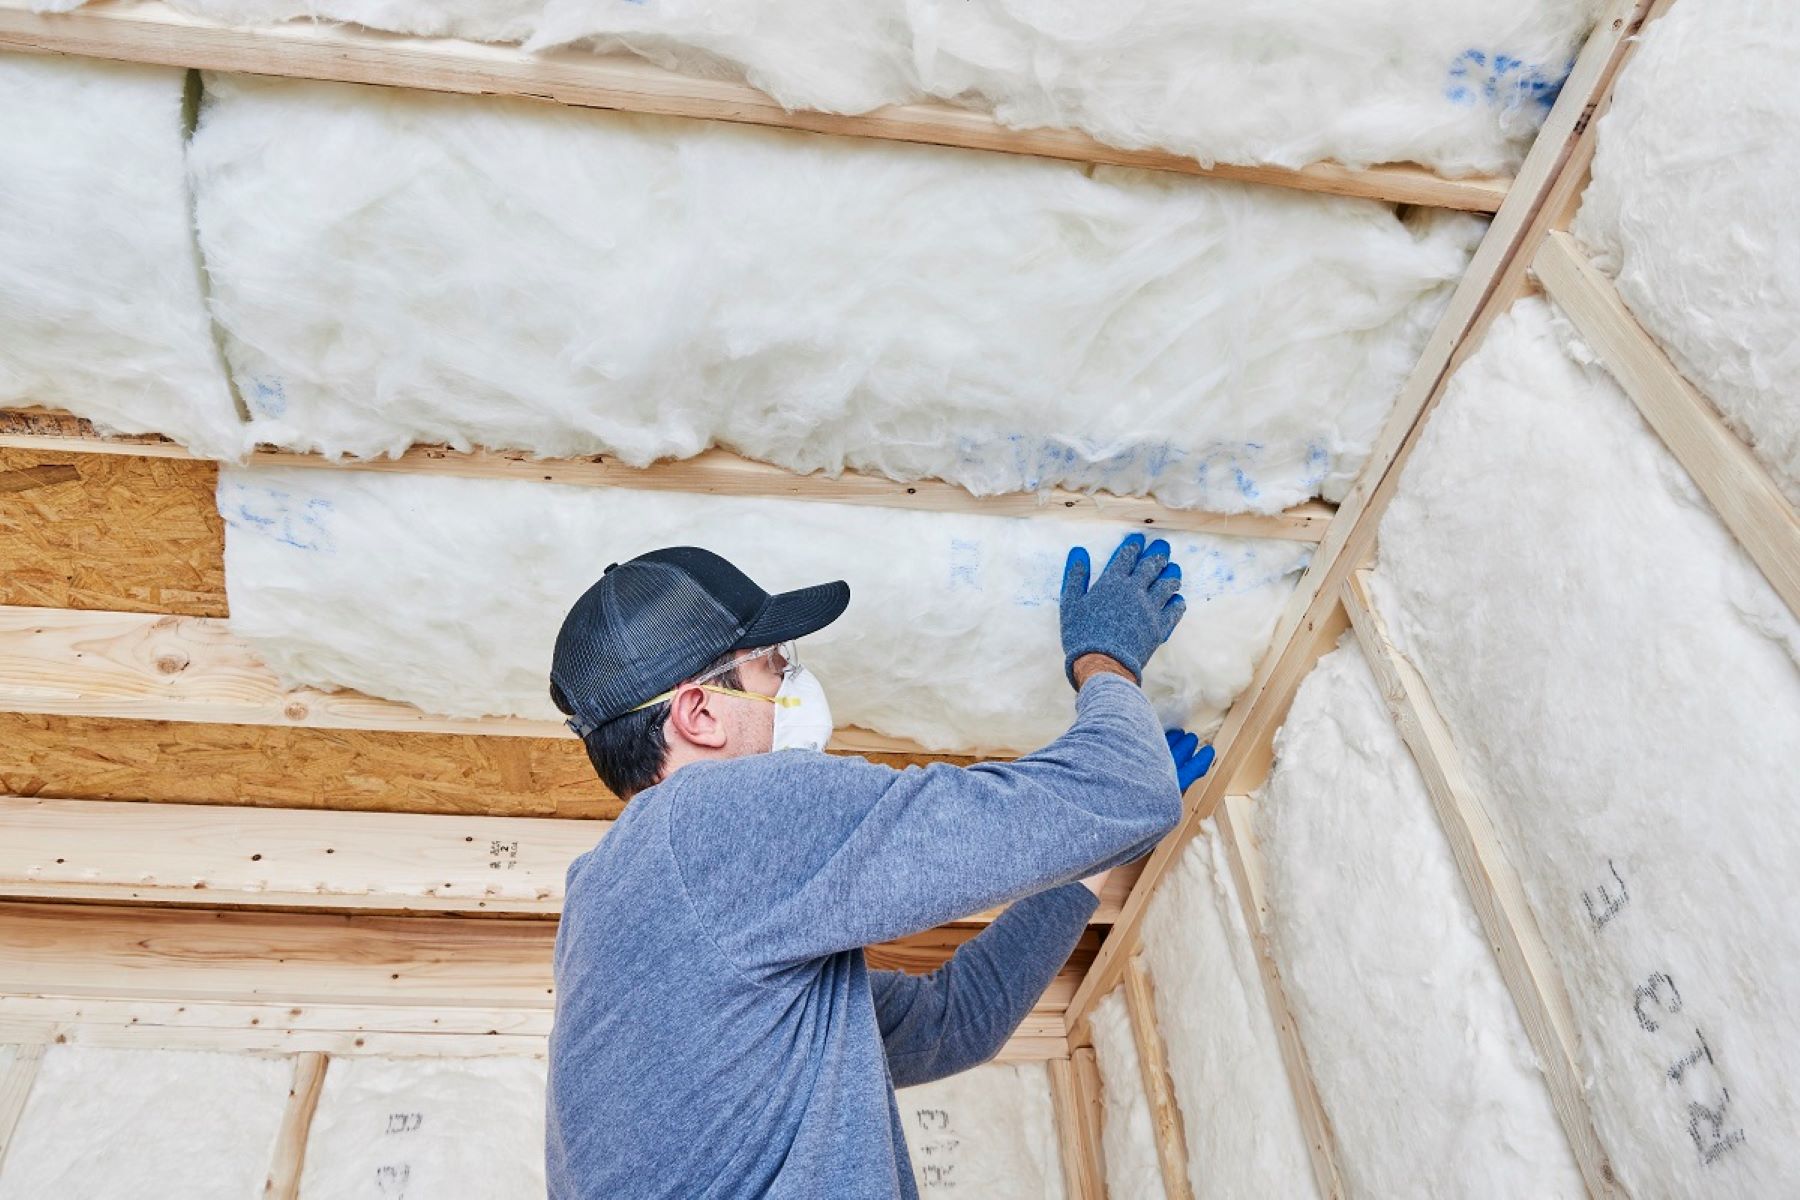
Before you begin handling fiberglass insulation, it is crucial to protect yourself by wearing the proper protective gear. This will help minimize the risk of skin irritation and respiratory issues associated with fiberglass fibers. Follow these steps to ensure you are wearing the appropriate protective gear:
- Wear Long-Sleeved Clothing: Put on long-sleeved clothing to cover your arms and reduce direct contact with the fiberglass insulation.
- Wear Long Pants: Choose long pants to protect your legs from possible irritation or contact with the insulation.
- Put on Gloves: Wear gloves made of a suitable material, such as nitrile or latex, to provide a barrier between your skin and the fiberglass fibers. Avoid using gloves made of cotton or other materials that may allow fibers to penetrate.
- Wear Safety Goggles: Protect your eyes from airborne fiberglass particles by wearing safety goggles. Make sure the goggles fit snugly to prevent any debris from entering your eyes.
- Use a Dust Mask or Respirator: To prevent inhaling fiberglass fibers, wear a dust mask or respirator that is specifically designed to filter out small particles. Ensure that the mask covers both your mouth and nose, providing you with adequate protection.
- Ensure Proper Fit and Seal: Check that all protective gear fits properly and forms a seal against your skin. This helps prevent any fiberglass fibers from entering through gaps or openings.
Remember, wearing the appropriate protective gear is essential when handling fiberglass insulation. It helps safeguard your health and minimizes the risk of skin irritation, respiratory issues, and eye discomfort. Once you have taken the necessary precautions, you can proceed to the next step: cutting the fiberglass insulation.
Wear protective clothing, gloves, and a mask when handling fiberglass insulation to avoid skin irritation and respiratory issues. Keep the area well-ventilated and clean up any stray fibers promptly.
Step 3: Cutting Fiberglass Insulation
Properly cutting fiberglass insulation is essential to ensure a precise fit and effective insulation coverage. Follow these steps to cut fiberglass insulation accurately:
- Measure and Mark: Use a tape measure to determine the dimensions of the space where you need to install the insulation. Mark these measurements on the insulation material using a pencil or marker.
- Use a Straight Edge: Place a straight edge, such as a ruler or level, along the marked line to ensure a straight and precise cut. This will help you achieve clean, straight edges.
- Score the Insulation: With the straight edge as a guide, use a utility knife or insulation cutter to score the fiberglass insulation along the marked line. Apply firm, even pressure as you cut.
- Complete the Cut: After scoring the insulation, carefully snap or cut it along the scored line. Take your time and use caution to avoid accidentally tearing or damaging the insulation.
- Repeat for Multiple Pieces: If you need multiple pieces of insulation, repeat the measuring, marking, and cutting process for each piece. Ensure consistency in size and shape to achieve proper insulation coverage.
- Dispose of Waste Properly: Collect any scraps or waste material from the cutting process and place them in a sealed bag or container for proper disposal. Seal the bag tightly to prevent fiberglass fibers from becoming airborne.
By following these steps, you can effectively cut fiberglass insulation to fit the specific dimensions of your installation area. Accurate cuts will ensure the insulation fits snugly, minimizing gaps and maximizing its thermal efficiency. Once you have cut the insulation pieces, it’s time to move on to the next step: installing the fiberglass insulation.
Step 4: Installing Fiberglass Insulation
Now that you have prepared the work area and cut the fiberglass insulation to size, it’s time to start the installation process. Follow these steps to properly install fiberglass insulation:
- Position the Insulation: Place the insulation into the desired position, ensuring it fits snugly between studs, joists, or rafters. If necessary, use insulation supports, such as wire hangers or rods, to hold the insulation in place.
- Unroll Batts or Fluff Loose-Fill: If you are using fiberglass batts or rolls, unroll them carefully to cover the designated area. For loose-fill insulation, use your hands or a tool to fluff and evenly distribute the insulation in the desired locations.
- Secure the Insulation: Use a staple gun or adhesive to secure the insulation in place. Be careful not to compress or overstuff the insulation, as this can reduce its effectiveness. Follow the manufacturer’s guidelines for proper installation techniques.
- Butt Edges Together: When installing multiple pieces of insulation, make sure to butt the edges together tightly to eliminate any gaps. This will ensure consistent insulation coverage and maintain the desired thermal performance.
- Avoid Blocking Vents or Fire Safety Features: Take note of any vents, fire safety features, or electrical outlets in the area you are insulating. Ensure that the insulation does not block or cover these important elements, as it may compromise their functionality.
- Follow Safety Guidelines: While installing the insulation, continue to wear the appropriate protective gear to minimize exposure to fiberglass fibers. Make sure the work area remains well-ventilated to reduce the concentration of airborne particles.
By following these steps, you can successfully install fiberglass insulation in your desired areas. The insulation will help improve energy efficiency and create a more comfortable living or working environment. Once you have installed the insulation, it’s time to move on to the next step: sealing any gaps and joints.
Step 5: Sealing Gaps and Joints
After installing the fiberglass insulation, it’s important to properly seal any gaps and joints to ensure maximum energy efficiency and thermal performance. Follow these steps to seal gaps and joints effectively:
- Inspect the Area: Carefully inspect the installed insulation and identify any gaps or joints where air may potentially leak. Common areas to check include corners, edges, and around electrical outlets or plumbing fixtures.
- Use Foam or Caulk: Apply a bead of foam or caulk along the gaps or joints. Foam insulation expands to fill gaps, while caulk provides a flexible seal. Choose a product that is suitable for your specific insulation and construction type.
- Fill Gaps Carefully: Fill any larger gaps with foam insulation, ensuring that the foam does not expand beyond the desired area. Follow the manufacturer’s instructions for proper application and drying time.
- Smooth and Even Out the Seal: Use a putty knife or your finger to smooth and even out the applied foam or caulk. This will create a neat finish and help improve the insulation’s appearance.
- Allow Proper Drying Time: Follow the manufacturer’s instructions for the recommended drying or curing time of the foam or caulk. Avoid disturbing or touching the sealed areas until the products have fully dried or cured.
- Reinspect and Touch Up: Once the sealed areas have dried, reinspect the insulation installation to ensure all gaps and joints are properly sealed. Touch up any areas that may require additional foam or caulk to achieve a complete seal.
Sealing gaps and joints is crucial to prevent air leakage, maintain consistent temperature control, and maximize energy efficiency. By following these steps, you can effectively seal the insulation and create an airtight barrier. Now that you have sealed the gaps and joints, it’s time to move on to the final step: cleaning up the work area.
Read more: How To Remove Fiberglass Insulation
Step 6: Cleaning Up
After completing the insulation installation and sealing process, it’s important to properly clean up the work area. Follow these steps to ensure a tidy and safe environment:
- Collect Waste Material: Gather any waste material, such as trimmed insulation pieces or packaging, and place them in a bag or bucket. This will help keep the work area clean and prevent loose fiberglass fibers from spreading.
- Seal Waste Material: Seal the bag or bucket containing the waste material tightly to prevent any fiberglass fibers from becoming airborne. Properly dispose of the waste material following local regulations.
- Vacuum or Sweep: Use a vacuum cleaner with a HEPA filter or a broom to remove any loose fibers or debris from the floor and surrounding areas. Be thorough in your cleaning to minimize the presence of fiberglass particles.
- Wash-Up Properly: After completing the cleanup, wash your hands and exposed skin thoroughly with soap and water to remove any residue or fibers. This will help minimize potential irritation or discomfort.
- Remove Protective Gear: Carefully remove your gloves, goggles, mask, and any other protective gear. Follow proper protocols for cleaning and storing these items, ensuring they are ready for future use or disposal.
By properly cleaning up the work area, you reduce the risk of exposure to fiberglass fibers and create a safe and tidy environment. Regular maintenance and cleaning of the surrounding areas will help ensure the long-term effectiveness and performance of the installed insulation.
Congratulations! You have successfully completed the installation process for fiberglass insulation, while following safety precautions and handling procedures. The insulation will provide improved energy efficiency, thermal comfort, and cost savings for your home or building.
Remember, if you have any concerns or require professional assistance, it’s always best to consult with a qualified insulation contractor or expert in your area.
Stay safe and enjoy the benefits of your newly installed fiberglass insulation!
Conclusion
Handling fiberglass insulation requires careful attention to safety precautions, proper installation techniques, and thorough clean-up. By following the guidelines outlined in this article, you can ensure a successful and safe insulation installation process.
Understanding the properties of fiberglass insulation, such as its ability to trap air and provide thermal insulation, is important for achieving energy efficiency and reducing heating and cooling costs. However, it is equally crucial to take handling precautions to avoid potential health hazards associated with fiberglass fibers.
Before starting the installation, it is essential to gather the required tools and materials and properly prepare the work area. Wearing protective gear, such as long-sleeved clothing, gloves, safety goggles, and a dust mask, is crucial to minimizing the risk of skin irritation and respiratory issues when handling fiberglass insulation.
Properly cutting and installing the insulation, and sealing any gaps and joints, are crucial steps in achieving effective thermal insulation. Taking the time to measure, mark, and cut the insulation accurately ensures a precise fit, while sealing gaps and joints helps maintain an airtight barrier for optimal energy efficiency.
Lastly, thorough clean-up of the work area, including collecting waste material, vacuuming or sweeping, and proper washing, helps maintain a safe and tidy environment and minimizes the presence of fiberglass fibers.
By following these steps and guidelines, you can handle and install fiberglass insulation confidently and successfully. Remember to always prioritize safety, carefully read and follow manufacturer instructions, and consult with professionals if needed. Enjoy the benefits of improved energy efficiency, thermal comfort, and cost savings provided by your properly installed fiberglass insulation!
Frequently Asked Questions about How To Handle Fiberglass Insulation
Was this page helpful?
At Storables.com, we guarantee accurate and reliable information. Our content, validated by Expert Board Contributors, is crafted following stringent Editorial Policies. We're committed to providing you with well-researched, expert-backed insights for all your informational needs.


0 thoughts on “How To Handle Fiberglass Insulation”