Home>Furniture & Design>Bathroom Accessories>How To Refinish A Fiberglass Bathtub Yourself
Bathroom Accessories
How To Refinish A Fiberglass Bathtub Yourself
Modified: March 18, 2024
Learn how to refinish a fiberglass bathtub yourself and give your bathroom a fresh new look with our step-by-step guide. Upgrade your bathroom accessories with this DIY project.
(Many of the links in this article redirect to a specific reviewed product. Your purchase of these products through affiliate links helps to generate commission for Storables.com, at no extra cost. Learn more)
Introduction
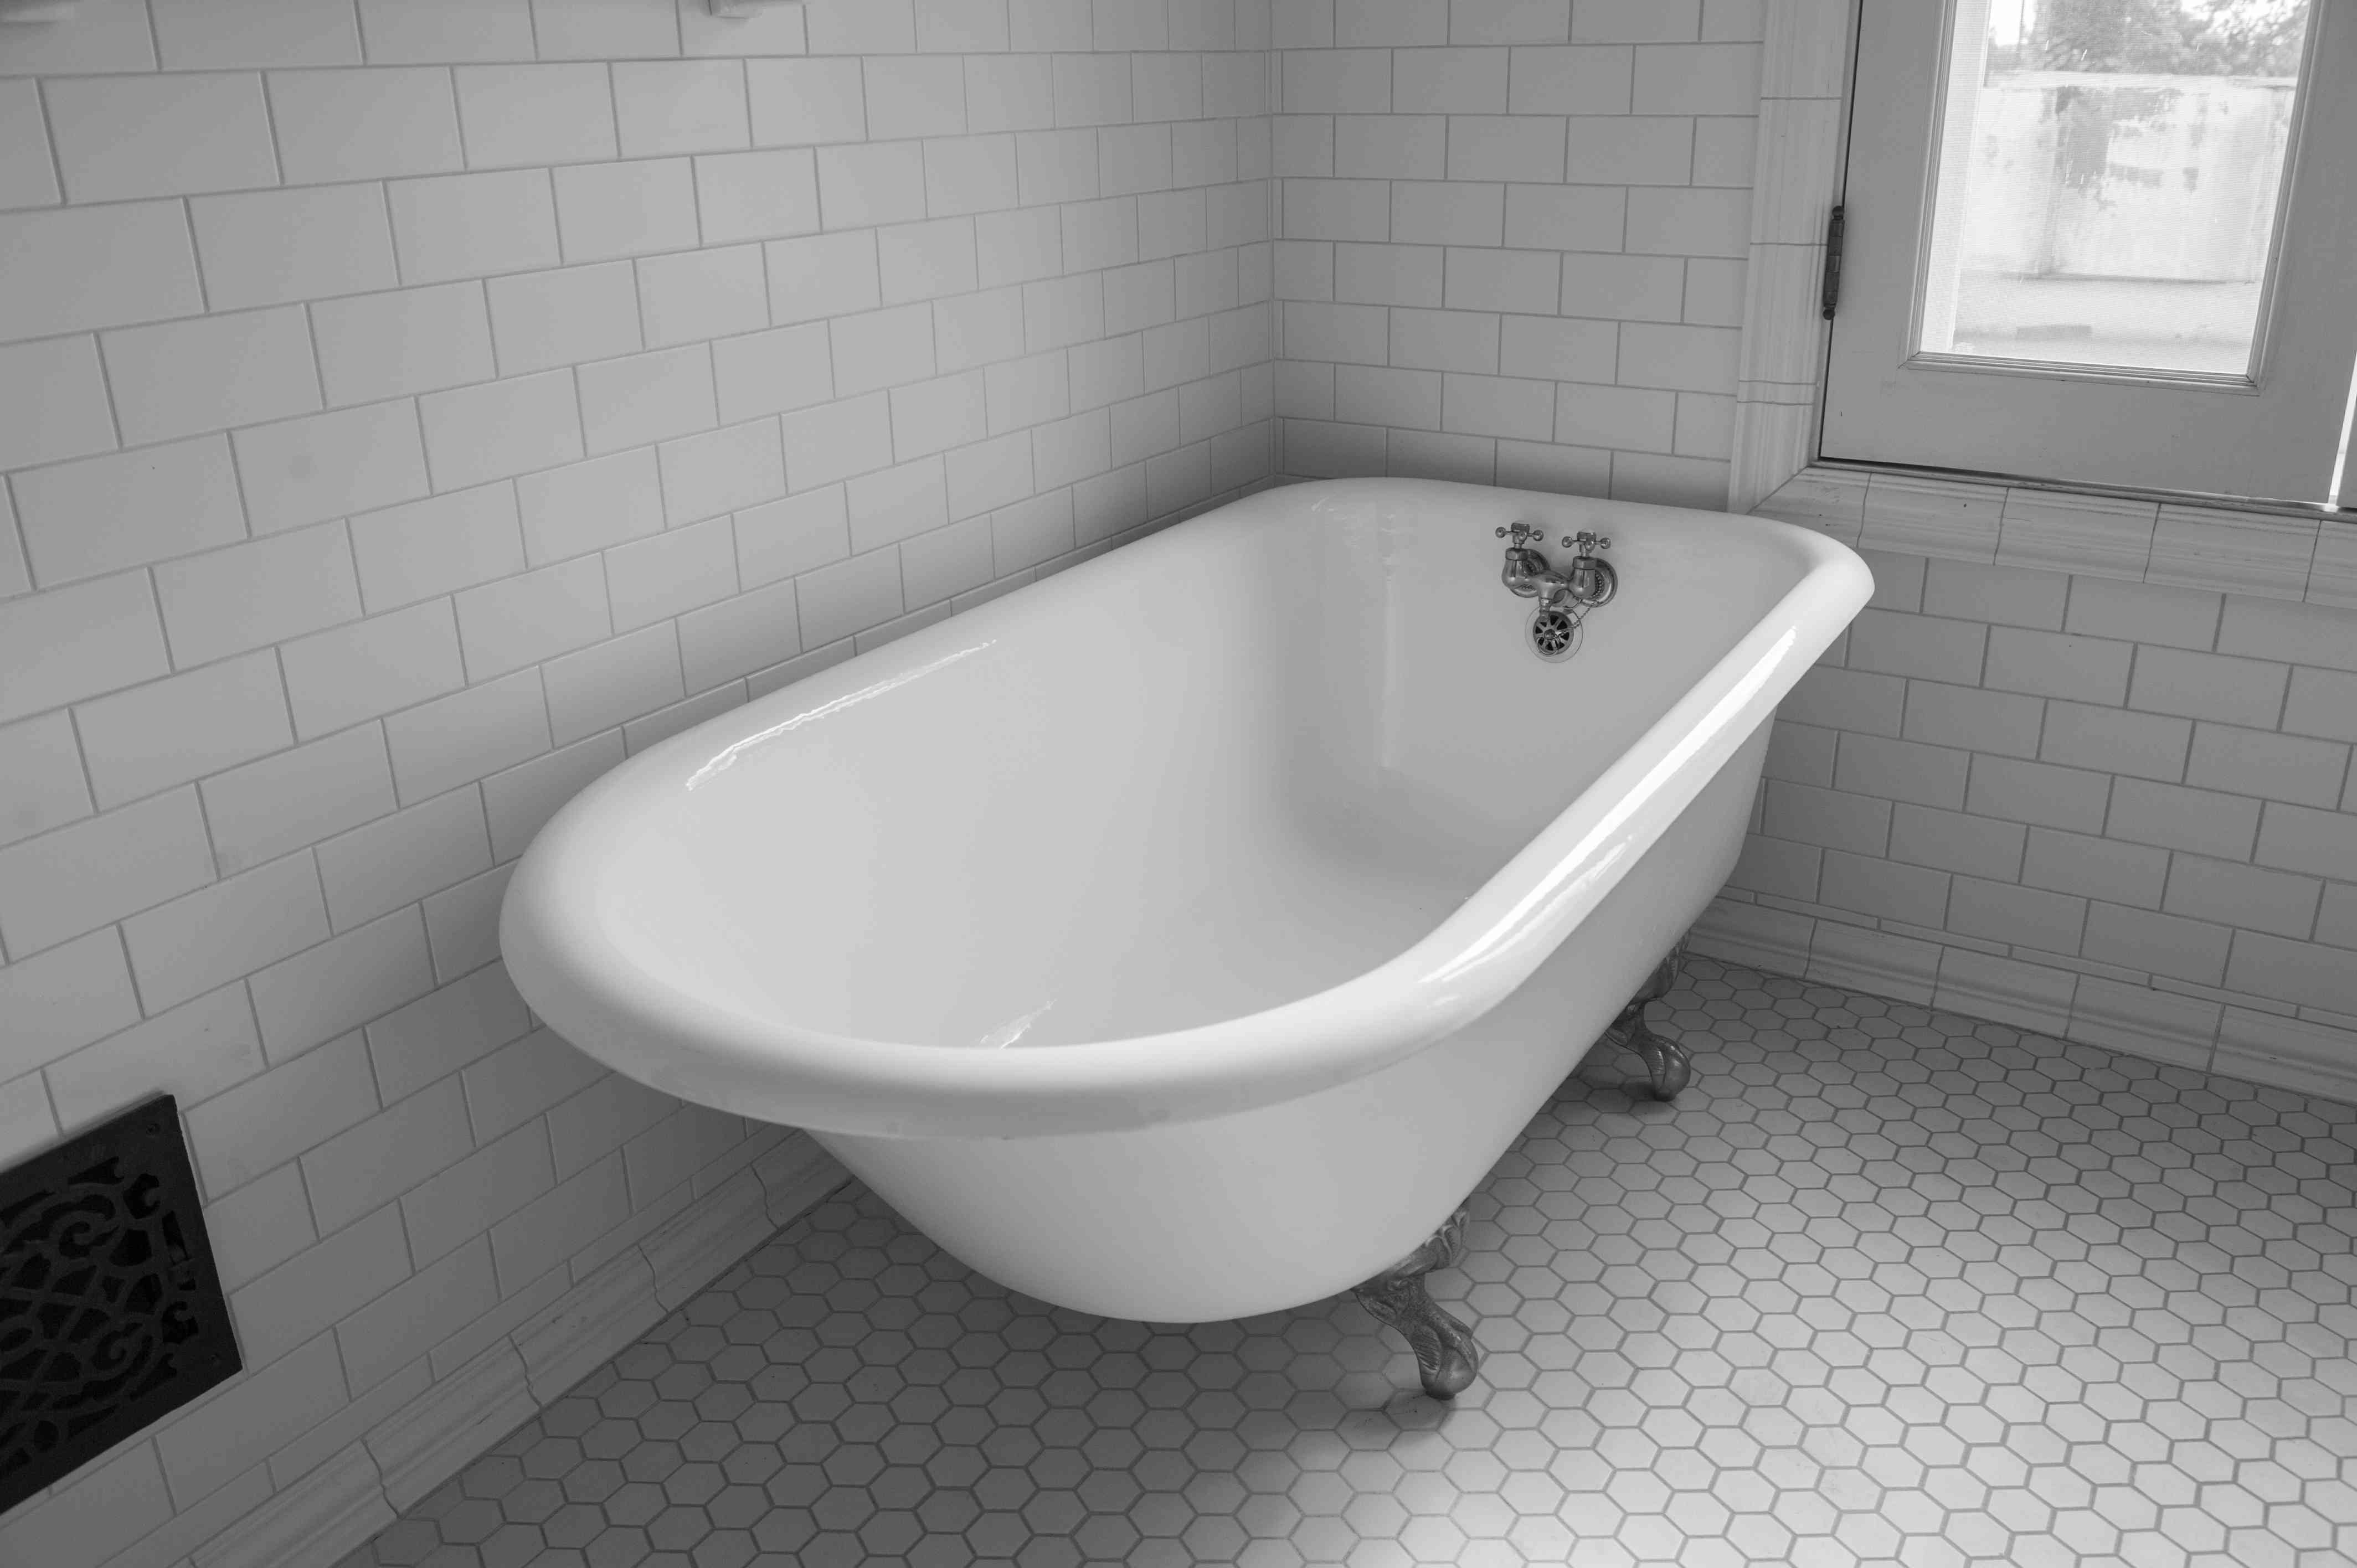
Refinishing a fiberglass bathtub can breathe new life into your bathroom without the cost and hassle of a full replacement. Over time, fiberglass bathtubs can become worn, stained, or scratched, detracting from the overall aesthetic of the space. However, with the right materials, a bit of elbow grease, and a touch of creativity, you can transform your bathtub into a sparkling centerpiece.
In this comprehensive guide, we will walk you through the process of refinishing your fiberglass bathtub step by step. Whether you're a seasoned DIY enthusiast or a novice looking to take on a new project, this guide will equip you with the knowledge and confidence to tackle this rewarding endeavor.
Refinishing a fiberglass bathtub is not only a cost-effective alternative to replacement but also an environmentally friendly choice. By choosing to revitalize your existing bathtub, you are contributing to the reduction of waste and the conservation of resources. Additionally, the satisfaction of witnessing the transformation of your bathtub under your own hands is a gratifying experience that adds a personal touch to your home.
Before diving into the refinishing process, it's important to understand that this project requires careful preparation, attention to detail, and patience. While the results can be stunning, it's essential to approach the task with a realistic mindset and a willingness to invest the necessary time and effort.
Throughout this guide, we will provide valuable insights, tips, and techniques to ensure that your fiberglass bathtub refinishing project is a success. From gathering the essential materials to applying the refinishing product and allowing it to cure, each step is crucial in achieving a professional-quality finish.
So, roll up your sleeves, put on your DIY hat, and let's embark on this transformative journey to revitalize your fiberglass bathtub!
Key Takeaways:
- Refinishing a fiberglass bathtub yourself is a cost-effective and eco-friendly way to revitalize your bathroom. It’s a rewarding DIY project that adds a personal touch to your home while reducing waste.
- By following the step-by-step process of cleaning, repairing, applying the refinishing product, and letting it cure, you can achieve a professional-quality finish and transform your bathtub into a sparkling centerpiece.
Read more: How To Whiten A Fiberglass Bathtub
Step 1: Gather Your Materials
Before embarking on the journey of refinishing your fiberglass bathtub, it's essential to gather all the necessary materials and tools. Having the right supplies at your disposal will streamline the process and ensure that you can proceed smoothly from one step to the next. Here's a comprehensive list of materials you'll need to refinish your fiberglass bathtub:
Safety Gear
- Respirator Mask: A high-quality respirator mask is essential for protecting your lungs from harmful fumes and particles during the refinishing process.
- Safety Goggles: Shield your eyes from splashes and fumes with a pair of durable safety goggles.
- Rubber Gloves: Invest in a pair of chemical-resistant rubber gloves to safeguard your hands from the refinishing products.
Cleaning and Preparation
- Abrasive Cleaner: Choose a non-abrasive, pH-neutral cleaner to thoroughly clean the bathtub surface and remove any dirt, grime, or soap scum.
- Sanding Materials: Prepare a range of sanding materials, including sandpaper with varying grits and a sanding block, to smooth out imperfections and create a suitable surface for refinishing.
- Tack Cloth: A tack cloth is essential for wiping down the bathtub after sanding to remove any residual dust and ensure a clean surface for the refinishing product.
Refinishing Products
- Fiberglass Refinishing Kit: Invest in a high-quality fiberglass refinishing kit that includes the necessary coatings, primers, and finishing compounds. Ensure that the kit is specifically designed for fiberglass surfaces to achieve optimal results.
- Epoxy or Polyurethane Topcoat: Depending on the specific refinishing kit you choose, you may need an epoxy or polyurethane topcoat to provide a durable and glossy finish to the bathtub.
Read more: How To Support A Fiberglass Bathtub
Application Tools
- Paint Sprayer or Brush: Depending on your preference and the recommendations of the refinishing kit, you'll need a high-quality paint sprayer or brush for applying the refinishing products evenly.
- Painter's Tape: Use painter's tape to mask off areas around the bathtub that you want to protect from overspray and accidental application.
Miscellaneous
- Drop Cloths or Plastic Sheeting: Cover the surrounding area with drop cloths or plastic sheeting to protect the floor and other fixtures from accidental spills and splatters.
- Ventilation Fan or Window Fan: Ensure proper ventilation in the bathroom by using a ventilation fan or opening windows to expel fumes and maintain a safe working environment.
By gathering these materials and tools, you'll be well-prepared to commence the bathtub refinishing process with confidence and efficiency. With the essentials in hand, you're ready to move on to the next step: preparing the bathtub for refinishing.
Step 2: Prepare the Bathtub
Preparing the bathtub for refinishing is a critical phase that sets the stage for the application of the refinishing products. This step involves thorough cleaning, repairing any damages, and creating a smooth, receptive surface for the refinishing coatings. Here's a detailed breakdown of the essential tasks involved in preparing the bathtub for refinishing:
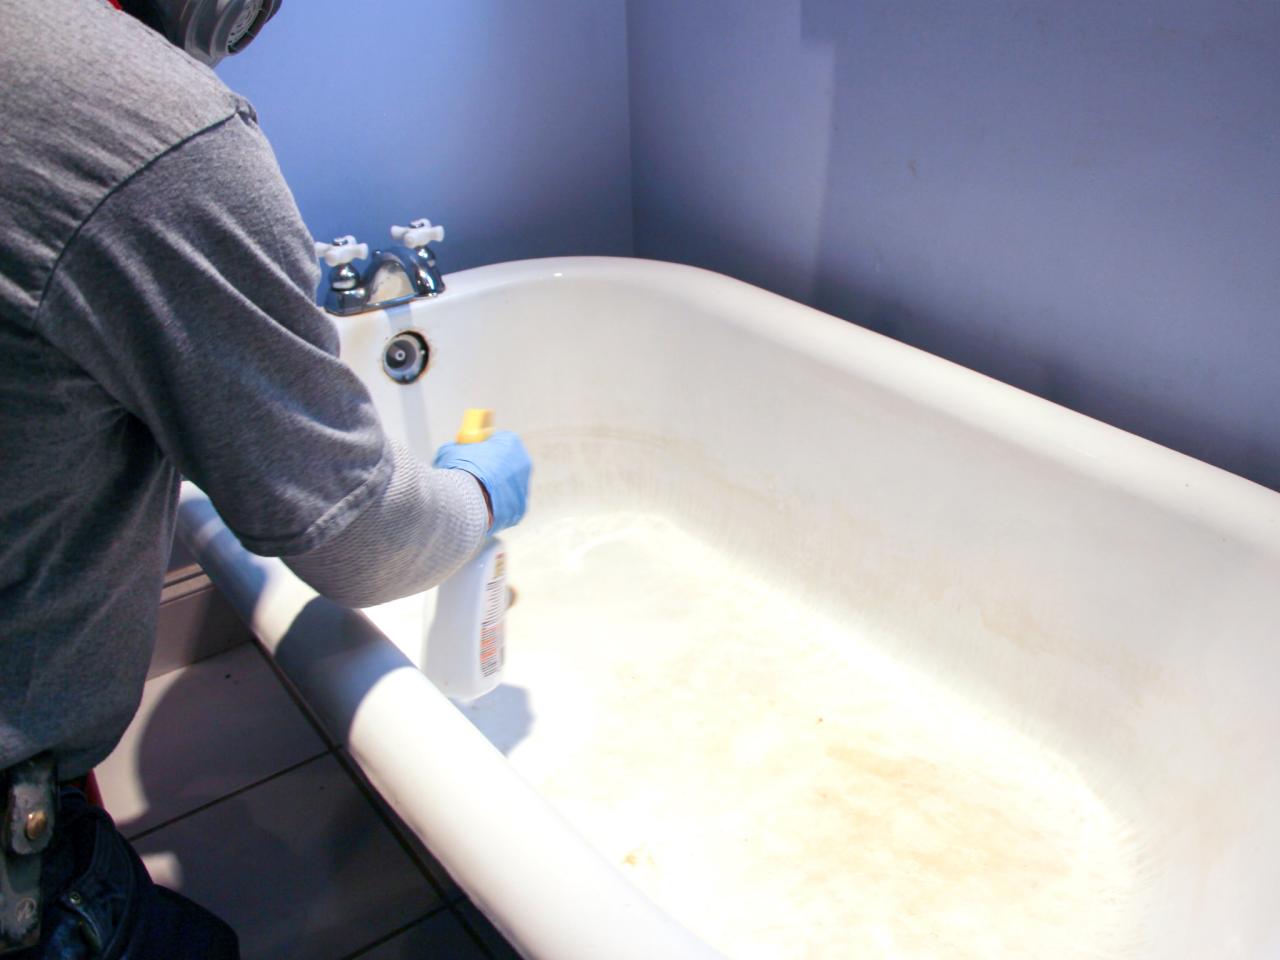
1. Clean the Surface
Begin by cleaning the entire surface of the bathtub using an abrasive cleaner. Ensure that the cleaner is non-abrasive and pH-neutral to avoid damaging the fiberglass. Scrub the bathtub surface diligently to remove accumulated dirt, grime, and soap scum. Pay special attention to areas around the drain, edges, and any textured surfaces where residue may be trapped. Rinse the bathtub thoroughly with water to remove any residual cleaner, and then dry it completely with a clean, lint-free cloth.
Read more: How To Refinish A Plastic Bathtub
2. Repair Damaged Areas
Inspect the bathtub for any chips, cracks, or deep scratches. Use a fiberglass repair kit to fill in these imperfections and create a smooth, uniform surface. Follow the manufacturer's instructions for the repair kit carefully, ensuring that the repaired areas are level with the surrounding surface. Once the repairs are complete, allow sufficient time for the filler to cure before proceeding to the next step.
3. Sand the Surface
To promote adhesion and create a suitable surface for the refinishing products, sand the entire bathtub using progressively finer grits of sandpaper. Start with a coarser grit to smooth out any rough patches, imperfections, or old finish. Then, gradually move to finer grits to achieve a smooth and evenly abraded surface. A sanding block can be used to maintain a consistent level of abrasion. After sanding, wipe down the bathtub with a tack cloth to remove any residual dust and ensure a clean surface for the next phase.
4. Mask Off Surrounding Areas
Use painter's tape to mask off areas around the bathtub that you want to protect from overspray and accidental application of the refinishing products. This includes the edges of the bathtub, the surrounding tiles, and any fixtures or hardware that are not being refinished. Proper masking ensures that the refinishing process remains contained to the bathtub area, preventing unintended damage to other surfaces.
By meticulously preparing the bathtub through thorough cleaning, repairing any damages, sanding the surface, and masking off surrounding areas, you are laying the groundwork for a successful refinishing project. With the bathtub primed and ready, you are now poised to move on to the next exciting phase: applying the refinishing product.
Step 3: Apply the Refinishing Product
With the bathtub meticulously prepared, it's time to apply the refinishing product to transform the surface into a lustrous, revitalized centerpiece of your bathroom. This phase requires precision, patience, and attention to detail to ensure a professional-quality finish. Here's a comprehensive guide to applying the refinishing product to your fiberglass bathtub:
1. Mix the Refinishing Coatings
Carefully follow the instructions provided with the fiberglass refinishing kit to mix the coatings thoroughly. Most kits include a primer, base coat, and topcoat, each designed to adhere to the fiberglass surface and create a durable, glossy finish. Ensure that the mixing ratios are accurate, as this will directly impact the performance and appearance of the refinishing product.
2. Apply the Primer
Using a high-quality paint sprayer or brush, apply a thin, even layer of the primer to the bathtub surface. The primer serves as a bonding agent, promoting adhesion between the fiberglass and the subsequent coatings. Work methodically, starting from one end of the bathtub and moving systematically to avoid overlapping or uneven application. Allow the primer to dry according to the manufacturer's instructions before proceeding to the next step.
3. Apply the Base Coat
Once the primer has cured, it's time to apply the base coat, which will establish the color and texture of the refinished bathtub. Similar to the primer application, ensure that the base coat is applied evenly and without streaks or drips. Depending on the desired finish and the specific refinishing kit, multiple coats may be required to achieve the desired depth and coverage. Allow each coat to dry thoroughly before applying the next, maintaining a consistent and smooth application.
4. Apply the Topcoat
The final step in the refinishing process involves applying the topcoat to seal and protect the base coat, creating a glossy and resilient finish. Whether using an epoxy or polyurethane topcoat, ensure that it is applied evenly and without imperfections. The topcoat not only enhances the visual appeal of the bathtub but also provides essential protection against daily wear and tear. Once the topcoat has been applied, allow the bathtub to cure undisturbed for the recommended duration, ensuring that the environment remains dust-free and well-ventilated.
Read more: How To Repair A Hole In A Fiberglass Bathtub
5. Remove the Masking
After the refinishing product has been applied and allowed to cure, carefully remove the painter's tape and masking materials from the surrounding areas. This reveals the seamless transition between the refinished bathtub and its surroundings, showcasing the meticulous attention to detail and precision in the refinishing process.
By following these steps and exercising patience and precision, you can achieve a stunning transformation of your fiberglass bathtub. The application of the refinishing product is a pivotal phase that culminates in the revitalization of your bathtub, elevating the aesthetic appeal of your bathroom and imbuing it with a renewed sense of elegance and charm.
Step 4: Let the Product Cure
After the meticulous application of the refinishing product, allowing the bathtub to cure is a crucial step in achieving a durable and long-lasting finish. The curing process is essential for the coatings to bond effectively, harden to their full strength, and develop the desired resilience and luster. Here's a detailed overview of the importance of letting the product cure and the recommended practices for this critical phase.
Importance of Curing
Curing is the process by which the chemical compounds in the refinishing coatings undergo polymerization and cross-linking, transforming from a liquid state to a solid, durable finish. This transformation is essential for the coatings to achieve their optimal strength, adhesion, and resistance to impacts, chemicals, and moisture. Proper curing also ensures that the refinishing product develops its intended visual characteristics, such as gloss and texture, resulting in a professional-quality appearance.
Recommended Curing Time
The manufacturer's instructions provided with the fiberglass refinishing kit typically specify the recommended curing time for each coating. It's imperative to adhere to these guidelines diligently, as the curing time can vary based on factors such as temperature, humidity, and the specific formulation of the refinishing product. In general, the bathtub should remain undisturbed and unused for the prescribed duration to allow the coatings to cure fully and achieve their maximum durability.
Creating an Ideal Curing Environment
To facilitate optimal curing, it's essential to create an environment that promotes proper drying and hardening of the refinishing coatings. Ensure that the bathroom remains well-ventilated to allow adequate air circulation, expel fumes, and accelerate the drying process. If available, use a ventilation fan or open windows to enhance airflow. Additionally, maintain a consistent temperature within the curing environment, as fluctuations can impact the curing process and the final finish of the bathtub.
Avoiding Premature Use
While the anticipation of enjoying the newly refinished bathtub may be high, it's crucial to resist the temptation to use the bathtub prematurely. Premature use can compromise the integrity of the coatings, leading to imperfections, soft spots, or reduced durability. To prevent accidental damage during the curing phase, it's advisable to make alternative bathing arrangements and communicate the temporary inaccessibility of the bathtub to household members.
Verifying Complete Curing
Before resuming regular use of the bathtub, it's prudent to verify that the coatings have cured completely. This can be confirmed by gently pressing a fingernail against an inconspicuous area of the bathtub surface. If the coatings feel firm, resilient, and unyielding, it indicates that the curing process is complete. However, if the coatings exhibit any softness or indentation, additional curing time is warranted to ensure the durability and longevity of the refinished surface.
By allowing the refinishing product to cure thoroughly, you are safeguarding the integrity and longevity of the newly refinished bathtub. Patience during the curing phase is a crucial investment in the durability and visual appeal of the bathtub, ensuring that the revitalized surface maintains its pristine condition for years to come.
Step 5: Reinstall the Fixtures
With the refinishing process successfully completed and the bathtub surface fully cured, the final step involves reinstalling the fixtures to restore functionality and aesthetic cohesion to the bathroom. Reattaching the fixtures, such as the faucet, handles, and drain components, requires precision and care to ensure a seamless integration with the refinished bathtub. Here's a detailed guide to the essential tasks involved in the process of reinstalling the fixtures:
-
Inspect the Fixtures: Before reinstalling the fixtures, carefully inspect each component to ensure that they are clean, undamaged, and free from any residual refinishing products. Wipe down the fixtures with a damp cloth to remove any dust or debris that may have accumulated during the refinishing process.
-
Apply Plumber's Tape: To prevent leaks and ensure a secure connection, apply plumber's tape to the threaded areas of the fixtures, such as the faucet and handles. This step is crucial for creating a watertight seal and preventing potential water damage once the fixtures are reinstalled.
-
Reattach the Faucet and Handles: Position the faucet and handles in their respective mounting locations on the bathtub, aligning them carefully to achieve a symmetrical and balanced appearance. Use the appropriate tools to secure the fixtures in place, ensuring that they are snug but not overtightened to avoid damaging the bathtub surface.
-
Connect the Drain Components: Reconnect the drain components, including the drain stopper and overflow cover, ensuring that they are aligned correctly and function smoothly. Tighten the connections securely to prevent any potential leaks and to maintain the efficient operation of the bathtub drain.
-
Test for Functionality: Once the fixtures are reinstalled, perform a thorough functionality test to ensure that the faucet, handles, and drain components operate as intended. Check for any leaks, drips, or irregularities in the water flow, and make any necessary adjustments to achieve optimal performance.
-
Clean and Polish: After the fixtures are securely reinstalled and verified for functionality, clean the surfaces with a gentle, non-abrasive cleaner to remove any fingerprints, smudges, or residues. Polish the fixtures to restore their luster and enhance their visual appeal, contributing to the overall rejuvenation of the bathtub area.
By meticulously following these steps and exercising attention to detail, you can seamlessly reintegrate the fixtures with the refinished bathtub, culminating in a harmonious and revitalized bathroom space. The successful reinstallation of the fixtures not only enhances the functionality of the bathtub but also contributes to the overall aesthetic transformation, elevating the ambiance of the entire bathroom.
Read more: How Long Does Refinishing A Bathtub Last?
Conclusion
In conclusion, the process of refinishing a fiberglass bathtub yourself is a rewarding endeavor that yields transformative results for your bathroom space. By following the comprehensive steps outlined in this guide, you have embarked on a journey to revitalize your bathtub, infusing it with a renewed sense of elegance and charm. From gathering the essential materials to meticulously preparing the bathtub, applying the refinishing product, allowing it to cure, and finally, reinstalling the fixtures, each step has contributed to the comprehensive rejuvenation of your bathroom centerpiece.
The decision to refinish your fiberglass bathtub represents a sustainable and cost-effective approach to enhancing your home environment. By choosing to revitalize the existing bathtub rather than opting for a full replacement, you have demonstrated a commitment to environmental responsibility and resource conservation. Furthermore, the personal touch and creative input invested in the refinishing process imbue the space with a unique character that reflects your individual style and craftsmanship.
Throughout this journey, you have honed your DIY skills, exercised patience, and embraced the satisfaction of witnessing the transformation of your bathtub under your own hands. The attention to detail, precision in application, and adherence to recommended curing times have culminated in a professional-quality finish that elevates the aesthetic appeal of your bathroom.
As you stand back and admire the revitalized bathtub, you can take pride in the accomplishment of breathing new life into a key element of your home. The seamless integration of the refinished bathtub with the surrounding fixtures and decor creates a harmonious and inviting atmosphere that enhances the overall ambiance of the bathroom.
Moving forward, the rejuvenated bathtub will serve as a focal point, inviting relaxation and rejuvenation within the confines of your home. The durability and resilience of the refinished surface, coupled with the restored functionality of the fixtures, ensure that your investment in the refinishing process will continue to yield benefits for years to come.
In essence, the journey of refinishing your fiberglass bathtub yourself transcends the realm of home improvement; it embodies a testament to creativity, resourcefulness, and the transformative power of DIY projects. As you revel in the revitalized space, may it serve as a reminder of the potential for renewal that resides within your hands, ready to breathe new life into every corner of your home.
Frequently Asked Questions about How To Refinish A Fiberglass Bathtub Yourself
Was this page helpful?
At Storables.com, we guarantee accurate and reliable information. Our content, validated by Expert Board Contributors, is crafted following stringent Editorial Policies. We're committed to providing you with well-researched, expert-backed insights for all your informational needs.


0 thoughts on “How To Refinish A Fiberglass Bathtub Yourself”