
Articles
How To Repair Fiberglass Ladder
Modified: January 6, 2024
Learn how to repair a fiberglass ladder with our informative articles. Get expert tips and tricks to fix any damage and ensure your ladder's safety.
(Many of the links in this article redirect to a specific reviewed product. Your purchase of these products through affiliate links helps to generate commission for Storables.com, at no extra cost. Learn more)
Introduction
Welcome to our guide on how to repair a fiberglass ladder. Fiberglass ladders are a popular choice for their durability and lightweight construction. However, accidents can happen, and over time, wear and tear can take a toll on the ladder’s structural integrity. Rather than replacing your ladder, you can save time and money by repairing it yourself.
Before we dive into the repair process, it’s important to note that safety should always be your top priority. Working with ladders can be risky, so make sure to take the necessary precautions to protect yourself from potential accidents. Wear protective gear, such as safety goggles and gloves, and work in a well-ventilated area to minimize exposure to fumes.
Now, let’s gather the tools and materials you’ll need for this project:
Key Takeaways:
- Repairing a fiberglass ladder can be a cost-effective and practical solution to extend its lifespan and maintain its structural integrity. By following the step-by-step process and prioritizing safety, you can successfully restore your ladder to a safe and usable condition.
- Regular maintenance and periodic inspections of your ladder are essential to keep it in good condition. By staying vigilant and addressing any new damages or issues promptly, you can prevent further deterioration and maintain safety for years to come.
Read more: What Is Better Aluminum Or Fiberglass Ladder
Tools and Materials Needed
- Safety goggles
- Gloves
- Dust mask
- Sanding block or sandpaper (grit 80-120)
- Fiberglass repair kit (resin and hardener)
- Spatula or plastic spreader
- Fiberglass cloth or mat
- Paintbrush or roller
- Acetone or fiberglass cleaner
- Plastic sheet or drop cloth
- Plastic wrap
Now that you have all the necessary tools and materials, it’s time to assess the damage and determine the best approach for repairing your fiberglass ladder. Let’s move on to the next step.
Safety Precautions
Repairing a fiberglass ladder requires proper safety precautions to minimize the risk of accidents and ensure your well-being. Follow these guidelines before starting the repair process:
- Wear protective gear: Put on safety goggles, gloves, and a dust mask before handling any tools or materials. This will protect your eyes, hands, and respiratory system from any potential hazards.
- Work in a well-ventilated area: Find a location with sufficient airflow to avoid inhaling fumes from the fiberglass repair kit components. If possible, open windows or doors and use fans to improve ventilation.
- Clear the work area: Ensure the repair area is clean and free of any clutter or obstacles. This will reduce tripping hazards and help you stay focused on the repair work.
- Secure the ladder: Make sure the ladder is stable and securely positioned before attempting any repairs. Avoid working on a ladder that wobbles or feels unstable to prevent accidents.
- Avoid overexertion: Fiberglass repair work can require physical effort. Take breaks when needed and pace yourself to avoid straining your muscles or causing fatigue.
- Handle chemicals safely: Follow the instructions on the fiberglass repair kit when working with resin and hardener. Use them in a well-ventilated area and avoid direct contact with your skin or eyes.
- Dispose of materials properly: Dispose of any waste materials, such as used fiberglass cloth or disposable gloves, in accordance with your local regulations. Avoid littering or improper disposal that could harm the environment.
By following these safety precautions, you can reduce the risk of accidents and work confidently knowing you have taken the necessary steps to protect yourself. Now that we have discussed safety, let’s move on to assessing the damage on your fiberglass ladder in the next step.
Key Takeaways:
- Repairing a fiberglass ladder can be a cost-effective and practical solution to extend its lifespan and maintain its structural integrity. By following the step-by-step process and prioritizing safety, you can successfully restore your ladder to a safe and usable condition.
- Regular maintenance and periodic inspections of your ladder are essential to keep it in good condition. By staying vigilant and addressing any new damages or issues promptly, you can prevent further deterioration and maintain safety for years to come.
Read more: What Is Better Aluminum Or Fiberglass Ladder
Tools and Materials Needed
Before you begin repairing your fiberglass ladder, it’s important to gather all the necessary tools and materials. Here’s a list of what you’ll need:
- Safety goggles: Protect your eyes from any potential debris or particles during the repair process.
- Gloves: Wear gloves to shield your hands from chemicals and to provide a better grip on tools.
- Dust mask: Prevent inhalation of dust particles by wearing a dust mask, especially when sanding the ladder’s surface.
- Sanding block or sandpaper (grit 80-120): Use sanding tools to smooth the damaged area and prepare it for the repair.
- Fiberglass repair kit (resin and hardener): Purchase a fiberglass repair kit that includes both resin and hardener. These components will be used to strengthen and bond the damaged parts of the ladder.
- Spatula or plastic spreader: Use a spatula or plastic spreader to apply and spread the resin onto the ladder’s surface.
- Fiberglass cloth or mat: Cut a piece of fiberglass cloth or mat that is slightly larger than the damaged area. This will provide reinforcement for the resin and help restore the ladder’s strength.
- Paintbrush or roller: Use a paintbrush or roller to apply the resin onto the ladder’s surface evenly.
- Acetone or fiberglass cleaner: Clean the ladder’s surface thoroughly before applying the repair materials. Acetone or a specialized fiberglass cleaner can help remove any dirt or debris.
- Plastic sheet or drop cloth: Protect your work area by placing a plastic sheet or drop cloth underneath the ladder to catch any drips or spills.
- Plastic wrap: Wrap the repaired area with plastic wrap to facilitate curing and prevent contamination.
Having these tools and materials ready will make the repair process more efficient and ensure that you have everything needed to complete the job effectively. In the next step, we will assess the damage on your fiberglass ladder and determine the extent of the repair needed.
Step 1: Assess the Damage
The first step in repairing your fiberglass ladder is to assess the damage. Take a close look at the ladder and identify any cracks, chips, or weak spots that need to be addressed. It’s important to have a clear understanding of the extent of the damage in order to determine the proper repair approach.
Here are some key points to consider during the assessment:
- Closely inspect the ladder: Examine the ladder from top to bottom, paying attention to the rungs, side rails, and any connecting joints. Look for any signs of cracks, delamination, or other damage that may compromise the ladder’s integrity.
- Measure the size of the damage: Using a tape measure or ruler, determine the length, width, and depth of any cracks or chips. This will help you understand the size of the repair area and plan accordingly.
- Assess the stability of the ladder: Test the ladder to ensure it is stable and safe to work on. If the ladder feels wobbly or unstable, it may require additional repairs or professional evaluation before proceeding.
- Consider the ladder’s age and condition: Take into account the ladder’s overall age and condition. If the ladder is significantly old or has multiple areas of damage, you may need to evaluate whether it’s worth repairing or if it’s more cost-effective to replace it.
Once you have a clear picture of the ladder’s damage, you’ll be able to move on to the next steps in the repair process. In step 2, we will discuss how to clean the repair area thoroughly to ensure proper adhesion of the repair materials.
Read more: How To Work With Fiberglass Tape
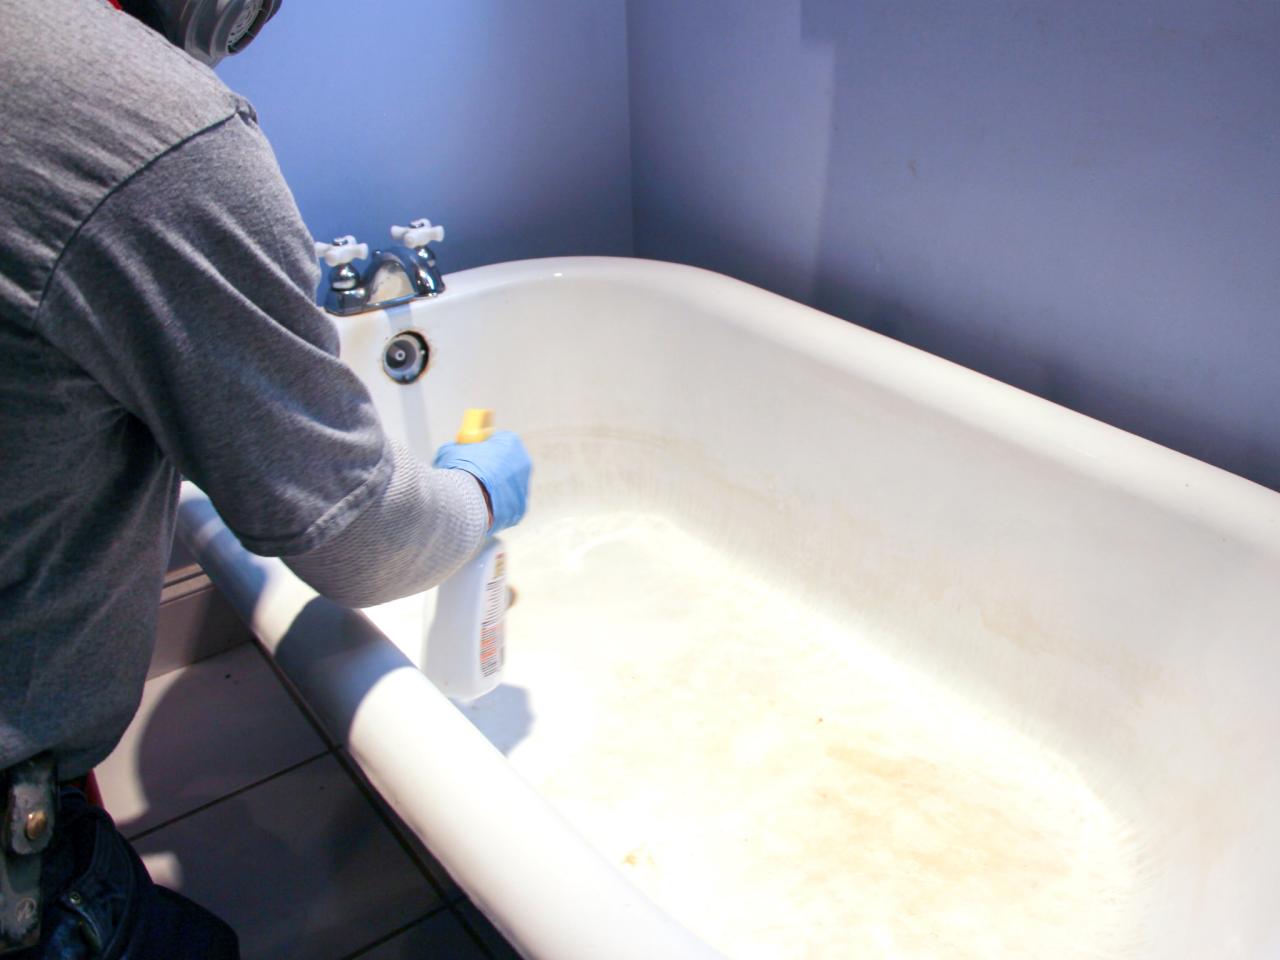
Step 2: Clean the Area
After assessing the damage on your fiberglass ladder in step 1, the next step is to thoroughly clean the repair area. Proper cleaning is essential to ensure optimal adhesion of the repair materials and create a strong and durable bond.
Follow these steps to clean the area effectively:
- Gather your cleaning supplies: You will need a clean cloth, acetone or a specialized fiberglass cleaner, and water.
- Wipe the repair area: Use a clean cloth dampened with acetone or fiberglass cleaner to wipe the damaged area. This will remove any dirt, grease, or residue that may hinder the bonding process.
- Rinse with water: After wiping the repair area with a cleaning solution, rinse it with water to remove any excess cleaner. This will ensure that no residue remains on the surface.
- Dry the area: Allow the repair area to dry completely before proceeding with the repair. This will ensure that the repair materials adhere properly to the surface.
It’s important to note that acetone and fiberglass cleaners can be toxic and should be used in a well-ventilated area. Follow the manufacturer’s instructions for proper usage and safety precautions.
By taking the time to clean the repair area, you are creating an optimal surface for the application of the repair materials. This will help ensure a successful and long-lasting repair. In step 3, we will discuss how to prepare the fiberglass repair kit for the next stage of the process.
Step 3: Prepare the Fiberglass Repair Kit
Now that you’ve assessed the damage and cleaned the repair area, it’s time to prepare the fiberglass repair kit. The repair kit typically includes resin and a hardener, which will be used to reinforce and bond the damaged parts of the ladder.
Follow these steps to prepare the fiberglass repair kit:
- Read the instructions: Start by carefully reading the instructions provided with the fiberglass repair kit. This will give you a clear understanding of the process and any specific recommendations from the manufacturer.
- Mix the resin and hardener: Most fiberglass repair kits come with separate containers for the resin and hardener. Follow the manufacturer’s instructions to determine the correct mixing ratio. Typically, you will pour a certain amount of hardener into the resin and thoroughly mix them together with a spatula or plastic spreader.
- Observe the working time: The fiberglass repair kit will have a specified working time, which is the amount of time you have to apply the repair materials before they begin to cure. Pay attention to this time frame and work efficiently to ensure proper adhesion.
- Consider the temperature: Take into account the recommended temperature range for working with the fiberglass repair kit. Extreme temperatures can affect the curing process, so it’s important to work within the specified temperature range for optimal results.
It’s crucial to follow the manufacturer’s instructions when preparing the fiberglass repair kit. This will ensure that the resin and hardener are mixed accurately, allowing for proper bonding and a successful repair.
Once you have prepared the fiberglass repair kit, you’re ready to move on to the next step: applying the fiberglass resin. We will cover this step in detail in the next section.
When repairing a fiberglass ladder, make sure to clean the damaged area thoroughly before applying any repair materials. This will ensure better adhesion and a more effective repair.
Step 4: Apply the Fiberglass Resin
With the repair area cleaned and the fiberglass repair kit prepared, it’s time to apply the fiberglass resin. The resin will provide structural reinforcement to the damaged parts of the ladder and help restore its strength.
- Put on gloves and safety goggles: Before handling the resin, make sure to protect yourself by wearing gloves and safety goggles.
- Apply the resin to the damaged area: Using a spatula or plastic spreader, apply a layer of mixed resin to the damaged area on the ladder. Spread it evenly, covering the entire damaged surface.
- Work in small sections: If the repair area is large, it’s best to work in small sections to ensure proper application and control. Apply the resin to one section at a time, gradually building up the thickness as needed.
- Smooth out the resin: After applying the resin, use the spatula or spreader to smooth out the surface. This will help create a uniform layer and ensure that the resin is evenly distributed.
- Check for air bubbles: Inspect the repaired area for any air bubbles in the resin. If you notice any, use a small needle or pin to gently pop them and smooth out the affected area.
- Allow the resin to cure: Follow the manufacturer’s instructions to determine the curing time for the resin. Allow the ladder to sit undisturbed during this time to ensure proper curing and bonding.
Remember that working with resin can be time-sensitive, so it’s important to work efficiently and within the specified working time. Any excess resin can be removed with a clean cloth or paper towel before it cures completely.
Now that you’ve applied the fiberglass resin, it’s time to move on to the next step: applying the fiberglass cloth. We will cover this process in detail in the following section.
Step 5: Apply the Fiberglass Cloth
After applying the fiberglass resin to the damaged area in step 4, the next step is to apply the fiberglass cloth. The cloth provides additional reinforcement and strength to the repair, ensuring a long-lasting solution.
- Cut the fiberglass cloth: Measure and cut a piece of fiberglass cloth or mat slightly larger than the damaged area. It should be large enough to cover the entire repair region with some overlap.
- Position the cloth: Place the fiberglass cloth over the resin-coated area, making sure it fully covers the damage. Adjust its position if necessary to ensure complete coverage and proper alignment.
- Apply more resin: Using a paintbrush or roller, apply another layer of mixed resin over the fiberglass cloth. Make sure the cloth is fully saturated with the resin, but avoid applying excessive amounts to prevent sagging or dripping.
- Smooth out any wrinkles: Gently smooth out any wrinkles or bubbles in the fiberglass cloth with a brush or roller. This will help create a smooth and seamless appearance for the repair.
- Allow the fiberglass to cure: Follow the manufacturer’s instructions for the curing time of the resin and fiberglass cloth. Allow the ladder to sit undisturbed during this time to ensure proper curing and bonding.
The fiberglass cloth will bond with the resin, creating a strong and durable repair. It’s essential to ensure that the cloth is fully saturated with resin for proper adhesion and reinforcement.
After applying the fiberglass cloth, move on to step 6: curing the fiberglass. We will cover this process in detail in the next section.
Read more: How To Whiten A Fiberglass Bathtub
Step 6: Cure the Fiberglass
Once you’ve applied the fiberglass cloth in step 5, the next step is to cure the fiberglass. Curing is the process of allowing the resin and cloth to harden and fully bond, creating a strong and durable repair on your ladder.
- Follow the manufacturer’s instructions: Refer to the manufacturer’s instructions for the recommended curing time of the fiberglass resin and cloth. This will vary depending on the specific product you’re using.
- Ensure proper ventilation: Allow the ladder to cure in a well-ventilated area to help facilitate the curing process and minimize the buildup of any fumes.
- Protect the repair area: To prevent any dust, dirt, or debris from settling on the repair area, cover it with plastic wrap. This will help maintain a clean surface during the curing process.
- Avoid disturbing the repair: It’s important not to disturb or put any weight on the repaired area while it’s curing. This can cause the resin and cloth to shift or become misaligned, compromising the integrity of the repair.
- Monitor the curing process: Keep an eye on the curing progress during the specified time. Look for any signs of incomplete curing or any issues that may require additional attention.
During the curing process, it’s crucial to follow the instructions and allow sufficient time for the resin and cloth to fully harden. Rushing this step can lead to a weak or unstable repair. Patience is key to achieving a strong and durable result.
Note: The curing time may vary depending on factors such as temperature, humidity, and the specific product used. Be sure to refer to the instructions provided by the manufacturer of your fiberglass repair kit for accurate curing guidelines.
Once the fiberglass has fully cured, you’re ready to move on to step 7: sanding and finishing the repaired area. We will cover this process in detail in the next section.
Step 7: Sand and Finish
After the fiberglass has fully cured in step 6, the next step is to sand and finish the repaired area. This will help create a smooth and seamless surface that blends in with the rest of the ladder.
- Gather your sanding materials: You will need a sanding block or sandpaper with a grit between 80 and 120 for this step.
- Sand the repaired area: Use the sanding block or sandpaper to gently sand the repaired area. Start with light pressure and gradually increase if needed. The goal is to create a smooth surface, removing any rough edges or excess resin.
- Check for evenness: Examine the sanded area to ensure it is even and flush with the surrounding ladder surface. Make any necessary adjustments by sanding gently or applying additional resin if needed.
- Wipe away dust: Use a clean cloth or a tack cloth to remove any sanding residue or dust from the repaired area. This will ensure a clean surface for the finishing steps.
- Apply a protective finish: To protect the repaired area and enhance its appearance, apply a suitable protective finish. This can be a clear coat or paint, depending on your preference and the desired final look of the ladder.
- Allow the finish to dry: Follow the manufacturer’s instructions for the drying time of the protective finish. Avoid touching or applying any pressure to the repaired area until it has fully dried.
Sanding and finishing the repaired area will help blend it invisibly with the rest of the ladder, making the repair much less noticeable. Take your time and be meticulous during this step to achieve the best results.
With the sanding and finishing complete, you’re nearly done with the repair process. The next step will cover the final inspection and testing to ensure the ladder is safe and ready for use.
Step 8: Final Inspection and Testing
After completing the sanding and finishing in step 7, it’s time for the final inspection and testing of your repaired fiberglass ladder. This step is crucial to ensure that the ladder is safe, secure, and ready for use.
- Visually inspect the repaired area: Carefully examine the repaired section of the ladder to ensure that it is smooth, well-sanded, and free from any visible damage or imperfections.
- Check the adhesion of the repair: Gently press and tap on the repaired area to ensure that the fiberglass cloth, resin, and finish are securely bonded to the ladder’s surface. Look for any signs of lifting or separation.
- Test the ladder’s stability: Set up the ladder in a safe and stable location. Climb up and down the ladder carefully, testing its stability and ensuring that the repair has not affected its overall sturdiness.
- Observe for any movement or flexing: While using the ladder, pay attention to any signs of movement or flexing in the repaired area. This could indicate that further reinforcement or adjustments are needed.
- Repeat the inspection periodically: Regularly inspect the repaired area during subsequent uses of the ladder. This will help identify and address any potential issues early on, ensuring the continued safety and durability of the repair.
By conducting a thorough final inspection and testing, you can have confidence in the quality of your repair and assure that your fiberglass ladder is in proper working condition.
If you encounter any concerns during the inspection or testing process, or if the ladder does not meet your safety expectations, it may be necessary to seek professional assistance or consider replacing the ladder.
Congratulations! You have successfully repaired your fiberglass ladder. By following this step-by-step guide, you have saved time and money while extending the lifespan of your ladder. Remember to always prioritize safety when working with ladders, and regularly inspect and maintain them to ensure years of reliable use.
Thank you for using our guide. Happy ladder repair and stay safe!
Conclusion
Repairing a fiberglass ladder can be a cost-effective and practical solution to extend its lifespan and maintain its structural integrity. Throughout this guide, we have provided you with a step-by-step process for repairing your ladder, from assessing the damage to conducting a final inspection. By following these steps and taking proper safety precautions, you can successfully restore your ladder to a safe and usable condition.
Remember, safety should always be your top priority when working with ladders. Wear protective gear, work in a well-ventilated area, and take breaks as needed. Additionally, carefully follow the manufacturer’s instructions for the fiberglass repair kit and be mindful of the recommended curing time.
By assessing the damage, cleaning the area, preparing the fiberglass repair kit, applying the resin and fiberglass cloth, curing the fiberglass, sanding and finishing the repaired area, and conducting a final inspection and testing, you have taken the necessary steps to ensure a thorough and effective repair.
Regular maintenance and periodic inspections of your ladder are essential to keep it in good condition. Stay vigilant and address any new damages or issues promptly to prevent further deterioration and maintain safety.
We hope this guide has been helpful in assisting you with repairing your fiberglass ladder. By following these steps and taking the time to properly care for your ladder, it will continue to serve you well for years to come.
Thank you for choosing our guide, and happy repairing!
Frequently Asked Questions about How To Repair Fiberglass Ladder
Was this page helpful?
At Storables.com, we guarantee accurate and reliable information. Our content, validated by Expert Board Contributors, is crafted following stringent Editorial Policies. We're committed to providing you with well-researched, expert-backed insights for all your informational needs.


0 thoughts on “How To Repair Fiberglass Ladder”