
Articles
How To Adjust A Pendulum Wall Clock
Modified: February 24, 2024
Learn how to adjust a pendulum wall clock with these helpful articles. Discover step-by-step instructions and tips for ensuring your clock keeps accurate time.
(Many of the links in this article redirect to a specific reviewed product. Your purchase of these products through affiliate links helps to generate commission for Storables.com, at no extra cost. Learn more)
Introduction
Welcome to this comprehensive guide on how to adjust a pendulum wall clock. Pendulum clocks have been a popular timekeeping mechanism for centuries, adding a touch of elegance and charm to any room. However, over time, the pendulum may become misaligned or the clock may start losing or gaining time.
Fortunately, adjusting a pendulum wall clock is a relatively simple task that you can do on your own. In this article, we will walk you through the steps to ensure your clock stays accurate and keeps beautiful time.
Before we get started, it’s important to note that this guide is intended for basic adjustments and does not cover more complex repairs. If you encounter any issues beyond basic adjustment, it is recommended to seek the assistance of a professional clock repair specialist.
Now, let’s dive into the fascinating inner workings of pendulum clocks and learn how to make those crucial adjustments.
Key Takeaways:
- Adjusting a pendulum wall clock is a simple yet rewarding process that ensures accurate timekeeping. By understanding the inner workings and following the step-by-step guide, you can preserve the beauty of your timepiece.
- Patience and care are crucial when adjusting a pendulum clock. Making small incremental changes, observing the timekeeping, and consulting the user manual will help maintain the clock’s accuracy and cherish its timeless elegance.
Read more: How To Adjust Volume On IPhone Alarm Clock
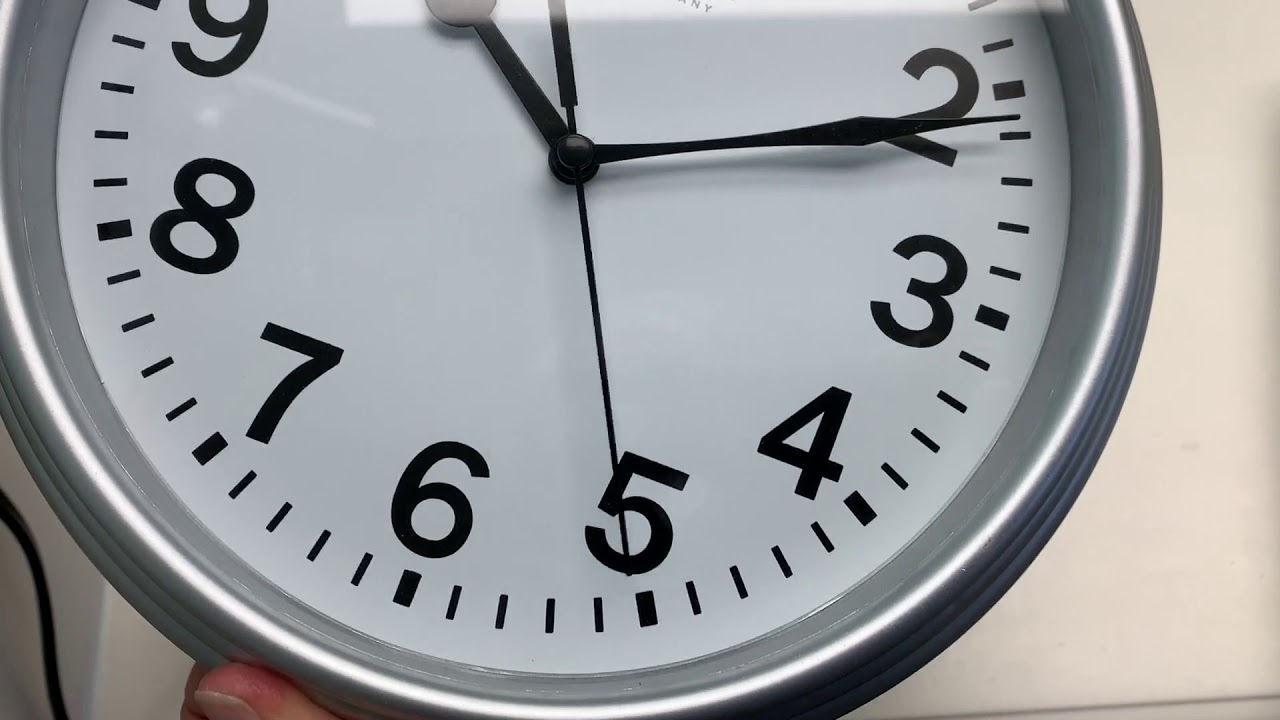
Understanding the Pendulum Wall Clock
Before we begin adjusting the pendulum, it’s important to have a basic understanding of how a pendulum wall clock operates.
A pendulum clock relies on the natural swing of a weighted pendulum to regulate its timekeeping. As the pendulum swings back and forth, it engages with the clock’s internal mechanisms, allowing the gears to turn and the hands to move.
The length of the pendulum, along with its weight, determines the speed at which the clock operates. A longer pendulum will result in a slower timekeeping, while a shorter pendulum will make the clock run faster.
Most pendulum clocks have an adjustment nut located on the pendulum arm that allows for fine-tuning of the clock’s timekeeping. By adjusting this nut, you can change the length of the pendulum, thus altering the clock’s accuracy.
In addition to the length adjustment, pendulum clocks also require periodic calibration to ensure the swing of the pendulum is consistent. This calibration helps maintain accurate timekeeping over the long term.
Now that we have a better understanding of how a pendulum wall clock operates, let’s gather the tools and materials needed for the adjustment process.
Tools and Materials Needed
Before you begin adjusting your pendulum wall clock, it’s important to have the necessary tools and materials at hand. Here’s a list of what you will need:
- Small screwdriver: You will need a small screwdriver to remove any screws or fasteners that secure the clock case.
- Soft cloth or towel: A soft cloth or towel will be useful for handling the clock and protecting its surfaces during the adjustment process.
- Pliers: Pliers may be needed to grip and turn the pendulum adjustment nut if it is tightly secured.
- Level: A small level or bubble level will help you ensure that the clock is hanging straight on the wall after adjustment.
- Clock oil: If you notice any signs of wear or friction in the clock’s mechanism, you may want to have some clock oil on hand for lubrication. However, be cautious, as applying oil to the mechanism should only be done if you have experience or are comfortable doing so.
Having these tools and materials readily available will ensure a smooth and efficient adjustment process. Once you have gathered everything you need, you’re ready to start adjusting your pendulum wall clock.
Step 1: Removing the Clock Case Cover
Before you can begin adjusting the pendulum of your wall clock, you need to remove the clock case cover to access the internal mechanisms. Follow the steps below to remove the clock case cover:
- Ensure that the clock is securely mounted on the wall and there is enough space around it to work comfortably.
- Locate any screws or fasteners that are securing the clock case cover. These are typically found on the back or sides of the clock.
- Using the appropriate small screwdriver, carefully remove the screws or fasteners. Place them in a safe location as you will need them later for reassembly.
- Gently remove the clock case cover, being cautious not to damage any delicate parts or mechanisms inside.
- Set the clock case cover aside on a soft cloth or towel, ensuring it is placed in a safe and clean area where it won’t be accidentally bumped or scratched.
Once the clock case cover is removed, you will have a clear view of the internal components, including the pendulum and adjustment nut. This will allow you to proceed with adjusting the pendulum length and calibrating its swing for accurate timekeeping.
Now that you have successfully removed the clock case cover, let’s move on to Step 2: Locating the Pendulum Adjustment Nut.
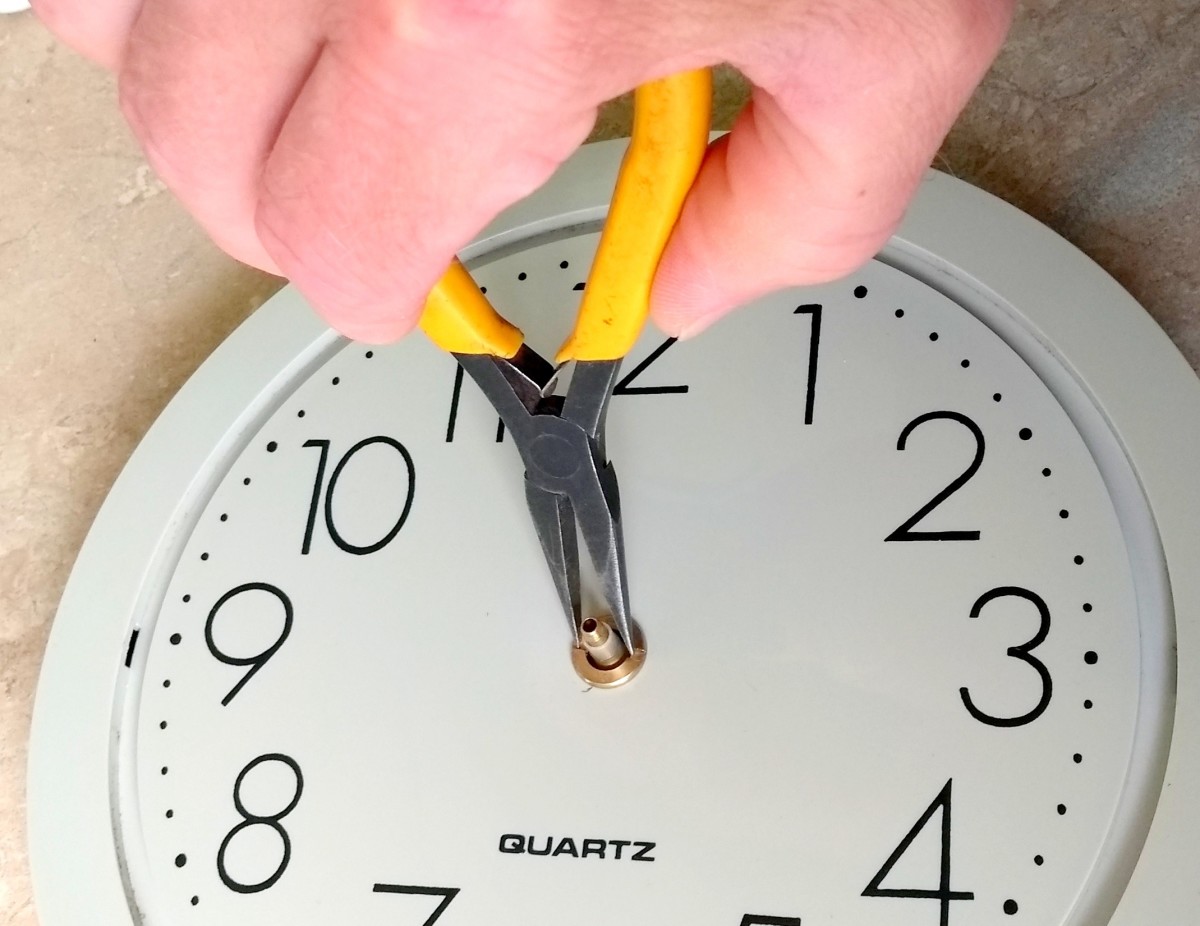
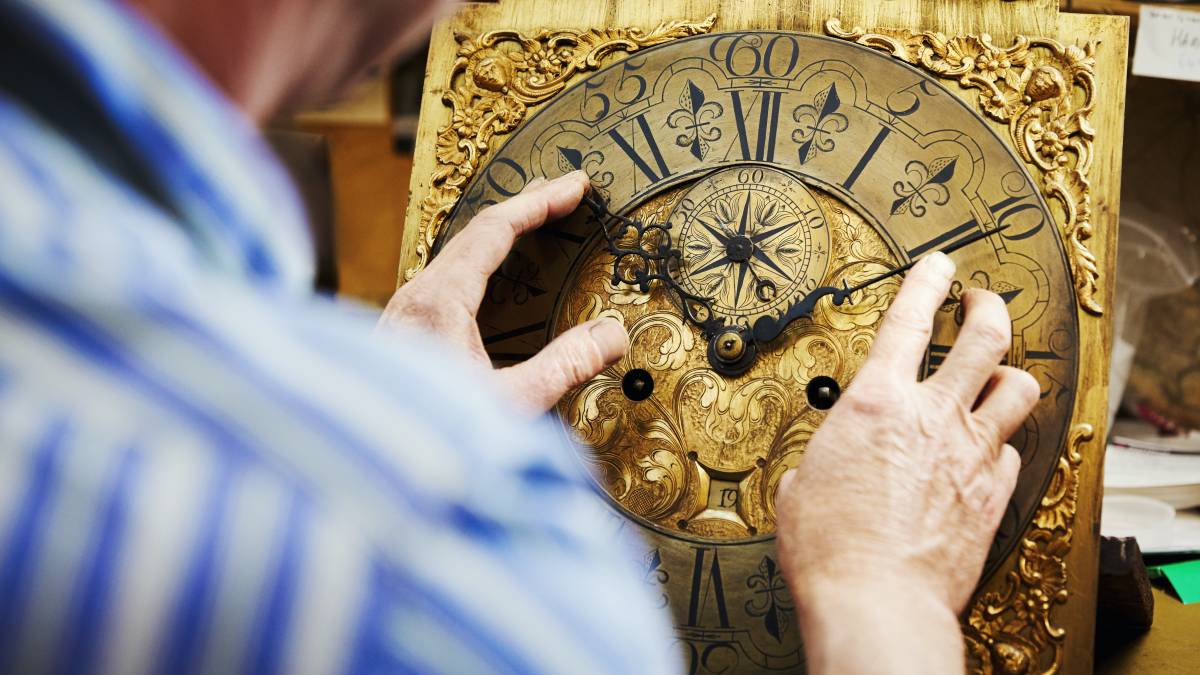
Step 2: Locating the Pendulum Adjustment Nut
After removing the clock case cover, the next step in adjusting your pendulum wall clock is locating the pendulum adjustment nut. The adjustment nut is typically located near the bottom of the pendulum arm, close to the clock’s movement.
Follow the steps below to locate the pendulum adjustment nut:
- Carefully observe the pendulum as it swings back and forth. Look for a small nut or disc-like object attached to the bottom of the pendulum arm.
- Using a small flashlight or additional light source, if necessary, ensure that you have clear visibility of the pendulum and its adjustment nut.
- If you have trouble locating the nut, consult the clock’s user manual or look for online resources specific to your clock model. These resources often include diagrams or images that can help you identify the location of the adjustment nut.
Once you have located the pendulum adjustment nut, you can proceed to the next step: adjusting the pendulum length to ensure accurate timekeeping.
Having a clear understanding of where the pendulum adjustment nut is located will make the process of adjusting the length much easier. With this information in hand, you are now ready to move on to Step 3: Adjusting the Pendulum Length.
When adjusting a pendulum wall clock, make small changes to the pendulum length to regulate the timekeeping. Shorten the pendulum to speed up the clock and lengthen it to slow it down.
Read more: How To Make A Wall Clock
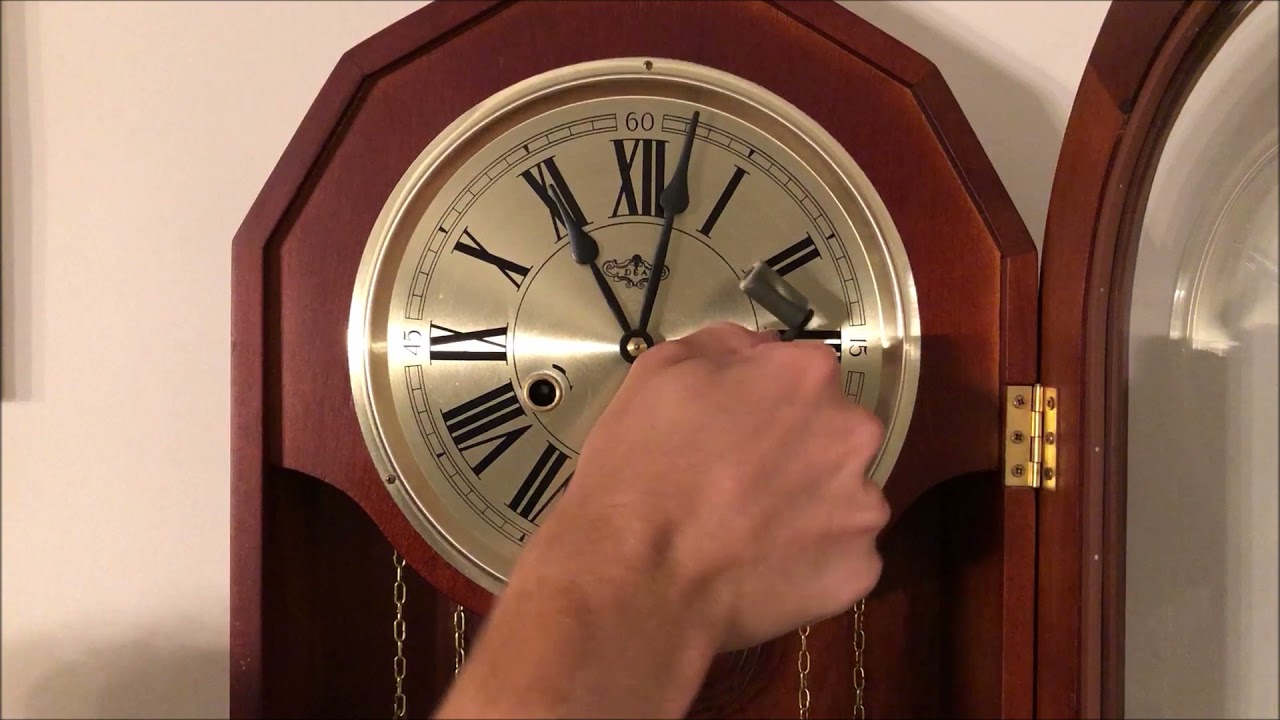
Step 3: Adjusting the Pendulum Length
Now that you have located the pendulum adjustment nut, it’s time to adjust the length of the pendulum. This adjustment will help regulate the timekeeping of your pendulum wall clock. Follow the steps below to adjust the pendulum length:
- Identify the direction in which your clock is running fast or slow. Is it gaining time or losing time? This will determine how you need to adjust the pendulum length.
- Using a pair of pliers, grip the pendulum adjustment nut firmly. Take care not to tighten it excessively, as this can damage the nut or the pendulum arm.
- If your clock is running fast and needs to be slowed down, gently turn the adjustment nut counterclockwise. This will allow the pendulum to swing with a longer arc, which slows down the clock’s timekeeping.
- If your clock is running slow and needs to be sped up, gently turn the adjustment nut clockwise. This will shorten the pendulum swing, resulting in a faster timekeeping.
- Make small, incremental adjustments to the pendulum length and observe the clock’s timekeeping over a period of several hours or days. This will help you find the optimal balance for accurate timekeeping.
Remember, when adjusting the pendulum length, it’s important to be patient and make small changes at a time. Rushing the adjustment process can lead to inaccurate timekeeping or damage to the clock. Take your time and be mindful of the changes you make.
After adjusting the pendulum length, it’s time to move on to Step 4: Calibrating the Pendulum Swing to ensure precise timekeeping.
Step 4: Calibrating the Pendulum Swing
Now that you have adjusted the length of the pendulum to regulate the timekeeping of your pendulum wall clock, the next step is to calibrate the pendulum swing. Calibrating the swing ensures that the pendulum maintains a consistent and accurate movement. Follow the steps below to calibrate the pendulum swing:
- Observe the pendulum as it swings back and forth. Pay attention to the amplitude of the swing, which refers to the distance the pendulum travels from one side to the other.
- Use a small level or bubble level to check if the clock is hanging straight on the wall. Adjust the position of the clock if necessary, ensuring that it is perfectly level.
- If the swing amplitude is too wide or too narrow, it can affect the accuracy of the clock’s timekeeping. To calibrate the swing, gently move the pendulum slightly to the left or right, gradually narrowing or widening the swing until it reaches an optimal amplitude.
- Continue making small adjustments to the pendulum swing and observe the clock’s timekeeping over a period of several hours or days. The goal is to achieve a smooth and consistent swing.
- Once you are satisfied with the pendulum swing and the clock’s accuracy, lock the pendulum adjustment nut securely in place using a pair of pliers. Take care not to overtighten it.
It’s important to note that the optimal amplitude of the pendulum swing can vary depending on the specific model and design of your pendulum wall clock. Refer to the clock’s user manual or consult the manufacturer’s guidelines for any specific recommendations regarding the pendulum swing amplitude.
With the pendulum swing calibrated, you are now ready to reassemble the clock case in Step 5: Reassembling the Clock Case.
Step 5: Reassembling the Clock Case
After adjusting the pendulum length and calibrating the pendulum swing, the final step is to reassemble the clock case. Follow the steps below to securely reattach the clock case cover:
- Gently pick up the clock case cover from the cloth or towel where you placed it earlier.
- Align the screw holes on the clock case cover with the corresponding holes on the clock case.
- Retrieve the screws or fasteners that you removed earlier and use the small screwdriver to carefully tighten them. Start with one screw and gradually tighten the others, making sure not to over tighten.
- Check that the clock case cover is securely fastened and there are no gaps or loose parts.
- Use a soft cloth or towel to wipe down the clock case and remove any fingerprints or smudges.
Once you have reassembled the clock case, step back and take a moment to make sure the clock is hanging straight on the wall. Use the level to check its position and make any necessary adjustments.
Now, sit back and enjoy the beauty of your newly adjusted pendulum wall clock. The careful adjustment of the pendulum length and swing will ensure its accurate timekeeping for years to come.
Remember, if you experience any issues or the clock requires further adjustment beyond basic tuning, it’s recommended to seek the assistance of a professional clock repair specialist.
Congratulations! You have successfully adjusted your pendulum wall clock. The timeless elegance of the pendulum clock, now perfectly calibrated, will bring a sense of nostalgia and precision to your living space.
Enjoy the rhythmic swing and the accurate timekeeping of your beautifully adjusted pendulum wall clock!
Thank you for choosing this guide as your resource for adjusting a pendulum wall clock. We hope this article has been helpful and that you now feel confident in maintaining the optimal functioning of your timekeeping treasure.
Conclusion
Adjusting a pendulum wall clock may seem like a daunting task, but with the right knowledge and steps, it can be a rewarding and fulfilling experience. By understanding the inner workings of a pendulum clock and carefully following the adjustment process outlined in this guide, you can ensure accurate timekeeping and preserve the beauty of your timepiece.
Throughout this comprehensive guide, we have touched on the importance of understanding the pendulum wall clock, gathering the necessary tools and materials, and following the step-by-step process for adjusting the pendulum length and calibrating the pendulum swing.
Remember to approach the adjustment process with patience and care, making small incremental changes and observing the clock’s timekeeping over time. It is also crucial to consult the clock’s user manual or manufacturer’s guidelines for any specific instructions or recommendations.
However, it is essential to note that there may be instances where the adjustment process goes beyond basic tuning. In such cases, seeking the assistance of a professional clock repair specialist is advisable to avoid any further complications or damage to the clock.
We hope that this guide has equipped you with the necessary knowledge to confidently adjust your pendulum wall clock. Whether it’s a family heirloom or a new addition to your decor, a well-adjusted pendulum clock not only provides accurate timekeeping but also becomes a cherished centerpiece in your home.
Thank you for choosing to learn with us, and we wish you many years of enjoyment with your perfectly calibrated pendulum wall clock!
Frequently Asked Questions about How To Adjust A Pendulum Wall Clock
Was this page helpful?
At Storables.com, we guarantee accurate and reliable information. Our content, validated by Expert Board Contributors, is crafted following stringent Editorial Policies. We're committed to providing you with well-researched, expert-backed insights for all your informational needs.


0 thoughts on “How To Adjust A Pendulum Wall Clock”