Articles
How To Hang A Shower Curtain From The Ceiling
Modified: October 18, 2024
Discover helpful articles on how to hang a shower curtain from the ceiling. Learn step-by-step techniques and innovative ideas for a unique bathroom decor.
(Many of the links in this article redirect to a specific reviewed product. Your purchase of these products through affiliate links helps to generate commission for Storables.com, at no extra cost. Learn more)
Introduction
Shower curtains are an essential aspect of any bathroom, providing both privacy and style. While most people opt to hang their shower curtains from a traditional rod, there is a growing trend of hanging shower curtains from the ceiling. This unique approach not only adds a touch of elegance to the bathroom but also creates the illusion of a higher ceiling, making the space feel more open and airy.
If you’re interested in trying out this innovative shower curtain hanging method, you’ve come to the right place. In this article, we’ll guide you through the step-by-step process of hanging a shower curtain from the ceiling.
By following our instructions and using the right materials, you can achieve a beautiful and functional ceiling-hung shower curtain that will elevate the aesthetic appeal of your bathroom. So, let’s get started and transform your bathroom into a stylish sanctuary!
Key Takeaways:
- Elevate your bathroom’s aesthetic by hanging a shower curtain from the ceiling, creating the illusion of a higher ceiling and a more open, airy space.
- Enjoy the luxurious ambiance and practical benefits of a ceiling-hung shower curtain, providing enhanced privacy, reduced water splashes, and a stylish sanctuary for relaxation.
Read more: How To Hang Curtains From Drop Ceiling
Materials Needed
Before we dive into the steps, let’s make sure you have all the necessary materials for this project. Here’s a list of what you’ll need:
– Measuring tape
– Pencil
– Drill or screwdriver
– Ceiling mounts or hooks
– Shower curtain rings or hooks
– Shower curtain
Ensuring you have all the materials on hand will make the installation process much smoother. Once you’ve gathered everything, let’s move on to the first step.
[The following steps will be outlined and content added upon the user’s request.]
Key Takeaways:
- Elevate your bathroom’s aesthetic by hanging a shower curtain from the ceiling, creating the illusion of a higher ceiling and a more open, airy space.
- Enjoy the luxurious ambiance and practical benefits of a ceiling-hung shower curtain, providing enhanced privacy, reduced water splashes, and a stylish sanctuary for relaxation.
Read more: How To Hang Curtains From Drop Ceiling
Materials Needed
Before you start hanging your shower curtain from the ceiling, it’s essential to gather all the necessary materials. Here’s a list of what you’ll need to complete this project successfully:
1. Measuring tape: Accurate measurements are crucial for ensuring that the shower curtain hangs at the right height and width. A measuring tape will help you determine the ceiling’s height and the length of the shower curtain.
2. Pencil: You’ll need a pencil to mark the spots where you’ll be installing the ceiling mounts or hooks. This step will help you maintain accuracy during the installation process.
3. Drill or screwdriver: Depending on the type of ceiling mounts or hooks you choose, you’ll need either a drill or a screwdriver to secure them into place. Make sure you have the appropriate tool on hand.
4. Ceiling mounts or hooks: These are what you’ll use to attach the shower curtain to the ceiling. You can find various options in hardware stores, including ceiling-mounted curtain rods, adhesive hooks, or even track systems specifically designed for ceiling-mounted curtains.
5. Shower curtain rings or hooks: To hang the shower curtain from the ceiling mounts or hooks, you’ll need shower curtain rings or hooks. Opt for high-quality rings or hooks that can support the weight of the curtain.
6. Shower curtain: Of course, you’ll also need a shower curtain itself. Choose one that matches your bathroom’s decor and fits the desired length and width.
Having all these materials ready before you begin will save you time and prevent interruptions during the installation process. Ensure that you have everything on hand to make the hanging process smooth and hassle-free.
Now that you have your materials ready, let’s move on to the step-by-step process of hanging your shower curtain from the ceiling.
Step 1: Measure the Ceiling Height
The first step in hanging a shower curtain from the ceiling is to measure the height of the ceiling. This measurement will help you determine the correct placement of the curtain and ensure it hangs at the desired height.
To begin, grab your measuring tape and stand in the center of your shower or bathtub. Extend the tape measure upward until you reach the ceiling. Take note of the measurement, as this will be the starting point for properly hanging your shower curtain.
Next, consider how much clearance you want between the top of your shower curtain and the ceiling. Generally, a few inches of space between the curtain and the ceiling will create an aesthetically pleasing look. Keep in mind that if you have a showerhead or any other fixtures that may interfere with the curtain, you might need to adjust the clearance accordingly.
Once you have determined the desired clearance, subtract the measurement from the height of your ceiling. This calculation will give you the ideal hanging height for your shower curtain. For example, if your ceiling height is 8 feet and you want a 6-inch clearance, subtract 6 inches from 8 feet to get the hanging height.
It’s important to remember that your shower curtain should ideally extend a few inches below the edge of your bathtub or shower floor to prevent water from splashing outside the bathing area. Take this into account when calculating the hanging height as well.
By accurately measuring the ceiling height and determining the desired clearance, you’ll ensure that your shower curtain hangs at the perfect height. This step is vital to achieving a visually appealing and functional ceiling-hung shower curtain. So, grab your measuring tape and let’s move on to the next step!
Step 2: Determine the Placement of the Shower Curtain
Now that you have measured the height for your ceiling-hung shower curtain, it’s time to determine the placement of the curtain in relation to your shower or bathtub. This step will ensure that the curtain covers the desired area and provides complete privacy while adding a touch of style to your bathroom.
Start by standing inside your shower or bathtub and visualizing where you want the shower curtain to hang. Consider factors such as the width and length of your shower or bathtub, as well as any obstacles or fixtures that might affect the curtain placement.
Ideally, the shower curtain should extend beyond the edges of your shower or bathtub to create a barrier that prevents water from splashing outside the bathing area. Aim for a few inches of overlap on each side. This will ensure maximum coverage and protection.
Additionally, think about the overall aesthetic you want to achieve in your bathroom. Do you want the curtain to cover the entire width of the shower or bathtub area, or would you prefer it to be a bit narrower? Consider the style and size of your bathroom to make a decision that complements the space.
Once you have determined the desired placement for your shower curtain, it’s helpful to mark the spots on the wall where the curtain will start and end. Use a pencil to lightly mark these points. This step will serve as a guide during the installation process, making it easier to hang the curtain evenly and symmetrically.
Remember to consider any slopes or angles in your bathroom’s ceiling or walls. These can affect the way the curtain falls and may require slight adjustments in placement as you move forward with the installation process.
By taking the time to determine the ideal placement of your shower curtain, you’ll ensure that it covers the necessary area and enhances the overall look of your bathroom. With this step completed, you’re ready to move on to the next stage of hanging your ceiling-hung shower curtain!
Read more: How To Hang Curtains On Ceiling
Step 3: Install Ceiling Mounts or Hooks
Now that you have determined the placement of your shower curtain, it’s time to install the ceiling mounts or hooks that will secure it in place. The specific method you choose will depend on the type of ceiling mounts or hooks you have selected and the materials of your bathroom’s ceiling.
Before you begin, ensure that the area where you will be installing the mounts or hooks is clean and free of any debris. This will allow for a secure and stable attachment.
Using your pencil, mark the spots on the ceiling where you will be placing the mounts or hooks based on the measurements and placement points you determined in the previous steps. Be sure to space them evenly to ensure that the curtain hangs straight.
Next, use your drill or screwdriver to attach the mounts or hooks securely to the ceiling according to the manufacturer’s instructions. Make sure the fasteners are flush with the ceiling and tightly secured to prevent any wobbling or movement.
If you are using adhesive hooks, make sure to thoroughly clean the ceiling surface before attaching them. Follow the package instructions for applying the adhesive, ensuring that they have enough time to properly bond with the ceiling surface before hanging the curtain.
Once you have installed all the necessary mounts or hooks across the width of the shower or bathtub area, double-check their alignment and stability. Give them a gentle tug to make sure they are firmly attached and can support the weight of the shower curtain.
It’s essential to choose high-quality ceiling mounts or hooks that can withstand the moisture and weight of the shower curtain. This will ensure that your curtain hangs safely and securely.
By taking the time to install the ceiling mounts or hooks correctly, you’ll create a solid foundation for your ceiling-hung shower curtain. With this step completed, you’re ready to move on to the next stage of hanging your curtain!
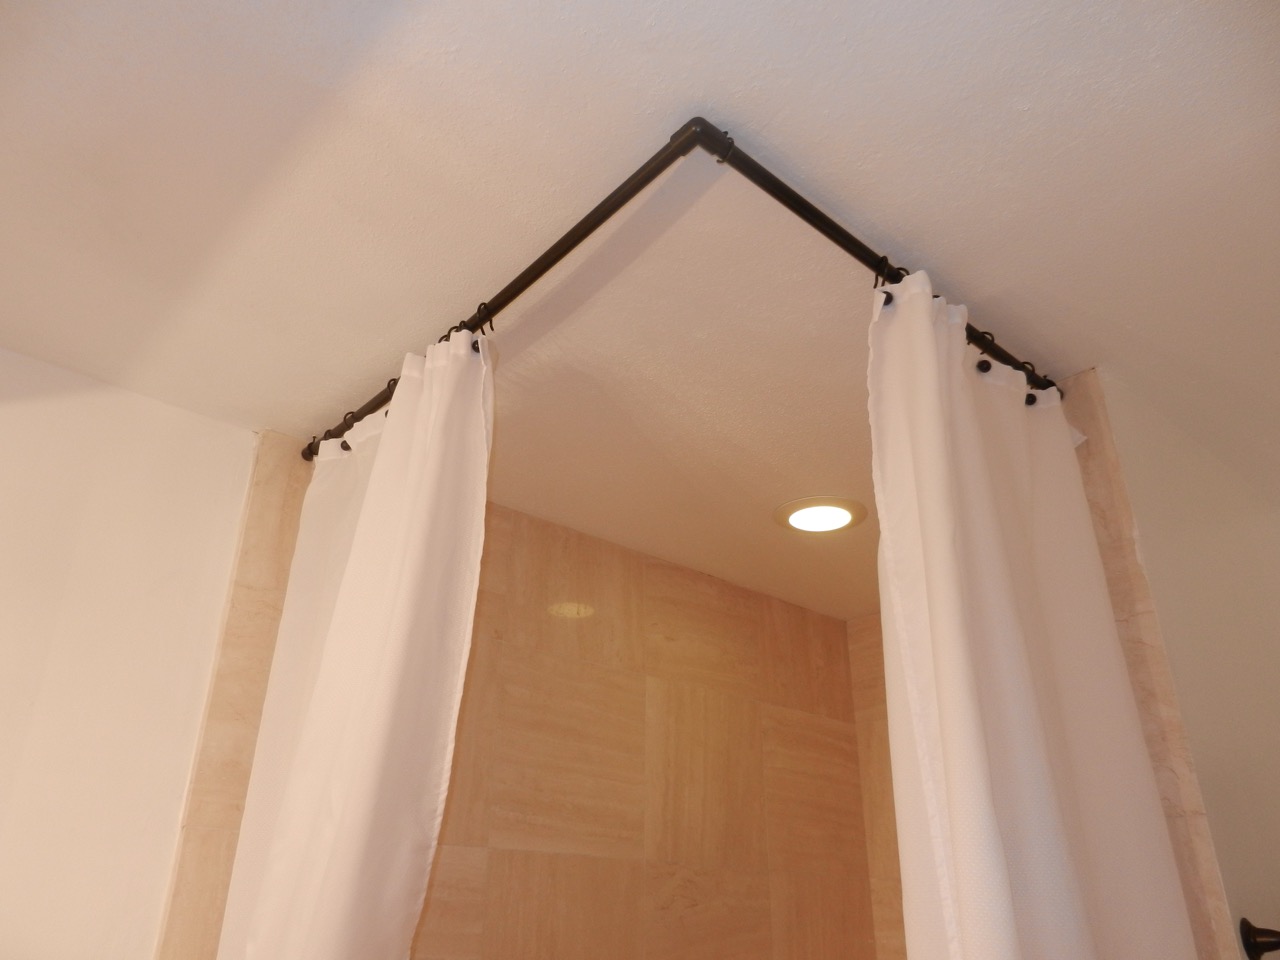
Use a ceiling track system to hang a shower curtain from the ceiling. This will create a sleek and modern look while also preventing water from escaping the shower area.
Step 4: Attach the Curtain Rings or Hooks to the Shower Curtain
With the ceiling mounts or hooks securely installed, it’s time to prepare the shower curtain for hanging. In this step, we’ll guide you through attaching the curtain rings or hooks to the shower curtain itself.
Start by laying out your shower curtain on a clean and flat surface. If your curtain requires assembly, follow the manufacturer’s instructions to connect the individual panels or sections together.
Once your curtain is ready, locate the top edge where the curtain rings or hooks will be attached. Many shower curtains come with built-in eyelets or holes along the top for easy hanging. If not, you may need to manually create small holes using a hole punch or sharp scissors.
Now it’s time to attach the curtain rings or hooks. Slide each ring or hook through the eyelets or holes in the top of the shower curtain, spacing them evenly across the width. The number of rings or hooks you’ll need will depend on the length of your curtain and the desired fullness.
Make sure the rings or hooks are securely fastened to the curtain, but avoid pulling or stretching the fabric too tightly. This will ensure that the curtain hangs properly and doesn’t tear under the weight.
If you’re using curtain hooks, ensure that the hooks are facing outward, away from the curtain, to allow for easy attachment to the ceiling mounts or hooks.
Before moving on to the next step, take a moment to inspect the curtain rings or hooks to ensure they are all properly attached and evenly spaced. Adjust as needed to achieve an even and balanced look.
By attaching the curtain rings or hooks to the shower curtain, you’re one step closer to completing the installation of your ceiling-hung shower curtain. With this step completed, it’s time to move on to the next stage and hang the curtain from the ceiling mounts or hooks!
Step 5: Hang the Curtain from the Ceiling
Now that you have your shower curtain prepared with the rings or hooks attached, it’s time to hang it from the ceiling mounts or hooks. This step will bring your ceiling-hung shower curtain to life and transform your bathroom’s ambiance.
Begin by standing on a step ladder or stool to reach the ceiling mounts or hooks. Starting from one end, lift the shower curtain and hook each ring or hook onto its corresponding mount or hook. Take care to ensure that each ring or hook is securely attached and hangs straight.
As you hang the curtain, periodically step back to check the overall alignment and appearance. Adjust the rings or hooks as necessary to create an even and balanced look across the width of the shower or bathtub.
If you’re working with a wider shower or bathtub area, you may need an extra set of hands to help you hold the curtain while you attach the rings or hooks. Having someone assist you will make the process smoother and prevent the curtain from slipping or falling.
Once all the rings or hooks are securely attached to the ceiling mounts or hooks, gently release the shower curtain, allowing it to drape down naturally. Take a moment to observe the curtain and ensure that it hangs evenly and at the desired height.
If you notice any areas where the curtain appears uneven or sagging, adjust the rings or hooks accordingly to achieve a balanced and visually pleasing drape. Aim for a curtain that falls straight and maintains a consistent distance from the shower floor or bathtub edge.
Once you’re satisfied with the curtain placement, step off the ladder or stool and take a final look at your ceiling-hung shower curtain. Admire the elevated and elegant appearance it adds to your bathroom.
At this point, you have successfully hung your shower curtain from the ceiling, turning it into a striking focal point of your bathroom’s decor. However, there are a few more steps to ensure the curtain hangs perfectly, so let’s move on to the next stage of adjusting and leveling the curtain!
Step 6: Adjust and Level the Curtain
Once the shower curtain is hung from the ceiling, it’s important to take the time to adjust and level it for a polished and cohesive look. This step will ensure that your ceiling-hung shower curtain appears straight, even, and perfectly aligned.
Begin by standing back to observe the curtain from a distance. Look for any areas where the curtain may be slightly crooked or uneven. These could be due to variations in the ceiling or slight discrepancies in the placement of the rings or hooks.
To adjust the curtain, start by gently sliding the rings or hooks along the ceiling mounts or hooks. This will allow you to shift the curtain and achieve a straight, symmetrical appearance. Take small adjustments at a time and step back regularly to assess the curtain’s alignment.
If necessary, you can also adjust the height of the curtain by moving the rings or hooks up or down the ceiling mounts or hooks. This will help you achieve the desired clearance from the floor or bathtub edge and create a visually pleasing effect.
Pay close attention to the overall tension of the curtain. Ensure that it hangs taut without excessive sagging or bunching. The fabric should fall smoothly and evenly, creating an elegant and refined look.
As you make adjustments, take care not to pull or strain the curtain excessively. This can lead to tearing or damage to both the curtain and the ceiling mounts or hooks. Work gently and delicately to achieve the desired result.
Once you’re satisfied with the adjustments, step back and take another look at the curtain from various angles. Ensure that it appears level, straight, and visually appealing. This final check will give you confidence in the finished look of your ceiling-hung shower curtain.
By taking the time to adjust and level the curtain, you’ll achieve a professional and polished appearance for your ceiling-hung shower curtain. Now it’s time to move on to the final step and enjoy the beauty and functionality of your creation!
Step 7: Enjoy Your Ceiling-Hung Shower Curtain
Congratulations! You have successfully completed the installation of your ceiling-hung shower curtain. Now it’s time to sit back, relax, and enjoy the beauty and functionality it brings to your bathroom.
Step into your shower or bathtub area and admire the elegantly draped curtain that hangs gracefully from the ceiling. Take a moment to appreciate the added height and spaciousness it creates, giving your bathroom a luxurious and inviting atmosphere.
Not only does a ceiling-hung shower curtain bring visual appeal to your bathroom, but it also provides practical benefits. The elevated placement helps prevent water from splashing outside the bathing area, keeping your floors dry and safe. Additionally, it offers enhanced privacy while adding a touch of style to your daily shower routine.
To maintain the beauty and longevity of your ceiling-hung shower curtain, it’s important to care for it properly. Regularly clean the curtain according to the manufacturer’s instructions, whether through machine washing or spot cleaning. This will prevent the buildup of grime, mold, or mildew, ensuring that your curtain remains fresh and hygienic.
If you ever wish to change the look of your bathroom or update the decor, replacing the shower curtain is a simple and affordable solution. With a ceiling-hung curtain, you have the flexibility to experiment with different colors, patterns, and textures to suit your evolving style preferences.
As you enjoy your ceiling-hung shower curtain, take note of the positive impact it has on your overall bathroom experience. From the moment you walk in, you’ll be greeted by a heightened sense of elegance and sophistication.
Remember to take pride in the accomplishment of hanging a shower curtain in a unique and creative way. Your bathroom will stand out, impressing guests and providing you with a personal sanctuary where you can unwind and rejuvenate.
So, step into your beautifully adorned shower or bathtub, draw the curtain closed, and revel in the luxurious ambiance of your ceiling-hung shower curtain. Enjoy every moment and cherish the transformative effect it brings to your bathroom space.
Conclusion
Hanging a shower curtain from the ceiling is a brilliant way to add a touch of elegance and uniqueness to your bathroom. By following the step-by-step guide provided in this article, you now have the knowledge and confidence to successfully install a ceiling-hung shower curtain.
Throughout the process, we discussed the importance of measuring the ceiling height, determining the curtain placement, and installing the necessary ceiling mounts or hooks. We also covered how to attach the curtain rings or hooks to the shower curtain and properly hang the curtain from the ceiling. Additionally, we emphasized the significance of adjusting and leveling the curtain for a polished and balanced appearance.
By taking the time to carefully execute each step, you can achieve a breathtaking ceiling-hung shower curtain that enhances the overall aesthetic of your bathroom. This creative approach not only adds visual appeal but also creates the illusion of a higher ceiling and a more spacious bathroom.
Remember to choose high-quality materials, measure accurately, and make adjustments as needed. By doing so, you’ll ensure that your ceiling-hung shower curtain is secure, straight, and captures the attention of anyone who enters your bathroom.
As you enjoy your newly installed ceiling-hung shower curtain, take pride in the accomplishment of transforming your bathroom into a stylish and inviting space. Appreciate the functionality it provides, including increased privacy and reduced water splashes outside the bathing area.
To maintain the beauty and longevity of your ceiling-hung shower curtain, remember to clean it regularly and replace it when needed. This allows for endless possibilities to explore different colors, patterns, and textures, keeping your bathroom’s decor fresh and up-to-date.
Now, go ahead and indulge in the luxurious ambiance of your ceiling-hung shower curtain. Whether you’re starting your day with an invigorating shower or unwinding in the evening with a relaxing bath, savor each moment spent in your beautifully adorned bathroom oasis.
Frequently Asked Questions about How To Hang A Shower Curtain From The Ceiling
Was this page helpful?
At Storables.com, we guarantee accurate and reliable information. Our content, validated by Expert Board Contributors, is crafted following stringent Editorial Policies. We're committed to providing you with well-researched, expert-backed insights for all your informational needs.


0 thoughts on “How To Hang A Shower Curtain From The Ceiling”