Articles
How To Hang A Tapestry From The Ceiling
Modified: May 6, 2024
Learn how to hang a tapestry from the ceiling with these helpful articles. Discover step-by-step instructions and tips to create a stunning display.
(Many of the links in this article redirect to a specific reviewed product. Your purchase of these products through affiliate links helps to generate commission for Storables.com, at no extra cost. Learn more)
Introduction
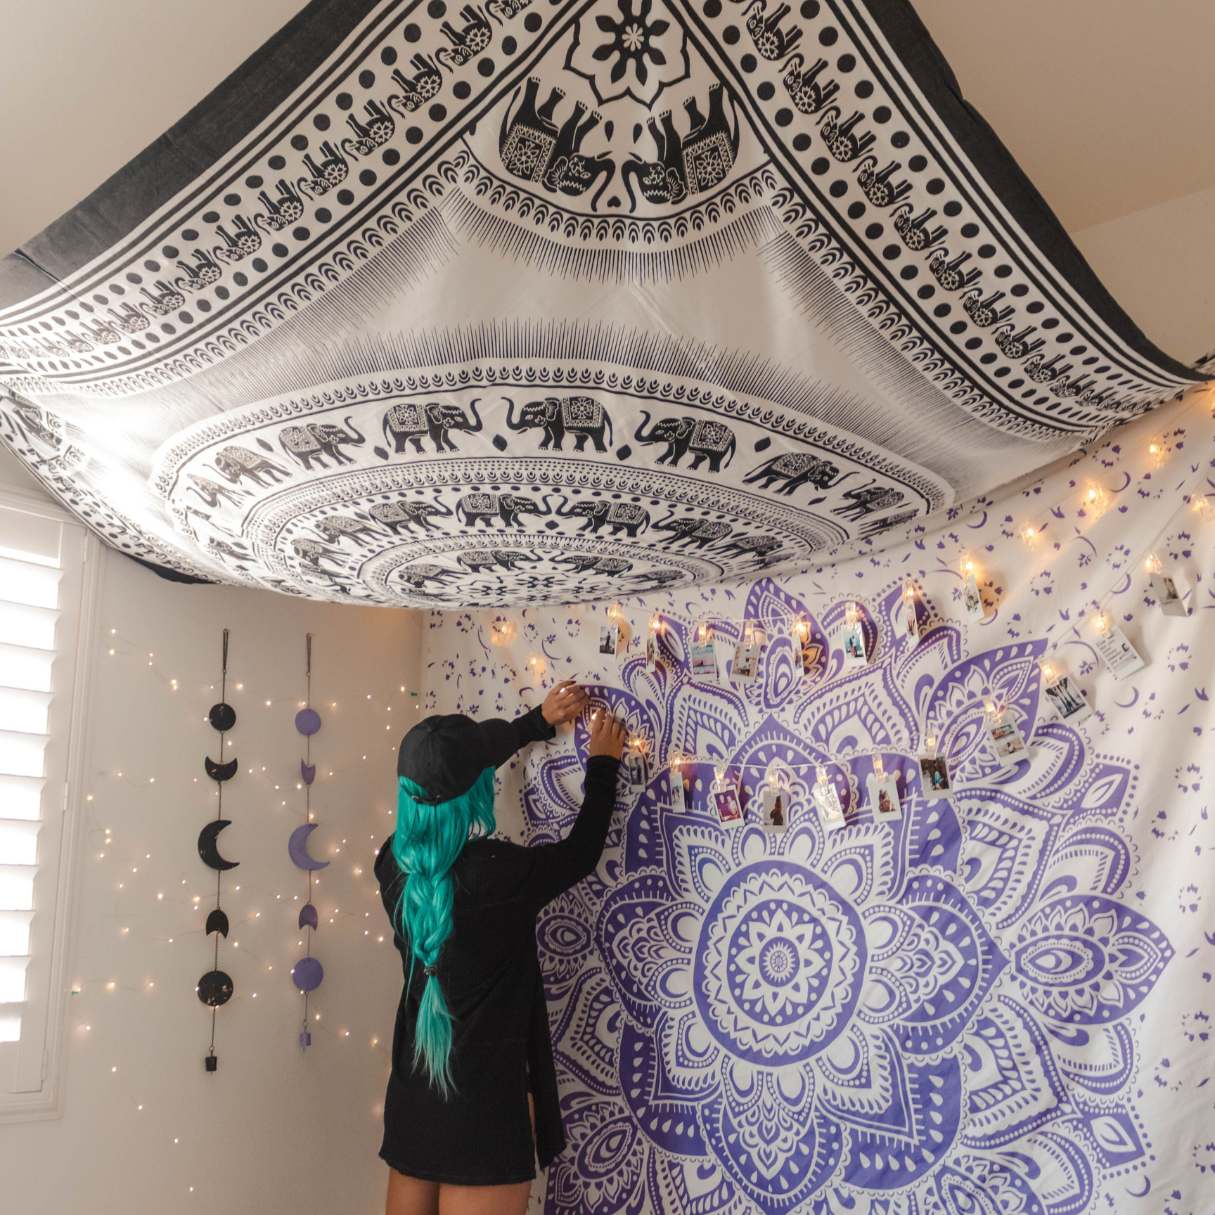
Adding a tapestry to your living space can instantly elevate the ambiance and bring texture and color to any room. While most people hang tapestries on walls, there’s a unique and visually stunning option to consider – hanging a tapestry from the ceiling.
Hanging a tapestry from the ceiling creates a dramatic effect and allows the artwork to become a focal point of the room. Whether you have a large open space or a cozy corner, hanging a tapestry from the ceiling can transform the aesthetic and add a touch of bohemian charm.
In this guide, we will walk you through the steps of how to hang a tapestry from the ceiling. From choosing the right tapestry to installing the necessary hardware, we’ll cover everything you need to know to create an eye-catching display that showcases your personal style.
So, if you’re ready to bring a touch of artistry and creativity to your space, let’s dive into the process of hanging a tapestry from the ceiling.
Key Takeaways:
- Elevate your living space by hanging a tapestry from the ceiling, creating a stunning focal point and adding a touch of bohemian charm to any room.
- Choose the right tapestry, measure your ceiling height, and secure the tapestry in place for a visually pleasing display that reflects your personal style.
Read more: How To Hang Unistrut From The Ceiling
Step 1: Choose the right tapestry
When it comes to hanging a tapestry from the ceiling, the first step is selecting the right tapestry for your space. Consider the theme and color palette of your room, as well as the overall style you want to achieve. Whether you prefer bold and vibrant patterns or subtle and intricate designs, there is a wide variety of tapestries available to suit every taste.
Keep in mind the size of the tapestry and the dimensions of your ceiling. Measure the height and width of the space where you plan to hang the tapestry to ensure it will fit properly. It’s also important to choose a tapestry that is lightweight enough to hang from the ceiling without causing any damage.
If you’re unsure about which tapestry to choose, consider the following tips:
- Look for tapestries with a rod pocket or loops at the top. These make it easier to hang the tapestry from the ceiling.
- Choose a tapestry made from durable materials like cotton, polyester, or a blend of both. This will ensure that the tapestry remains in good condition even when hung from the ceiling.
- Consider the design and pattern of the tapestry. Opt for a design that complements the existing decor and adds visual interest to the room.
- Don’t be afraid to mix and match different tapestries to create a unique and eclectic look. Experiment with different colors, textures, and sizes to find the perfect combination for your space.
By taking the time to choose the right tapestry, you can set the foundation for a stunning and visually appealing display when it is hung from the ceiling. So, explore your options and select a tapestry that speaks to your personal style and enhances the overall aesthetic of your space.
Step 2: Measure the ceiling height
Before you start hanging the tapestry from the ceiling, it’s important to measure the height of your ceiling. This will help you determine the appropriate length of hardware and ensure that the tapestry hangs at the desired height.
Grab a tape measure and follow these steps:
- Stand in the area where you plan to hang the tapestry and extend the tape measure vertically from the floor to the ceiling. Make sure the tape measure is straight and aligned with the center of the space.
- Take note of the measurement in feet or inches. This will be the height of your ceiling.
- Consider the placement of furniture or other objects that may affect the overall hanging height. You want to ensure that the tapestry hangs at a visually pleasing height and doesn’t interfere with any existing elements in the room.
Once you have measured the ceiling height, you can now proceed to the next steps in the hanging process. Having an accurate measurement will guide you in determining the appropriate length for the hardware and the overall placement of the tapestry.
Remember, it’s essential to measure carefully to avoid any mistakes or miscalculations. Taking the time to measure the height accurately will help you achieve a balanced and visually appealing display once the tapestry is hung from the ceiling.
Step 3: Prepare the necessary tools and materials
Now that you have chosen the perfect tapestry and measured your ceiling height, it’s time to gather the necessary tools and materials for hanging the tapestry from the ceiling. Here’s what you’ll need:
- Ceiling hooks: These will be the main support for hanging the tapestry. Choose hooks that are sturdy and can hold the weight of the tapestry. They should also be suitable for the type of ceiling you have, whether it’s drywall, plaster, or another material.
- Drill or screwdriver: If your ceiling hooks require pre-drilling, make sure you have the appropriate drill or screwdriver on hand. Follow the manufacturer’s instructions for the correct size of drill bit or screwdriver tip.
- Measuring tape: This will come in handy for precise placement and measurements while installing the ceiling hooks.
- Pencil: Use a pencil to mark the spots on the ceiling where you plan to install the hooks.
- Tapestry rod or wooden dowel: Depending on the type of tapestry you have, you may need a rod or dowel to slide through the rod pocket or loops at the top of the tapestry for hanging.
- Optional: Command hooks or adhesive strips: If you prefer not to drill holes in your ceiling, you can use adhesive hooks or strips designed for hanging items. Make sure to choose ones that can support the weight of your tapestry.
Having these tools and materials ready ahead of time will ensure a smooth and efficient hanging process. Take a moment to gather everything you need, double-checking that you have the correct hooks and any additional hardware specific to your tapestry’s hanging requirements. With the right tools in hand, you’re now ready to move on to the next step of locating the hanging points on the ceiling.
Step 4: Locate the hanging points on the ceiling
Before you can hang the tapestry from the ceiling, you need to determine the ideal placement for the hanging points. The hanging points are the spots on the ceiling where you will install the hooks or adhesive strips.
To locate the hanging points:
- Take your tapestry and hold it up against the ceiling in the desired position. Ensure that it is centered and aligned with the space you want to decorate.
- Using a pencil, make small marks on the ceiling where the top corners or hanging loops of the tapestry meet the ceiling.
- Step back and check if the placement looks visually balanced and aligned with the surrounding area. Make any adjustments if needed.
If you have a larger tapestry, you may need to make additional marks along the top edge of the tapestry to evenly distribute the weight.
Once you have marked the hanging points on the ceiling, it’s time to move on to the next step of installing the ceiling hooks or adhesive strips. These will provide the sturdy support needed to hang the tapestry securely from the ceiling.
By taking the time to carefully locate the hanging points, you can ensure that the tapestry hangs in the desired position and enhances the aesthetics of your space.
Use adhesive hooks or ceiling clips to hang a tapestry from the ceiling. Make sure to measure and mark the placement before attaching the hooks or clips to ensure the tapestry hangs evenly.
Read more: How To Hang Surfboard From The Ceiling
Step 5: Install the ceiling hooks
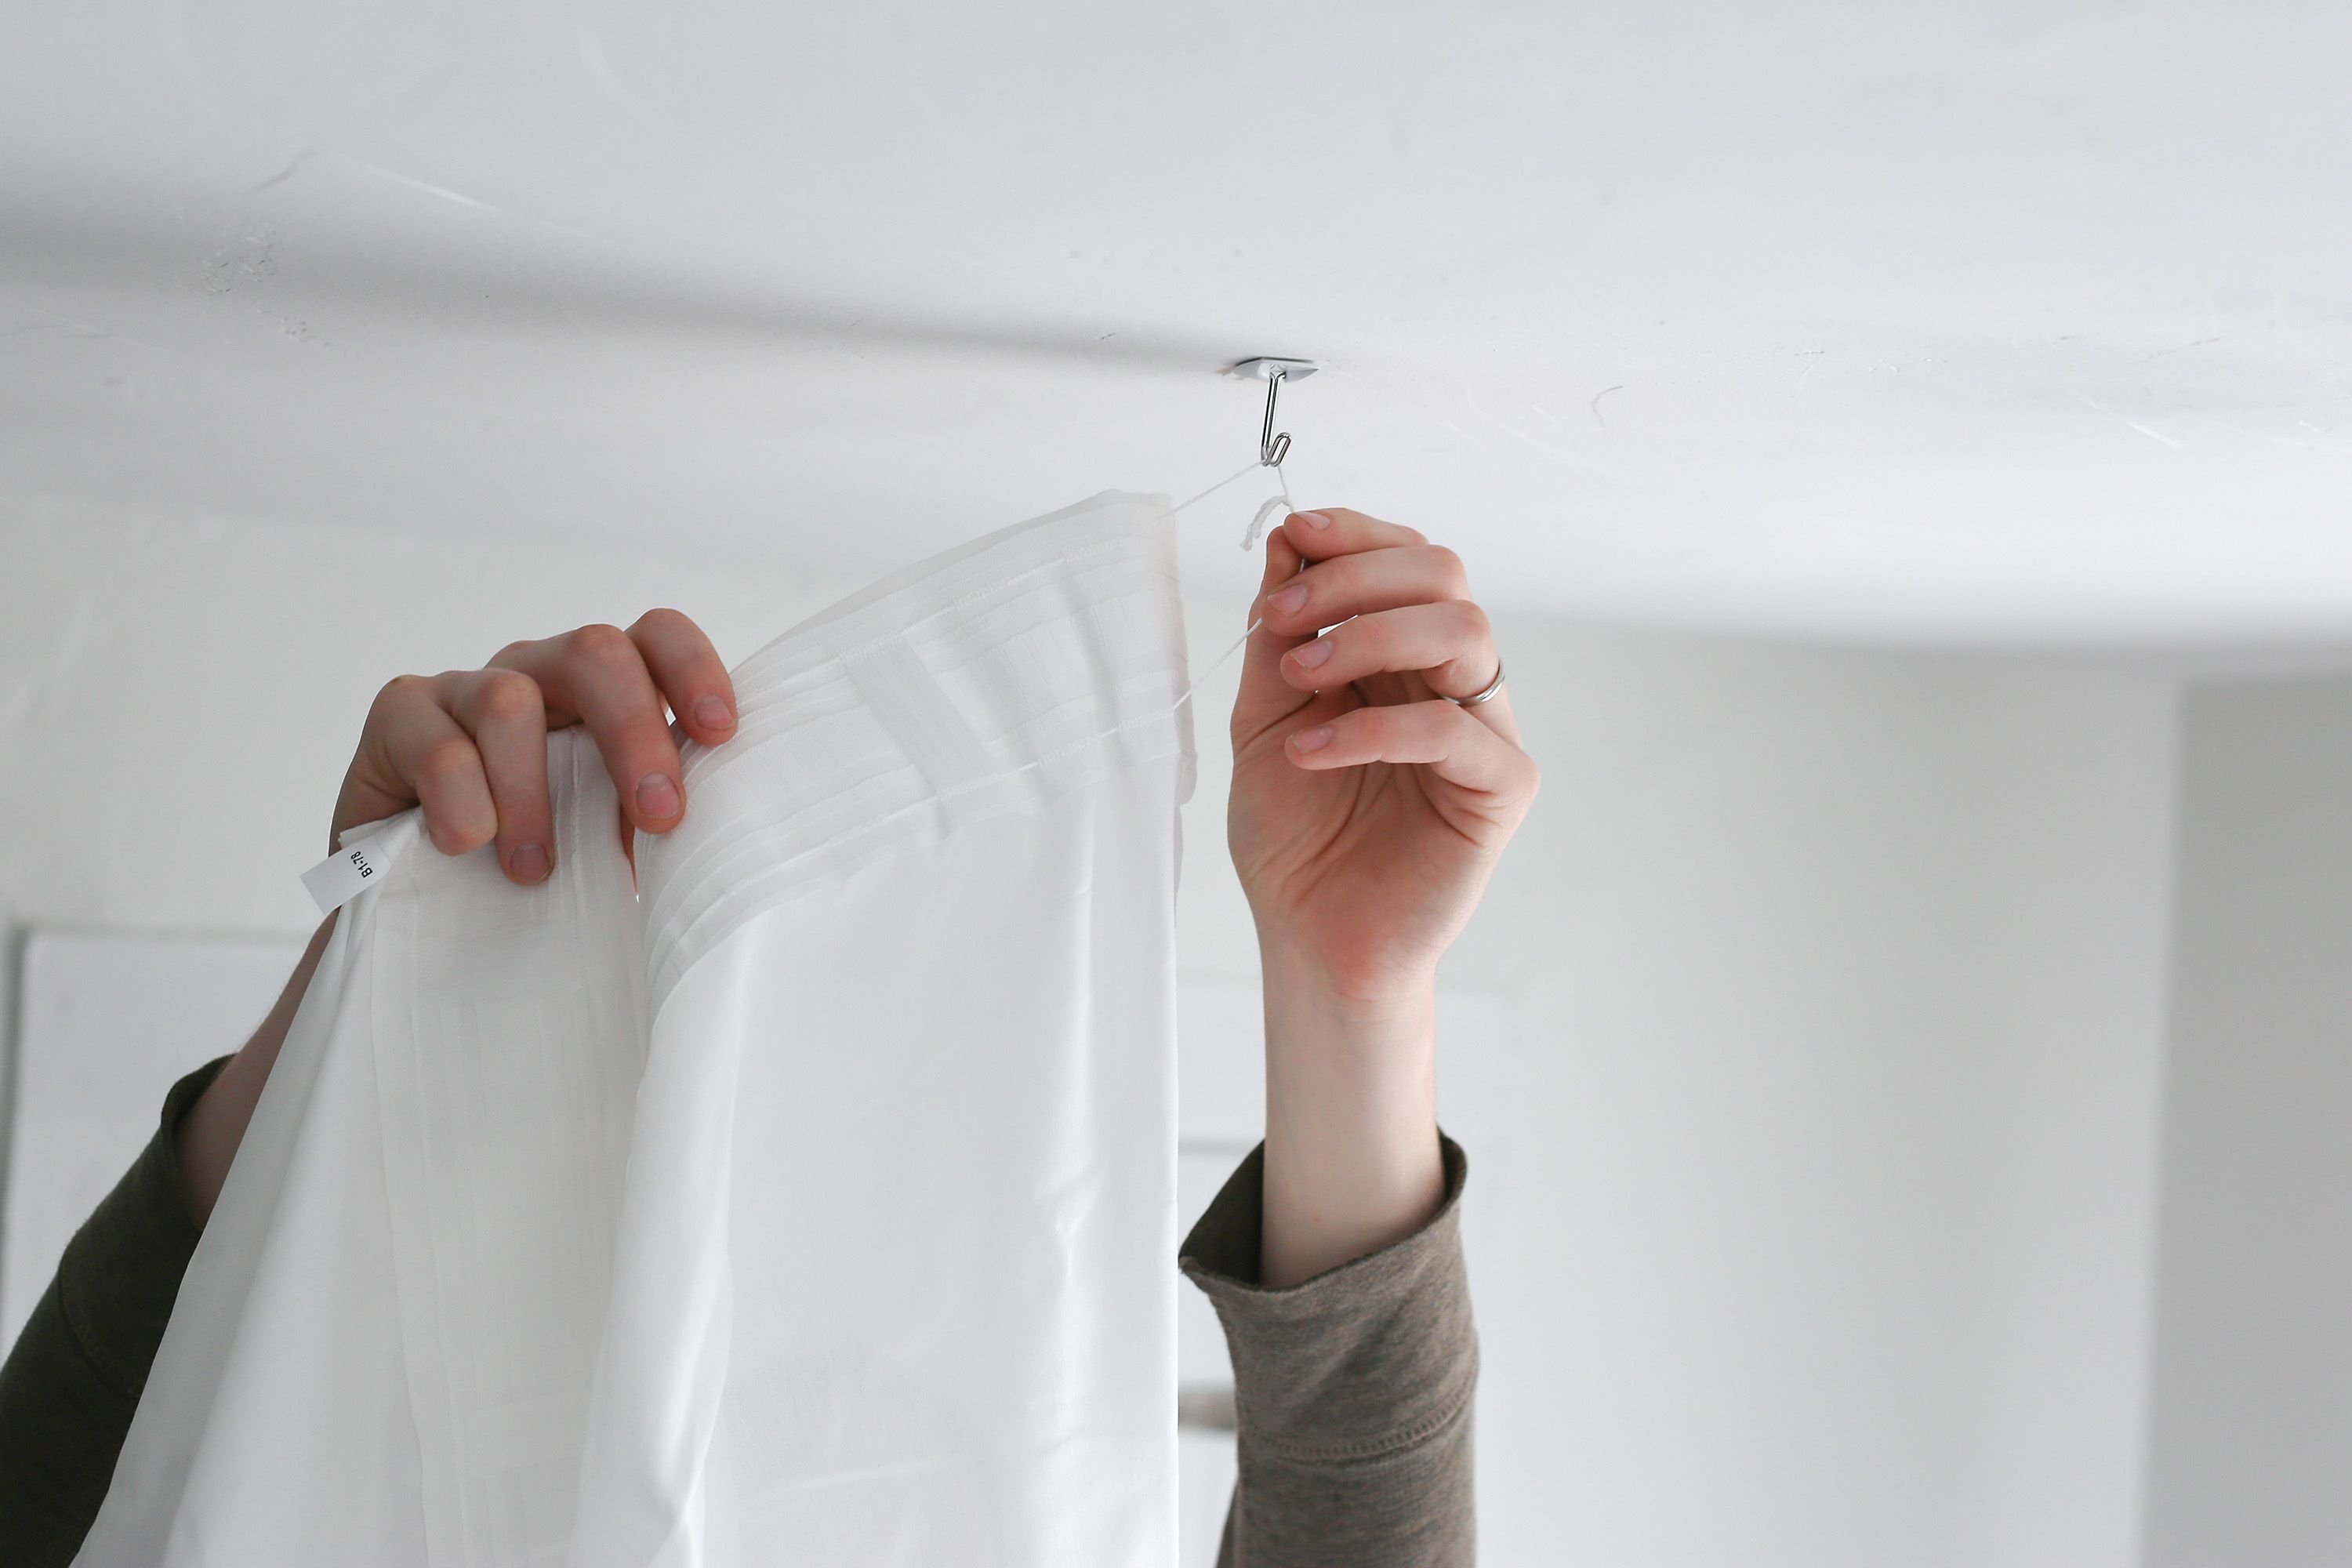
Now that you have marked the hanging points on the ceiling, it’s time to install the ceiling hooks. Ceiling hooks provide a secure anchor for hanging the tapestry and ensure that it remains in place. Follow these steps to install the hooks:
- Refer to the manufacturer’s instructions for the specific type of hooks you have.
- If necessary, use a drill or screwdriver to pre-drill holes at the marked hanging points on the ceiling. Make sure the holes are the appropriate size for the hooks and that they are straight and secure.
- Insert the ceiling hooks into the pre-drilled holes, turning them clockwise until they are fully secured. If you are using adhesive strips or Command hooks, follow the instructions provided to attach them securely to the ceiling.
- Double-check that the hooks are firmly in place and can support the weight of the tapestry.
It’s important to ensure that the hooks are properly installed and can bear the weight of the tapestry to prevent any accidents or damage. Take your time during this step to ensure the hooks are securely in place.
Once the hooks are installed, you’re ready to move on to the next step of attaching the tapestry to the hooks and bringing your vision to life.
Step 6: Attach the tapestry to the hooks
With the ceiling hooks securely installed, it’s time to attach the tapestry to the hooks and bring your vision to life. Follow these steps to hang the tapestry from the ceiling:
- If your tapestry has a rod pocket or loops at the top, insert a tapestry rod or a wooden dowel through the pocket or loops. Ensure that the rod or dowel is long enough to span the width of the tapestry.
- Hold the tapestry with the rod or dowel parallel to the ceiling.
- Carefully lift the tapestry and hook the rod or dowel onto the installed ceiling hooks. Make sure the tapestry is centered and hanging evenly.
- Step back and adjust the tapestry’s position if needed, ensuring that it is straight and at the desired height.
If your tapestry doesn’t have a rod pocket or loops at the top, you can use alternative hanging methods. One option is to attach decorative clips or clothespins to the top edges of the tapestry and use them to hook onto the ceiling hooks. Just be sure to distribute the weight evenly to prevent any strain on the tapestry or the hooks.
Take your time during this step to make sure the tapestry is properly attached and hanging securely. Straighten out any wrinkles or folds in the fabric for a smooth and neat appearance.
Now that the tapestry is hanging from the ceiling, it’s time to move on to the final step of adjusting and securing the tapestry to ensure it stays in place.
Step 7: Adjust and secure the tapestry
Now that your tapestry is attached to the ceiling hooks, it’s important to make any necessary adjustments and secure it in place to ensure it stays in position. Follow these steps:
- Step back and observe the tapestry from different angles. Check if it is hanging straight and centered.
- If needed, gently adjust the tapestry’s position by sliding it on the rod or dowel. Ensure that it is aligned properly and visually balanced.
- If your tapestry tends to slide or move on the rod, consider using small clips or fabric-friendly adhesive tape to secure it in place along the edges. This will help prevent any unwanted movement or sagging.
- Take a moment to inspect the tapestry for any wrinkles or folds. Smooth them out gently by hand or use a fabric steamer or iron on low heat, if appropriate for the material.
Once you’re satisfied with the tapestry’s positioning and appearance, step back and admire your handiwork. The tapestry should now be hanging beautifully from the ceiling, adding a unique and artistic touch to your space.
It’s important to periodically check the tapestry’s stability and make adjustments as needed, especially if it’s exposed to drafts or movement in the room. This will ensure that the tapestry remains securely in place and maintains its visual impact over time.
With the tapestry properly adjusted and secured, you can now enjoy the beauty and charm it brings to your living environment. Take the time to appreciate the unique atmosphere it creates and the personal touch it adds to your home.
Conclusion
Hanging a tapestry from the ceiling is a creative and visually captivating way to bring art and texture into your living space. By following the steps outlined in this guide, you can successfully hang a tapestry from your ceiling and create a stunning focal point that reflects your personal style.
From choosing the right tapestry to measuring your ceiling height and locating the hanging points, each step is essential to ensure a secure and visually pleasing display. Installing the ceiling hooks or using adhesive strips provides the necessary support, while adjusting and securing the tapestry ensures it remains in place and looks its best.
Remember to consider the overall aesthetics of the room and select a tapestry that complements your existing décor. Experiment with different sizes, colors, and patterns to achieve the desired look. Don’t hesitate to mix and match tapestries to create a unique and eclectic display.
Keep in mind that the tapestry will become the centerpiece of the room once it’s hung from the ceiling. Take the time to step back and enjoy the beauty and ambiance it brings to your space. Periodically check and adjust the tapestry, ensuring it remains securely in place and free from wrinkles or folds.
Now it’s time to unleash your creativity and transform your living environment with a beautifully hung tapestry. Embrace the visual impact, texture, and artistry it adds to your space, and enjoy the ambiance it creates. Happy hanging!
Ready to tackle more exciting projects around your home? If you’ve enjoyed mastering tapestry hanging, our guide on DIY home projects is just the next step waiting for you. It's packed with creative ideas and practical advice that will help you transform spaces with your own hands. Whether looking to build, repair, or innovate, find the inspiration needed to kickstart your next DIY adventure. Don’t just dream about a beautiful home; start creating it today!
Frequently Asked Questions about How To Hang A Tapestry From The Ceiling
Was this page helpful?
At Storables.com, we guarantee accurate and reliable information. Our content, validated by Expert Board Contributors, is crafted following stringent Editorial Policies. We're committed to providing you with well-researched, expert-backed insights for all your informational needs.


0 thoughts on “How To Hang A Tapestry From The Ceiling”