Articles
How To Hang Bike From The Ceiling
Modified: August 28, 2024
Learn how to hang your bike from the ceiling with these helpful articles. Keep your space organized and save floor space.
(Many of the links in this article redirect to a specific reviewed product. Your purchase of these products through affiliate links helps to generate commission for Storables.com, at no extra cost. Learn more)
Introduction
Welcome to the ultimate guide on how to hang your bike from the ceiling! If you’re short on floor space or simply want to keep your bike out of the way and securely stored, hanging it from the ceiling is a smart solution. Not only does it free up valuable floor space, but it also protects your bike from potential damage and keeps it within easy reach for your next adventure.
Before you start hanging your bike from the ceiling, there are a few key factors to consider. Assessing your ceiling space, choosing the right bike rack, and installing it properly are crucial steps to ensure a safe and secure hanging system. Additionally, taking the necessary precautions and performing regular maintenance will help prolong the life of your bike rack and keep your bike in top condition. Let’s dive into each step in detail and make sure your bike hanging experience is a breeze!
Key Takeaways:
- Maximize space and protect your bike by hanging it from the ceiling. Assess your space, choose the right rack, and secure your bike for a hassle-free storage solution.
- Properly secure and maintain your bike rack to ensure longevity and safety. Follow installation steps and maintenance tips for a secure and reliable hanging system.
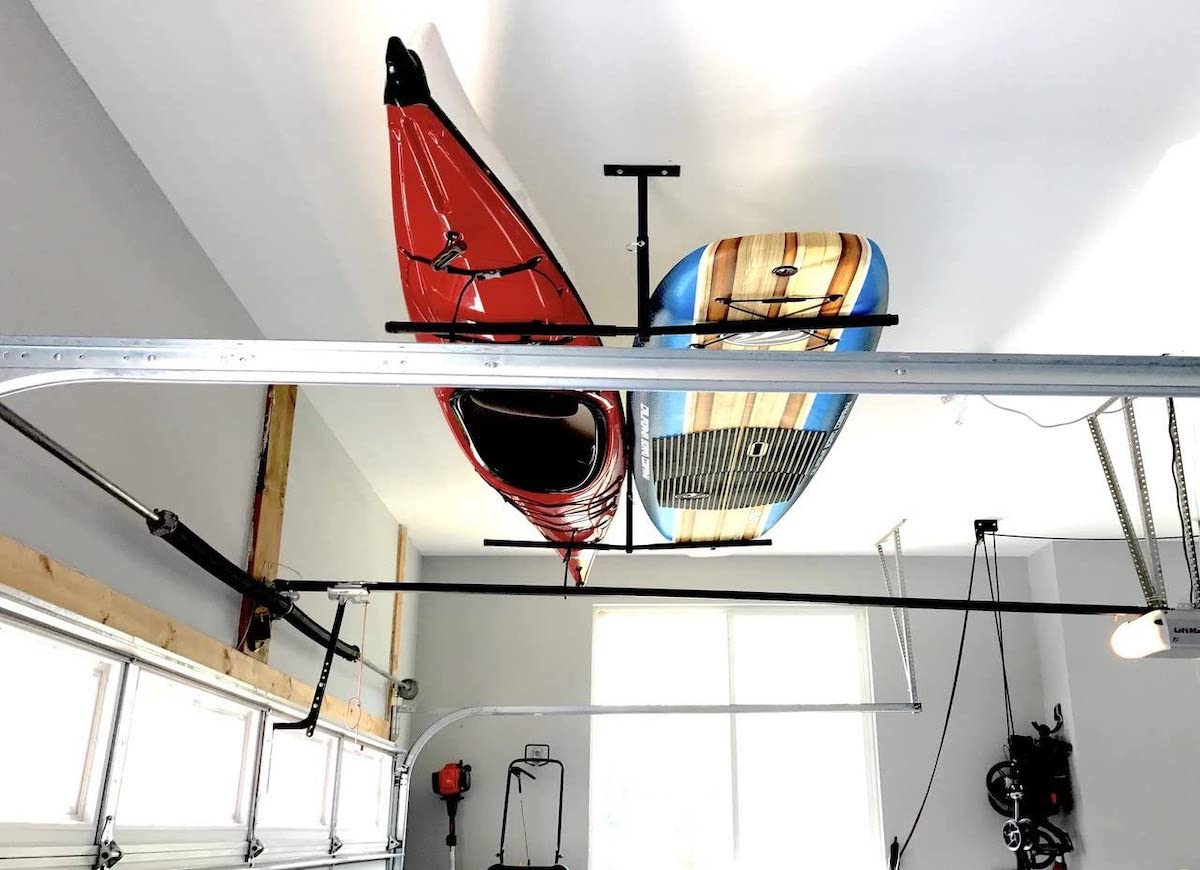
Read more: How To Hang Unistrut From The Ceiling
Assessing Your Ceiling Space
Before you begin the process of hanging your bike from the ceiling, it’s important to assess your ceiling space and determine the feasibility of installing a bike rack. Here are a few key factors to consider:
- Ceiling Height: Measure the height of your ceiling to ensure there is enough clearance for your bike to hang comfortably without interfering with any obstructions or objects.
- Ceiling Material: Take note of the material your ceiling is made of, as this will impact the type of mounting hardware you’ll need to use. For example, if you have a concrete ceiling, you’ll require specific concrete anchors.
- Weight Capacity: Check the weight capacity of your ceiling to ensure it can safely support the weight of your bike and the bike rack. You don’t want to risk any damage to your ceiling or potential accidents due to an overloaded setup.
- Access: Consider the ease of access to your bike hanging area. Make sure there is enough clearance to easily lift and lower your bike, as well as sufficient space to maneuver around it without any obstructions.
By thoroughly assessing your ceiling space, you’ll have a clear understanding of the limitations and possibilities for installing a bike rack. This will ultimately help you choose the right bike rack that fits your space and provides a secure hanging system for your bike.
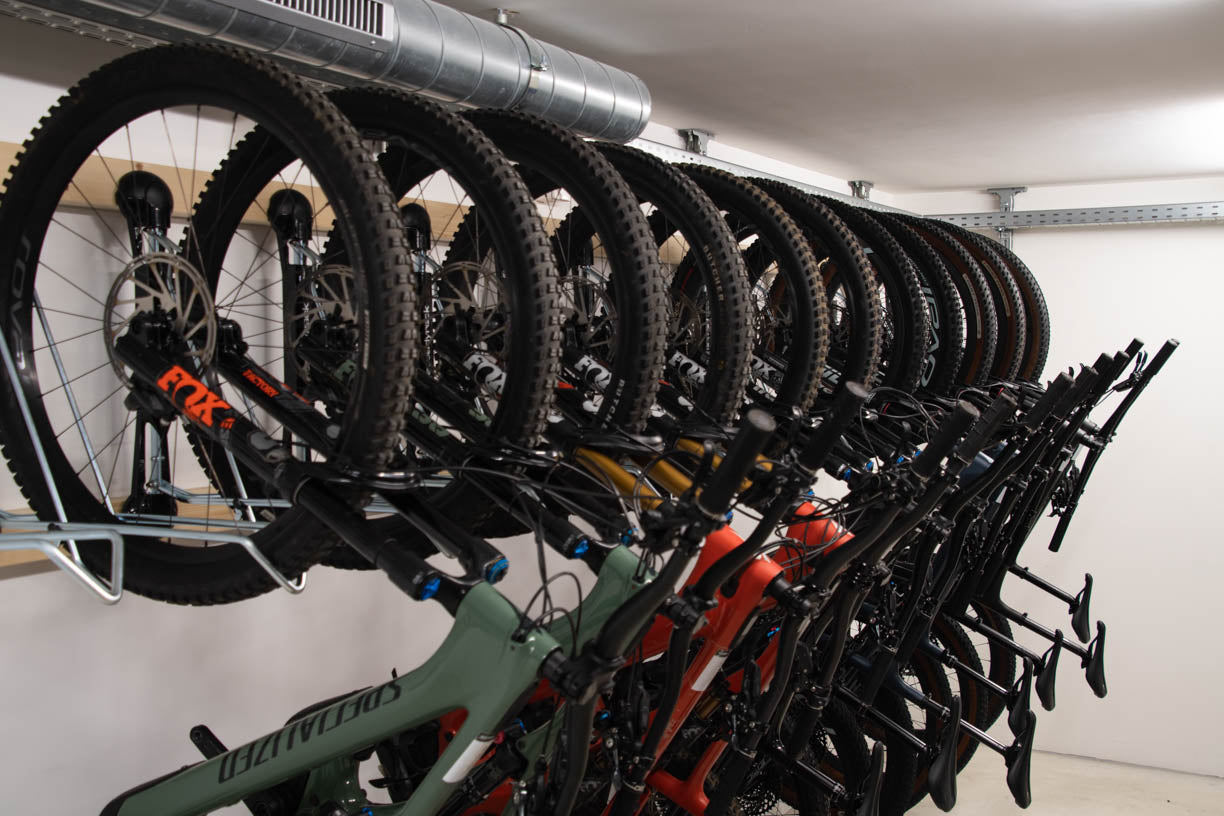
Choosing the Right Bike Rack
Now that you’ve assessed your ceiling space, it’s time to choose the right bike rack for your needs and preferences. Here are some factors to consider when selecting a bike rack:
- Ceiling Mount vs. Wall Mount: Decide whether you want to mount your bike rack directly to the ceiling or to the wall near the ceiling. Ceiling-mounted racks typically require more space above the bike to accommodate the hanging mechanism, while wall-mounted racks may be more compact but still require sufficient wall space.
- Bike Capacity: Determine how many bikes you need to hang from the ceiling. Some racks are designed to hold just one bike, while others can accommodate multiple bikes. Consider your current bike collection and any potential future additions when deciding on the capacity of the bike rack.
- Space Efficiency: Look for bike racks that maximize space efficiency by allowing you to store your bike horizontally or vertically. Vertical racks, such as pulley or hoist systems, are great for minimizing the footprint and making the most of your ceiling space.
- Secure Attachment: Ensure that the bike rack you choose provides a secure attachment to the ceiling or wall. Look for racks with sturdy construction and reliable mounting hardware, such as bolts, screws, or anchors, to keep your bike safely suspended.
- Bike Protection: Consider racks that offer additional features like rubberized hooks or padded cradles to protect your bike from scratches or damage while hanging. These features can help maintain the integrity of your bike’s frame and components.
Take your time to research and compare different bike rack options to find the one that best suits your specific needs and space constraints. It’s important to invest in a high-quality rack that will securely hold your bike and provide peace of mind.
Installing the Bike Rack
Once you’ve chosen the right bike rack for your needs, it’s time to install it properly. Follow these steps to ensure a secure and stable installation:
- Locate the Studs: Use a stud finder to locate the ceiling or wall studs where you’ll be mounting the bike rack. Studs provide the necessary strength and stability to support the weight of your bike.
- Measure and Mark: Measure and mark the exact locations where the mounting hardware will be inserted into the studs. Double-check your measurements to ensure they are accurate before proceeding.
- Pre-Drill Holes: Use a drill with an appropriate-sized drill bit to pre-drill pilot holes at the marked locations. This will help prevent the wood or drywall from splitting when inserting the mounting hardware.
- Attach Mounting Hardware: Depending on the type of bike rack you have, follow the manufacturer’s instructions to attach the mounting hardware to the ceiling or wall. Use screws, bolts, or anchors that are appropriate for the material you are mounting onto.
- Secure Bike Rack: Once the mounting hardware is in place, carefully attach the bike rack according to the manufacturer’s instructions. Ensure that all screws or bolts are tightened securely to prevent any wobbling or movement of the rack.
It is crucial to focus on the stability and weight distribution of the bike rack during installation. Make sure it is securely fastened to the studs or wall, as a loose or unstable rack can pose a safety hazard. If you’re unsure about the installation process, consult a professional or seek assistance from a knowledgeable individual.
By following these steps, you’ll have your bike rack installed and ready to hang your bike in no time. Remember to take your time and double-check all measurements and mounting hardware to ensure a safe and secure hanging system.
Use a ceiling-mounted bike hoist to easily lift and store your bike out of the way. Make sure to secure the hoist to a ceiling joist for maximum stability.
Hanging Your Bike from the Ceiling
Now that your bike rack is securely installed, it’s time to hang your bike from the ceiling. Follow these steps to ensure a smooth and hassle-free hanging process:
- Positioning the Bike: Stand beside your bike rack and position your bike parallel to the ground. Hold the handlebars with one hand and the seat with the other to maintain control and balance.
- Lift the Bike: Lift the bike by the seat and guide it towards the rack. Slowly lift the front wheel up and slide it into the designated hook or cradle on the bike rack. Keep lifting until the bike is fully suspended, with the back wheel off the ground.
- Adjust the Position: Once your bike is hanging, make any necessary adjustments to ensure it is level and properly secured. Straighten the handlebars and align the wheels to ensure the bike is balanced and won’t sway or slip from the rack.
- Test Stability: Gently shake the bike to test its stability. If you notice any excessive movement or wobbling, double-check the rack’s attachment and make any necessary adjustments. A stable bike hanging system is crucial for maintaining the integrity of the bike and preventing any accidental falls or damage.
Practice hanging and removing your bike a few times to become comfortable with the process. With a little practice, you’ll be able to hang your bike quickly and easily whenever you need to store it away.
Remember, the weight distribution is important when hanging your bike. Make sure it is balanced and secured within the rack to avoid any strain on the rack or potential damage to your bike.
By following these steps, you can safely and confidently hang your bike from the ceiling. This not only saves space but also keeps your bike off the ground and protected from potential damage.
Read more: How To Hang Surfboard From The Ceiling
Properly Securing Your Bike
After hanging your bike from the ceiling, it’s essential to properly secure it to prevent any accidental falls or damage. Follow these tips to ensure your bike stays securely in place:
- Use Additional Security Measures: Consider using additional security measures such as a bike lock or strap to provide extra stability and prevent any movement or slippage of the bike on the rack. This is especially important if you live in an area prone to earthquakes or if your hanging system doesn’t have built-in locking mechanisms.
- Lock Wheels in Place: Locking the wheels of your bike can help prevent any swaying or rolling while it’s hanging. Use wheel locks or straps to secure the wheels to the bike frame or the rack itself.
- Tighten All Fasteners: Regularly inspect and tighten all fasteners, including bolts, screws, or straps, to ensure they remain securely in place. Loose fasteners can compromise the stability of your bike and the overall hanging system.
- Check for Clearance: Make sure there is enough clearance between your bike and any nearby objects or walls. This will prevent any accidental contact or potential damage to your bike while it’s hanging.
- Regularly Inspect the Rack: Perform regular inspections of your bike rack to check for any signs of wear or damage. Look for any loose parts, rust, or corrosion that could affect the stability and safety of the hanging system. If you notice any issues, address them promptly.
By taking these precautions and securing your bike properly, you can have peace of mind knowing that your bike is safely hung and protected from any potential accidents or damage.
Remember, proper bike security not only keeps your bike safe but also extends its lifespan and ensures it’s always ready for your next adventure.
Tips for Maintaining Your Bike Rack
Proper maintenance of your bike rack is essential to ensure its longevity and functionality. Here are some tips to keep your bike rack in optimal condition:
- Regular Cleaning: Clean your bike rack regularly to remove any dirt, dust, or debris that may accumulate on its surface. Use a mild detergent and water to clean the rack, and avoid using harsh chemicals that could damage the finish.
- Inspect for Damage: Conduct routine inspections of your bike rack to check for any signs of damage or wear. Look for cracks, rust, or loose parts that may affect its stability and functionality. If you notice any issues, address them promptly to prevent further damage.
- Tighten Fasteners: Periodically check and tighten all fasteners on the bike rack, including bolts, screws, or straps. Over time, vibrations and regular use can cause these fasteners to become loose, compromising the stability of the hanging system.
- Grease Moving Parts: Apply a light coating of grease or lubricant to any moving parts of the bike rack, such as pulleys or hinges. This will help ensure smooth operation and prevent any squeaking or sticking.
- Protective Padding: Consider adding protective padding to your bike rack where it comes in contact with your bike. This will help prevent any scratches or damage to the frame or components of your bike while it’s hanging.
- Check Weight Capacity: Make sure you’re not exceeding the weight capacity of your bike rack. Overloading the rack can cause stress on the mounting hardware and compromise its stability. If you plan to hang multiple bikes, ensure that the rack is designed to support the combined weight.
- Follow Manufacturer’s Instructions: Always refer to the manufacturer’s instructions and guidelines for your specific bike rack. Different models may have unique requirements for installation and maintenance, so it’s important to follow the instructions provided.
- Avoid Extreme Temperatures: Try to avoid exposing your bike rack to extreme temperatures, such as direct sunlight or freezing conditions. This can cause the materials to deteriorate or warp over time.
By following these maintenance tips, you can prolong the life of your bike rack and ensure it continues to provide a secure and reliable hanging system for your bike.
Remember, regular maintenance not only keeps your bike rack in optimal condition but also ensures the safety and longevity of your beloved bike.
Conclusion
Congratulations! You’ve learned how to hang your bike from the ceiling like a pro. By assessing your ceiling space, choosing the right bike rack, and properly installing it, you’ve created a safe and secure hanging system for your bike. By following the steps for hanging your bike, properly securing it, and maintaining your bike rack, you’ll enjoy the benefits of saving space, protecting your bike, and having easy access to your two-wheeled companion.
Remember, always take the necessary precautions and regularly inspect your bike rack to ensure its stability and functionality. Properly securing your bike and performing routine maintenance will not only protect your bike from potential damage but also extend its lifespan.
Now that you know how to hang your bike from the ceiling, why not share this knowledge with fellow cycling enthusiasts or friends who may benefit from this space-saving solution? Help them unlock the potential of their ceiling space and create a clutter-free environment for their bikes.
We hope this comprehensive guide has empowered you to confidently hang your bike from the ceiling and maximize your storage space. So go ahead, take that extra space back, and enjoy the convenience and organization that comes with a properly hung bike.
Happy riding, and may your hanging adventures be smooth and hassle-free!
Frequently Asked Questions about How To Hang Bike From The Ceiling
Was this page helpful?
At Storables.com, we guarantee accurate and reliable information. Our content, validated by Expert Board Contributors, is crafted following stringent Editorial Policies. We're committed to providing you with well-researched, expert-backed insights for all your informational needs.


0 thoughts on “How To Hang Bike From The Ceiling”