Articles
How To Hang Aluminum Gutters
Modified: February 17, 2024
Learn how to hang aluminum gutters with our informative articles. Get expert tips and step-by-step instructions for a successful gutter installation.
(Many of the links in this article redirect to a specific reviewed product. Your purchase of these products through affiliate links helps to generate commission for Storables.com, at no extra cost. Learn more)
Introduction
Are you tired of water pouring off your roof and damaging your home’s foundation? Installing aluminum gutters can help solve this problem by channeling water away from your house. Aluminum gutters are lightweight, durable, and resistant to rust, making them an ideal choice for homeowners.
In this article, we will guide you through the step-by-step process of hanging aluminum gutters. Don’t worry if you’re not a DIY expert – we will break down each step into easy-to-follow instructions. By the end of this guide, you’ll have a well-functioning gutter system that will protect your home for years to come.
But before we jump into the installation process, let’s go over the materials you’ll need to gather.
Key Takeaways:
- Proper installation of aluminum gutters involves gathering materials, accurate measurements, secure attachment, and thorough testing. Following these steps ensures effective water drainage and protection for your home’s foundation.
- Regular maintenance and cleaning of aluminum gutters are essential for long-term functionality. By taking the necessary steps to install, test, and maintain your gutters, you can safeguard your home from water damage and ensure its longevity.
Read more: What Paint To Use On Aluminum Gutters
Step 1: Gather necessary materials
Before you start installing aluminum gutters, it’s important to gather all the necessary materials. Having everything you need beforehand will help streamline the installation process and prevent any unnecessary delays.
Here is a list of materials you will need:
- Aluminum gutter sections
- Fascia brackets
- Gutter hangers
- End caps
- Downspouts
- Gutter screws/nails
- Silicone caulk
- Measuring tape
- Saw
- Screwdriver/drill
- Hacksaw
- Gutter sealant
- Ladder
- Safety goggles
- Gloves
Make sure you have all the materials on hand before you begin the installation process. It’s also worth mentioning that the quantity of materials required will depend on the specific measurements and requirements of your gutter system.
Once you have gathered all the materials, it’s time to move on to the next step – measuring and marking the gutter positions.
Step 2: Measure and mark the gutter positions
Accurate measurements and proper marking are crucial for the successful installation of your aluminum gutters. Before you start attaching any brackets or gutter sections, take the time to measure and mark the positions where the gutters will be installed.
Here’s how to do it:
- Start at the highest point of your gutter system, usually near the downspout area. Use a measuring tape to determine the desired height of the gutter and mark it on the fascia board. You might need assistance to hold the tape in place while you make the mark.
- Continue measuring and marking at regular intervals along the fascia board, ensuring that the gutters will have a slight slope towards the downspouts for proper drainage. Generally, a slope of ¼ inch per 10 feet of gutter length is recommended.
- Take note of any obstacles such as corners, windows, or doors that might require additional gutter sections or downspouts. Make the necessary measurements and markings to ensure a seamless and effective gutter system.
Once you have marked all the positions, take a step back and verify that the markings are straight and aligned. This step is crucial for maintaining the aesthetic appeal of your gutter system. If needed, make any adjustments before moving forward.
With the positions marked, you’re ready to move on to the next step – installing the fascia brackets.
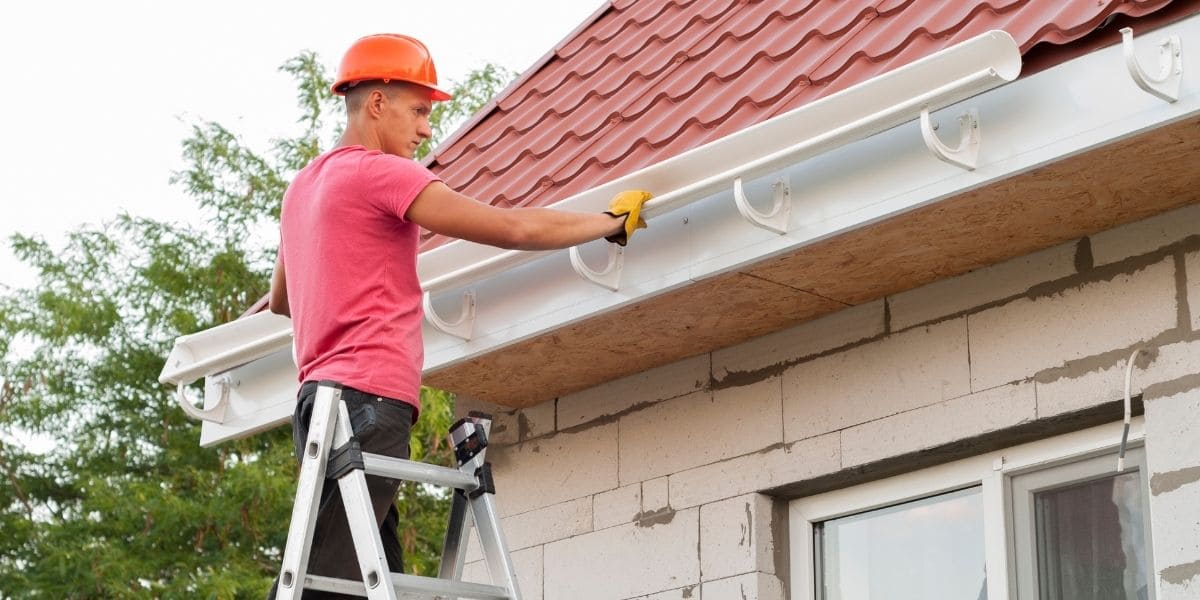
Step 3: Install the fascia brackets
Now that you have measured and marked the positions for your aluminum gutters, it’s time to install the fascia brackets. Fascia brackets provide support and stability to your gutters, ensuring they stay securely in place.
Here’s how to install the fascia brackets:
- Position the first fascia bracket at one end of the marked gutter position. Make sure it is level and align it with the top edge of the fascia board.
- Using a drill or screwdriver, secure the fascia bracket in place with gutter screws or nails. Ensure that the screws penetrate the fascia board and provide a secure hold.
- Move along the marked gutter position, spacing the fascia brackets at regular intervals according to the manufacturer’s instructions. Typically, a spacing of about 24 to 36 inches is recommended, but this may vary depending on the specific gutter system.
- Check the alignment of each fascia bracket and adjust as needed. It’s important to ensure that all the brackets are at the same height and level for proper gutter installation.
As you install the fascia brackets, it’s vital to follow safety precautions. Always use a sturdy ladder and wear safety goggles and gloves to protect yourself from any potential hazards.
With the fascia brackets securely in place, you’re ready to move on to the next step – attaching the gutter sections.
Step 4: Attach the gutter sections
Now that the fascia brackets are installed, it’s time to attach the aluminum gutter sections. This step will bring your gutter system together, ensuring proper water flow and drainage.
Here’s how to attach the gutter sections:
- Start at one end of the marked gutter position and position the first gutter section against the fascia brackets. Slide it into place, ensuring a snug fit.
- Secure the gutter section to the fascia brackets by using gutter hangers or screws. These should be placed at regular intervals along the length of the gutter section. Check the manufacturer’s instructions for the recommended spacing and placement of the hangers.
- Move along the marked gutter position, attaching each subsequent gutter section to the fascia brackets using gutter hangers or screws.
- Ensure that each gutter section is aligned properly, with no gaps or overlaps. This will ensure smooth water flow and proper drainage.
- If necessary, cut the gutter sections to the required length using a saw or hacksaw. Measure carefully and make precise cuts to achieve a seamless and custom fit.
- Once all the gutter sections are attached, install end caps on both ends to prevent water from escaping.
Throughout the process, double-check the alignment and stability of each gutter section to ensure a secure and functional gutter system.
With the gutter sections in place, you’re ready for the next step – installing the downspouts.
When hanging aluminum gutters, make sure to use the correct size and type of hangers for your specific gutter system. This will ensure proper support and stability for the gutters.
Read more: What Gauge Aluminum For Gutters
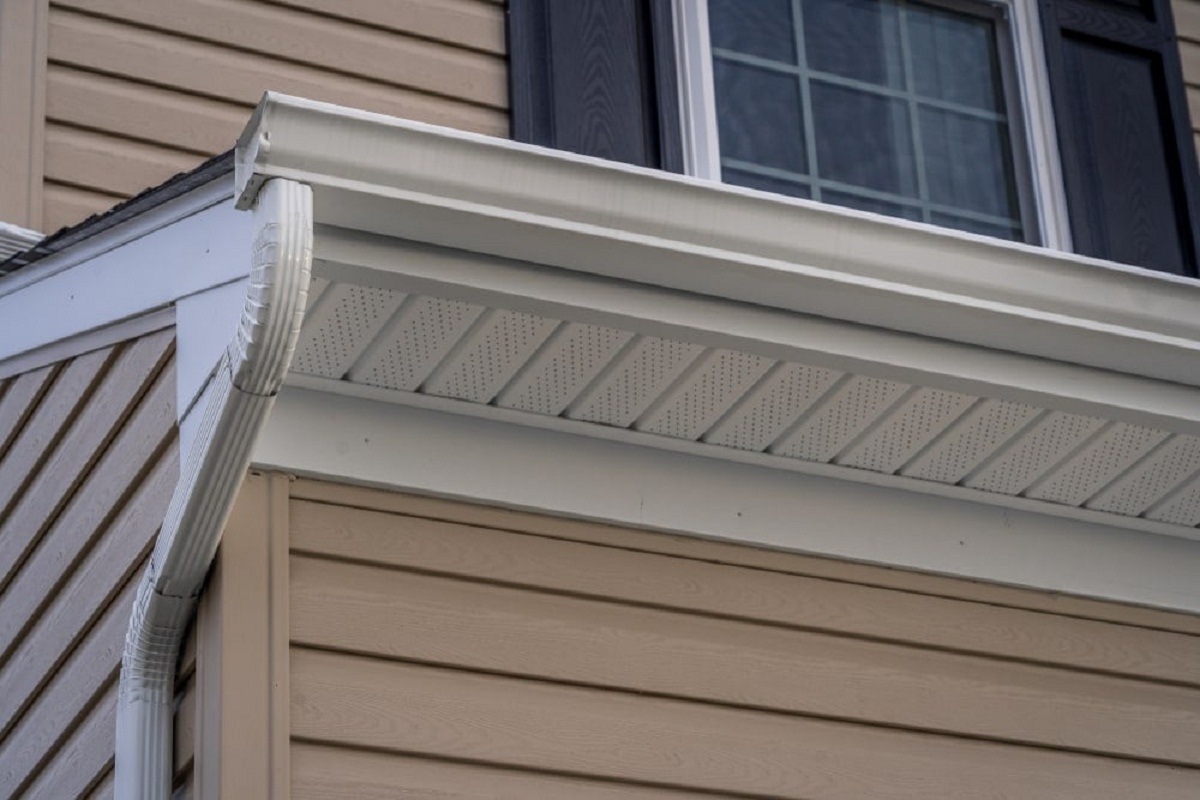
Step 5: Install the downspouts
Downspouts play a crucial role in directing water from the gutters to the ground, preventing water damage to your home’s foundation. In this step, we will guide you through the process of installing the downspouts to complete your gutter system.
Here’s how to install the downspouts:
- Determine the ideal location for the downspout outlets. These outlets are typically placed at the corners or ends of the gutter system, where water flow needs to be directed downward.
- Trace the outline of the downspout outlet on the gutter section, using a pencil or marker.
- Using a drill or a saw, carefully cut along the traced outline to create an opening for the downspout outlet.
- Attach the downspout outlet to the opening in the gutter section, following the manufacturer’s instructions. This usually involves using screws or rivets to secure the outlet in place.
- Measure and cut the downspout pipe to the desired length, ensuring it reaches from the downspout outlet to the desired drainage location.
- Attach the downspout pipe to the downspout outlet, making sure it fits securely. Use screws or fasteners to secure the connection, ensuring it is watertight.
- If necessary, install additional elbow fittings to redirect the downspout pipe as needed, ensuring proper water flow and directing it away from the foundation of your home.
During the installation process, make sure that the downspouts are securely fastened and aligned properly. This will ensure optimal water drainage and prevent leaks or damage to your gutter system.
With the downspouts installed, you’re ready to move on to the next step – ensuring proper alignment and securing the gutters.
Step 6: Ensure proper alignment and secure the gutters
Ensuring that your aluminum gutters are properly aligned and securely fastened is essential for their effective functioning. In this step, we will guide you through the process of aligning and securing your gutters to provide optimum performance and longevity.
Here’s how to ensure proper alignment and secure the gutters:
- Check the alignment of each gutter section and adjust as necessary. A straight and level alignment is crucial to ensure smooth water flow and prevent any pooling or overflowing.
- Once the alignment is correct, secure the gutter sections to the fascia brackets using gutter screws or nails. Make sure to drive the screws or nails into the designated holes on the gutter sections to ensure a secure and sturdy connection.
- Inspect the connection between the gutter sections and the downspout outlets. Ensure that they are tightly sealed using gutter sealant or silicone caulk. This will prevent any leaks or water seepage at these critical junctions.
- If your gutter system includes seamless gutters, check for any gaps or weak spots along the length of the gutters. Use additional sealant or caulk to seal any potential areas of concern.
- Inspect the fascia brackets to ensure they are securely attached to the fascia board. Tighten any loose screws or nails and reinforce the brackets if needed.
- Give the entire gutter system a final visual inspection to ensure everything is properly aligned and securely fastened. This step will help identify any potential areas of improvement before moving forward.
By taking the time to align and secure your gutters correctly, you can prevent damage to your home’s exterior and ensure a reliable and functional gutter system for years to come.
With your gutters properly aligned and secured, it’s time to move on to the final step – testing the gutter system for proper draining.
Step 7: Test the gutter system for proper draining
After completing the installation of your aluminum gutters, it’s crucial to test the system to ensure proper draining. This step will validate the effectiveness of your gutter system and help identify any potential issues that need to be addressed.
Here’s how to test your gutter system for proper draining:
- First, make sure that the downspouts are properly connected and directing water away from your home’s foundation.
- Using a hose or buckets of water, pour water into the gutters at the highest point. Start with a small amount and gradually increase the flow to simulate heavy rainfall.
- Observe the flow of water as it moves through the gutters. Look for any signs of pooling, overflowing, or leakage along the gutter sections.
- Check that the water is flowing smoothly through the downspouts and being directed away from the foundation of your home.
- Inspect the gutters and downspouts for any signs of clogging or blockage. Remove any debris or obstructions that may hinder the proper draining of water.
- Continue to monitor the gutter system during heavy rainfall to ensure that it effectively channels water away from your home.
If you notice any issues during the testing process, such as overflowing gutters or water not flowing properly through the downspouts, make the necessary adjustments or repairs. This may include realigning sections, tightening fasteners, or clearing clogs.
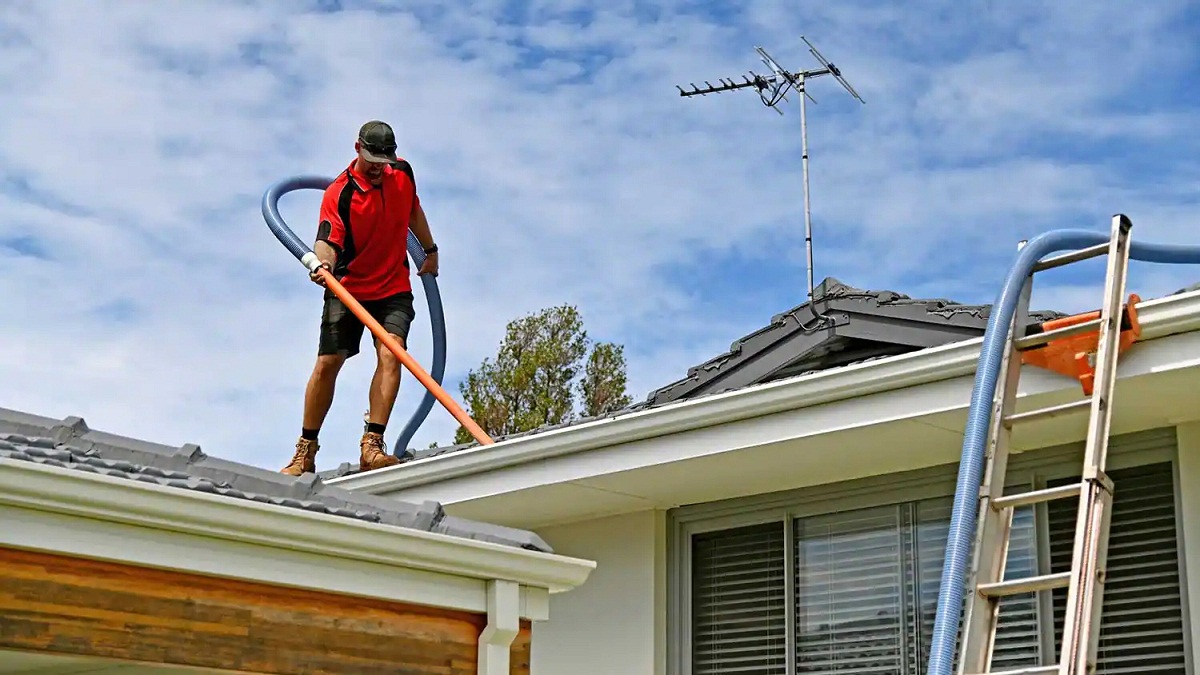
Regularly inspect and maintain your gutter system to prevent future issues and keep it working efficiently. Clean out any debris that accumulates in the gutters, and ensure that the gutters and downspouts are free of damage or blockage.
By testing and maintaining your gutter system, you can protect your home from water damage and maintain the integrity of your structure.
With these steps completed, you have successfully installed and tested your aluminum gutter system. Congratulations! You can now enjoy the peace of mind knowing that your home is protected against water damage.
Remember, regular maintenance and cleaning are essential to keep your gutters functioning optimally. It’s recommended to inspect and clean your gutters at least twice a year to remove debris and ensure proper drainage.
If you’re unsure or uncomfortable with installing gutters on your own, consider hiring a professional to ensure the job is done correctly and safely.
By following these steps and properly maintaining your gutters, you can protect your home from the damaging effects of water and ensure its longevity.
Have any questions or concerns? Feel free to reach out to a professional to get further guidance and assistance.
Now, go ahead and enjoy the benefits of your newly installed aluminum gutters!
Conclusion
Installing aluminum gutters is a worthwhile investment for any homeowner looking to protect their property from water damage. By following the step-by-step guide provided in this article, you can successfully hang aluminum gutters and enjoy the benefits of a well-functioning gutter system.
Throughout the installation process, it’s important to gather all the necessary materials, measure and mark the gutter positions accurately, install fascia brackets for support, attach the gutter sections securely, and install the downspouts to direct water away from your home’s foundation.
After completing the installation, it’s crucial to test the gutter system for proper draining. This includes checking the flow of water, ensuring there are no leaks or blockages, and monitoring the performance during heavy rainfall.
Regular maintenance and cleaning of your gutters are vital to ensure their continued efficiency. Clear out any debris, inspect for damage or blockages, and make any necessary repairs or adjustments as needed.
By taking the necessary steps to install and maintain your aluminum gutters, you can protect your home from water damage, prevent foundational issues, and maintain its overall integrity for years to come.
If you’re unsure about installing gutters on your own or need assistance, don’t hesitate to seek professional help. Professionals can ensure that the installation is done correctly and efficiently, saving you time and potential headaches down the road.
Remember, proper gutter installation and maintenance are key to safeguarding your home and maintaining its value. With your new aluminum gutters in place, you can have peace of mind during rainstorms, knowing that your home is well-protected.
So, don’t delay – take action to install aluminum gutters and protect your home today. Trust us, your future self will thank you!
Frequently Asked Questions about How To Hang Aluminum Gutters
Was this page helpful?
At Storables.com, we guarantee accurate and reliable information. Our content, validated by Expert Board Contributors, is crafted following stringent Editorial Policies. We're committed to providing you with well-researched, expert-backed insights for all your informational needs.


0 thoughts on “How To Hang Aluminum Gutters”