Home>Articles>How To Hang An Old Door In A New Jamb Using A Jamb Kit
Articles
How To Hang An Old Door In A New Jamb Using A Jamb Kit
Modified: January 19, 2024
Learn the step-by-step process of hanging an old door in a new jamb using a jamb kit with these helpful articles.
(Many of the links in this article redirect to a specific reviewed product. Your purchase of these products through affiliate links helps to generate commission for Storables.com, at no extra cost. Learn more)
Introduction
When renovating a home or revamping its interior, one often comes across the challenge of hanging an old door in a new jamb. Whether you’re replacing a worn-out door or simply adding a touch of vintage charm to your space, using a jamb kit can make the process much simpler and more efficient.
In this article, we will guide you through the step-by-step process of hanging an old door in a new jamb using a jamb kit. We will cover everything from gathering the necessary materials to making adjustments for a perfect fit. Let’s dive in!
Key Takeaways:
- Transform an outdated door into a functional and aesthetically pleasing addition to your space by following the step-by-step process of hanging an old door in a new jamb using a jamb kit.
- Attention to detail and careful execution are key to achieving the best results when hanging an old door in a new jamb using a jamb kit. Enjoy the beauty and functionality it brings to your space!
Gathering the Materials
Before you begin the door hanging process, it’s important to gather all the necessary materials. Here’s a list of what you’ll need:
- Old door
- New jamb kit
- Measuring tape
- Hinges
- Screws
- Door handle and lock
- Sanding block
- Primer and paint
- Screwdriver or drill
- Level
Having these materials handy will help streamline the process and ensure a successful installation.
Preparing the Door
Before hanging the door, it’s essential to prepare it properly. Start by removing any old hardware, including hinges, door handles, and locks. This will make it easier to work with and give your door a fresh start.
Next, use a sanding block to smooth out any rough areas and create a clean surface for painting. Once the door is sanded, apply a coat of primer to promote better adhesion and protect the surface. Allow the primer to dry before moving on to the next step.
Key Takeaways:
- Transform an outdated door into a functional and aesthetically pleasing addition to your space by following the step-by-step process of hanging an old door in a new jamb using a jamb kit.
- Attention to detail and careful execution are key to achieving the best results when hanging an old door in a new jamb using a jamb kit. Enjoy the beauty and functionality it brings to your space!
Gathering the Materials
Before you begin hanging an old door in a new jamb using a jamb kit, it’s crucial to gather all the necessary materials. Having everything prepared will save you time and ensure a smooth installation process. Here’s a list of the materials you’ll need:
- Old door: Choose a door that fits the desired dimensions and complements the style of your space.
- New jamb kit: This kit includes the necessary components to create a new door jamb, such as side jambs, a top header, and trim pieces.
- Measuring tape: Use a measuring tape to accurately determine the dimensions and ensure proper fitment.
- Hinges: Select hinges that are suitable for the weight and size of your door. It’s recommended to use three hinges for optimal stability.
- Screws: Choose screws that are long enough to securely fasten the hinges to the jamb and door without penetrating too deeply.
- Door handle and lock: If your old door doesn’t have a handle and lock, consider purchasing ones that match your desired aesthetic and security needs.
- Sanding block: A sanding block will help smoothen any rough areas on the door’s surface, allowing for a better finish.
- Primer and paint: Apply a coat of primer to the door to enhance paint adhesion and protect the surface. Choose paint that suits your decorative preferences.
- Screwdriver or drill: You’ll need a screwdriver or drill equipped with the appropriate bit to attach the hinges and door handle.
- Level: Ensure the door hangs straight and level by using a level to check its alignment at various stages of the installation.
Once you have gathered these materials, it’s time to move on to the next step: preparing the door for installation.
Preparing the Door
Before you can hang an old door in a new jamb using a jamb kit, it’s essential to prepare the door properly. This involves removing the old hardware and giving the door a fresh start by sanding and priming it. Let’s break down these steps:
Read more: How To Use A Laser Level To Hang Doors
Removing the Old Hardware
Start by carefully removing any existing hardware from the door, including hinges, door handles, and locks. Use a screwdriver or drill to unscrew the hardware and detach it from the door. Set the hardware aside for future use or replacement.
Removing the old hardware not only makes it easier to work with the door but also allows you to upgrade to new hardware that matches your style and preferences.
Sanding and Priming the Door
After removing the old hardware, it’s time to prepare the door’s surface. Use a sanding block to smooth out any rough areas, scratches, or imperfections on the door. Sanding will create a clean and uniform surface for painting or staining.
Start with a medium-grit sandpaper to remove any major blemishes, and then switch to a fine-grit sandpaper for a smoother finish. Sand in the direction of the wood grain to avoid creating cross-grain scratches.
Once the door has been sanded, it’s important to apply a coat of primer. Primer helps to seal the wood and provides a necessary base for paint or stain. Use a paintbrush or roller to evenly apply the primer on all sides of the door, including the edges. Allow the primer to dry according to the manufacturer’s instructions.
Priming the door not only enhances the adhesion of the paint or stain but also protects the wood from moisture and other environmental factors.
With the old hardware removed and the door sanded and primed, you are now ready to move on to the next step: measuring and marking.
Measuring and Marking
Once you have prepared the door by removing the old hardware and sanding and priming it, the next step in hanging an old door in a new jamb using a jamb kit is to measure and mark the door for proper placement. This involves determining the proper height and marking the hinge placement. Let’s go through these steps in detail:
Determining the Proper Height
Before you can install the door in the new jamb, you need to determine the proper height at which it should be hung. This will ensure that the door operates smoothly and aligns correctly with the jamb and floor. You can use a measuring tape to measure the height of the jamb opening from the floor, and then transfer this measurement to the door.
Measure the height of the door opening and subtract the clearance you desire between the bottom of the door and the floor. This will give you the height at which you should hang the door. Make sure to measure both the hinge side and the latch side of the jamb to ensure the door is level.
Marking the Hinge Placement
Next, you need to mark the placement of the hinges on the door. The hinges provide the pivot points and allow the door to swing smoothly. Begin by determining the number of hinges you will use for your door. Typically, three hinges are recommended for standard-sized doors to ensure proper support.
Place the hinges on the jamb and align them with the marks you made for the proper height. Use a pencil to mark the outline of each hinge on the edge of the door. Make sure the hinges are evenly spaced along the edge of the door. These markings will be your guide for attaching the hinges to the door.
Once you have determined the proper height and marked the hinge placement on the door, you are ready to move on to the next step: installing the jamb kit.
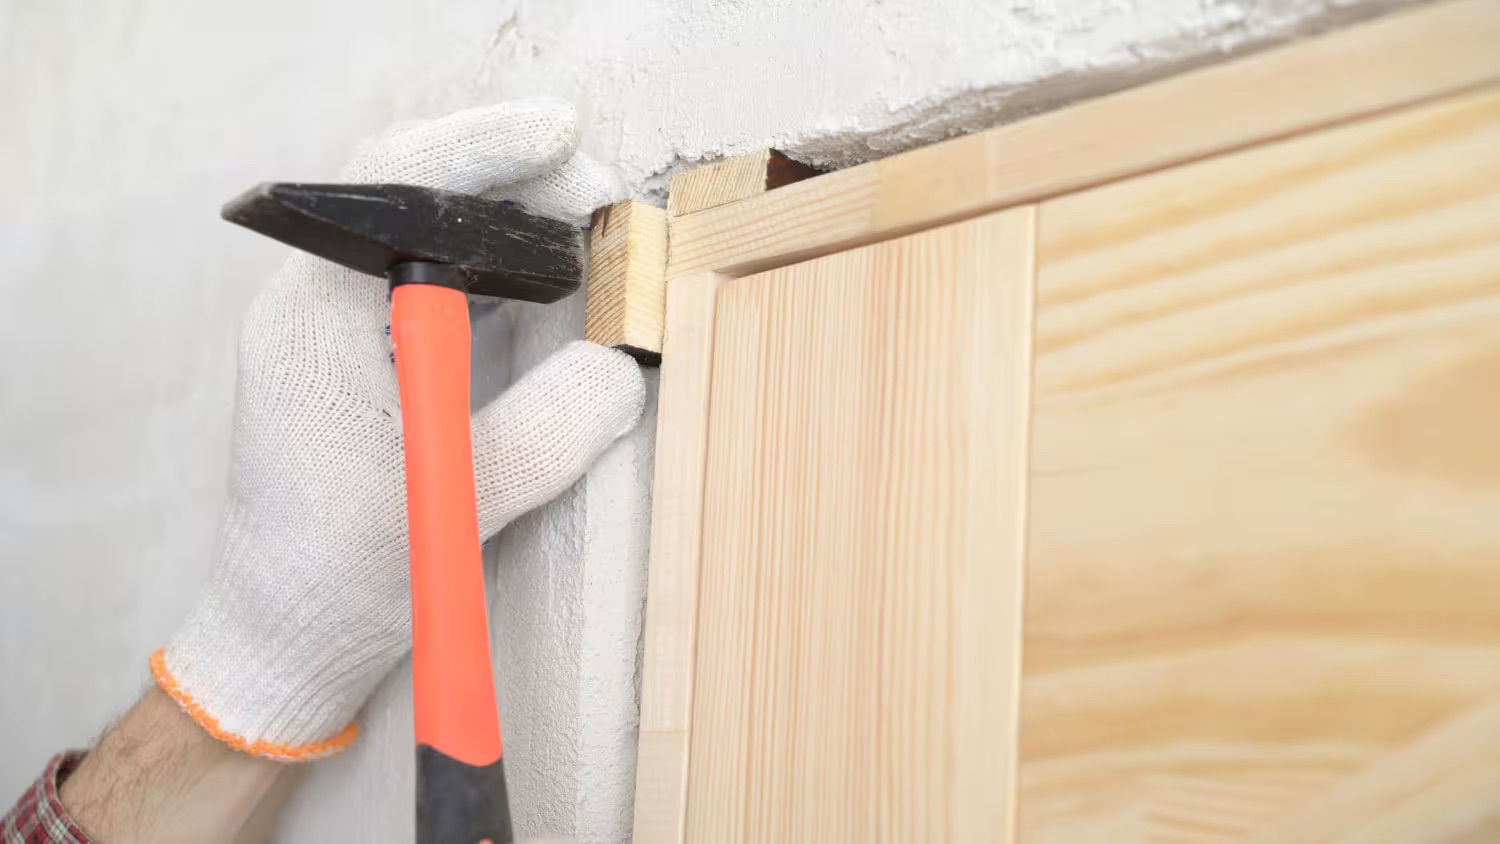
Installing the Jamb Kit
With the door prepared and the measurements and markings in place, it’s time to install the jamb kit. The jamb kit includes the necessary components to create a new door frame, such as side jambs and a top header. Follow these steps to install the jamb kit:
Attaching the Side Jambs
Start by positioning the side jambs on either side of the door opening. The side jambs should be flush with the edge of the door and extend from the top of the opening to the desired height based on your earlier measurements. Make sure the side jambs are plumb and level using a level tool.
Once the side jambs are properly aligned, use a screwdriver or drill to attach them securely to the wall framing. Start at the top and work your way down, placing screws at regular intervals to ensure stability. Be sure to use screws that are long enough to penetrate the wall framing without protruding too far.
Attaching the side jambs provides the structure and support for the door, keeping it secure and aligned within the jamb.
Securing the Top Header
Now that the side jambs are in place, it’s time to install the top header. The top header acts as the horizontal support for the door and helps distribute the weight evenly.
Measure the width of the door opening and cut the top header to fit. Ensure that it is centered and level with the side jambs. Once positioned correctly, attach the top header to the side jambs using screws. Ensure that it is tightly secured for added stability.
By attaching the top header, you create a solid frame for the door, allowing it to swing properly and ensuring a secure fit within the jamb.
With the jamb kit securely installed, you are now ready to hang the door. In the next step, we will guide you through the process of hanging the door in the new jamb.
Hanging the Door
Now that the jamb kit is installed, it’s time to hang the door in the new jamb. This step involves properly placing the hinges and ensuring the door is aligned correctly. Follow these steps to hang the door:
Read more: How Old For Booster Seat In New Jersey?
Placing the Hinges
Start by aligning the hinge markings on the door with the corresponding marks on the side jamb. Use a chisel or router to create recesses, also known as mortises, for the hinges. This will allow the hinges to sit flush with the surface of the door and jamb.
Place the hinges in the mortises and secure them in place using screws. Ensure that the hinges are positioned correctly and aligned vertically. It’s important to use screws that are appropriate for the hinge and securely fasten them to both the door and jamb.
By properly placing the hinges, you ensure that the door swings freely without binding or rubbing against the jamb.
Confirming Proper Alignment
After attaching the hinges, carefully lift the door and position it within the jamb. Ensure that the door sits evenly on the side jambs and aligns properly with the top header.
Use a level tool to confirm that the door is plumb and level. Adjust the positioning if necessary by shimmying or sanding down any areas that cause the door to be uneven. It’s important to take your time during this step to ensure that the door hangs correctly and operates smoothly.
Confirming proper alignment ensures that the door opens and closes properly and provides a secure seal when closed.
With the door properly hung and aligned, we can move on to the next step: attaching the hardware.
Attaching the Hardware
Now that the door is properly hung in the new jamb, the next step is to attach the hardware. This includes installing the door handle and adding a door lock for security. Follow these steps to attach the hardware:
Installing the Door Handle
Start by selecting a door handle that matches your desired aesthetic and fits the style of the door. Place the handle on the door at a comfortable height for easy access.
Use a drill or screwdriver to attach the handle to the door, following the manufacturer’s instructions. Make sure the screws are tight, but be careful not to overtighten, as it could damage the handle or weaken the door. Double-check that the handle is securely fastened and doesn’t wobble or move.
Installing the door handle not only adds functionality but also enhances the overall appearance of the door.
Read more: How To Make Old Glass Look New
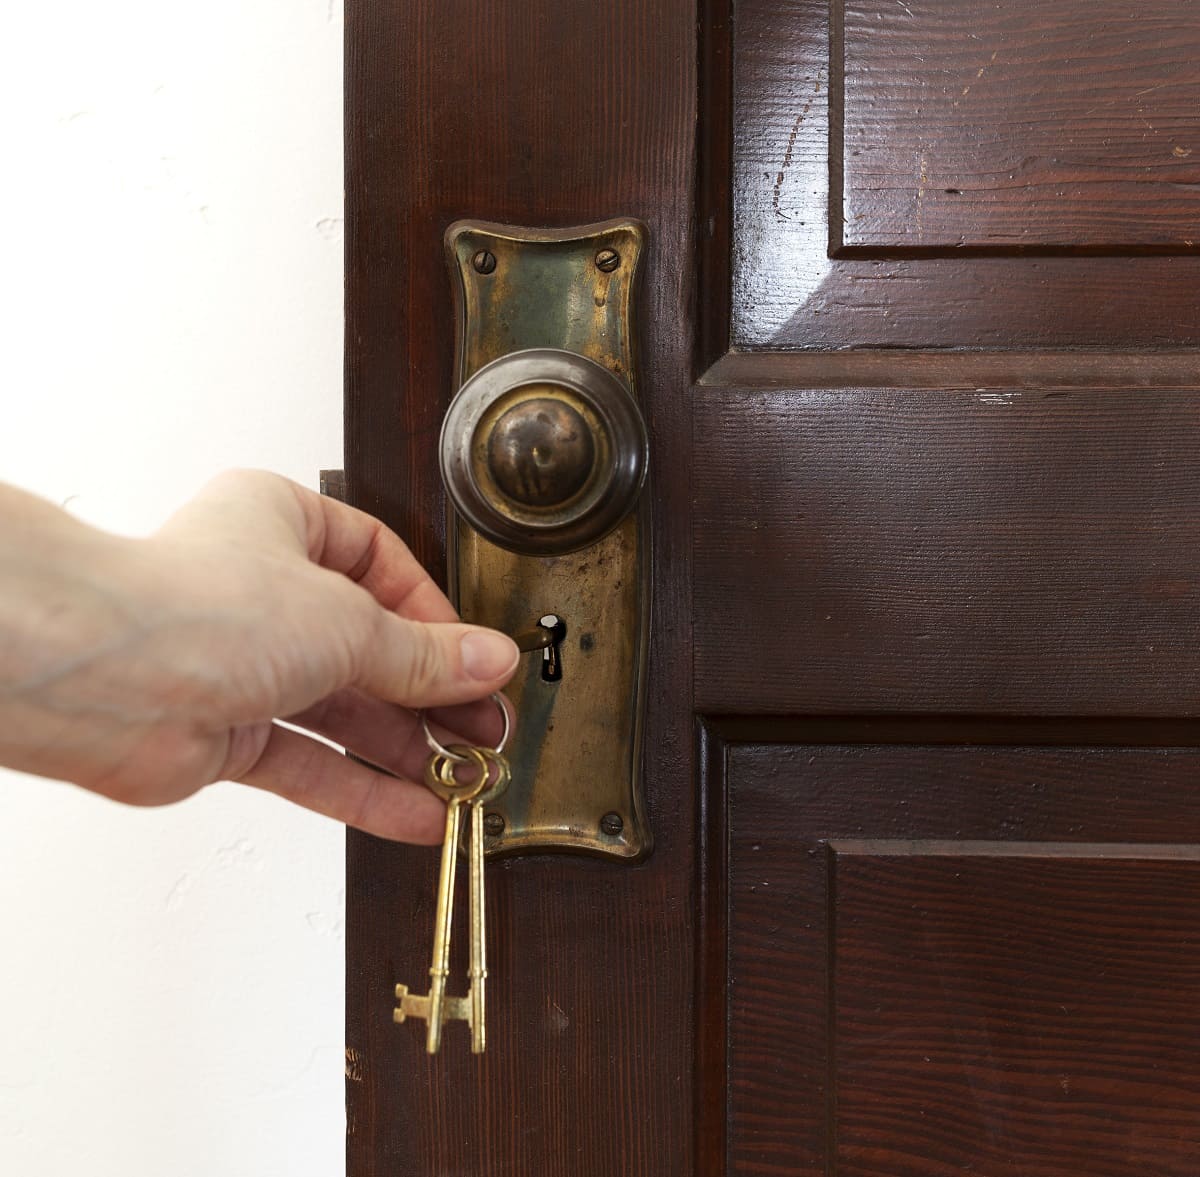
Adding the Door Lock
Increase the security of your door by adding a lock. Choose a door lock that suits your security needs and complements the door handle. The lock should be installed at a height that is comfortable to engage and disengage.
Follow the manufacturer’s instructions to install the door lock. This typically involves drilling holes for the lock components on the edge of the door and attaching the lock mechanism. Make sure the lock operates smoothly and the latch engages properly with the strike plate on the jamb.
Adding a door lock provides an extra layer of security to protect your home and belongings.
With the hardware attached, you have successfully completed the major steps of hanging an old door in a new jamb using a jamb kit. However, there is one more step to ensure a perfect fit, which is making any necessary adjustments.
Making Adjustments
After attaching the hardware and ensuring a secure fit, it’s time to make any necessary adjustments to ensure the door operates smoothly and fits snugly within the jamb. This step involves checking for proper alignment and making any required modifications. Follow these steps to make adjustments:
Ensuring Smooth Operation
Open and close the door several times to test its operation. Pay attention to any resistance or sticking points. If the door doesn’t swing freely or rubs against the jamb or floor, adjustments may be needed.
One common adjustment is to trim the door edges. Using a plane or sander, gently remove small amounts of material from the areas that are causing friction. Check the door’s operation after each adjustment and continue until it moves smoothly without any obstructions.
Ensuring smooth operation allows for easy access and prevents damage to the door or jamb over time.
Adjusting for a Tighter Fit
If the door has gaps between the door and the jamb, you may need to adjust the door’s position to create a tighter fit. This is especially important for insulation and security purposes.
To adjust for a tighter fit, you can use shims. Place shims in the appropriate areas between the door and the jamb to eliminate any gaps. Use a level to ensure the door remains plumb and level while making adjustments. Once the desired fit is achieved, secure the shims in place using screws or nails.
Adjusting for a tighter fit helps improve energy efficiency and prevents drafts from entering your home.
By making adjustments to the door’s operation and fit, you can ensure a properly functioning and secure door within the jamb.
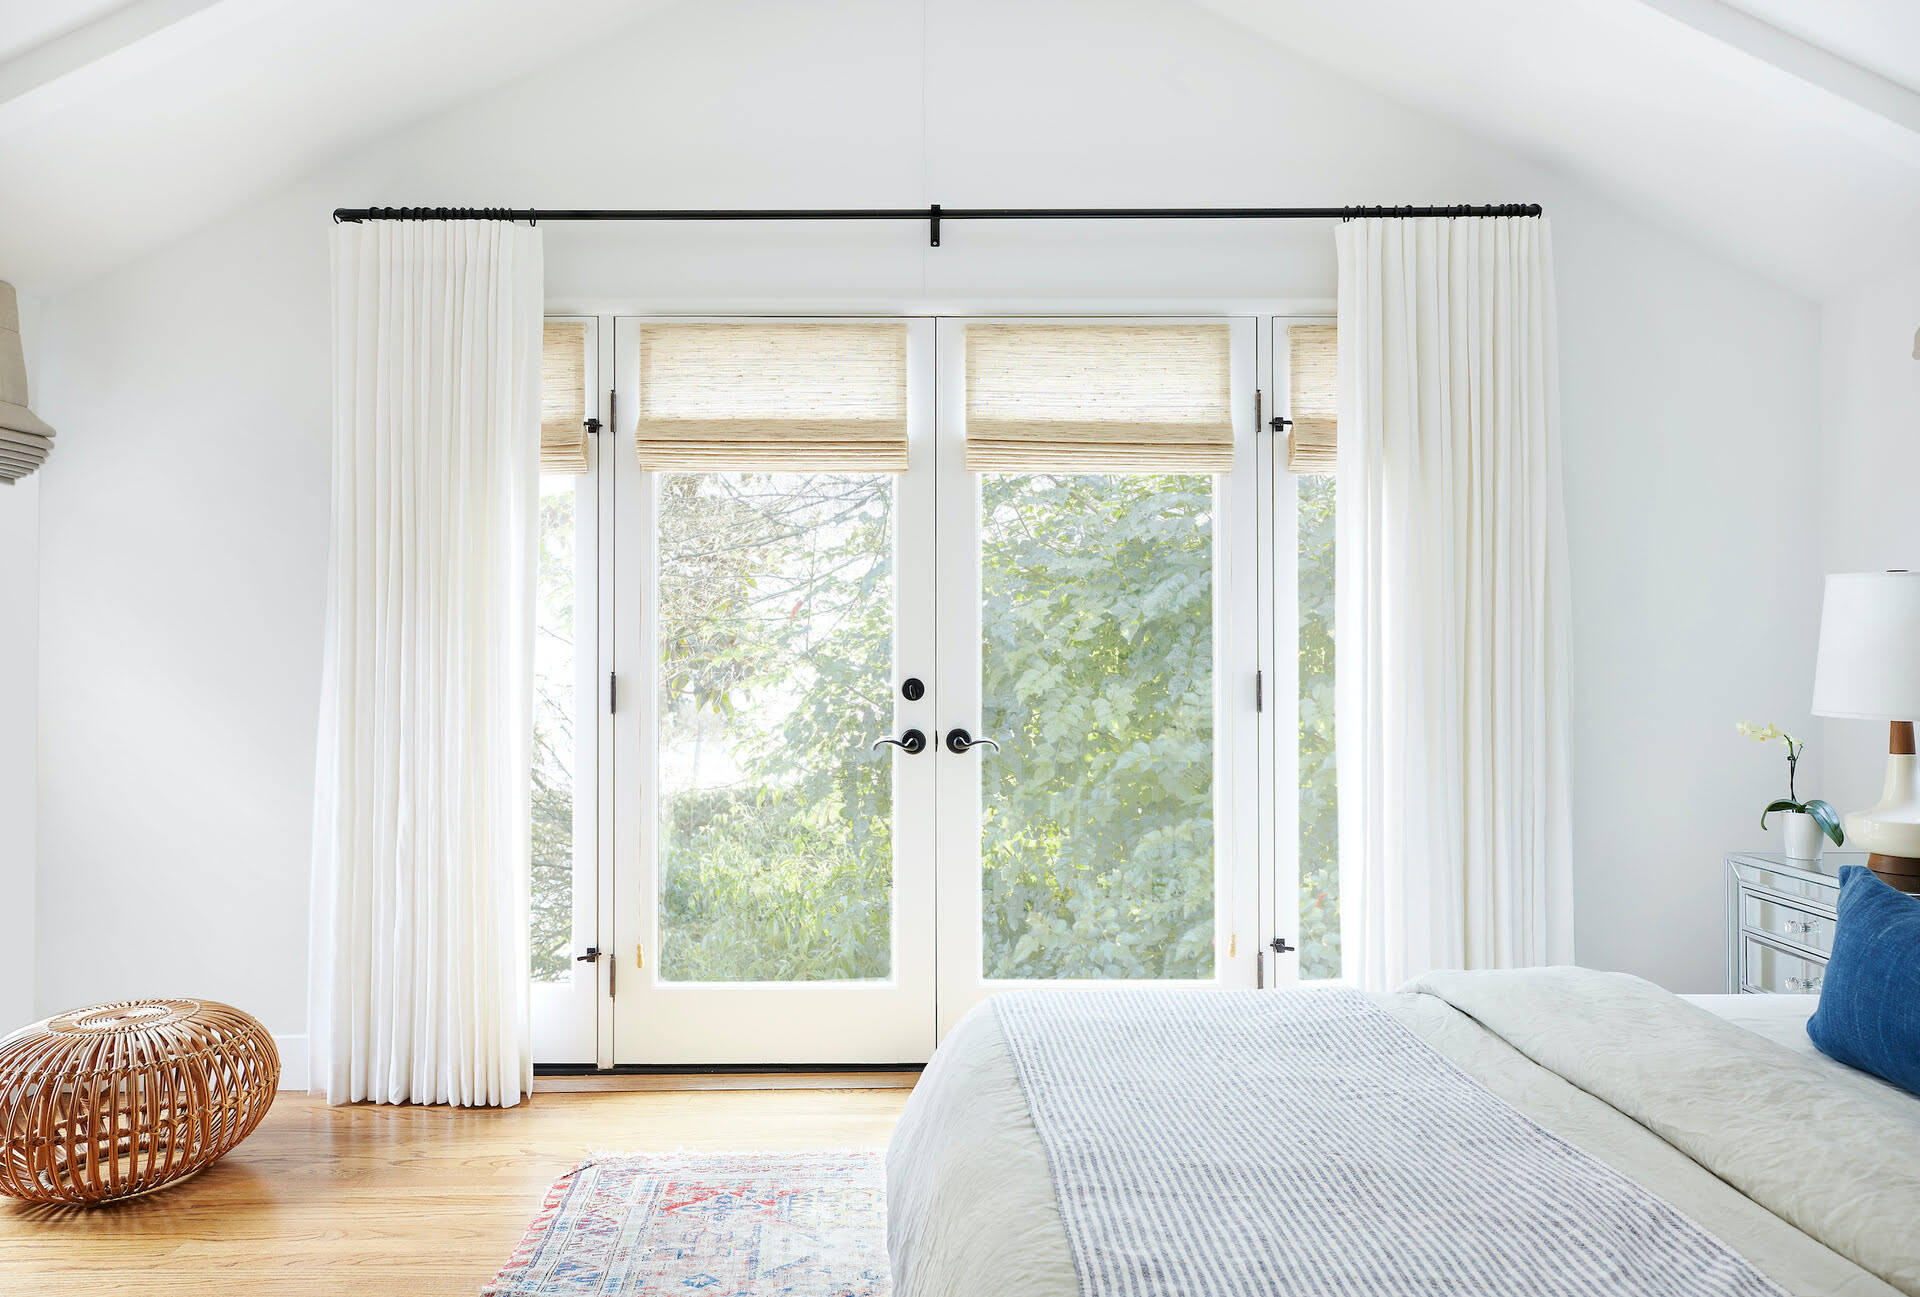
With the adjustments complete, you have successfully finished hanging an old door in a new jamb using a jamb kit. Take a moment to admire your work and enjoy the beauty and functionality that the door brings to your space.
Read more: How To Put A New Showerhead On An Old Ball
Conclusion
Congratulations! You have successfully completed the process of hanging an old door in a new jamb using a jamb kit. By following the steps outlined in this article, you have transformed an outdated door into a functional and aesthetically pleasing addition to your space. Let’s recap what we’ve covered:
1. Gathering the Materials: You learned about the essential materials needed for the project, including the old door, jamb kit, measuring tape, hinges, screws, door handle, lock, sanding block, primer and paint, screwdriver or drill, and a level.
2. Preparing the Door: You removed the old hardware and sanded and primed the door to create a smooth surface for painting or staining.
3. Measuring and Marking: You determined the proper height for the door and marked the hinge placement to ensure a proper fit within the jamb.
4. Installing the Jamb Kit: You attached the side jambs and secured the top header to create a sturdy frame for the door.
5. Hanging the Door: You placed the hinges on the door and confirmed the proper alignment to ensure smooth operation.
6. Attaching the Hardware: You installed the door handle and added a lock for both functionality and security.
7. Making Adjustments: You made any necessary adjustments, such as trimming the door edges or using shims, to ensure a seamless fit within the jamb.
By following these steps and infusing your own creativity, you have successfully completed the process of hanging an old door in a new jamb using a jamb kit. The result is a door that not only adds character to your space but also functions properly and meets your needs.
Remember, attention to detail and careful execution are key to achieving the best results. Take your time with each step and don’t hesitate to seek help or guidance if needed.
Now it’s time to enjoy your newly hung door and the beauty it adds to your home. Whether you’ve repurposed an old door or added a touch of vintage charm, you can take pride in the fact that you have successfully completed a DIY project that enhances both the appearance and functionality of your space.
Have fun showcasing your new door and the sense of accomplishment that comes with a job well done!
Frequently Asked Questions about How To Hang An Old Door In A New Jamb Using A Jamb Kit
Was this page helpful?
At Storables.com, we guarantee accurate and reliable information. Our content, validated by Expert Board Contributors, is crafted following stringent Editorial Policies. We're committed to providing you with well-researched, expert-backed insights for all your informational needs.


0 thoughts on “How To Hang An Old Door In A New Jamb Using A Jamb Kit”