Home>Home Appliances>Laundry Appliances>How To Hang An Ironing Board On A Door
Laundry Appliances
How To Hang An Ironing Board On A Door
Modified: February 18, 2024
Learn how to efficiently store your ironing board on a door with our simple guide. Save space and keep your laundry area organized. Perfect for laundry appliances.
(Many of the links in this article redirect to a specific reviewed product. Your purchase of these products through affiliate links helps to generate commission for Storables.com, at no extra cost. Learn more)
Introduction
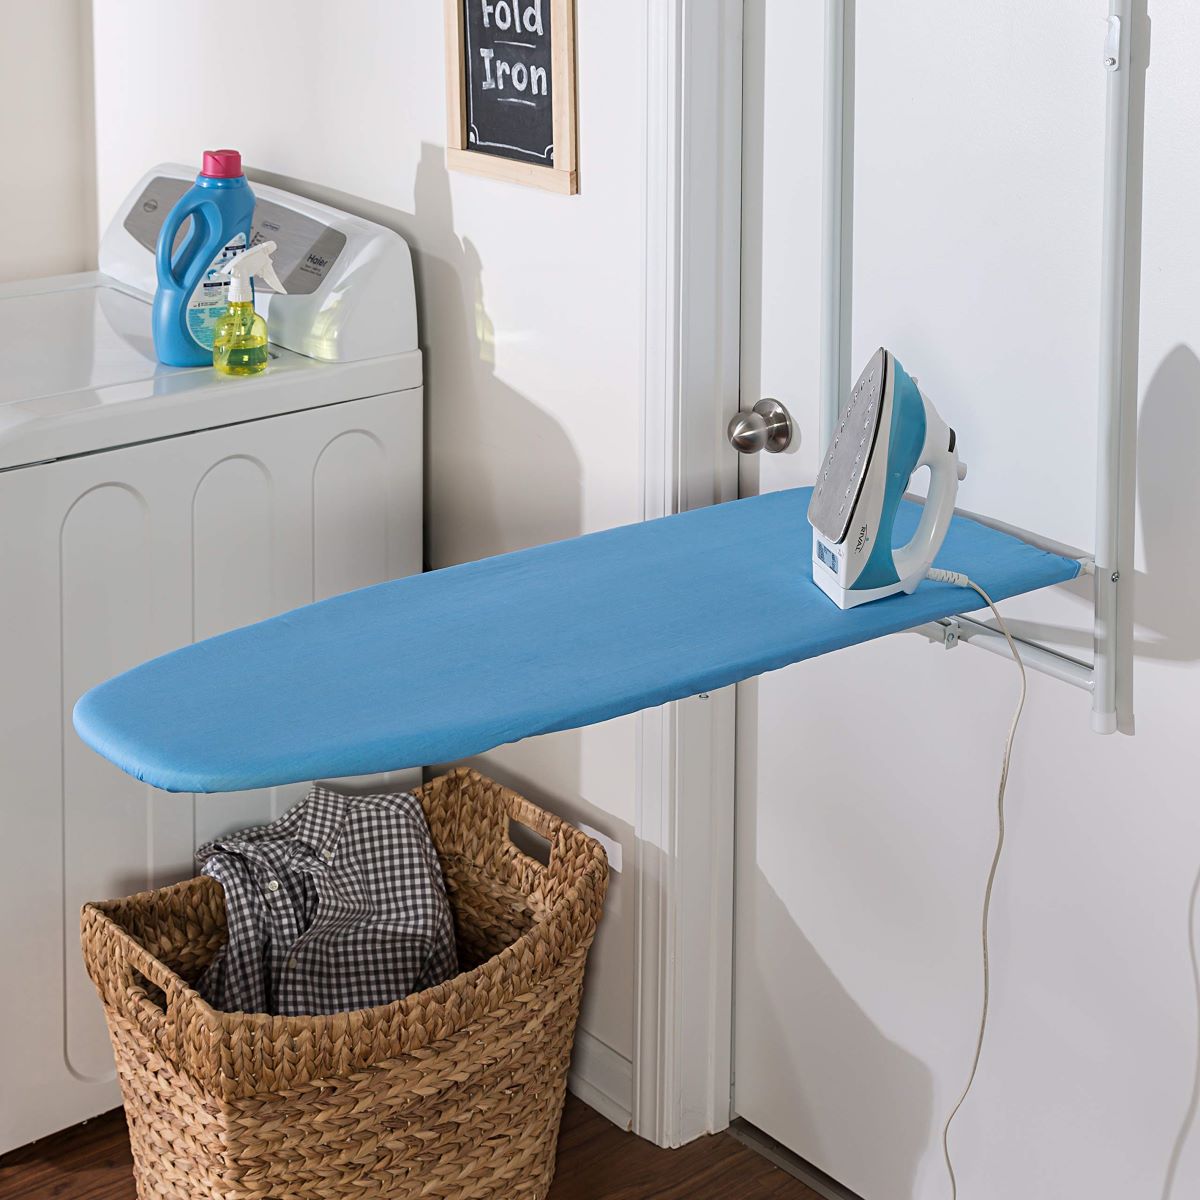
Hanging an ironing board on a door is a practical and space-saving solution for many households. Whether you live in a small apartment or a spacious home, utilizing the back of a door to store your ironing board can free up valuable space in your laundry room or closet. This simple and efficient method not only keeps your ironing board easily accessible but also helps to declutter your living space.
In this comprehensive guide, we will walk you through the step-by-step process of hanging an ironing board on a door. By following these instructions, you can ensure that your ironing board is securely and conveniently mounted, ready for use whenever you need it. With just a few basic tools and a little bit of time, you can transform an ordinary door into a functional storage space for your ironing board.
By the end of this guide, you will have the knowledge and confidence to complete this project with ease. Whether you are a DIY enthusiast or simply looking for a practical storage solution, hanging your ironing board on a door is a rewarding and space-efficient endeavor. So, let's dive into the steps and get started on this simple yet impactful home improvement project.
Key Takeaways:
- Transform any door into a space-saving ironing board storage with over-the-door hooks, a measuring tape, and a screwdriver. Enjoy easy access to your ironing essentials while keeping your living space clutter-free.
- Ensure a secure and stable installation by measuring the door and ironing board accurately, testing the stability, and making any necessary adjustments. Hang your ironing board with confidence, maximizing space efficiency in your home.
Read more: How To Hang An Ironing Board On The Wall
Step 1: Gather the necessary materials
Before embarking on the process of hanging your ironing board on a door, it's essential to gather all the required materials. By ensuring that you have everything at hand, you can streamline the installation process and minimize interruptions. Here's a comprehensive list of the materials you will need:
-
Over-the-door hooks: These hooks are specifically designed to hang over the top of a door, providing a sturdy and convenient mounting point for your ironing board. Look for hooks that are durable and capable of supporting the weight of your ironing board.
-
Measuring tape: Accurate measurements are crucial for ensuring that the over-the-door hooks are positioned correctly. A reliable measuring tape will enable you to determine the precise dimensions of the door and the ironing board, allowing for a secure and customized fit.
-
Screwdriver or drill: Depending on the type of over-the-door hooks you choose, you may need a screwdriver or drill to secure them in place. Be sure to have the appropriate tools on hand to facilitate the installation process.
-
Level: To ensure that the over-the-door hooks are mounted evenly and securely, a level is indispensable. This tool will help you align the hooks accurately, preventing any instability or misalignment once the ironing board is hung.
-
Ironing board: Of course, you will need the ironing board itself. Before proceeding, it's a good idea to inspect the board to ensure that it's in good condition and suitable for hanging. Additionally, take note of the dimensions and weight of the ironing board to inform the installation process.
-
Optional: Pencil and masking tape: These items can be useful for marking the placement of the over-the-door hooks and ensuring precise positioning before installation.
By gathering these materials in advance, you can set the stage for a smooth and efficient installation process. With everything at your disposal, you'll be well-prepared to move on to the next step and begin the process of hanging your ironing board on the door.
Step 2: Measure the door and ironing board
Accurate measurements are crucial for the successful installation of over-the-door hooks and the secure hanging of your ironing board. Before proceeding with the mounting process, it's essential to measure both the door and the ironing board to ensure a precise and customized fit.
Measuring the Door
Begin by using a measuring tape to determine the width and height of the door where you intend to hang the ironing board. Measure the top portion of the door, as this is where the over-the-door hooks will be positioned. Take note of the exact dimensions, as this will guide the placement of the hooks and ensure a snug and secure fit.
It's important to consider any obstructions on the door, such as decorative molding or handles, that may affect the placement of the over-the-door hooks. By taking these factors into account during the measurement process, you can avoid potential obstacles and ensure a smooth installation.
Measuring the Ironing Board
Next, measure the width and thickness of the ironing board. This step is crucial for determining the spacing and positioning of the over-the-door hooks to accommodate the dimensions of the ironing board. Additionally, take note of the weight of the ironing board, as this will inform the selection of sturdy and reliable over-the-door hooks capable of supporting the board securely.
By accurately measuring both the door and the ironing board, you can proceed with confidence, knowing that the installation will be tailored to fit your specific requirements. These precise measurements will serve as the foundation for the next steps in the process, ensuring a seamless and customized mounting solution for your ironing board.
With the measurements in hand, you are now ready to move on to the next step and begin the installation of the over-the-door hooks, bringing you one step closer to the convenience of having your ironing board easily accessible whenever you need it.
Read more: How To Secure Hotel Door With Ironing Board
Step 3: Install the over-the-door hooks
With precise measurements in hand, you are now ready to proceed with the installation of the over-the-door hooks. These hooks will serve as the secure mounting point for your ironing board, providing easy access while maximizing space efficiency. Follow these steps to install the over-the-door hooks with precision and stability:
-
Select the Placement: Based on the measurements of the door and the ironing board, determine the optimal placement for the over-the-door hooks. Position the hooks at a height that allows the ironing board to hang freely without touching the floor or obstructing the door's functionality. Use a pencil or masking tape to mark the placement of the hooks, ensuring that they are aligned evenly and symmetrically.
-
Prepare the Hooks: If the over-the-door hooks require assembly or attachment of any components, follow the manufacturer's instructions to prepare them for installation. This may involve securing screws or adjusting the hook mechanisms to fit the thickness of the door. Ensure that the hooks are fully assembled and ready for mounting before proceeding.
-
Align and Mount the Hooks: Place the over-the-door hooks at the marked positions on the door, ensuring that they are level and evenly spaced. If the hooks come with screws, use a screwdriver or drill to secure them in place according to the manufacturer's guidelines. Double-check the alignment and stability of the hooks to prevent any wobbling or misplacement once the ironing board is hung.
-
Test the Stability: Once the over-the-door hooks are securely mounted, perform a brief stability test by gently pulling on the hooks to ensure that they can support the weight of the ironing board. This step is crucial for verifying the integrity of the installation and addressing any potential issues before hanging the ironing board.
By following these steps, you can install the over-the-door hooks with precision and confidence, creating a reliable mounting point for your ironing board. With the hooks securely in place, you are now ready to proceed to the next step and hang the ironing board on the door, bringing you closer to the convenience and efficiency of this space-saving storage solution.
Step 4: Hang the ironing board on the door
With the over-the-door hooks securely installed, it's time to proceed with hanging the ironing board on the door. This step will bring your storage solution to life, providing easy access to your ironing board while maximizing space efficiency in your home.
-
Position the Ironing Board: Begin by positioning the ironing board in front of the door where the over-the-door hooks are mounted. Ensure that the board is aligned with the hooks and positioned at a suitable height for convenient access. Take a moment to verify that the hooks are capable of supporting the weight of the ironing board before proceeding.
-
Lift and Hang: Lift the ironing board and carefully place the top edge onto the over-the-door hooks. Slowly lower the board onto the hooks, allowing them to support the weight evenly. Ensure that the board is centered and balanced on the hooks to prevent any instability or misalignment.
-
Verify Stability: Once the ironing board is hung on the door, take a moment to verify its stability. Gently nudge the board to ensure that it is securely supported by the over-the-door hooks. Test for any wobbling or shifting, and make any necessary adjustments to ensure that the board is firmly in place.
-
Check Accessibility: Open and close the door to confirm that the ironing board does not obstruct the door's functionality. Ensure that the board is positioned in a way that allows the door to operate smoothly without any interference. This step is essential for maintaining the practicality of the door while utilizing it as a storage space for the ironing board.
-
Final Adjustments: If needed, make final adjustments to the positioning of the ironing board to achieve the desired height and alignment. Take a step back and assess the overall appearance and functionality of the setup, making any refinements to ensure that the board is hung securely and accessibly.
By following these steps, you can successfully hang your ironing board on the door, transforming it into a functional and space-efficient storage solution. With the board securely in place, you can enjoy the convenience of having your ironing essentials easily accessible whenever needed, while keeping your living space organized and clutter-free.
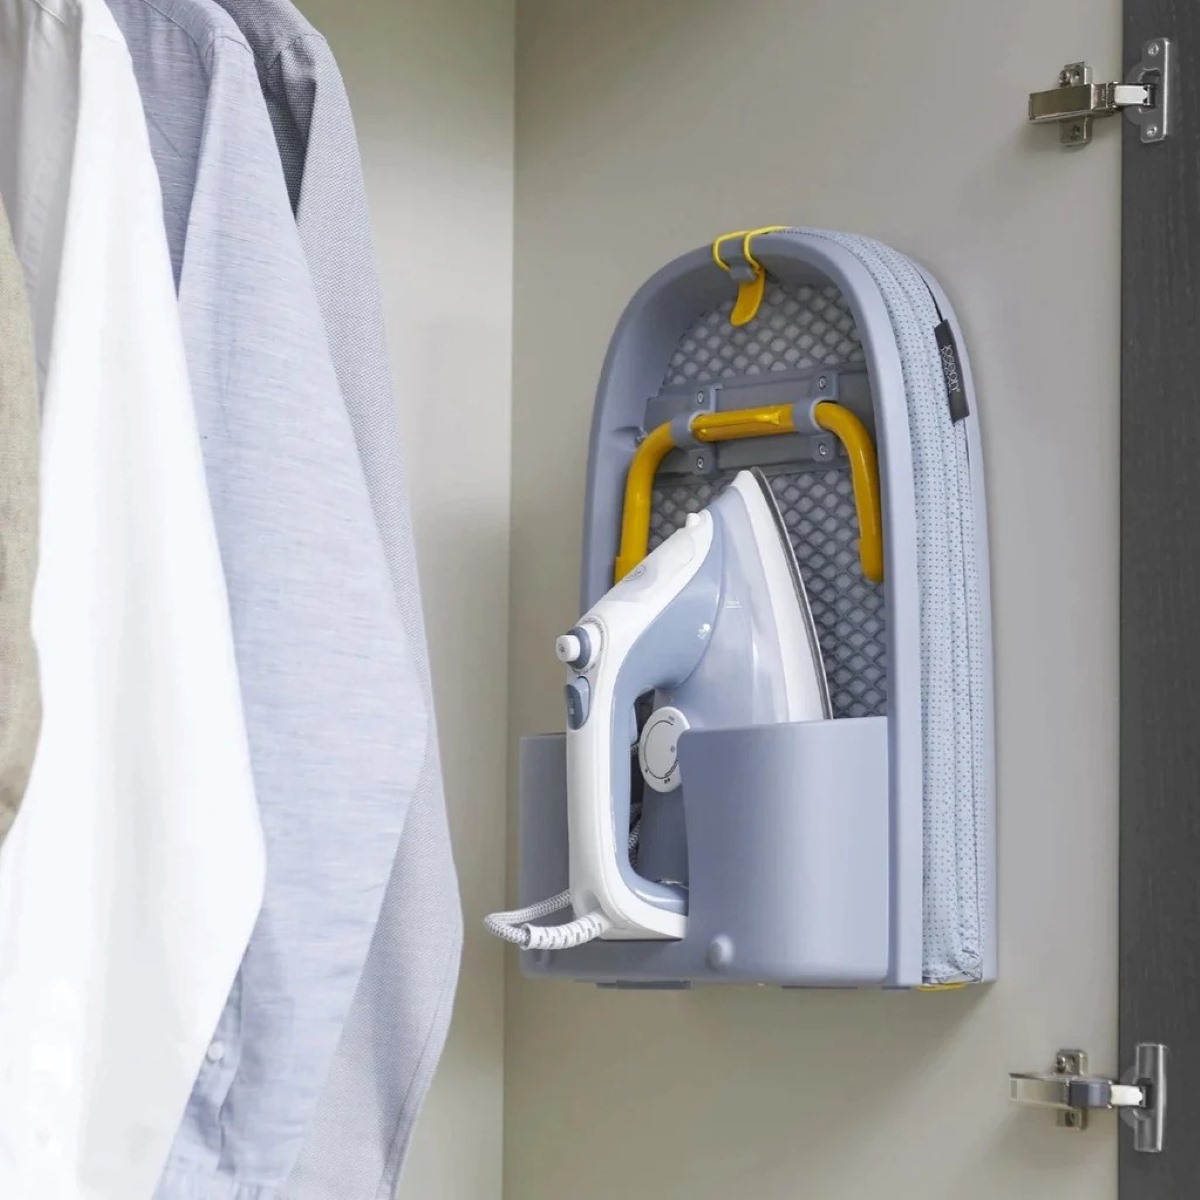
Use an over-the-door ironing board holder with hooks to hang the ironing board securely on the back of a door. This will keep it out of the way and easily accessible when needed.
Step 5: Test the stability
After hanging the ironing board on the door, it's crucial to test the stability to ensure that the setup is secure and reliable. This step is essential for verifying that the over-the-door hooks can adequately support the weight of the ironing board and that the entire arrangement is stable and safe for use.
To test the stability, begin by gently applying pressure to the ironing board, checking for any signs of wobbling or shifting. By exerting light pressure in different directions, you can assess the integrity of the mounting and identify any potential issues that may compromise the stability of the setup.
Next, perform a brief stability test by simulating the typical movements associated with using an ironing board. Gently sway the board from side to side and apply slight pressure as if ironing clothes. This action will help you gauge the resilience of the over-the-door hooks and ensure that they can withstand the practical demands of using an ironing board.
Additionally, consider placing a lightweight item, such as a piece of fabric or a small garment, on the ironing board to mimic the actual load it would bear during use. This test will provide a practical assessment of the stability, allowing you to observe how the setup responds to the added weight and movement.
As you conduct these stability tests, pay close attention to any signs of strain or instability in the over-the-door hooks or the mounting points. Look for any indications of bending, shifting, or loosening that may compromise the security of the ironing board. If you notice any concerns during the stability test, it's essential to address them promptly to ensure a safe and reliable setup.
By thoroughly testing the stability of the ironing board on the door, you can gain confidence in the durability and safety of the installation. This step allows you to identify and address any potential issues, ensuring that the setup is robust and dependable for regular use. With the stability test successfully completed, you can proceed with peace of mind, knowing that your ironing board is securely and effectively mounted on the door, ready to serve its purpose whenever needed.
Conclusion
In conclusion, hanging an ironing board on a door offers a practical and space-saving solution that can significantly enhance the organization and functionality of any living space. By following the step-by-step process outlined in this guide, you can transform an ordinary door into a convenient storage area for your ironing essentials, ensuring easy access while maximizing space efficiency.
The process begins with gathering the necessary materials, including over-the-door hooks, a measuring tape, a screwdriver or drill, a level, and, of course, the ironing board itself. By ensuring that you have all the required tools and components at hand, you can streamline the installation process and set the stage for a successful outcome.
Accurate measurements of the door and the ironing board are essential for customizing the installation to fit your specific requirements. By carefully measuring the dimensions and weight of both the door and the ironing board, you can ensure a precise and secure fit, laying the groundwork for a stable and reliable mounting solution.
The installation of over-the-door hooks is a pivotal step in the process, providing a sturdy and convenient mounting point for the ironing board. By following the detailed instructions for positioning, mounting, and testing the stability of the hooks, you can create a reliable foundation for hanging the ironing board on the door.
Hanging the ironing board on the door marks the culmination of the installation process, bringing the storage solution to life and providing easy access to your ironing essentials. By carefully positioning, lifting, and verifying the stability of the ironing board, you can ensure that it is securely and conveniently mounted, ready for use whenever needed.
Finally, testing the stability of the setup is crucial for verifying the integrity and safety of the installation. By conducting thorough stability tests and addressing any potential issues, you can gain confidence in the durability and reliability of the mounted ironing board, ensuring a safe and practical storage solution.
In essence, hanging an ironing board on a door is a simple yet impactful home improvement project that offers a myriad of benefits, from decluttering living spaces to providing convenient access to essential household items. By following the steps outlined in this guide, you can embark on this endeavor with confidence, knowing that you have the knowledge and guidance to create a functional and space-efficient storage solution for your ironing board.
Frequently Asked Questions about How To Hang An Ironing Board On A Door
Was this page helpful?
At Storables.com, we guarantee accurate and reliable information. Our content, validated by Expert Board Contributors, is crafted following stringent Editorial Policies. We're committed to providing you with well-researched, expert-backed insights for all your informational needs.

0 thoughts on “How To Hang An Ironing Board On A Door”