Articles
How To Use A Laser Level To Hang Doors
Modified: October 27, 2024
Learn how to properly use a laser level to accurately and efficiently hang doors. Check out our informative articles on this essential technique.
(Many of the links in this article redirect to a specific reviewed product. Your purchase of these products through affiliate links helps to generate commission for Storables.com, at no extra cost. Learn more)
Introduction
When it comes to hanging doors, precision is key. A perfectly aligned door not only enhances the aesthetic appeal of a room but also ensures proper functionality, preventing issues such as sticking or uneven closing. Traditionally, hanging doors required meticulous measuring, leveling, and rechecking to achieve the desired result. However, thanks to modern technology, the process has become much simpler and more efficient with the use of laser levels.
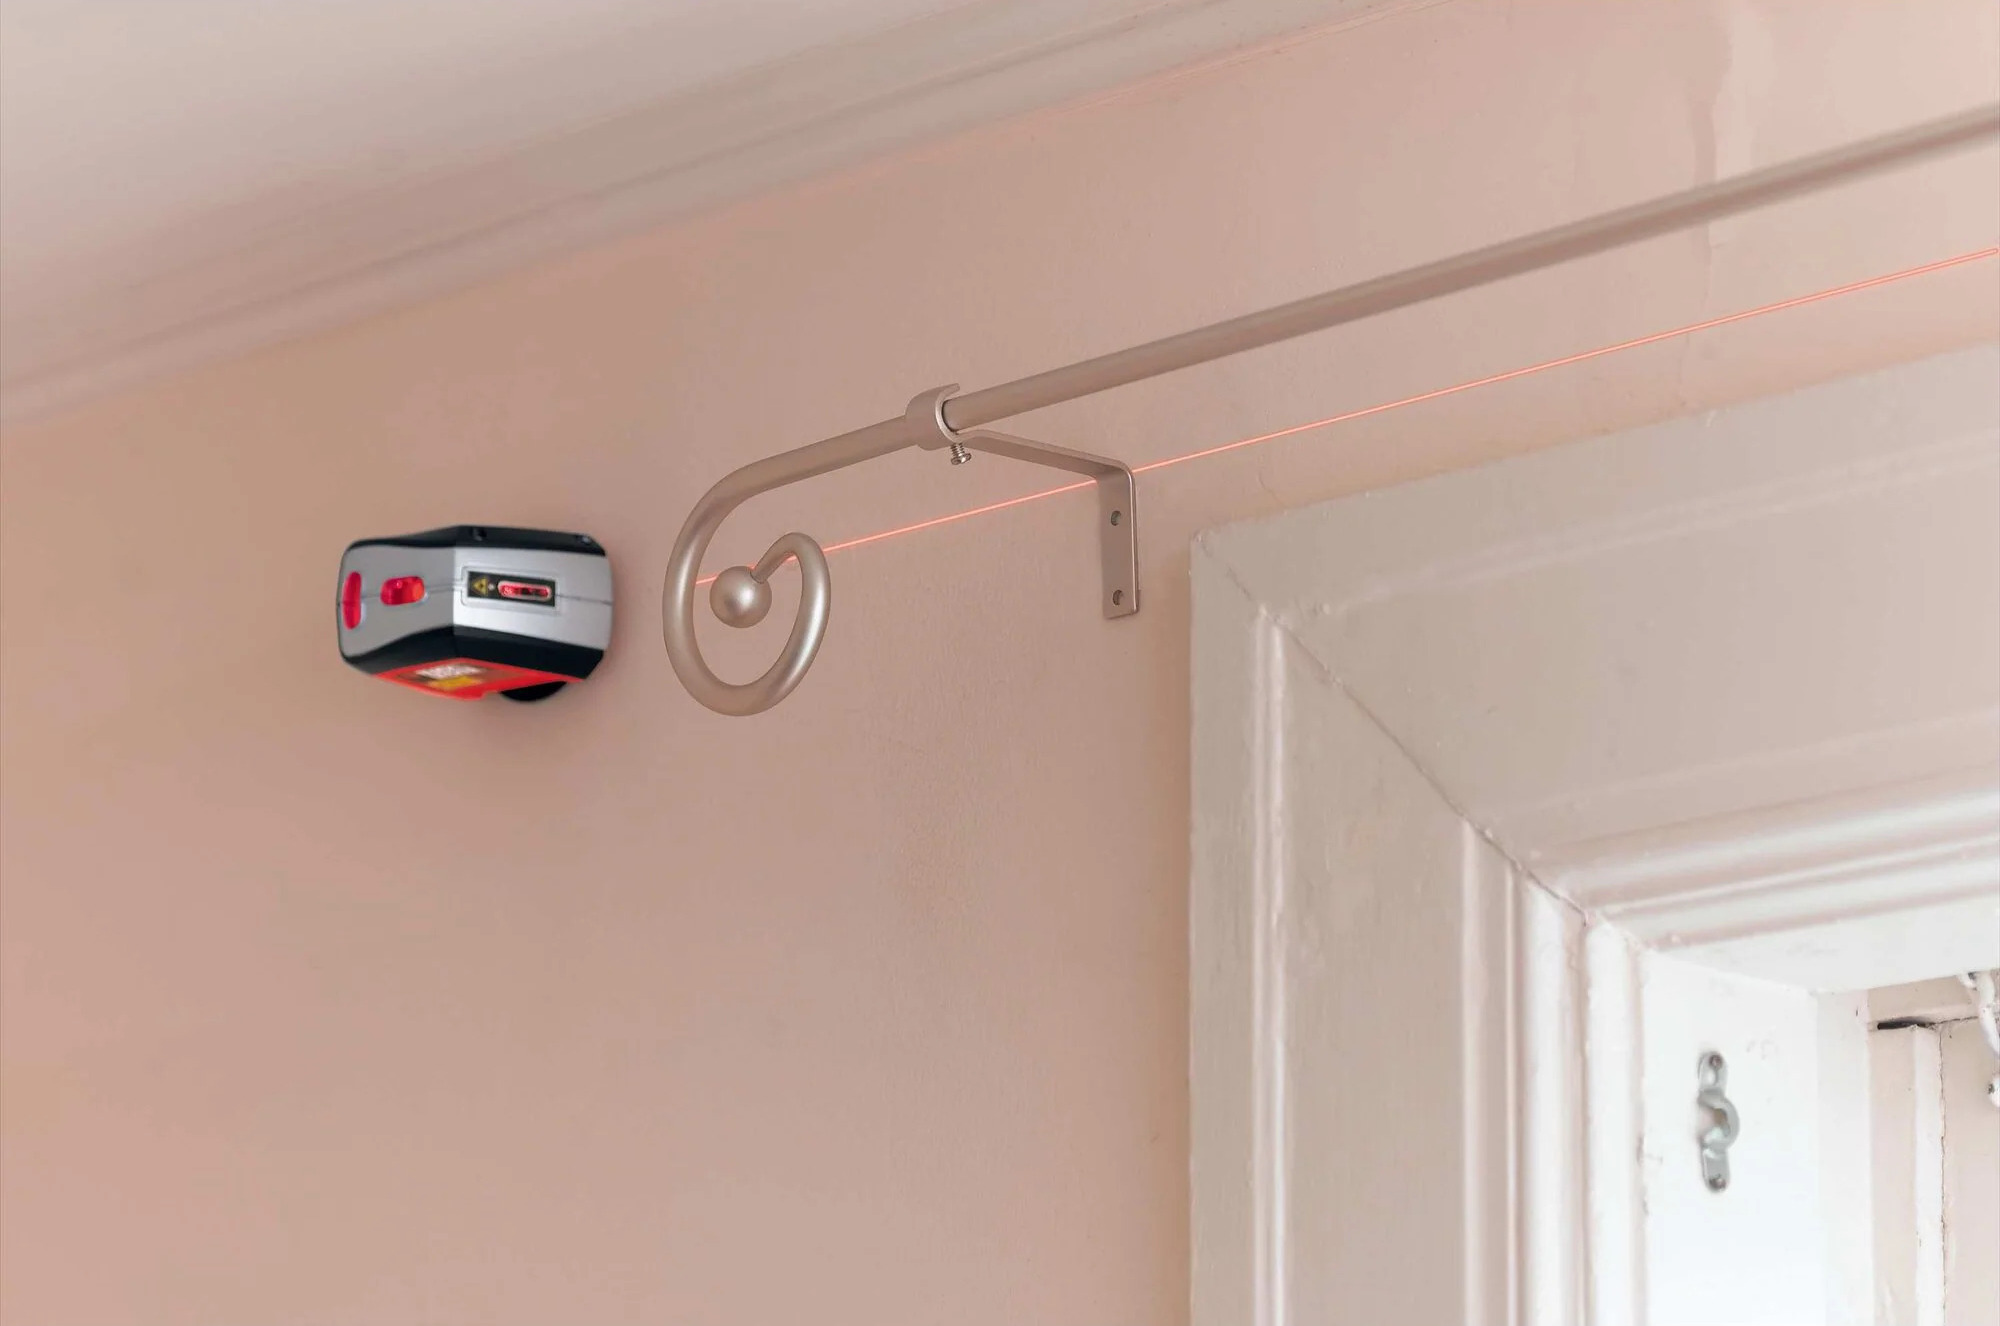
A laser level is a versatile tool that emits a highly visible laser beam, providing a straight and level reference line. This makes it an invaluable asset when it comes to hanging doors, as it eliminates the need for manual measurements and ensures accurate alignment.
There are various types of laser levels available on the market, each with its own unique features and applications. Understanding the different types and their functions will help you choose the right laser level for your door installation project.
In this article, we will delve into the world of laser levels and explore how they can be effectively used to hang doors with precision. We will discuss the importance of laser levels in door installation, as well as provide step-by-step instructions on preparing the workspace, setting up the laser level, aligning the laser level with the door frame, marking the door for alignment, and, finally, installing the door with laser level assistance.
Additionally, we will share some valuable tips and tricks to enhance your door installation process and answer commonly asked questions about using laser levels.
If you’re ready to elevate your door hanging skills and achieve professional-level results, let’s dive into the world of laser levels and learn how they can transform your door installation projects.
Key Takeaways:
- Laser levels streamline door hanging with precision, eliminating manual measurements and ensuring accurate alignment. Their versatility and ease of use make them essential for professional contractors and DIY enthusiasts alike.
- Laser levels offer time-saving benefits, improved aesthetics, and professional results in door installation. Their accuracy and efficiency make them indispensable tools for any construction project.
Read more: How To Use Laser Level To Hang Pictures
What is a Laser Level?
A laser level is a precision tool used to project a straight, level, or plumb line onto a surface. It utilizes laser technology to emit a highly visible beam of light, which serves as a reference point for various construction and alignment tasks.
Unlike traditional bubble levels that rely on a vial filled with liquid and an air bubble, laser levels provide a more accurate and efficient way to determine straight lines and precise angles.
Laser levels are commonly used in a wide range of applications, such as building and construction, carpentry, plumbing, electrical work, and interior design. They are especially useful in tasks that require precise alignment, such as hanging doors, installing cabinets, laying tiles, and mounting shelves.
There are several types of laser levels available on the market, each designed for specific applications:
- Line Laser Level: This type of laser level emits one or more laser beams to create a straight, horizontal or vertical line. It is ideal for tasks like leveling walls, installing drop ceilings, and aligning tiles.
- Rotary Laser Level: Rotary laser levels project a 360-degree laser beam around a room or outdoor space. They are commonly used in large-scale construction projects, such as setting foundation levels, aligning walls, or installing outdoor fences.
- Dot Laser Level: Dot laser levels project multiple laser dots onto surfaces. They are primarily used for tasks like aligning shelves, hanging artwork, or transferring reference points.
- Cross Line Laser Level: Cross line laser levels emit both horizontal and vertical laser lines, typically forming a cross shape. They are popular for interior tasks, such as installing cabinets, shelves, or light fixtures.
Most laser levels are equipped with features that allow for easy adjustment and customization of the laser beam. This includes options like beam rotation, line thickness adjustment, and brightness control.
Overall, laser levels offer convenience, accuracy, and time-saving benefits in a wide range of construction and alignment tasks. Their advanced technology provides a reliable reference point, ensuring precise measurements and alignment, ultimately leading to high-quality and professional results.
Types of Laser Levels
When it comes to laser levels, there are several types available on the market, each designed to fulfill specific construction and alignment needs. Understanding the different types will help you choose the right laser level for your project. Let’s take a look at the most common types of laser levels:
- Line Laser Level: Line laser levels emit a straight, horizontal or vertical laser line, creating a visual reference for alignment. They are commonly used in tasks such as leveling walls, installing drop ceilings, and aligning tiles. Line laser levels typically offer features like self-leveling capabilities and adjustable line thickness to accommodate different project requirements.
- Rotary Laser Level: Rotary laser levels project a 360-degree laser beam in all directions, providing a complete horizontal reference plane. They are commonly used in large-scale construction projects, such as setting foundation levels, aligning walls, or installing outdoor fences. Rotary laser levels often come with features like remote control, dual-axis leveling, and Grade Match technology for precise slope adjustments.
- Dot Laser Level: Dot laser levels project multiple laser dots onto surfaces, enabling accurate positioning and alignment. They are primarily used for tasks like aligning shelves, hanging artwork, or transferring reference points. Dot laser levels can have different dot patterns, such as single dots, cross patterns, or grid patterns, depending on the desired application.
- Cross Line Laser Level: Cross line laser levels emit both horizontal and vertical laser lines, typically forming a cross shape. They are popular for interior tasks, such as installing cabinets, shelves, or light fixtures. Cross line laser levels often include additional features like self-leveling, pendulum lock for manual mode, and pulse mode for extended range with a receiver.
- Point Laser Level: Point laser levels project single laser dots in different directions, useful for determining level or plumb points. They are commonly used for tasks like installing electrical outlets, plumbing fixtures, or stair railings. Point laser levels can have multiple laser points or feature a 360-degree reference plane, allowing for increased versatility and flexibility in different applications.
It’s important to consider the specific requirements of your project when selecting a laser level. Factors such as the desired range, accuracy, leveling capabilities, and additional features should be taken into account. Additionally, be sure to check the specifications of the laser level, including the laser class, accuracy rating, and battery life, to ensure it meets your specific needs.
By choosing the right type of laser level, you can enhance your construction and alignment tasks, increase efficiency, and achieve accurate and professional results with ease.
Importance of Laser Levels in Hanging Doors
When it comes to hanging doors, precision is crucial for achieving a seamless installation. Using a laser level can greatly enhance the accuracy and efficiency of the process. Let’s explore the importance of laser levels in hanging doors:
- Accurate Alignment: Laser levels provide a straight and level reference line, ensuring precise alignment of the door frame. This is crucial for a properly fitting and functioning door, preventing issues like sticking, gaps, or misalignment.
- Time-saving: With a laser level, the process of measuring, leveling, and rechecking manually is eliminated. The laser beam serves as a visual guide, allowing for quick and accurate adjustments, which saves both time and effort, especially when working on multiple doors.
- Consistency: Using a laser level ensures consistency in door alignment throughout the installation process. This is particularly important when dealing with multiple doors in the same area, as it creates a cohesive and visually appealing result.
- Improved Aesthetics: Laser levels help achieve clean and straight lines during door installation. This enhances the overall appearance of the room by creating a polished and professional finish.
- Ease of Use: Laser levels are designed to be user-friendly, with features like self-leveling or manual leveling options, adjustable laser lines, and intuitive controls. This makes them accessible to both professionals and DIY enthusiasts, simplifying the hanging process.
- Versatility: Laser levels can be used for various door installation tasks, including aligning the door frame, marking the hinge locations, checking for levelness of the door components, and verifying plumbness of the door jamb. This versatility makes laser levels a valuable tool for any door installation project.
- Professional Results: By using a laser level for door hanging, you can achieve professional-level precision and accuracy. This ensures that the door operates smoothly, fits properly, and adds value to the overall decor of the space.
Overall, laser levels are essential tools for hanging doors, providing the necessary accuracy, consistency, and efficiency for a successful installation. Whether you are a professional contractor or a DIY enthusiast, incorporating a laser level into your door hanging process will elevate your results and make the task much easier and more enjoyable.
Preparing the Workspace
Before you begin hanging a door using a laser level, it’s important to prepare the workspace to ensure a smooth and efficient installation process. Proper preparation will help you achieve accurate door alignment and minimize any potential issues. Here are some steps to follow when preparing the workspace:
- Clean the Area: Start by clearing the doorway area of any obstructions, debris, or furniture. This will provide you with a clean and unobstructed workspace, making it easier to maneuver and install the door.
- Inspect the Door Frame: Before hanging the door, inspect the door frame to ensure it is in good condition and properly aligned. Check for any loose or damaged components, such as hinges or screws, and make any necessary repairs or adjustments.
- Check the Door Opening: Measure the dimensions of the door opening to ensure it matches the size of the door you are installing. Make any necessary adjustments or modifications to the door frame, such as shaving or trimming, to create a proper fit.
- Level the Floor: Check the levelness of the floor where the door will be installed. Use a bubble level or a laser level to determine if the floor is level or if it requires any adjustments. Uneven floors can affect the alignment of the door, so it’s important to address this before proceeding.
- Prepare the Tools: Gather all the necessary tools and equipment for the door installation, including a laser level, a hammer, a drill, screws, a screwdriver, a chisel, a tape measure, and any other tools specific to your project. Having everything readily available will save time and ensure a smoother workflow.
- Protect the Surrounding Surfaces: Cover any nearby surfaces, such as floors, walls, or furniture, with drop cloths or protective sheets. This will prevent damage or scratches during the installation process.
- Ensure Proper Lighting: Illuminate the workspace adequately to ensure clear visibility when using the laser level. Proper lighting will help you accurately align the laser beam and mark the door for installation.
By following these steps, you will create an optimal workspace for hanging the door using a laser level. Taking the time to prepare will help you achieve accurate door alignment, minimize potential issues, and ensure a successful and professional door installation.
Read more: How To Use A Laser Level
Setting Up the Laser Level
Setting up the laser level correctly is crucial for achieving accurate alignment when hanging a door. Here are the steps to follow when setting up your laser level:
- Choose the Right Location: Select a stable and level surface to place your laser level. This can be a tripod, a mounting bracket, or a flat surface that is secure and won’t move during the installation process.
- Ensure Power Supply: Check if your laser level requires batteries or if it can be powered by an electrical outlet. Ensure that you have a sufficient power supply to keep the laser level running throughout the door installation process.
- Calibrate the Laser Level: Most modern laser levels are self-leveling and will automatically calibrate themselves when turned on. However, it’s always a good idea to check the calibration by placing the laser level on a stable surface and verifying if the bubble or digital indicator shows that it is level. If it needs adjustment, refer to the manufacturer’s instructions for calibration.
- Secure the Laser Level: Attach the laser level to a tripod, a mounting bracket, or any other stable and secure surface. Make sure it is tightly secured to prevent any movement during the door installation.
- Position the Laser Level: Position the laser level at an appropriate height and distance from the door frame. Ideally, it should be positioned at a height where the laser beam is visible and aligns with the desired reference points on the door frame.
- Turn on the Laser Level: Once the laser level is securely set up, turn it on and allow it to self-level, if applicable. Some laser levels may take a few seconds to fully self-level and stabilize, so be patient and wait for the laser beam to become steady.
- Adjust the Laser Beam: Use the adjustable features of the laser level, such as rotation, line thickness, or brightness, to customize the laser beam according to your needs. Adjust the settings to create a clear, visible laser line that aligns with the centerline or reference points of the door frame.
- Verify the Alignment: Double-check that the laser beam is straight, level, or plumb by using a bubble level or a visual assessment. Ensure that the laser beam accurately represents the desired alignment for the door installation.
By following these steps, you will be able to set up your laser level correctly and position it in a way that provides a clear and accurate reference line for door installation. Taking the time to properly set up the laser level will significantly improve the accuracy and efficiency of the hanging process.
Adjusting the Laser Level
After setting up the laser level, it’s important to make any necessary adjustments to ensure precise alignment when hanging a door. Here are the steps to follow when adjusting your laser level:
- Verify the Levelness: Check the bubble or digital indicator on your laser level to ensure that it is perfectly level. If it is not level, adjust the leveling screws or knobs until the bubble is centered or the digital indicator shows a level position.
- Check the Plumbness: If your laser level has a plumb point or plumb line feature, use a vertical surface, such as a wall or door frame, to check for plumbness. Adjust the leveling screws or knobs until the laser beam aligns perfectly with the vertical reference point.
- Rotate the Laser Beam: If your laser level has a rotation feature, you can adjust the angle of the laser beam. Rotate the laser level until the laser line aligns with the desired reference points on the door frame, such as the centerline or hinge locations.
- Adjust the Line Thickness: Some laser levels allow you to customize the thickness of the laser line. Adjust the line thickness to make it more visible and clearly aligned with the reference points on the door frame.
- Modify the Brightness: If your laser level has brightness control, adjust it to your preferred level based on the ambient lighting conditions in your workspace. A brighter laser beam may be necessary in well-lit areas, while a dimmer beam can be used in low-light situations.
- Test the Alignment: After making adjustments, test the alignment of the laser level by comparing the laser beam to the reference points on the door frame. Verify that the laser line matches the desired alignment, such as the centerline or hinge points.
- Fine-tune if Necessary: If you notice any slight misalignment, make small adjustments to the leveling screws or knobs to fine-tune the laser level. Repeat the test and adjustment process until you achieve precise alignment.
By carefully adjusting your laser level, you can ensure that the laser beam accurately represents the desired alignment for hanging the door. Take your time to make precise adjustments, as even small misalignments can have noticeable effects on the door installation.
Remember to refer to the manufacturer’s instructions for specific adjustment procedures based on the model of your laser level. Taking the necessary steps to adjust the laser level will result in accurate door alignment and a professional-looking installation.
When using a laser level to hang doors, make sure to secure the level in place and adjust it to the desired height. Then, use the laser line as a guide to ensure the door is hung straight and level.
Aligning the Laser Level with the Door Frame
Once your laser level is set up and adjusted, the next step is to align it with the door frame. This will ensure that your laser beam serves as an accurate reference line for hanging the door. Here’s how to align the laser level with the door frame:
- Position the Laser Level: Place the laser level at a convenient position where the laser beam can reach the entire height and width of the door frame. Ideally, position it so that the laser beam aligns with the centerline of the door frame.
- Aim the Laser Beam: Adjust the rotation or swivel feature of the laser level to direct the laser beam towards the door frame. Ensure that the laser beam is aligned with the reference points you want to use for door installation, such as the centerline or hinge locations.
- Check the Horizontal Alignment: Use a bubble level or a visual assessment to check if the laser beam is perfectly horizontal. Adjust the leveling screws or knobs on the laser level if necessary to achieve a level laser beam.
- Verify the Vertical Alignment: Check if the laser beam is vertically aligned with the door frame. Use a plumb line or a visual assessment to ensure that the laser beam follows the vertical reference points accurately. Adjust the leveling screws or knobs if needed to achieve proper vertical alignment.
- Confirm the Alignment: Double-check that the laser beam is precisely aligned with the desired reference points on the door frame. Ensure that it matches the centerline, hinge locations, or any other points you plan to use for accurate door installation.
- Secure the Laser Level in Place: Once you have confirmed the alignment, make sure to secure the laser level in its position. This will prevent any accidental movement or displacement during the door installation process.
Aligning the laser level with the door frame is a crucial step to ensure accurate and precise door installation. By taking the time to align the laser beam with the desired reference points, you will have a reliable visual guide to follow when hanging the door and achieve professional results.
Remember to consult the manufacturer’s instructions for specific guidance on aligning the laser level based on the model you are using. With a properly aligned laser level, you are ready to mark the door for installation.
Marking the Door for Alignment
Once your laser level is aligned with the door frame, it’s time to mark the door for proper alignment. These markings will serve as a guide during the installation process, ensuring that the door is hung accurately. Here’s how to mark the door for alignment:
- Identify Reference Points: Determine the specific reference points on the door frame that you will use for alignment. This can include the centerline, hinge locations, or any other points that will help you achieve accurate positioning of the door.
- Transfer the Reference Points: Position the door in the door frame, ensuring that it is flush and properly aligned with the frame. Use a pencil or a marker to transfer the reference points from the door frame onto the edge of the door. Make small marks or lines to indicate these reference points clearly.
- Mark the Hinge Locations: If you are hanging a door with hinges, mark the exact locations where the hinges will be installed on the door. This can be done by placing the hinge on the edge of the door and using a pencil to mark the screw hole locations.
- Verify the Alignment: After marking the door, double-check that the reference points and hinge locations align with the laser beam from the laser level. Make any necessary adjustments to the markings to ensure precise alignment with the laser’s guidance.
- Label the Markings: To avoid confusion during the installation process, label each marking or line on the door. This can be done by using numbers or letters to correspond with the reference points or hinge locations on the door frame.
Marking the door for alignment is an essential step that allows for accurate installation. These markings will act as your guide, ensuring that the door is positioned correctly and aligned with the reference points indicated by the laser level. Taking the time to mark the door accurately will save you time and effort during the actual hanging process.
Remember to use a pencil or a marker that is easily visible, but can also be easily removed or covered up once the door is installed. This will prevent any permanent marks or damage to the door’s surface.
With the door marked for alignment, you are now ready to proceed with the actual installation process using the guidance provided by the laser level.
Read more: How To Use A Self Leveling Laser Level
Installing the Door with Laser Level Assistance
With the door marked for alignment, it’s time to proceed with the installation process. The laser level will serve as a valuable tool in ensuring accurate and precise door hanging. Here are the steps to follow for installing the door with laser level assistance:
- Attach the Hinges: Begin by attaching the hinges to the marked locations on the door. Use the appropriate screws and a screwdriver to secure the hinges firmly in place. Make sure the hinges are flush with the edge of the door.
- Position the Door: Carefully position the door in the door frame, aligning the hinge leaves with the corresponding hinge locations on the frame. Ensure that the door is flush and evenly positioned within the frame.
- Check Alignment: Use the laser level to verify the alignment of the door with the reference points marked on the door frame. Adjust the position of the door if necessary to achieve proper alignment with the laser beam.
- Secure the Hinges: Once the door is properly aligned, secure the hinges to the door frame using the appropriate screws and a screwdriver. Make sure the hinges are tightly fastened, ensuring a sturdy connection between the door and the frame.
- Check Swing and Functionality: Open and close the door a few times to ensure that it swings smoothly and without any obstructions. Test the functionality of the door, making sure that it opens and closes properly.
- Verify Alignment Once More: Double-check the alignment of the door using the laser level. Ensure that the laser beam still aligns with the reference points on the door frame and confirms its accurate installation.
- Make Final Adjustments: If necessary, make any final adjustments to the door position or alignment. This can be done by loosening the hinge screws slightly and gently tapping or adjusting the door’s position. Once adjusted, tighten the screws securely.
- Complete the Installation: With the door hung and aligned properly, check all screws and fasteners to ensure they are tight. Make any necessary adjustments to the latch, strike plate, or other hardware components for proper functionality and security.
By following these steps, you can successfully install the door with the assistance of the laser level. The laser beam serves as a guide to ensure precise alignment and a professional-looking result. The laser level eliminates the need for manual measurements and guesswork, providing accuracy and efficiency in the door installation process.
Remember to always follow manufacturer’s instructions and guidelines for specific door and hardware installation procedures. Additionally, consult local building codes and regulations to ensure compliance with safety and structural requirements.
With the door installed and properly aligned, you can now enjoy the benefits of a well-hung and seamlessly functioning door in your space.
Tips and Tricks for Using a Laser Level
Using a laser level effectively requires some knowledge and practice. Here are some tips and tricks to help you make the most out of your laser level:
- Read the Instructions: Familiarize yourself with the user manual and instructions provided by the manufacturer. Each laser level may have specific features, settings, and calibration methods that you need to understand.
- Choose the Right Laser Class: Laser levels are classified into different classes based on their power and safety levels. Ensure that you select a laser level with an appropriate class for your specific application, taking into account the safety considerations.
- Check the Battery Life: Before starting your project, ensure that the laser level has sufficient battery life or power supply. Consider carrying spare batteries or having a backup power source to avoid interruptions during your work.
- Use a Tripod or Mounting Bracket: For stability and accuracy, it’s recommended to use a tripod or a mounting bracket to secure the laser level. This will minimize shake or movement during operation, resulting in better alignment.
- Make Use of the Self-Leveling Feature: If your laser level has a self-leveling feature, let it do the work. Allow the laser level to settle and automatically adjust before making any manual adjustments. This will ensure accurate readings and save you time in calibration.
- Mark the Laser Level’s Position: If you need to move the laser level during the project, mark its initial position. This will help you reposition it accurately if you need to return to a previous alignment point or if the laser level gets accidentally bumped or shifted.
- Consider Adding a Laser Detector: In situations where you need to work at longer distances or in bright conditions, a laser detector can enhance the visibility of the laser beam. It can receive the laser signal and provide audible or visual cues to assist with alignment.
- Adjust Brightness Settings: Depending on the ambient lighting conditions, you may need to adjust the brightness settings of the laser level. Increase the brightness in bright environments and decrease it in darker conditions for better visibility of the laser beam.
- Protect the Laser Level: When not in use, store the laser level in a protective case to prevent dust, dirt, or damage. Handle it with care, avoiding rough handling or dropping, as it can affect its accuracy and performance.
- Regularly Calibrate and Maintain: Keep your laser level in optimal condition by periodically calibrating it as per the manufacturer’s instructions. Clean the laser lens and check for any signs of wear or damage. Regular maintenance will ensure accurate readings and extend the lifespan of your laser level.
By applying these tips and tricks, you can maximize the effectiveness of your laser level and achieve precise alignment in your projects. Remember to always prioritize safety when working with laser levels and follow the recommended guidelines provided by the manufacturer for safe handling and usage.
With practice, you will become more comfortable and proficient in using your laser level, enabling you to accomplish your alignment tasks with ease and confidence.
Frequently Asked Questions
Here are some commonly asked questions regarding the use of laser levels in door installation:
- How accurate are laser levels? Laser levels are known for their high degree of accuracy. Most modern laser levels have an accuracy range of around ±1/8 inch at 30 feet. However, it’s important to note that accuracy can vary based on the quality and type of laser level used.
- Can laser levels be used outdoors? Yes, many laser levels are designed for both indoor and outdoor use. However, for outdoor applications, it’s recommended to use a laser level with a higher power output and a laser detector to enhance visibility in bright conditions.
- Do laser levels require manual leveling? Many laser levels today come with a self-leveling feature that automatically levels the device. This eliminates the need for manual leveling, saving time and effort. However, it’s important to ensure that the surface or tripod on which the laser level is placed is level to allow for accurate self-leveling.
- Can laser levels project multiple beams? Yes, some laser levels have the capability to project multiple beams, such as cross line or dot laser levels. These multiple beams can be useful for various alignment tasks, allowing you to align multiple reference points simultaneously.
- Can laser levels be used for tasks other than door hanging? Absolutely! Laser levels have a wide range of applications in various construction and alignment tasks. They can be used for tasks such as wall framing, tile installation, shelving, wallpapering, electrical work, and more.
- Do laser levels require any special maintenance? Laser levels generally require minimal maintenance. However, it’s important to keep the lens clean, handle the device with care to prevent damage, and periodically calibrate the laser level as per the manufacturer’s instructions to ensure accurate readings.
- Can laser levels be used by beginners? Yes, laser levels are user-friendly and can be used by beginners with proper guidance and practice. It’s important to read the instructions, understand the features and functionalities of the laser level, and follow proper safety precautions.
- Do laser levels work in all lighting conditions? Laser levels work best in dim to moderate lighting conditions. In very bright or direct sunlight, it may be necessary to use a laser detector to enhance the visibility of the laser beam.
If you have any more specific questions about using laser levels for door installation or any other construction tasks, it’s always best to consult the manufacturer’s instructions or seek advice from professionals in the field.
Remember that using laser levels appropriately and understanding their capabilities will help you achieve precise alignment and improve the efficiency of your door installation projects.
Conclusion
In conclusion, laser levels are invaluable tools for hanging doors with precision and accuracy. By providing a straight and level reference line, laser levels eliminate the need for manual measurements, reduce the margin of error, and streamline the installation process. Their versatility, ease of use, and accuracy make them essential for both professional contractors and DIY enthusiasts.
Throughout this article, we have explored the various types of laser levels, discussed their importance in door installation, and provided step-by-step instructions on preparing the workspace, setting up the laser level, aligning it with the door frame, marking the door for alignment, and ultimately installing the door with laser level guidance. By following these instructions and tips, you can achieve professional-level results and create a seamless and visually appealing door installation.
It’s important to note that laser levels are not only limited to door hanging but also have a wide range of applications in construction, remodeling, and various alignment tasks. Their accuracy, efficiency, and time-saving benefits make them an indispensable tool in any construction project.
Whether you are a professional contractor or a DIY enthusiast, incorporating a laser level into your door installation process offers numerous advantages. From accurate alignment and improved aesthetics to time-saving benefits and professional results, laser levels are a game-changer when it comes to precise door hanging.
Remember to always prioritize safety when working with laser levels, carefully read the manufacturer’s instructions, and follow proper usage and maintenance guidelines. By doing so, you can optimize the performance of your laser level and ensure long-lasting accuracy.
Incorporate the knowledge and techniques shared in this article, and embrace the benefits of using a laser level for hanging doors. With each successful door installation, your expertise and confidence in working with laser levels will grow, enabling you to tackle future projects with ease and precision.
Frequently Asked Questions about How To Use A Laser Level To Hang Doors
Was this page helpful?
At Storables.com, we guarantee accurate and reliable information. Our content, validated by Expert Board Contributors, is crafted following stringent Editorial Policies. We're committed to providing you with well-researched, expert-backed insights for all your informational needs.


0 thoughts on “How To Use A Laser Level To Hang Doors”