Home>Articles>How To Hang Pegboard For An Organized Workspace
Articles
How To Hang Pegboard For An Organized Workspace
Modified: March 3, 2024
Learn how to hang pegboard in your workspace for better organization. Find helpful articles and tips to maximize your productivity.
(Many of the links in this article redirect to a specific reviewed product. Your purchase of these products through affiliate links helps to generate commission for Storables.com, at no extra cost. Learn more)
Introduction
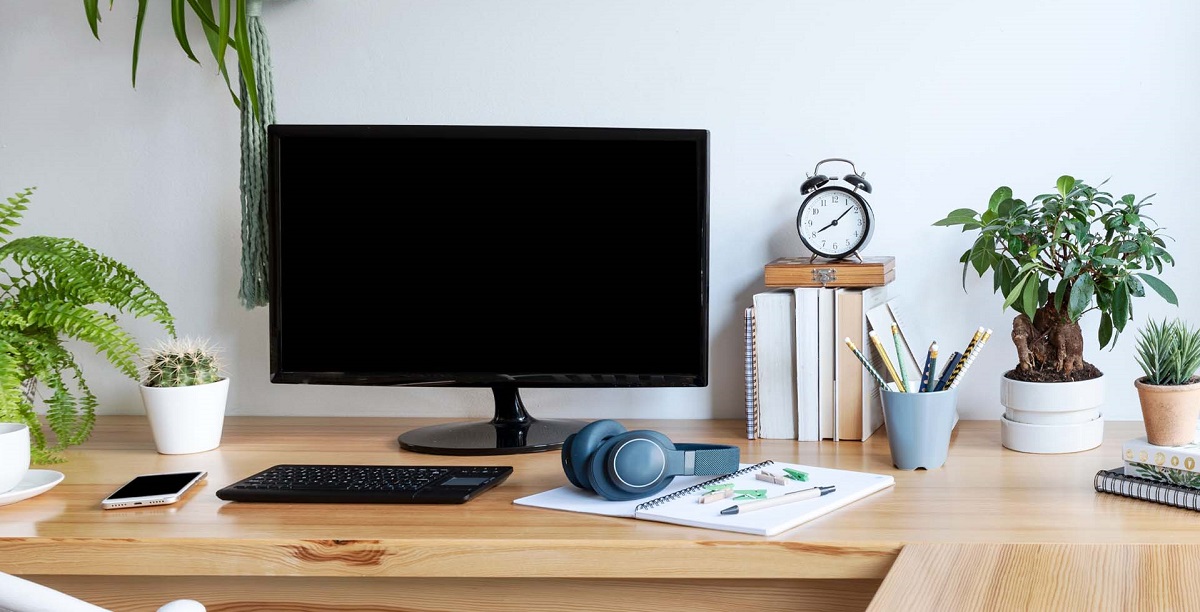
Welcome to the world of organized workspaces! If you’ve been struggling with cluttered countertops, tangled cords, and a lack of storage space, then it’s time to consider hanging pegboard. Pegboard is a versatile and practical solution for keeping your workspace tidy and efficient. Whether you have a home office, garage, or workshop, this article will guide you through the process of hanging pegboard and creating a well-organized environment.
A well-organized workspace is not only visually pleasing but also offers several benefits. It improves productivity by allowing you to easily locate tools and supplies, reduces the risk of accidents caused by clutter, and maximizes the use of available space. Hanging pegboard is a simple and effective way to achieve these benefits, as it provides a customizable system to store and access your tools, equipment, and accessories.
In this article, we will take you through a step-by-step process to successfully hang pegboard in your workspace. We will cover everything from gathering the necessary tools and materials to organizing your tools and supplies on the pegboard. Additionally, we will provide tips on maintaining and adjusting your pegboard setup to meet your evolving needs.
Before we dive into the details, make sure you have ample space around your work area to easily maneuver and access your tools. It’s also essential to have proper lighting, as a well-lit workspace can significantly improve productivity and prevent eye strain. With these considerations in mind, let’s get started on transforming your cluttered workspace into an organized paradise!
Key Takeaways:
- Transform your cluttered workspace into an efficient and visually pleasing area by hanging pegboard. Enjoy easy access to tools, increased productivity, and a well-structured work environment.
- Regularly maintain and adjust your pegboard setup to ensure long-term effectiveness. Clean the pegboard, reassess organization, optimize space usage, and declutter as needed for a productive and stress-free environment.
Read more: How To Organize Tools On A Pegboard
Step 1: Gather the necessary tools and materials
Before you can start hanging pegboard, it’s important to gather all the necessary tools and materials. Here’s a list of what you’ll need:
- Pegboard: Measure your wall space and purchase a pegboard panel that fits your dimensions. Pegboard comes in various sizes, so choose one that suits your needs.
- Mounting hardware: Depending on the wall surface, you may need different types of mounting hardware. For drywall, use toggle bolts or wall anchors. For concrete or masonry walls, use screws and wall plugs.
- Level: A level will help ensure that your pegboard is straight and properly aligned.
- Drill: You’ll need a drill to create pilot holes and secure the pegboard to the wall.
- Screws: Select screws that are appropriate for your mounting hardware and the thickness of your pegboard.
- Pegboard hooks and accessories: Choose a variety of hooks, baskets, and tool holders to accommodate your specific tools and supplies.
- Measuring tape: Use a measuring tape to accurately measure and mark the placement of the pegboard on your wall.
- Pencil: A pencil will be handy for marking the locations of mounting holes and any measurements.
- Safety equipment: Don’t forget to wear safety glasses and gloves when handling tools and drilling into walls.
Once you have gathered all the necessary tools and materials, you’re ready to move on to the next step: determining the placement of the pegboard.
Step 2: Determine the placement of the pegboard
Selecting the right location for your pegboard is crucial for optimal functionality and aesthetics. Consider the following factors when determining its placement:
- Accessibility: Choose a spot that is easily accessible and within reach of your work area. You’ll want to have your most frequently used tools and supplies within arm’s reach.
- Wall space: Measure the available wall space and ensure that it can accommodate the size of your pegboard. Keep in mind any obstructions such as windows, doors, or electrical outlets.
- Height: Consider the height at which you want to install the pegboard. Generally, it should be at a comfortable height that allows for easy access to the hooks and accessories while standing or sitting.
- Weight distribution: If you plan to hang heavy tools or equipment, make sure to locate studs behind the wall. Using a stud finder can help you identify the strongest points to support the weight.
- Aesthetics: Take into account the overall look and feel of your workspace. Choose a placement that complements the existing decor and does not interfere with the functionality of other elements.
Once you have considered these factors, use a measuring tape and pencil to mark the outline of the pegboard on the wall. Double-check the measurements to ensure accuracy. Use a level to make sure the lines are straight and even.
Now that you have determined the ideal location for your pegboard, it’s time to move on to the next step: mounting the pegboard onto the wall.
Step 3: Mounting the pegboard onto the wall
Once you have determined the placement of the pegboard, it’s time to mount it onto the wall. Follow these steps to ensure a secure and sturdy installation:
- Prepare the wall: Clear the area of any obstacles and make sure the wall is clean and free of dust. If necessary, fill any holes or imperfections in the wall with spackle and allow it to dry before proceeding.
- Locate the studs: Use a stud finder to locate the studs behind the wall. Mark the positions of the studs with a pencil. Mounting the pegboard to the studs will provide added stability and support for heavier items.
- Position the pegboard: Hold the pegboard against the wall, aligning it with the marked outline. Use a level to ensure it is straight and level. Make any necessary adjustments to the position.
- Mark the mounting holes: With the pegboard in position, use a pencil to mark the locations of the mounting holes on the wall. Space the marks evenly along the perimeter of the pegboard and near the corners.
- Create pilot holes: Remove the pegboard and set it aside. Use a drill with a drill bit slightly smaller than the diameter of the screws you will be using. Drill pilot holes at the marked locations. This will make it easier to secure the pegboard to the wall without damaging it.
- Attach the pegboard: With the pilot holes in place, align the pegboard with the holes and carefully place it against the wall. Start by securing the top corners or the screws closest to the studs. Insert the screws through the pilot holes and into the wall, tightening them with a screwdriver or drill. Continue attaching the pegboard along the perimeter, ensuring it remains straight and level.
Once the pegboard is securely mounted to the wall, give it a gentle shake to test its stability. Make any necessary adjustments or tighten the screws if needed. Your pegboard is now ready for the next step: attaching hooks and accessories.
When hanging pegboard for an organized workspace, make sure to use sturdy anchors and screws to securely attach the pegboard to the wall. This will ensure that it can hold the weight of your tools and supplies without sagging or falling.
Step 4: Securely attach hooks and accessories to the pegboard
Now that your pegboard is securely mounted onto the wall, it’s time to add hooks and accessories to customize it for your specific tools and supplies. Follow these steps to ensure a secure and efficient setup:
- Plan your layout: Before attaching any hooks or accessories, take a moment to plan out your desired layout. Consider the size and shape of your tools, as well as the frequency of use. This will help you determine the placement of hooks and maximize the available space.
- Choose the right hooks: There are a wide variety of pegboard hooks available, ranging in size and design. Select the appropriate hooks based on the type of tools and supplies you plan to hang. Choose hooks that fit securely into the holes of the pegboard without wobbling or falling out.
- Attach the hooks: Insert the selected hooks into the desired holes on the pegboard. Give them a firm twist or push to ensure they are securely in place. Avoid overcrowding the hooks as it may cause them to become unstable or difficult to access.
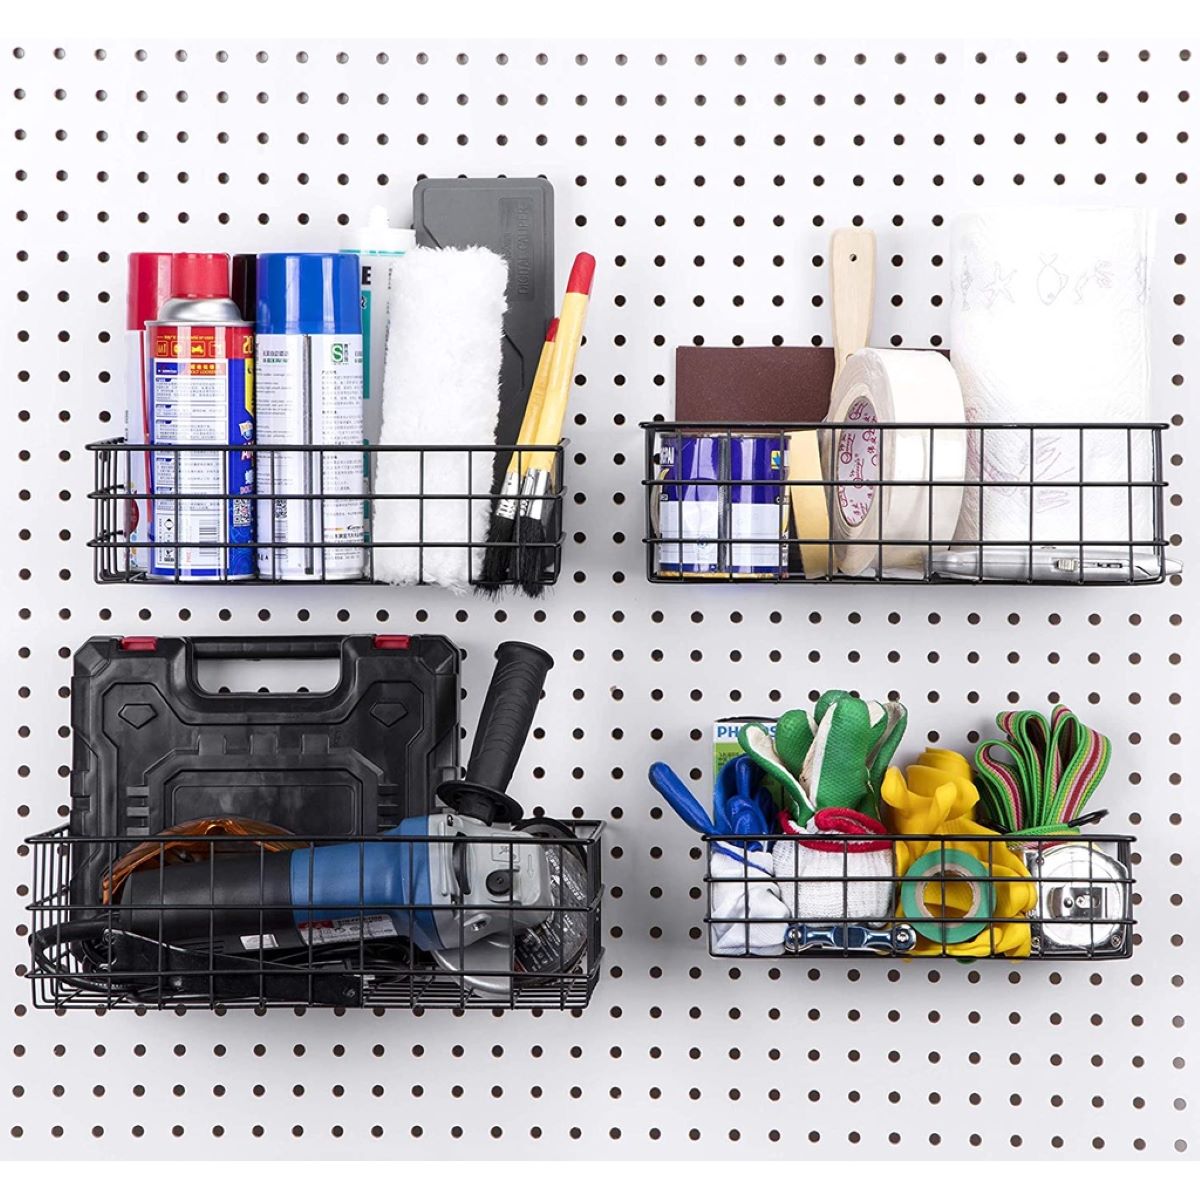
- Add accessories: Depending on your needs, you may also want to include accessories such as baskets, tool holders, or shelves. These can provide additional storage space and further organize your workspace. Follow the manufacturer’s instructions to securely attach these accessories to the pegboard.
- Test stability: Once you have attached the hooks and accessories, gently pull on them to test their stability. Ensure that they are firmly in place and will not easily come loose when you hang or remove items.
Remember to distribute the weight of your tools and supplies evenly across the pegboard. Overloading one section may cause the pegboard to sag or the hooks to bend under the weight.
With your hooks and accessories securely attached, you can now move on to the next step: organizing your tools and supplies on the pegboard.
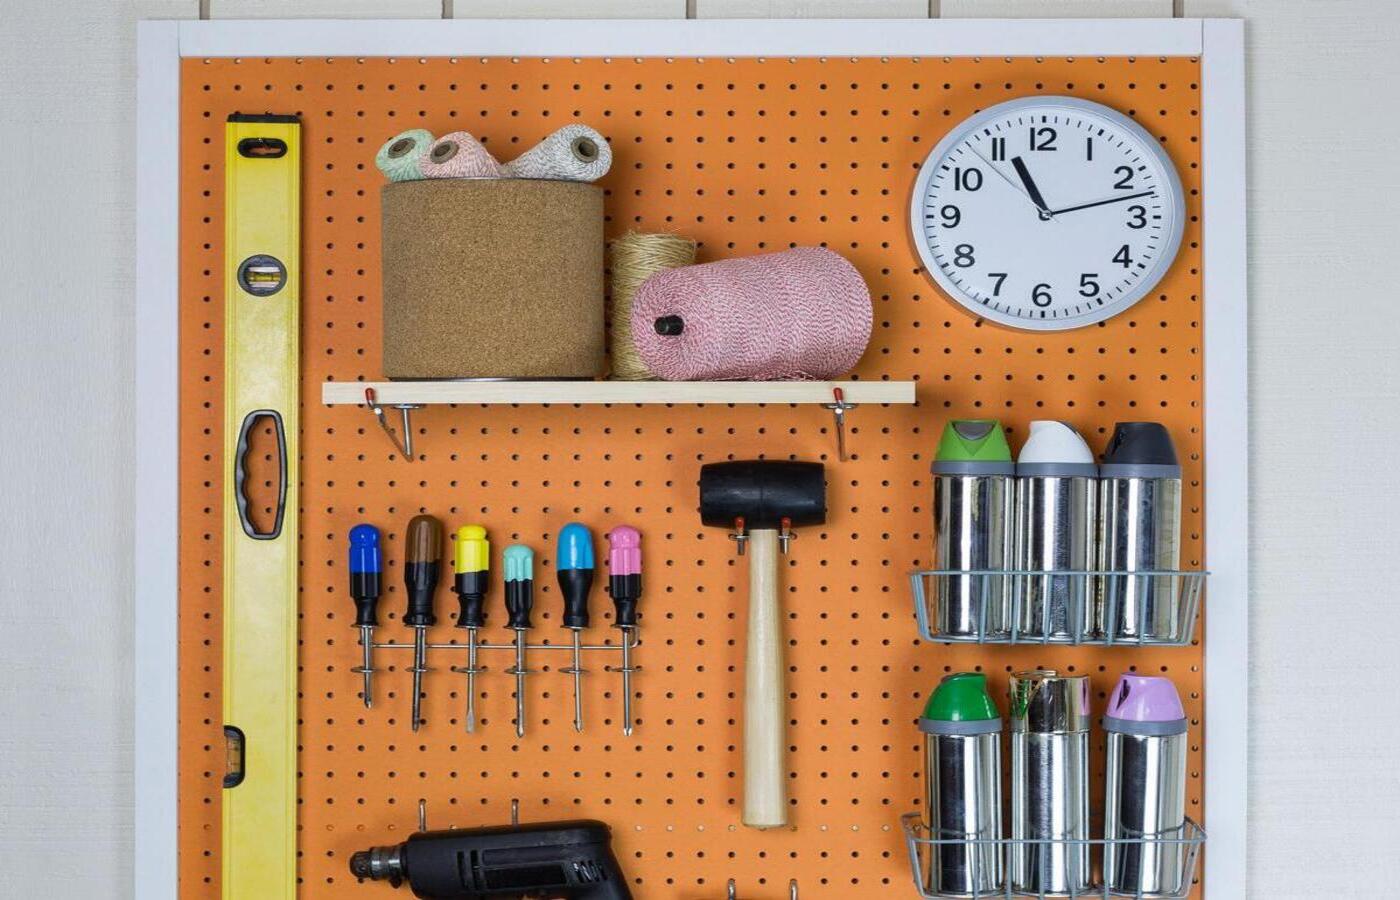
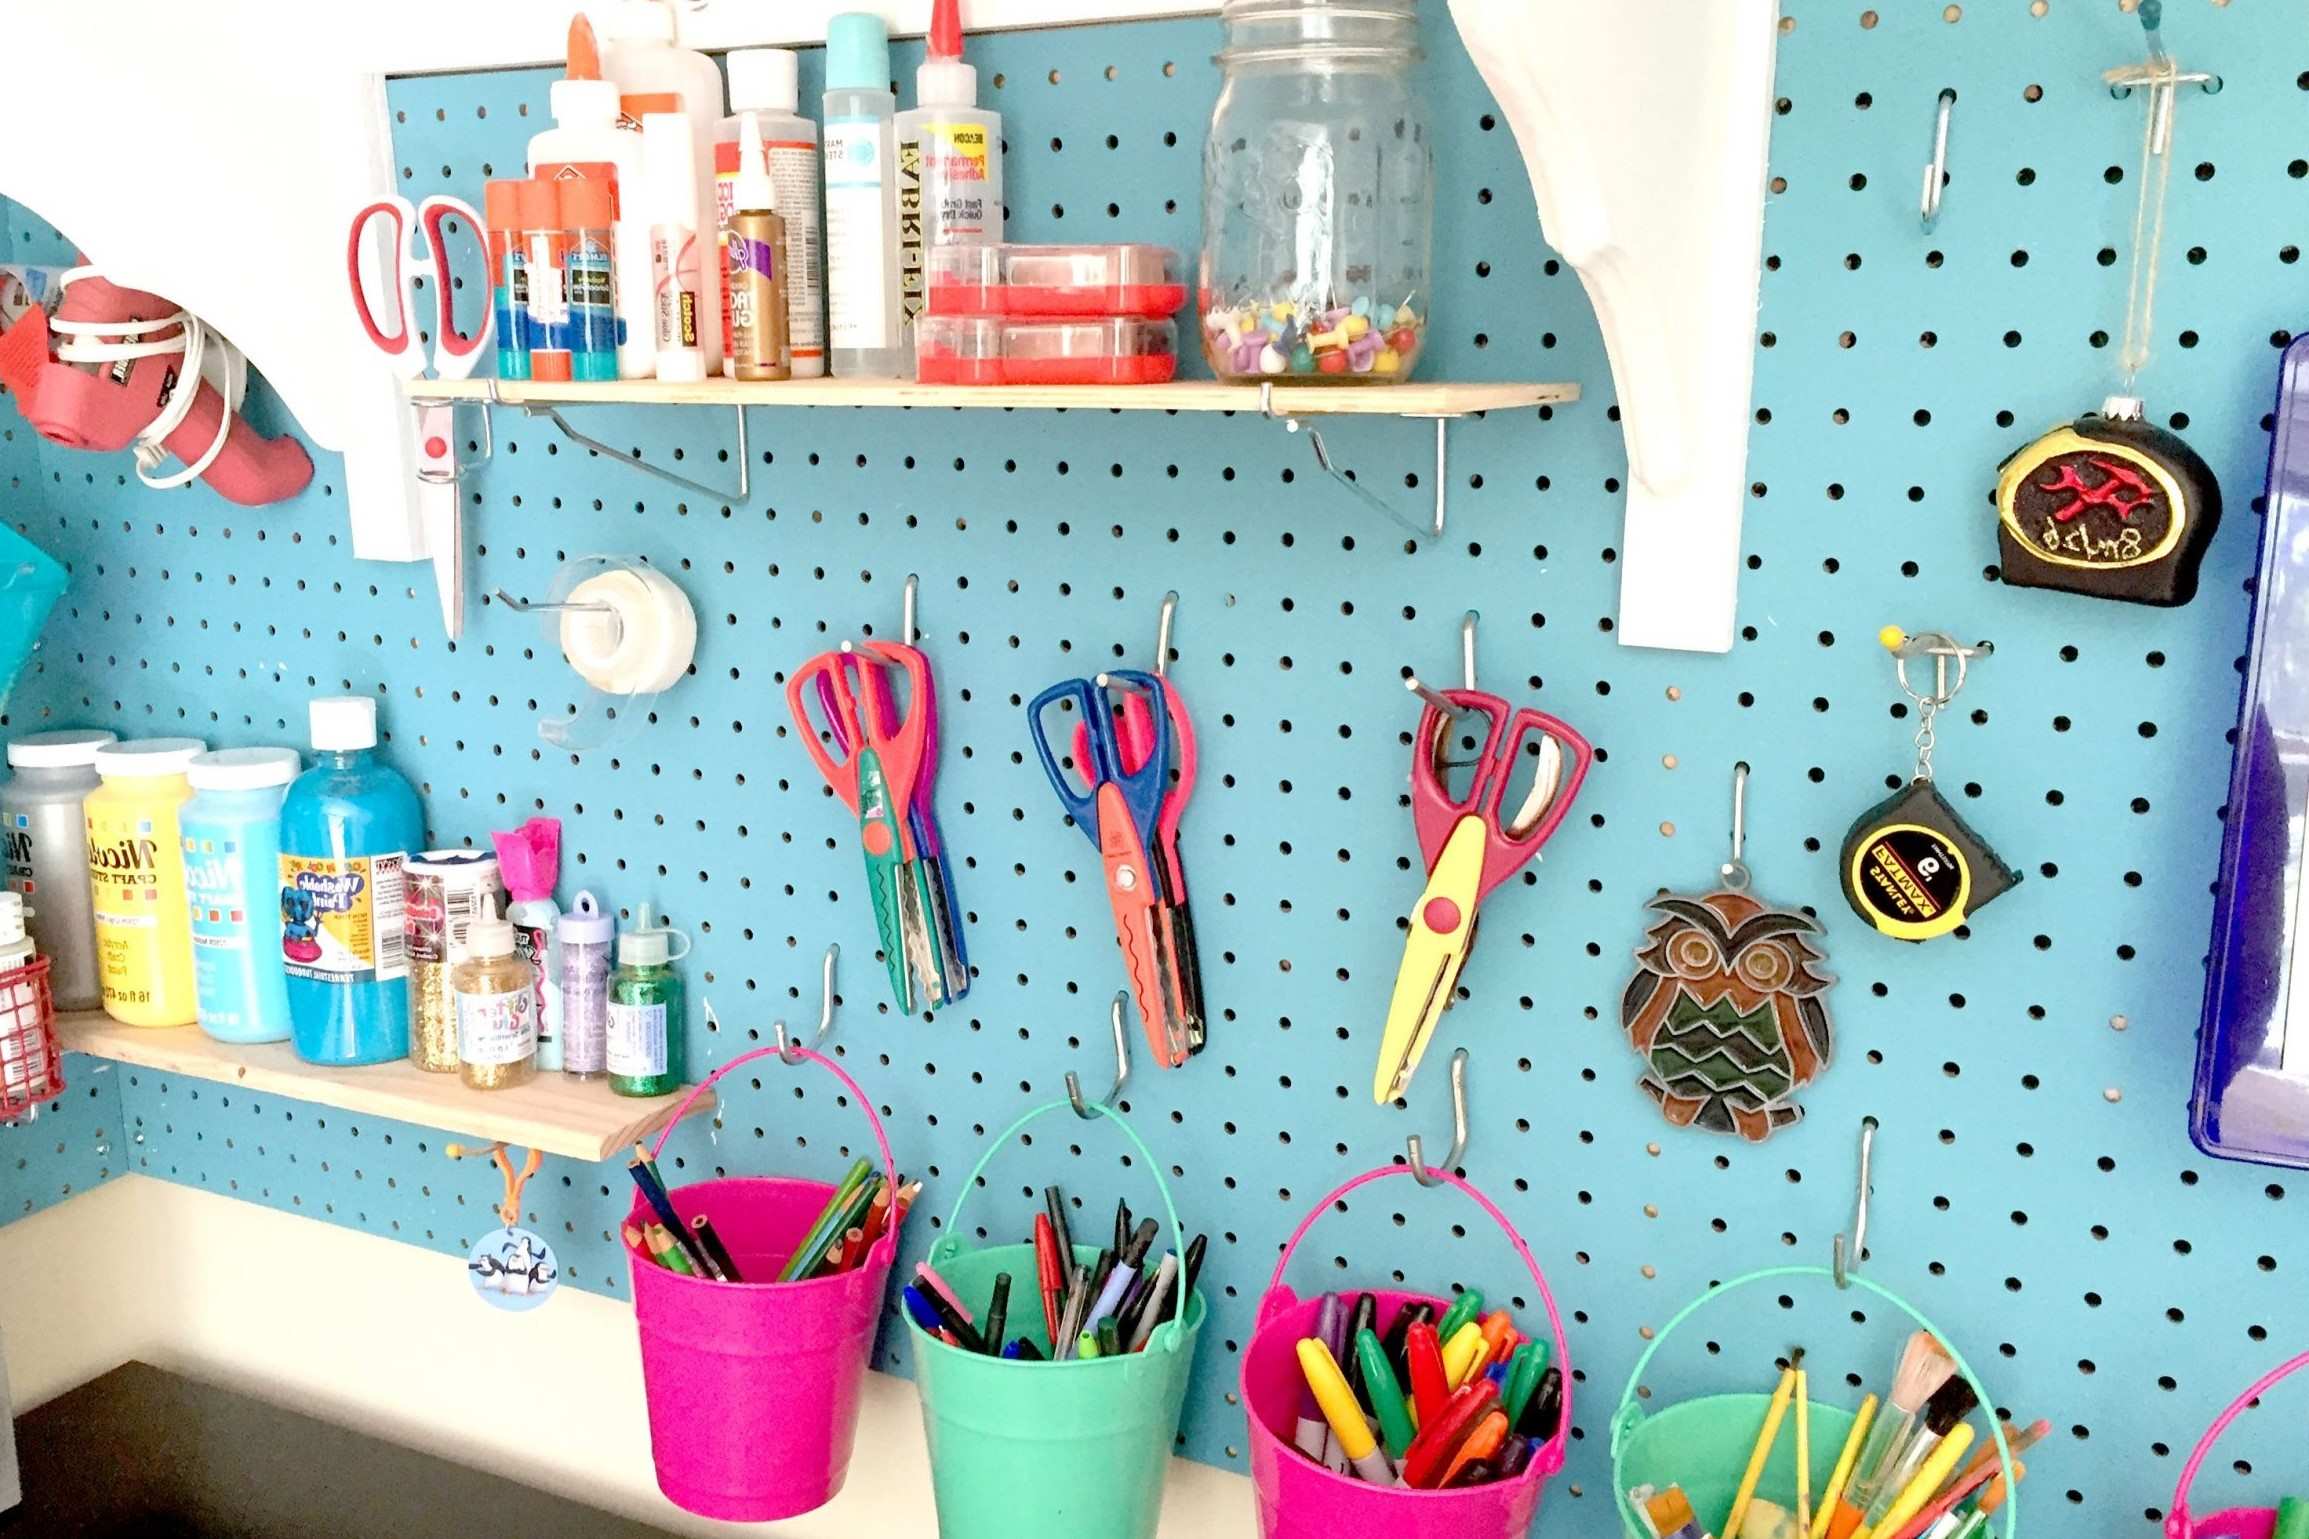
Step 5: Organize your tools and supplies on the pegboard
Now that your pegboard is set up with hooks and accessories, it’s time to organize your tools and supplies in a way that is practical and efficient. Follow these tips to create a well-organized workspace:
- Categorize: Start by categorizing your tools and supplies. Group similar items together, such as hand tools, power tools, or gardening supplies. This will make it easier to locate and access specific items when needed.
- Arrange by frequency of use: Consider the frequency with which you use each tool or supply. Place the most frequently used items within easy reach, preferably at eye level. This ensures quick and convenient access without cluttering the workspace.
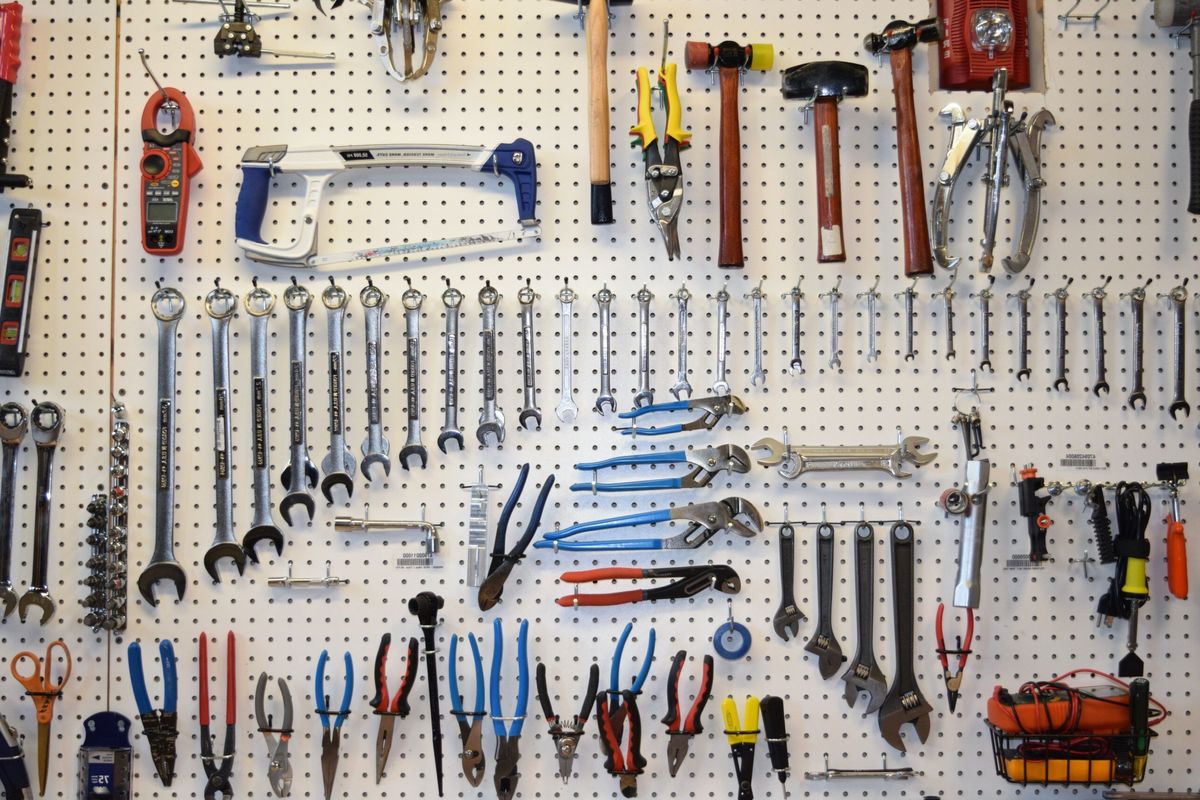
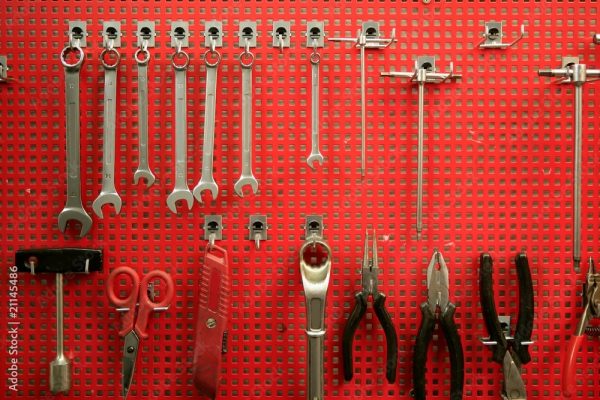
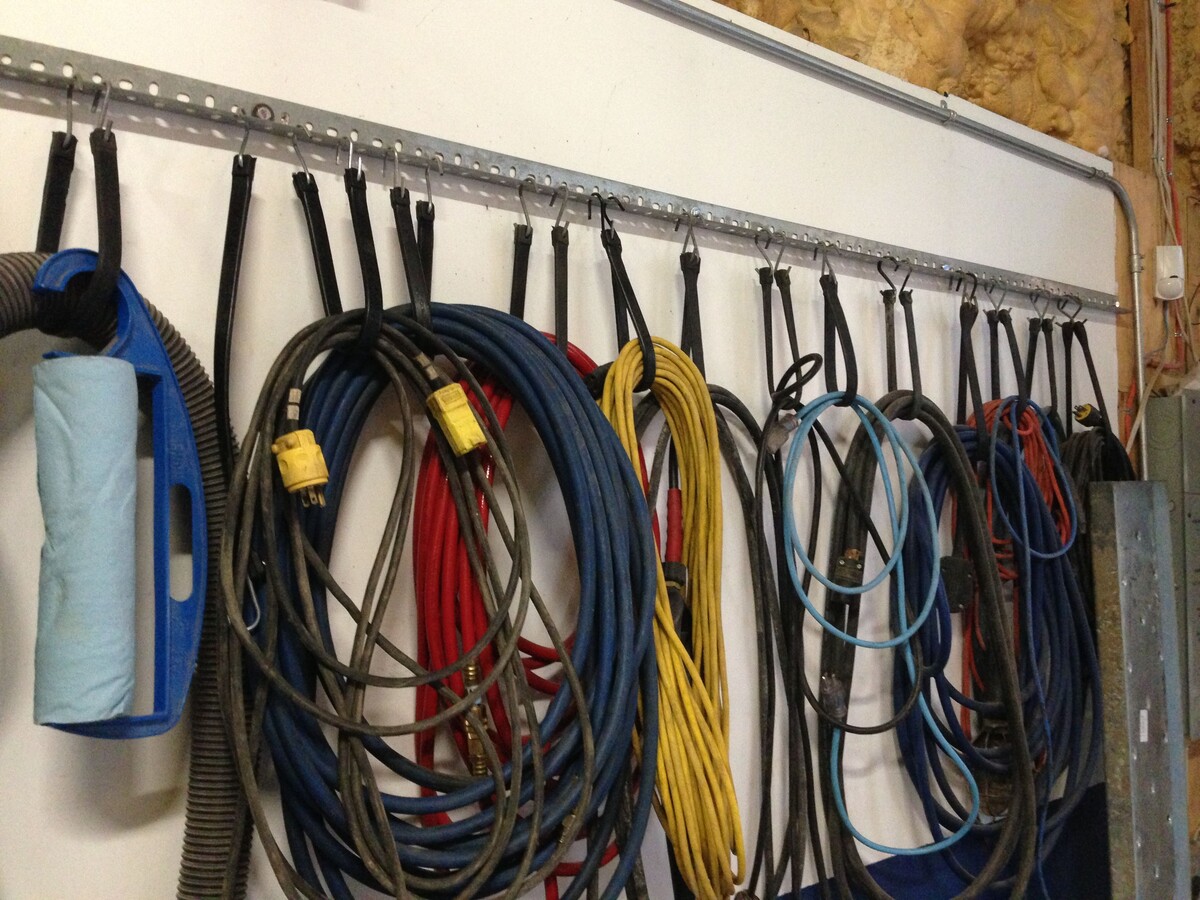
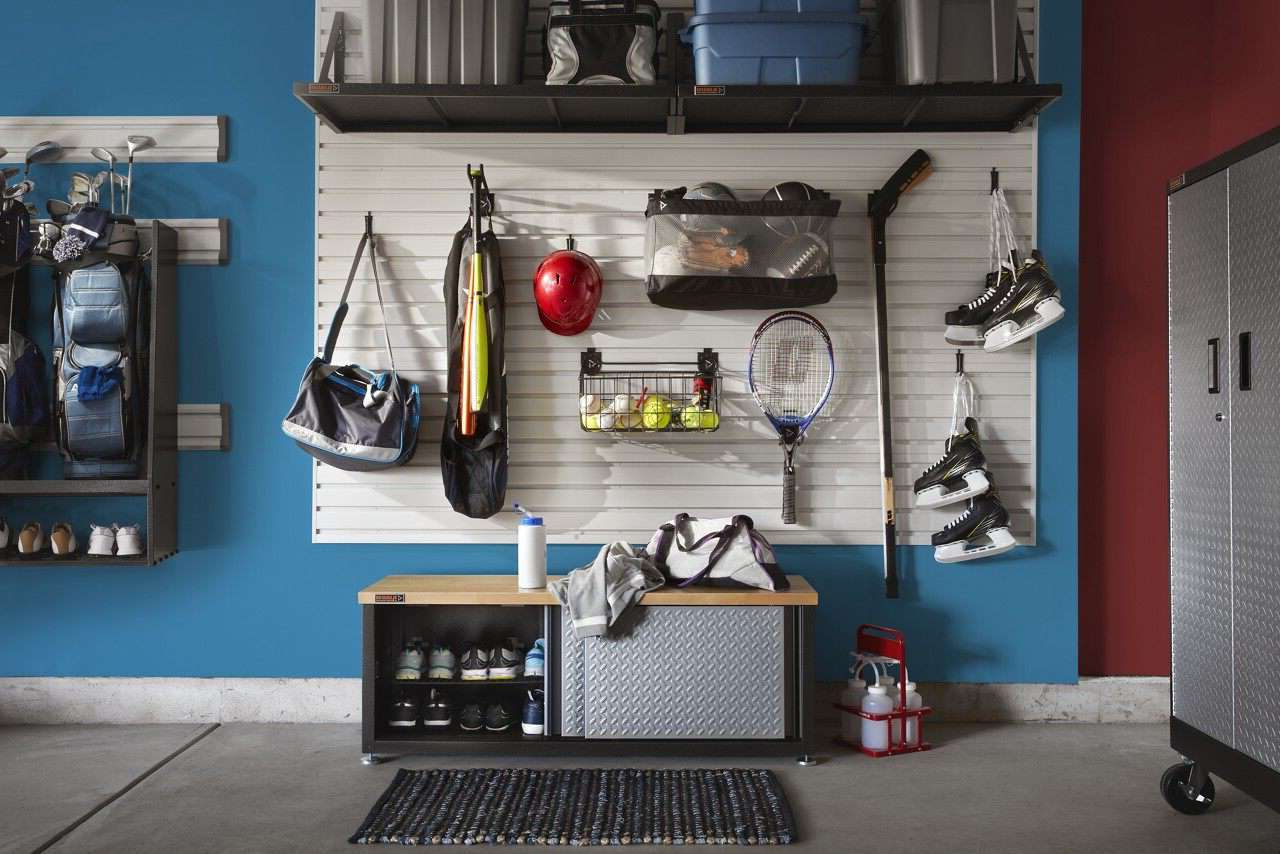
- Utilize hooks and accessories: Use the various hooks and accessories on your pegboard to hang different types of tools. Larger tools, such as hammers or wrenches, can be hung directly on hooks, while smaller items, like screwdrivers or pliers, can be hung from tool holders or magnetic strips.
- Utilize baskets and shelves: Baskets and shelves are great for storing items that don’t hang well on hooks. Use them to hold spray cans, jars of screws, or other small items. Label baskets or use clear ones to easily identify the contents.
- Keep it visually pleasing: Arrange your tools in a visually appealing manner. Consider color-coding or grouping similar items together for a cohesive and organized look. This not only makes it easier to find what you need but also creates a pleasant and motivating workspace.
- Leave room for growth: Allow for some empty space on your pegboard to accommodate future additions or changes to your tool collection. This way, you can easily incorporate new tools without disrupting the overall organization.
Remember to regularly assess and adjust your organization system as your needs evolve. As you become familiar with the pegboard setup, you may find certain tools or supplies that would benefit from a different placement or arrangement. Don’t be afraid to experiment and make changes to optimize your workspace.
With your tools and supplies organized on the pegboard, you’ll enjoy the benefits of easy access and a clutter-free workspace. Now that everything is in place, let’s move on to the final step: maintaining and adjusting the pegboard setup over time.
Step 6: Maintaining and adjusting the pegboard setup
Once your pegboard setup is complete, it’s important to maintain and adjust it over time to ensure its continued effectiveness. Follow these tips to keep your pegboard organized and functional:
- Regularly clean your pegboard: Dust and debris can accumulate on the pegboard over time. Keep it clean by wiping it down with a damp cloth or using a gentle cleaning solution. This will help maintain its appearance and prevent dirt from affecting the functionality of your tools and supplies.
- Reassess your organization system: Periodically reassess your organization system to identify any tools or supplies that may need to be relocated or re-categorized. As your needs and preferences change, it’s important to adjust your pegboard setup accordingly.
- Consider additional hooks and accessories: As you acquire new tools or supplies, you may find that your existing hooks and accessories are not sufficient. Invest in additional hooks, holders, or shelves to accommodate your expanding collection. This will help ensure that everything has its designated place.
- Optimize space usage: Get creative with space utilization on the pegboard. Consider using pegboard spacers or offset hooks to maximize vertical space. This will allow you to efficiently utilize the entire surface of the pegboard, making the most of your storage capacity.
- Adjust as needed: If you find that certain tools or supplies are frequently used together, consider rearranging their placement on the pegboard to improve workflow. Keep the items you use in combination close to each other for easy access and efficiency.
- Regularly declutter: Over time, you may accumulate tools or supplies that are no longer useful. Take the opportunity to declutter your pegboard and remove any items that you no longer need. This will free up space for new additions and maintain an organized and streamlined workspace.
By regularly maintaining and adjusting your pegboard setup, you’ll ensure that your workspace remains efficient, organized, and visually pleasing. Adapting to your evolving needs will help you make the most of your pegboard and enjoy a clutter-free and productive environment.
Congratulations! You have successfully learned how to hang pegboard for an organized workspace. By following these steps, you can transform your cluttered workspace into a functional and visually appealing area. Enjoy the benefits of easy access to your tools and supplies, increased productivity, and a sense of order and efficiency in your work environment.
Now, go ahead and create your organized workspace with pegboard!
Conclusion
Congratulations on completing the process of hanging pegboard for an organized workspace! By following the steps outlined in this article, you have transformed your cluttered space into an efficient and visually pleasing area. With your tools and supplies neatly organized on the pegboard, you can now enjoy the benefits of easy access, increased productivity, and a well-structured work environment.
Remember, maintaining and adjusting your pegboard setup is key to its long-term effectiveness. Regularly clean the pegboard, reassess your organization system, and make necessary adjustments as your needs evolve. This will ensure that your workspace remains tidy, functional, and optimized for your specific work requirements.
Utilizing various hooks, accessories, baskets, and shelves on the pegboard provides flexibility and customization, enabling you to create a personalized organizational system. Categorize your tools and supplies, arrange them by frequency of use, and visually enhance the overall look of your workspace. A well-organized and visually appealing work area not only improves your efficiency but also enhances your motivation and enjoyment of the tasks at hand.
Finally, don’t forget to regularly declutter your pegboard to eliminate any items that are no longer needed. This will free up valuable space, allowing for future additions and maintaining an organized and streamlined workspace.
By implementing these practices, you will continue to reap the benefits of an organized workspace, ensuring a productive and stress-free environment. Enjoy the ease of finding your tools, the efficiency of your workflow, and the satisfaction of a well-kept work area.
Now, go ahead and make good use of your newly organized pegboard workspace! Stay focused, stay productive, and let your creativity and efficiency thrive in your clutter-free environment.
Frequently Asked Questions about How To Hang Pegboard For An Organized Workspace
Was this page helpful?
At Storables.com, we guarantee accurate and reliable information. Our content, validated by Expert Board Contributors, is crafted following stringent Editorial Policies. We're committed to providing you with well-researched, expert-backed insights for all your informational needs.


0 thoughts on “How To Hang Pegboard For An Organized Workspace”