Home>Articles>How To Install Heated Floors For Warm Feet All Year
Articles
How To Install Heated Floors For Warm Feet All Year
Modified: March 21, 2024
Learn all about installing heated floors to keep your feet warm throughout the year. Find expert articles and tips on how to make your floors cozy and comfortable.
(Many of the links in this article redirect to a specific reviewed product. Your purchase of these products through affiliate links helps to generate commission for Storables.com, at no extra cost. Learn more)
Introduction
Imagine waking up on a chilly winter morning and stepping onto warm floors that instantly embrace your feet. With heated floors, you can enjoy the luxury of warm feet all year round. Whether you’re building a new home or renovating your current space, installing heated floors can be a game-changer in terms of comfort and energy efficiency.
In this article, we will guide you through the step-by-step process of installing heated floors. From gathering the necessary materials to connecting the heating system, we will cover everything you need to know to ensure a successful installation.
Before diving into the installation process, it’s essential to understand the two main types of heated floors: electric and hydronic. Electric systems use heating cables or mats, while hydronic systems use hot water or antifreeze-filled tubes. Both types have their pros and cons, so it’s important to consider your specific needs and preferences before making a decision.
Now let’s get started on the installation of your heated floors to bring warmth and comfort to every step you take.
Key Takeaways:
- Experience the luxury of warm feet all year round by following our comprehensive guide to installing heated floors. Enjoy energy-efficient heating and create a cozy living space for years to come.
- Transform your home into a haven of warmth and comfort with heated floors. From gathering materials to enjoying the luxury of warm feet, our step-by-step guide ensures a successful and enjoyable installation process.
Read more: How To Install Heated Floors
Step 1: Gather Materials and Tools
Before embarking on your heated floor installation journey, it’s crucial to gather all the necessary materials and tools. This will ensure a smooth and efficient installation process. Here is a comprehensive list of what you will need:
- Heating system: This includes either electric heating cables or hydronic tubes, depending on the type of system you choose.
- Thermostat: A thermostat will allow you to control the temperature of your heated floors, ensuring optimal comfort.
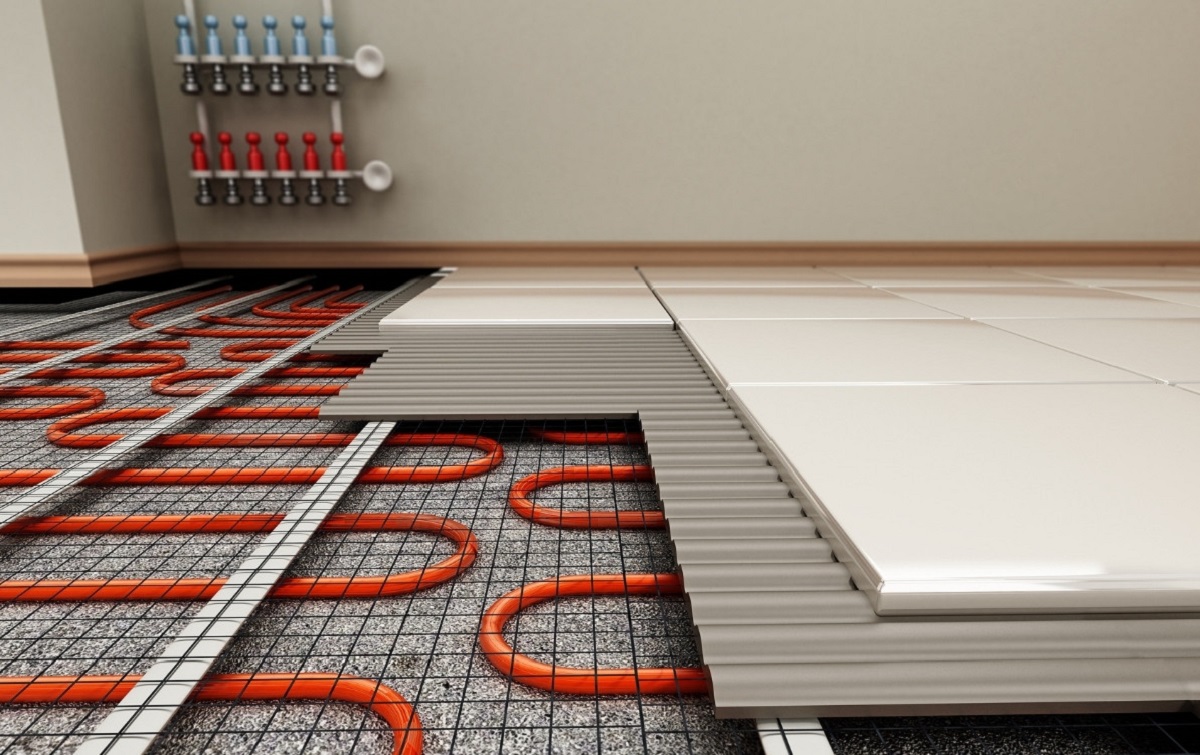
- Underlayment: Underlayment acts as a barrier between the subfloor and the heating system, providing insulation and supporting heat distribution.
- Measuring tape: Precise measurements are crucial for a successful installation, so make sure to have a measuring tape on hand.
- Trowel: A trowel will be used to spread adhesive or thinset during the installation process.
- Utility knife: A utility knife will come in handy for cutting and trimming materials such as underlayment and flooring.
- Electric drill: An electric drill will be needed to create holes for the thermostat and other electrical connections.
- Screws or nails: These will be required to secure the heating system and the underlayment to the subfloor.
- Level: A level will ensure that your floors are properly aligned and flat, allowing for even heat distribution.
- Flooring material: Choose your preferred flooring material, such as tiles, hardwood, or laminate.
Once you have gathered all the materials and tools, it’s a good idea to organize them and have them easily accessible throughout the installation process. This will save you time and frustration, allowing for a more efficient and enjoyable experience.
Now that you have everything you need, it’s time to move on to the next step: preparing the floors for installation.
Step 2: Prepare the Floors
Proper preparation of the floors is crucial for a successful heated floor installation. This step involves ensuring that the subfloor is clean, level, and ready to accommodate the heating system. Here’s a detailed guide on how to prepare your floors:
- Clean the subfloor: Start by thoroughly cleaning the subfloor to remove any dirt, dust, or debris. This will create a clean surface for the underlayment and heating system.
- Check the subfloor condition: Inspect the subfloor for any damages, such as cracks or uneven areas. Repair any issues to ensure a smooth and stable surface.
- Level the subfloor: Use a level to check for any uneven spots on the subfloor. If you identify any high or low areas, use a leveling compound to create a flat surface.
- Install the underlayment: Once the subfloor is clean and leveled, install the underlayment. This acts as a thermal barrier and helps distribute heat evenly across the floor. Follow the manufacturer’s instructions to install the underlayment properly.
- Secure the underlayment: Secure the underlayment to the subfloor using screws or nails, ensuring it is tightly attached and doesn’t move during the installation process.
- Inspect the installation area: Before proceeding, double-check the installation area to ensure that there are no obstructions or obstacles that may hinder the installation of the heating system.
By following these steps, you will create a solid foundation for your heated floor system. Preparing the floors properly will ensure optimal performance and longevity of your heating system.
With the floors prepared, it’s time to move on to the next step: installing the heating elements.
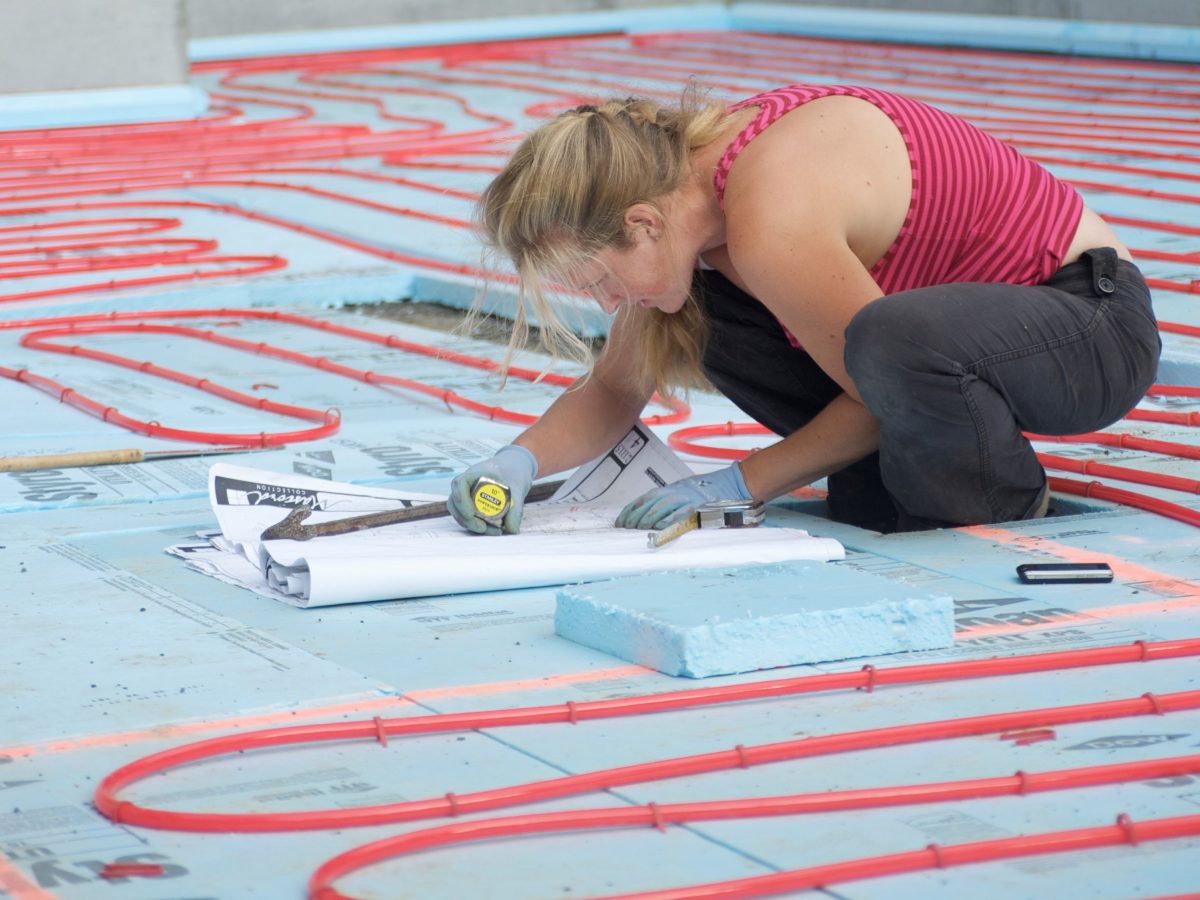
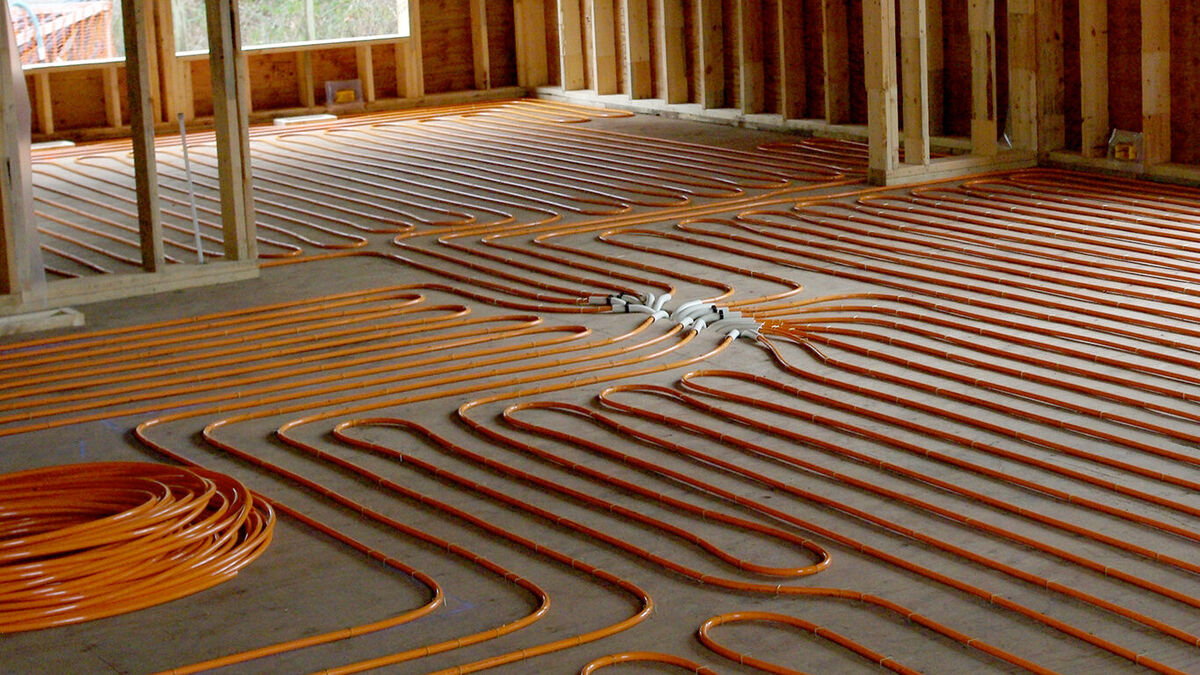
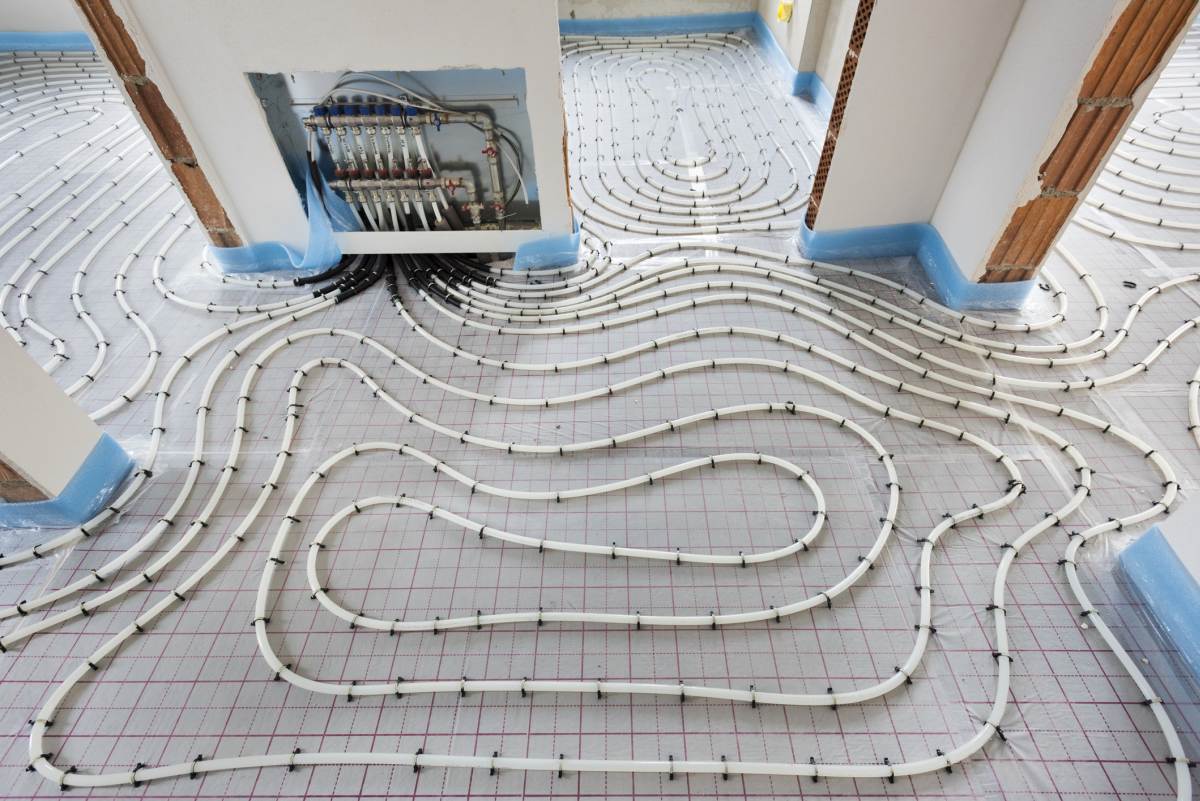
Step 3: Install the Heating Elements
Now that your floors are prepared, it’s time to install the heating elements. The method will differ depending on whether you have chosen an electric or hydronic system. Let’s go through the process for each type:
Electric System:
- Begin by referring to the manufacturer’s instructions for the specific electric heating system you have. Familiarize yourself with the installation process and any safety precautions.
- Measure and mark the layout: Use a measuring tape and layout plans to mark the locations where the heating cables or mats will be installed. Ensure that the spacing is consistent for efficient heat distribution.
- Secure the heating cables or mats: Adhere the heating cables or mats to the subfloor as per the manufacturer’s recommendations. Use a trowel and the recommended adhesive or thinset to secure them in place.
- Inspect the installation: Double-check the installed wiring to ensure there are no crossed or damaged cables. Pay attention to maintaining proper spacing and avoiding overlaps or kinks.
Read more: How To Install In Floor Heating In Concrete
Hydronic System:
- Consult a professional: Due to the complexity of hydronic systems, it’s recommended to consult a professional plumber or heating specialist to ensure proper installation.
- Install the manifold: The manifold is the central distribution point for the hot water or antifreeze solution. Follow the manufacturer’s instructions for installing the manifold in the designated area.
- Lay out the tubing: Using the layout plans as a guide, lay out the tubing according to the manufacturer’s recommendations. Secure the tubing, ensuring it is evenly spaced and doesn’t have any sharp bends or kinks.
- Connect the tubing: Connect the tubing to the manifold, following the specific instructions provided by the manufacturer. Make sure the connections are tight and leak-free.
Whether you’re installing an electric or hydronic system, it’s crucial to follow safety precautions and guidelines provided by the manufacturer. Once the heating elements are installed, you’re ready to move on to the next step: connecting the heating system.
Step 4: Connect the Heating System
With the heating elements in place, it’s time to connect the heating system. This step involves making electrical or plumbing connections, depending on the type of system you have chosen. Here’s a step-by-step guide on how to connect your heating system:
Electric System:
- Locate the manufacturer-provided junction box: The junction box is where the heating system’s electrical connections will be made. Follow the manufacturer’s instructions to find it.
- Make electrical connections: If you’re comfortable working with electrical components, carefully connect the heating system’s cables to the appropriate electrical wiring inside the junction box. Ensure all connections are secure and follow electrical code regulations.
- Install the thermostat: Mount the thermostat in a convenient location within reach. Connect the thermostat to the designated wires in the junction box according to the thermostat manufacturer’s instructions. Test the thermostat to ensure it is functioning properly.
- Double-check the electrical connections: Before proceeding, inspect all electrical connections and ensure they are secure and properly insulated. This will help prevent any electrical hazards.
Read more: How To Install In Floor Heating In Concrete
Hydronic System:
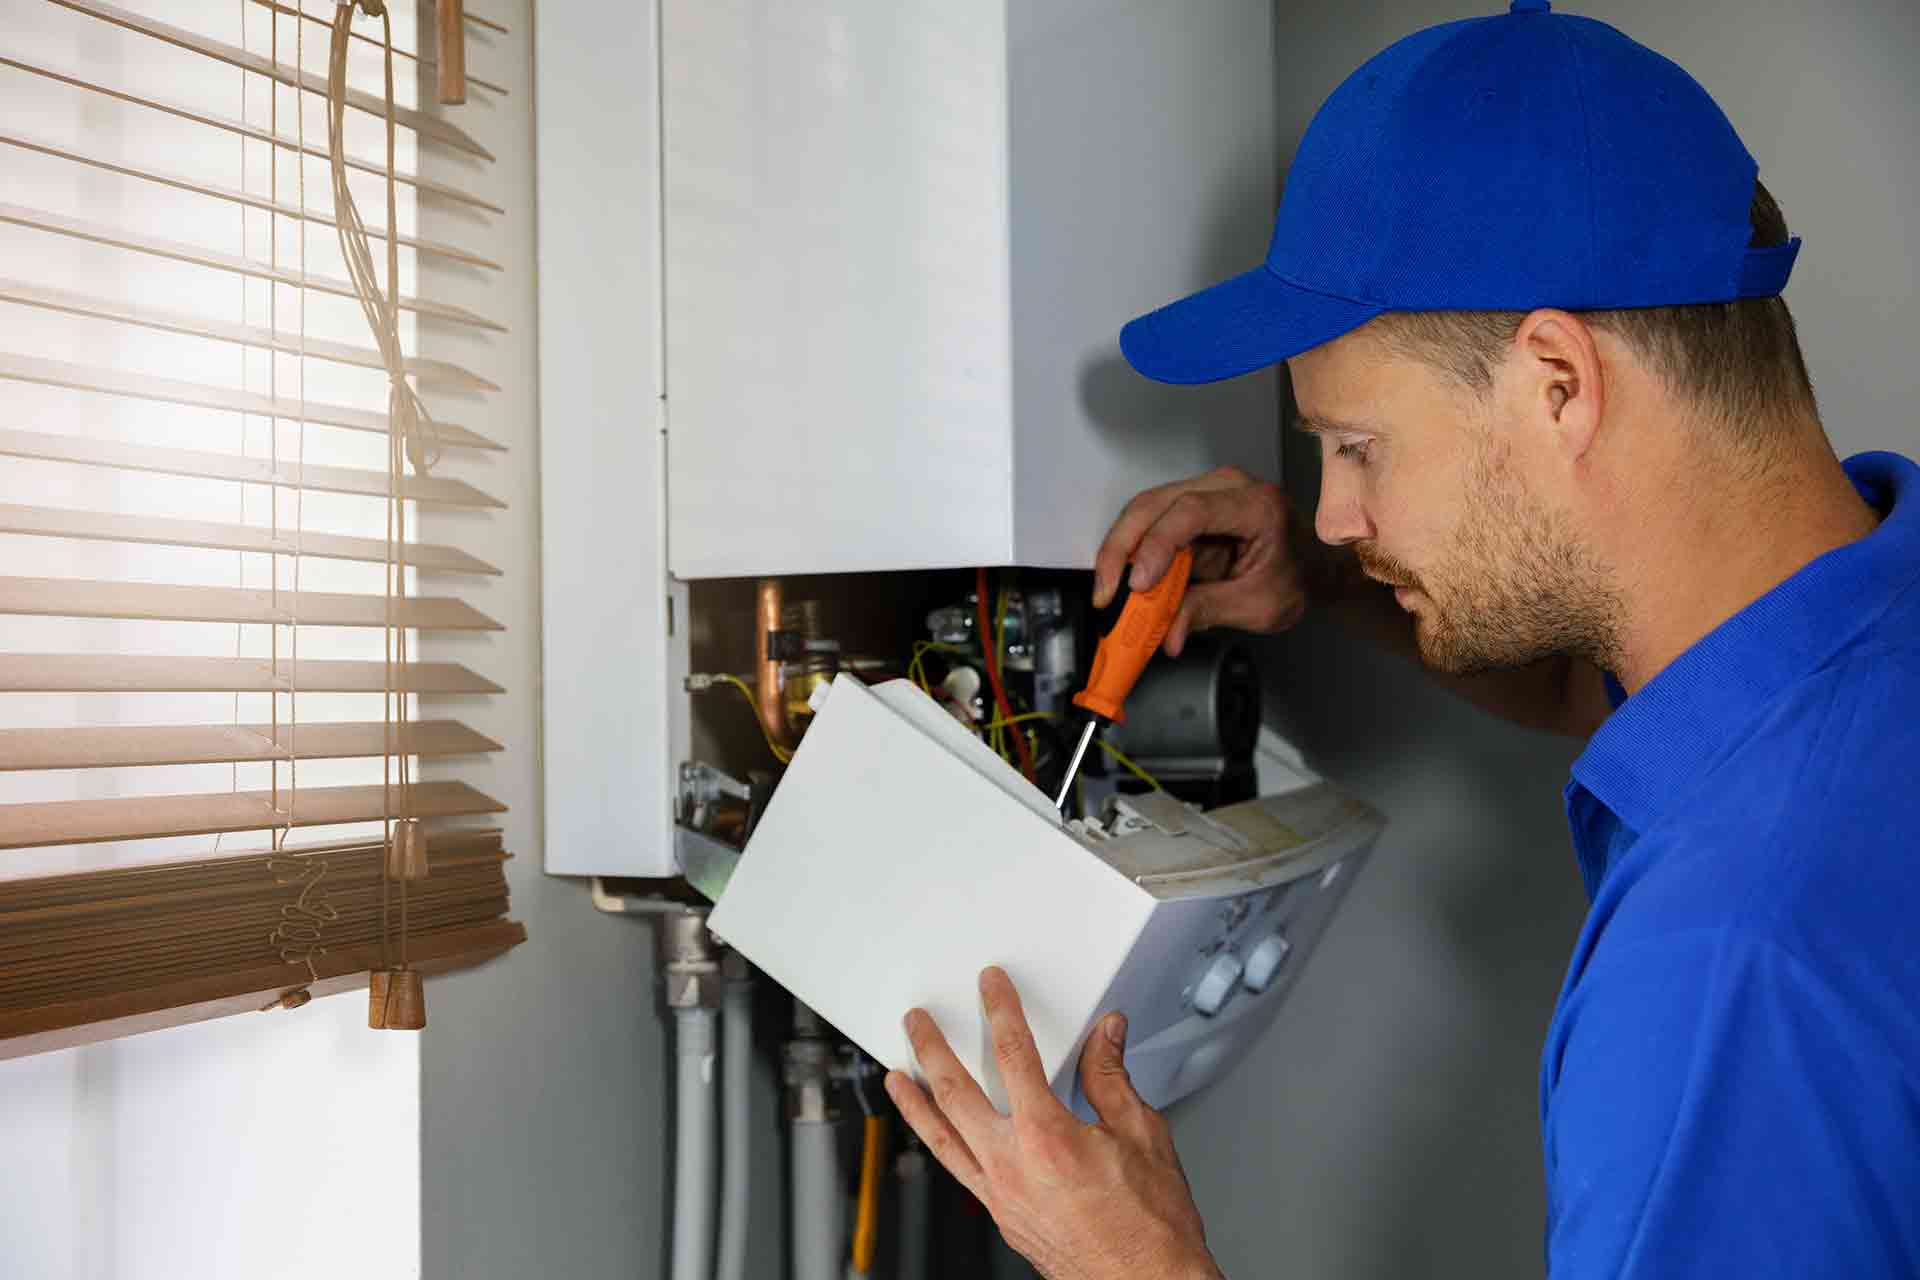
- Connect the tubing to the heat source: The tubing for a hydronic system needs to be connected to the heat source, which can be a boiler, water heater, or other heat-producing appliance. Consult a professional plumber or heating specialist to ensure the connections are made correctly following local plumbing codes.
- Install the pump and control system: Install the pump and control system to circulate hot water or antifreeze through the tubing. Follow the manufacturer’s instructions for proper installation, and ensure the system is properly balanced for efficient heating.
- Set the desired temperature and mode: Once all the connections are made, set the temperature and mode on the control system according to your preferences. Test the system to ensure it is working effectively.
During the connection process, it’s essential to take necessary safety precautions and, if needed, seek professional assistance for electrical or plumbing connections. Once the heating system is connected, you’re ready to move on to the next step: testing the heating system.
Read more: How To Install Heated Floors On Concrete
Step 5: Test the Heating System
After installing and connecting the heating system, it’s crucial to test its functionality to ensure optimal performance. Testing the system will help identify any issues or malfunctions that need to be addressed before moving forward. Here’s how you can test your heating system:
- Turn on the heating system: Start by turning on the heating system and setting it to a low temperature. Allow it to run for a few hours to ensure that the heat is distributed evenly throughout the floor.
- Check for hotspots or cold spots: Walk across the heated floor and carefully inspect it for any hotspots or cold spots. This will help identify any areas that may require adjustments or further attention.
- Measure the temperature: Use a thermometer to measure the temperature of the floor surface. Ensure that it matches the desired temperature set on the thermostat.
- Adjust thermostat settings: Test the thermostat by adjusting the temperature settings and observing the system’s response. Ensure that the heating system operates smoothly and maintains the desired temperature consistently.
- Monitor energy consumption: Keep track of the energy consumption of your heating system. Compare it with the manufacturer’s specifications to ensure that it is operating efficiently.
If you notice any issues during the testing phase, such as uneven heat distribution or inconsistent temperatures, it’s important to address them promptly. Consult the manufacturer’s troubleshooting guide or seek assistance from a professional to resolve any problems.
Once you are satisfied with the performance and functionality of the heating system, you can proceed to the next step: laying the flooring.
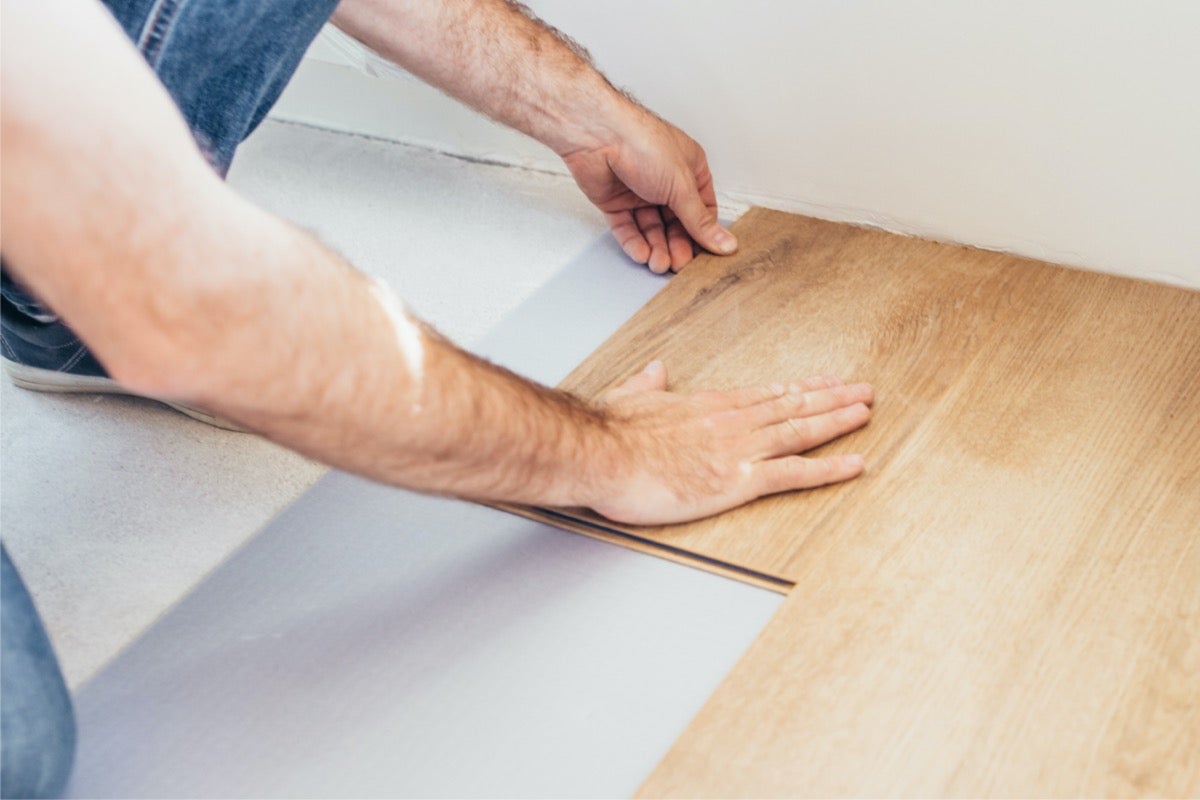
Step 6: Lay the Flooring
With the heating system tested and functioning properly, it’s time to lay the flooring of your choice. The type of flooring you select will depend on your personal preferences and the overall design aesthetic of your space. Here’s a general guide on how to lay the flooring over your heated floors:
- Prepare the flooring material: Follow the manufacturer’s instructions to prepare the chosen flooring material. This may involve acclimatizing the flooring to the room temperature or applying any necessary adhesives.
- Start from a corner: Begin laying the flooring from a corner of the room. This will provide a starting point and help ensure a neat and organized installation.
- Follow the manufacturer’s guidelines: Refer to the flooring manufacturer’s instructions for proper installation techniques. This may include using adhesive, interlocking pieces, or other specific methods.
- Cut and trim the flooring: Use a utility knife or appropriate cutting tool to trim and fit the flooring around obstacles, such as door frames or vents. Take measurements carefully for precise cuts.
- Leave expansion gaps: Remember to leave small expansion gaps around the perimeter of the room to accommodate for any potential expansion or contraction of the flooring material.
- Install the flooring completely: Continue laying the flooring across the room until it is completely installed. Follow the manufacturer’s guidelines for any additional steps, such as applying finishing touches or sealing the flooring if required.
During the flooring installation process, be mindful of maintaining the integrity of the heating system. Avoid damaging or interfering with the heating elements, and ensure that the flooring is securely placed over the system.
Once the flooring is installed, you’re ready to experience the ultimate comfort of your heated floors. Proceed to the next and final step: enjoying warm feet all year round!
When installing heated floors, make sure to properly insulate the subfloor to maximize the efficiency of the system and reduce heat loss. This will help keep your feet warm all year round.
Step 7: Enjoy Warm Feet All Year
Congratulations! You have successfully installed heated floors, and now it’s time to sit back, relax, and enjoy the luxurious warmth under your feet, no matter the season. Here are a few tips on how to fully embrace the benefits of your heated floors:
- Set the ideal temperature: Adjust the thermostat settings to your desired temperature. Experiment with different settings to find the perfect balance of warmth and comfort for your space.
- Experience energy savings: Heating your floors can be an energy-efficient option. Take advantage of the energy-saving feature on your thermostat to optimize energy consumption and save on heating costs.
- Control individual zones: If you have multiple heated zones in your home, utilize the zoning feature on your thermostat to regulate the temperature in different areas according to preferences and usage patterns.
- Enjoy cozy mornings: Start your mornings off on a pleasant note by setting the timer on your thermostat to warm up your floors a few minutes before you wake up. This will ensure that your feet are greeted by a cozy surface as soon as you step out of bed.
- Extend the comfort to other rooms: Consider expanding the installation of heated floors to other areas of your home, such as bathrooms or kitchens, to experience the comfort throughout your living space.
- Maintain your floors: Regularly clean and maintain your flooring to ensure its longevity and optimum performance. Follow the manufacturer’s instructions for cleaning and care to preserve the beauty of your heated floors.
- Share the warmth: Invite friends and family over to experience the joy of warm floors. Create a cozy and inviting atmosphere that will make everyone feel welcome and comfortable in your heated space.
Remember, the key to fully enjoying your heated floors is to find the perfect balance between comfort and energy efficiency. Adjust the settings according to your preferences and stay mindful of energy usage.
With heated floors, you can transform the atmosphere of your home, creating a welcoming and comfortable environment all year round. So kick off your shoes and revel in the warmth and luxury of your newly installed heated floors!
Thank you for following this comprehensive guide on installing heated floors. We hope you found it helpful and enjoy the benefits of warm feet and a cozy living space for years to come.
Conclusion
Congratulations on completing the installation of your heated floors! You have transformed your living space into a haven of warmth and comfort. By following the step-by-step guide in this article, you have successfully installed a heating system that will provide you with the luxury of warm feet all year round.
From gathering the necessary materials and tools to preparing the floors, installing the heating elements, connecting the system, testing its functionality, laying the flooring, and finally, enjoying the warmth, you have gone through a comprehensive process to ensure a successful installation.
Heated floors not only provide you with a cozy and inviting living space, but they also offer energy-efficient heating options. By properly using and maintaining your heated floors, you can experience cost savings while relishing unparalleled comfort.
Remember to adjust the thermostat settings to your desired temperature, take advantage of energy-saving features, and consider expanding the installation to other rooms in your home. Share the warmth with others and create a welcoming environment where everyone can enjoy the luxury of warm feet.
Maintain your floors regularly to ensure their longevity and optimum performance. Follow the manufacturer’s instructions for cleaning and care to preserve the beauty of your heated floors.
We hope that this guide has been informative and helpful in guiding you through the installation process. Enjoy the benefits of your heated floors, and may they bring you comfort, warmth, and joy for years to come.
Frequently Asked Questions about How To Install Heated Floors For Warm Feet All Year
Was this page helpful?
At Storables.com, we guarantee accurate and reliable information. Our content, validated by Expert Board Contributors, is crafted following stringent Editorial Policies. We're committed to providing you with well-researched, expert-backed insights for all your informational needs.


0 thoughts on “How To Install Heated Floors For Warm Feet All Year”