Articles
How To Install Heated Floor Under Tile
Modified: October 20, 2024
Learn how to install a heated floor under tile with our informative articles. Achieve cozy and warm tiles in your home with our step-by-step guides and expert tips.
(Many of the links in this article redirect to a specific reviewed product. Your purchase of these products through affiliate links helps to generate commission for Storables.com, at no extra cost. Learn more)
Introduction
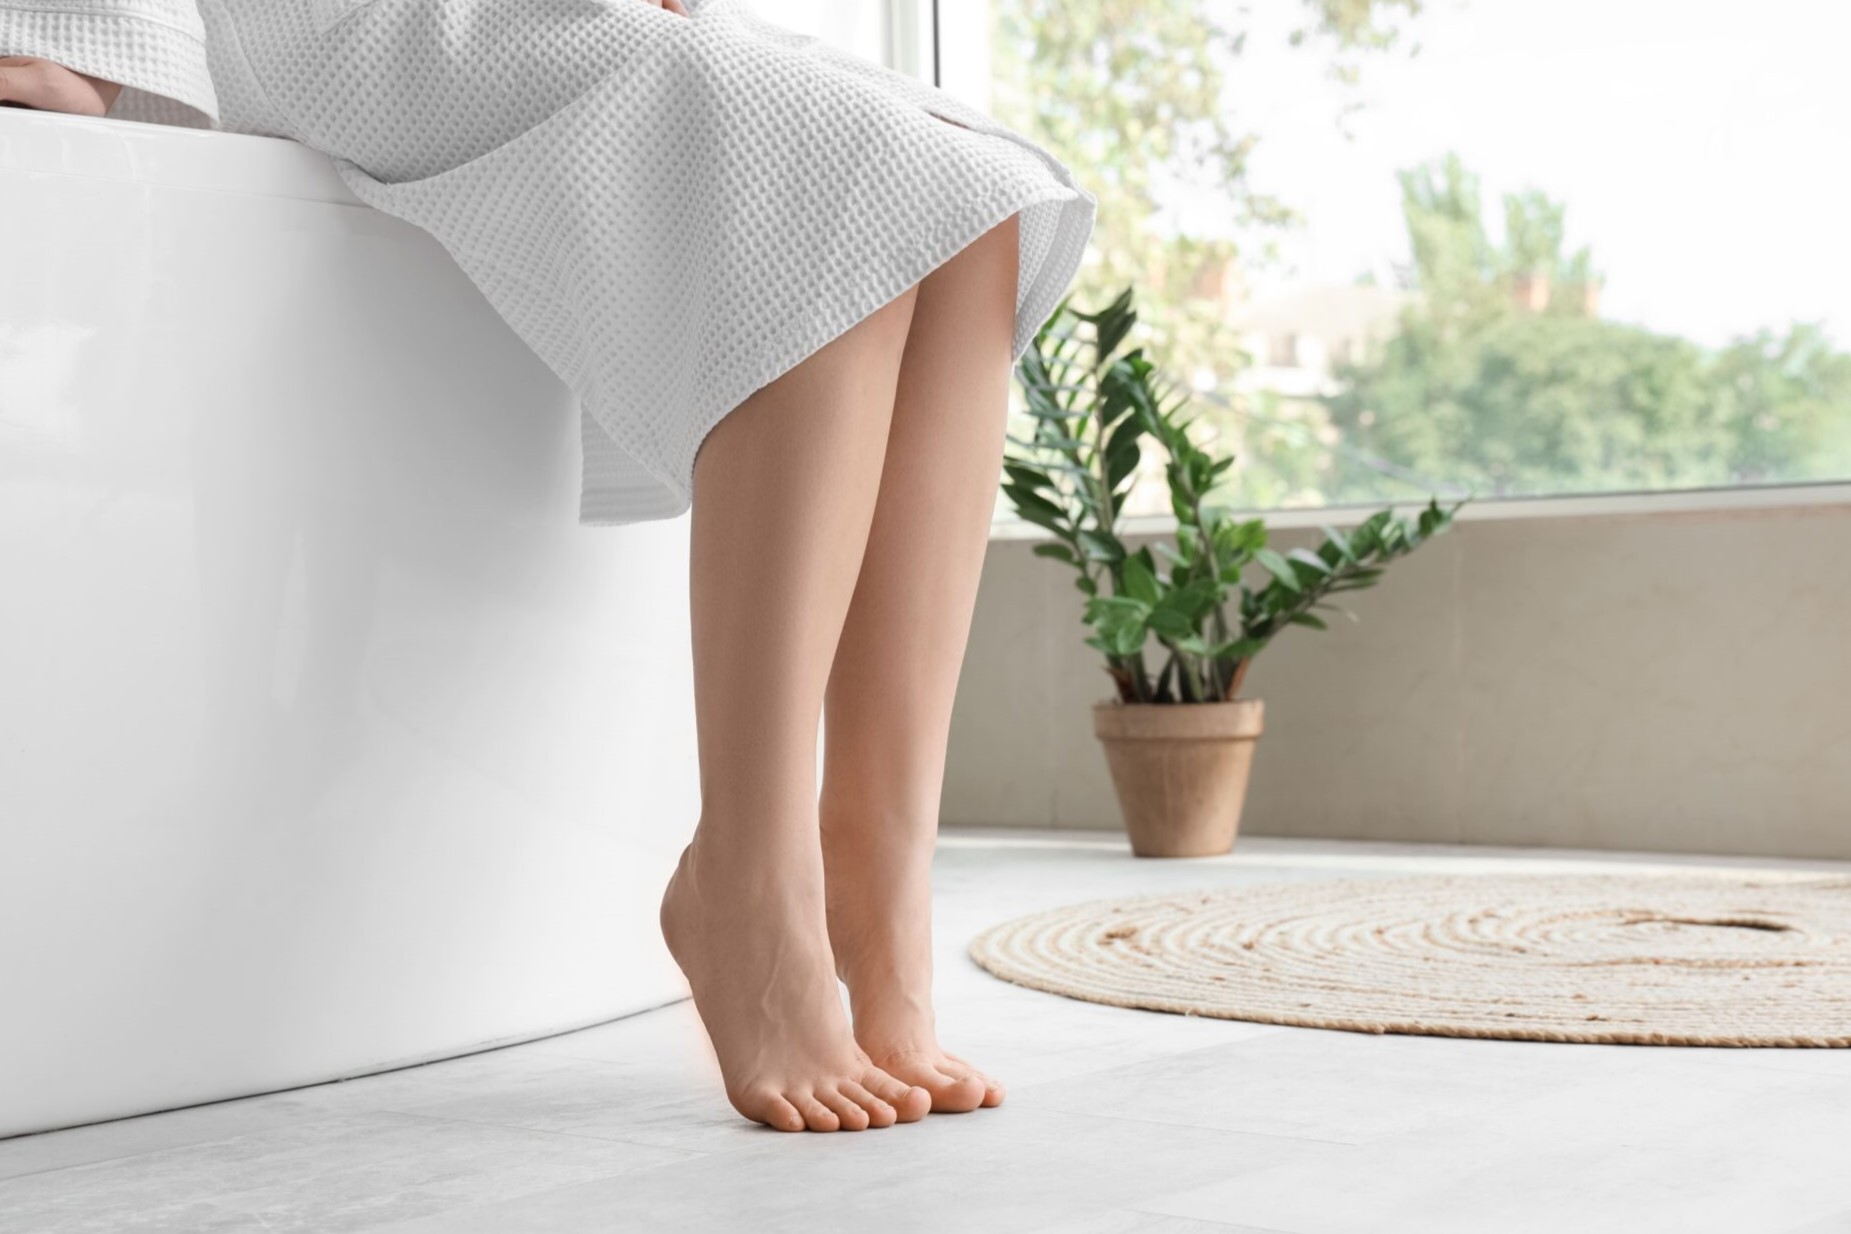
There’s nothing quite like stepping onto a warm floor on a chilly winter morning. If you’ve ever dreamt of having heated floors in your home, specifically under your tiles, you’re not alone. Heated floors are not only a luxurious addition to your living space but can also provide comfort and energy efficiency.
In this article, we’ll walk you through the process of installing heated floor systems under tile. We’ll cover the different types of heated floor systems available, the tools and materials you’ll need, and the step-by-step instructions to help you successfully install heated floors. Whether you’re a DIY enthusiast or just curious about the process, we’ve got you covered.
Key Takeaways:
- Enjoy the luxury of warm, energy-efficient floors by installing heated floor systems under tile. Follow the step-by-step process to create a cozy haven in your home, providing comfort and cost savings during chilly seasons.
- From planning and preparation to laying the tiles and grouting, the installation of heated floor systems under tile transforms your living space into a visually stunning and inviting environment. Embrace the warmth and comfort of your newly installed heated floors, a testament to your skills and dedication.
Read more: How To Install Heated Floors
Overview of Heated Floors
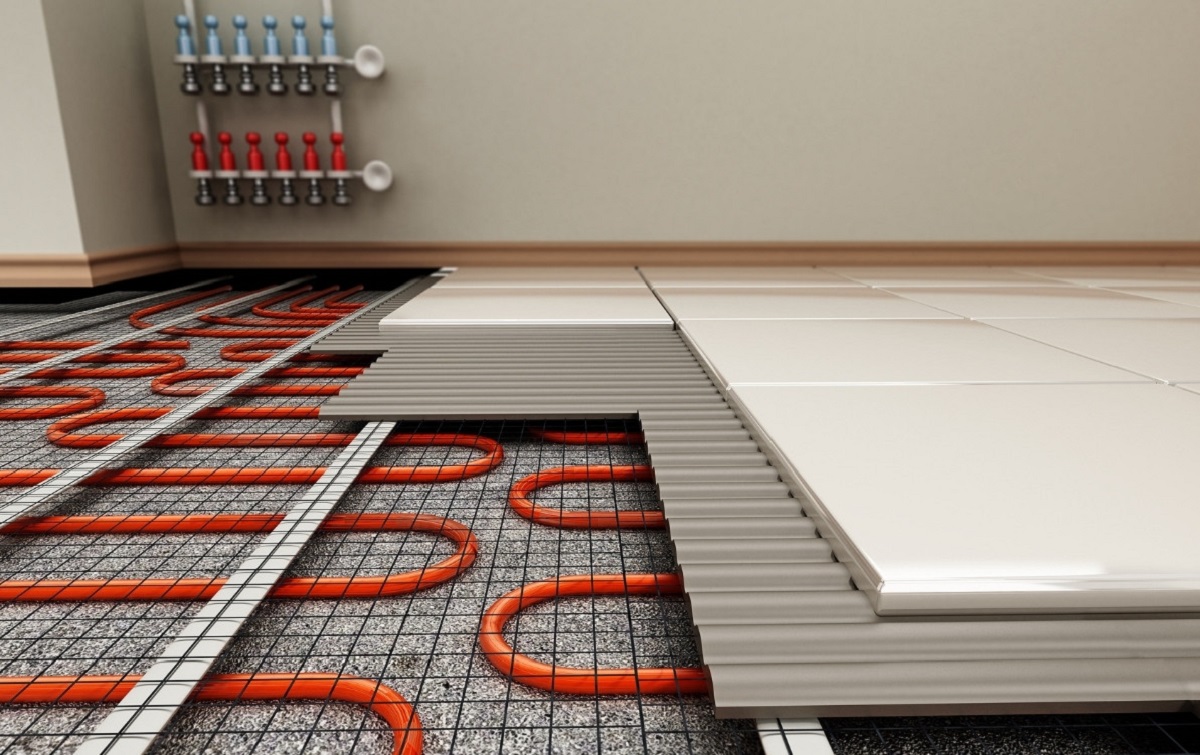
Heated floors, also known as radiant floor heating, work by heating the floor surface to create warmth that radiates upward, providing a comfortable environment in your home. This type of heating system is typically installed beneath tile flooring, as tiles are excellent conductors of heat and allow for an even distribution of warmth.
One of the key advantages of heated floors is their energy efficiency. They can provide heat more efficiently and evenly compared to traditional forced-air heating systems. Additionally, radiant floor heating systems don’t rely on blowing air, making them a great option for those with allergies or respiratory sensitivities.
Types of Heated Floor Systems
Before diving into the installation process, it’s important to understand the different types of heated floor systems available. The two main types are electric-based systems and hydronic (water-based) systems.
Electric-based systems consist of electric cables or thin electric mats that are installed directly beneath the flooring. These systems are relatively easy to install and are better suited for smaller areas or rooms where electric power is more accessible. However, they can be more expensive to operate in the long run.
Hydronic systems, on the other hand, use hot water that circulates through a series of pipes installed underneath the floor. These systems are generally more cost-effective to operate, especially for larger areas. However, they require professional installation and may be more complex to set up.
Now that you have a basic understanding of heated floor systems, let’s move on to the planning and preparation phase.
Key Takeaways:
- Enjoy the luxury of warm, energy-efficient floors by installing heated floor systems under tile. Follow the step-by-step process to create a cozy haven in your home, providing comfort and cost savings during chilly seasons.
- From planning and preparation to laying the tiles and grouting, the installation of heated floor systems under tile transforms your living space into a visually stunning and inviting environment. Embrace the warmth and comfort of your newly installed heated floors, a testament to your skills and dedication.
Read more: How To Install Heated Floors
Overview of Heated Floors
Imagine waking up on a cold winter morning and stepping onto a warm and cozy floor. This is the magic of heated floors. Heated floors, also known as radiant floor heating, have gained popularity in recent years for their luxurious comfort and energy-efficient heating capabilities.
Heated floors work by utilizing either electric-based systems or hydronic systems to generate heat beneath the flooring surface. The heat is then radiated evenly upwards, warming the room from the ground up. This form of heating ensures a consistent and comfortable temperature throughout the living space.
One of the major advantages of heated floors is their energy efficiency. Unlike traditional forced-air heating systems that rely on blowing hot air, radiant floor heating directly warms the floor and surrounding objects. This radiant heat transfer method reduces heat loss and eliminates air drafts, resulting in lower energy consumption and reduced heating costs.
Another benefit of heated floors is their versatility, as they can be installed in various types of flooring materials, with tiles being the most commonly used. Tiles are excellent conductors of heat and provide efficient heat transfer to the room. With heated floors under the tiles, you can say goodbye to cold feet and enjoy the cozy warmth underfoot.
In addition to the comfort and energy efficiency they provide, heated floors offer several other advantages. They can help improve indoor air quality by reducing the circulation of dust and allergens that are often stirred up by forced-air systems. Additionally, heated floors eliminate the need for bulky radiators or heating vents, freeing up valuable wall space and allowing for more creative interior design opportunities.
When it comes to choosing between electric-based and hydronic heated floor systems, there are a few considerations to keep in mind. Electric-based systems are typically easier and more affordable to install, making them a popular choice for smaller areas or retrofitting existing spaces. On the other hand, hydronic systems are ideal for larger areas and offer cost-effective long-term operation, although they require professional installation and are initially more expensive.
Overall, heated floors provide a luxurious and efficient heating solution that can enhance the comfort and value of any home. Whether you’re building a new house or remodeling an existing space, considering the installation of heated floors can be a wise investment that brings warmth, energy savings, and a touch of luxury to your living environment.
Types of Heated Floor Systems
When it comes to heated floor systems, there are two main types to choose from: electric-based systems and hydronic (water-based) systems. Understanding the differences between these two options will help you determine which is best suited for your needs and preferences.
1. Electric-based Systems: Electric-based systems are the most common and popular type of heated floor systems. These systems consist of either electric cables or thin electric mats that are installed directly beneath the flooring surface.
The electric cables, also known as electric radiant heat cable, are typically installed in a serpentine pattern in the thinset mortar that holds the tiles in place. These cables heat up when electricity is passed through them, providing warmth to the floor surface.
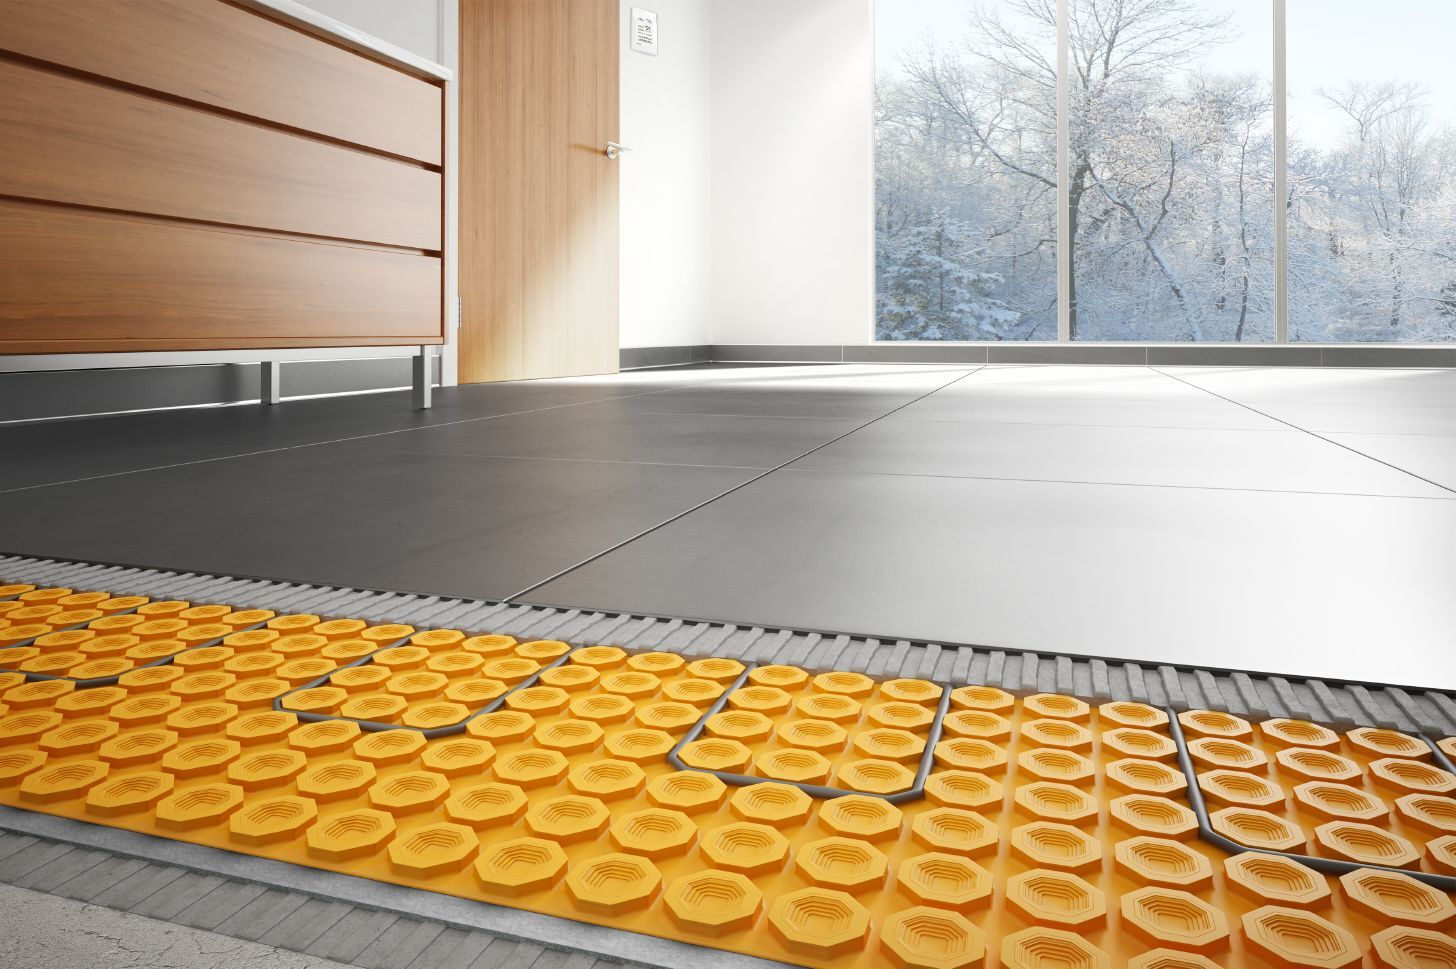
Electric mats, on the other hand, are pre-constructed mats with embedded heating elements. These mats are available in various sizes and can be easily rolled out on the subfloor for installation. The heating elements in the mats generate heat when electricity flows through them, ensuring even and consistent warmth.
Electric-based systems offer several advantages. They are relatively easy to install, making them a popular choice for DIY enthusiasts. These systems are also more cost-effective for smaller areas or rooms where electric power is readily accessible.
However, electric-based systems can be more expensive to operate in the long run, as electricity costs tend to be higher than other energy sources. Therefore, these systems are recommended for areas with lower heating demands or where usage is intermittent, such as bathrooms or kitchens.
2. Hydronic Systems: Hydronic heated floor systems utilize hot water to generate heat. In this system, heated water from a boiler or a dedicated water heater is circulated through a series of pipes installed beneath the flooring surface.
The pipe layout for hydronic systems can vary, with options such as staple-up, floating, or embedded systems. In a staple-up system, the pipes are attached to the subfloor from below and covered with insulation. Floating systems use panels with grooves to hold the pipes, which are then covered with a floating floor. Embedded systems involve embedding the pipes within a concrete or gypsum layer, which acts as both the subfloor and the heat conductor.
Hydronic systems offer several advantages over electric-based systems. They are more cost-effective to operate, as water is usually less expensive than electricity. These systems are also better suited for larger areas with higher heating demands.
However, installing hydronic systems requires professional expertise, as it involves plumbing and connecting the system to a water source. Additionally, these systems are initially more expensive due to the cost of the boiler or water heater and the installation process.
Choosing the right heated floor system depends on various factors, including the size of the area, the availability of energy sources, and your budget. Consulting with a professional or a knowledgeable supplier can help you make an informed decision based on your specific requirements.
Read more: What To Put Under Tile Floor
Planning and Preparation
Before diving into the installation of heated floor systems under tile, it is crucial to properly plan and prepare. Taking the time to plan and gather the necessary materials and tools will ensure a smooth and successful installation process. Here are some key steps to consider:
1. Assess the Space: Start by assessing the area where you plan to install the heated floors. Measure the square footage of the room and take note of any obstacles or irregularities that may affect the installation process, such as furniture, cabinets, or tight spaces.
2. Determine the Heating Requirements: Consider the heating needs of the space. Factors such as room size, insulation, and climate will impact the heating requirements. Consulting with a heating professional or supplier can help determine the appropriate heating capacity for your specific needs.
3. Choose the Right System: Based on your assessment and heating requirements, select the appropriate type of heated floor system. Consider factors such as energy efficiency, ease of installation, and long-term maintenance costs.
4. Check Subfloor Conditions: Assess the condition of the subfloor, ensuring it is structurally sound and free from any moisture issues. A solid and well-prepared subfloor is crucial for the proper installation and performance of heated floors.
5. Insulation: Insulation plays a significant role in maximizing the efficiency of the heated floor system. Insulating the subfloor will minimize heat loss and help direct the warmth upwards. Consider installing insulation boards or reflective barrier systems, depending on your specific requirements.
6. Electrical Requirements: If you are opting for an electric-based system, ensure that the electrical supply can accommodate the heating system’s power requirements. Consult an electrician to assess the electrical load and make any necessary upgrades or adjustments.
7. Obtain Necessary Permits: In some regions, installing a heated floor system may require obtaining permits or adhering to specific building codes. Check with your local authorities to ensure compliance with any regulations and obtain the necessary permits before proceeding with the installation.
8. Gather Tools and Materials: Make a list of the tools and materials you will need for the installation process. Common tools include a trowel, knee pads, a notched trowel, a pipe cutter (for hydronic systems), and a multimeter for electrical connections. Additionally, gather the necessary materials such as thinset mortar, heating cables or mats, and tile adhesive.
9. Set a Budget: Determine a budget for the project, considering not only the cost of materials but also any required professional assistance, permits, and potential electrical or plumbing upgrades. Setting a budget will help you stay on track and avoid unexpected costs.
By carefully planning and preparing for the installation process, you can ensure a successful and efficient installation of heated floor systems under tile. Taking the time to assess the space, choose the right system, and gather the necessary tools and materials will set the foundation for a warm and comfortable living space.
Tools and Materials Needed
Before starting the installation of heated floor systems under tile, it’s important to have the right tools and materials on hand. Proper preparation and organization of supplies will make the installation process smoother and more efficient. Here is a list of the essential tools and materials you’ll need:
Tools:
- Tape Measure: Used for measuring the dimensions of the room and determining the layout of the heating elements.
- Notched Trowel: Used for applying the thinset mortar or adhesive to secure the heating elements and tiles.
- Knee Pads: Provide cushioning and protection when working on the floor for extended periods.
- Wire Strippers: Required for electrical connections, especially when working with electric-based systems.
- Pipe Cutter: Needed for cutting the pipes in hydronic systems, if applicable.
- Utility Knife: Used for trimming the insulation, membranes, and any excess materials during installation.
- Thinset Spreader: Helps spread the thinset mortar evenly on the subfloor.
- Trowel: Used for leveling the thinset mortar or adhesive beneath the tiles.
- Grout Float: Essential for applying grout between the tiles and ensuring a smooth finish.
- Multimeter: Used to test electrical connections and ensure proper voltage and resistance in electric-based systems.
- Plastic Buckets: Handy for mixing the thinset mortar or adhesive as per manufacturer’s instructions.
Materials:
- Heating Elements: This could be electric cables or mats for electric-based systems or pipes for hydronic systems, depending on the type chosen.
- Thinset Mortar or Tile Adhesive: Used to secure the heating elements and tiles to the subfloor.
- Insulation: Helps to minimize heat loss and direct heat towards the tiles. Insulation boards or reflective barrier systems can be used.
- Tile Spacers: Used to ensure consistent spacing between tiles during installation.
- Grout: Required to fill the gaps between the tiles and provide a finished look.
- Tile Sealer: Provides a protective layer to prevent staining and water damage to the tiles.
- Tile: Choose the type and design of tile you prefer, such as ceramic, porcelain, or natural stone.
- Primer (if needed): Depending on the specific system and subfloor conditions, a primer may be required to enhance adhesion.
- Wiring and Connectors (for electric-based systems): Ensure you have the necessary wiring and connectors to connect the heating elements to the power supply.
It’s important to note that the exact tools and materials required may vary depending on the specific heated floor system chosen, manufacturer’s instructions, and any additional factors such as subfloor conditions or local building codes. It’s recommended to consult the manufacturer’s guidelines and seek professional advice if needed.
Having the right tools and materials readily available will save you time and ensure a smooth installation process. Proper preparation and organization will lead to a successful installation of heated floors under tile, providing you with a cozy and comfortable living space.
Step 1: Preparing the Subfloor
The first step in installing heated floor systems under tile is to properly prepare the subfloor. The subfloor serves as the foundation for the heating elements and tiles, so it’s crucial to ensure it is clean, level, and in good condition. Follow these steps to prepare the subfloor:
1. Clear the Area: Remove any existing flooring materials, such as carpet, vinyl, or hardwood. Use a pry bar, screwdriver, or any other suitable tool to carefully remove the flooring without damaging the subfloor.
2. Inspect the Subfloor: Thoroughly examine the subfloor for any signs of damage, such as cracks, rot, or unevenness. Repair or replace any damaged sections as necessary. It’s essential to have a solid and stable subfloor for the even installation of the heating elements and tiles.
3. Clean the Subfloor: Sweep or vacuum the subfloor to remove any debris, dust, or loose particles that could affect the adhesion of the heating elements and tiles. Ensure the surface is clean and free from any grease or moisture that may hinder proper installation.
4. Level the Subfloor: Use a leveling compound or self-leveling underlayment to fill any low spots or uneven areas on the subfloor. Follow the manufacturer’s instructions carefully to achieve a smooth and level surface. This step is crucial for proper heat distribution and stable tile installation.
5. Seal the Subfloor (if necessary): If your subfloor is made of porous material, such as plywood or concrete, it’s recommended to apply a suitable sealer. The sealer will help prevent moisture from penetrating the subfloor and compromising the installation. Follow the manufacturer’s instructions for the proper application and drying time.
6. Prime the Subfloor (if necessary): In some cases, priming the subfloor may be required, especially if working with certain types of heating elements or adhesives. Priming helps improve adhesion and ensures a strong bond between the subfloor and the heating elements or adhesive. Consult the manufacturer’s instructions to determine if priming is necessary and follow the recommended application process.
7. Allow for Subfloor Drying Time: Depending on the leveling compound, sealer, or primer used, it’s important to allow sufficient drying time before proceeding with the next steps of the installation process. Refer to the product instructions for the recommended drying period to ensure a proper bond with the heating elements and tiles.
By taking the time to properly prepare the subfloor, you’ll create a solid foundation for the installation of heated floor systems under the tiles. A clean, level, and well-prepared subfloor will contribute to the longevity and performance of the heating system and ensure a smooth and successful tile installation process in the following steps.
When installing heated floors under tile, make sure to use a high-quality, waterproof heating system designed for use with tile. Properly level the subfloor and follow the manufacturer’s instructions for installation to ensure even heat distribution.
Step 2: Installing the Insulation
After preparing the subfloor, the next step in installing heated floor systems under tile is to install insulation. Insulation is essential for maximizing the efficiency of the heating system by minimizing heat loss and directing the warmth upward towards the tiles. Follow these steps to properly install insulation:
1. Choose the Right Insulation: Select the appropriate type of insulation based on your specific requirements and the recommendations of the heating system manufacturer. Insulation boards and reflective barrier systems are commonly used for this purpose.
2. Measure and Cut the Insulation: Measure the dimensions of the room and the sections of the subfloor where insulation will be installed. Use a utility knife to cut the insulation boards or reflective barrier materials to fit the designated areas. Be accurate in your measurements to ensure a proper fit.
3. Lay the Insulation: Place the insulation boards or reflective barrier materials on the subfloor, starting in one corner of the room and working your way across. Ensure that the insulation covers the entire surface area where the heating system will be installed. Butt the edges of the insulation tightly together to eliminate gaps.
4. Secure the Insulation: If using insulation boards, secure them to the subfloor using a suitable adhesive or mechanical fasteners, following the manufacturer’s instructions. If using a reflective barrier system, use tape or adhesive to secure the seams and edges of the reflective material.
5. Cut Openings for Obstacles: If there are any obstacles in the room, such as pipes or floor vents, carefully cut openings in the insulation to accommodate them. Ensure that the insulation fits snugly around these obstacles without compressing or blocking them.
6. Insulate Wall Edges: Apply insulation along the perimeter of the room, adjacent to the walls, to prevent heat loss through the edges. Cut insulation boards to width and secure them in place using adhesive or fasteners.
7. Seal the Insulation: Use an appropriate tape or adhesive to seal the joints and seams of the insulation. This will prevent air leakage and improve the overall effectiveness of the insulation.
8. Allow for Insulation Drying Time: Depending on the type of insulation and adhesive used, allow sufficient drying or curing time before proceeding with the next steps of the installation process. Refer to the manufacturer’s instructions for recommended drying periods to ensure a proper bond with the heating elements and tiles.
Installing insulation is a crucial step in the heated floor installation process. It helps optimize the performance of the heating system, improves energy efficiency, and ensures a comfortable living environment. By following these steps, you’ll properly install insulation, setting the groundwork for the successful installation of the heating elements and tiles in the subsequent steps.
Read more: How To Install Insulation Under Floor
Step 3: Laying the Heating Elements
After preparing the subfloor and installing insulation, the next step in installing heated floor systems under tile is laying the heating elements. The heating elements, whether electric cables or hydronic pipes, are responsible for generating the warmth that will radiate through the tiles. Follow these steps to properly lay the heating elements:
1. Consult Manufacturer’s Instructions: Review the manufacturer’s instructions specific to your chosen heating system. This will provide you with detailed guidelines and specifications for laying the heating elements.
2. Plan the Layout: Determine the layout of the heating elements based on the dimensions and shape of the room. Take into consideration any furniture or fixtures that may affect the placement or heat distribution. Using a tape measure and a floor plan, plot the path the heating elements will follow on the subfloor.
3. Mark the Layout: Use a non-permanent marker or tape to mark the layout of the heating elements on the subfloor. This will serve as a guide during the installation process.
4. Lay the Wiring or Pipes: Carefully place the heating elements in the designated path, following the markings on the subfloor. If using electric cables, secure them to the subfloor using adhesive or special clips designed for the purpose. If using hydronic pipes, fasten them in place according to the manufacturer’s instructions.
5. Maintain Proper Spacing: Ensure that the heating elements are laid out with the proper spacing recommended by the manufacturer. This will ensure even heat distribution across the floor surface. The spacing may vary depending on the system and the wattage or BTU requirements.
6. Avoid Obstacles: Be mindful of any obstacles, such as pipes or floor vents, and adjust the layout of the heating elements accordingly. Avoid running the heating elements directly beneath fixtures or heavy furniture, as this may obstruct their performance.
7. Connect the Heating Elements: If using electric cables, carefully connect them to the appropriate power source according to the manufacturer’s instructions. Follow electrical codes and safety guidelines during the connection process. If using hydronic pipes, consult a professional plumber to connect the pipes to the boiler or water heater.
8. Test the Heating Elements: Before proceeding to the next steps, it’s crucial to test the heating elements to ensure they are functioning correctly. Follow the manufacturer’s instructions for testing procedures and use a multimeter or temperature gauge to confirm that the elements are heating up properly.
9. Document the Layout: It’s helpful to take photos or make notes of the heating element layout for future reference. This will be beneficial during the tile installation and if any maintenance or repairs are needed in the future.
Laying the heating elements is a critical step in the installation process as it determines the performance and efficiency of the heated floor system. By carefully following these steps and referring to the manufacturer’s instructions, you’ll ensure that the heating elements are properly laid out and prepared for the next stages of the installation process.
Step 4: Connecting the Wiring
Once you have laid the heating elements for your heated floor system, the next step is connecting the wiring. This step is crucial for electric-based systems, as it ensures that the heating elements can be powered and controlled effectively. Follow these steps to properly connect the wiring:
1. Consult the Manufacturer’s Instructions: Refer to the manufacturer’s instructions specific to your heated floor system for detailed guidelines and specifications regarding the wiring connections.
2. Turn Off Power: Before starting any electrical work, ensure that the power to the heating elements is turned off. Locate the appropriate circuit breaker in your electrical panel and switch it off to avoid any risk of electric shock.
3. Prepare the Wiring: Trim the wiring as necessary, leaving enough length to connect to the power supply or control unit. Use wire strippers to remove the appropriate amount of insulation from the ends of the wires.
4. Connect the Wiring to the Power Supply: Depending on the specific wiring requirements of your heated floor system, you may need to connect the wiring to a power supply. Follow the manufacturer’s instructions, ensuring that you connect the appropriate wires (e.g., black to black, white to white) securely and according to electrical codes. Use wire connectors or terminal blocks to make the connections.
5. Test the Connections: After making the wiring connections, it is essential to test them to ensure proper functionality and safety. Use a multimeter to confirm the voltage and continuity of the wiring. This step will help identify any potential wiring issues that need to be addressed before proceeding.
6. Install a Thermostat (if applicable): If your heated floor system includes a thermostat, follow the manufacturer’s instructions to install it in a suitable location. The thermostat will allow you to control the temperature and settings of the heated floor system efficiently.
7. Signage: Install appropriate signage or labeling to indicate the presence of electric heating elements in the floor, especially in spaces where future work or renovations may occur. This will help prevent accidental damage to the system during construction or maintenance activities.
8. Turn on Power and Test the System: Once all the wiring connections are complete and tested, you can turn the power back on. Use the control unit or thermostat to apply power to the heating elements and verify that they are functioning correctly. Allow sufficient time for the system to heat up and evenly distribute warmth throughout the floor surface.
9. Seek Professional Assistance (if needed): If you are unsure about electrical connections or do not have experience with electrical work, it is advisable to seek professional assistance from a licensed electrician. They can ensure that the wiring connections comply with electrical codes and provide expert guidance throughout the process.
Connecting the wiring for your heated floor system is a critical step in the installation process. By following these steps and referring to the manufacturer’s instructions, you can ensure proper electrical connections and functionality of the system. Always prioritize safety and consult a professional if you have any concerns or uncertainties during the wiring process.
Step 5: Testing the System
After connecting the wiring for your heated floor system, the next important step is to thoroughly test the system before proceeding with the installation of the tiles. Testing ensures that the heating elements are working properly, allowing you to identify and address any issues before moving forward. Follow these steps to test the system:
1. Turn on the Power: Ensure that the power to the heating elements is turned on. Check that the circuit breaker or power switch is in the “on” position.
2. Allow Sufficient Warm-Up Time: Give the system enough time to warm up and reach its operating temperature. This may take several hours, so be patient and wait for the system to fully heat the floor surface.
3. Check Heat Output: Walk barefoot or place a hand on different areas of the floor to assess the heat output. The floor should feel warm and comfortable to the touch. Make note of any areas that feel significantly cooler or warmer than others, as this may indicate an issue with the heating elements or their positioning.
4. Use a Temperature Gauge or Infrared Thermometer: Measure the temperature of the floor using a temperature gauge or infrared thermometer. Aim to achieve the desired temperature range recommended by the manufacturer. If there are significant deviations, it may indicate an issue with the system that needs to be addressed before continuing with the tile installation.
5. Monitor the System Over Time: Keep the system running for an extended period, monitoring its performance. Observe the consistency of heat distribution and ensure that the heating elements maintain a steady temperature. Any fluctuations or inconsistencies should be investigated and resolved before proceeding.
6. Check the Thermostat: If your heated floor system has a thermostat, test its functionality. Adjust the temperature settings and ensure that the system responds accordingly, heating up or cooling down as expected. Familiarize yourself with the controls and settings to effectively operate and regulate the system.
7. Consult the Manufacturer’s Instructions: Refer to the manufacturer’s instructions for specific testing guidance and any troubleshooting steps. They may provide additional details that are crucial to ensuring the proper functioning of the system.
8. Seek Professional Assistance (if needed): If you encounter any issues or are unsure about the testing process, it is advisable to seek professional assistance. A heating specialist or technician with experience in heated floor systems can help pinpoint and resolve any problems and ensure the system is ready for tile installation.
Thoroughly testing the heated floor system is essential to identify any issues and address them before proceeding with the tile installation. By following these steps and referring to the manufacturer’s instructions, you can ensure the system is functioning properly, providing reliable and efficient heat distribution throughout the floor surface. This testing phase will give you confidence that the system is ready for the final steps of the installation process.
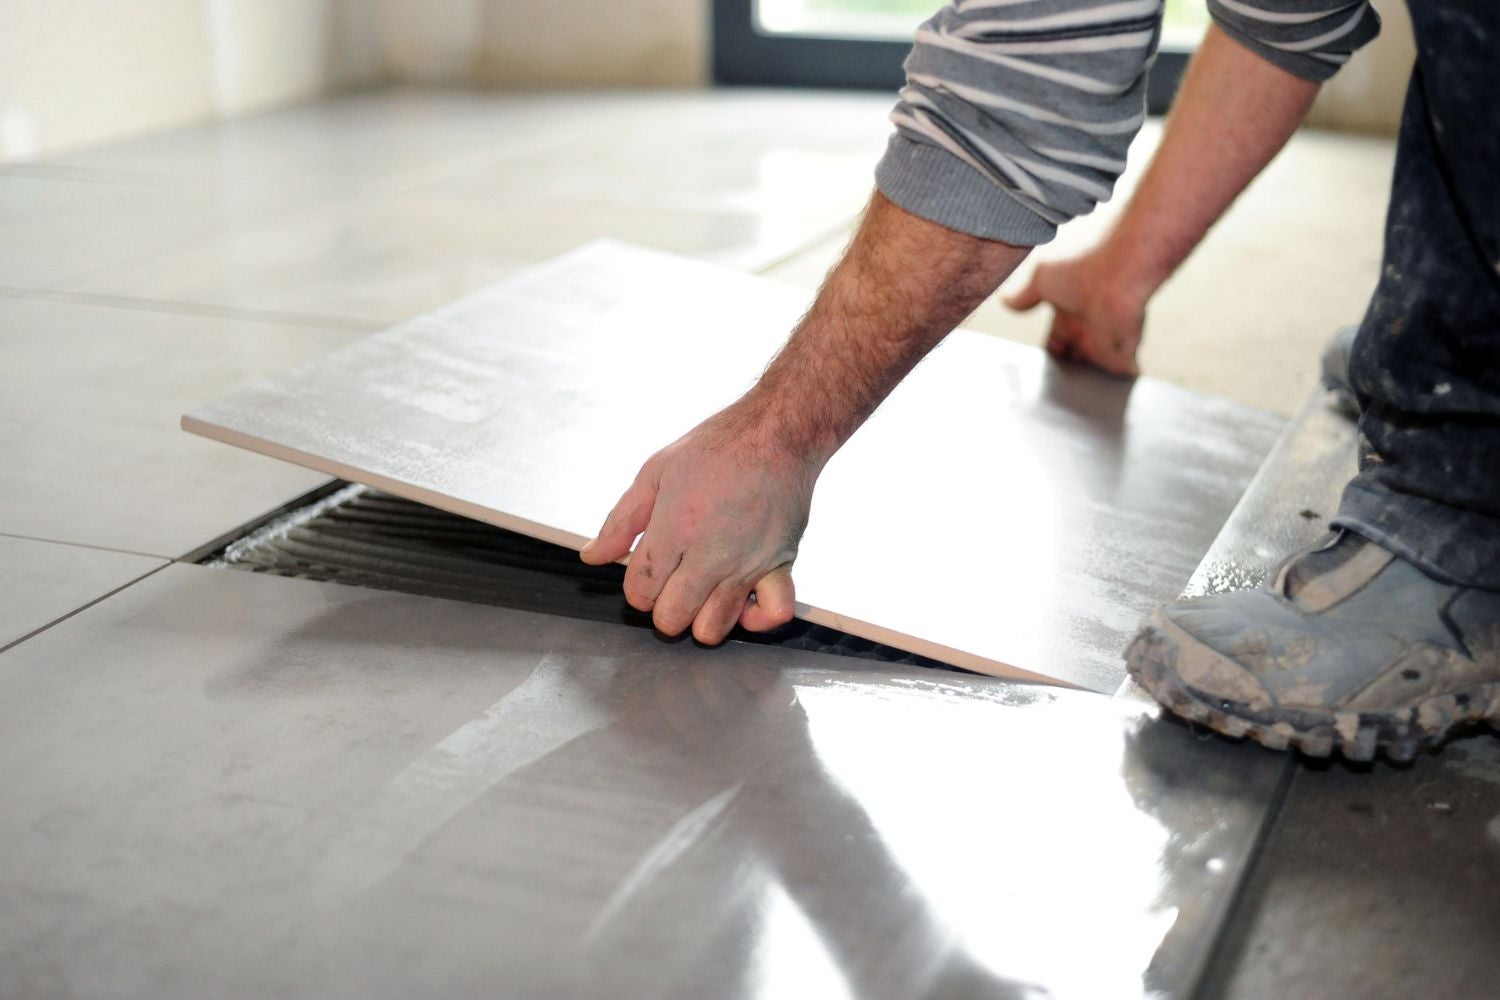
Step 6: Installing the Tile
With the heated floor system tested and functioning properly, you’re now ready to proceed with the installation of the tiles. This step will bring your heated floor vision to life, creating a beautiful and functional space. Follow these steps to install the tile:
1. Gather the Materials: Ensure you have all the necessary materials on hand, including the tiles, tile adhesive, grout, tile spacers, a trowel, a grout float, and a sponge for cleaning.
2. Plan the Tile Layout: Before applying any adhesive, plan the layout of the tiles to ensure a balanced and aesthetically pleasing arrangement. Consider any focal points, patterns, or specific design preferences.
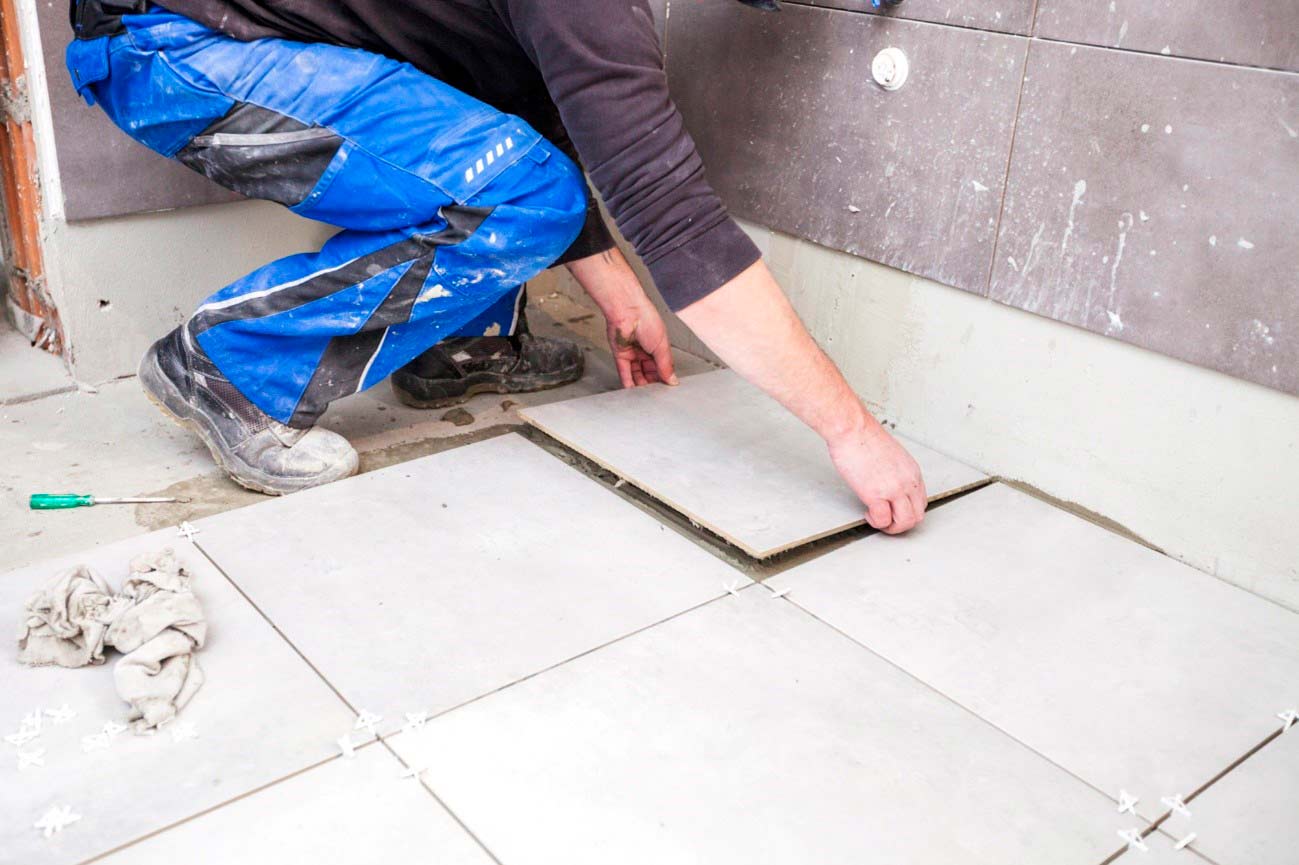
3. Apply the Tile Adhesive: Spread a layer of tile adhesive on a small section of the subfloor, using the flat side of the trowel. Then, use the notched edge of the trowel to create grooves in the adhesive, ensuring proper adhesion between the subfloor and the tiles.
4. Lay the Tiles: Begin laying the tiles in the adhesive, starting from a reference point. Press each tile firmly into place, ensuring it is level and aligning it with the tile spacers for consistent spacing. Continue this process, working in small sections at a time.
5. Cut Tiles (if necessary): Use a tile cutter or wet saw to make any necessary cuts to fit tiles around corners, edges, or obstacles. Take precise measurements and use appropriate safety equipment when cutting tiles.
6. Install the Tiles in Stages: Work in stages, applying adhesive and laying tiles section by section. This will allow you to work efficiently and ensure that the adhesive doesn’t dry out before you have a chance to lay the tiles.
7. Check for Level and Spacing: Periodically check that the tiles are level and that the spacing between them is consistent. Adjust as needed and use tile spacers to maintain uniform gaps between the tiles.
8. Allow Adhesive to Cure: Follow the manufacturer’s instructions for the recommended drying and curing time of the tile adhesive. Avoid stepping on or disturbing the tiles during this curing period.
9. Apply Grout: Once the adhesive has cured, remove the tile spacers and use a grout float to apply the grout between the tiles. Work the grout into the gaps, ensuring full coverage and a uniform appearance. Clean off any excess grout with a damp sponge.
10. Allow Grout to Cure: Let the grout dry and cure according to the manufacturer’s instructions. Avoid excessive moisture or foot traffic on the freshly grouted tiles during this period.
11. Clean and Seal the Tiles: Once the grout has fully cured, clean the tiles with a mild cleaner or grout haze remover to remove any residue. After cleaning, consider applying a tile sealer to protect and enhance the appearance of the tiles.
12. Install Thresholds or Transitions: If needed, install thresholds or transitions where the heated floor meets other types of flooring. These will provide a smooth and seamless transition between different areas.
Installing the tiles is an exciting and transformative part of the heated floor installation process. By following these steps and paying attention to detail, you’ll create a visually stunning and functional floor surface that perfectly complements your heated flooring system. Enjoy the satisfaction of seeing your vision come to life as you step onto your beautifully tiled, warm, and cozy floor.
Read more: How To Install In Floor Heating In Concrete
Step 7: Grouting and Finishing
After installing the tiles on your heated floor, the next step is to grout and finish the floor. Grouting fills the gaps between the tiles, provides stability, and enhances the overall appearance of the floor. Follow these steps to complete the grouting and finishing process:
1. Gather the Materials: Ensure you have all the necessary materials, including grout, a grout float, a sponge, a bucket of water, and a towel or cloth for cleaning.
2. Prepare the Grout: Mix the grout according to the manufacturer’s instructions. Use a trowel or mixing tool to blend the grout thoroughly until it reaches a smooth, lump-free consistency.
3. Apply the Grout: Using the grout float, spread the grout over the tiled surface at a 45-degree angle, pressing it into the gaps between the tiles. Work in small sections to prevent the grout from drying out before you can clean the excess.
4. Fill the Gaps: Use the edge of the grout float to push the grout into the gaps, ensuring complete coverage. Scrape off any excess grout from the surface of the tiles as you go.
5. Clean the Tiles: After filling the gaps with grout, clean the excess grout off the tiles using a damp sponge. Rinse the sponge frequently and wipe diagonally across the tiles to avoid pulling out the grout from the gaps. Be careful not to remove too much grout from the joints.
6. Finishing Touches: Once the surface is mostly clean, use a damp cloth or towel to gently wipe away any remaining haze or residue. This will help give the tiles a clean and polished appearance.
7. Allow Grout to Cure: Follow the manufacturer’s instructions for the recommended drying and curing time of the grout. Avoid foot traffic and excessive moisture on the freshly grouted floor during this period.
8. Apply Grout Sealer (if desired): Applying a grout sealer can help protect the grout from stains, moisture, and discoloration. Follow the manufacturer’s instructions to apply the sealer evenly and allow it to cure according to the recommended time frame.
9. Clean and Maintain: After the grout has fully cured, clean the tiled surface regularly to keep it looking its best. Use suitable cleaning products and methods recommended for your specific tiles to maintain their appearance and longevity.
10. Enjoy Your Finished Heated Floor: Once the grout and finishing touches are complete, step back and admire your beautifully grouted and finished heated floor. Enjoy the warmth and comfort it provides while enhancing the overall aesthetic of your living space.
Grouting and finishing the heated floor is the final step in the installation process. By following these steps with care and precision, you’ll achieve a professionally finished and visually stunning floor surface that complements the warmth and comfort of your heated floor system. Sit back, relax, and enjoy your cozy and inviting new space.
Conclusion
Congratulations on successfully installing heated floor systems under tile! You’ve taken the necessary steps to create a warm, comfortable, and luxurious living space in your home. By following the process outlined in this article, you’ve gained the knowledge and skills to bring this modern heating solution to life.
Throughout the installation process, you’ve learned about the different types of heated floor systems, including electric-based and hydronic systems. You’ve discovered the importance of proper planning, preparation, and assessing the subfloor conditions. You’ve also become familiar with the tools and materials necessary for the job.
From preparing the subfloor to installing insulation, laying the heating elements, connecting the wiring, and testing the system, you’ve meticulously followed each step to ensure a functional and efficient heating system. Finally, you’ve successfully installed the tiles, grouted, and finished the floor to achieve a beautiful and polished look.
With your new heated floor system, you can enjoy the luxurious comfort of warm floors on chilly winter mornings. The energy-efficient nature of these systems will not only keep your feet cozy, but also help reduce heating costs and provide consistent warmth throughout your living space.
Remember to follow proper maintenance procedures to keep your heated floors in optimal condition. Regular cleaning, using appropriate cleaning products, and being mindful of any maintenance requirements will help prolong the life and performance of your system.
Installing heated floor systems under tile is a significant home improvement project, and completing it successfully is a testament to your skills and determination. Your efforts have created a comfortable and inviting atmosphere that you, your family, and guests can enjoy for years to come.
So, sit back, relax, and revel in the warmth and comfort of your newly installed heated floors. Bask in the knowledge that you have harnessed a modern heating solution to transform your living space into a cozy haven during the cold seasons. Your efforts have truly paid off, and you can now experience the luxury and functionality of heated floor systems in your home.
Frequently Asked Questions about How To Install Heated Floor Under Tile
Was this page helpful?
At Storables.com, we guarantee accurate and reliable information. Our content, validated by Expert Board Contributors, is crafted following stringent Editorial Policies. We're committed to providing you with well-researched, expert-backed insights for all your informational needs.


0 thoughts on “How To Install Heated Floor Under Tile”