Articles
How To Install Washer And Dryer Hookups
Modified: January 21, 2024
Looking for articles on how to install washer and dryer hookups? Find comprehensive guides and step-by-step instructions to help you with your installation project.
(Many of the links in this article redirect to a specific reviewed product. Your purchase of these products through affiliate links helps to generate commission for Storables.com, at no extra cost. Learn more)
Introduction
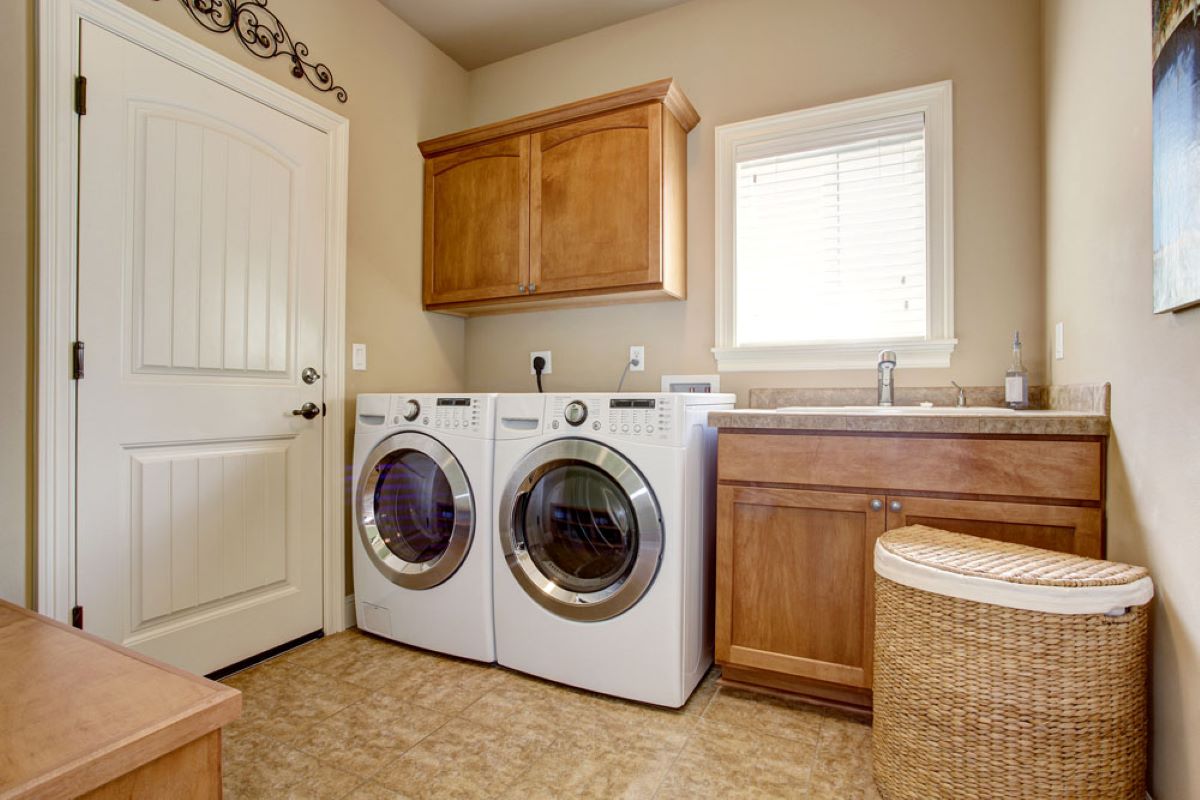
Welcome to our guide on how to install washer and dryer hookups! If you’ve recently purchased a new washer and dryer or decided to relocate your laundry area, having the proper hookups is essential for their functionality. Whether you’re a seasoned DIYer or a beginner, this step-by-step guide will walk you through the process of installing washer and dryer hookups in your home.
Having a dedicated laundry area with properly installed hookups not only improves the efficiency of doing your laundry but also adds value to your home. By following these instructions, you’ll be able to connect your washer and dryer to water supply lines, drainage systems, electrical outlets, and ventilation with ease.
But before you begin, there are a few important factors to consider. Make sure you have enough available space in the desired location for both your washer and dryer. It’s crucial to measure this space accurately to ensure a snug fit and easy access for maintenance. Additionally, ensure that the location you choose has proper access to water and electrical connections, as well as a way to vent the dryer’s hot air.
In terms of tools and materials, the specific requirements will depend on various factors, such as the type and model of your washer and dryer, as well as your home’s existing plumbing and electrical setup. However, some common tools and materials needed for this project may include:
- Measuring tape
- Drill
- Screwdriver
- Adjustable wrench
- Utility knife
- Plumbing fittings (e.g., connectors, valves, hoses)
- PVC pipes and connectors
- Electrical wires and connectors
- Ventilation duct and clamps
- Fasteners (screws, nails, etc.)
Now that we have a brief overview let’s dive into each step of the installation process, starting with checking for available space and placement.
Key Takeaways:
- Proper installation of washer and dryer hookups involves measuring and marking the placement, connecting water supply lines, setting up the drainage system, handling electrical wiring, installing ventilation, and testing the hookups. Prioritize safety and regular maintenance for efficient operation.
- By following the step-by-step guide, you can enhance the functionality and convenience of your laundry area. Ensure a snug fit, proper connections, and compliance with local codes for a successful installation.
Read more: How Much To Install Washer And Dryer Hookups
Tools and Materials Needed
Before you begin the installation of washer and dryer hookups, it’s important to gather the necessary tools and materials. While the specific requirements may vary depending on your specific setup, here is a general list of items you will likely need for this project:
Tools:
- Measuring tape: A measuring tape is essential for accurately measuring the available space for your washer and dryer, as well as ensuring proper placement of the hookups.
- Drill: You’ll need a drill to create holes for mounting brackets or fasteners, particularly when securing the water supply lines, drainage system, and ventilation ducts.
- Screwdriver: A screwdriver is necessary for removing panels or accessing the internal components of the washer and dryer during the installation process.
- Adjustable wrench: This tool will be used to tighten or loosen various plumbing fittings, such as connectors and valves.
- Utility knife: A utility knife is handy for cutting through materials like PVC pipes or insulation when necessary.
Materials:
- Plumbing fittings: Depending on your existing plumbing setup, you may need connectors, valves, hoses, and other fittings to connect the washer and dryer to the water supply lines. Make sure to choose fittings that are compatible with your specific model and type of washer and dryer.
- PVC pipes and connectors: These will be required for installing the drainage system. Choose the appropriate size and type of PVC pipes, along with the necessary connectors for your specific setup.
- Electrical wires and connectors: If your washer and dryer require electrical connections, you’ll need appropriate wires and connectors to ensure a safe and secure electrical hookup. Consult the manufacturer’s instructions or an electrician to determine the specific requirements for your appliances.
- Ventilation duct and clamps: If you’re installing a dryer, proper ventilation is crucial to safely remove hot air and moisture. You’ll need a ventilation duct that matches the dimensions of your dryer’s exhaust outlet, along with clamps to secure the duct in place.
- Fasteners: Depending on your specific installation requirements, you may need screws, nails, or other types of fasteners to secure brackets, mounting plates, or other components in place.
Having the right tools and materials from the beginning will make the installation process smoother and more efficient. Ensure that you have all the necessary items before you begin, as it can save you time and frustration down the line. Now that you have your tools and materials ready, let’s move on to the first step: checking for available space and placement.
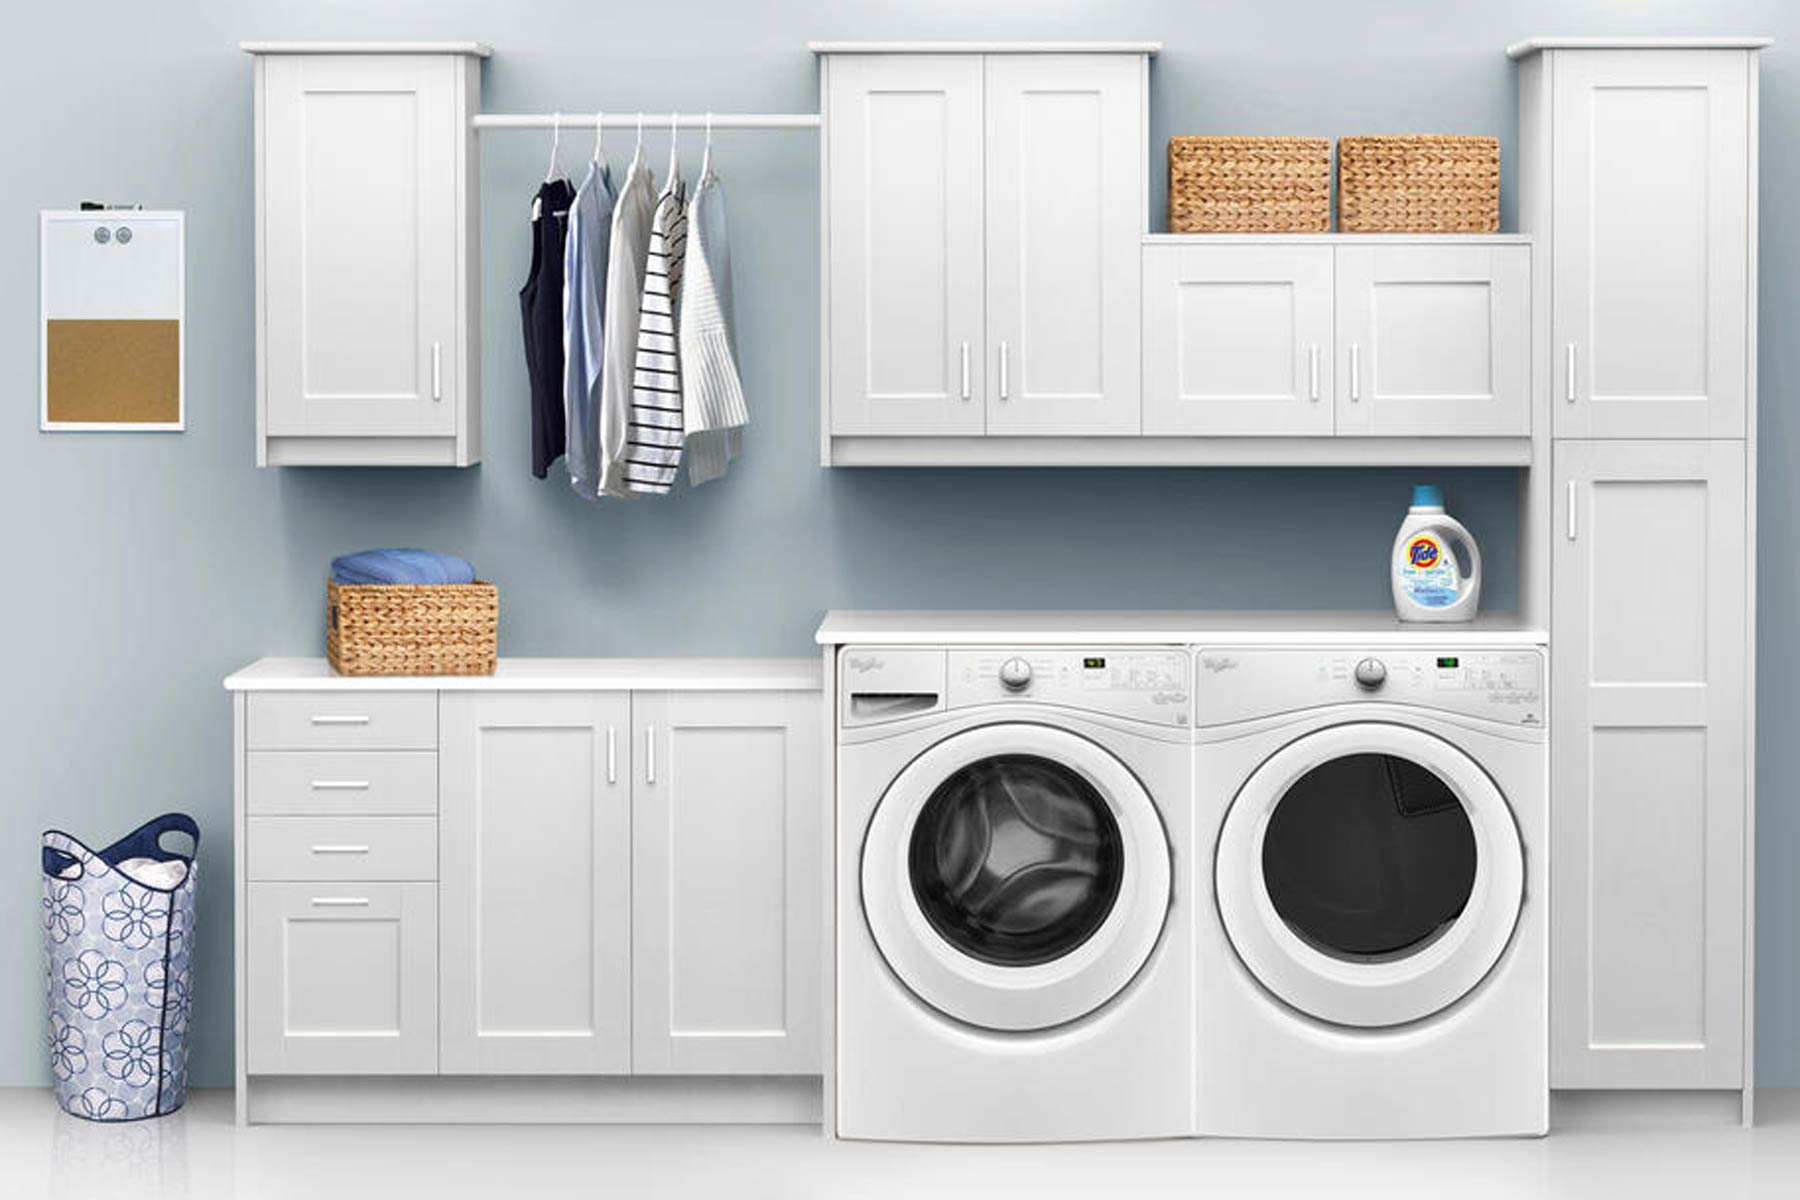
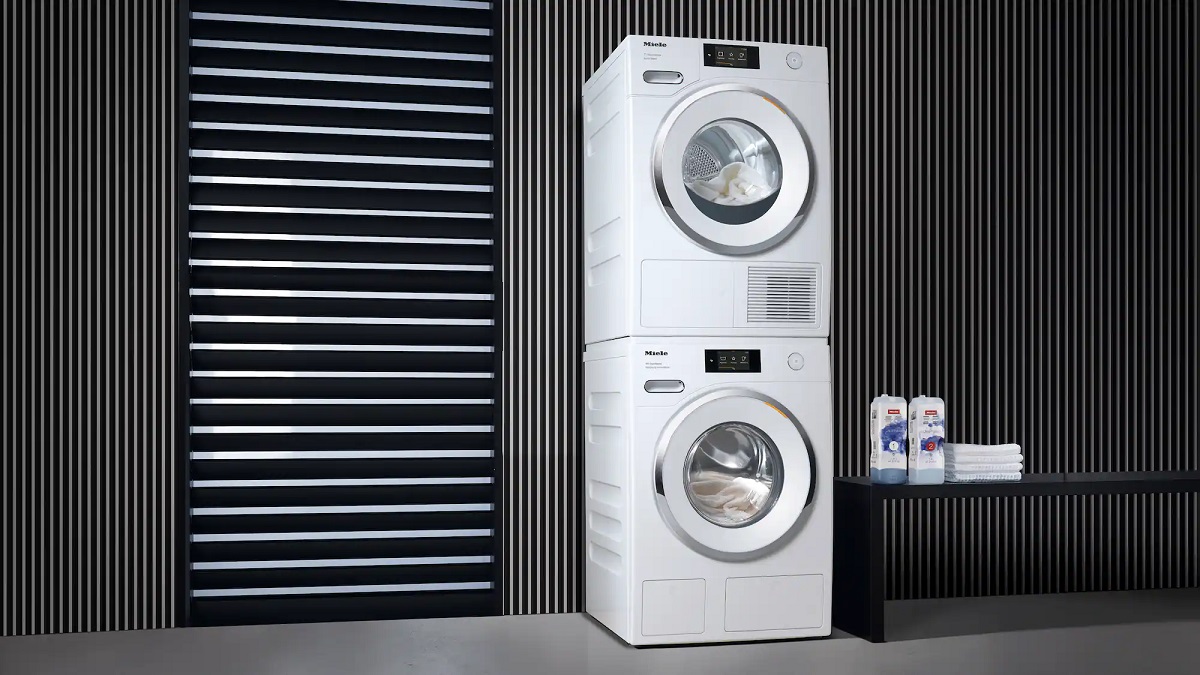
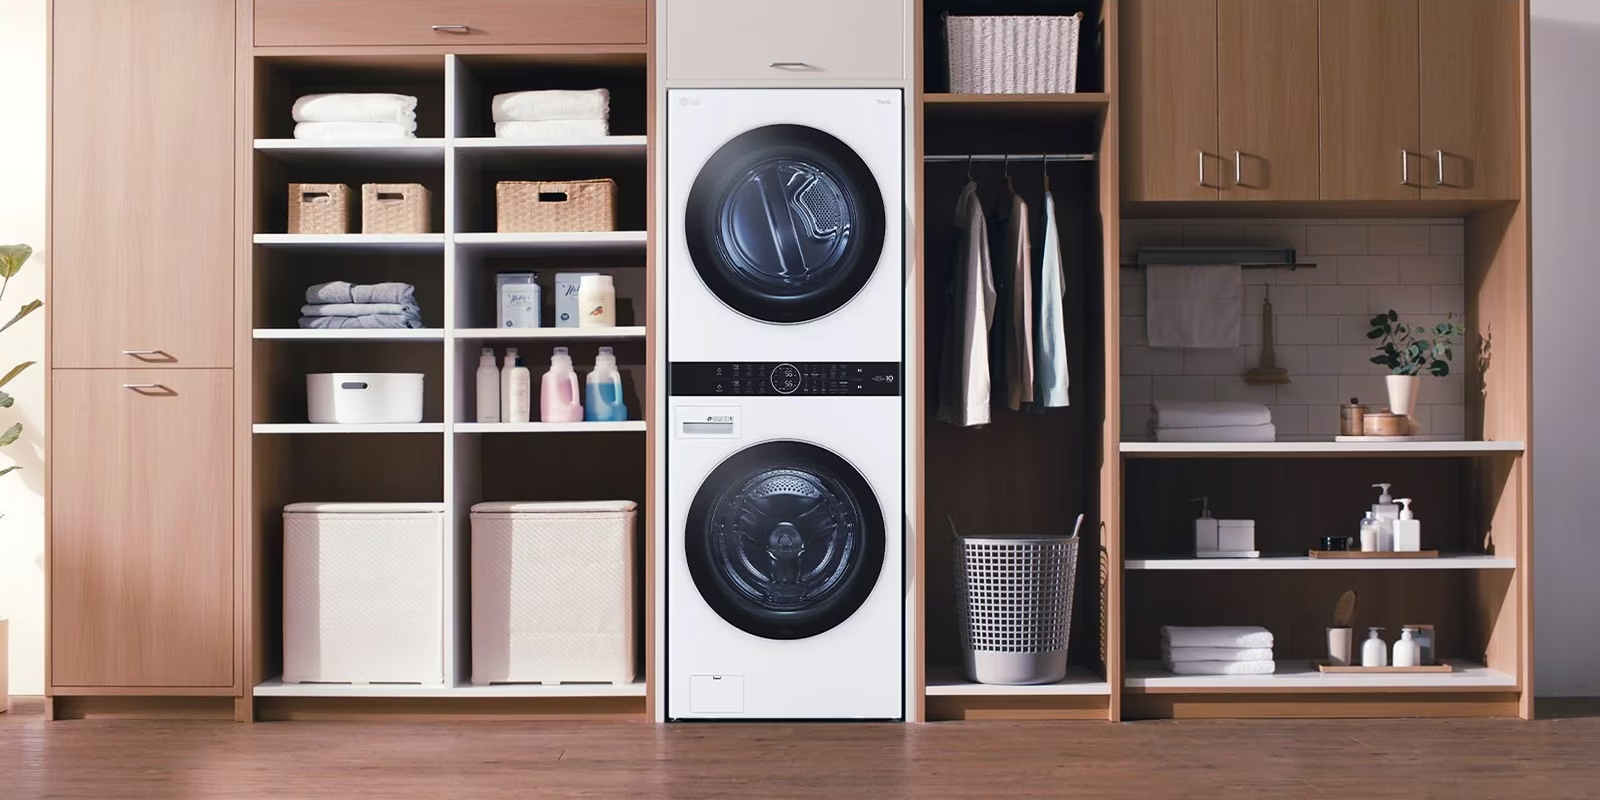
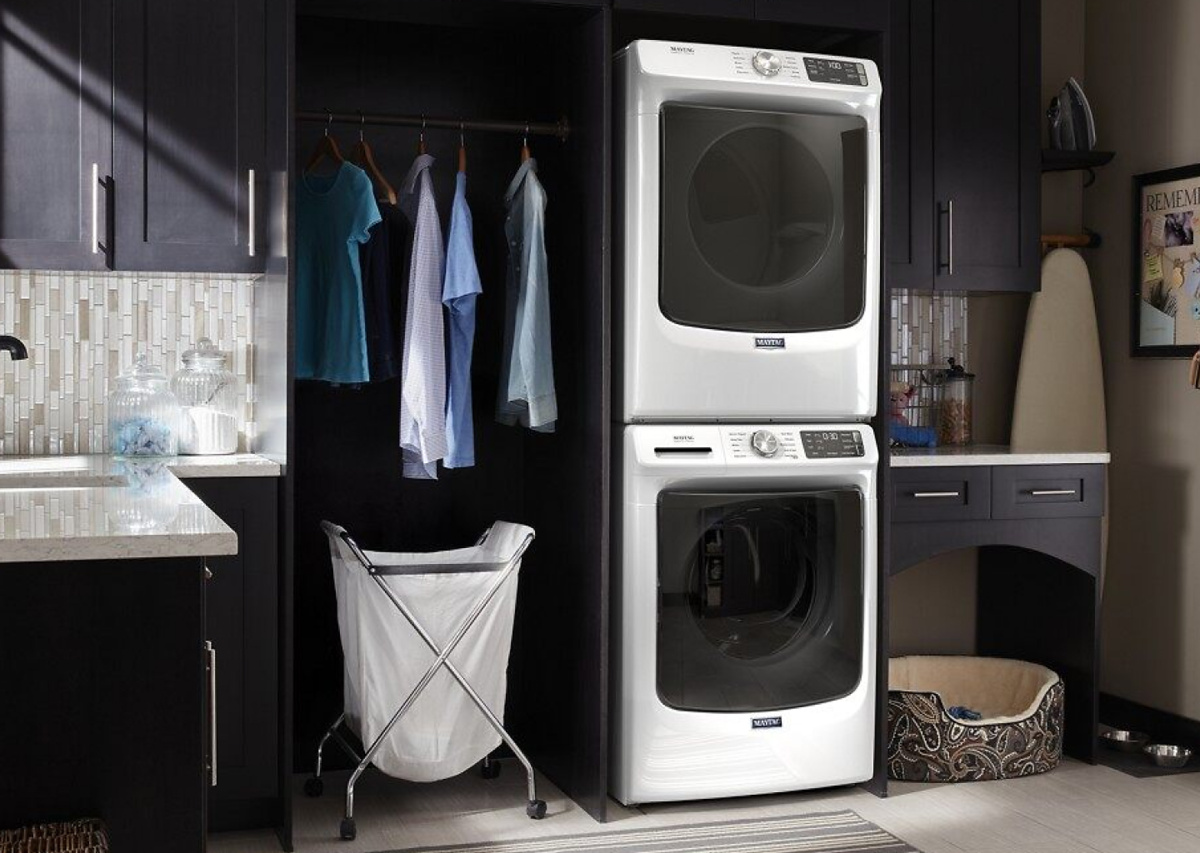
Step 1: Check for Available Space and Placement
The first step in installing washer and dryer hookups is to assess the available space and determine the ideal placement for your appliances. Consider the following factors before finalizing the location:
- Accessibility: Ensure that the area you choose for your washer and dryer is easily accessible. This includes considering factors such as proximity to your laundry room or utility area, ease of maneuverability, and clearance for opening doors and loading and unloading laundry.
- Space requirements: Measure the dimensions of your washer and dryer and compare them to the available space. Make sure you have enough room for both appliances to fit comfortably without blocking walkways or creating cramped conditions.
- Proximity to utilities: Check the proximity to water supply lines, drainage systems, electrical outlets, and ventilation options. Ideally, the chosen space should be close to these utilities to minimize the length of pipes, wires, and ducts required.
- Flooring and leveling: Ensure that the flooring is level and sturdy enough to support the weight of the washer and dryer. Uneven or weak flooring can cause vibrations or instability during operation.
- Adequate ventilation: If you’re installing a dryer, make sure there is a suitable location for venting hot air and moisture. It’s necessary to have proper ventilation to prevent the buildup of lint and to maintain dryer performance and safety.
Once you’ve considered these factors, measure the available space accurately. Use a measuring tape to determine the width, height, and depth of the area. Take into account any obstructions such as built-in cabinets, countertops, or plumbing fixtures that may affect the placement of the washer and dryer.
Mark the potential placement area using painter’s tape or chalk to visualize the layout. This will allow you to make adjustments if needed before proceeding with the installation process.
Remember, a well-planned placement will not only optimize the functionality of your washer and dryer but also contribute to the overall aesthetics and convenience of your laundry area. Once you have confirmed the ideal space and placement, you’re ready to gather the necessary tools and materials for the installation process.
In the next step, we will discuss the tools and materials needed to complete the installation process successfully.
Step 2: Gather Required Tools and Materials
Before diving into the installation of washer and dryer hookups, it’s crucial to ensure you have all the necessary tools and materials on hand. Having everything ready will make the process smoother and more efficient. Here’s a list of the common tools and materials you may need:
Tools:
- Measuring tape: You’ll need a measuring tape to accurately measure the dimensions of the available space, as well as the distance between utilities like water supply lines, drainage systems, and electrical outlets.
- Drill: A drill will be essential for creating holes in walls or cabinets to secure mounting brackets or fasteners.
- Screwdriver: Keep a screwdriver handy for removing panels or accessing internal components in the washer and dryer during the installation process.
- Adjustable wrench: An adjustable wrench is necessary for tightening or loosening various plumbing fittings like connectors and valves.
- Utility knife: A utility knife will come in handy for cutting materials like PVC pipes or insulation during the installation.
- Pliers: Pliers can be useful in gripping and turning small components that may be difficult to maneuver with a wrench or screwdriver.
Materials:
- Plumbing fittings: Depending on your setup, you may need connectors, valves, hoses, and other fittings to connect the washer and dryer to the water supply lines. Ensure you choose fittings that are appropriate for your specific models and types of appliances.
- PVC pipes and connectors: These are required for the installation of the drainage system. Make sure to select the correct size and type of PVC pipes and the necessary connectors for your particular setup.
- Electrical wires and connectors: If your washer and dryer require electrical connections, you’ll need appropriate wires and connectors to ensure a safe and secure electrical hookup. Consult the manufacturer’s instructions or an electrician to determine the specific requirements for your appliances.
- Ventilation duct and clamps: Installing a dryer will require proper ventilation to remove hot air and moisture. You’ll need a suitable ventilation duct that matches the dimensions of your dryer’s exhaust outlet, along with clamps to secure the duct in place.
- Fasteners: Depending on your installation requirements, you may need screws, nails, or other types of fasteners to secure brackets, mounting plates, or other components in place.
It’s essential to ensure you have the right tools and materials to avoid any delays or setbacks during the installation process. Gather all the required items before you proceed to the next step. With your tools and materials ready, we can move on to measuring and marking the placement for the washer and dryer hookups.
Step 3: Measure and Mark the Placement
Now that you have gathered the necessary tools and materials, it’s time to measure and mark the placement for the washer and dryer hookups. This step is crucial to ensure a proper fit and maximize the functionality of your appliances. Follow these steps to measure and mark the placement accurately:
- Measure the available space: Use a measuring tape to determine the width, height, and depth of the area where you plan to install the washer and dryer. Consider any obstructions such as cabinets, countertops, or plumbing fixtures that may affect the placement of the appliances. It’s essential to have enough room for both appliances to fit comfortably without blocking walkways or creating cramped conditions.
- Mark the placement area: Once you have measured the available space, use painter’s tape or chalk to mark the placement area on the floor or walls. This will help you visualize the layout and make adjustments if necessary.
- Consider clearances: While marking the placement area, remember to account for clearances. Leave enough space around the appliances for easy access, loading, and unloading of laundry. Make sure there is sufficient clearance for doors to open fully without obstruction. Additionally, consider any clearance requirements specified by the manufacturer in the appliance’s user manual.
- Check utility connections: Verify the proximity to water supply lines, drainage systems, electrical outlets, and ventilation options. Ensure that the marked placement area allows for easy connection to these utilities without the need for extensive modifications or additional wiring or plumbing work.
- Check levelness: Use a level to check the evenness of the floor or surface where the appliances will be placed. It’s crucial to ensure that the area is level to prevent vibrations or instability during operation.
Take your time during this step to ensure accurate measurements and proper marking of the placement area. Double-check all measurements and clearances to avoid any potential issues later on. Consulting the user manuals of your appliances can provide additional guidance on placement requirements and clearances.
Once you have measured and marked the placement area, you’re ready to move on to the next steps, which involve installing the water supply lines, drainage system, and electrical wiring. In the next step, we will discuss how to install the water supply lines for your washer and dryer hookups.
Read more: What Does Washer Dryer Hookup Mean
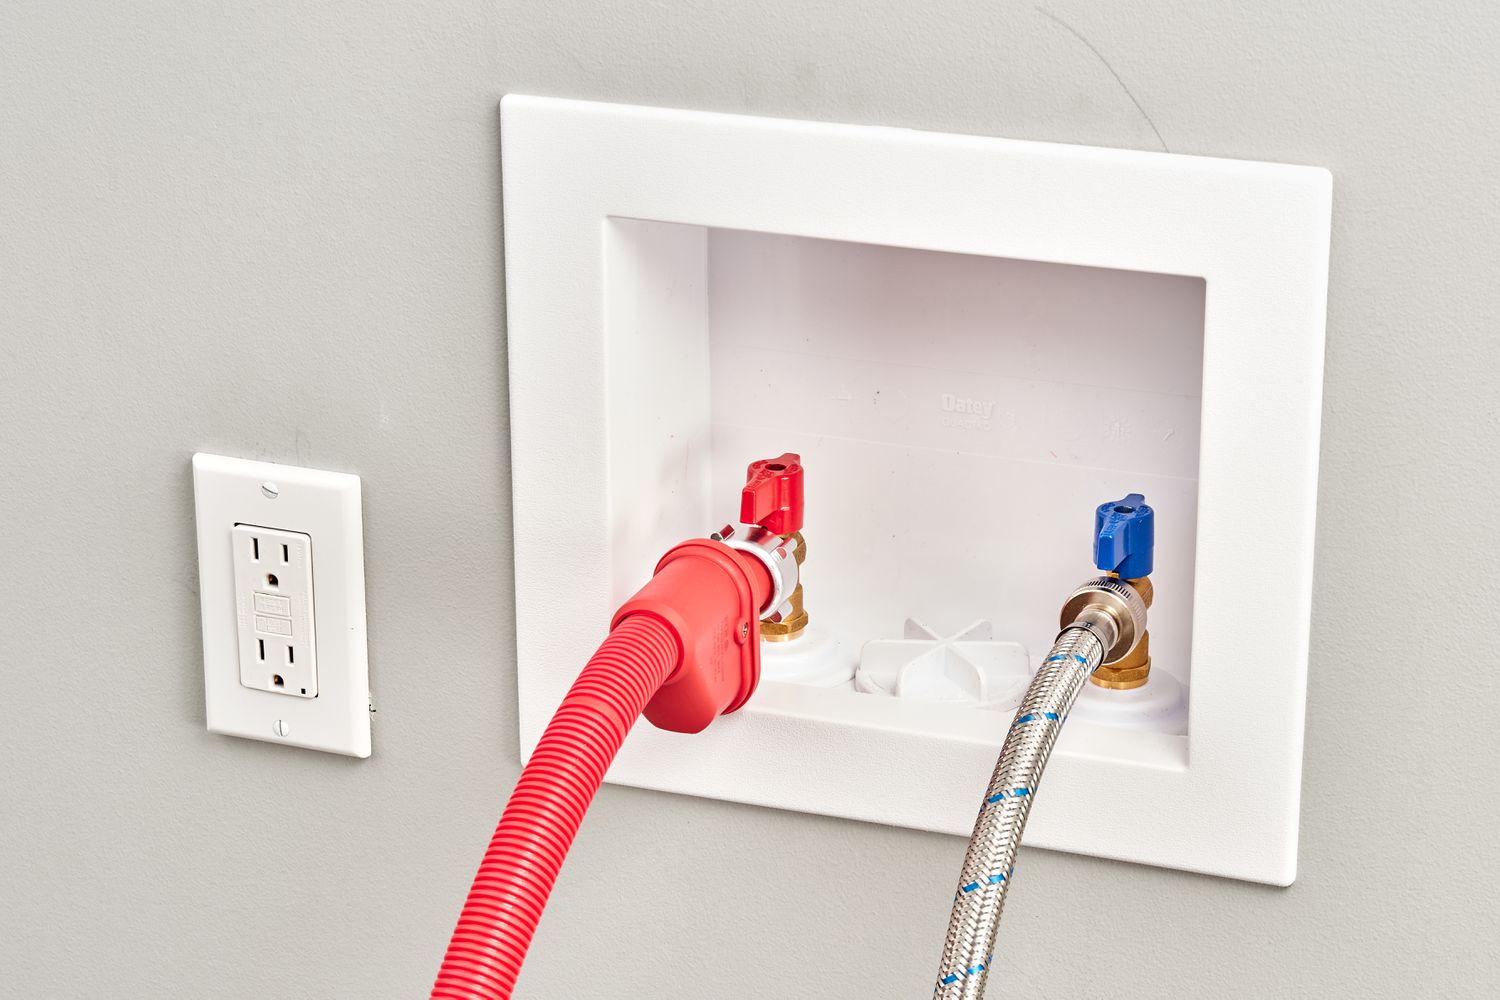
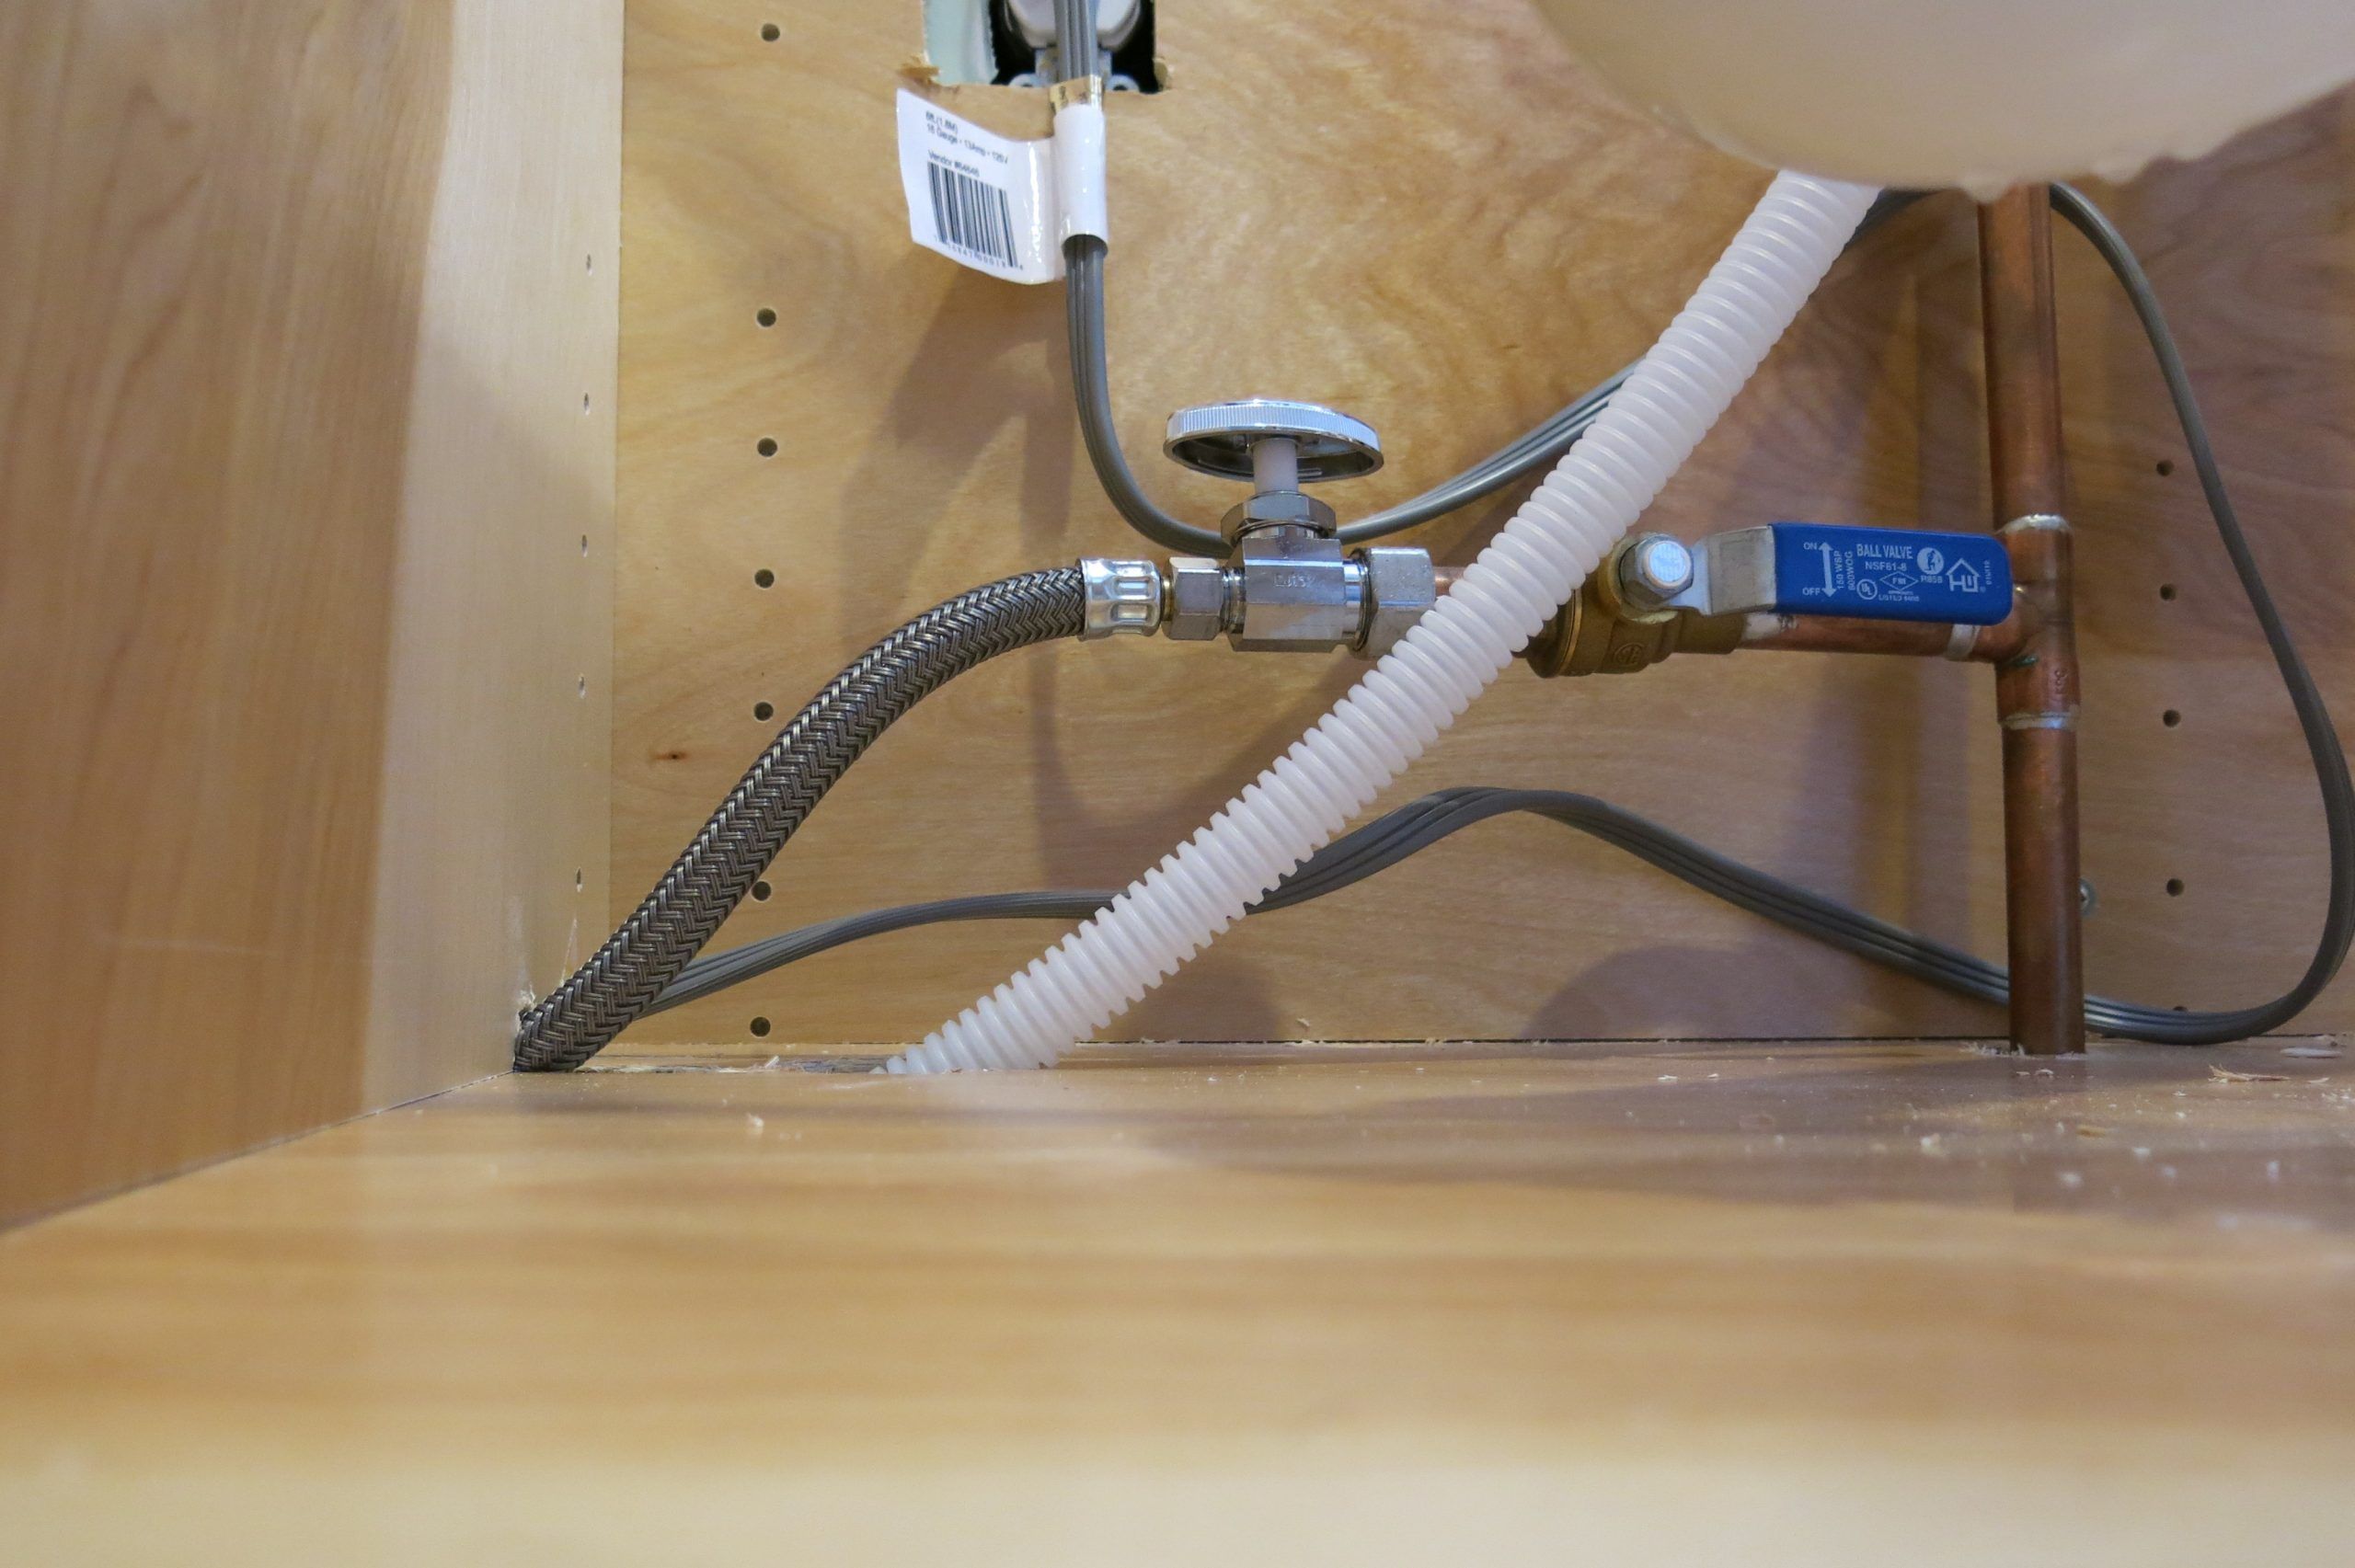
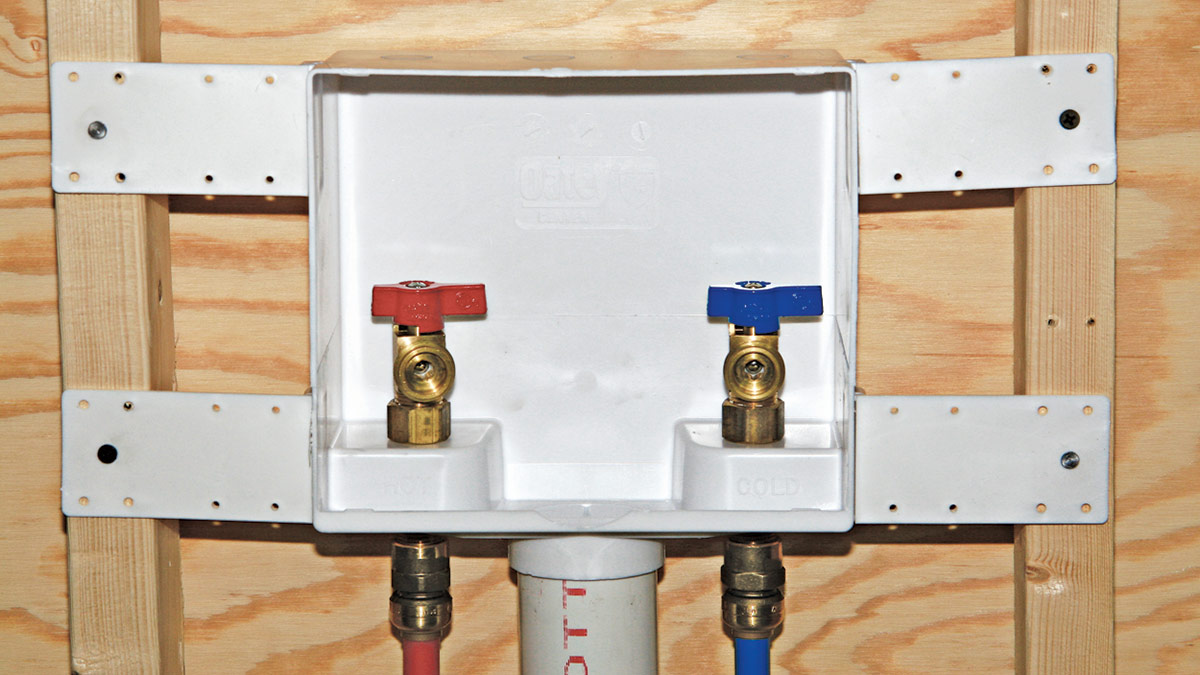
Step 4: Install Water Supply Lines
Now that you have measured and marked the placement for your washer and dryer hookups, it’s time to install the water supply lines. Proper installation of the water supply lines is crucial for the efficient and reliable operation of your appliances. Follow these steps to install the water supply lines:
- Locate the water shut-off valve: Before you start installing the supply lines, locate the water shut-off valve for the area where you will be installing the washer and dryer. This valve allows you to turn off the water supply in case of any repairs or emergencies.
- Connect the supply hoses: Depending on the type of washer you have, you may need to purchase stainless steel braided supply hoses. These hoses are durable and resistant to leaks. Connect one end of each supply hose to the hot and cold water outlets on the back of your washer. Make sure to tighten the connections securely with an adjustable wrench.
- Connect the other end of the hoses: After connecting one end of the supply hoses to the washer, connect the other end to the corresponding water supply valves. The hot water hose should be connected to the hot water valve, and the cold water hose should be connected to the cold water valve. Again, tighten the connections securely to prevent any leaks.
- Test for leaks: Once all the connections are made, turn on the water supply at the shut-off valve and check for any leaks around the hose connections. If you notice any leaks, tighten the connections further or replace the hoses if necessary.
It’s important to follow the manufacturer’s instructions provided with your washer to ensure proper installation of the water supply lines. Some washers may have specific requirements or recommendations regarding the water pressure or temperature settings. Always double-check that the supply hoses are connected correctly and securely, as any leaks can cause water damage to your laundry area.
After installing the water supply lines, move on to the next step, which involves installing the drainage system for your washer and dryer hookups. Following the correct installation procedures will ensure a smooth and efficient flow of water for laundry tasks.
Step 5: Install Drainage System
Installing a proper drainage system is essential for the efficient operation of your washer and dryer. By following these steps, you can ensure that water is discharged effectively and avoid any potential plumbing issues:
- Determine the drainage method: There are two common methods for draining a washer: a standpipe or a laundry sink. A standpipe is a vertical pipe connected to a P-trap that allows water to drain from the washer, while a laundry sink provides a larger basin for water to collect and drain. Choose the method that best suits your setup and preferences.
- Install a standpipe: If you’ve chosen the standpipe method, start by removing the existing pipe or cap from the waste drain. Insert the standpipe into the drain, ensuring a tight fit. Use a level to ensure that the standpipe is straight and vertically aligned. Secure it in place by using a bracket or fasteners.
- Install a laundry sink: If you opt for a laundry sink, place the sink near the washer and ensure it is level and stable. Connect the sink’s drain to the existing waste drain using appropriate fittings and connectors. Make sure there is a P-trap installed to prevent sewer gases from entering your laundry area.
- Connect the washer drain hose: For both methods, connect the washer’s drain hose to either the standpipe or the laundry sink’s drain. Make sure the connection is secure and watertight to prevent leaks.
- Test the drainage system: Before using the washer, run a small wash and drain cycle to test the efficiency of the drainage system. Check for any leaks or backups and adjust the connections if needed. It’s important to have a smooth and unobstructed flow of water during the draining process.
Keep in mind that local plumbing codes may have additional requirements or restrictions for the drainage system. Familiarize yourself with these codes to ensure compliance during installation.
By properly installing the drainage system, you can avoid water damage, prevent clogs or backups, and maintain the overall functionality of your washer and dryer.
With the water supply lines and drainage system in place, we can now move on to the next step: electrical wiring. Proper electrical connection is crucial for the safe and proper operation of your appliances.
Step 6: Electrical Wiring
Proper electrical wiring is essential for the safe and efficient operation of your washer and dryer. Follow these steps to ensure a successful electrical hookup:
- Turn off the power: Before beginning any electrical work, ensure that the power to the area is turned off at the breaker box. This will prevent the risk of electrical shock.
- Determine the electrical requirements: Check the specifications provided by the manufacturer for your washer and dryer to determine the electrical requirements. This may include the voltage, amperage, and plug type needed for each appliance.
- Prepare the electrical outlets: If the existing outlets in the area do not meet the requirements of your washer and dryer, you may need to hire a licensed electrician to install new outlets or make the necessary modifications.
- Wire the outlets: If you have the necessary knowledge and skills, you can wire the outlets yourself. However, it is always recommended to hire a licensed electrician to ensure safe and proper wiring. Follow local electrical codes and regulations during the wiring process.
- Connect the washer and dryer plugs: Once the outlets are wired, connect the plugs of the washer and dryer to their respective outlets. Ensure a secure and proper fit to prevent any electrical issues.
- Test the electrical connections: After connecting the plugs, turn on the power at the breaker box and test the electrical connections. Make sure all functions of the washer and dryer, such as controls and lights, are working correctly. If you notice any issues or abnormalities, immediately turn off the power and consult a professional electrician.
Remember that electrical work can be dangerous, so it’s crucial to take the necessary precautions and follow safety guidelines. If you are unsure about any aspect of the electrical wiring, it’s always best to consult a licensed electrician to ensure the safety of yourself and your home.
With the electrical wiring completed, we can now move on to the next step: ventilation installation. Proper ventilation is important to remove hot air and moisture from the dryer.
When installing washer and dryer hookups, make sure to carefully measure and mark the locations for the water and electrical connections. Double check the measurements before cutting into walls or floors to avoid costly mistakes.
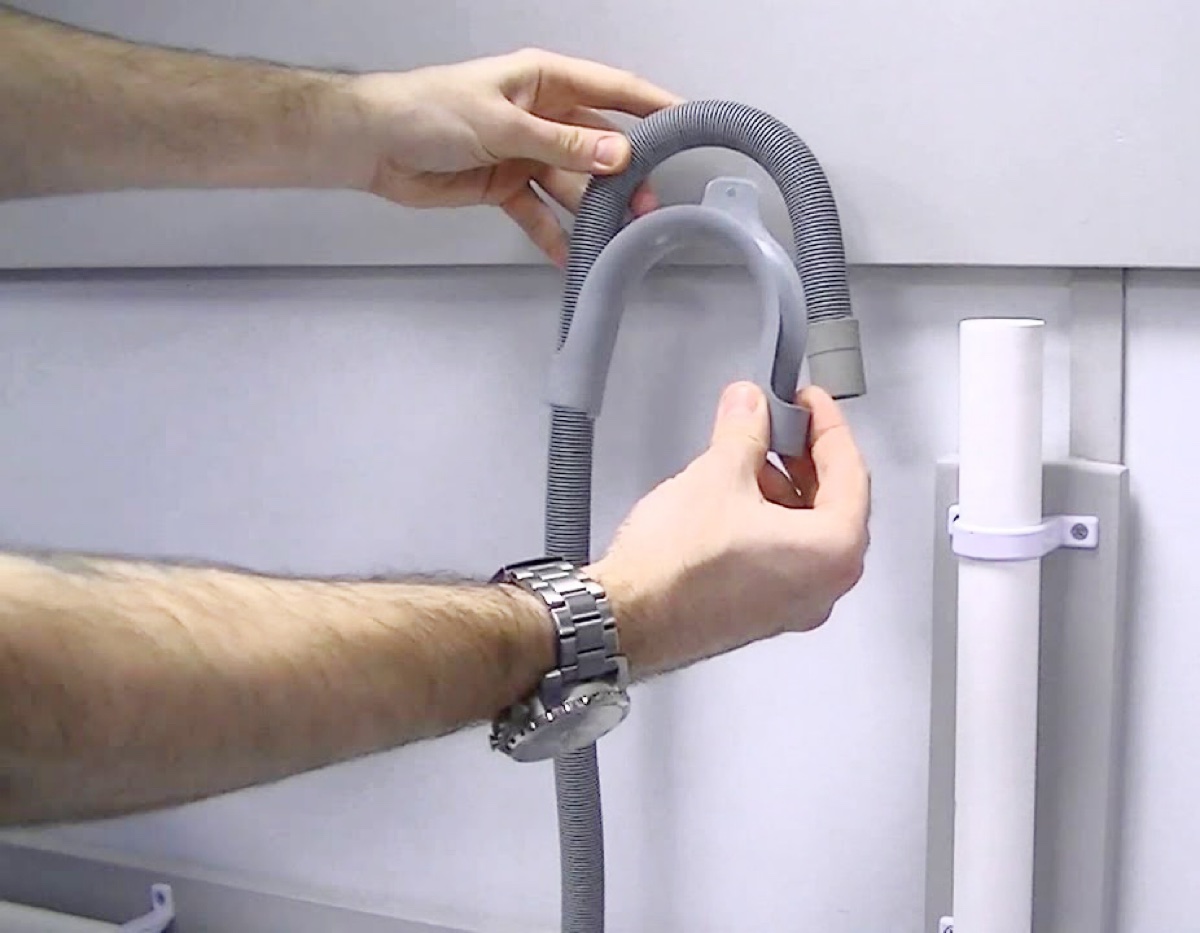
Step 7: Ventilation Installation
Proper ventilation is crucial for the safe and efficient operation of your dryer. The following steps will guide you through the installation of a ventilation system:
- Choose an appropriate ventilation route: Determine the most suitable route for the dryer ventilation duct to expel hot air and moisture. Ideally, the duct should be as short and straight as possible, with minimal bends or turns.
- Measure and cut the ventilation duct: Measure the distance between the dryer’s exhaust outlet and the exterior wall or designated outlet location. Using a utility knife or appropriate cutting tool, cut the ventilation duct to the required length, ensuring a precise and clean cut.
- Install the ductwork: Attach one end of the ventilation duct to the dryer’s exhaust outlet, securing it tightly with a clamp. Connect the other end of the duct to the exterior wall or designated outlet location. Again, secure it firmly with a clamp.
- Ensure proper support: Install metal straps or hangers along the length of the ductwork to provide support and prevent sagging or shifting over time. These supports should be spaced at regular intervals and securely fastened to the wall or ceiling using appropriate fasteners.
- Seal the connections: To prevent air leaks, use foil duct tape or approved duct sealant to seal the connections between the ductwork and the dryer’s exhaust outlet as well as the exterior wall or outlet location. Ensure a tight and secure seal to maintain the efficiency of the ventilation system.
- Test the ventilation system: Once the ductwork is installed and all connections are sealed, run the dryer and check for proper airflow through the ventilation system. Test for any air leaks or restrictions that may impede the airflow. Make any necessary adjustments or repairs to ensure optimal performance.
It’s important to regularly inspect and clean the ventilation system to prevent lint buildup and maintain its efficiency. Ensure that the exterior vent cover flap functions properly and is clear of any obstructions.
Proper ventilation not only helps to eliminate moisture and prevent overheating but also reduces the risk of fire hazards caused by lint accumulation. By following these steps, you can install a functional and safe ventilation system for your dryer.
With the ventilation system in place, we can now move on to the next step: connecting the washer and dryer to the installed hookups.
Read more: How To Hide Washer Hookups
Step 8: Connecting the Washer and Dryer
Once you have installed the necessary hookups, including the water supply lines, drainage system, electrical wiring, and ventilation, it’s time to connect your washer and dryer to these hookups. Follow these steps to ensure a proper and secure connection:
- Position the appliances: Carefully move the washer and dryer into the marked placement area. Ensure that there is enough space for the doors to open fully and for easy access to the control panels.
- Water supply connections: For each appliance, connect the hot water hose to the hot water valve and the cold water hose to the cold water valve. Tighten the connections using an adjustable wrench, ensuring they are secure and leak-free.
- Drainage connection: Connect the washer’s drain hose to either the standpipe or the laundry sink’s drain. Make sure it is secured tightly to prevent leaks or disconnections during the wash cycle.
- Electrical connection: Plug in the washer and dryer to their respective electrical outlets. Ensure a secure fit and check that the plugs are inserted fully to establish a proper electrical connection.
- Ventilation connection: Ensure that the ventilation duct is securely connected to the dryer’s exhaust outlet using a clamp. Make sure the duct is properly aligned with the exterior vent or designated outlet location.
- Secure the appliances: Once all the connections are made, carefully check that the washer and dryer are stable and level. Use a level to ensure they are balanced. If necessary, adjust the leveling legs or feet to achieve stability.
After connecting the washer and dryer, it’s a good idea to run a small test cycle to ensure that all components are functioning properly. Check for any leaks, unusual noises, or error codes that may indicate a problem. Consult the manufacturer’s instructions for any specific startup procedures or troubleshooting tips.
Remember to perform regular maintenance and inspections on your washer and dryer to keep them operating efficiently and to prevent potential issues.
With your washer and dryer now connected to the hookups, we’re almost done! The final step is to test the hookups to ensure everything is working correctly.
Step 9: Test the Hookups
After completing the installation process and connecting your washer and dryer to the hookups, it’s essential to test them to ensure everything is functioning correctly. Follow these steps to test the hookups:
- Turn on the water supply: Verify that the water shut-off valve is fully open and turn on the water supply. Check for any leaks in the water supply connections. If you notice any leaks, tighten the connections further or replace any faulty components.
- Check the drainage system: Start a wash cycle on your washer and observe the draining process. Ensure that the water is effectively draining through the drainage system without any backups or blockages. If necessary, adjust the position or angle of the drain hose to optimize the draining process.
- Test the electrical connections: Power on both the washer and dryer and test their individual functions. Make sure that the control panels, buttons, and settings are all operational. Run a test load on the washer to ensure proper water fill, agitation, and spin cycles. For the dryer, check that it starts, generates heat, and effectively dries clothes.
- Check the ventilation system: Monitor the airflow from the dryer’s exhaust during a drying cycle. Ensure that the ventilation system is adequately expelling hot air and moisture outside the designated area. If you notice any restrictions or poor airflow, inspect the ductwork and make any necessary adjustments.
- Inspect for any issues: During the testing phase, be attentive to any signs of malfunctions, unusual noises, or error codes. If you encounter any problems, consult the manufacturer’s instructions or contact a professional for troubleshooting and repairs.
Testing the hookups allows you to identify and address any potential issues early on, ensuring the proper functioning of your washer and dryer. It’s important to incorporate regular maintenance and inspections into your routine to prolong the life of your appliances and prevent any potential problems.
Congratulations! You have successfully installed washer and dryer hookups in your home. Enjoy the convenience and efficiency of having your laundry area properly equipped with the necessary connections.
As a final note, always prioritize safety during the installation process and consult professionals when needed. Following the manufacturer’s instructions and any applicable local codes or regulations will help ensure a successful installation.
Thank you for using our guide, and we hope this has been helpful in your installation journey!
Conclusion
Installing washer and dryer hookups in your home is a rewarding project that can enhance the functionality and convenience of your laundry area. By following the step-by-step guide provided here, you can successfully install the necessary connections for your washer and dryer, ensuring their efficient operation.
Throughout the installation process, we covered important steps such as checking for available space and placement, gathering the required tools and materials, measuring and marking the placement, installing water supply lines, setting up the drainage system, handling electrical wiring, installing the ventilation system, connecting the appliances, and testing the hookups. Each step plays an integral role in ensuring a safe and operational laundry area.
Remember to prioritize safety, consult professionals when necessary, and familiarize yourself with local plumbing and electrical codes to ensure compliance during installation. Regular maintenance and inspections are also key to prolonging the lifespan of your appliances and preventing potential issues.
We hope this guide has provided you with the knowledge and confidence to successfully install washer and dryer hookups in your home. Enjoy the convenience and efficiency of having a dedicated laundry area equipped with proper connections!
Thank you for choosing our guide, and happy laundry days!
Frequently Asked Questions about How To Install Washer And Dryer Hookups
Was this page helpful?
At Storables.com, we guarantee accurate and reliable information. Our content, validated by Expert Board Contributors, is crafted following stringent Editorial Policies. We're committed to providing you with well-researched, expert-backed insights for all your informational needs.

0 thoughts on “How To Install Washer And Dryer Hookups”