Articles
How To Hook Up A Stacked Washer And Dryer
Modified: August 25, 2024
Learn how to hook up a stacked washer and dryer with these informative articles. Find step-by-step instructions and expert tips for a smooth installation process.
(Many of the links in this article redirect to a specific reviewed product. Your purchase of these products through affiliate links helps to generate commission for Storables.com, at no extra cost. Learn more)
Introduction
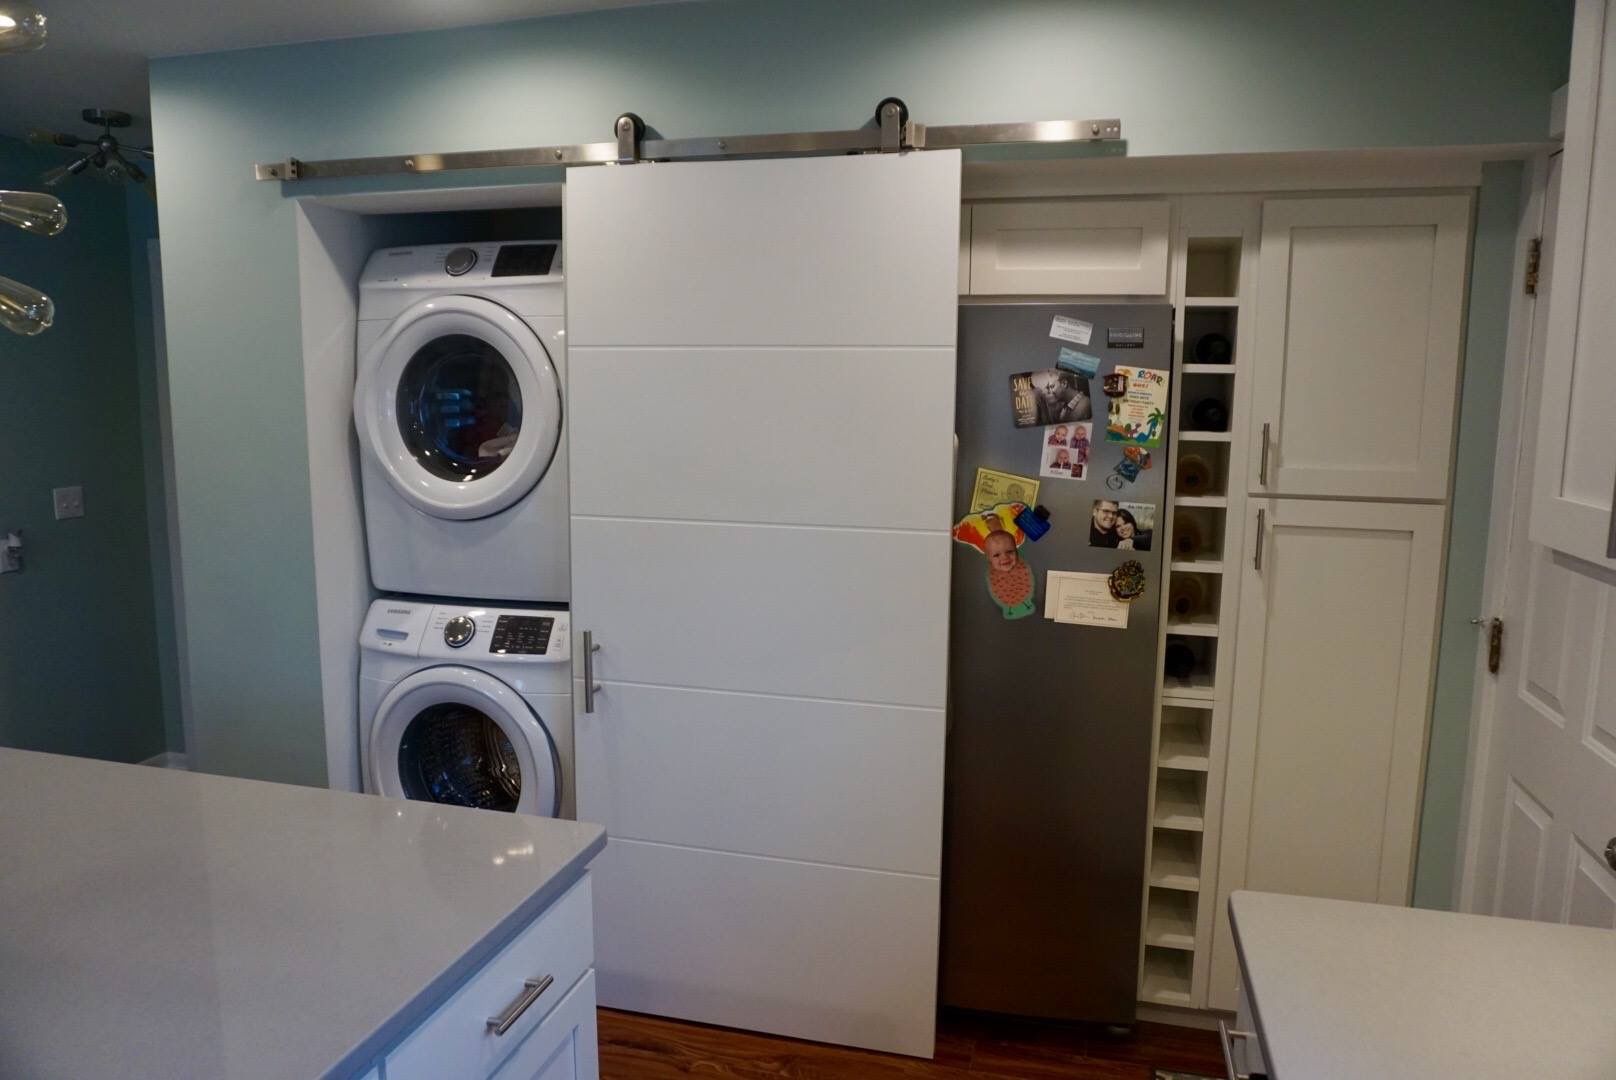
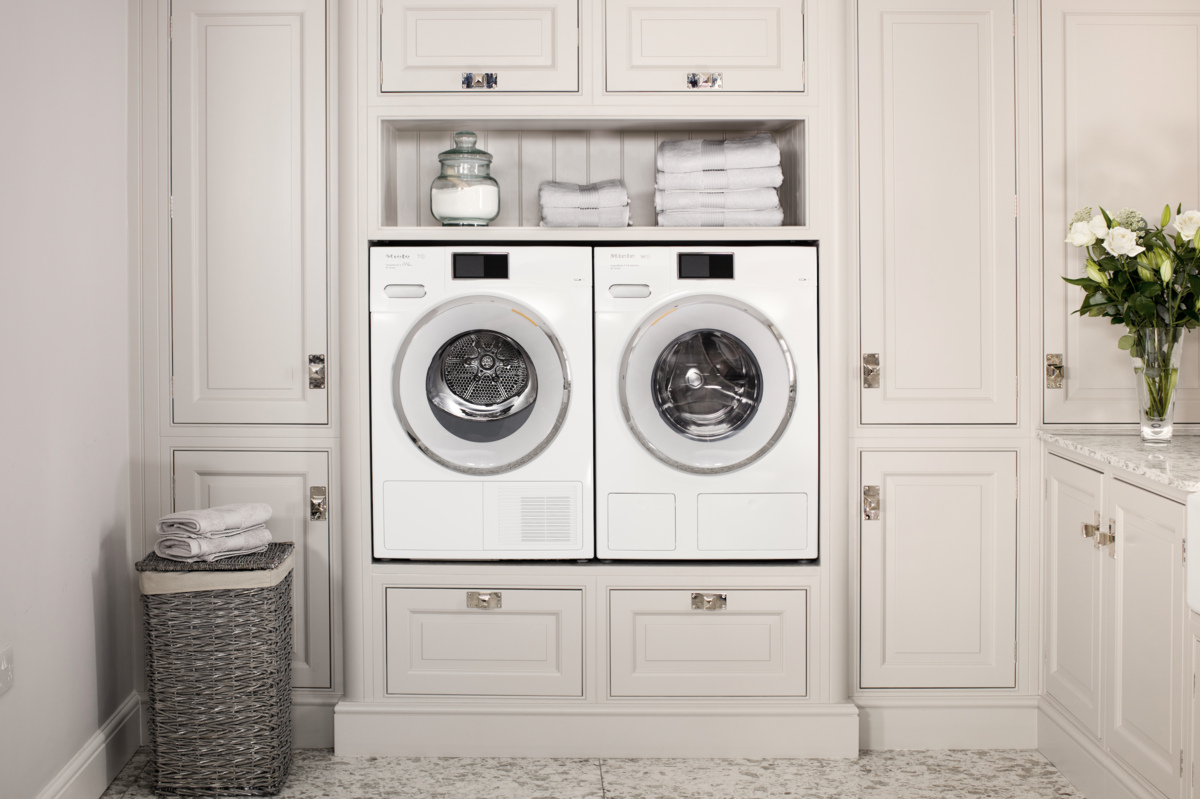
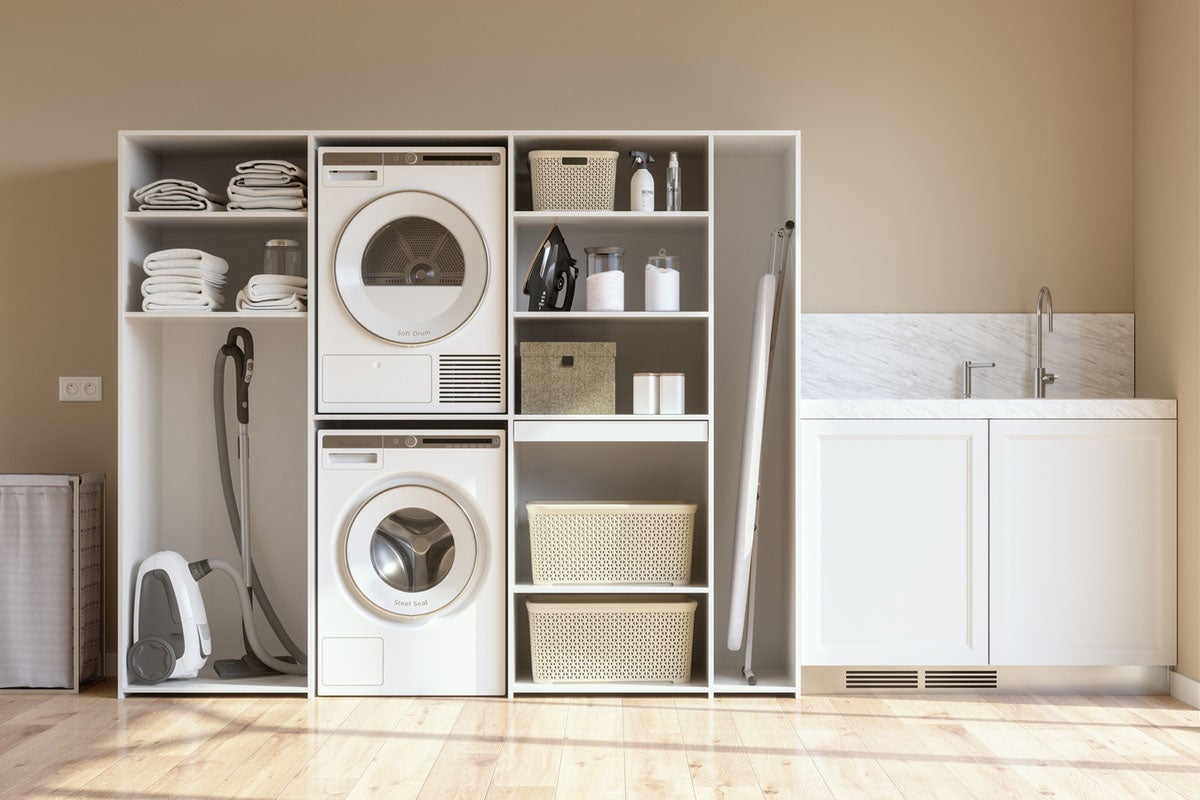
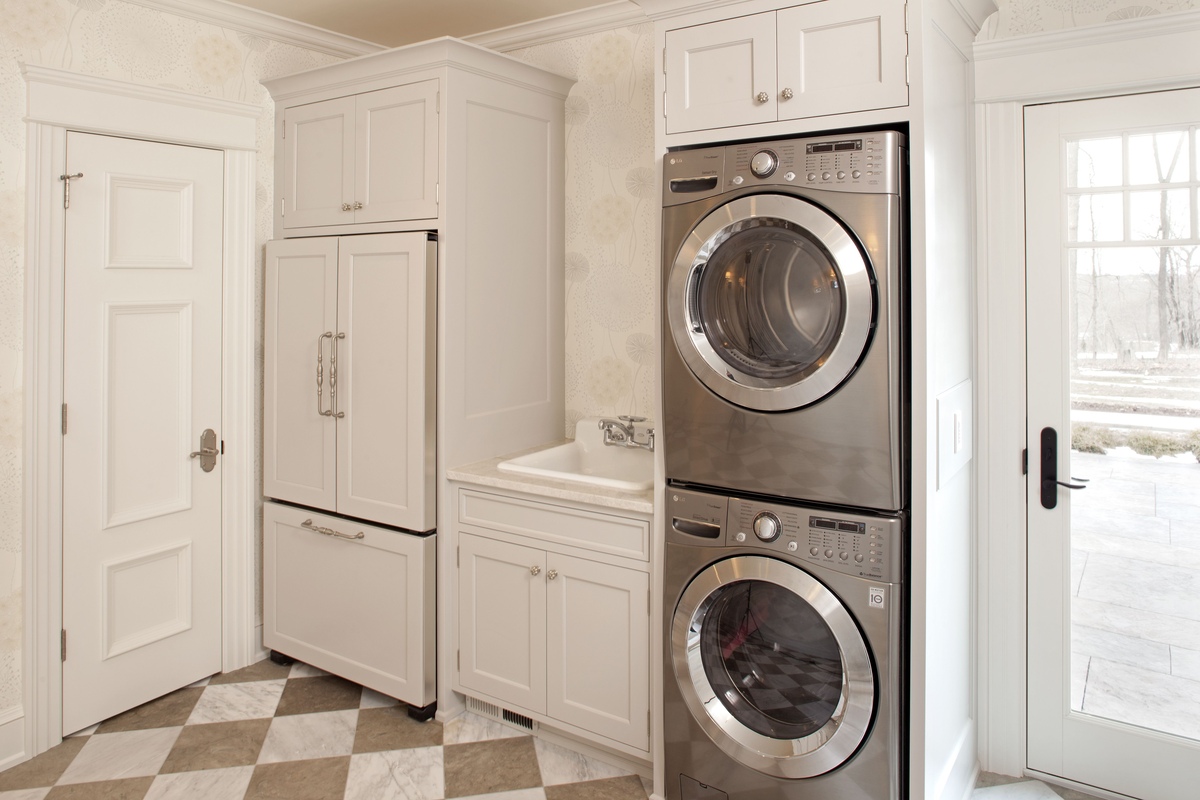
Having a stacked washer and dryer is a convenient and space-saving solution for laundry needs. Whether you’re dealing with limited space in your home or looking for an efficient setup, understanding how to hook up a stacked washer and dryer is essential. This article will guide you through the process, providing step-by-step instructions and tips for a successful installation.
Before you begin, it’s important to gather the necessary tools and materials. You’ll need the washer and dryer units, a stacking kit specifically designed for your model, a measuring tape, a level, a screwdriver, an adjustable wrench, and a power cord. It’s crucial to check the manufacturer’s instructions for specific requirements and ensure all components are compatible.
The first step is to prepare the laundry space. Clear the area of any debris or clutter and ensure proper ventilation. It’s important to have enough space around the stacked units for easy access and maintenance. Additionally, make sure the floor is level to prevent any issues during operation.
Next, follow the instructions provided with your stacking kit to install it correctly. This generally involves attaching brackets to the washer and dryer and securing them together. Take the time to read the instructions carefully and double-check that everything is properly aligned and tightened.
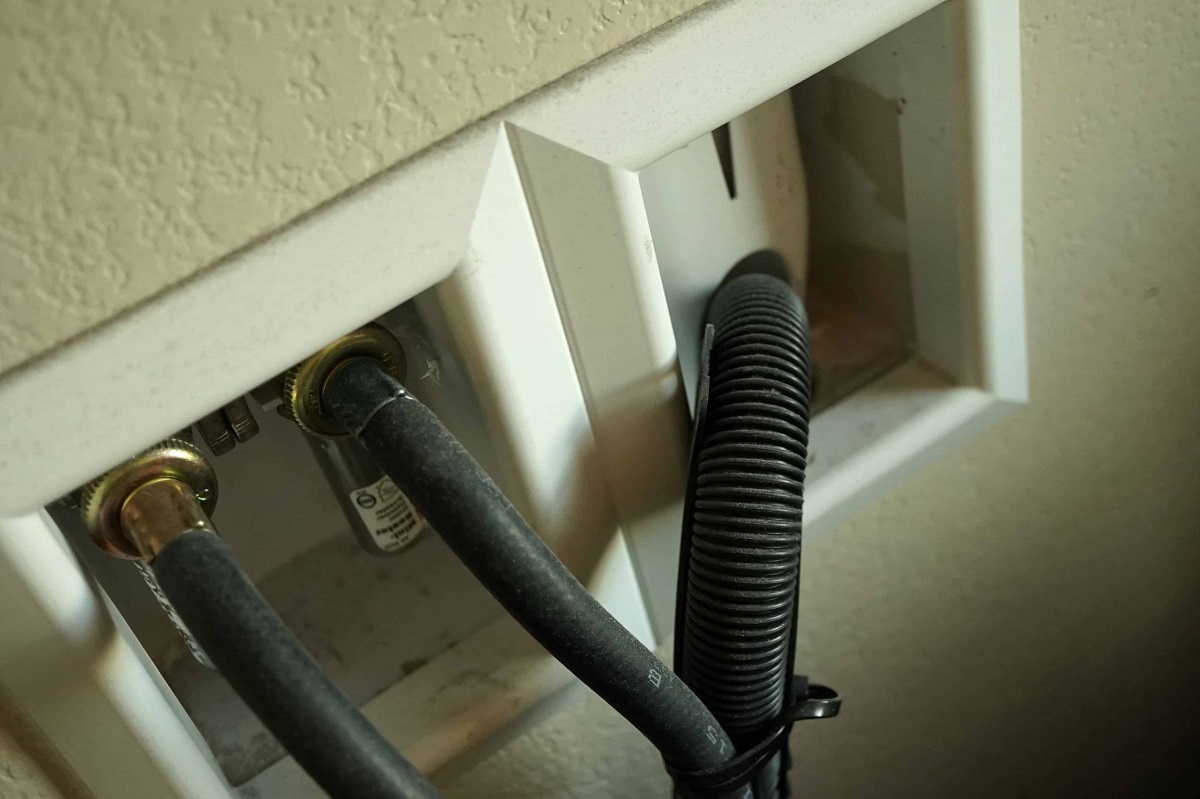
Once the stacking kit is installed, you can move on to connecting the water supply. Locate the water inlet valves on the back of the washer unit. Attach the hoses securely, ensuring that hot water is connected to the hot water valve and cold water to the cold water valve. Use an adjustable wrench to tighten the connections.
In addition to the water supply, you’ll also need to connect the dryer vent. Check the manufacturer’s specifications for the venting requirements and choose the appropriate vent hose. Attach one end of the hose to the dryer vent outlet and secure it with a clamp. The other end should be connected to a vent opening or an exterior wall using another clamp.
With the connections for water supply and dryer vent completed, it’s time to plug in the units. Locate power outlets that are compatible with your washer and dryer’s electrical requirements. Connect the power cords securely, making sure they are not tangled or pulled too tightly.
Finally, before you start using your stacked washer and dryer, it’s crucial to run a test cycle to ensure everything is properly functioning. Follow the manufacturer’s instructions to select an appropriate cycle and check for any leaks or unusual noises. Make adjustments if necessary and contact customer support if you encounter any issues.
To summarize, hooking up a stacked washer and dryer involves gathering the necessary tools and materials, preparing the laundry space, installing the stacking kit, connecting the water supply and dryer vent, plugging in the units, and testing their operation. By following these steps and adhering to the manufacturer’s instructions, you can enjoy the convenience and efficiency of a stacked washer and dryer in your home.
Key Takeaways:
- Efficiently hook up a stacked washer and dryer by gathering tools, preparing the space, installing the stacking kit, connecting water supply and dryer vent, plugging in units, and testing for proper operation.
- Prioritize safety and follow manufacturer’s instructions for a successful installation. Regular maintenance and cleaning will optimize performance and ensure the longevity of your stacked washer and dryer.
Read more: How To Hook Up Pressure Washer
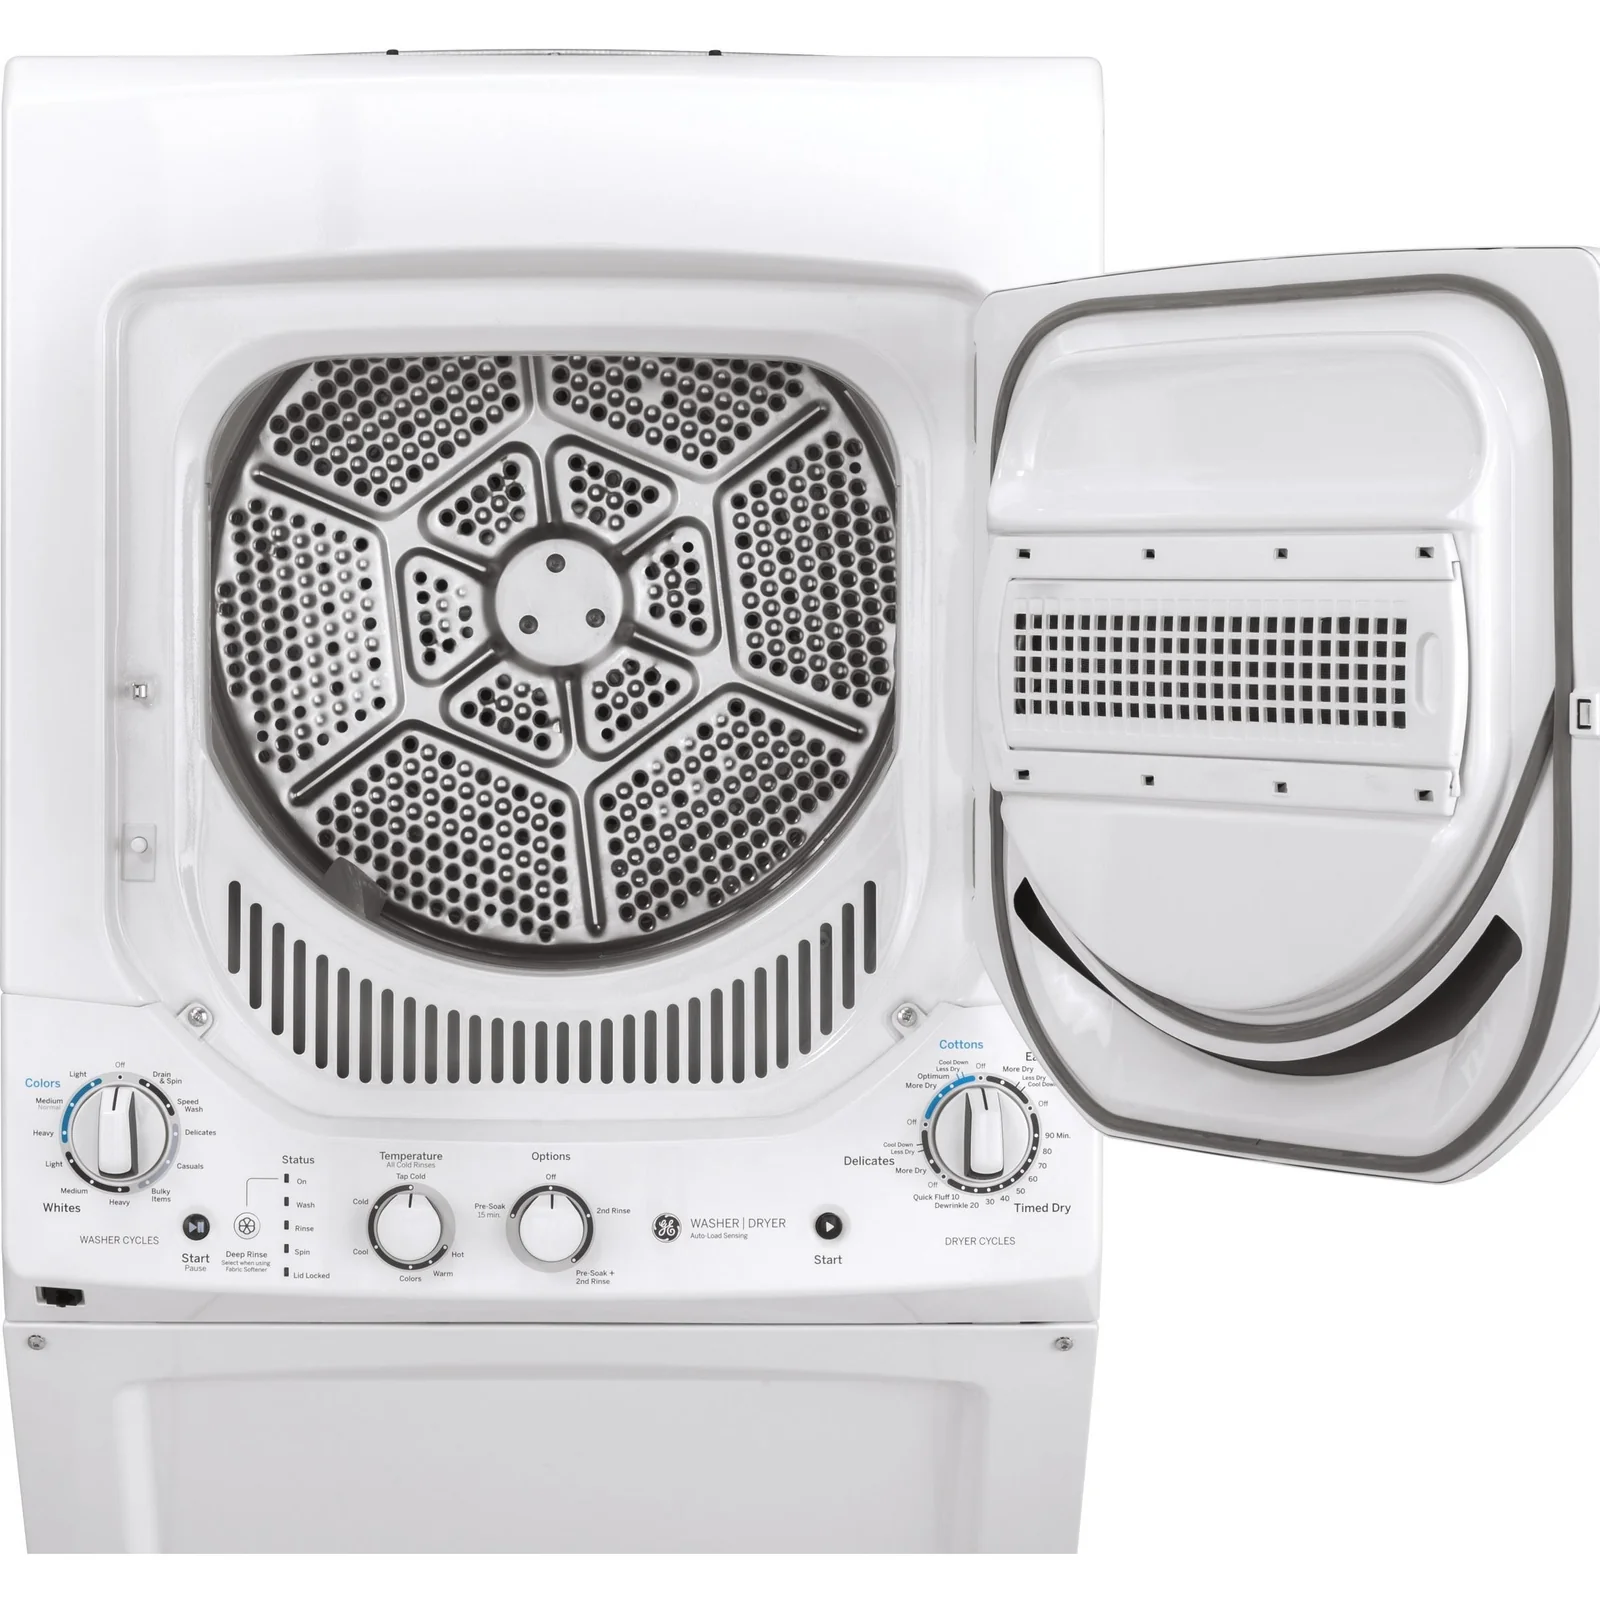
Step 1: Gather the necessary tools and materials
Before you can begin the process of hooking up a stacked washer and dryer, it’s important to gather all the necessary tools and materials. Having everything you need will make the installation process smoother and more efficient. Here’s a list of the essential items you’ll need:
- Washer and dryer units: The heart of your laundry setup, ensure you have the appropriate washer and dryer units for stacking. Make sure they are compatible and designed for stacking.
- Stacking kit: A stacking kit is specifically designed to secure the washer and dryer units together. It typically includes brackets and hardware needed for installation. Ensure you have the correct stacking kit for your specific washer and dryer models.
- Measuring tape: Accurate measurements are crucial during installation. Use a measuring tape to determine the available space and ensure the stacked units will fit properly in your laundry area.
- Level: Maintaining a level surface is important for the proper functioning of the stacked washer and dryer. A level tool will help you ensure that the floor or platform is flat and even.
- Screwdriver: You may need a screwdriver to fasten the brackets of the stacking kit and secure the units together. Choose the appropriate screwdriver based on the type of screws provided with your stacking kit.
- Adjustable wrench: An adjustable wrench will come in handy for tightening the hose connections during the water supply setup. Ensure you have a wrench that can accommodate various sizes of fittings.
- Power cord: Depending on your specific washer and dryer models, you may need a power cord for each unit. Check the manufacturer’s instructions to determine the appropriate type and length of power cords needed.
By gathering these tools and materials beforehand, you’ll have everything you need to successfully hook up your stacked washer and dryer. It’s important to ensure that all components are compatible and to follow the manufacturer’s instructions throughout the installation process.
Step 2: Prepare the laundry space
Before you can begin installing your stacked washer and dryer, it’s important to prepare the laundry space to ensure a smooth and efficient setup. Taking the time to properly prepare the area will help prevent any issues and ensure optimal performance. Here are the key steps to follow:
- Clear the area: Start by clearing the designated space where you plan to install the stacked washer and dryer. Remove any obstacles, clutter, or unnecessary items in the area to provide ample space for the units. This will make it easier to maneuver during installation and future maintenance.
- Ensure proper ventilation: Adequate ventilation is crucial for the proper operation of the dryer unit and to prevent the buildup of moisture and heat. Check for any obstructions around the dryer vent and ensure proper airflow by keeping a sufficient distance from walls or other objects. This will help prevent lint accumulation and reduce the risk of overheating.
- Level the floor: A level floor is essential to ensure that the stacked washer and dryer remain stable during operation. Use a level tool to check the floor’s evenness. If you notice any unevenness, consider using shims or leveling compound to create a flat surface. This will help prevent vibrations and reduce the risk of any imbalance issues.
By clearing the area, ensuring proper ventilation, and leveling the floor, you’ll create an environment that is conducive to efficient and safe functioning of your stacked washer and dryer. These preparatory steps will help you avoid any potential complications during the installation process and promote long-lasting performance.
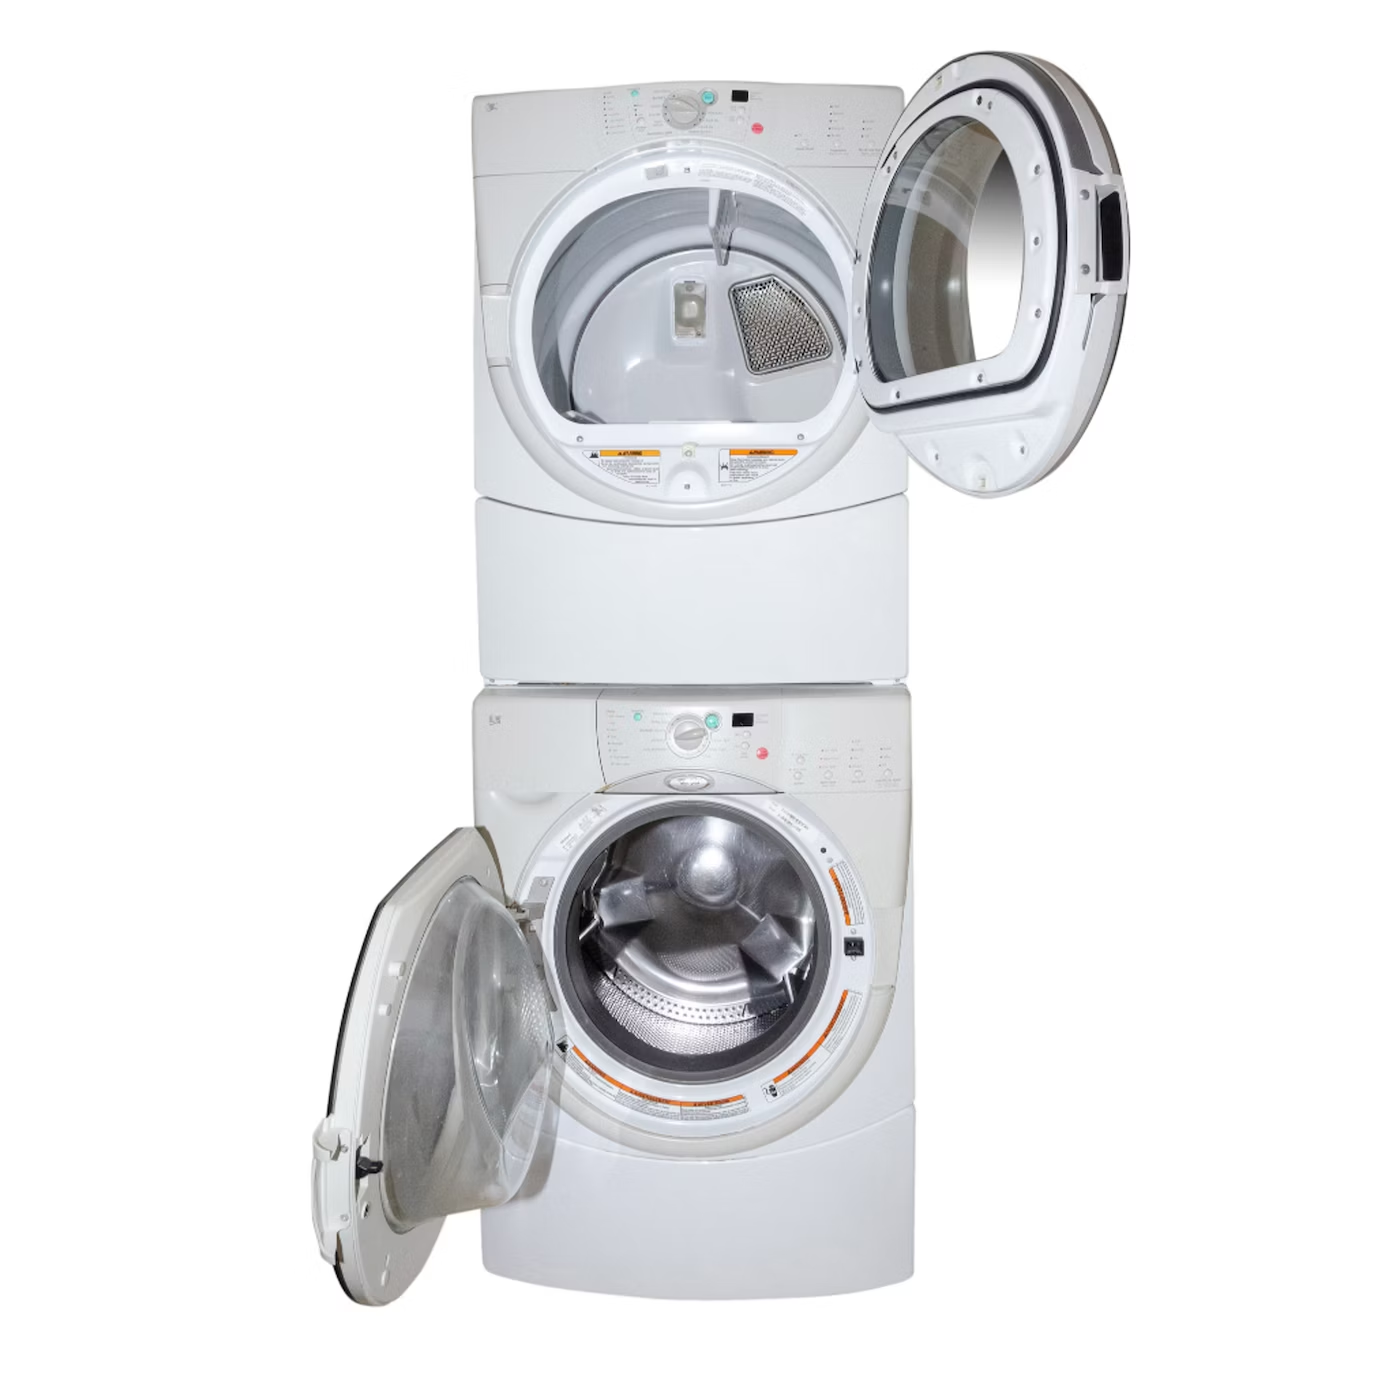
Step 3: Install the stacking kit
Installing the stacking kit is a crucial step in the process of hooking up a stacked washer and dryer. The stacking kit is designed to securely attach the washer and dryer units together, ensuring stability and safety. Follow these steps to install the stacking kit:
- Read the manufacturer’s instructions: Before you begin the installation process, carefully read the manufacturer’s instructions that come with your specific stacking kit. Each kit may have slight variations in installation steps, so it’s important to understand the specific requirements for your washer and dryer models.
- Attach the brackets: Start by attaching the brackets provided with the stacking kit to the washer and dryer. The brackets are typically designed to fit securely on the back of each unit. Use the appropriate screws or fasteners as specified in the instructions.
- Secure the units together: Once the brackets are securely attached to both the washer and dryer, carefully lift the dryer unit onto the top of the washer. Align the brackets on the dryer with the brackets on the washer. Use the provided fasteners or screws to secure the units together, ensuring a tight and stable connection.
During the installation process, it’s important to pay attention to the specific instructions provided by the manufacturer. By following these instructions and properly installing the stacking kit, you’ll ensure the washer and dryer units are securely attached and minimize the risk of any accidents or instability.
Remember to double-check that all brackets are in place and properly tightened before moving on to the next step. This will help ensure the stacked washer and dryer units remain stable and function properly.
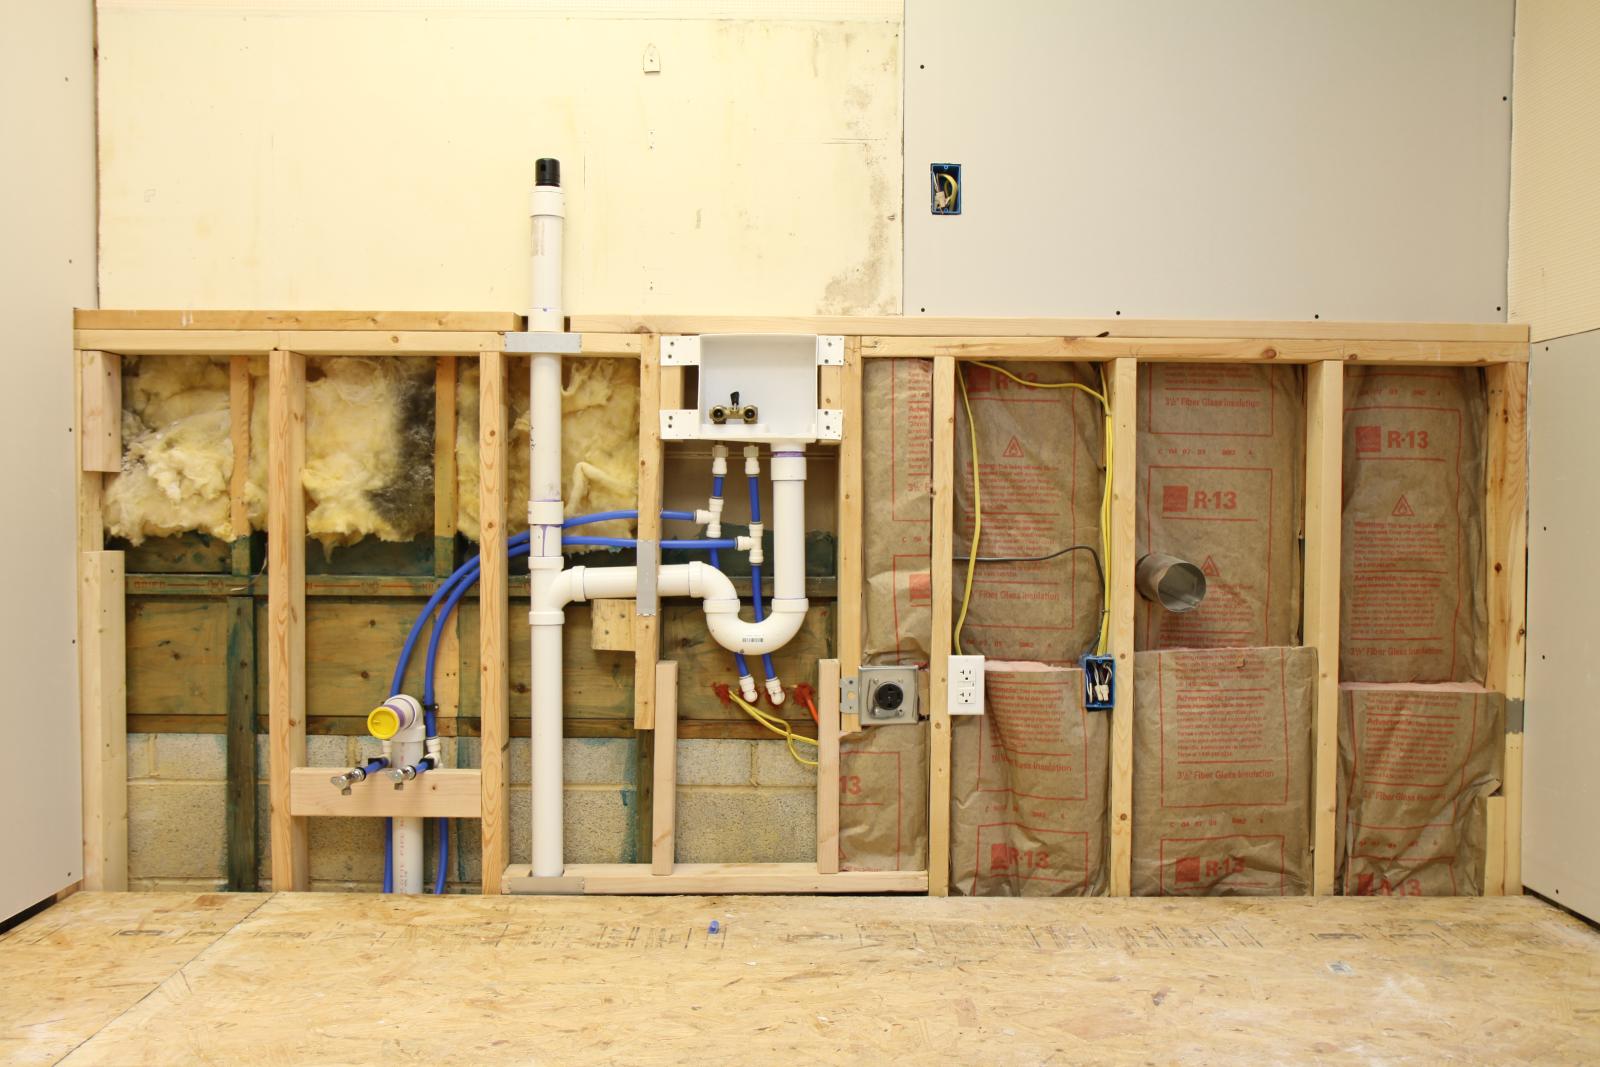
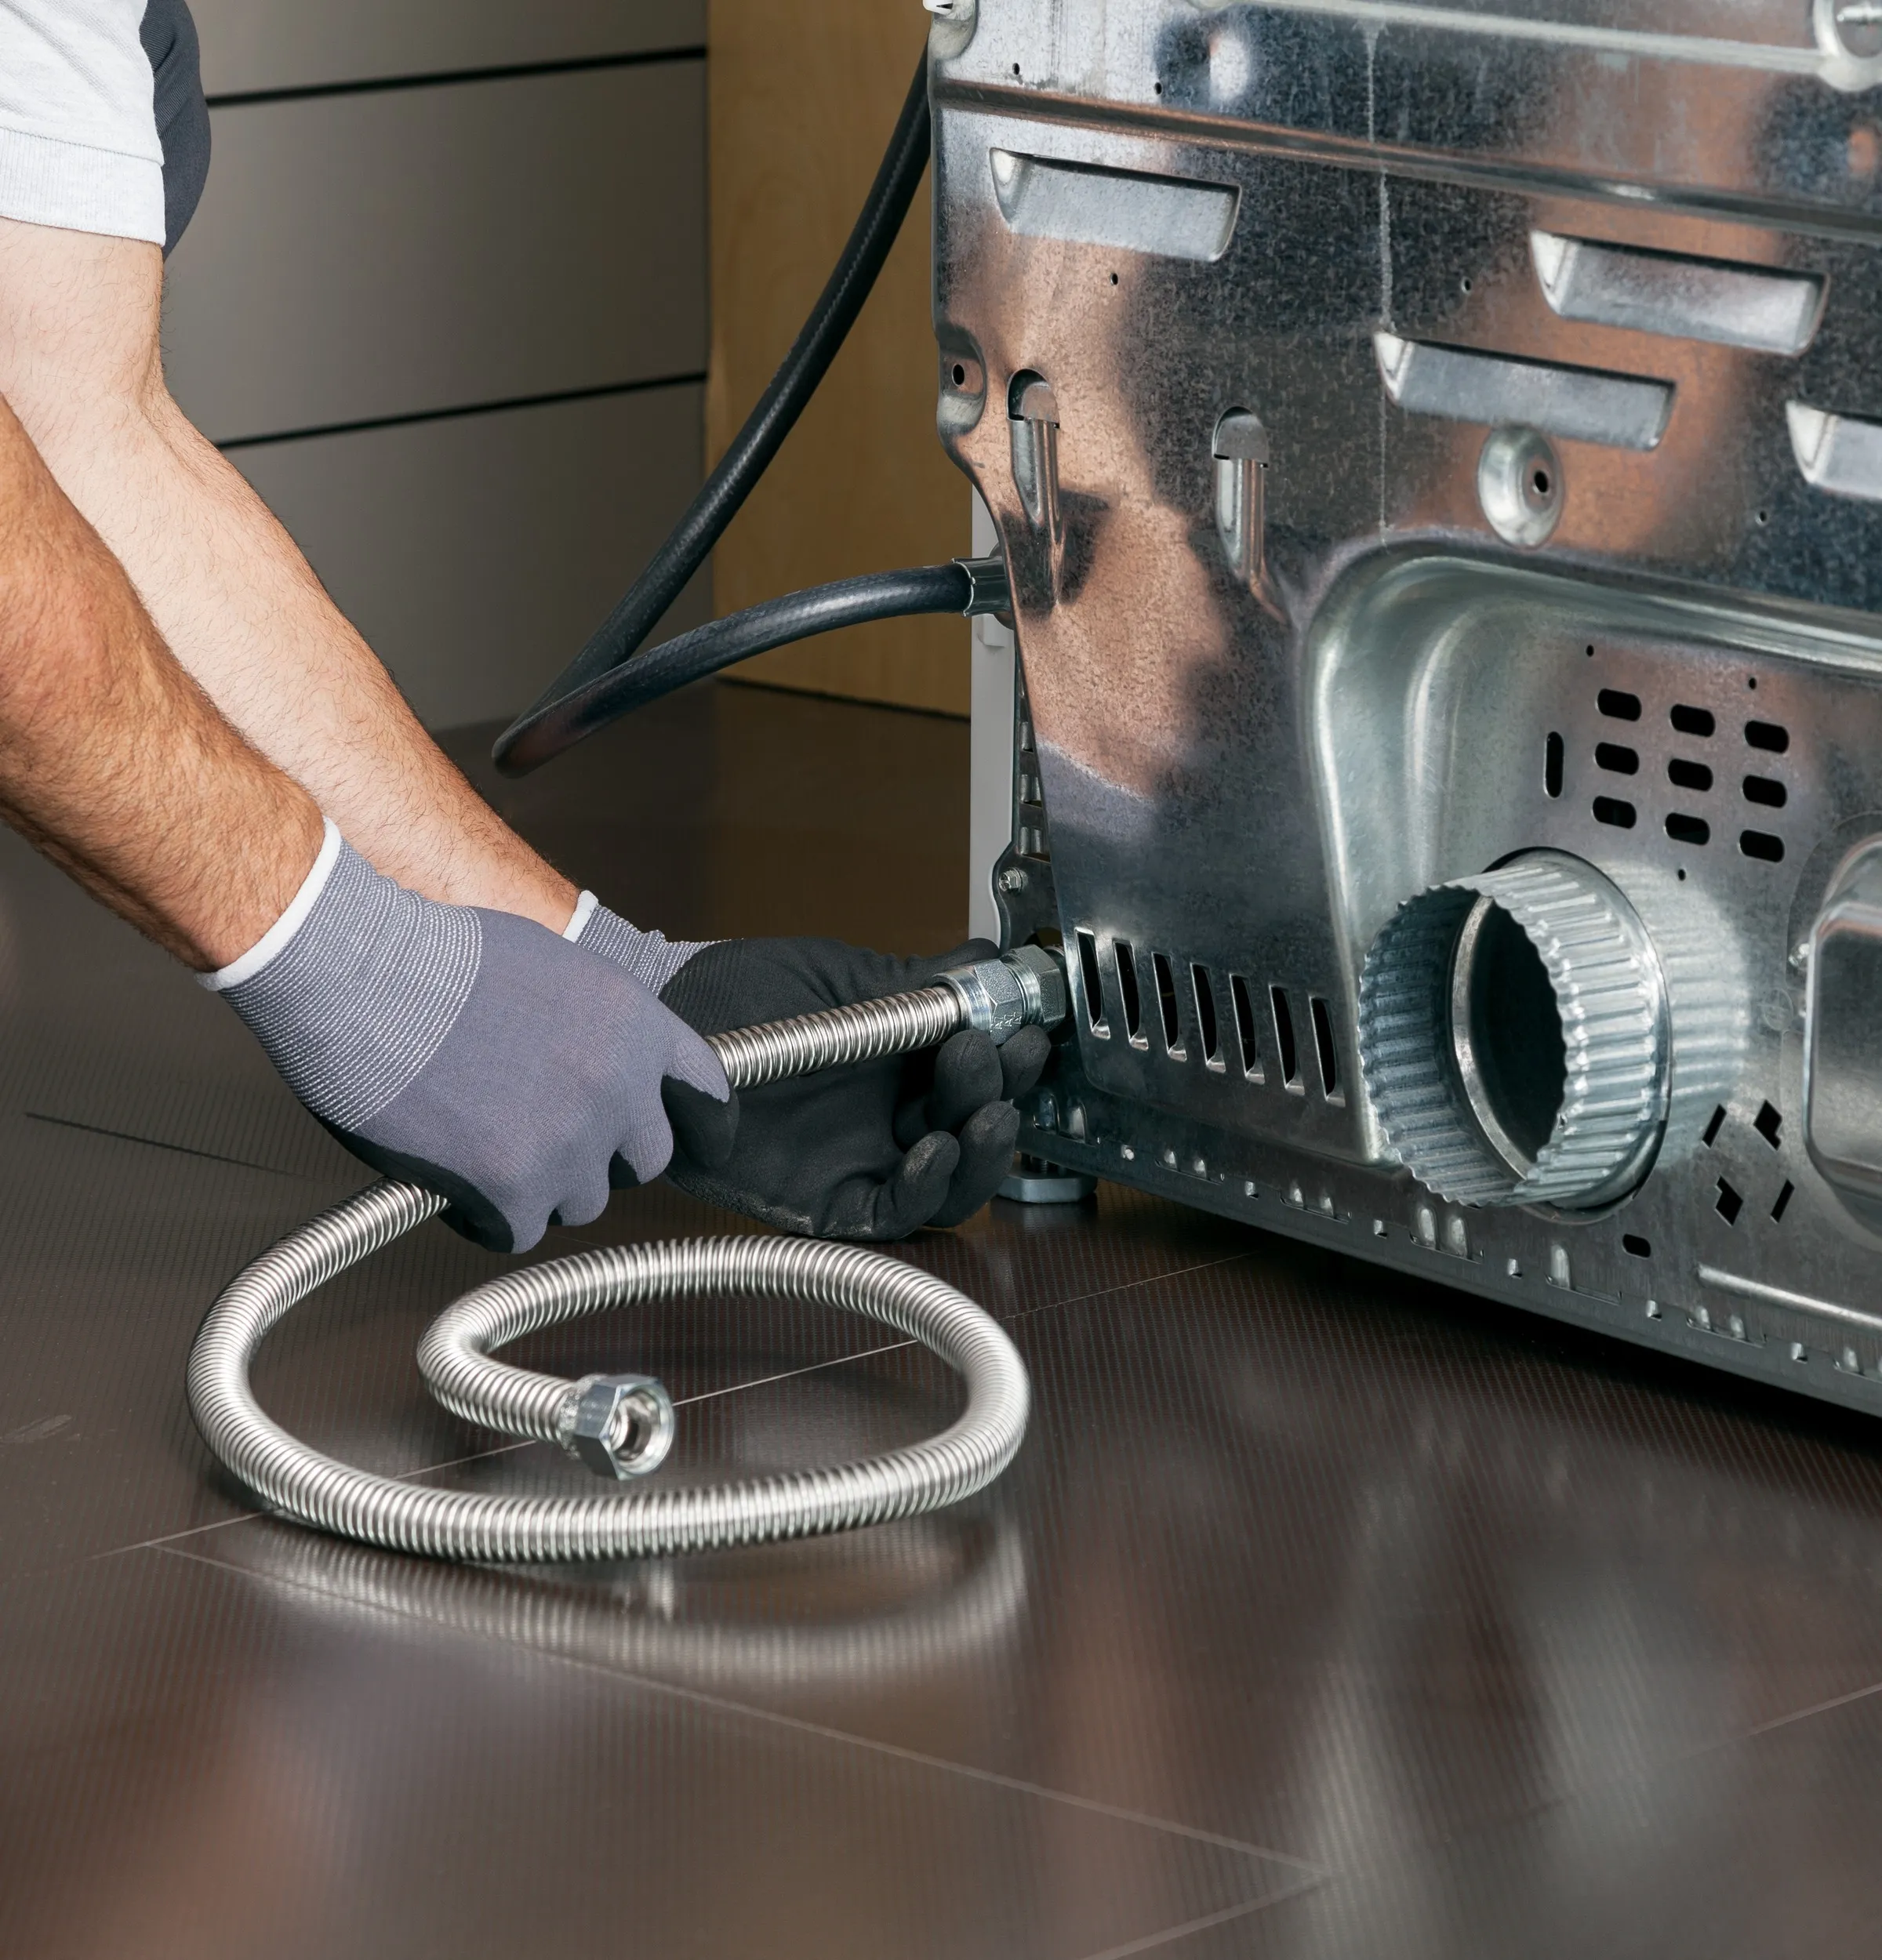
Step 4: Connect the water supply
Connecting the water supply is an essential step in hooking up a stacked washer and dryer. Proper water connections are necessary for the washer unit to function effectively. Here’s how to connect the water supply:
- Locate the water inlet valves: Look for the water inlet valves at the back of the washer unit. These valves are typically labeled as hot and cold. Ensure there is a water source nearby that can supply both hot and cold water.
- Attach the hoses: Connect the appropriate hoses to the respective water inlet valves. The hot water hose should be connected to the hot water valve, and the cold water hose should be connected to the cold water valve. Ensure a tight connection by hand-tightening the hoses onto the valves.
It’s important to note that some washer units may require additional steps or specific hose connections. Always refer to the manufacturer’s instructions for your particular washer model to ensure proper installation.
Once the hoses are securely attached, double-check that there are no leaks by turning on the water supply valves. Keep an eye out for any drips or water seepage around the connections. If you notice any leaks, tighten the connections further or consider using plumber’s tape to create a stronger seal.
Properly connecting the water supply ensures that your stacked washer unit has access to the necessary water for effective cleaning and rinsing. Take the time to ensure the connections are secure, and check for leaks regularly to maintain optimal performance.
When hooking up a stacked washer and dryer, make sure to properly level the units to prevent excessive vibration and noise during operation. Use a bubble level to ensure they are balanced before securing them in place.
Read more: How To Remove A Stacked Washer And Dryer
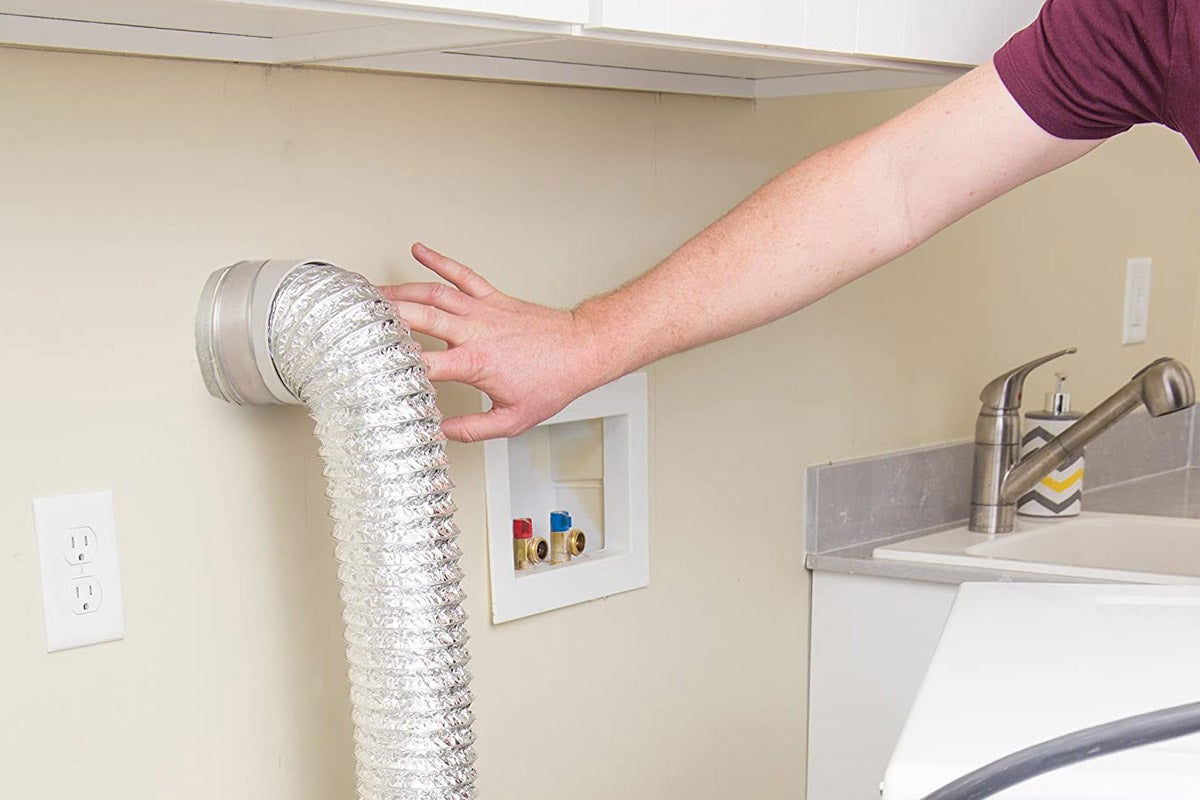
Step 5: Connect the dryer vent
Connecting the dryer vent is a crucial step in setting up a stacked washer and dryer system. The dryer vent is responsible for expelling hot air and moisture from the dryer unit, ensuring efficient drying and preventing the accumulation of lint. Here’s how to connect the dryer vent:
- Determine the venting requirements: Every dryer unit has specific venting requirements that must be met for optimal performance. Refer to the manufacturer’s instructions to determine the recommended venting method and materials for your particular dryer model. This may include the type and size of the vent hose as well as the location of the vent opening.
- Install the vent hose: Once you have determined the appropriate venting requirements, install the vent hose according to the instructions. Start by attaching one end of the vent hose to the dryer’s vent outlet, typically located at the back of the unit. Use a clamp to secure the hose tightly in place.
- Route the vent hose: Next, route the other end of the vent hose to the designated vent opening or the exterior wall. Ensure that the hose follows a straight and unobstructed path. Avoid any sharp bends or kinks, as they can restrict airflow and lead to congestion and lint buildup.
- Secure the hose connections: Use another clamp to secure the vent hose tightly to the vent opening or the exterior wall. Make sure the connection is sturdy and airtight to prevent any air leaks.
Properly connecting the dryer vent is essential for the safe and efficient operation of the dryer unit. An adequately vented dryer helps to prevent overheating, reduces the risk of fires, and ensures that damp air and lint are properly expelled from your laundry area.
Remember to regularly clean and maintain the vent hose and the vent opening to prevent lint buildup, which can lead to reduced dryer performance and potential safety hazards. Following the manufacturer’s guidelines and ensuring a proper venting setup will help prolong the lifespan of your dryer and enhance its overall efficiency.
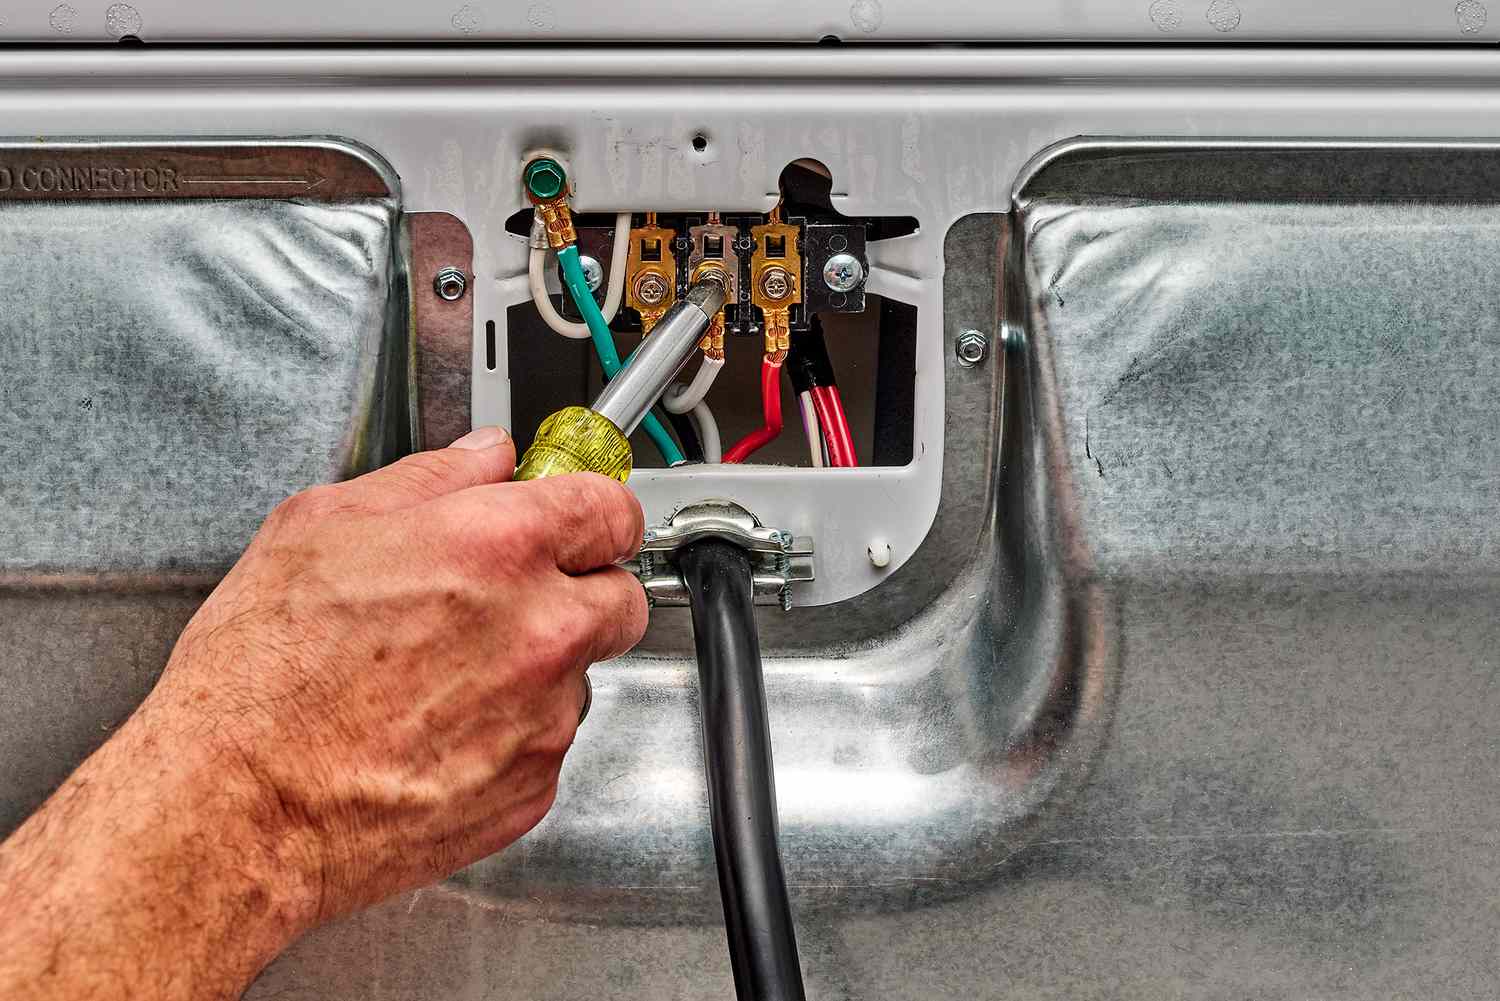
Step 6: Plug in the units
Plugging in the units is the final step in the process of hooking up a stacked washer and dryer. Properly connecting the power cords ensures that both the washer and dryer units receive the necessary electrical supply for operation. Here’s what you need to do:
- Connect the power cords to the appropriate outlets: Locate power outlets that are compatible with your washer and dryer’s electrical requirements. Check the manufacturer’s instructions or labels on the units for information on the voltage and amperage needed.
- Ensure a secure connection: Once you have identified the appropriate power outlets, connect the power cords to the outlets. Make sure the cords are plugged in securely, without any loose or exposed wires. Avoid using extension cords whenever possible, as they can pose safety hazards.
During the plugging-in process, it’s essential to prioritize safety. Be cautious to avoid accidents or electric shocks. If you are unsure about electrical connections, it’s always best to consult a professional electrician for assistance.
Before turning on the units, take a moment to carefully inspect the power cords for any signs of damage. Look for frayed wires, exposed insulation, or loose connections. If you notice any issues, do not plug in the units and seek professional help to resolve the problem.
Once you have ensured a secure connection, you can proceed to the next step of testing the washer and dryer units.
Remember, electrical safety is of paramount importance, so it’s crucial to follow all safety guidelines and precautions during the installation process. By plugging in the units correctly, you can enjoy the convenience and efficiency of your stacked washer and dryer without compromising safety.
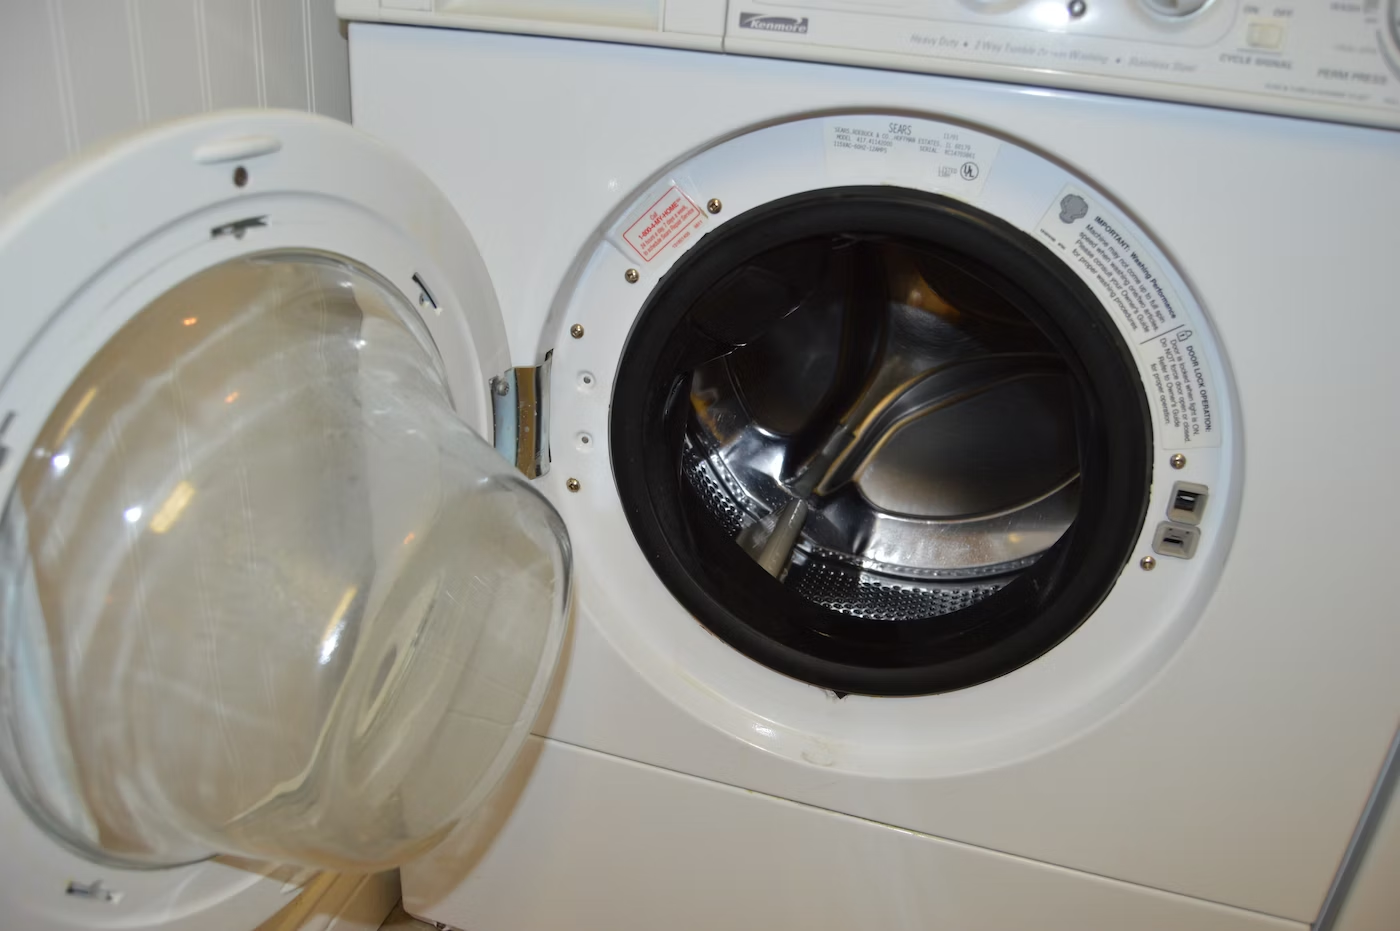
Step 7: Test the washer and dryer
After hooking up a stacked washer and dryer, it’s vital to test both units to ensure they are operating correctly. Running a test cycle and checking for proper operation will help identify any potential issues early on. Here’s what you need to do:
- Run a test cycle: Refer to the manufacturer’s instructions for your specific washer and dryer models to determine the appropriate test cycle. Start by adding a small load of laundry, following the recommended load size and detergent guidelines. Select the desired wash and dry settings and let the cycle complete.
- Check for proper operation: As the test cycle runs, pay close attention to both the washer and dryer units. Observe whether they are functioning smoothly and quietly. Look out for any unusual vibrations, loud noises, or error messages displayed on the control panels.
During the test cycle, it’s essential to monitor the entire process to ensure that both the washer and dryer units are operating efficiently and effectively. Be on the lookout for any leaks, excessive vibrations, or abnormal sounds, and take note of any error codes or malfunctions that may occur.
If you notice any issues during the test cycle or if the units are not functioning as expected, consult the manufacturer’s troubleshooting guide or contact their customer support for assistance. It’s better to address any potential problems early on to prevent further complications and ensure the longevity of your stacked washer and dryer.
Once you are satisfied with the test cycle and have confirmed that both the washer and dryer are working correctly, you can proceed to regular use and enjoy the convenience of your newly hooked-up stacked washer and dryer system.
Remember, regularly maintaining and cleaning your stacked washer and dryer will help optimize their performance and prolong their lifespan. Follow the manufacturer’s guidelines for maintenance recommendations to keep your units in excellent working condition.
Conclusion
Hooking up a stacked washer and dryer is a practical and space-saving solution for your laundry needs. By following the step-by-step instructions provided in this guide, you can successfully install and connect your units, ensuring optimal performance and efficiency.
In the initial steps, gathering the necessary tools and materials is essential for a smooth installation process. Make sure you have the appropriate washer and dryer units, a stacking kit, measuring tape, level, screwdriver, adjustable wrench, and power cord. Confirm compatibility and refer to the manufacturer’s instructions for specific requirements.
Preparing the laundry space is crucial for a safe and efficient setup. Clear the area, ensure proper ventilation, and level the floor for stability during operation. Following these steps will create an environment conducive to optimal performance.
Installing the stacking kit properly is vital to securely attach the washer and dryer units together. Read the manufacturer’s instructions, attach the brackets provided with the stacking kit, and ensure a tight and stable connection between the units.
Connecting the water supply requires locating the water inlet valves on the washer unit and attaching the hoses securely. Double-check for leaks and ensure the connections are tight and properly sealed.
Connecting the dryer vent involves determining the venting requirements, installing the vent hose, and securing the connections. Proper ventilation is crucial for efficient drying and preventing lint buildup, so be sure to follow the manufacturer’s instructions for your specific dryer model.
Finally, plug in the units by connecting the power cords to the appropriate outlets. Double-check the connections for safety and ensure that the cords are securely plugged in without any damage or exposed wires.
After completing the installation, run a test cycle on both the washer and dryer to check for proper operation. Observe any abnormal noises, vibrations, or error messages and address any issues that arise. Regularly maintain and clean your stacked washer and dryer to optimize their performance and longevity.
In conclusion, by following these steps and maintaining your stacked washer and dryer correctly, you can enjoy the convenience and benefits of a space-saving laundry solution. Remember to consult the manufacturer’s instructions for your specific models and reach out to customer support if you encounter any difficulties. With proper installation and maintenance, your stacked washer and dryer will provide efficient and reliable service for years to come.
Now that you're set with your stacked washer and dryer, why stop there? Dive into our guide on washer dryer combos, which showcases incredible options for 2024. Perfect for those looking to upgrade their laundry game! For the hands-on folks, our guide on managing DIY home projects offers valuable insights and creative ideas that'll transform your home maintenance skills. Both articles pack a punch with practical advice tailored just for you!
Frequently Asked Questions about How To Hook Up A Stacked Washer And Dryer
Was this page helpful?
At Storables.com, we guarantee accurate and reliable information. Our content, validated by Expert Board Contributors, is crafted following stringent Editorial Policies. We're committed to providing you with well-researched, expert-backed insights for all your informational needs.


0 thoughts on “How To Hook Up A Stacked Washer And Dryer”