Articles
15 Superior Washer Box For 2025
Modified: June 9, 2025
Discover the top 15 superior washer boxes for 2025. Upgrade your laundry room with our high-quality washer boxes for added convenience and functionality.
(Many of the links in this article redirect to a specific reviewed product. Your purchase of these products through affiliate links helps to generate commission for Storables.com, at no extra cost. Learn more)
Introducing the 15 Superior Washer Box for 2025. As a content writer expert, I understand the significance of using high-quality tools for optimal performance. The Superior Washer Box stands out among its counterparts, offering superior functionality and durability, making it the go-to choice for professionals in the upcoming year. Its advanced features, such as enhanced water flow control and easy installation, ensure seamless operations for any washing project. Whether you're a seasoned contractor or a DIY enthusiast, the 15 Superior Washer Box for 2025 is a must-have tool to elevate your washing experience to a whole new level.

Overall Score: 9/10
The SPONGELLÉ Boxed Flower Shower Body Wash Infused Buffer in Beach Grass is a must-have accessory for your shower routine. This vegan-friendly body wash buffer adds a touch of luxury to your everyday bathing experience. With its beautiful scent and exfoliating properties, it leaves your skin feeling refreshed and rejuvenated. The buffer is loaded with soap that smells delicious and provides just the right amount of exfoliation for your skin. It is the perfect balance of softness and hardness, making your skin feel great. The Beach Grass color adds a touch of nature and elegance to your shower. This pack includes one count of the buffer, and it is recommended for all skin types except for sensitive skin. Enhance your shower time with the SPONGELLÉ Boxed Flower Shower Body Wash Infused Buffer!
Key Features
- Vegan friendly
Specifications
- Color: Beach Grass
- Dimension: 4.72Lx4.72Wx1.57H
- Size: 1 Count (Pack of 1)
Pros
- Vegan friendly
- Beautiful scent that lasts
- Provides exfoliation for the skin
- Long-lasting buffer
Cons
- Not suitable for sensitive skin
The SPONGELLÉ Boxed Flower Shower Body Wash Infused Buffer in Beach Grass is a fantastic addition to your bathing routine. With its vegan friendly formula, beautiful scent, and exfoliating properties, this buffer is a treat for the skin. It lasts longer than expected, making it great value for money. However, individuals with sensitive skin should avoid using it. Overall, it is a great product that elevates your shower experience and leaves your skin feeling refreshed and revitalized.

Overall Score: 8.5/10
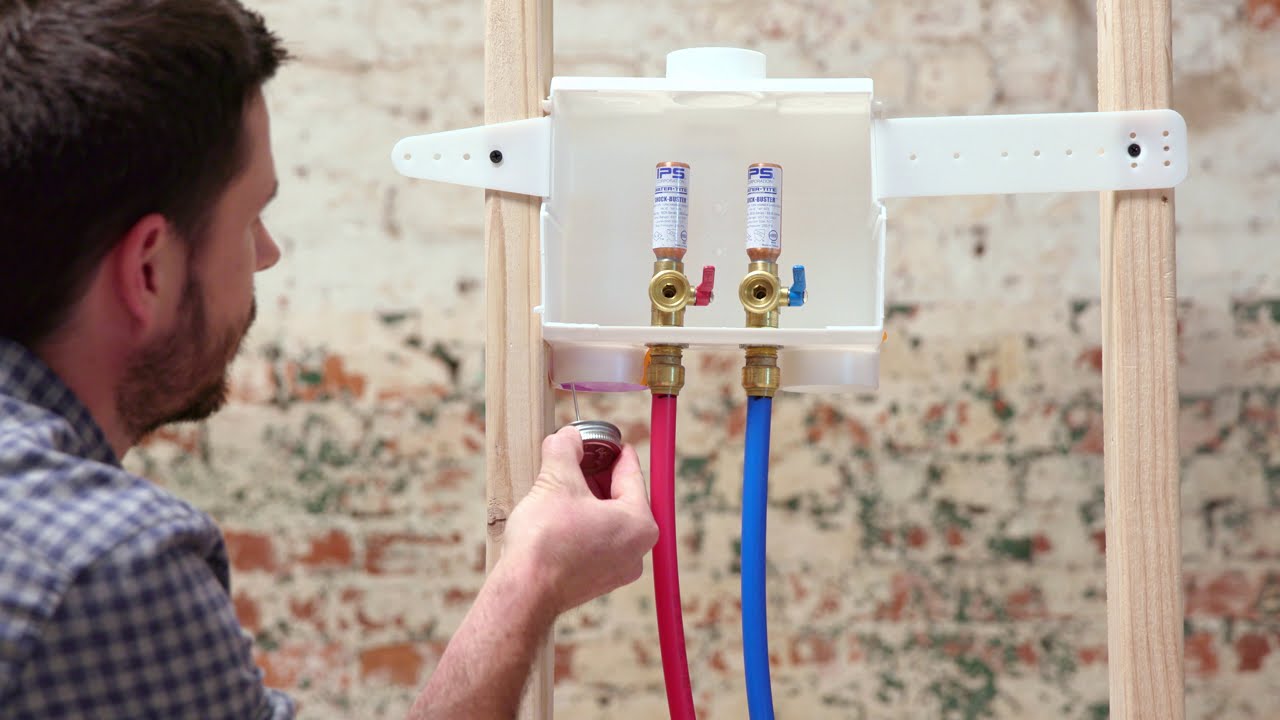
The Eastman 1/2 Inch PEX Connection x 3/4 Inch MHT Washing Machine Outlet Box is a reliable and convenient solution for installing washing machines. It features a raised drip guard to prevent leaks and offers easy access to the valves for shut off if needed. The box has a 1/2 inch PEX inlet connection, a 3/4 inch MHT connection, and a right or left side drain connection. With its snap-on frame, it allows for inverted installation and can accommodate up to 1 inch drywall. Made of high-impact, non-corrosive plastic, this laundry outlet box is durable and long-lasting. Its rough opening dimensions are 8-1/4 W x 6-1/8 H x 3-3/4 D inches, and the face plate dimensions are 10-3/16 W x 8-13/16 H inches.
Key Features
- WASHER MACHINE OUTLET BOX: Prevents leaks and offers easy access to valves
- FEATURES: 1/2 inch PEX inlet connection, 3/4 Inch MHT connection
- EASY INSTALLATION: Inverted installation, snap-on frame, recessed design
- DURABLE: High impact, non-corrosive plastic with raised drip guard
- SPECS: Rough opening dimension of 8-1/4 W x 6-1/8 H x 3-3/4 D in inches, and a face plate dimension of 10-3/16 W x 8-13/16 H in inches
Specifications
- Color: White
- Dimension: 10.25Lx4.00Wx9.00H
- Size: 1/2 in. PEX Connection
Pros
- Prevents leaks with raised drip guard
- Easy access to valves if shut off is required
- Snap-on frame allows inverted installation
- Durable high impact, non-corrosive plastic
- Quick and easy installation
Cons
- Enclosure is flimsy
- Brackets are slightly loose
- May not fit all openings
The Eastman 1/2 Inch PEX Connection x 3/4 Inch MHT Washing Machine Outlet Box is a reliable option for safely installing washing machines. It offers features like a raised drip guard to prevent leaks and easy access to valves for shut off. The box is made of durable plastic and has a snap-on frame for easy installation. However, some users have noted that the enclosure is flimsy and the brackets may be slightly loose. Additionally, it may not fit all openings. Overall, it provides a convenient solution for washing machine installations, earning a score of 8.5 out of 10.

Overall Score: 9/10
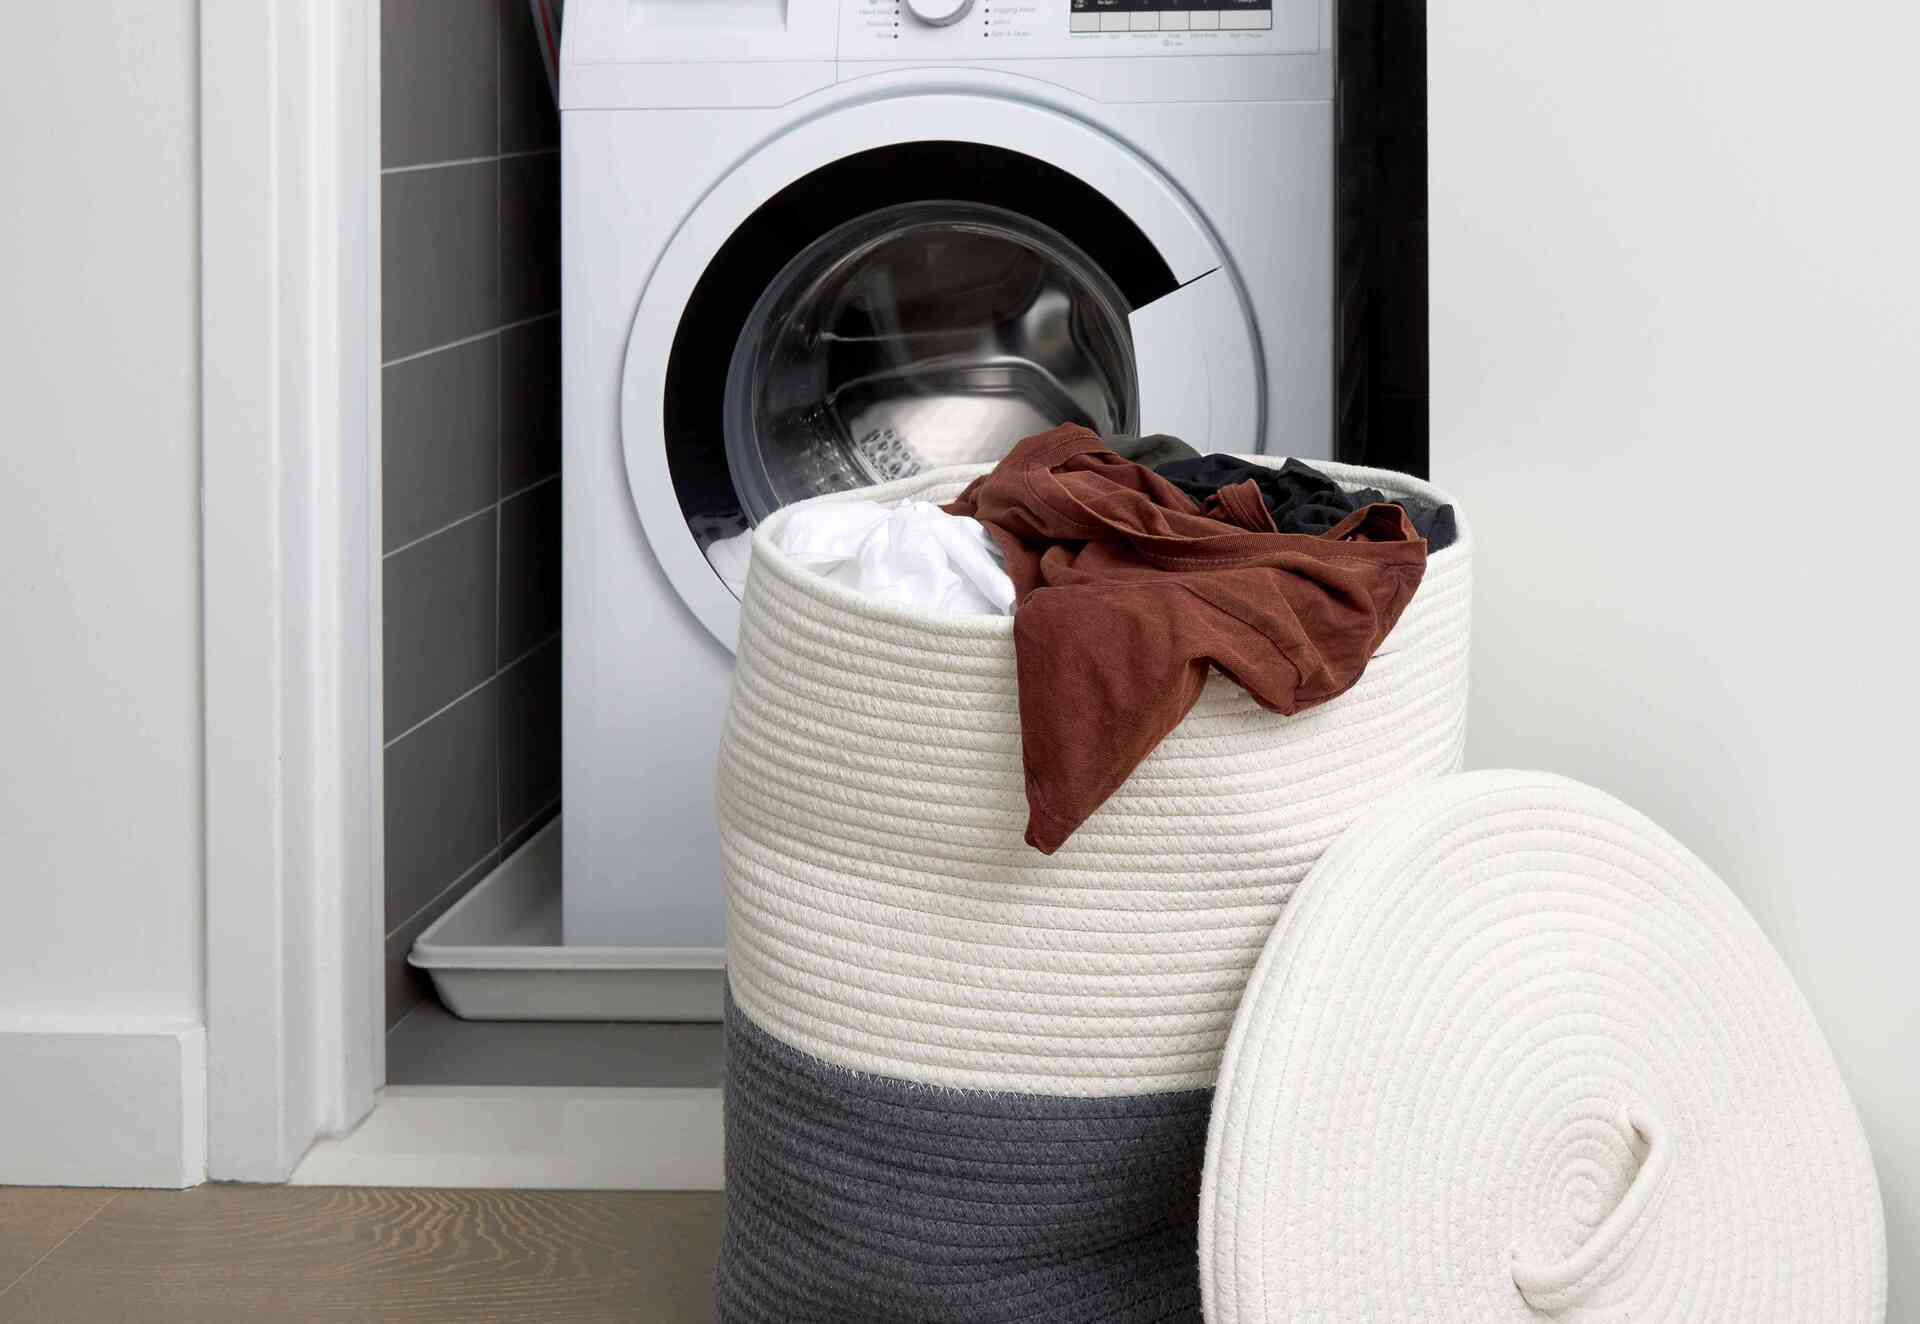
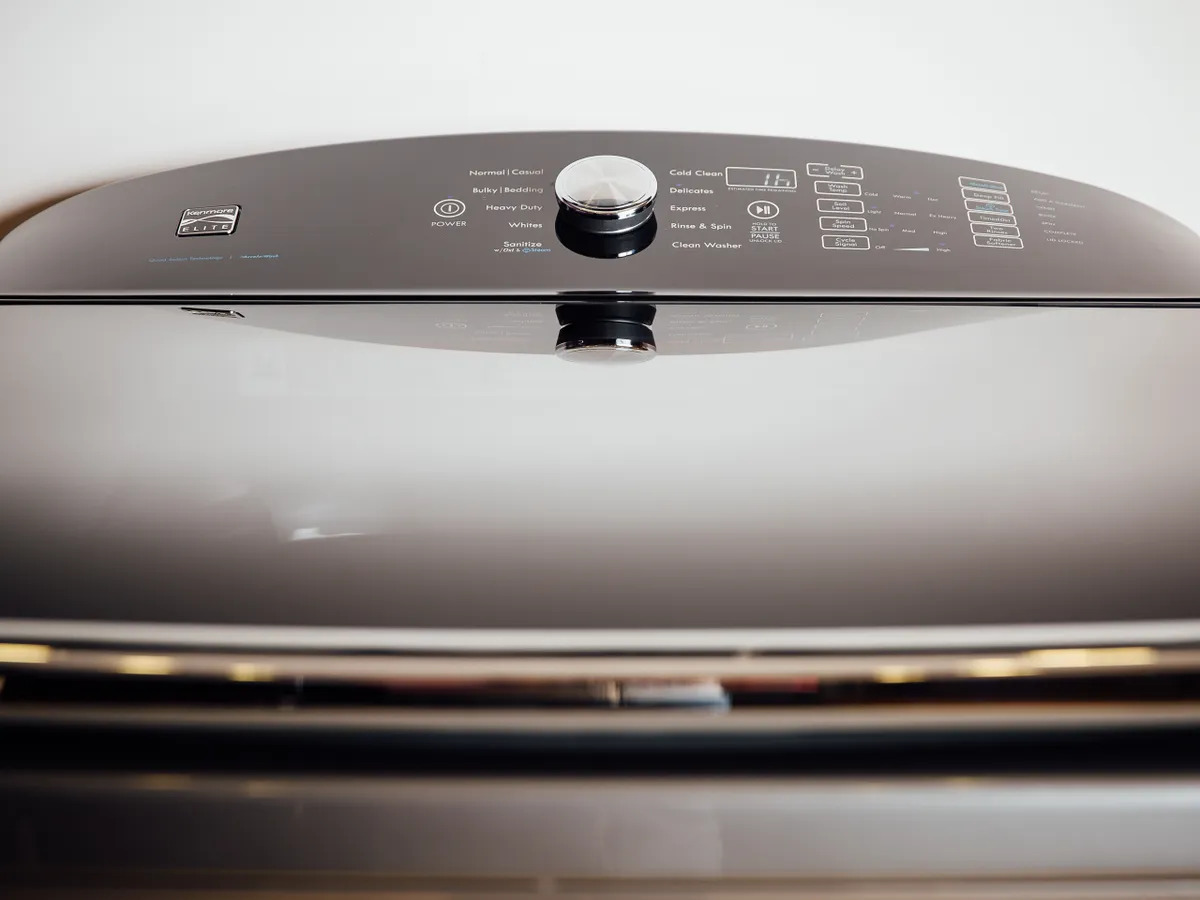
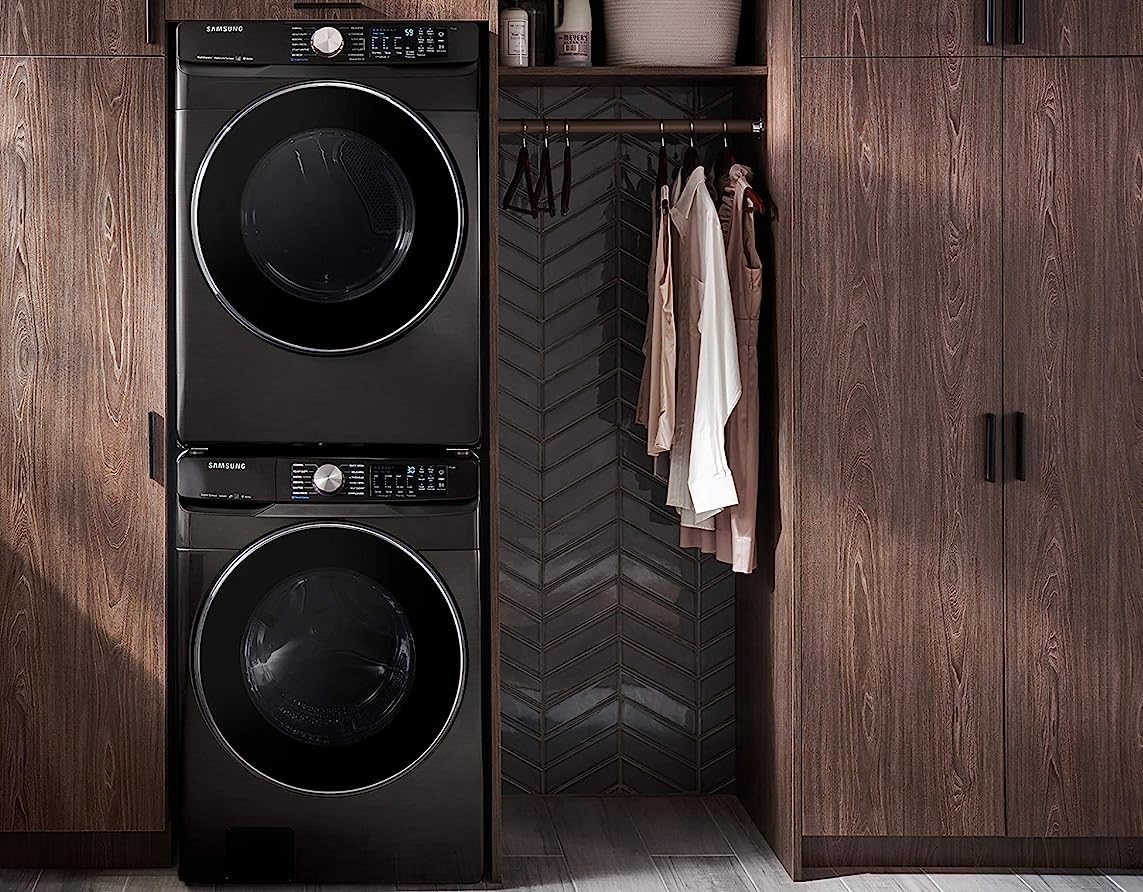
The Electrolux Washer is a high-quality, reliable washing machine that will make laundry day a breeze. With its sleek design and advanced features, this washer offers both style and performance. It is equipped with a variety of innovative technologies and functions, ensuring that your clothes are thoroughly cleaned and cared for. The Electrolux Washer has a large capacity drum, allowing you to wash more clothes in fewer loads. It also offers a range of cycle options, including a quick wash for those times when you need clean clothes in a hurry. With its user-friendly controls and quiet operation, this washer is a great addition to any home. Say goodbye to endless piles of dirty laundry and hello to fresh, clean clothes with the Electrolux Washer.
Key Features
- Sleek design
- Large capacity drum
- Variety of cycle options
Specifications
- N/A
Pros
- Reliable and high-quality performance
- Innovative technologies for thorough cleaning
- User-friendly controls and quiet operation
- Quick wash option for convenience
Cons
The Electrolux Washer is a top-notch washing machine that offers both style and performance. Its sleek design and advanced features make laundry day a breeze, while its large capacity drum and range of cycle options ensure that your clothes are thoroughly cleaned. With user-friendly controls and quiet operation, this washer is a great addition to any home. The quick wash option is especially convenient for those times when you need clean clothes in a hurry. Overall, the Electrolux Washer is a reliable and high-quality choice for all your laundry needs.

Overall Score: 8/10
The EcoSmart ECO 11 Electric Tankless Water Heater provides endless on-demand hot water while saving space and energy. With its patented self-modulating technology, it ensures consistent hot water performance and efficiency. This 13KW water heater is 90% smaller than traditional tank heaters, making it suitable for wall installation or point-of-use applications. It is also 99% thermal energy efficient, only heating water when called for compared to tank heaters that maintain temperature even when not in use. The ECO 11 is ideal for small spaces like bathrooms, office breakrooms, or low-flow applications. Its compact dimensions make it easy to install, and it provides between 1.3 and 3.1 gallons-per-minute depending on the inlet water temperature. Overall, the EcoSmart ECO 11 offers convenience, energy savings, and consistent performance for all your hot water needs.
Key Features
- Endless on-demand hot water
- Save space
- Save energy
- Eco Smart ECO 11 sizing
Specifications
- Color: White
- Dimension: 3.75Lx8.00Wx11.50H
- Size: 12 x 8 x 4
Pros
- Provides consistent hot water
- Compact and space-saving design
- Energy-efficient operation
- Suitable for small spaces or low-flow applications
Cons
- Difficult water connections
- Requires additional adapters for water connections
- Inlet and outlet connections could be improved
If you’re looking for a tankless water heater that combines convenience, energy savings, and consistent performance, the EcoSmart ECO 11 Electric Tankless Water Heater is an excellent choice. This compact unit efficiently provides endless on-demand hot water while saving space and energy. It is ideal for small spaces, such as bathrooms or office breakrooms, and its self-modulating technology ensures efficiency and temperature control. While the water connections may be a bit challenging, the overall performance and energy savings make it a worthwhile investment. Say goodbye to running out of hot water and hello to a reliable and efficient heating solution.

Overall Score: 9/10
The GUOFIS Washing Machine Outlet Box is a durable and reliable option for laundry rooms. It features a central and side drain design, allowing for convenient water drainage. The box is easy to install and can be recessed for a flexible layout. It comes with a 1/4-turn hot and cold shut off ball valve made of lead-free brass to resist corrosion and rust. The box measures 9.25 x 3.5 x 8 inches and has a 1/2 inch PEX inlet and 3/4 inch MHT outlet connection. It includes a support bracket and faceplate cover. Overall, the GUOFIS Washing Machine Outlet Box offers quick and safe water supply shut-off access for washing machines.
Key Features
- Superior durability
- Function design with central and side drain
- Easy installation with recessed application
- Product measurement of 9.25 x 3.5 x 8 inches
- Package includes support bracket and faceplate cover
Specifications
- Size: PEX Washing Box with Water Hammer Arrestor
Pros
- High impact, non-corrosive plastic for durability
- Lead-free brass shut off ball valve
- Flexible layout with separate box and frame
- Quick and strong mounting
- Includes necessary accessories for installation
Cons
The GUOFIS Washing Machine Outlet Box is a reliable and convenient option for laundry rooms. Its durable construction and functional design make it a great addition to any washing machine setup. With easy installation and the included accessories, it provides a quick and safe shut-off access. The separate box and frame allow for flexible placement, and the central and side drain design adds convenience. Overall, this outlet box offers a long-lasting solution for all your washing machine water supply needs.

Overall Score: 8/10
The EFIELD Washing Machine Outlet Box with Center Drain is a high-quality plumbing product that is directly supplied by one of the biggest plumbing systems manufacturers. It is equipped with 1/2 inch sweat inlet X 3/4 inch MHT outlet connections and measures 9.25 inches x 3.5 inches x 8 inches. This outlet box comes with a 1/4-turn hot and cold ball valve with stainless steel water hammer arrestors installed and includes a pre-installed support bracket. The stainless steel color adds a sleek and modern touch to any laundry room. With its UPC certification, you can trust in the durability and performance of this product.
Key Features
- Directly Supplied by One of the Biggest Plumbing systems Manufacturers
- Equipped with 1/2 inch sweat inlet X 3/4 inch MHT outlet connections
- Measures 9.25 inch x 3.5 inch x 8 inch
- 1/4-turn hot and cold ball valve with stainless steel water hammer arrestors Installed
- Includes a pre-installed support bracket
- Outlet box is UPC certified
Specifications
- Color: Stainless Steel
Pros
- High-quality and durable construction
- Easy installation
- Sleek and modern design
- Includes pre-installed support bracket
Cons
- Mounting flanges may need adjustment for perfect fit
- Some users reported issues with the ball valve
The EFIELD Washing Machine Outlet Box with Center Drain is a reliable and convenient solution for your laundry room plumbing needs. With its high-quality construction and easy installation process, it offers great value for money. The sleek and modern design adds an aesthetic touch to your laundry area, while the pre-installed support bracket ensures stability. However, it’s worth noting that some users have experienced issues with the ball valve and mounting flanges, so it may require some adjustments for a perfect fit. Overall, this outlet box is a worthy investment for anyone looking for a durable and efficient plumbing solution.

Overall Score: 7.8/10
The Eastman 1/2 inch CPVC Connection, White Center Drain Washing Machine Outlet Box, 60249 provides a safe and reliable water supply installation for washing machines. It features a raised drip guard to prevent potential leaks and easy access to the valves for shut-off purposes. The box is made of high impact, non-corrosive plastic for durability and has a recessed design. The installation is easy with its snap-on frame and accommodates up to 1 inch drywall. The product dimensions are 10.25Lx3.50Wx9.00H, and it comes in a white color. With a customer rating of 4.6/5, this product is highly recommended for its quality and ease of use.
Key Features
- Washer machine outlet box
- Features
- Easy installation
- Durable
- Specs
Specifications
- Color: White
- Dimension: 10.25Lx3.50Wx9.00H
- Size: 1/2 in. CPVC Connection
Pros
- Prevents potential leaks with raised drip guard
- Easy access to valves for shut-off purposes
- Durable and long-lasting
- Easy installation with snap-on frame
- Accommodates up to 1 inch drywall
Cons
- Outlet panel may not fit all old outlet boxes
The Eastman 1/2 inch CPVC Connection, White Center Drain Washing Machine Outlet Box, 60249 is a highly recommended product for its quality and ease of use. It provides a safe water supply installation for washing machines, preventing potential leaks with its raised drip guard. The easy access to the valves allows for quick shut-off when needed. The box is made of durable, non-corrosive plastic, ensuring long-lasting reliability. Its easy installation and ability to accommodate up to 1 inch drywall make it convenient for any laundry room. The only drawback is that the outlet panel may not fit all old outlet boxes. Overall, this product is a great addition to any washing machine setup, ensuring safety and reliability.

Overall Score: 8/10
The Aienxn 435PCS Stainless Steel Flat Washers Set is a versatile collection designed for use in a wide range of settings such as home decoration, kitchens, shops, outdoor construction, and factories repair projects. Made of high-quality 304 stainless steel, these washers offer exceptional hardness, wear resistance, and rust resistance, ensuring a long-lasting service life even in harsh environments. The set includes 9 metric sizes – M2, M2.5, M3, M4, M5, M6, M8, M10, and M12. These washers are suitable for fixing bolts with diameters smaller than washer holes, making them ideal for tasks like electrical connections on automobiles or household and commercial appliances. Packaged in a transparent box, the set contains a total of 435 washers, allowing for easy organization and storage. For any inquiries, the customer support team responds promptly within 12 hours. Overall, the Aienxn 435PCS Stainless Steel Flat Washers Set offers durability, versatility, and convenience for various applications.
Key Features
- Material: Made of 304 stainless steel
- High hardness, wear resistance, rust resistance and long service life
- Size: M2, M2.5, M3, M4, M5, M6, M8, M10, M12
- Wide Application: Suitable for fixing bolts with smaller diameters
- Packaged in a transparent box with 435 pcs in 9 sizes
Specifications
- Color: 435PCS 304 Flat Washers-Metric
- Size: 435PCS 304 Flat Washers-Metric
Pros
- Made of high-quality stainless steel
- Suitable for use in harsh environments
- Wide range of sizes for various applications
- Transparent box for easy organization and storage
Cons
- Plastic spacers may not be of the highest quality
- Packaging could be improved
The Aienxn 435PCS Stainless Steel Flat Washers Set is a reliable choice for any home decoration, kitchen, shop, outdoor construction, or factory repair project. Made of durable 304 stainless steel, these washers offer high hardness, wear resistance, and rust resistance, ensuring a long service life even in harsh environments. With 9 metric sizes included in the set, it provides versatility for various applications. The transparent box packaging allows for easy organization and storage. Although the plastic spacers may not be the highest quality and the packaging could be improved, these minor drawbacks do not outweigh the overall quality and performance of this washer set.

Overall Score: 8/10
The Eastman 1/2 Inch Crimp PEX Connection Dual Drain Washing Machine Outlet Box provides a safe water supply installation for washing machines. It features 1/4 turn ball valves and hammer arrestors that prevent pipes from shaking and pounding. The white laundry valve box is made of high impact, non-corrosive plastic for long-lasting reliability. It includes a pre-installed support bracket, face plate cover, and 1/4-turn hot and cold ball valve. The recessed design of the outlet box can accommodate up to 1 inch drywall. With dimensions of 10-1/4 W x 4 D x 9 H inches, it has a 1/2 inch Crimp PEX inlet and a 3/4 inch Male Hose Thread outlet connection. Overall, the Eastman 1/2 Inch Crimp PEX Connection Dual Drain Washing Machine Outlet Box is a durable and reliable choice for a professional-looking installation.
Key Features
- WASHER MACHINE OUTLET BOX with hammer arrestors
- Recessed design compatible with up to 1 inch drywall
- Durable and non-corrosive plastic construction
- Equipped with pre-installed support bracket and face plate cover
- 1/2 inch Crimp PEX inlet and 3/4 inch Male Hose Thread outlet
Specifications
- Color: White
- Dimensions: 10.38Lx3.88Wx9.00H
Pros
- Provides a safe water supply installation for washing machines
- Hammer arrestors prevent pipes from shaking and pounding
- Durable and long-lasting construction
- Professional and space-saving design
Cons
- Valves may not perform well in shutting off the water
- Not suitable for PEX pipe without modifications
- Thin and flimsy construction
- May require additional supports for stability
The Eastman 1/2 Inch Crimp PEX Connection Dual Drain Washing Machine Outlet Box offers a convenient and reliable solution for installing a washing machine. With its recessed design and durable plastic construction, it provides a professional-looking and space-saving installation. However, some users have reported concerns with the valve performance and the suitability for PEX pipe without modifications. Overall, if proper precautions are taken during installation, this outlet box can be a cost-effective choice for a washing machine setup. Just ensure that it is compatible with your specific plumbing requirements before making a purchase.

Overall Score: 8.5/10
The WHK Washing Machine Outlet Box is a versatile storage solution for your laundry room. With its built-in water hammer arrester, it reduces noise and ensures a quick water supply installation for your washing machine. The recessed design provides a space for supply valves, while the center drain allows for easy drainage. The box is equipped with a 1/2-inch Crimp PEX Inlet and a 3/4-inch Male Hose Thread Outlet to accommodate various connections. The lead-free brass ball valve with stainless steel water hammer arresters is CUPC and NSF certified. The Push Connect system allows for easy installation without the need for soldering or crimping. Overall, the WHK Washing Machine Outlet Box offers functionality, convenience, and durability for your laundry needs.
Key Features
- Functionality
- Recessed design
- PEX Connector (F1807)
- Size for Washing Machine Box Trim Plate
- Lead Free 1/4-Turn Hot and Cold Brass Ball Valve
- Easy Installation
Specifications
- N/A
Pros
- Reduces noise with water hammer arrester
- Provides safe and quick water supply installation
- Recessed design for supply valves
- Certified lead-free brass ball valve
- Easy installation without soldering or crimping
Cons
- Plastic enclosure is flimsy
- Water hammer is for line after the valve and not before
The WHK Washing Machine Outlet Box is a reliable and convenient solution for your laundry room. Despite some minor issues with the plastic enclosure and water hammer positioning, the box offers great functionality and ease of installation. The built-in water hammer arrester reduces noise, while the recessed design provides a space for supply valves. Additionally, the certified lead-free brass ball valve ensures safe water supply. With its versatile features and durable construction, this washing machine outlet box is a valuable addition to any laundry room.

Overall Score: 8/10
The Eastman 1/2 Inch Sweat Connection x 3/4 Inch MHT Washing Machine Outlet Box is a high-quality plumbing fitting that provides a safe water supply installation for washing machines. This outlet box has a durable construction of high-impact, non-corrosive plastic, ensuring longer-lasting use. It is also certified by the Uniform Plumbing Code (UPC) for product safety. The package includes a pre-installed support bracket, faceplate cover, and 1/4-turn ball valve. With a 1/2 inch sweat connection and a 3/4 inch male hose thread outlet, this outlet box is versatile and compatible with various washing machines. Overall, it is a reliable and well-designed product.
Key Features
- Eastman washing machine outlet box
- What is included
- Durable
- Specs
- Certified
Specifications
- Color: White
- Dimension: 22.50Lx12.50Wx23.25H
- Size: 1/2 in. Sweat Connection x 3/4 in. MHT
Pros
- Easy to install
- Durable construction
- Includes necessary components
Cons
- Flimsy in some areas
- Link on the box is cheap
The Eastman 1/2 Inch Sweat Connection x 3/4 Inch MHT Washing Machine Outlet Box is a reliable and affordable option for ensuring a safe water supply installation for your washing machine. It is easy to install and comes with all the necessary components. The durable construction ensures long-lasting use, although it may be a bit flimsy in some areas. The link on the box could be of better quality, but overall, this outlet box offers great value for its price. If you’re looking to upgrade your washing machine outlet box, the Eastman 1/2 Inch Sweat Connection x 3/4 Inch MHT Washing Machine Outlet Box is definitely worth considering.

Overall Score: 7/10
The Eastman 1/2 inch Crimp PEX Connection, White Center Drain Washing Machine Outlet Box with Hammer Arrestors is a reliable and durable option for installing a safe water supply for your washing machine. It features a 1/2 inch PEX inlet connection, 3/4 inch MHT connection, hammer arrestors, and a center drain connection. The laundry valve box is made of high impact, non-corrosive plastic, ensuring long-lasting reliability. The raised drip guard prevents potential leaks, providing peace of mind. With a recessed design, this laundry outlet box allows for easy installation and inverted installation, and the snap-on frame accommodates up to 1 inch drywall. The Eastman outlet box is UPC approved and offers a rough opening dimension of 8-1/4 W x 6-1/8 H x 3-3/4 D inches.
Key Features
- WASHER MACHINE OUTLET BOX: Eastman washing machine outlet boxes provide a safe water supply installation for washing machines, preventing potential leaks with a raised drip guard and enabling easy access to the valves in case that shut off is required.
- FEATURES: Washer hookup box features a 1/2 inch PEX inlet connection, 3/4 Inch MHT connection, hammer arrestors, and a center drain connection
- EASY INSTALLATION: Laundry outlet box allows for inverted installation, features a snap on frame which accommodates up to 1 inch drywall, and features a recessed design
- DURABLE: Laundry valve box is composed of high impact, non-corrosive plastic for long-lasting reliability, and a raised drip guard which prevents potential leaks; UPC approved
- SPECS: Washer hook up box features a rough opening dimension of 8-1/4 W x 6-1/8 H x 3-3/4 D in inches, and a face plate dimension of 10-3/16 W x 8-13/16 H in inches
Specifications
- Color: White
- Dimension: 9.00Lx10.25Wx3.50H
- Size: 1/2 in. Crimp PEX Connection
Pros
- Safe water supply installation for washing machines
- Prevents potential leaks with raised drip guard
- Easy access to valves for shut off
- Durable and reliable
- Recessed design for easy installation
Cons
- Limited customization options
- Fixed drain and valve positions
- Flimsy construction
- Poor quality paint on valve handles
- No included face flange
The Eastman 1/2 inch Crimp PEX Connection Washing Machine Outlet Box is a reliable option for installing a safe water supply for your washing machine. It features a raised drip guard to prevent potential leaks and enables easy access to the valves if shut off is required. The high impact, non-corrosive plastic construction ensures durability, while the recessed design allows for easy installation. However, the limited customization options and flimsy construction are notable drawbacks. Additionally, the poor quality paint on the valve handles and the lack of an included face flange are disappointing. Overall, if you’re looking for a budget-friendly option with basic features, this outlet box could be suitable for your needs.

Overall Score: 7.8/10
The GUOFIS Washing Machine Outlet Box is a superior and durable plumbing fitting that provides a safe and reliable water supply installation for washing machines. It features a snap-on frame for easy installation, preventing potential leaks with a raised drip guard. The box is designed for recessed residential applications and can be separated for flexible layout options. Equipped with a 1/2 inch Push-fit Connection Inlet and 3/4 inch Male Hose Thread Outlet Connections, it also includes a 1/4 inch turn ball valve and water hammer arresters. Overall, this washing machine outlet box offers a convenient and secure solution for water supply shut-off access in your laundry room.
Key Features
- Superior Durability
- Functional Design
- Easy Installation
- Product Measurement
- Package Includes
Specifications
- Size: PUSH Connection with Water Hammer Arrestor
Pros
- High Impact and non-corrosive plastic for durability
- Lead-free brass shut-off valve resists corrosion
- Snap-on frame for easy and secure installation
- Flexible layout options
- Includes necessary components for installation
Cons
The GUOFIS Washing Machine Outlet Box is an excellent choice for those in need of a reliable and durable plumbing fitting for their washing machine. With its superior durability, functional design, and easy installation, it provides a secure water supply installation while preventing potential leaks. The included 1/4 inch turn ball valve and water hammer arresters ensure safety and convenience. The box’s snap-on frame and flexible layout options further enhance its usability. Overall, this product offers a comprehensive solution for water supply shut-off access in your laundry room.

Overall Score: 8/10
The Creative Co-Op Woven Rattan Display Boxes are a stylish and functional storage solution. This set includes two sizes of boxes, made with a beautiful combination of woven rattan and fir wood frame, and topped with glass lids. These boxes can be used in multiple ways – place them on your coffee table to store remotes, or use them as elegant display cases. The small box measures 12.5"L x 6.75"W x 4.25"H, while the large box is 15.5"L x 9.5"W x 6"H. The beige color adds a natural and rustic touch to any space. Customers rave about the quality and beauty of these boxes, with only minor concerns regarding crooked cane or small size. Overall, these Creative Co-Op display boxes are a great addition to your home decor.
Key Features
- Use for remotes on the coffee table
- Stand upright and use as a display case
- Set includes small and large sizes
Specifications
- Color: Beige
- Dimension: 14.63Lx5.13Wx9.50H
Pros
- Stylish and well-made
- Good dupe for more expensive brands
- Great quality and sturdy
- Perfect for storage or display
- Beautiful decorative pieces
- Well packaged to prevent damage
Cons
- Some crooked cane in the smaller box
- Minor details make it look slightly cheap
- Smaller than expected for some customers
- Boxes can slam back closed when opened
- Expensive for the quality
The Creative Co-Op Woven Rattan Display Boxes are an excellent choice for both practical storage and stylish display. They are well-made, sturdy, and add a touch of natural elegance to any room. While there have been a few concerns about crooked cane or minor details, these boxes still receive high praise for their quality and aesthetics. The set includes both small and large boxes, offering versatility in use. Whether you need to organize remotes or showcase your treasures, these Creative Co-Op display boxes are a worthy investment. Just be mindful of the size and consider the price in relation to the overall quality. Overall, a great addition to elevate your home decor.

Overall Score: 7/10
The Highcraft TC300 Replacement Washing Machine Outlet Box with Faceplate White ABS offers a practical and elegant solution for controlling your washing machine supply and drainage. With a box depth of 2.3 inches, it allows for a 1-inch wall thickness. Made from highly durable ABS one-piece construction, this outlet box is ASSE/UPC compliant. It features a compatible drain funnel, raised drip guard, and easy knockout removal for dual drainage of your washing machine and condensation line. The box can also be flipped for top-mount installation. Available in multiple styles, features, connections, and sizes, this outlet box can be tailored to suit your residential needs. Valves, nuts, hammer arrestors, faceplate, and mounting brackets are included. (Drain funnel sold separately under item #546GVO).
Key Features
- Practical and elegant solution for washing machine supply and drainage
- 2.3'' box depth; allows 1'' wall thickness
- Highly durable ABS one-piece construction; ASSE/UPC compliant
- Compatible drain funnel for dual drainage
- Can be flipped for top-mount installation
- Available in multiple styles, features, connections, and sizes
- Accessories and drain funnels available (sold separately)
- Includes valves, nuts, hammer arrestors, faceplate, and mounting brackets
Specifications
- Color: White
- Dimension: 10.00Lx8.00Wx2.00H
- Size: Replacement Box with Faceplate
Pros
- Practical and elegant design
- Durable construction
- Can be flipped for top-mount installation
- Multiple styles and sizes available
Cons
- Product dimensions may be inaccurate
- Some customers found it a little flimsy
The Highcraft TC300 Replacement Washing Machine Outlet Box is a practical and stylish solution for controlling your washing machine supply and drainage. It offers durability and versatility with the option for top-mount installation and various styles and sizes to choose from. However, there have been some concerns regarding inaccurate product dimensions and the product being slightly flimsy. Overall, if the dimensions meet your requirements and you are looking for an aesthetically pleasing outlet box, this could be a suitable choice.
Buyer's Guide: Washer Box
Are you in need of a washer box? Look no further, as we have crafted a comprehensive buyer's guide to assist you in making the right purchasing decision. Whether you're a seasoned expert or a first-time buyer, we've got you covered with all the essential information. So, let's dive right in!
Read also: 15 Superior Washer/Dryer For 2025
Benefits of a Washer Box
- Organized Laundry Room: A washer box provides a neat and tidy solution for your laundry room. With its convenient design, it allows you to conceal both the hot and cold water supply valves, providing a streamlined look.
- Damage Prevention: By installing a washer box, you can safeguard your laundry room against water leaks. The box acts as a barrier, containing any potential leaks and directing them safely to a drainage system.
- Space Efficiency: Washer boxes are designed to optimize space utilization in your laundry area. With their compact design, they help to create a clutter-free environment while making the most of the available space.
- Easy Installation: Most washer boxes come with detailed installation instructions, making it a simple and hassle-free process. Whether you're a DIY enthusiast or prefer professional assistance, installation is generally straightforward.
Factors to Consider
When selecting a washer box, it's essential to consider various factors to ensure it meets your specific requirements. Here are some important considerations:
- Material: Look for a washer box made from durable and high-quality materials such as brass or stainless steel. These materials offer longevity and are resistant to corrosion, ensuring your investment will last.
- Size: Consider the dimensions of the washer box to ensure it fits seamlessly into your laundry room setup. Measure the available space accurately and choose a box that offers compatibility with standard washer hoses.
- Valve Type: Determine the type of valve you prefer for your washer box. Most models come with quarter-turn or multi-turn valves. Each has its advantages, such as easy operation or better control over water flow.
- Accessibility: Some washer boxes feature an easily accessible panel that allows convenient access to the valves for maintenance or repairs. Consider this feature if you value quick and hassle-free maintenance.
- Additional Features: Explore any additional features provided with the washer box. Some models may include integrated drain connections, pre-installed mounting brackets, or noise-reducing features. Evaluate which features are essential for your needs.
Maintenance Tips
To ensure optimal performance and longevity of your washer box, follow these maintenance tips:
- Regularly check for any signs of leaks or damage around the box.
- Clean the washer box periodically to remove any accumulated debris or dirt.
- Test the valves periodically to ensure they are functioning properly.
- If you notice any issues or suspect a leak, address it promptly to prevent further damage.
- Consult the manufacturer's guidelines for any specific maintenance requirements.
Frequently Asked Questions about 15 Superior Washer Box For 2025
Installation difficulty may vary depending on your DIY skills and experience. If you’re confident and have the necessary tools, you can likely handle the installation yourself. However, if you’re unsure or prefer professional assistance, it’s advisable to hire a plumber.
Washer boxes are designed to be compatible with most standard washing machines. However, it’s always recommended to check the specifications of the washer box and your washing machine to ensure compatibility.
Start by determining the source of the leak. It could be a loose connection or a faulty valve. Tighten any loose connections and inspect the valves for any damage or signs of wear. If the issue persists, consult a professional plumber for further assistance.
Yes, it is crucial to turn off the water supply before installing the washer box. This ensures safety and avoids any water leakage during installation.
Most washer boxes are designed for indoor use. If you intend to install a washer box in an outdoor area, ensure it is specifically designed for outdoor use and is resistant to outdoor elements.
Was this page helpful?
Trust Storables.com for unbiased and honest product reviews. Our reviews are rigorously assessed by our Expert Board Contributors and adhere to strict Editorial Standards. We ensure that each review is transparent and trustworthy, helping you make informed purchasing decisions.


0 thoughts on “15 Superior Washer Box For 2025”