Articles
How To Insulate A Cape Cod Attic
Modified: August 22, 2024
Insulate your Cape Cod attic with these helpful articles. Learn how to keep your home comfortable and energy-efficient.
(Many of the links in this article redirect to a specific reviewed product. Your purchase of these products through affiliate links helps to generate commission for Storables.com, at no extra cost. Learn more)
Introduction
Welcome to our comprehensive guide on how to insulate a Cape Cod attic. If you own a Cape Cod style home, you may already be familiar with the unique features and charm that make these houses so appealing. However, one common issue with Cape Cod homes is their susceptibility to heat loss and poor insulation in the attic space.
An improperly insulated attic can result in high energy bills, uncomfortable indoor temperatures, and a strain on your heating and cooling systems. By taking the time to properly insulate your Cape Cod attic, you can significantly improve the energy efficiency of your home and create a more comfortable living environment.
In this guide, we will walk you through the step-by-step process of insulating your Cape Cod attic, from assessing the current insulation to installing the right materials and addressing air leaks. We will also cover important considerations such as proper ventilation and insulation for attic walls and sloped ceilings. By the end of this article, you will have all the knowledge you need to successfully insulate your Cape Cod attic and reap the benefits of a more energy-efficient home.
So, let’s get started with the first step: assessing the current insulation in your Cape Cod attic.
Key Takeaways:
- Properly insulating your Cape Cod attic is crucial for improving energy efficiency, reducing energy bills, and creating a more comfortable living environment. Assess, choose, prepare, seal, and install for optimal results.
- Prioritize safety, consider professional guidance, and follow local building codes when insulating your attic. Regular maintenance and additional energy efficiency upgrades can further enhance your home’s sustainability.
Read more: Cape Cod Living Room Ideas
Step 1: Assess the Current Insulation
Before you begin insulating your Cape Cod attic, it’s important to assess the current insulation to determine its effectiveness and identify any areas that may require additional insulation. Here are a few steps to help you assess the current insulation:
- Locate the existing insulation: Start by identifying where the insulation is located in your attic. It is typically found on the attic floor, between the ceiling joists or on top of the ceiling drywall. Look for any obvious gaps, compression, or damage in the insulation.
- Determine the insulation type: The most common types of insulation found in attics are fiberglass batts, blown-in cellulose, or spray foam insulation. Each type has different properties and R-values, which indicate their thermal resistance. The higher the R-value, the better the insulation’s performance.
- Check the insulation’s condition: Insulation can degrade over time due to factors such as moisture, pests, or improper installation. Look for signs of moisture damage, mold, pest infestation, or compression that may reduce its effectiveness.
- Measure the insulation’s thickness: Using a ruler or tape measure, measure the thickness of the insulation. The recommended minimum insulation thickness for Cape Cod attics is typically around 12 to 16 inches, depending on your climate zone.
- Assess the coverage: Insulation should be uniformly installed throughout the attic, with no gaps or areas left uninsulated. Check for any areas where the insulation may be missing or unevenly distributed.
By assessing the current insulation in your Cape Cod attic, you can determine if it meets the recommended standards for energy efficiency and identify any areas that may need improvement. This step will help you make informed decisions about adding new insulation and addressing any insulation gaps or issues that may be present.
Now that you’ve assessed the current insulation in your Cape Cod attic, it’s time to move on to Step 2: Choosing the right insulation material.
Step 2: Choose the Right Insulation Material
Choosing the right insulation material is crucial in achieving optimal energy efficiency and comfort in your Cape Cod attic. There are several insulation options available, each with its own pros and cons. Here are some common insulation materials to consider:
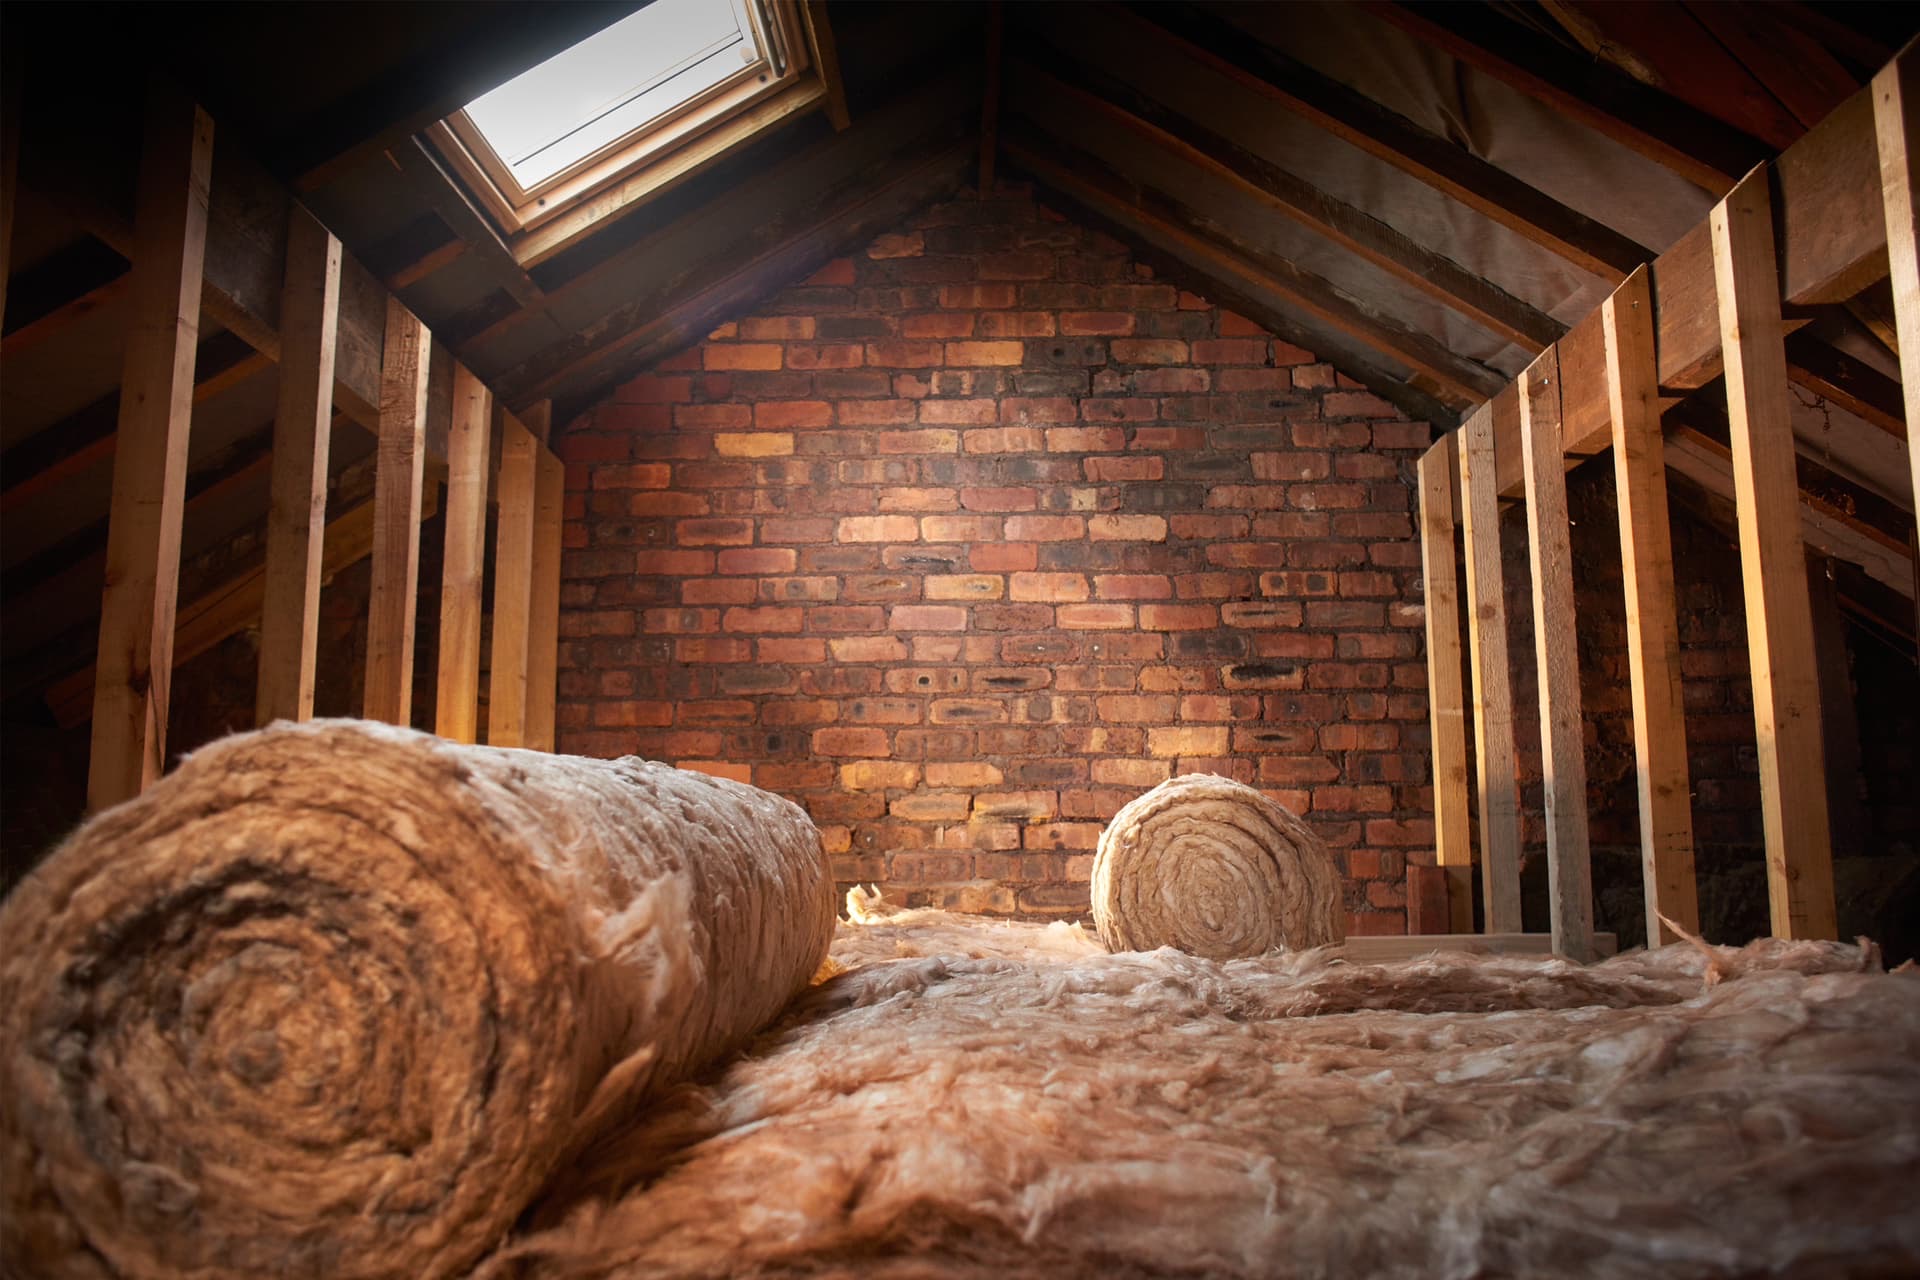
- Fiberglass Batts: Fiberglass batts are one of the most widely used insulation materials. They come in pre-cut panels or rolls and are relatively easy to install. Fiberglass batts have good thermal resistance and are cost-effective, making them a popular choice for attics. However, they can be challenging to install properly around irregularly shaped areas or in tight spaces.
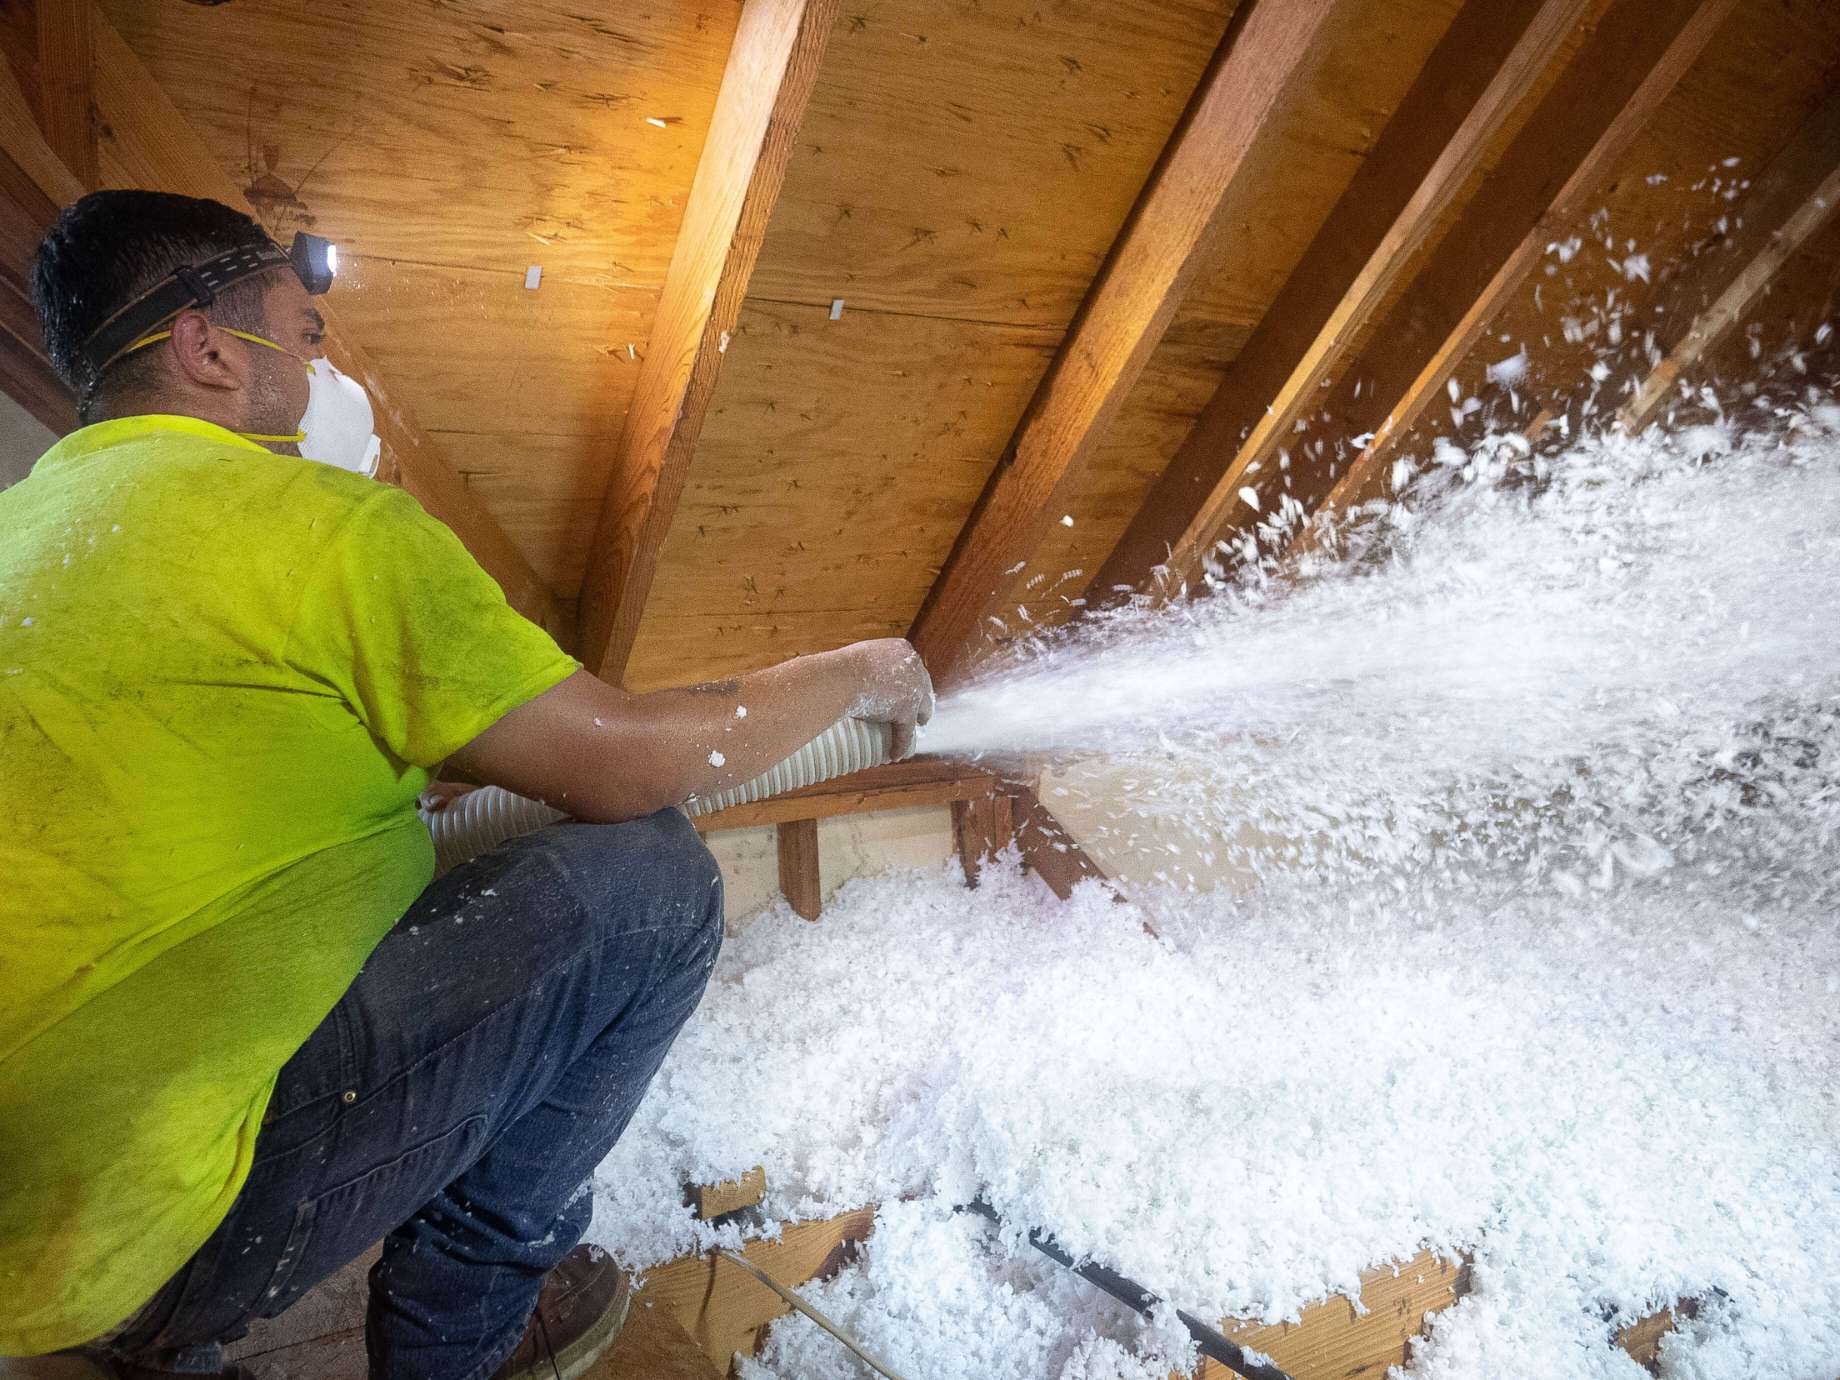
- Blown-in Cellulose: Blown-in cellulose insulation is made from recycled paper treated with fire-retardant chemicals. It is blown into the attic using a special machine, filling in gaps and providing excellent coverage. Cellulose insulation is known for its superior sound absorption and resistance to pests. However, it may settle over time, reducing its effectiveness.
- Spray Foam Insulation: Spray foam insulation is a versatile option that expands to fill cavities, creating an airtight seal. It provides excellent insulation and helps prevent air leakage, making it an energy-efficient choice. However, spray foam insulation can be more expensive and may require professional installation.
- Rigid Foam Insulation: Rigid foam insulation is a durable and moisture-resistant option that offers high thermal resistance. It comes in rigid panels or boards and is often used for insulating attic walls and sloped ceilings. Rigid foam insulation provides good insulation performance but may require additional framing for installation.
When selecting the right insulation material for your Cape Cod attic, consider factors such as the R-value, ease of installation, moisture resistance, and any specific requirements for your climate zone. It’s essential to choose an insulation material that fits your budget, provides optimal thermal performance, and addresses any specific needs or challenges in your attic space.
After choosing the insulation material, check its compatibility with any existing insulation and ensure compliance with local building codes and regulations. Consulting with a professional insulation contractor can provide valuable guidance and help you make an informed decision.
Now that you’ve chosen the right insulation material, it’s time to move on to Step 3: Preparing the attic for insulation.
Step 3: Prepare the Attic for Insulation
Before you can begin the insulation process in your Cape Cod attic, it’s crucial to properly prepare the space. Taking the time to prepare the attic will ensure a smooth and effective insulation installation. Here are the steps to follow for preparing the attic:
- Clean and declutter: Clear out any unnecessary items, debris, or obstructions from the attic space. This will make it easier to navigate and install the insulation.
- Inspect for damage: Look for any signs of damage, such as water leaks, mold, or pest infestations. Repairing any damage before insulating will help maintain the integrity of the attic and ensure long-term insulation effectiveness.
- Seal gaps and cracks: Inspect the attic for any gaps, cracks, or openings that could allow air leakage. Use caulk, spray foam, or weatherstripping to seal these gaps and ensure proper insulation performance.
- Ensure proper ventilation: Adequate attic ventilation is essential for maintaining healthy indoor air quality and preventing moisture buildup. Check that the attic has proper ventilation in the form of vents, soffits, or ridge vents. If needed, consult a professional to improve ventilation before insulation installation.
- Protect electrical fixtures: Safely cover any electrical fixtures, such as light fixtures or wires, with insulation baffles or shields to prevent contact with insulation material.
- Provide access pathways: Create safe and accessible pathways in the attic to allow for future maintenance or repairs. This will make it easier to navigate the attic space without compressing or damaging the insulation.
By properly preparing the attic for insulation, you will ensure a clean, safe, and well-ventilated environment for the insulation installation. Take the time to address any issues or repairs before proceeding to the next steps.
Now that the attic is prepared, you’re ready to move on to Step 4: Sealing air leaks in the attic. This crucial step will help maximize the insulation’s effectiveness and prevent energy loss.
Step 4: Seal Air Leaks
Sealing air leaks in your Cape Cod attic is a vital step in achieving optimal energy efficiency and insulation performance. Air leaks can significantly impact your home’s heating and cooling costs, as well as compromise the effectiveness of the insulation. Here’s how you can seal air leaks in your attic:
- Identify problem areas: Carefully inspect the attic for any areas where air may be leaking. Common problem areas include gaps around plumbing and electrical penetrations, recessed lighting fixtures, attic hatches or access doors, and gaps around the perimeter of the attic floor.
- Seal gaps and cracks: Use weatherstripping, caulk, or foam sealant to seal gaps and cracks around windows, doors, vents, and other openings. Pay special attention to areas where different building materials meet, such as where the walls meet the ceiling or where ductwork enters the attic.
- Seal recessed lights: Insulate and seal any recessed light fixtures to prevent air leakage. Use insulation covers or boxes specifically designed for recessed lighting to maintain the fire safety rating and reduce energy loss.
- Insulate and weatherstrip attic hatches or access doors: Attic hatches or access doors are common sources of air leakage. Install weatherstripping around the edges and consider adding insulation to the hatch or door to prevent energy loss.
- Insulate and seal ductwork: Insulate and seal any exposed ductwork in the attic to prevent air leaks and improve the efficiency of your heating and cooling systems. Use insulation wrap or mastic tape to seal joints and connections.
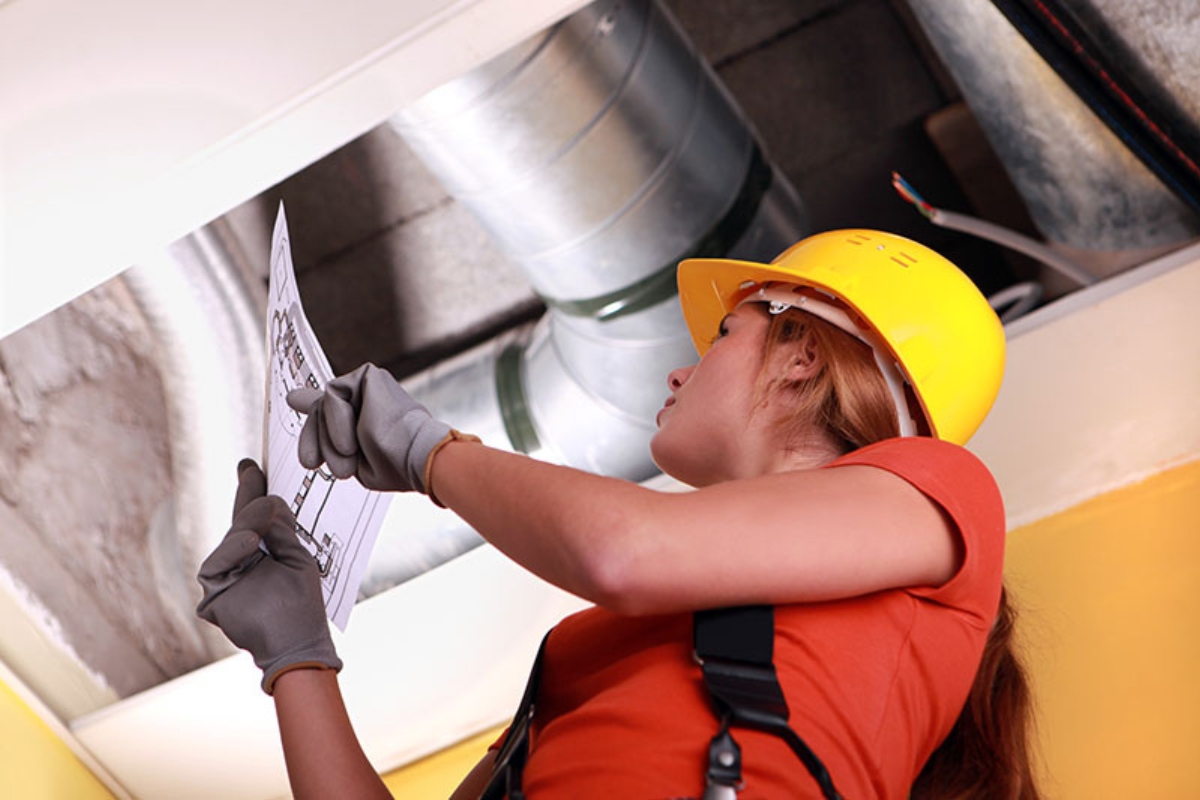
- Consider professional energy audits: If you’re unsure about identifying and sealing air leaks, consider hiring a professional energy auditor. They can perform a comprehensive assessment of your home’s energy efficiency and help identify areas for improvement.
By sealing air leaks in your Cape Cod attic, you will enhance the effectiveness of the insulation, improve indoor comfort, and reduce energy waste. Take the time to thoroughly assess and address any air leakage points before proceeding to the next steps.
Now that the air leaks are sealed, you’re ready to move on to Step 5: Installing insulation in the attic floor. This step is crucial in creating a thermal barrier between your living space and the attic.
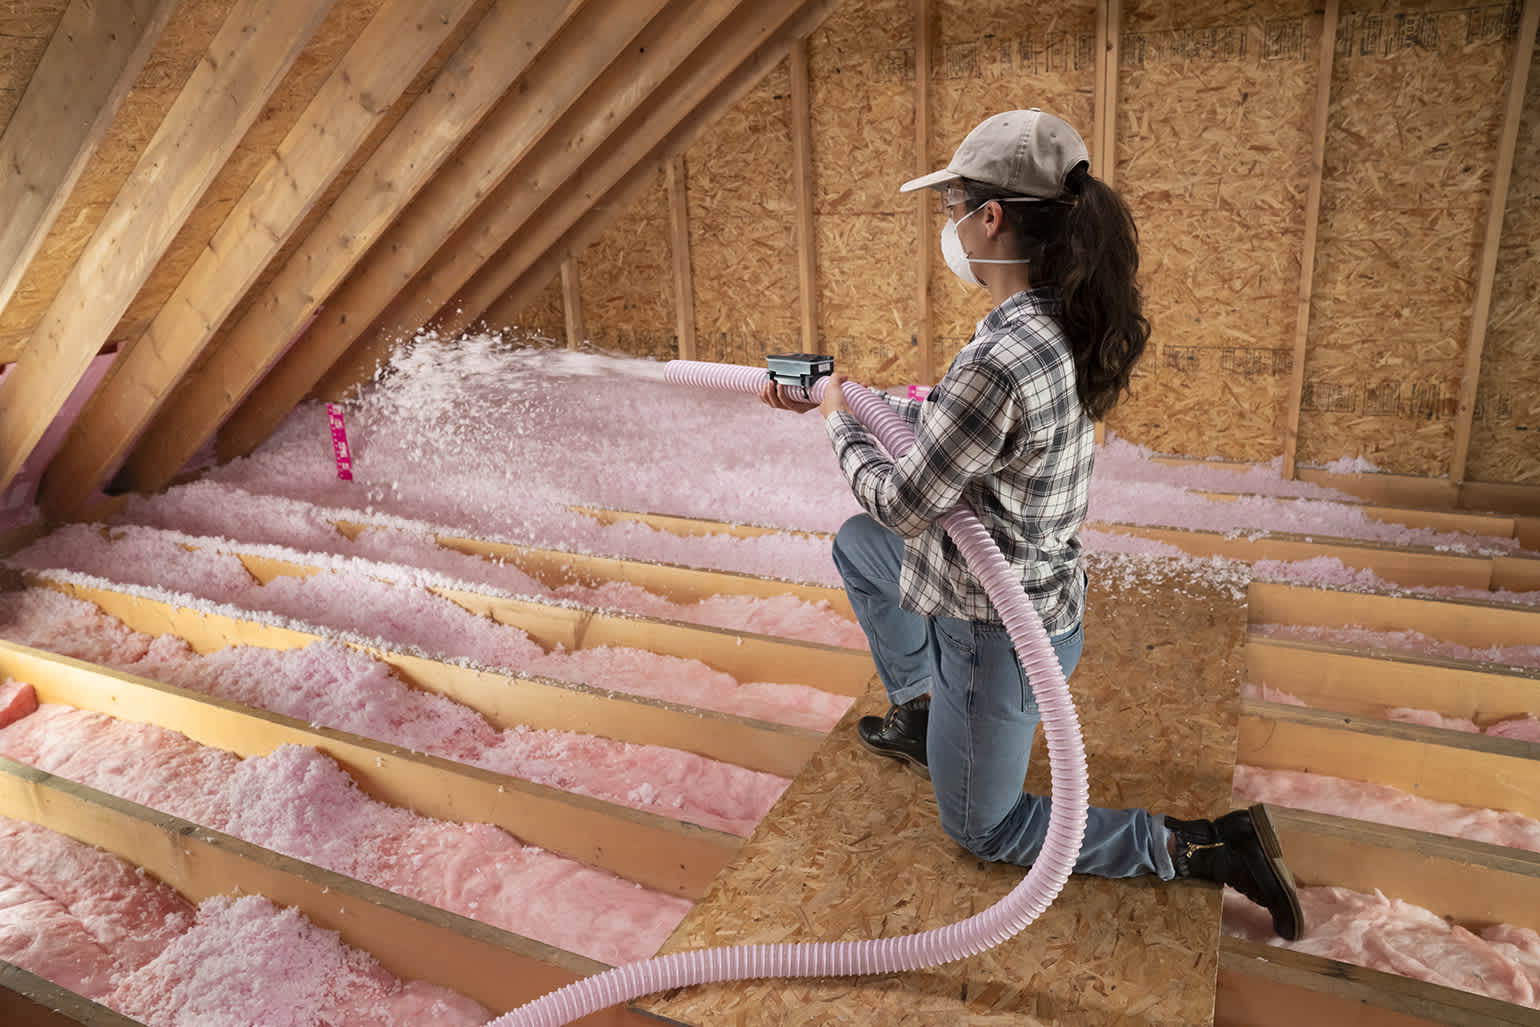
Step 5: Install Insulation in the Attic Floor
Properly insulating the attic floor is essential in preventing heat transfer between your living space and the attic. Installing insulation in the attic floor will create a thermal barrier, keeping your home warm in winter and cool in summer. Here’s how you can install insulation in the attic floor of your Cape Cod home:
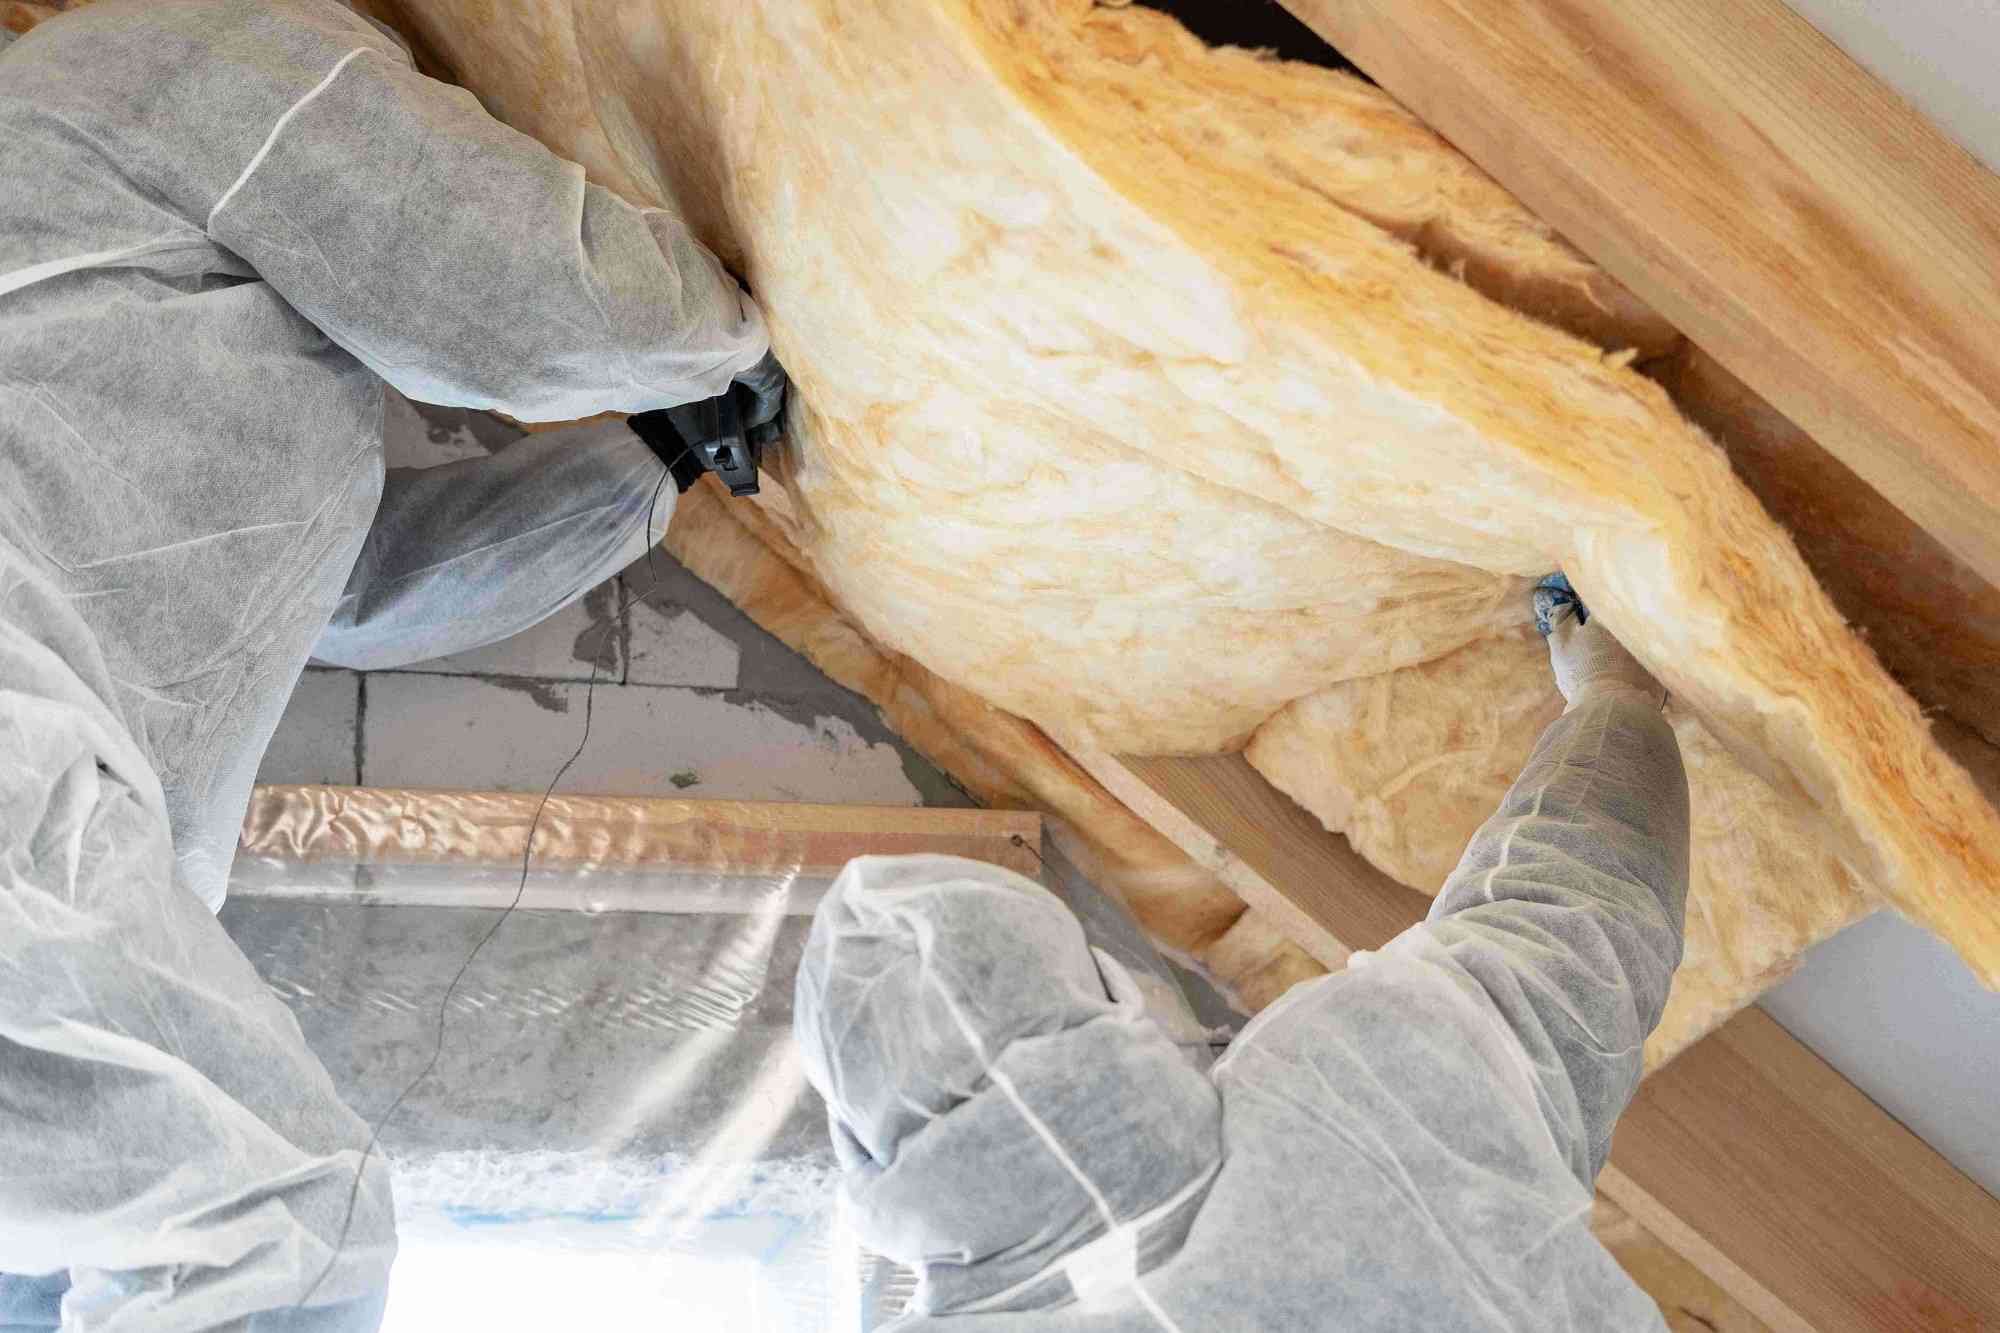
- Measure and cut the insulation: Measure the length and width of the areas between the ceiling joists in the attic floor. Using a utility knife or insulation cutter, cut the insulation material to fit snugly between the joists. Be sure to wear protective clothing, gloves, and a mask while handling insulation.
- Lay the insulation: Gently place the insulation batts or rolls between the ceiling joists, ensuring a tight fit. Avoid compressing the insulation, as this can reduce its effectiveness. Be careful not to cover any eave vents or soffit vents to maintain proper attic ventilation.
- Insulate around obstacles: Pay special attention to areas with obstacles such as pipes, electrical wires, or ductwork. Carefully cut and fit the insulation around these obstacles, maintaining a continuous layer of insulation throughout the attic floor.
- Use insulation supports: In areas where the insulation needs to be held in place, such as above ceiling light fixtures, use insulation supports or retaining clips to keep the insulation from sagging or falling. This will help ensure consistent coverage and prevent gaps.
- Seal air leaks: As you install the insulation, check for any gaps or openings where air may be leaking. Use weatherstripping, caulk, or foam sealant to seal these areas and maintain the integrity of the thermal barrier.
- Consider hiring professionals: If you’re not confident in your ability to install attic insulation properly, it’s recommended to consult a professional insulation contractor. They have the expertise and tools to ensure proper installation and maximize energy efficiency.
Remember, the attic floor insulation should be thick enough to achieve the desired R-value for your climate zone. Refer to local building codes and insulation recommendations to determine the appropriate thickness for your area.
With the attic floor properly insulated, you have created an effective barrier against heat loss or gain through the ceiling. Next, in Step 6: Insulate the attic hatch or access door, we’ll focus on preventing thermal bridging and air leakage through this crucial access point.
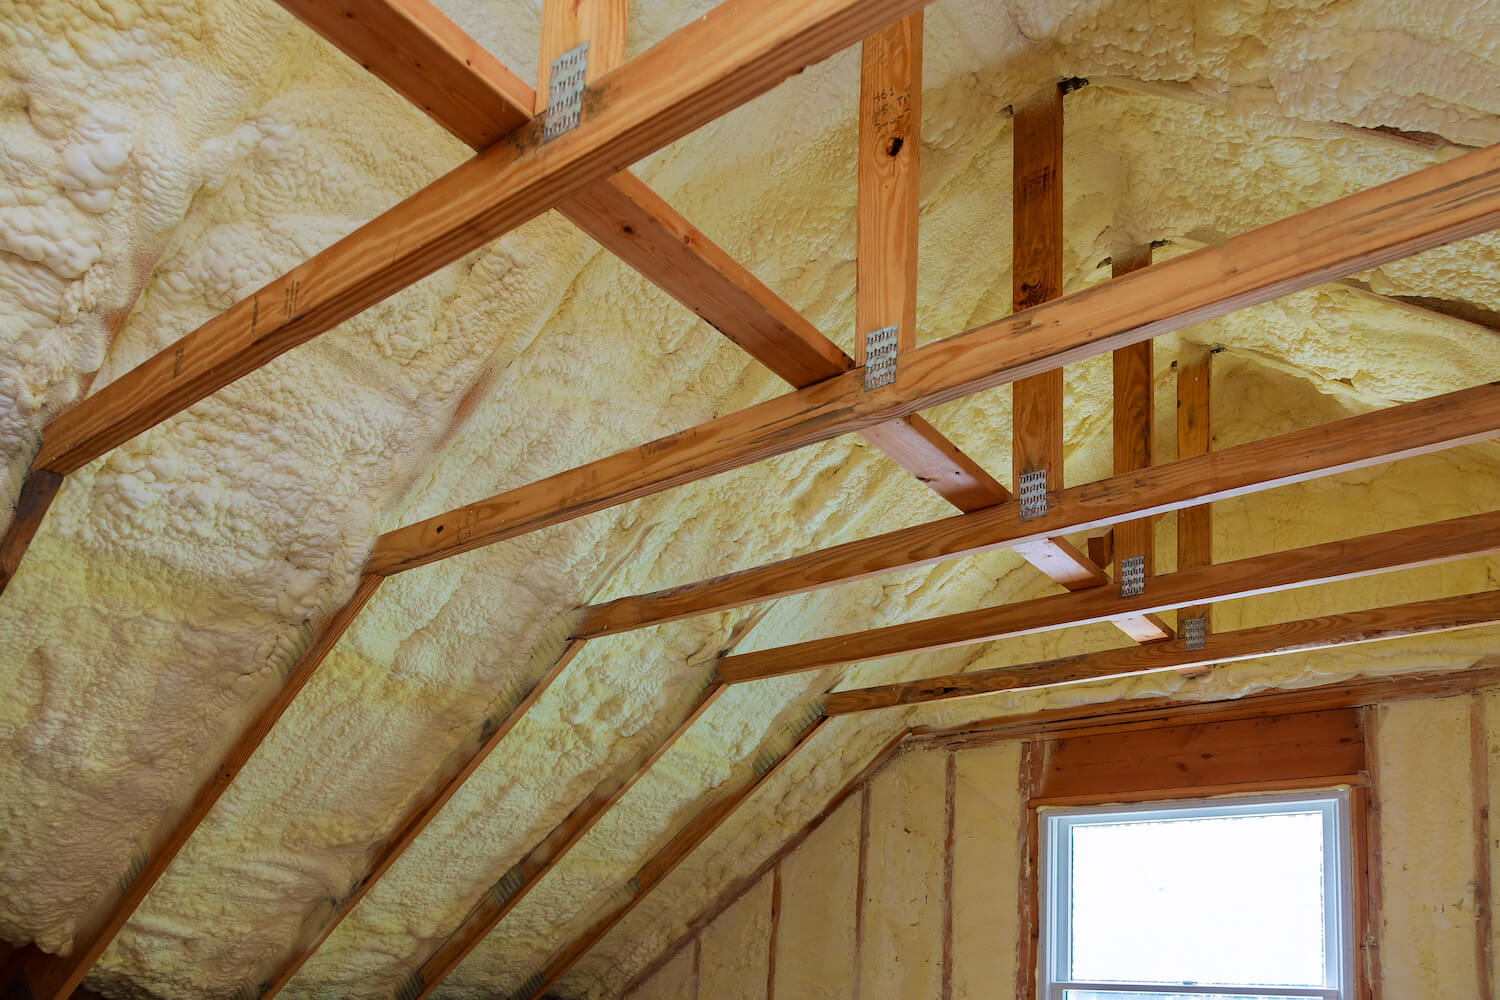
Consider using spray foam insulation to effectively insulate the sloped ceilings and knee walls in a Cape Cod attic. This type of insulation can provide a tight seal and effectively fill in small gaps and cracks.
Step 6: Insulate the Attic Hatch or Access Door
Insulating the attic hatch or access door is an important step in maintaining the energy efficiency of your Cape Cod home. These openings can be significant sources of heat loss or gain and can allow air leakage between your living space and the attic. Insulating the attic hatch or access door will help prevent thermal bridging and improve the overall insulation performance. Here’s how you can insulate the attic hatch or access door:
- Measure the hatch or door: Take accurate measurements of the attic hatch or access door to determine the amount of insulation material you will need.
- Choose the insulation material: Opt for an insulation material that is suitable for enclosing the hatch or door, such as rigid foam board insulation or fiberglass batts.
- Cut the insulation material: Using a utility knife or insulation cutter, cut the insulation material to fit the size of the attic hatch or access door. Make sure the cuts are precise and the insulation fits snugly.
- Attach the insulation to the hatch or door: Depending on the insulation material chosen, secure it to the hatch or door using adhesive, velcro strips, or staples. Ensure that the insulation completely covers the hatch or door and there are no gaps.
- Add weatherstripping: Apply weatherstripping along the edges of the hatch or door to create an airtight seal when closed. This will prevent air leakage and maintain the integrity of the insulation.
- Create a latch or handle: If your attic hatch or access door requires a latch or handle to open and close, install one that allows you to easily access the attic while maintaining a tight seal. Consider using a latch or handle with insulation built into its design.
By insulating the attic hatch or access door, you are sealing off a potential area of heat transfer and air leakage. This helps ensure that the insulation in the rest of the attic remains effective and prevents energy loss.
Now that the attic hatch or access door is properly insulated, it’s time to move on to Step 7: Insulating the attic walls and sloped ceilings, which are key areas for keeping your Cape Cod attic properly insulated.
Step 7: Insulate Attic Walls and Sloped Ceilings
Insulating the attic walls and sloped ceilings in your Cape Cod home is crucial in creating a fully insulated and energy-efficient attic space. Proper insulation in these areas will help prevent heat transfer, maintain consistent indoor temperatures, and reduce energy consumption. Here’s how you can insulate the attic walls and sloped ceilings:
- Choose the insulation material: Select an insulation material suitable for the walls and sloped ceilings, such as fiberglass batts, rigid foam insulation, or blown-in insulation.
- Measure and cut the insulation material: Measure the walls and sloped ceiling areas that require insulation. Cut the insulation material to fit the measurements, ensuring a snug and secure fit.
- Install the insulation: Gently place the insulation against the attic walls and sloped ceilings, starting from the bottom and working your way up. Press firmly to ensure proper coverage and avoid any gaps or voids in the insulation.
- Secure the insulation: Use insulation supports or staples to hold the insulation in place, especially on sloped ceilings. Make sure the insulation is held securely and does not sag or shift over time.
- Address electrical fixtures: If there are electrical fixtures, such as outlets or recessed lights, in the attic walls or sloped ceilings, use insulation baffles to maintain the required clearance around them. This will help prevent fire hazards and ensure proper ventilation.
- Seal any remaining gaps: Inspect the installed insulation for any gaps or openings and seal them with weatherstripping, caulk, or foam sealant. This will ensure an airtight seal and prevent air leakage.
Insulating the attic walls and sloped ceilings is essential for creating a fully insulated and energy-efficient attic space. It helps maintain the desired indoor temperatures, reduces energy waste, and improves the overall comfort of your Cape Cod home.
Now that the attic walls and sloped ceilings are properly insulated, it’s time to focus on Step 8: Ensuring proper ventilation in the attic. Proper ventilation is vital for maintaining a healthy attic environment and prolonging the lifespan of your insulation.
Step 8: Proper Ventilation in the Attic
Establishing proper ventilation in your Cape Cod attic is critical for maintaining a healthy and well-functioning space. Adequate ventilation helps prevent moisture buildup, reduce the risk of mold and mildew growth, and prolong the lifespan of your insulation. Here’s how you can ensure proper ventilation in the attic:
- Assess the current ventilation: Evaluate the existing ventilation system in your attic. Check for the presence of soffit vents, ridge vents, gable vents, or other ventilation openings.
- Calculate the ventilation requirements: Determine the recommended ventilation requirements based on the size and square footage of your attic. Generally, the rule of thumb is to have 1 square foot of ventilation opening for every 150 square feet of attic space.
- Add intake vents: Install soffit vents along the eaves of the roof to allow fresh outdoor air to enter the attic. These vents are crucial for drawing in cool air and preventing the formation of hot spots in the attic.
- Install exhaust vents: Ensure that your attic has sufficient exhaust vents, such as ridge vents or gable vents, to allow hot air and moisture to escape. These vents promote airflow and prevent the buildup of excess heat and humidity.
- Remove any blockages: Clear away any obstructions such as insulation, debris, or bird nests that may be blocking the airflow through the ventilation openings. Ensure that the vents are free from any restrictions.
- Consider attic fans: If your attic experiences inadequate natural ventilation, you may opt to install attic fans. These fans help improve airflow and assist with expelling hot air, especially during the hotter months.
- Maintain regular inspections: Regularly inspect and clean the ventilation system to ensure it remains unobstructed and functioning properly. Remove any debris or buildup that may impede airflow.
Proper ventilation in the attic plays a crucial role in maintaining the overall health and effectiveness of your insulation. It helps regulate moisture levels, prevent the development of mold and mildew, and promote efficient airflow for better energy efficiency.
Now that you have established proper ventilation in your Cape Cod attic, it’s time for Step 9: Additional Tips and Considerations. We will provide some helpful tips and address important considerations to ensure a successful insulation project.
Step 9: Additional Tips and Considerations
As you near the end of your Cape Cod attic insulation project, here are some additional tips and considerations to ensure a successful and effective insulation installation:
- Consider hiring a professional: If you are unsure about any aspect of the insulation process or if your attic has complex issues, it is recommended to hire a professional insulation contractor. They have the knowledge and expertise to handle challenging situations and ensure proper insulation installation.
- Follow safety precautions: Always prioritize safety when working in the attic. Wear protective clothing, including gloves, goggles, and a mask to protect against insulation fibers. Take care when moving around the attic space to avoid accidents or injuries.
- Insulate pipes and ductwork: In addition to insulating the attic itself, consider insulating any exposed pipes or ductwork in the attic. Insulated pipes and ducts help prevent heat loss or gain and maintain the efficiency of your heating and cooling systems.
- Maintain access and pathways: Ensure that access to the attic, such as stairways or pulldown stairs, is easily accessible and unobstructed. This will make it simpler to perform necessary maintenance or repairs in the future without compromising the insulation.
- Check local building codes: Familiarize yourself with the local building codes and regulations regarding insulation in your area. Ensure that your insulation installation meets or exceeds these requirements to comply with the standards.
- Consider energy efficiency upgrades: While insulating your attic, it may be the perfect opportunity to consider other energy efficiency upgrades, such as installing LED lighting, improving window insulation, or upgrading your HVAC system. These upgrades can further enhance your home’s energy efficiency and save you money in the long run.
- Maintain regular maintenance: Once your Cape Cod attic insulation is complete, make it a priority to conduct regular inspections and maintenance checks. Look for any signs of damage, moisture buildup, or insulation settling, and address them promptly to maintain the insulation’s effectiveness.
By following these additional tips and considerations, you can ensure that your Cape Cod attic is properly insulated and optimized for energy efficiency. Not only will this result in a more comfortable living space but also help reduce your energy bills and contribute to a greener, more sustainable home.
With Step 9 completed, you have reached the end of our comprehensive guide on how to insulate a Cape Cod attic. By following each step diligently and considering the additional tips and considerations, you can successfully insulate your attic and enjoy the benefits of improved energy efficiency and comfort in your home.
Remember to regularly check and maintain your insulation to ensure its long-term effectiveness. If you have any doubts or questions, don’t hesitate to consult with a professional insulation contractor for expert guidance tailored to your specific circumstances.
Best of luck with your Cape Cod attic insulation project!
Conclusion
Congratulations on completing the journey of insulating your Cape Cod attic! By following the step-by-step guide in this article, you have taken significant steps toward improving the energy efficiency and comfort of your home. Properly insulating your attic can lead to lower energy bills, reduced environmental impact, and a more comfortable living environment for you and your family.
Throughout this guide, we covered the essential steps of assessing the current insulation, choosing the right insulation materials, preparing the attic, sealing air leaks, installing insulation in the attic floor, insulating the attic hatch or access door, insulating attic walls and sloped ceilings, ensuring proper ventilation, and considering additional tips and considerations.
Remember, when insulating your Cape Cod attic, it is important to prioritize safety, follow local building codes, and consider consulting a professional if needed. Insulation provides long-term benefits, but proper maintenance and regular inspections are necessary to ensure its effectiveness.
By properly insulating your attic, you have created a thermal barrier that prevents heat loss or gain, reduces energy waste, and promotes a more sustainable home. Your efforts will not only contribute to reducing your carbon footprint but also provide you with a more comfortable and energy-efficient living space for years to come.
We hope that this comprehensive guide has provided you with the knowledge and confidence to successfully insulate your Cape Cod attic. Remember to regularly assess, maintain, and upgrade your insulation as needed to maximize its performance. With these measures in place, you can enjoy a more comfortable home while saving on energy costs.
Thank you for joining us on this insulation journey. Keep up the great work, and enjoy the benefits of your well-insulated Cape Cod attic!
Frequently Asked Questions about How To Insulate A Cape Cod Attic
Was this page helpful?
At Storables.com, we guarantee accurate and reliable information. Our content, validated by Expert Board Contributors, is crafted following stringent Editorial Policies. We're committed to providing you with well-researched, expert-backed insights for all your informational needs.


0 thoughts on “How To Insulate A Cape Cod Attic”