Articles
How To Insulate A Ceiling Without Attic
Modified: October 28, 2024
Learn how to insulate a ceiling without an attic with our helpful articles. Get practical tips and tricks to improve your home's energy efficiency.
(Many of the links in this article redirect to a specific reviewed product. Your purchase of these products through affiliate links helps to generate commission for Storables.com, at no extra cost. Learn more)
Introduction
Welcome to the world of ceiling insulation! When it comes to creating a comfortable and energy-efficient home, insulating your ceiling is a vital step. However, what happens if you don’t have an attic? Don’t worry – in this article, we’ll explore different methods of insulating a ceiling without an attic and help you make an informed decision.
Insulating a ceiling without an attic presents a unique challenge. Attics provide a convenient space for installing insulation between the ceiling and the roof, but not all homes have this feature. This may be the case for homes with flat roofs, low ceilings, or certain architectural designs. However, lack of an attic doesn’t mean you can’t insulate your ceiling effectively. There are alternative methods that can still provide thermal protection and improve energy efficiency.
In this article, we’ll delve into various techniques that you can employ to insulate your ceiling without an attic. From using rigid foam insulation to installing reflective foil and even utilizing recycled denim, there are a range of solutions available to meet your specific needs. So, let’s dive in and explore these methods in more detail.
Key Takeaways:
- Insulating a ceiling without an attic is achievable through methods such as rigid foam, reflective foil, blow-in insulation, recycled denim, or a suspended ceiling system. Each method offers unique benefits and considerations for improving energy efficiency and comfort in your home.
- Proper ceiling insulation not only reduces heat loss and gain, but also contributes to soundproofing and environmental sustainability. By choosing the right method for your home, you can create a more comfortable, energy-efficient, and eco-friendly living space.
Read more: How Important Is Attic Insulation
Understanding the Importance of Ceiling Insulation
Before we discuss the different methods of insulating a ceiling without an attic, it’s important to understand why ceiling insulation is so crucial for your home. The primary role of insulation is to create a barrier that prevents the transfer of heat between the interior and exterior of your home. By reducing heat flow, insulation helps maintain a comfortable temperature inside, regardless of the weather conditions outside. It also plays a vital role in improving energy efficiency and reducing utility costs.
Ceiling insulation, in particular, is essential because heat rises. During the colder months, warm air naturally moves upwards, and without proper insulation, it can escape through the ceiling. This results in heat loss and an increased demand for heating, leading to higher energy consumption and utility bills. Similarly, during the hot summer months, the sun’s rays can penetrate the roof and transfer heat into your home, forcing your cooling system to work harder.
By insulating your ceiling, you can reduce both heat loss in winter and heat gain in summer, creating a more comfortable living environment year-round. It also helps to maintain a consistent temperature throughout your home, eliminating cold spots near the ceiling and reducing the need for excessive heating or cooling. Furthermore, ceiling insulation can contribute to soundproofing, reducing noise transmission from the outside or between different levels of your home.
Another benefit of ceiling insulation is its positive impact on the environment. By reducing your energy consumption, you not only save money but also lower your carbon footprint. Insulated homes require less energy for heating and cooling, which helps to conserve natural resources and reduce greenhouse gas emissions.
Now that we’ve established the importance of ceiling insulation, let’s explore the different methods you can use to insulate your ceiling without an attic. Each method has its advantages and considerations, so let’s find the one that suits your needs best.
Different Methods of Insulating a Ceiling without Attic
When it comes to insulating a ceiling without an attic, there are several methods you can consider. These methods are designed to provide effective insulation while taking into account the specific requirements and constraints of your home. Let’s take a closer look at each method:
- Using Rigid Foam Insulation: Rigid foam insulation, also known as foam board insulation, is a popular choice for ceiling insulation. It is lightweight and comes in large sheets that can be easily cut to fit between the ceiling joists. Rigid foam offers excellent thermal resistance and can effectively reduce heat transfer. It is a good option if you have limited space between your ceiling and roof and need a solution that doesn’t add much weight. However, proper installation is crucial, as any gaps or air leaks can compromise its effectiveness.
- Installing Reflective Foil Insulation: Reflective foil insulation works by reflecting radiant heat away from your ceiling. It consists of a layer of reflective foil that is installed facing downwards, reflecting the heat back towards the roof. This type of insulation is ideal for homes in hot climates, as it helps to block the heat from entering your living space. Reflective foil insulation is relatively easy to install and can be stapled directly to the underside of the rafters or screwed onto the ceiling joists.
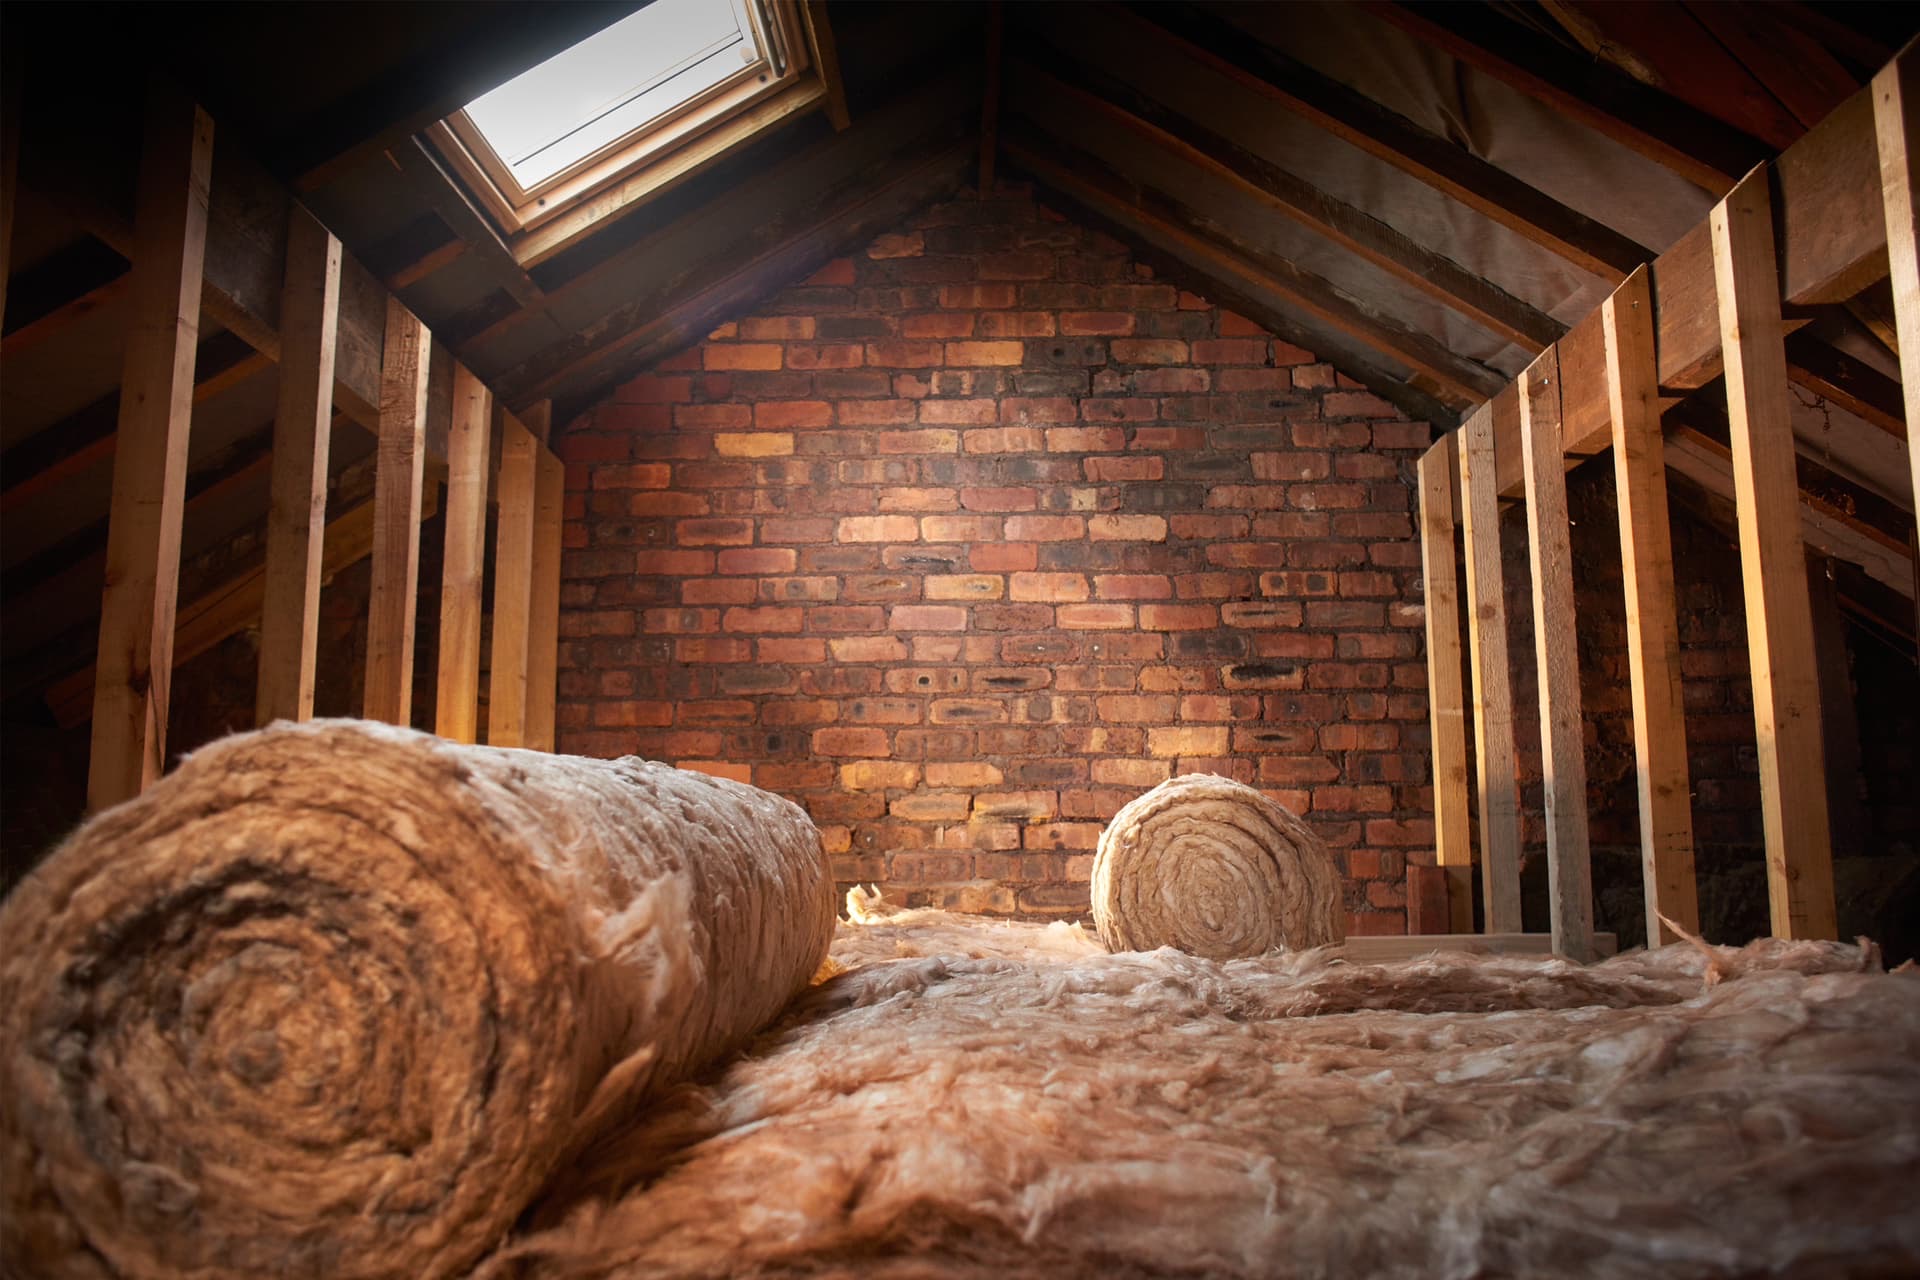
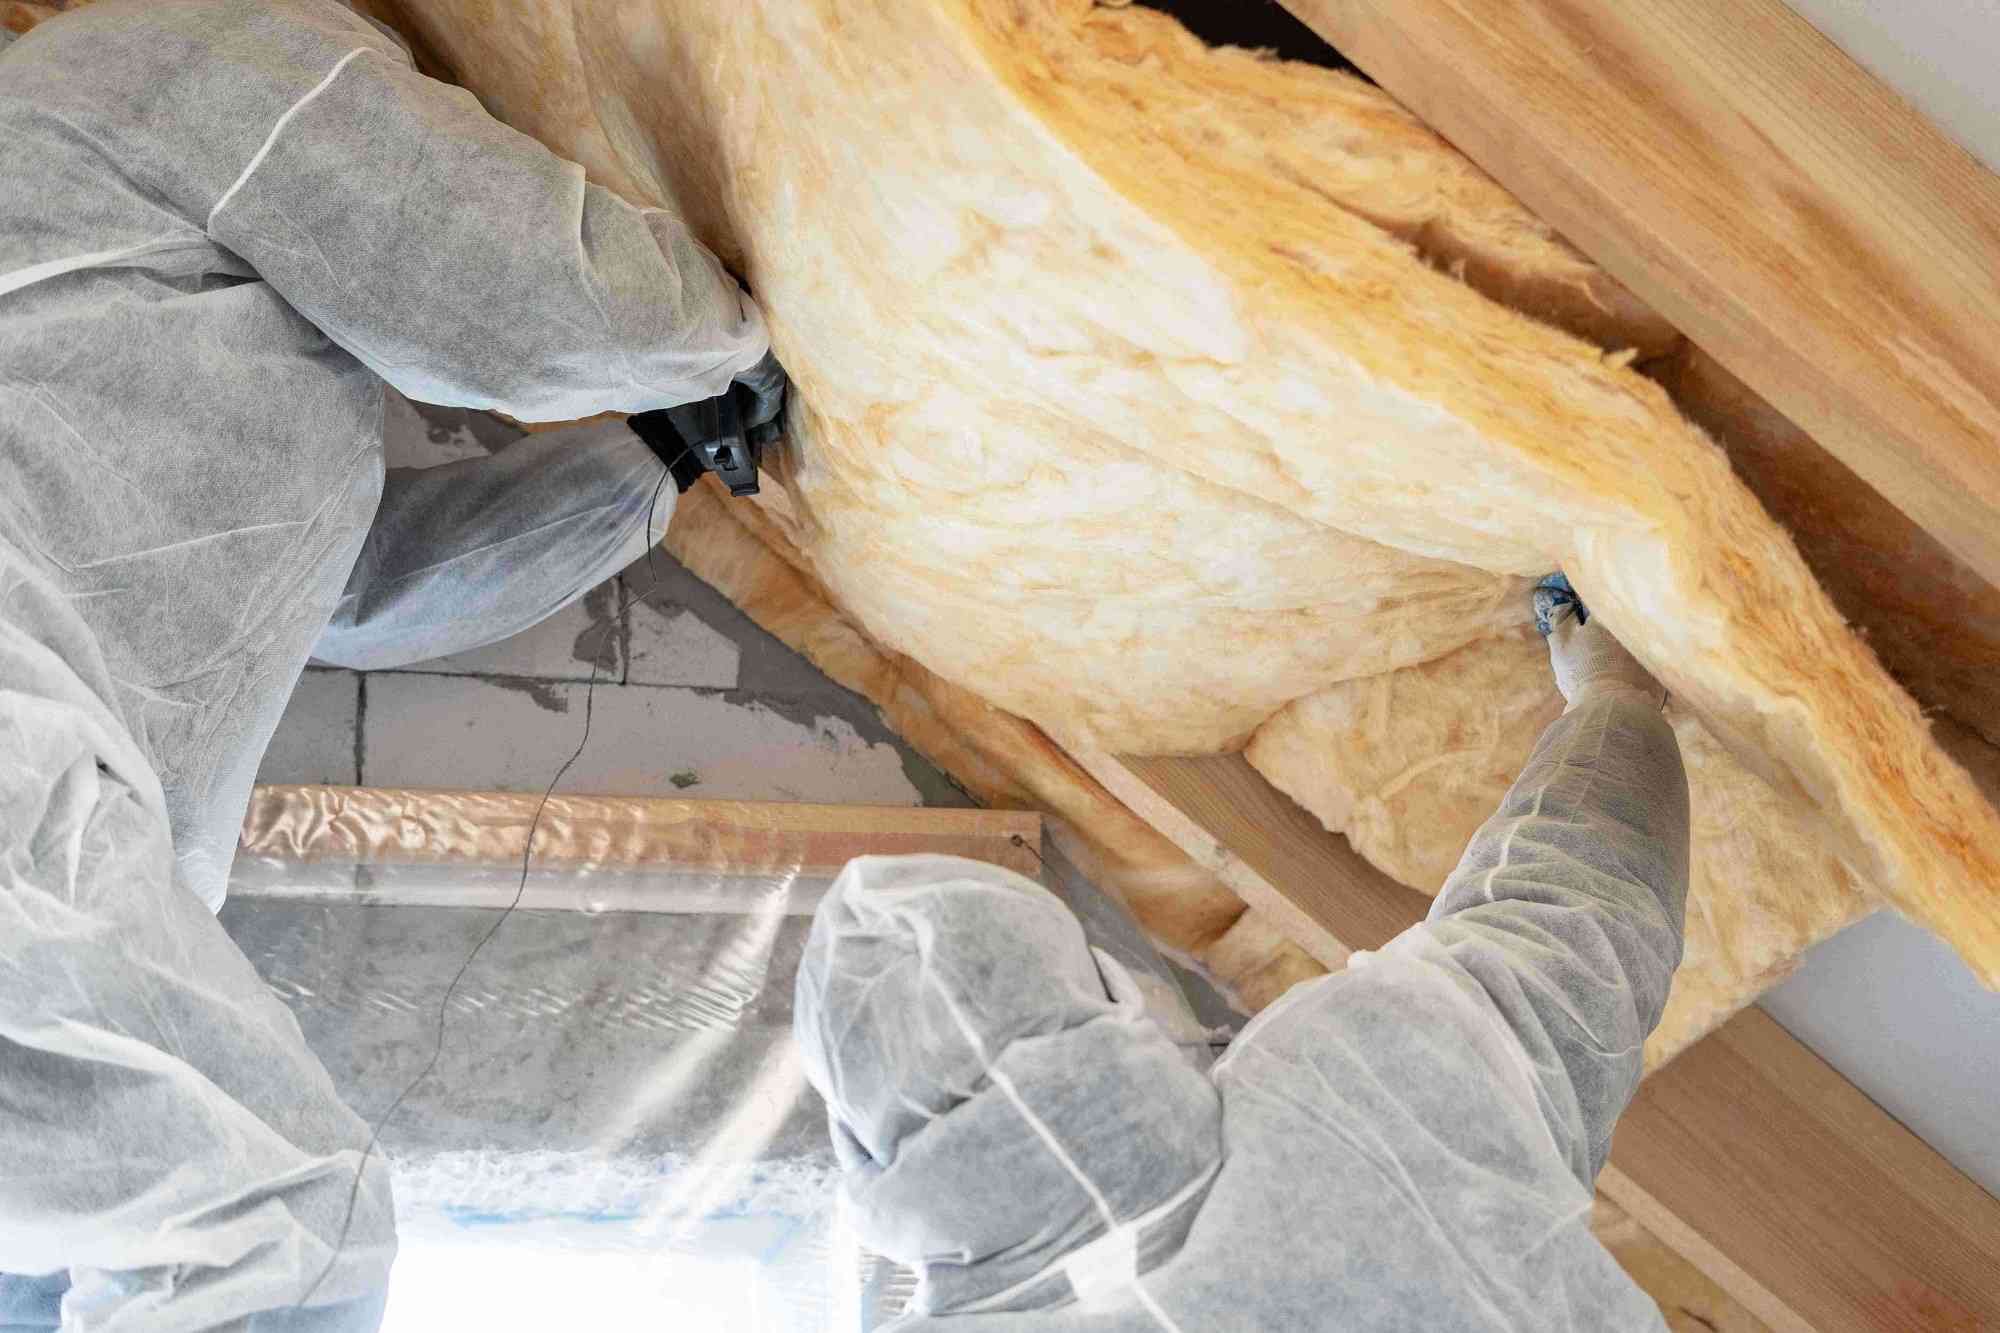
- Utilizing Blow-in Insulation: Blow-in insulation, also known as loose-fill insulation, is a versatile option for insulating a ceiling without an attic. This method involves blowing or spraying insulation material into the spaces between the ceiling joists. Materials commonly used for blow-in insulation include fiberglass, cellulose, or mineral wool. Blow-in insulation provides excellent coverage, filling any gaps or voids and effectively reducing heat transfer. It is important to hire a professional to ensure proper installation and to avoid any issues with ventilation or moisture accumulation.
- Employing Recycled Denim Insulation: An eco-friendly option for ceiling insulation is recycled denim insulation. Made from recycled denim jeans, this type of insulation is free from harmful chemicals and offers excellent thermal performance. Recycled denim insulation comes in batts or rolls that can be easily installed between the ceiling joists. It provides effective soundproofing and is resistant to mold and pests. However, it is worth noting that recycled denim insulation can be more expensive compared to other options.
- Creating a Suspended Ceiling System: If you have a high ceiling and want to add insulation without disrupting the existing structure, a suspended ceiling system can be a viable solution. This involves installing a secondary ceiling below the existing one and filling the cavity with insulation material. The insulation can be in the form of batts, panels, or blow-in insulation. This method allows you to achieve effective insulation while preserving the aesthetics of your current ceiling. However, it reduces the height of the room, so it may not be suitable for all spaces.
These different methods of insulating a ceiling without an attic provide options to suit various needs and conditions. Consider the specific characteristics of your home, your budget, and any unique requirements you may have when choosing the best method for your situation. Consulting with a professional insulation contractor can also help ensure that you make the right decision and achieve optimal results.
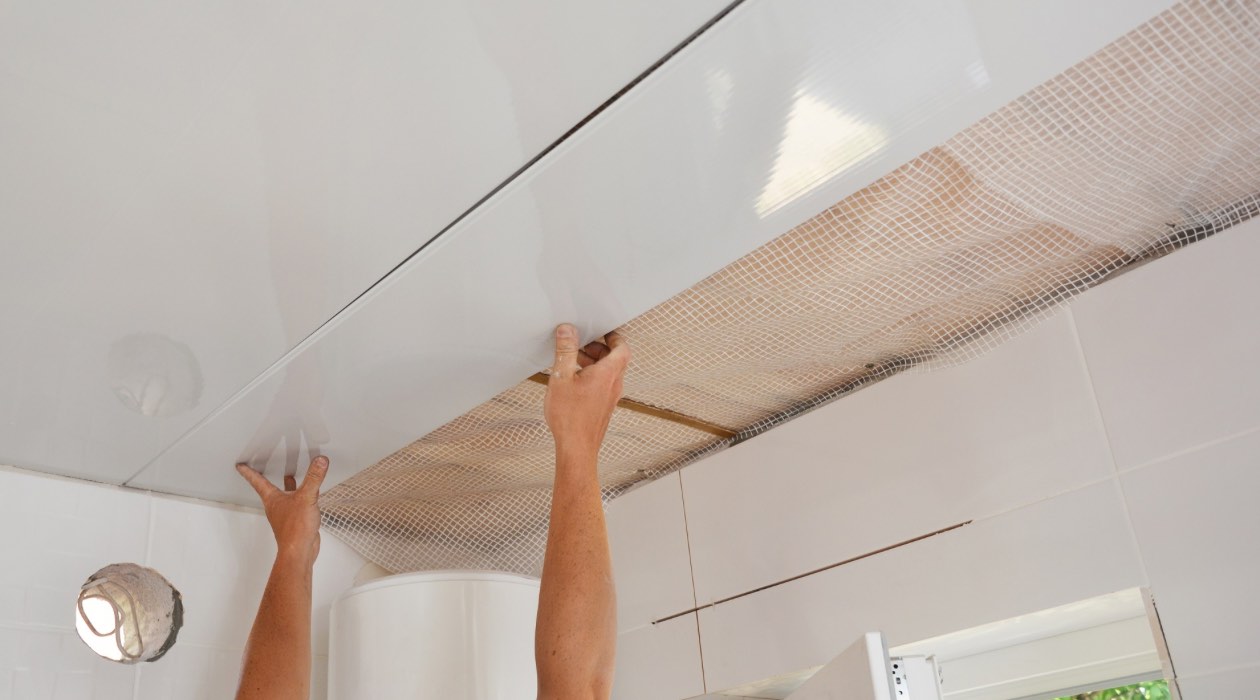
Method 1: Using Rigid Foam Insulation
When it comes to insulating a ceiling without an attic, one effective method is to use rigid foam insulation. Rigid foam insulation, also known as foam board insulation, is a lightweight and durable option that provides excellent thermal resistance. Here’s how you can go about using rigid foam insulation:
- Measure and Prepare: Start by measuring the spaces between your ceiling joists to determine the size of the rigid foam insulation sheets you will need. Cut the foam insulation boards to fit snugly between the joists. It’s essential to ensure a tight fit to minimize any air gaps that could compromise the insulation’s effectiveness.
- Seal Air Leaks: Before installing the foam insulation boards, inspect the ceiling for any air leaks or gaps that may allow air to bypass the insulation. Use caulking or expanding foam insulation to seal any openings or cracks. This step is crucial to create an airtight barrier and maximize the insulation’s performance.
- Install the Foam Insulation: With the air leaks sealed, carefully insert the cut foam insulation boards between the ceiling joists. Press them firmly into place, ensuring that they fit snugly. If necessary, you can use a utility knife to trim the foam boards for a perfect fit.
- Secure the Insulation Boards: To secure the foam insulation boards in place, you can use adhesive or construction adhesive on the back of the boards. Apply a generous amount of adhesive, making sure to cover the entire surface that will be in contact with the ceiling joists. This will ensure a strong bond and prevent the insulation from shifting or coming loose over time.
- Seal the Seams: To further enhance the insulation’s effectiveness, seal the seams between the foam insulation boards. Use foam board adhesive or spray foam insulation to seal any gaps or cracks, ensuring a continuous and airtight barrier.
- Install a Vapor Barrier: Depending on your climate and local building codes, you may need to install a vapor barrier on top of the foam insulation. The vapor barrier helps prevent condensation and moisture buildup within the insulation. Consult with a local expert or building professional to determine if a vapor barrier is necessary for your specific situation.
It’s important to note that proper installation and attention to detail are essential when using rigid foam insulation. Any gaps or air leaks can compromise its effectiveness. If you’re unsure about the installation process or want to ensure optimal results, consider consulting with a professional insulation contractor.
Using rigid foam insulation to insulate a ceiling without an attic offers several benefits. It provides excellent thermal resistance and can effectively reduce heat transfer. Additionally, rigid foam insulation is lightweight and easy to handle, making it a convenient option for DIY enthusiasts. By properly insulating your ceiling with rigid foam, you can create a more energy-efficient and comfortable living space.
Method 2: Installing Reflective Foil Insulation
Another effective method for insulating a ceiling without an attic is by installing reflective foil insulation. Reflective foil insulation works by reflecting radiant heat away from your ceiling, helping to keep your home cooler in the summer and reducing heat loss in the winter. Here’s how you can install reflective foil insulation:
- Measure and Prepare: Start by measuring the space between the ceiling joists to determine the size of the reflective foil insulation sheets needed. Cut the sheets to fit between the joists, making sure they extend to cover the entire ceiling area.
- Locate and Seal Air Leaks: Inspect the ceiling for any air leaks or gaps that may allow air to bypass the insulation. Seal any openings or cracks with caulking or expanding foam insulation. This step is essential to ensure an airtight barrier and maximize the insulation’s effectiveness.
- Install the Reflective Foil: Position the reflective foil insulation between the ceiling joists, ensuring that the shiny reflective side faces down towards the living space. Staple or use construction adhesive to secure the insulation to the joists. Make sure to leave a small airspace between the insulation and the ceiling to allow for proper ventilation.
- Cover Seams: To create a continuous barrier, seal any seams or gaps in the reflective foil insulation. Use reflective foil tape to cover the joints between the sheets, ensuring a tight seal. This helps to prevent any air leakage and maintain the reflective properties of the insulation.
- Install Recessed Lighting Covers: If you have recessed lighting fixtures in your ceiling, it’s important to install appropriate covers to ensure that the insulation does not come into direct contact with the fixtures. Use approved insulating covers or build an air space box around the fixtures to maintain safety standards.
- Consider Attic Insulation: While you may not have an attic, it’s worth considering insulating the roof if accessible. Insulating the roof from above can provide additional thermal protection and enhance the overall energy efficiency of your home. Consult with a professional insulation contractor to determine the feasibility of this option for your specific situation.
Reflective foil insulation is an effective option for homes in hot climates, as it helps to block the heat from entering the living space. It is relatively easy to install and provides a cost-effective solution for ceiling insulation without an attic. The reflective properties of the foil help to reduce heat gain during hot weather, keeping your home cooler and reducing the load on your cooling system.
Remember, proper installation and sealing of the reflective foil insulation are key to its effectiveness. Pay attention to detail and ensure that there are no gaps or air leaks that can compromise its performance. If you’re unsure about the installation process or want to ensure optimal results, consulting with a professional insulation contractor is always a good idea.
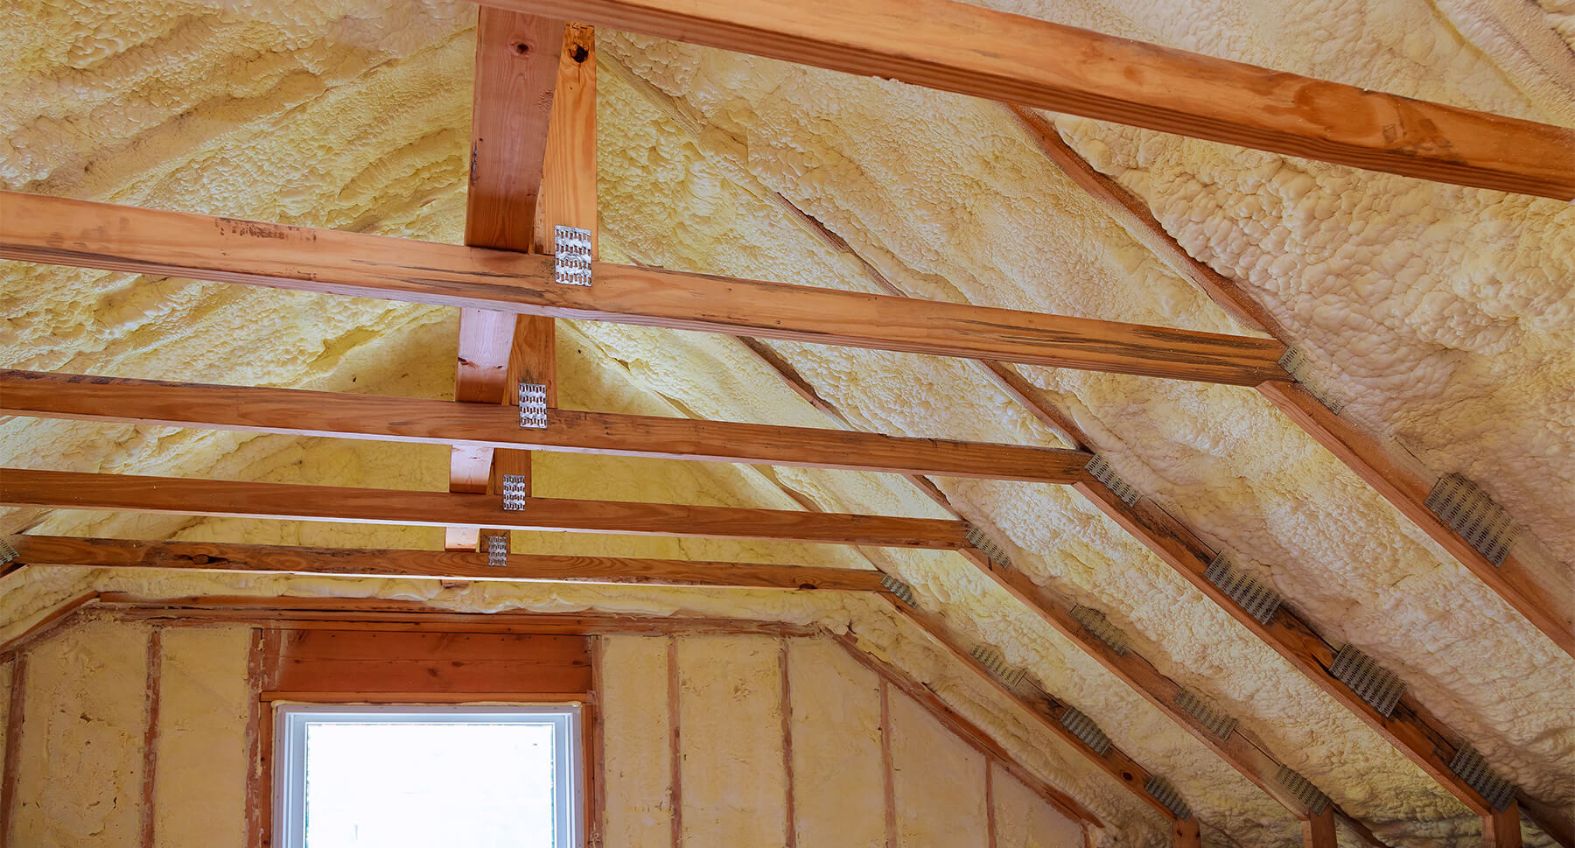
Consider using spray foam insulation to insulate a ceiling without attic access. It can be applied directly to the underside of the roof deck, providing an effective barrier against heat transfer.
Read more: How To Insulate A Garage Attic
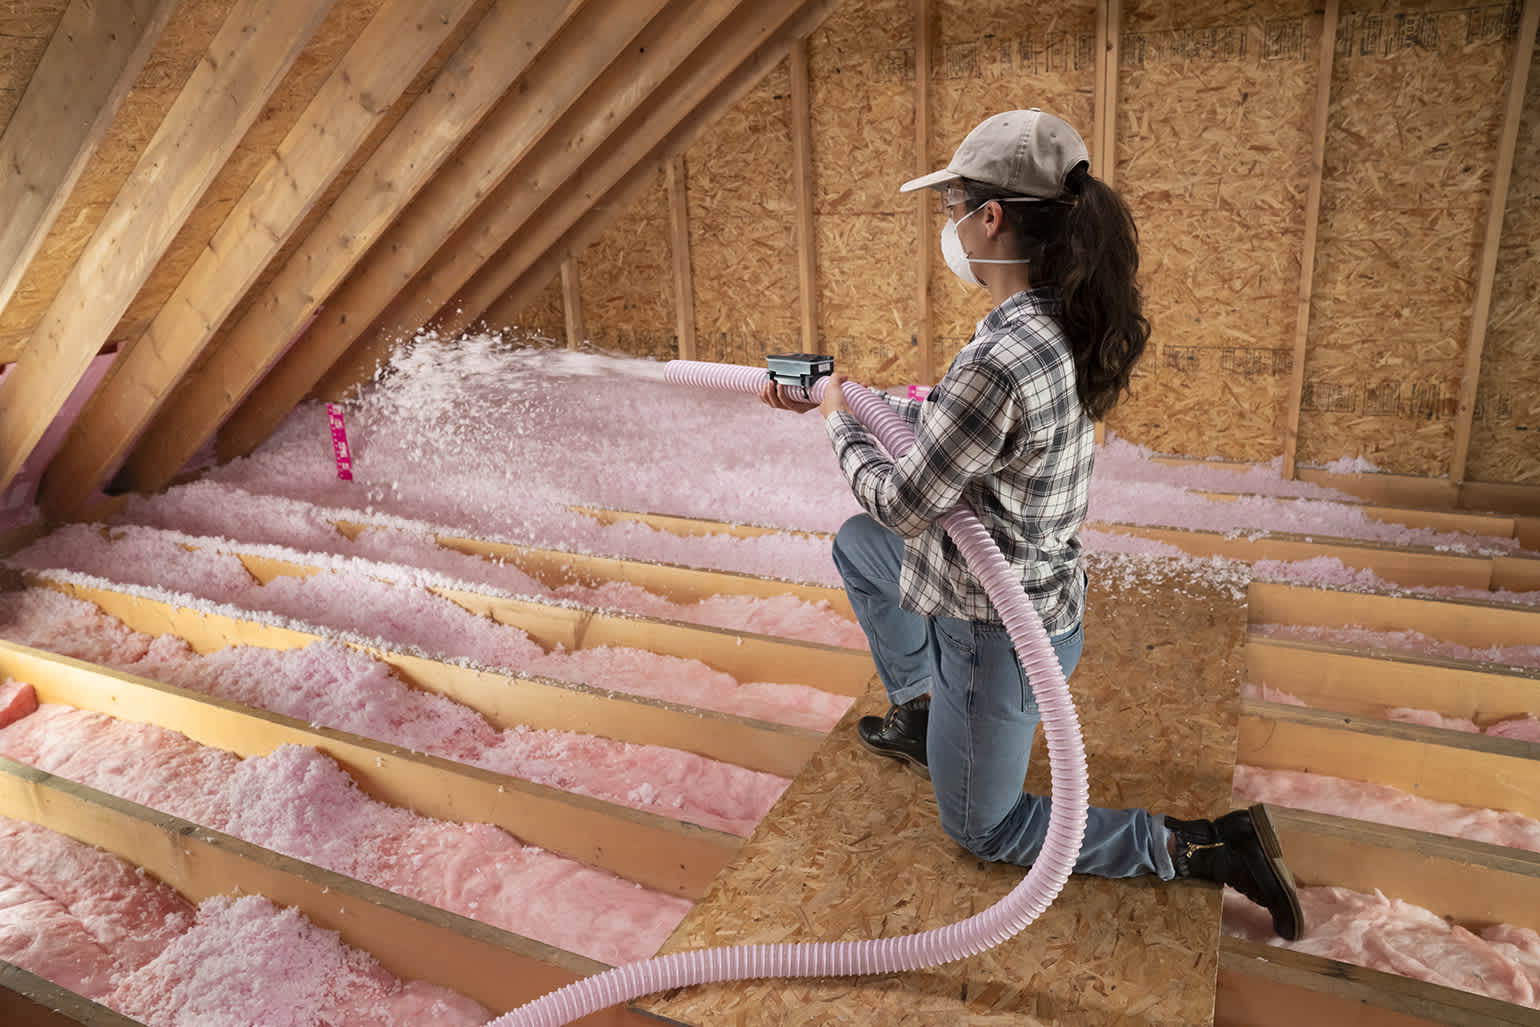
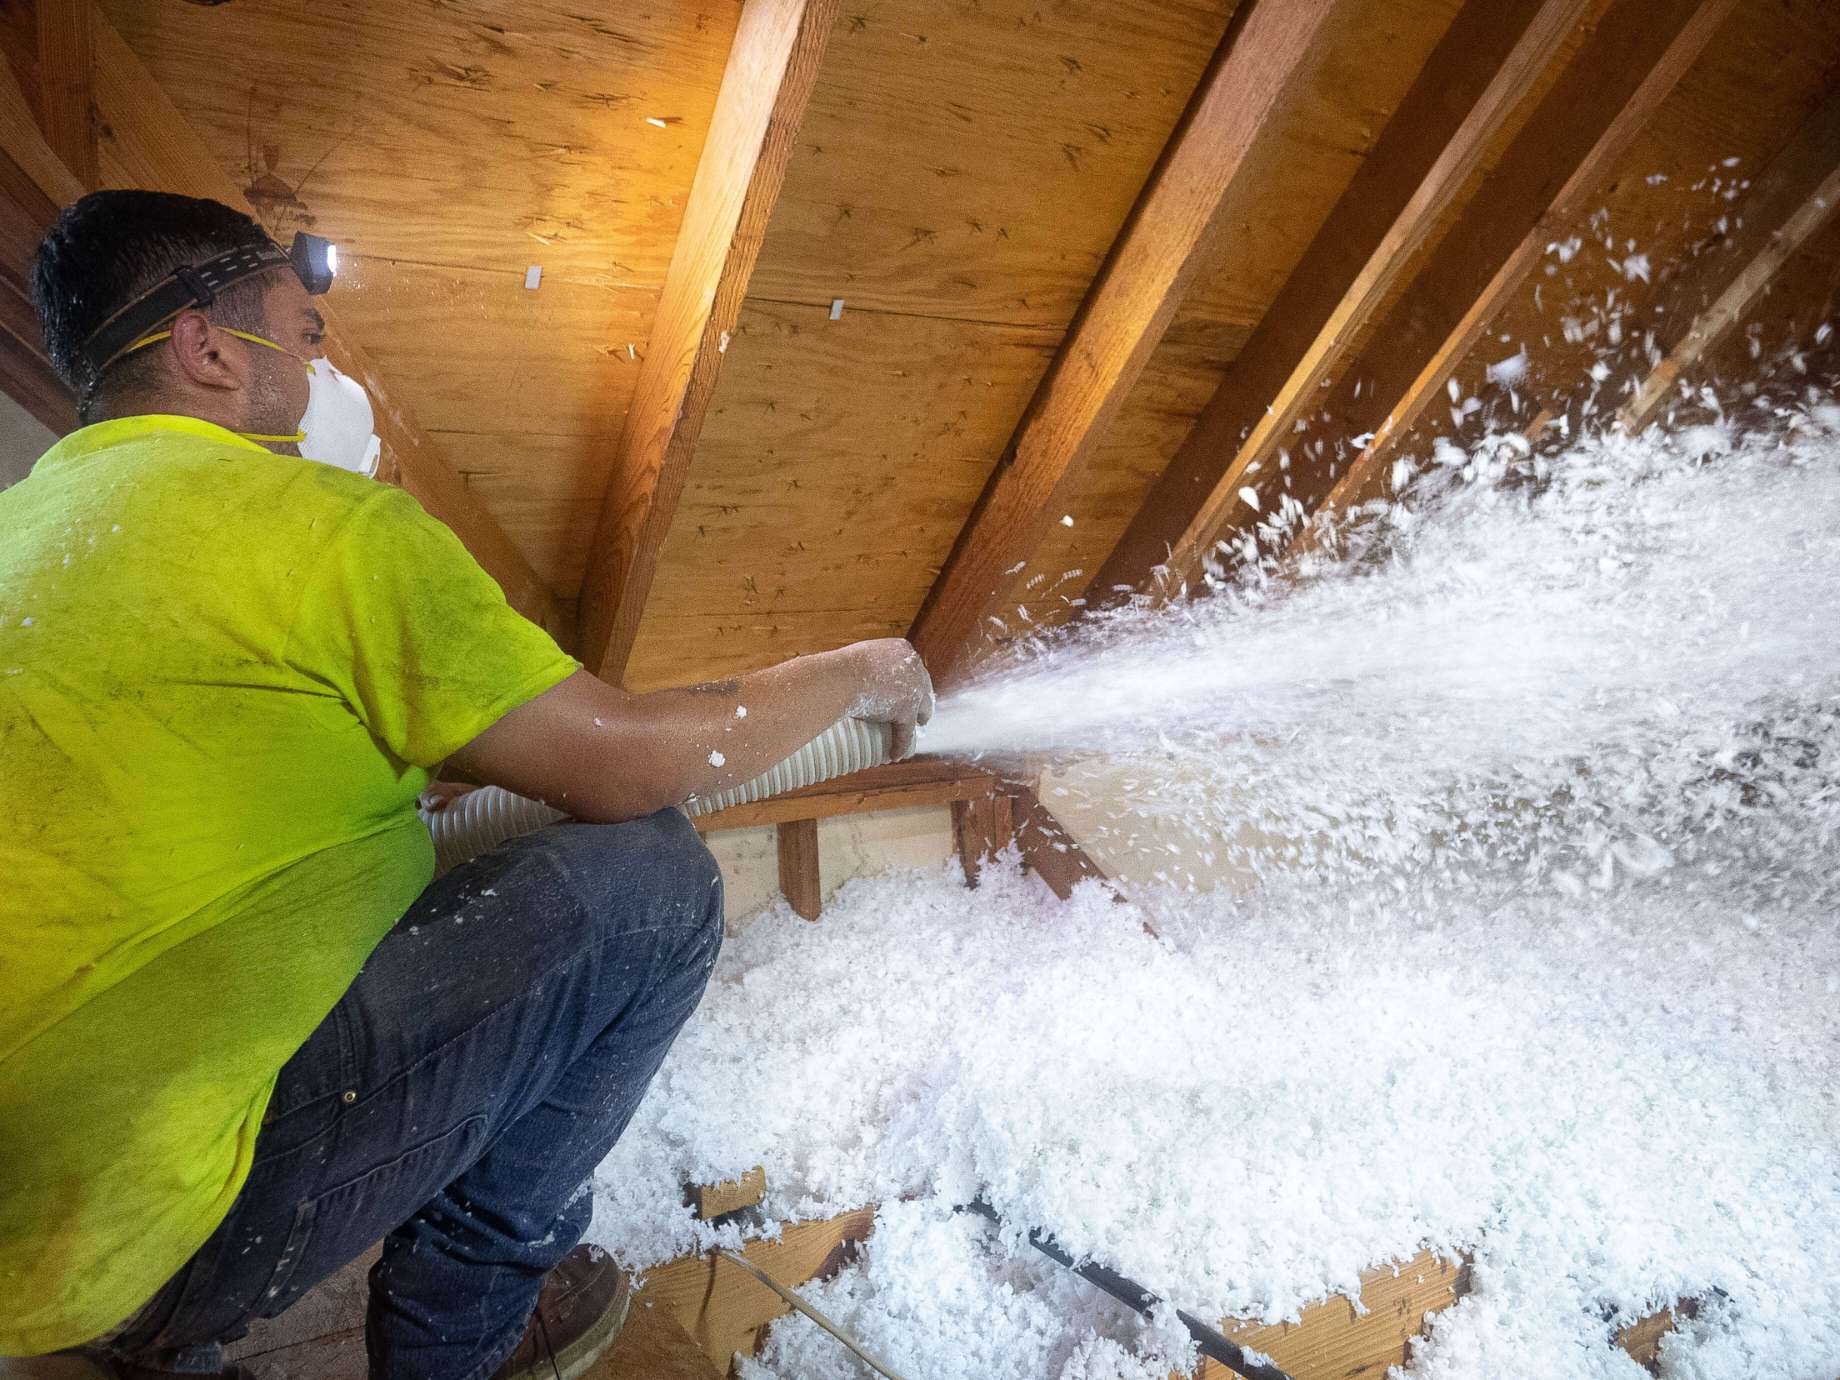
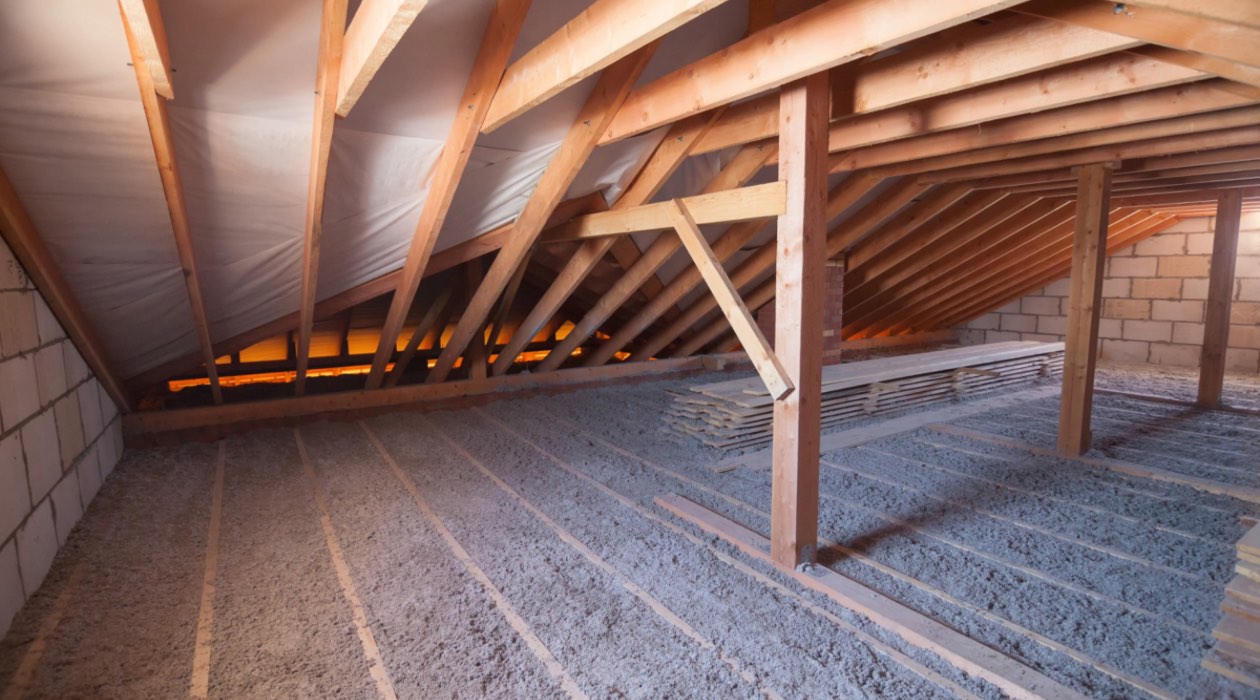
Method 3: Utilizing Blow-in Insulation
When you have a ceiling without an attic, utilizing blow-in insulation can be an effective method to insulate your space. Blow-in insulation, also known as loose-fill insulation, involves spraying or blowing insulation material into the spaces between the ceiling joists. This method provides excellent coverage and can effectively reduce heat transfer. Here’s how you can utilize blow-in insulation to insulate your ceiling:
- Assess Insulation Needs: Start by determining the insulation R-value needed for your climate and the desired level of insulation. The R-value measures the insulation’s thermal resistance, with higher R-values providing better insulation. Consult local building codes or insulation experts to determine the appropriate R-value for your specific location.
- Clean and Prepare the Ceiling: Clear the ceiling area of any obstructions or debris that could impede the installation process. Ensure that there are no air leaks or gaps that may compromise the effectiveness of the blow-in insulation. Use caulk or expanding foam to seal any openings or cracks.
- Choose the Insulation Material: Select the appropriate insulation material for your blow-in insulation. Common materials used include fiberglass, cellulose, or mineral wool. Each material has its own advantages, so consider factors such as cost, availability, and environmental impact when making your choice.
- Prepare the Insulation Material: Follow the manufacturer’s instructions to prepare the chosen insulation material for installation. This may involve fluffing up cellulose insulation or conditioning fiberglass insulation to achieve the desired consistency for easy blowing or spraying.
- Install the Blow-in Insulation: Using specialized equipment, such as a blowing machine or spray machine, install the blow-in insulation material into the spaces between the ceiling joists. Start at one end of the ceiling and work your way across systematically, ensuring even distribution of the insulation. Pay close attention to corners, edges, and hard-to-reach areas to maintain consistent insulation coverage.
- Verify Insulation Depth: Periodically check the depth of the blow-in insulation to ensure that it meets the recommended level for your desired R-value. Use a measuring stick or ruler to gauge the thickness of the insulation. Make adjustments if necessary to achieve proper coverage.
Utilizing blow-in insulation offers several benefits, including excellent coverage and the ability to fill gaps and voids effectively. It can adapt well to irregular ceiling surfaces, ensuring a complete insulation barrier. Furthermore, blow-in insulation is a suitable option for DIY enthusiasts, although it’s recommended to consult with a professional insulation contractor for optimal results.
Keep in mind that blow-in insulation requires proper installation and equipment, so it’s important to consider safety precautions and follow the manufacturer’s instructions. Additionally, it is advisable to consult with an insulation professional to ensure that the insulation material and installation method are suitable for your specific ceiling and climate conditions.
Method 4: Employing Recycled Denim Insulation
For an eco-friendly approach to insulating a ceiling without an attic, you can consider utilizing recycled denim insulation. Made from shredded and treated recycled denim jeans, this type of insulation offers both thermal performance and sustainable benefits. Here’s how you can employ recycled denim insulation to insulate your ceiling:
- Measure and Prepare: Begin by measuring the spaces between your ceiling joists to determine the size of the recycled denim insulation batts or rolls you will need. Cut the insulation to fit the dimensions of your ceiling, ensuring a snug and proper fit.
- Clean and Seal the Ceiling: Before installing the recycled denim insulation, clean the ceiling area and remove any debris or obstructions. Seal any air leaks or gaps using caulk or expanding foam insulation to ensure an airtight seal and maximize the insulation’s effectiveness.
- Wear Protective Gear: When working with recycled denim insulation, it’s important to wear appropriate protective gear, such as gloves, goggles, and a mask. This will help protect against any potential irritation from the insulation material.
- Position the Insulation: Carefully place the recycled denim insulation batts or rolls between the ceiling joists, pressing them firmly to ensure a snug fit. The insulation should extend from one end to the other, covering the entire ceiling surface. If needed, use a utility knife to trim the insulation to fit perfectly.
- Secure the Insulation: To prevent the insulation from sagging over time, use insulation supports or wire mesh to hold it in place. Attach the supports or mesh to the ceiling joists to provide structural support and maintain the integrity of the insulation installation.
- Seal any Gaps: Inspect the installation to ensure there are no gaps or spaces between the recycled denim insulation batts or rolls. Use additional insulation material or filler to fill any voids, ensuring a continuous thermal barrier and maximum energy efficiency.
Employing recycled denim insulation offers multiple advantages. Firstly, it provides excellent thermal performance, reducing heat flow through your ceiling and improving energy efficiency. Secondly, recycled denim insulation is environmentally friendly, as it repurposes materials that otherwise would end up in landfills. It is also safe to handle, free from harmful chemicals, and resistant to mold and pests.
When working with recycled denim insulation, it’s essential to follow safety guidelines and wear protective gear. If you’re unsure about the installation process or want to ensure optimal results, consulting with a professional insulation contractor who specializes in eco-friendly insulation materials is recommended. They can provide guidance on the specific requirements of your ceiling and ensure that the recycled denim insulation is properly installed for maximum efficiency.
Method 5: Creating a Suspended Ceiling System
If you have a high ceiling and want to add insulation without disturbing the existing structure, creating a suspended ceiling system can be a viable option. This method allows you to install insulation while preserving the aesthetics of your current ceiling. Here’s how you can create a suspended ceiling system to insulate your ceiling:
- Assess Ceiling Height: Determine the available ceiling height in your space to ensure that creating a suspended ceiling will not make the room feel too cramped. Take into account the dimensions of the insulation material you plan to use and the thickness of the suspended ceiling system itself.
- Choose Insulation Material: Select the insulation material that best suits your requirements. Common options for a suspended ceiling system include batt insulation, panels, or blow-in insulation. Consider factors such as thermal performance, soundproofing capabilities, and any specific needs for your space.
- Install Suspension Framework: Install the suspension framework for the suspended ceiling system. This involves attaching a grid of ceiling channels and main runners to the existing ceiling. Use adjustable hangers or wires to ensure a level and secure installation. Ensure that the framework follows the desired height and layout for your space.
- Place Insulation: Once the suspension framework is in place, install the chosen insulation material within the grid. For batt insulation, cut the insulation to fit between the ceiling channels and main runners. For panels or blow-in insulation, follow the manufacturer’s instructions for proper installation.
- Complete the Suspended Ceiling: Once the insulation is in place, install the ceiling panels or tiles within the suspended framework. These panels should fit snugly into the grid, creating a finished surface. Choose panels that complement your aesthetics while still allowing for proper airflow and ventilation around the insulation.
- Ensure Correct Lighting Integration: If you have recessed lighting fixtures in your ceiling, ensure proper integration with the suspended ceiling system. Use approved insulating covers or build an air space box around the fixtures to maintain safety standards while still allowing for insulation around the fixtures.
Creating a suspended ceiling system provides the opportunity to add insulation while maintaining the visual appeal of your existing ceiling. By installing the insulation within the suspended grid, you create a thermal barrier and improve energy efficiency. Additionally, a suspended ceiling system can also enhance soundproofing capabilities, creating a quieter and more comfortable environment.
It’s important to consider the specific requirements of your space and consult with a professional to ensure proper installation of the suspended ceiling system. They can provide guidance on the appropriate insulation material and ensure that the suspended ceiling is structurally sound and meets your insulation needs.
Conclusion
Insulating a ceiling without an attic may present unique challenges, but it is certainly achievable with the right methods. We have explored several effective techniques for insulating your ceiling without an attic, and each method offers its own advantages and considerations.
From using rigid foam insulation to installing reflective foil, utilizing blow-in insulation, employing recycled denim insulation, or creating a suspended ceiling system, there are options to suit various needs and conditions. Each method provides a way to achieve effective insulation and improve the energy efficiency of your home.
Proper insulation is crucial for creating a comfortable and energy-efficient living space. Insulating your ceiling helps to reduce heat loss in the winter and heat gain in the summer, ensuring a more consistent and comfortable temperature year-round. It can also contribute to soundproofing, reducing noise transmission between rooms or floors.
In addition to the benefits for your comfort, insulation also has positive environmental impacts. By reducing energy consumption, you help conserve natural resources and lower your carbon footprint. Insulated homes require less energy for heating and cooling, resulting in reduced greenhouse gas emissions.
When considering the different methods of insulating a ceiling without an attic, it’s important to assess the specific characteristics of your home, your budget, and any unique requirements you may have. Consulting with a professional insulation contractor can provide valuable guidance and ensure that you select the best method for your situation.
In conclusion, insulating a ceiling without an attic is possible and can greatly improve the energy efficiency and comfort of your home. By utilizing the methods discussed in this article, you can achieve effective insulation and enjoy the benefits of a well-insulated living space. Whether you choose rigid foam insulation, reflective foil, blow-in insulation, recycled denim insulation, or a suspended ceiling system, taking steps to insulate your ceiling is a worthwhile investment in creating a more sustainable and comfortable home.
Frequently Asked Questions about How To Insulate A Ceiling Without Attic
Was this page helpful?
At Storables.com, we guarantee accurate and reliable information. Our content, validated by Expert Board Contributors, is crafted following stringent Editorial Policies. We're committed to providing you with well-researched, expert-backed insights for all your informational needs.


0 thoughts on “How To Insulate A Ceiling Without Attic”