Articles
How To Light Up Stairs
Modified: October 20, 2024
Discover the best articles on how to light up stairs and create a safe and inviting atmosphere in your home. Find expert tips, step-by-step guides, and product recommendations to illuminate your stairs effectively.
(Many of the links in this article redirect to a specific reviewed product. Your purchase of these products through affiliate links helps to generate commission for Storables.com, at no extra cost. Learn more)
Introduction
Welcome to the world of stair lighting! When it comes to enhancing the aesthetics of your home while increasing safety, illuminating your stairs is a crucial step. Whether you have an indoor staircase or an outdoor set of steps, adding proper lighting not only helps navigate through the area but also adds a touch of elegance and ambiance.
Stairs are commonly used in homes, offices, and public spaces, and they can pose a potential safety hazard, especially in low-light conditions. Accidents related to tripping or falling on stairs are more common than you might think. This is where stair lighting comes into play, providing a practical solution to overcome this risk.
Stair lighting serves dual purposes: functionality and aesthetics. Functionally, it ensures that the stairs are well lit, allowing users to clearly see each step and identifying any potential obstacles or hazards. Aesthetically, it provides a visually appealing feature that can transform a mundane staircase into a focal point of your interior or exterior decor.
Nowadays, the options for stair lighting are diverse, ranging from recessed lights to step lights, wall-mounted lights, handrail lights, and understep lights. Each type comes with its own unique features and benefits, offering a variety of design possibilities to suit your style and preferences.
Before diving into the installation process, it is essential to consider some safety aspects. Make sure the lighting fixtures you choose comply with local building codes and regulations. Additionally, opt for LED lights as they are energy-efficient, long-lasting, and produce minimal heat.
In this article, we will explore the different types of stair lighting available and guide you through the installation process. By the end, you will be equipped with the knowledge to transform your dull and unsafe stairs into a well-lit and visually stunning focal point in your space. So, let’s get started!
Key Takeaways:
- Illuminate your stairs for safety and elegance. Choose from various lighting options, plan the layout, and ensure proper wiring and installation for a captivating and secure staircase.
- Regular maintenance and troubleshooting are essential for optimal stair lighting performance. Keep fixtures clean, inspect wiring, and address any issues promptly to maintain a safe and visually appealing environment.
Read more: How To Walk Up Stairs
Importance of Lighting Stairs
Properly lighting your stairs is not just a matter of aesthetics; it is an essential aspect of ensuring safety in your home or any space with staircases. Here are some key reasons why having well-lit stairs is crucial:
1. Enhanced Visibility: Darkness can be a significant risk factor when it comes to using stairs. Insufficient lighting can make it difficult to see each step, leading to potential accidents. By illuminating your stairs, you provide clear visibility, even in low-light conditions, helping to prevent trips, slips, and falls.
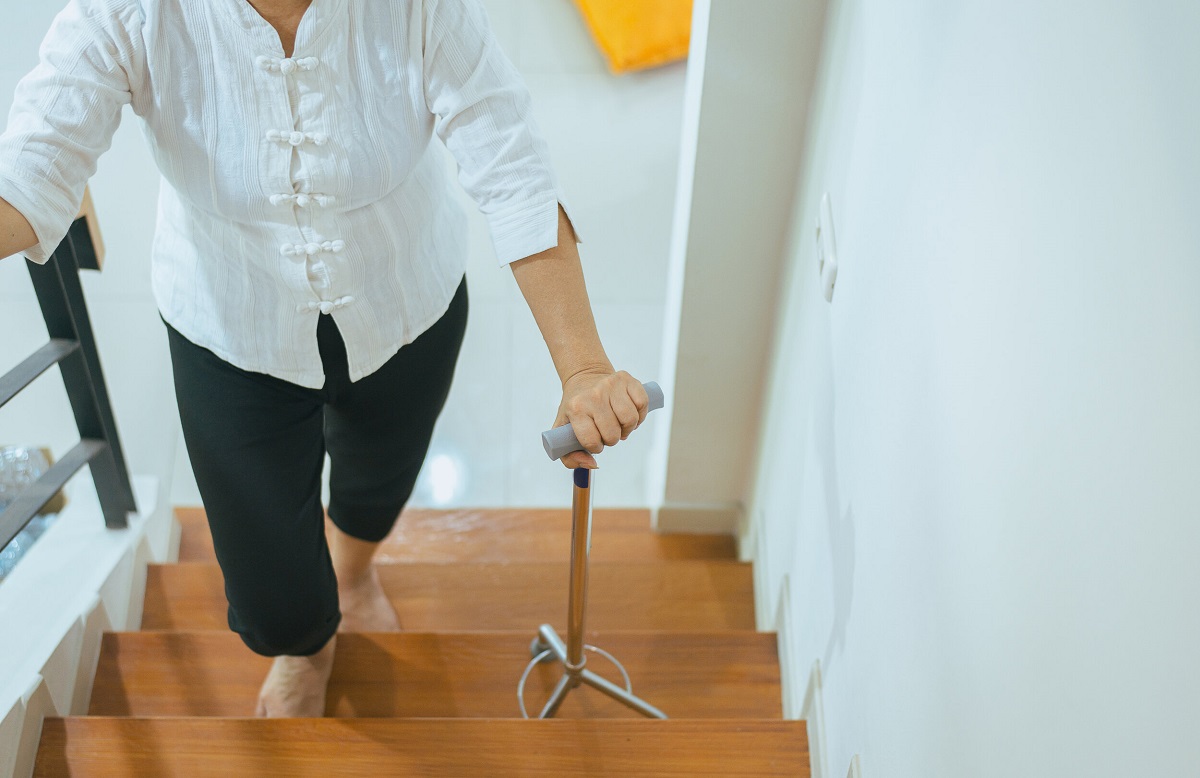
2. Accident Prevention: Stair-related accidents are a common occurrence, especially in homes with children, the elderly, or visitors who are not familiar with the layout. Proper lighting can significantly reduce the chances of accidents by ensuring that each step is clearly visible and eliminating any potential hazards.
3. Guidance and Direction: Stair lighting serves as a visual guide, directing people towards the upper or lower levels of a property. It helps individuals navigate the stairs safely, especially in buildings with multiple floors or during nighttime when it may be challenging to find the staircase entrance.
4. Security and Deterrence: Adequate lighting on stairs adds an extra layer of security to your property. A well-illuminated staircase that is visible from the outside acts as a deterrent to intruders and burglars, as it exposes any suspicious activity and increases the chances of detection.
5. Aesthetics and Ambiance: Lighting fixtures for stairs come in various designs and styles, allowing you to enhance the visual appeal of your space. By choosing the right lighting configuration, you can transform a basic staircase into an impressive architectural element, adding ambiance and character to your home or building.
6. Compliance with Building Codes: In many jurisdictions, proper stair lighting is a requirement according to building codes and safety regulations. By installing the appropriate lighting fixtures, you ensure compliance, avoiding potential penalties and legal issues in the future.
Considering the importance of lighting stairs, it is essential to choose lighting solutions that best suit your specific requirements while complementing your overall interior or exterior design. Take into account factors such as brightness, color temperature, and the positioning of the lights to create a cohesive and safe stair lighting system.
In the next sections, we will explore the different types of stair lighting available and guide you through the installation process. By adequately illuminating your stairs, you can enjoy both the functional and aesthetic benefits for years to come.
Safety Considerations
When it comes to lighting stairs, safety should always be the top priority. Here are some important safety considerations to keep in mind when planning to install stair lighting:
1. Proper Illumination: Ensure that the lighting is bright enough to provide adequate visibility on each step. Opt for fixtures that emit enough light to clearly illuminate the entire tread, preventing any potential missteps or accidents.
2. Avoid Glare: While it is vital to have well-lit stairs, it is equally important to avoid glare. Glare can be distracting and create visual discomfort, making it difficult to navigate the stairs. Choose fixtures with diffusers or opt for indirect lighting options to minimize glare and create a more comfortable environment.
3. Consistent Lighting: Maintain consistent lighting throughout the entire staircase, including landings and turns. Uneven lighting can create shadows or dark spots, making it hard to see the stairs clearly and increasing the risk of accidents. Ensure that light transitions smoothly from one step to another.
4. Motion Sensor Activation: Consider incorporating motion sensors into your stair lighting system. This feature allows the lights to activate automatically when someone approaches the stairs, providing instant illumination without the need for manual operation. It not only enhances convenience but also improves safety by eliminating the risk of forgetting to turn on the lights.
5. Secure Installation: When installing the lighting fixtures, ensure they are securely fastened and cannot be easily dislodged. Loose or unstable fixtures may pose a hazard, especially in high-traffic areas with multiple users. Use appropriate mounting brackets and screws to secure the fixtures in place.
6. Waterproof and Weather-Resistant: If you are installing outdoor stair lighting, make sure that the fixtures are waterproof and designed to withstand various weather conditions. This ensures durability and prevents damage caused by exposure to rain, snow, or extreme temperatures.
7. Wiring and Electrical Safety: If you are not familiar with electrical work, it is recommended to hire a professional electrician to handle the wiring and connections for your stair lighting. Improper installation can lead to electrical hazards or malfunctioning lights. Ensure that all wiring is done following electrical safety guidelines and codes.
8. Maintenance and Inspections: Regularly inspect your stair lighting system to ensure that all lights are functioning correctly. Replace any burned-out bulbs or damaged fixtures promptly. Additionally, keep the staircase clean and clear of any obstructions that could obstruct the lighting or pose a tripping hazard.
By considering these safety measures and taking the necessary precautions, you can enjoy the benefits of well-lit stairs without compromising on the safety of your household or visitors. Properly designed and installed stair lighting will not only enhance the aesthetic appeal of your space but also provide a secure and inviting atmosphere for everyone to enjoy.
Types of Stair Lighting
When it comes to stair lighting, there are various types of fixtures and configurations to choose from. Here are some popular options to consider:
1. Recessed Lighting: Recessed lights, also known as pot lights or can lights, are installed directly into the steps or the wall alongside the stairs. They provide a clean and minimalist look while offering efficient illumination. Recessed lights are typically installed flush with the surface to avoid tripping hazards and can be used for both indoor and outdoor stairs.
2. Step Lighting: Step lights are specifically designed to be installed on the face of each step. They provide direct illumination onto the treads, enhancing visibility and safety. Step lights come in various shapes and sizes, including rectangular, round, and linear options. They can be recessed or surface-mounted, depending on your preference and the design of your stairs.
3. Wall-Mounted Lighting: Wall-mounted lights are fixtures that are installed on the wall adjacent to the stairs. They provide indirect lighting, casting a soft glow that illuminates the steps and the surrounding area. Wall-mounted lights can be either sconces or wall washers, offering a versatile option to highlight the beauty of your staircase and add a touch of elegance to the space.
4. Handrail Lighting: Handrail lighting is an innovative way to illuminate stairs while also enhancing the handrail’s visual appeal. LED lights are integrated into the handrail, providing a subtle and continuous source of light along the entire length of the staircase. Handrail lighting not only serves as a functional lighting solution but also adds a contemporary and stylish element to your stairs.
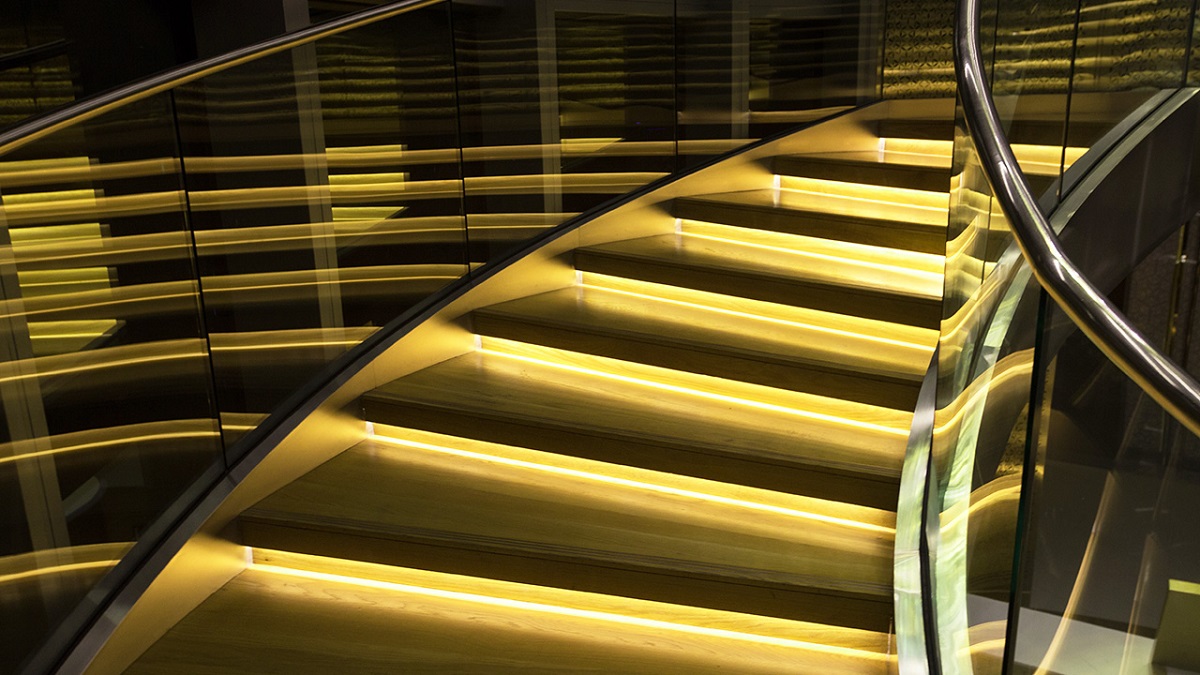
5. Understep Lighting: Understep lighting involves installing LED strips or linear lights underneath the edge of each step. This creates a stunning effect of light shining from beneath the stairs, giving them a floating appearance. Understep lighting is a modern and eye-catching option that adds a unique ambiance to your staircase, particularly in dimly lit areas.
Each type of stair lighting has its own advantages and can be used individually or combined to achieve the desired effect. Consider the layout and design of your stairs, as well as your personal preferences, when selecting the appropriate lighting solution.
It is important to note that regardless of the type of stair lighting you choose, opt for fixtures that are energy-efficient, such as LED lights. LED lights consume less electricity, have a longer lifespan, and produce minimal heat. They are also available in various color temperatures, allowing you to customize the lighting to match your desired ambiance and decor.
In the next section, we will explore the installation process for stair lighting, helping you bring your chosen lighting concept to life.
Recessed Lighting
Recessed lighting is a popular choice for stair lighting due to its sleek and minimalist design. It provides a seamless and clean look, making it suitable for various staircase styles and interior designs. Here is a step-by-step guide to installing recessed lighting on your stairs:
1. Plan the Layout: Start by determining the placement of the recessed lights. Consider spacing them evenly along the length of the staircase for optimal illumination. Take into account the dimensions of each step and ensure that the lights are positioned to provide even coverage without casting shadows.
2. Prepare the Tools and Materials: Gather all the necessary tools and materials for the installation, including recessed light fixtures, wiring, a screwdriver, a wire stripper, a voltage tester, and a saw or utility knife for cutting holes in the ceiling or walls.
3. Turn Off Power: Before starting any electrical work, turn off the power to the area where you will be installing the recessed lights. This can be done by flipping off the corresponding circuit breaker in your electrical panel.
4. Mark the Hole Locations: Use a pencil to mark the locations where the recessed lights will be installed. Measure and mark the center of each step or the desired placement on the wall adjacent to the stairs. Ensure that the markings are accurately aligned.
5. Cut Holes: Use a saw or utility knife to carefully cut holes in the ceiling or wall according to the marked locations. The size of the holes should match the dimensions of the recessed light fixtures.
6. Wire the Lights: Run electrical wiring from the power source to each recessed light location. Strip the ends of the wires and connect them to the corresponding wiring in the light fixtures, following the manufacturer’s instructions. Make sure to use wire connectors and secure all connections tightly.
7. Mount the Fixtures: Insert the recessed light fixtures into the holes and secure them using the provided mounting clips or brackets. Ensure that the fixtures are flush with the surface and securely fitted to prevent any movement.
8. Test the Wiring: After mounting the fixtures, turn the power back on and use a voltage tester to check the wiring connections. Confirm that there is no live electrical current and that the recessed lights are functioning properly.
9. Adjust the Lighting: To achieve the desired lighting effect, adjust the direction of the recessed lights. Some fixtures allow you to rotate or tilt the light source to focus the illumination on the steps and minimize glare. Experiment with different angles until you achieve the desired result.
Recessed lighting offers a clean and unobtrusive look while providing effective illumination for your stairs. However, if you are not comfortable with electrical work or cutting holes in your ceiling or walls, it is recommended to hire a professional electrician or contractor to ensure a safe and proper installation.
In the next section, we will discuss another type of stair lighting: step lighting.
Read more: How To Get A Wheelchair Up Stairs
Step Lighting
Step lighting is specifically designed to illuminate the individual steps of a staircase, ensuring optimal visibility and safety. This type of lighting adds a stylish and functional element to your stairs, making each step stand out. Here’s a step-by-step guide to installing step lighting on your staircase:
1. Plan the Layout: Determine the positioning of the step lights. Measure the width and depth of each step to determine the number of lights required. For optimal visibility, it is recommended to install a light on each step or every other step, depending on the spacing and design of your staircase.
2. Gather the Materials: Collect the necessary materials, including step lights, wiring, a screwdriver, wire connectors, a voltage tester, and any additional tools required for installation.
3. Turn Off the Power: Before starting any electrical work, turn off the power to the area where you will be installing the step lights. This can be done by flipping off the corresponding circuit breaker in your electrical panel.
4. Mark the Light Locations: Use a pencil to mark the desired location for each step light. Ensure that the markings are aligned consistently across the staircase to maintain a cohesive appearance.
5. Prepare the Wiring: Run electrical wiring from the power source to each step light location. Ensure that the wiring is hidden and properly secured in place. Use wire connectors to make reliable connections between the wiring and the step light fixtures.
6. Install the Step Lights: Attach the step light fixtures to the marked locations. Depending on the design of the step lights, you may need to screw them into place, use mounting brackets, or follow specific installation instructions provided by the manufacturer. Make sure the lights are securely attached to the steps.
7. Connect the Wiring: Connect the wiring from the step lights to the main power source. Double-check the connections to ensure they are secure and properly insulated. Use a voltage tester to verify that there is no live electrical current before proceeding.
8. Test the Lighting: Turn on the power and test each step light to ensure they are functioning correctly. Adjust the angle or direction of the lights if needed to achieve the desired illumination effect.
Step lighting provides not only practical illumination but also adds a touch of elegance and sophistication to your staircase. It enhances the visibility of each step, making it easier and safer to navigate the stairs, particularly in darker environments. Remember to consult a professional electrician if you are unsure about any electrical connections or need assistance with the installation.
In the next section, we will explore another type of stair lighting: wall-mounted lighting.
Wall-Mounted Lighting
Wall-mounted lighting is a versatile option to illuminate your staircase and create a visually appealing effect. These fixtures are installed on the wall adjacent to the stairs, providing indirect lighting that enhances the overall ambiance of the space. Here’s a step-by-step guide to installing wall-mounted lighting on your staircase:
1. Plan the Placement: Determine the desired location for the wall-mounted lights. Consider the height, spacing, and overall design of your staircase. Aim for even distribution of light to ensure consistent illumination throughout the stairs.
2. Select the Lighting Fixtures: Choose wall-mounted lights that complement the style of your staircase and blend well with the surrounding decor. Consider factors such as the size, shape, and finish of the fixtures. Also, ensure that they are suitable for the specific location, whether indoor or outdoor.
3. Prepare the Installation: Gather the necessary tools and materials, including the wall-mounted lights, screws, a screwdriver, a drill (if required), and a voltage tester. Ensure that you have all the components and accessories provided with the fixtures.
4. Turn Off the Power: Before starting any electrical work, turn off the power to the area where you will be installing the wall-mounted lights. This can be done by flipping off the corresponding circuit breaker in your electrical panel.
5. Mount the Lights: Position each wall-mounted light against the wall at the desired location. Use a pencil to mark the screw holes accurately. If necessary, use a drill to create pilot holes to facilitate screw insertion.
6. Secure the Lights: Attach the wall-mounted lights to the wall using screws. Ensure that the fixtures are tightly secured and aligned correctly. Double-check the stability of each light to prevent any accidents or loosening over time.
7. Connect the Wiring: Follow the manufacturer’s instructions to connect the wiring of each wall-mounted light to the power source. Use wire connectors to make secure and insulated connections. Pay close attention to the polarity and ensure that there are no exposed wires.
8. Test the Lighting: Once the lights are installed and wired, turn on the power and test each wall-mounted light to ensure proper functionality. Make any necessary adjustments or repositioning to achieve the desired lighting effect.
Wall-mounted lighting offers a stylish and elegant way to illuminate your staircase. The indirect lighting creates a soft and diffused glow that enhances the overall atmosphere of the space. Carefully chosen wall-mounted lights can also serve as decorative elements that add character to your stairwell.
If you are unsure about electrical connections or require assistance with drilling holes or mounting the fixtures, it is advised to seek the help of a professional electrician or contractor to ensure a safe and proper installation.
In the next section, we will explore another type of stair lighting: handrail lighting.
Handrail Lighting
Handrail lighting is a unique and innovative way to illuminate your staircase while adding a touch of elegance and sophistication. This type of lighting involves integrating LED lights into the handrail, providing a continuous and subtle source of light along the entire length of the staircase. Here’s a step-by-step guide to installing handrail lighting:
1. Choose the LED Handrail System: Select a handrail system that is specifically designed to accommodate LED lights. Look for a system that suits your staircase design and complements your interior or exterior decor. Consider factors such as the handrail material, color, and the type of LED lights that can be integrated.
2. Measure and Prepare the Handrail: Measure the length of your staircase handrail and mark the desired locations for the LED lights. Ensure that the spacing between each light is consistent for a cohesive look. Prepare the handrail by drilling holes or creating grooves where the lights will be installed.
3. Install the LED Lights: Carefully insert the LED lights into the prepared holes or grooves in the handrail. Follow the manufacturer’s instructions to ensure proper installation. Make sure that the lights are securely fitted and aligned with each other.
4. Connect the Wiring: Depending on the handrail system, you may need to connect the wiring for each LED light. Follow the provided instructions to make the necessary electrical connections. Use wire connectors and ensure that all connections are secure and well-insulated.
5. Test the Lighting: Turn on the power and test each LED light to ensure they are functioning correctly. Check the overall lighting effect and adjust the installation if needed to achieve the desired illumination and ambiance.
Handrail lighting offers numerous benefits beyond providing illumination for your stairs. It enhances visibility and safety during nighttime or low-light conditions, while also adding a visually striking element to your staircase. The continuous light emitted from the handrail creates a sleek and modern look that can elevate the overall aesthetic of your space.
It is important to note that the installation of handrail lighting can be more complex than other types of stair lighting. If you are not experienced in electrical work or working with handrails, it is advisable to seek the help of a professional electrician or contractor who can ensure a safe and proper installation.
In the next section, we will explore another type of stair lighting: understep lighting.
Consider installing motion sensor lights on the stairs for safety and convenience. This will ensure that the lights turn on automatically when someone is using the stairs, reducing the risk of accidents in the dark.
Understep Lighting
Understep lighting is a modern and visually striking option that adds a unique ambiance to your staircase. This type of lighting involves installing LED strips or linear lights underneath the edge of each step, creating a captivating effect of light shining from beneath the stairs. Here’s a step-by-step guide to installing understep lighting:
1. Plan the Layout: Determine the placement of the understep lights. Measure the width and depth of each step to determine the length of LED strips or linear lights required. Consider spacing them evenly along the stairs for consistent illumination.
2. Gather the Materials: Collect the necessary materials, including LED strips or linear lights, wiring, a screwdriver, wire connectors, a voltage tester, and any additional tools required for installation.
3. Turn Off the Power: Before starting any electrical work, turn off the power to the area where you will be installing the understep lights. This can be done by flipping off the corresponding circuit breaker in your electrical panel.
4. Prepare the Wiring: Run electrical wiring from the power source to each understep light location. Ensure that the wiring is hidden and properly secured along the underside of the staircase. Use wire connectors to make reliable connections between the wiring and the LED strips or linear lights.
5. Attach the Lights: Secure the LED strips or linear lights underneath the edge of each step using adhesive or mounting clips. Make sure they are securely attached and aligned straight along the edge, allowing for consistent lighting.
6. Connect the Wiring: Follow the manufacturer’s instructions to connect the wiring from each LED strip or linear light to the power source. Use wire connectors to ensure secure and insulated connections. Double-check the connections and ensure that there are no exposed wires.
7. Test the Lighting: Turn on the power and test each understep light to ensure they are functioning correctly. Adjust the intensity or color temperature of the lights, if applicable, to achieve the desired lighting effect.
Understep lighting creates a visually stunning effect, highlighting the architectural design of your staircase and creating a captivating ambiance. The light shining from beneath each step adds depth and drama, transforming your stairs into a unique focal point in your space.
If you are not comfortable with electrical work or unsure about the installation process, it is recommended to seek the guidance of a professional electrician or contractor. They can ensure that the understep lighting is installed safely, in compliance with electrical codes, and properly integrated into your staircase design.
In the next section, we will discuss the installation process for stair lighting, providing a general overview of the steps involved.
Read more: How To Go Up Stairs With Crutches
Installation Process
The installation process of stair lighting may vary depending on the type of lighting you choose and the specific requirements of your staircase. Here is a general overview of the steps involved in installing stair lighting:
1. Plan the Layout: Before you begin the installation, carefully plan the layout of your chosen lighting fixtures. Consider factors such as the placement, spacing, and overall design of your staircase. This will help ensure even lighting distribution and a visually appealing result.
2. Prepare the Tools and Materials: Gather all the necessary tools and materials required for the installation. These may include light fixtures, wiring, a screwdriver, wire connectors, a voltage tester, a drill (if needed), and any additional accessories specific to your chosen lighting type.
3. Turn Off the Power: Always remember to turn off the power to the area where you will be working. This is crucial to ensure your safety during the installation process. Switch off the appropriate circuit breaker in your electrical panel.
4. Install the Wiring and Power Source: Install the necessary wiring to connect the lighting fixtures to a power source. The wiring will typically run behind walls, along the ceiling, or underneath the staircase, depending on the location and design of your chosen lighting type. Follow electrical safety guidelines and codes to ensure proper wiring installation.
5. Mount the Light Fixtures: Depending on the type of lighting, mount the fixtures in their designated locations. This may involve screwing the lights onto the steps, attaching them to the wall or handrail, or securing them underneath the stairs. Make sure the fixtures are firmly mounted and aligned properly.
6. Connect the Wiring: Connect the wiring of the fixtures to the power source. Use wire connectors to securely join the wires, ensuring there are no exposed connections. Double-check the wiring connections and use a voltage tester to verify that there is no live electrical current before proceeding.
7. Test and Adjust the Lighting: Once the installation is complete, turn on the power and test each lighting fixture to ensure they are functioning correctly. Pay attention to the brightness, angle, and overall illumination effect. Make any necessary adjustments or repositioning to achieve the desired lighting result.
8. Clean Up and Finishing Touches: Clean up any debris and ensure that the installation area is tidy. Conceal any exposed wiring or make sure it is neatly organized and secured. Add any finishing touches, such as trim or covers, to enhance the overall appearance of your stair lighting installation.
It is important to note that while this provides a general overview of the installation process, it is recommended to follow the specific instructions provided by the manufacturer for the lighting fixtures you choose. Additionally, if you are not experienced in electrical work or unsure about any aspect of the installation, it is advised to consult a professional electrician or contractor to ensure a safe and proper installation.
In the next section, we will provide some maintenance and troubleshooting tips to keep your stair lighting in optimal condition.
Planning the Layout
Planning the layout is an essential step in installing stair lighting. It involves determining the placement, spacing, and overall design of your chosen lighting fixtures. Here are some key considerations to keep in mind when planning the layout of your stair lighting:
1. Measure the Staircase: Begin by measuring the dimensions of your staircase, including the width and height of each step. This will help you determine the appropriate size and quantity of lighting fixtures you will need.
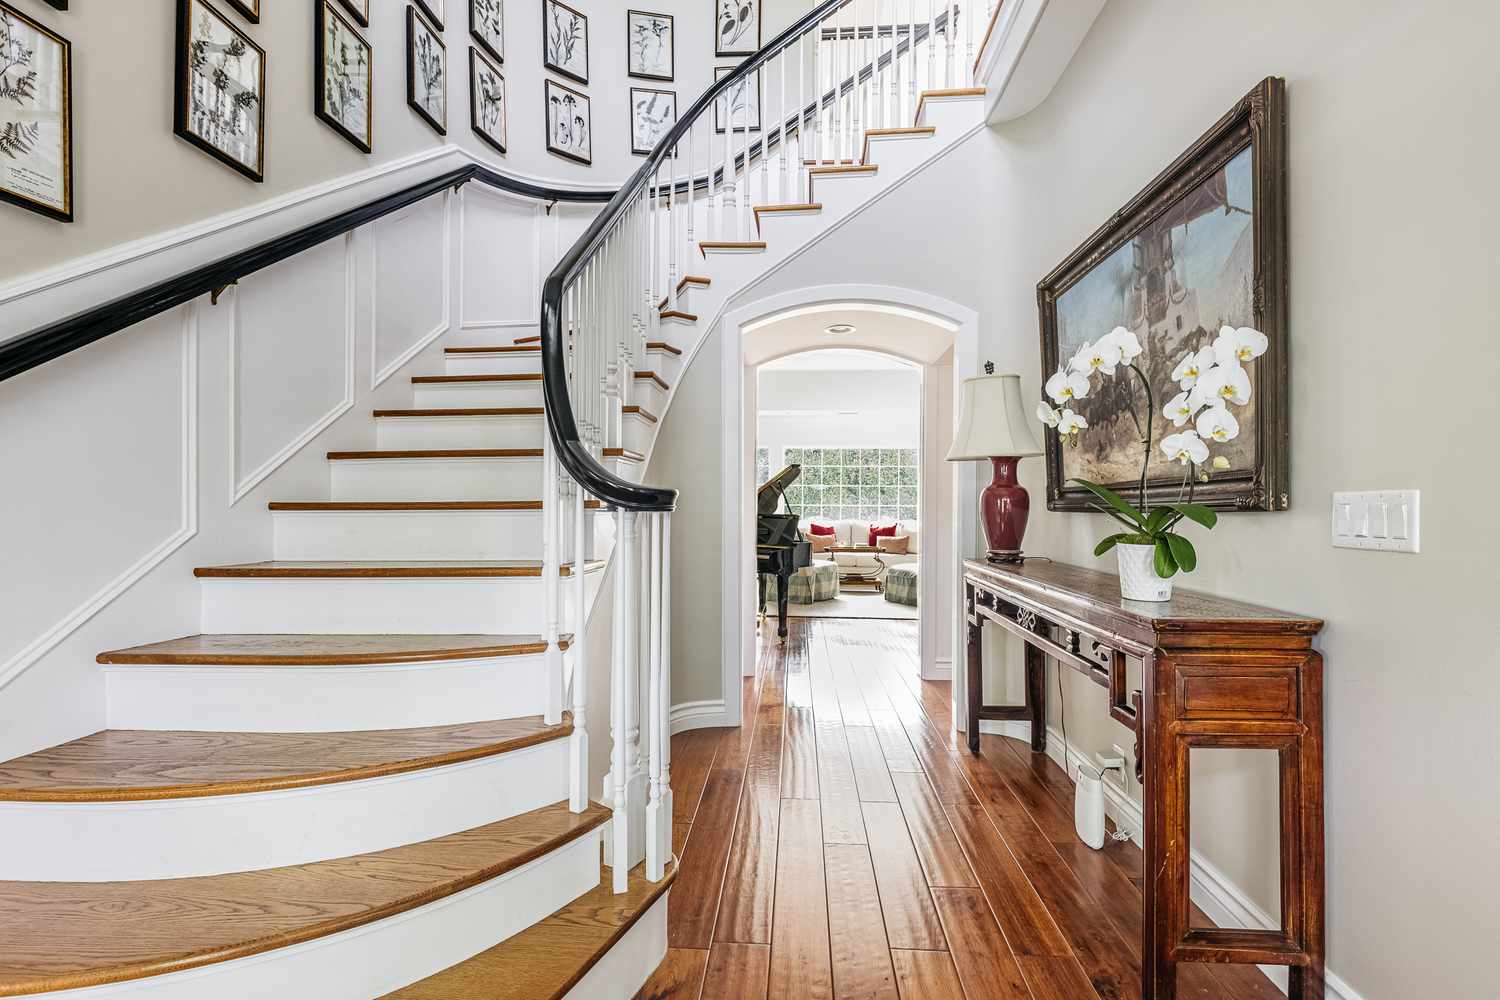
2. Consider the Staircase Design: Take into account the design and style of your staircase. The layout of your lighting fixtures should complement the overall aesthetic and architectural features of the stairs. For instance, if you have a curved staircase, you might need to plan the lighting placement accordingly.
3. Ensure Even Lighting Distribution: Aim for even distribution of light across the entire staircase. Proper spacing between fixtures is crucial to ensure that there are no significant gaps or dark spots. Consider using a combination of lighting types, such as recessed lights or step lights, to achieve an evenly and aesthetically pleasing illumination.
4. Highlight the Treads: Focus on illuminating the treads of the steps, as this is where people typically place their feet. Ensure that each step is clearly visible and well-lit to prevent accidents and provide safe navigation.
5. Manage Glare: Be mindful of any potential glare that could be caused by direct or intense lighting. Aim for a balance between illumination and minimizing any uncomfortable glare for those using the stairs. Consider using diffusers or shielding the bulbs to help reduce glare.
6. Harmonize with the Surroundings: Take into consideration the surrounding areas of the staircase when planning the lighting layout. Ensure that the stair lighting complements the overall lighting scheme of the space and creates a cohesive and visually pleasing atmosphere.
7. Consider Safety Codes and Regulations: Familiarize yourself with local building codes and safety regulations regarding stair lighting. Ensure that the layout you plan adheres to these guidelines to ensure compliance and avoid any potential issues in the future.
Remember that every staircase is unique, so adapt the lighting layout to suit your specific needs and preferences. Sketching out a diagram or using lighting design software can help you visualize the placement of the fixtures and make adjustments as necessary.
By carefully planning the layout of your stair lighting, you can create a visually stunning and safe environment while enhancing the overall aesthetics of your staircase. The next section will discuss the process of wiring and power sources for your stair lighting installation.
Wiring and Power Source
Wiring and electrical connections are crucial components of any stair lighting installation. Properly installing and connecting the wiring ensures that the lights function correctly and safely. Here is a step-by-step guide on wiring and selecting a power source for your stair lighting:
1. Determine Power Source: Identify the source from which you will draw electricity for your stair lighting. This can be an existing electrical circuit or a dedicated circuit specifically for the stair lighting. Consult a qualified electrician if you are unsure about the electrical capacity or need assistance with determining the power source.
2. Follow Electrical Codes and Guidelines: Before proceeding with any wiring, familiarize yourself with local electrical codes and guidelines. Adhere to these regulations to ensure compliance and maintain safety throughout the installation process.
3. Gather Necessary Tools and Materials: Gather all the required tools and materials for wiring, such as electrical wire, wire connectors, a screwdriver, wire cutters/strippers, electrical tape, and a voltage tester. Ensure that the wires and connectors are appropriate for the voltage and current of the lighting fixtures.
4. Prepare the Wiring: Measure and cut the electrical wires to the required lengths, taking into account the distance between the lighting fixtures and the power source. Strip the ends of the wires using wire cutters or strippers to expose the bare copper conductors.
5. Make Connections: Connect the wiring from each lighting fixture to the appropriate wires from the power source. Twist the bare ends of the wires together and secure them with wire connectors. Ensure that all connections are secure and tightly fastened.
6. Test the Connection: Use a voltage tester to check that the wiring connections are properly installed and there is no live electrical current. It is important to perform this step to ensure your safety before proceeding further with the installation.
7. Route and Conceal Wiring: Carefully route the wiring from the lighting fixtures to the power source, ensuring that the wires are hidden or neatly organized. Use cable channels, conduits, or wire clips to secure and conceal the wiring along the staircase or within the walls for a clean and professional look.
8. Secure Wiring and Fixtures: Ensure that all wiring is securely fastened and supported. Use cable staples or clips to secure the wiring along its path. Secure the lighting fixtures in their designated locations, following the manufacturer’s instructions.
9. Double-Check Connections: Before turning on the power, thoroughly inspect the wiring connections to ensure they are properly insulated and there are no exposed wires. This step is crucial to avoid electrical hazards.
It is crucial to prioritize safety throughout the wiring process. If you are not experienced in electrical work or unsure about any aspect of the installation, it is advisable to consult a professional electrician. They can guide you through the wiring process and ensure that it is done correctly and in compliance with electrical codes.
In the next section, we will discuss the process of installing the light fixtures for your stair lighting.
Installing the Light Fixtures
Installing the light fixtures is a crucial step in the stair lighting installation process. Proper installation ensures that the fixtures are securely and safely attached, providing effective illumination for your stairs. Here is a step-by-step guide on how to install the light fixtures for your stair lighting:
1. Prepare the Tools and Materials: Gather all the necessary tools and materials for installing the light fixtures. This may include a screwdriver, screws or mounting brackets, a level, a drill (if needed), and any additional accessories specific to your chosen light fixtures.
2. Refer to Manufacturer’s Instructions: Carefully review the manufacturer’s instructions that came with your light fixtures. Familiarize yourself with the recommended installation process, including any specific steps or requirements for your particular fixtures.
3. Mark Fixture Locations: Use a pencil to mark the desired locations for each light fixture. Ensure that the markings are aligned consistently and in the designated spots you planned during the layout process. Use a level to ensure accurate placement.
4. Prepare Mounting Surfaces: Depending on your chosen light fixtures, you may need to prepare the mounting surfaces. This could involve drilling holes for screws or installing mounting brackets. Follow the manufacturer’s instructions for the specific preparation steps.
5. Secure the Fixtures: Once the mounting surfaces are prepared, secure the light fixtures in the marked locations. Use screws or mounting brackets, ensuring that the fixtures are tightly attached and level. Be mindful of the weight capacity and stability of the fixtures.
6. Make Electrical Connections: Connect the wiring from the light fixtures to the wiring that you previously installed. Follow the manufacturer’s instructions and use wire connectors to make secure and properly insulated connections. Double-check the connections to ensure they are tight and reliable.
7. Test the Lighting: Before proceeding further, turn on the power to test each light fixture. Ensure that they are functioning correctly and providing the desired illumination. If any issues arise, double-check the wiring connections and troubleshoot accordingly.
8. Adjust the Lighting Angle: Depending on the type of light fixtures, you may have the flexibility to adjust the angle or direction of the lighting. Experiment with different angles to achieve the desired lighting effect, avoiding glare and ensuring even illumination. Secure the fixtures in the preferred positions.
9. Secure and Conceal Wiring: After confirming that the light fixtures are properly installed and functioning, secure and conceal the wiring to maintain a clean and organized appearance. Use cable channels, conduits, or wire clips to secure and hide the wiring along the staircase or within the walls.
Always follow the manufacturer’s instructions and precautions when installing the light fixtures. If you are unsure about any aspect of the installation or require assistance, it is recommended to consult a professional electrician.
In the next section, we will discuss tips for testing and adjusting the lighting in your stair lighting installation.
Read more: How To Carry Mattress Up Stairs
Testing and Adjusting the Lighting
Testing and adjusting the lighting is a crucial step in the stair lighting installation process. It ensures that the lighting is functioning properly and meets your desired illumination objectives. Here are some tips for testing and adjusting the lighting in your stair lighting installation:
1. Turn on the Power: Once the light fixtures are installed and the wiring is properly connected, turn on the power to activate the stair lighting. Ensure that the wall switches or control system for the lighting are in the “on” position.
2. Inspect for Proper Functionality: Carefully inspect each light fixture to ensure that it is functioning correctly. Check for any flickering, dimming, or malfunctioning lights. If you notice any issues, double-check the wiring connections and troubleshoot accordingly.
3. Assess the Illumination: Observe the overall illumination of the staircase. Pay attention to the brightness, coverage, and uniformity of the lighting. Ensure that each step is adequately illuminated, promoting safety and visibility.
4. Check for Glare or Shadows: Assess the lighting for any glare or shadows that could compromise safety or create discomfort. Adjust the positioning, angle, or intensity of the light fixtures to eliminate these issues. Consider using diffusers or shielding to minimize glare.
5. Experiment with Lighting Angles: If adjustable, experiment with different angles or directions for the light fixtures. Walk up and down the staircase to get a sense of how the lighting interacts with the stairs and surrounding areas. Adjust the fixtures as needed to achieve optimal lighting conditions.
6. Assemble Feedback: Gather feedback from family members or others who regularly use the staircase. Ask for their input on the lighting visibility, comfort, and overall aesthetics. Consider their suggestions and make necessary adjustments to improve the lighting experience.
7. Consider Dimming or Smart Controls: If desired, explore the option of dimming or smart lighting controls for your stair lighting. Dimming can help create the desired ambiance and energy savings, while smart controls allow for convenient remote or automatic lighting adjustments.
8. Ensure Proper Timing and Sensors: If your stair lighting includes motion sensors or timers, verify that they are functioning correctly. Test their responsiveness and adjust the settings as needed to ensure convenient and efficient operation.
Remember that adjusting the lighting may require some trial and error to achieve the desired result. Take the time to fine-tune the lighting and make any necessary adjustments to ensure optimal safety and visual appeal.
Regularly assess and test the stair lighting to ensure that it continues to function properly over time. Perform maintenance tasks such as replacing burnt-out bulbs, cleaning light fixtures, and inspecting wiring connections periodically to keep the lighting in excellent condition.
In the next section, we will provide some maintenance and troubleshooting tips to help you maintain your stair lighting system.
Maintenance and Troubleshooting Tips
Maintaining your stair lighting system is essential to ensure its longevity and optimal performance. Regular maintenance and troubleshooting can help address any issues as they arise and keep your lighting system in excellent condition. Here are some tips to help you maintain and troubleshoot your stair lighting:
1. Regular Cleaning: Keep your light fixtures clean by regularly dusting them or wiping them with a soft cloth. Avoid using abrasive materials or harsh chemicals that can damage the fixtures. Cleanliness helps to maintain the brightness and effectiveness of the lights.
2. Replace Burnt-Out Bulbs: If you notice any bulbs that are no longer functioning, promptly replace them with new ones. Burnt-out bulbs can affect the overall lighting quality and compromise visibility. Follow the manufacturer’s instructions for proper bulb replacement and ensure you use the correct wattage and type of bulb.
3. Inspect Wiring Connections: Periodically inspect the wiring connections for any signs of wear, fraying, or loose connections. If you notice any issues, such as exposed wires or damaged insulation, promptly address them. Ensure all connections are tight, secure, and well-insulated to prevent electrical hazards.
4. Address Dimming or Flickering Lights: If you notice a decrease in brightness or flickering lights, it may indicate an issue with the wiring or power supply. Check the wiring connections for any loose or damaged parts and ensure the power source is stable. If the problem persists, consult a professional electrician for further assessment.
5. Check Sensor or Timer Settings: For systems with motion sensors or timers, periodically check their settings to ensure they are functioning according to your needs. Adjust the sensitivity or timing as necessary to maintain efficient and convenient operation.
6. Monitor for Excessive Heat: Pay attention to the temperature of the light fixtures while they are in operation. Excessive heat can be a sign of malfunctioning or improperly installed lights. If you notice excessive heat or burning smells, turn off the power immediately and consult a professional for further inspection.
7. Be Mindful of Moisture and Outdoor Exposure: If your stair lighting is installed outdoors, take precautions to protect it from moisture, rain, and extreme weather conditions. Ensure that outdoor fixtures are designed to be weather-resistant and follow the manufacturer’s guidelines for proper installation and protection.
8. Seek Professional Assistance: If you encounter any complex issues or are unsure about how to handle a specific problem, it is recommended to seek professional assistance. Electricians or lighting experts can provide detailed troubleshooting and ensure that any issues are addressed safely and efficiently.
By regularly maintaining and troubleshooting your stair lighting system, you can ensure its longevity and consistent performance. Paying attention to any changes in lighting quality and addressing potential issues promptly will help maintain a safe and visually appealing environment for your staircase.
Remember to always prioritize safety when conducting any maintenance or troubleshooting tasks. If at any point you feel unsure or uncomfortable with handling electrical components, seek assistance from a qualified professional.
Conclusion
Lighting up your stairs is not only a practical choice but also a creative and visually appealing way to enhance the safety and aesthetics of your space. By installing proper stair lighting, you can ensure that your stairs are well-lit, significantly reducing the risk of accidents caused by tripping, slipping, or falling. Additionally, well-placed and well-designed lighting fixtures can transform a mundane staircase into a captivating architectural element that adds elegance and charm to your home or any space with stairs.
Throughout this article, we have explored the importance of lighting stairs and discussed various types of stair lighting options, including recessed lighting, step lighting, wall-mounted lighting, handrail lighting, and understep lighting. Each type offers distinct benefits and design possibilities, allowing you to customize your stair lighting to suit your personal style and specific requirements.
Furthermore, we have provided a step-by-step guide on how to plan the layout, wire and connect the lighting fixtures, and install and adjust the lights. Following these guidelines will help you successfully install your stair lighting while adhering to electrical safety protocols and building codes.
To maintain the optimal performance of your stair lighting system, regular maintenance is necessary. This includes cleaning the fixtures, replacing burnt-out bulbs, inspecting wiring connections, and monitoring the overall functionality of the lights. Additionally, troubleshooting any issues promptly and seeking professional assistance when needed will ensure the longevity and effectiveness of your stair lighting.
With well-designed and properly installed stair lighting, you can create a safer and more enchanting staircase that will impress both residents and visitors. So, take the opportunity to transform your stairs into a captivating focal point that adds charm to your space while promoting safety.
Remember, when it comes to stair lighting, the key is to strike a balance between functionality and aesthetics. By carefully planning, selecting the appropriate fixtures, and considering the layout and design of your staircase, you can achieve a beautiful lighting installation that enhances the visual appeal of your space while providing a safe and well-illuminated pathway.
Frequently Asked Questions about How To Light Up Stairs
Was this page helpful?
At Storables.com, we guarantee accurate and reliable information. Our content, validated by Expert Board Contributors, is crafted following stringent Editorial Policies. We're committed to providing you with well-researched, expert-backed insights for all your informational needs.


0 thoughts on “How To Light Up Stairs”