Articles
How To Wire Up A Light Socket
Modified: September 2, 2024
Learn how to wire up a light socket with this informative and easy-to-follow article-guide. Enhance your DIY skills and create a well-lit space.
(Many of the links in this article redirect to a specific reviewed product. Your purchase of these products through affiliate links helps to generate commission for Storables.com, at no extra cost. Learn more)
Introduction
Wiring up a light socket is a basic electrical task that can be completed by anyone with a little know-how and the right tools. Whether you’re replacing an old socket or installing a new one, understanding the process will allow you to safely and confidently complete the job.
By following the proper steps and taking necessary precautions, you’ll be able to wire up a light socket in no time. In this article, we’ll guide you through the process, from gathering the materials needed to testing the final installation. So, let’s get started!
Note: Before proceeding with any electrical work, ensure that you have shut off the power to the area you’ll be working in. Safety should always be the top priority when dealing with electricity.
Key Takeaways:
- Safely wire up a light socket by gathering the right tools, preparing the wires, and securing connections. Always prioritize safety and enjoy the satisfaction of a well-lit space.
- Before restoring power, test the newly wired light socket to ensure proper functionality. Double-check connections and seek professional help if uncertain. Enjoy your well-lit space!
Read more: How To Wire A Light Bulb Socket
Materials Needed
Before you begin wiring up a light socket, it’s important to gather all the necessary materials. Having everything on hand will ensure a smooth and efficient process. Here are the materials you’ll need:
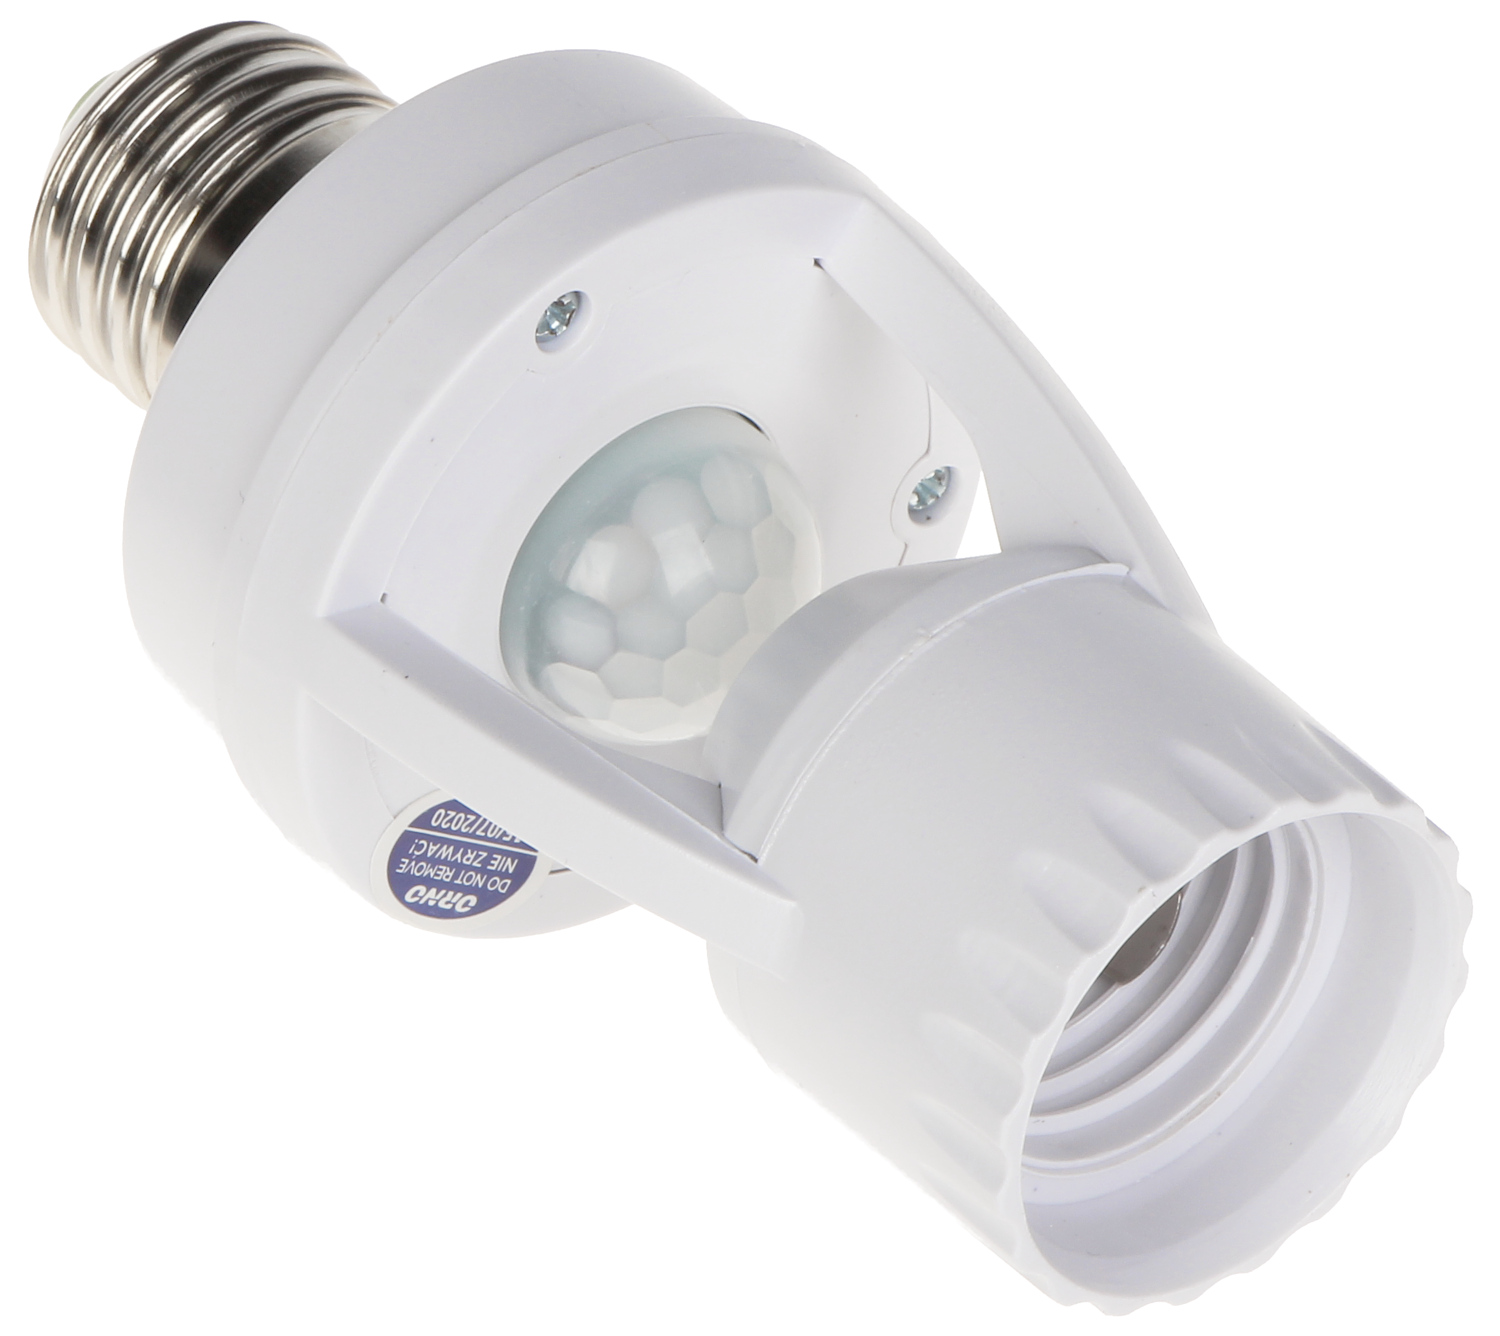
- A new light socket – choose one that matches the type and wattage of the bulb you plan to use.
- A screwdriver – make sure it is the appropriate size for the screws on your light socket.
- A pair of wire strippers – used to remove the insulation from the wires.
- Electrical tape – to insulate and protect the connections.
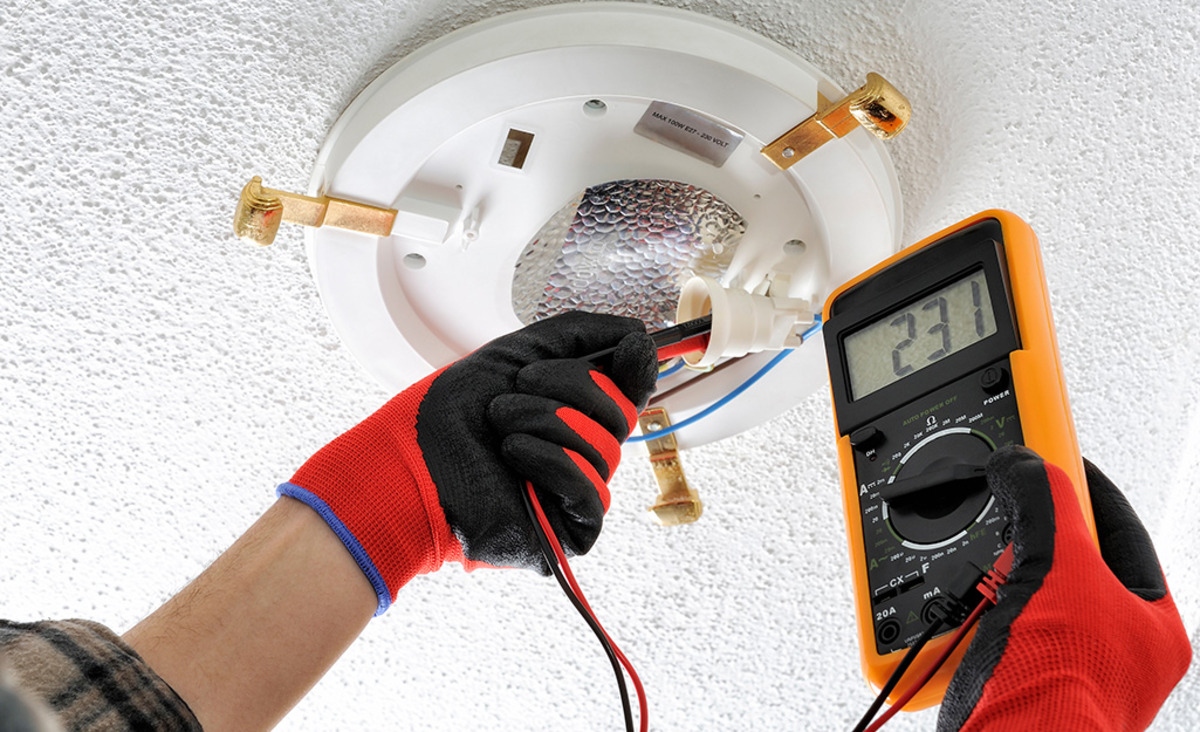
- A voltage tester – to ensure the power is off before starting the wiring.
- A ladder or step stool – to reach the light socket.
- A pen and paper – to take note of any specific instructions or measurements.
It’s always a good idea to double-check the specifications of your specific light socket and bulb to ensure that you have the correct materials for the job. Additionally, if you are unsure about any aspect of the task, it may be helpful to consult an electrician or seek guidance from a knowledgeable source.
Step 1: Gather the necessary tools
Before you begin wiring up a light socket, it’s important to gather all the necessary tools. Having the right tools on hand will make the process easier and more efficient. Here are the tools you’ll need:
- Screwdriver – Choose a screwdriver that is appropriate for the screws on your light socket. It should fit securely into the screw heads to prevent slipping.
- Wire strippers – This tool is used to remove the insulation from the wires, exposing the conductive metal beneath. Make sure to select wire strippers that are the correct size for your wire gauge.
- Electrical tape – Electrical tape is used to insulate and protect the connections. It helps to prevent any exposed wires from coming into contact with each other, reducing the risk of electrical shocks or short circuits.
- Voltage tester – Before starting any electrical work, it’s crucial to ensure that the power is off. A voltage tester is a handheld device that allows you to check if there is any electrical current present in the wires or sockets.
- A pair of pliers – Pliers can be handy for making secure connections and tightening screws. They provide a better grip than your fingers alone and help ensure that connections are properly tightened.
- A ladder or step stool – These tools are essential if the light socket is located at a height that is out of reach. Make sure to choose a stable and sturdy ladder or step stool to ensure your safety while working at a height.
Having all of these tools readily available before starting the wiring process will save you time and make the task much more manageable. It’s important to remember that safety is paramount when working with electricity, so ensure that you are using the right tools and taking necessary precautions throughout the entire process.
Step 2: Turn off the power source
Before you begin any electrical work, it’s essential to shut off the power to the area where you’ll be working. This step is crucial for your safety and to prevent any electrical accidents. Follow these steps to turn off the power:
- Locate the circuit breaker – The circuit breaker box is usually located in the basement, utility room, or garage. Open the panel door to access the circuit breakers.
- Identify the breaker for the light socket – Look for the breaker that controls the power to the area where the light socket is located. Most circuit breakers are labeled, but if they are not, you may need to do some trial and error by flipping breakers until the lights turn off.
- Switch off the breaker – Once you’ve identified the correct breaker, switch it to the “off” position. This action will cut off power to the light socket and ensure that there is no electrical current flowing through the wires.
- Verify the power is off – It’s important to double-check that the power is truly off before proceeding. Use a voltage tester to test the wires or socket to confirm that there is no electrical current present. This step provides an extra layer of safety.
Turning off the power source is a critical step as it helps prevent electric shocks and other potential hazards. Always double-check that the power is off before starting any electrical work. If you’re unsure about the process or feel uncomfortable working with electrical systems, it’s recommended to seek the assistance of a qualified electrician.
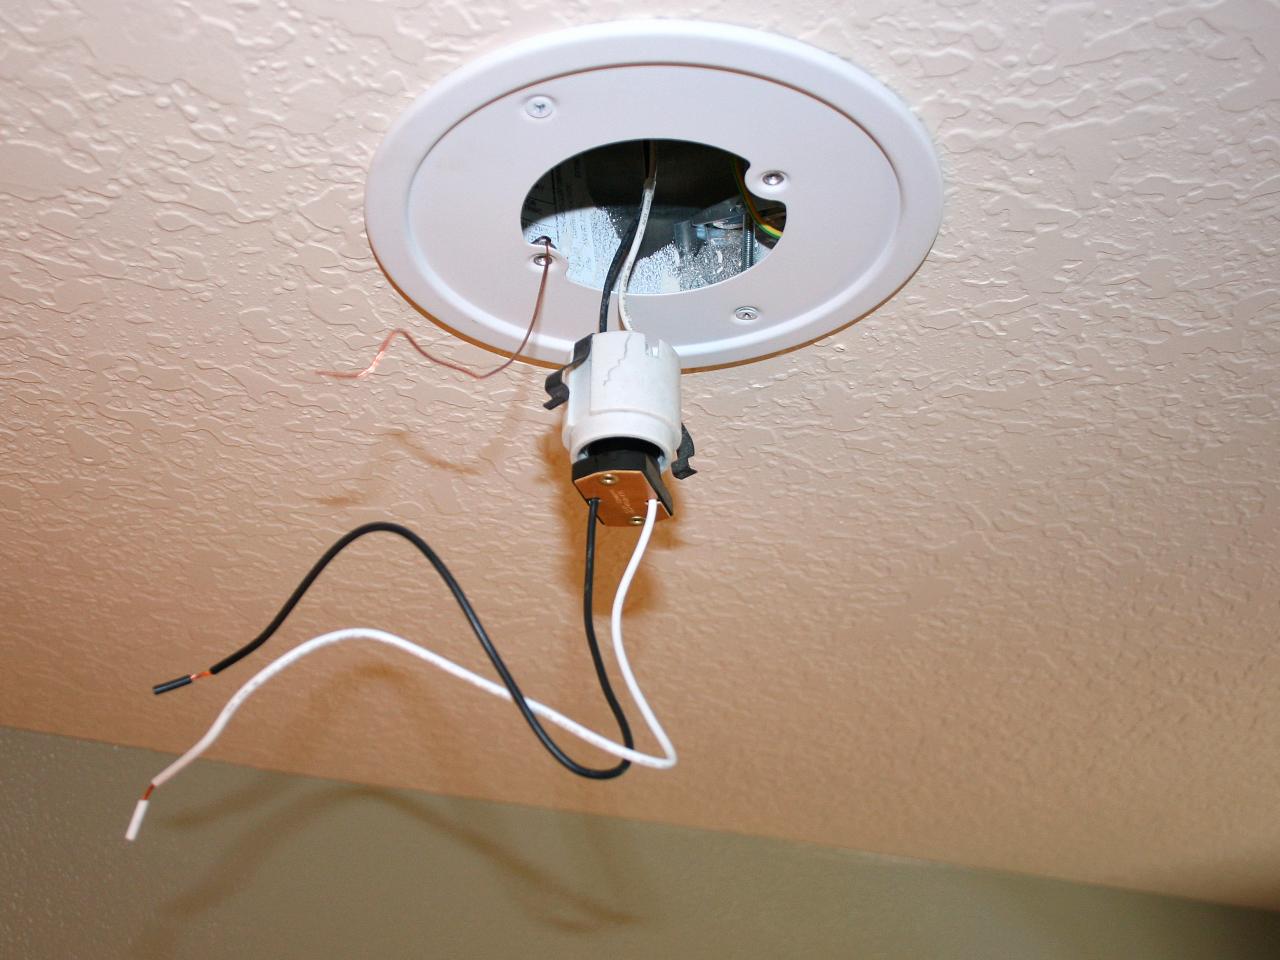
Step 3: Remove the old light socket
Once you’ve turned off the power to the light socket, it’s time to remove the old socket. Follow these steps to safely remove the old socket:
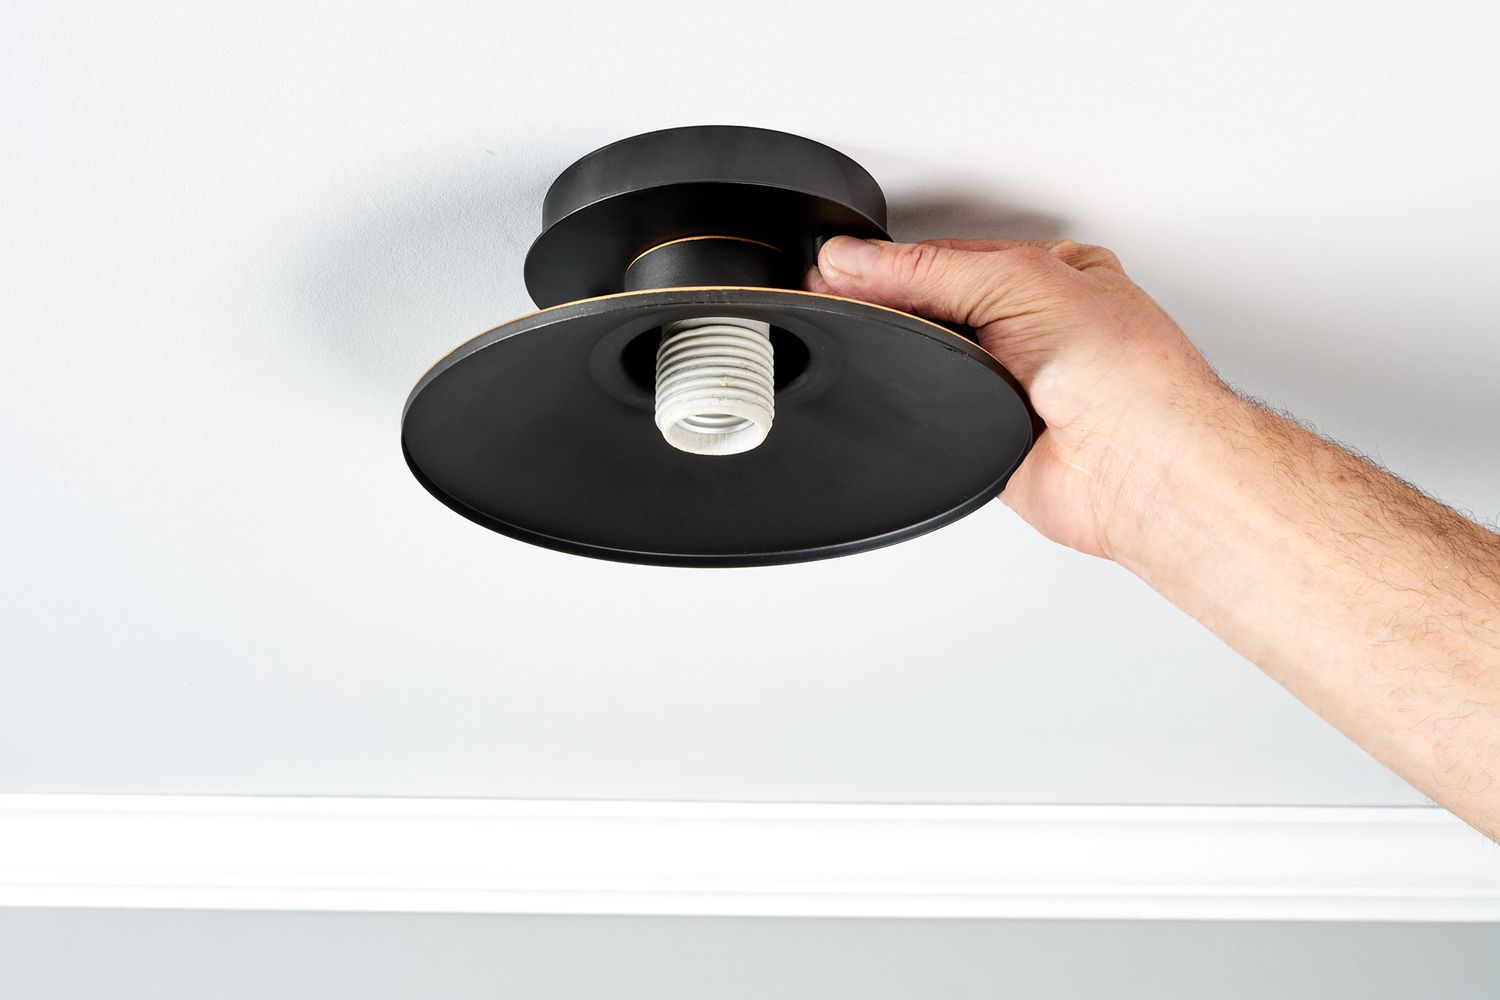
- Inspect the socket – Take a close look at the old light socket to understand how it is secured in place. Typically, the socket is attached to the light fixture or ceiling with screws or a retaining ring.
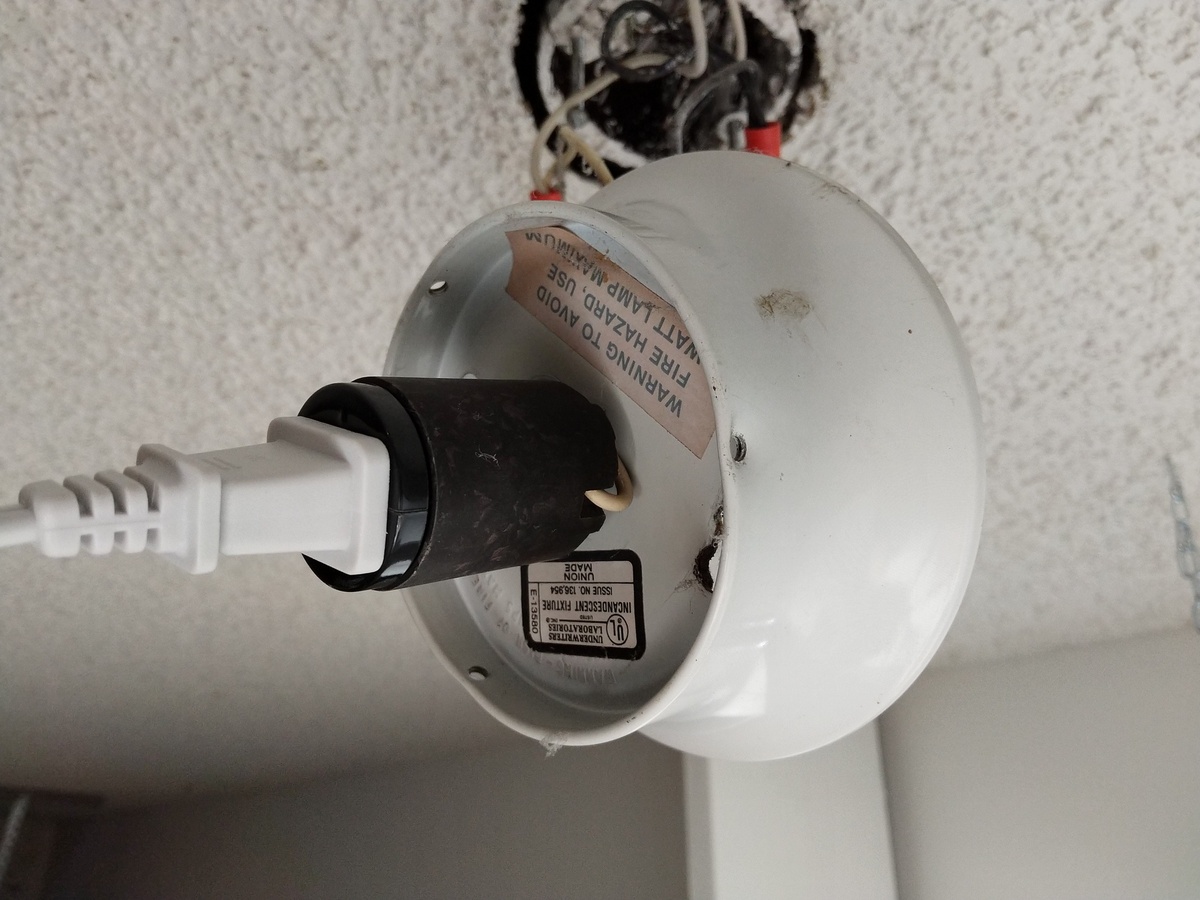
- Disconnect the wires – Carefully remove any wire connectors or screws that are securing the wires to the socket. Make sure to note which wire is connected to which terminal. You can either take a photo or draw a diagram to help with the reinstallation later.
- Remove the socket from the fixture – Once the wires are disconnected, unscrew the old socket from the fixture or remove the retaining ring. Keep track of any additional parts that may be attached to the socket, such as a shade ring or decorative cover.
- Inspect for any damage – Take a moment to inspect the wires and the socket itself for any signs of damage or wear. If you notice any frayed wires or cracked parts, you may need to replace them before installing the new socket.
It’s important to handle the old light socket with care and avoid any unnecessary force or mishandling. If you encounter any difficulties during the removal process or if the socket is stuck, it may be best to consult a professional electrician for assistance.
Note: Do not touch the exposed wires or any live electrical components during this step. Even though the power may be turned off, it’s always better to err on the side of caution.
With the old socket removed, you’re now ready to move on to the next step of preparing the wires for the new socket installation.
Read also: 9 Amazing Hard Wired Light Socket for 2025
Step 4: Prepare the wires
Once the old light socket has been removed, it’s time to prepare the wires for the new socket installation. Properly preparing the wires will ensure a secure and stable connection. Follow these steps to prepare the wires:
- Inspect the wires – Take a close look at the wires to ensure they are in good condition. Look for any signs of fraying or damage. If you notice any issues, it’s important to repair or replace the wires before proceeding.
- Strip the wire insulation – Using a pair of wire strippers, carefully strip off approximately 1/2 inch (1.3 cm) of insulation from the ends of the wires. Be cautious not to cut into the wire strands.
- Twist the wire strands – After stripping the insulation, twist the exposed wire strands tightly together. This will create a solid connection and prevent any loose or frayed strands from causing issues later on.
- Trim the wire ends – If the wire strands are longer than necessary, use wire cutters to trim them to the desired length. Leaving excess wire can make it difficult to securely attach the wires to the new socket.
Properly preparing the wires ensures a clean and reliable connection. It’s important to take your time during this step and make sure the wire strands are securely twisted together. This will help prevent any potential electrical hazards or loose connections.
Note: Always exercise caution when working with exposed wires. It’s also a good idea to double check that the power is still off before proceeding to the next step.
Now that the wires are ready, you can move on to the next step of connecting them to the new light socket.
When wiring up a light socket, always make sure to turn off the power at the circuit breaker before starting. This will help prevent any accidents or electrical shocks while working on the wiring.
Step 5: Connect the wires to the new light socket
With the wires prepared, it’s time to connect them to the new light socket. Follow these steps to ensure a secure and proper connection:
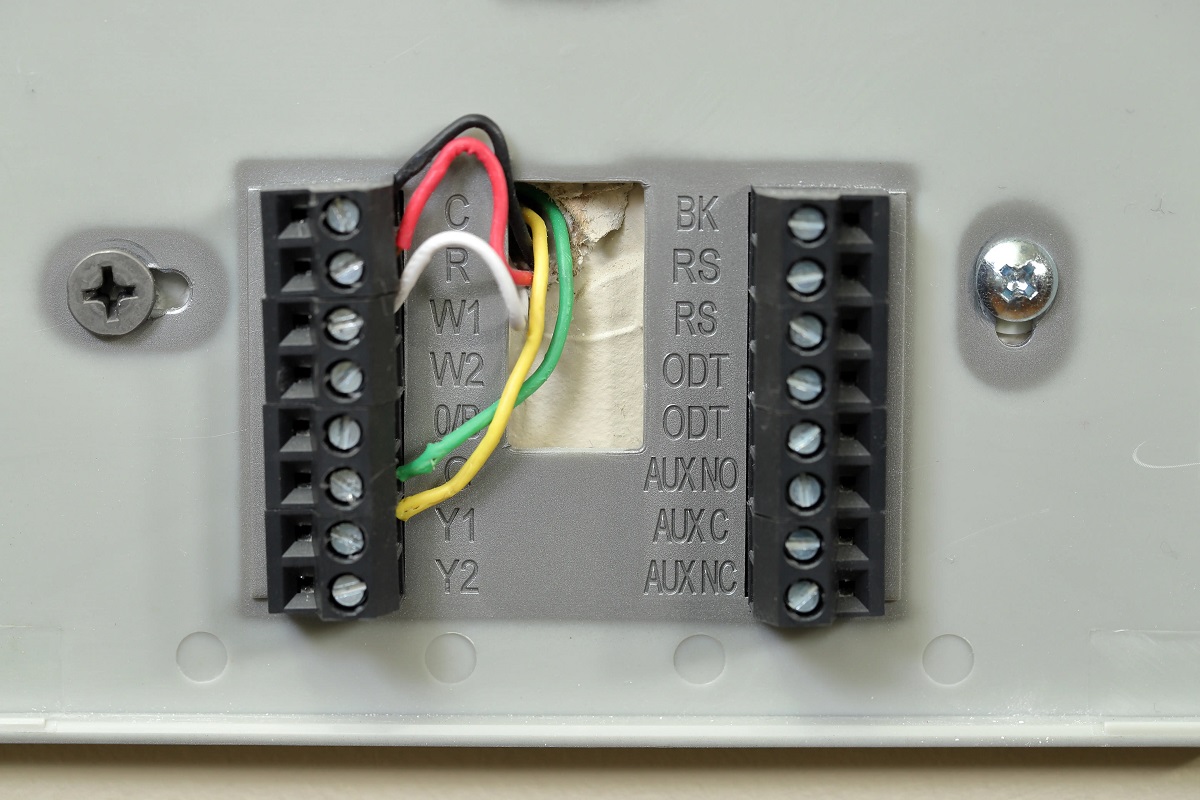
- Identify the terminal screws – Take a look at the new light socket and identify the terminal screws. These are typically labeled “hot” (or “live”) and “neutral”. The color of the wires can also help in identification, with black or red usually indicating the hot wire, and white or gray indicating the neutral wire.
- Attach the wires – Starting with the hot wire, insert it into the appropriate terminal screw and tighten the screw securely. Repeat this step with the neutral wire, ensuring it is connected to the correct terminal screw. It’s important to make sure there are no loose strands of wire sticking out from under the screw.
- Tighten the terminal screws – Use a screwdriver to tighten the terminal screws. Make sure they are securely fastened but be careful not to overtighten, as this can damage the wires or the socket.
- Insulate the connections – Once the wires are connected, use electrical tape to insulate the terminal screws and any exposed wire. Wrap the tape tightly around the base of the socket, covering the screws and a few inches of the wire to provide added protection and prevent any accidental contact.
It’s important to ensure that the wires are securely fastened to the terminal screws. Loose connections can lead to flickering lights or even electrical hazards. Double-check that the wires are tightly secured before moving on to the next step.
Note: If you are unsure about the proper connections or if the color-coding is different from what you expected, consult the manufacturer’s instructions or seek professional help.
Now that the wires are connected, you’re one step closer to completing your newly wired light socket.
Step 6: Secure the connections
After connecting the wires to the new light socket, it’s important to secure the connections to ensure they remain stable and reliable. Follow these steps to properly secure the connections:
- Inspect the connections – Carefully examine the connections between the wires and the terminal screws. Ensure that there are no loose strands or exposed wire. If necessary, trim any excess wire to prevent it from interfering with the installation or causing a potential hazard.
- Tighten the terminal screws – Use a screwdriver to tighten the terminal screws further, ensuring that they are snugly fastened. Be cautious not to overtighten, as this can damage the wires or the socket.
- Check for secureness – Gently tug on each wire to check if they are securely attached to the terminal screws. A properly secured connection should not budge or come loose. If any of the wires feel loose, re-tighten the corresponding terminal screw.
Securing the connections is crucial for the long-term reliability and safety of your light socket. Loose connections can result in flickering lights or even disrupt the electrical circuit. Taking the time to double-check and properly secure the connections will minimize the chances of any future issues.
Note: Always double-check that the power is still off before proceeding to the next step. It’s also a good practice to wrap electrical tape around the terminal screws and wire connections for added insulation and protection.
With the connections securely in place, you’re ready to move on to the next step of attaching the new light socket to the fixture.
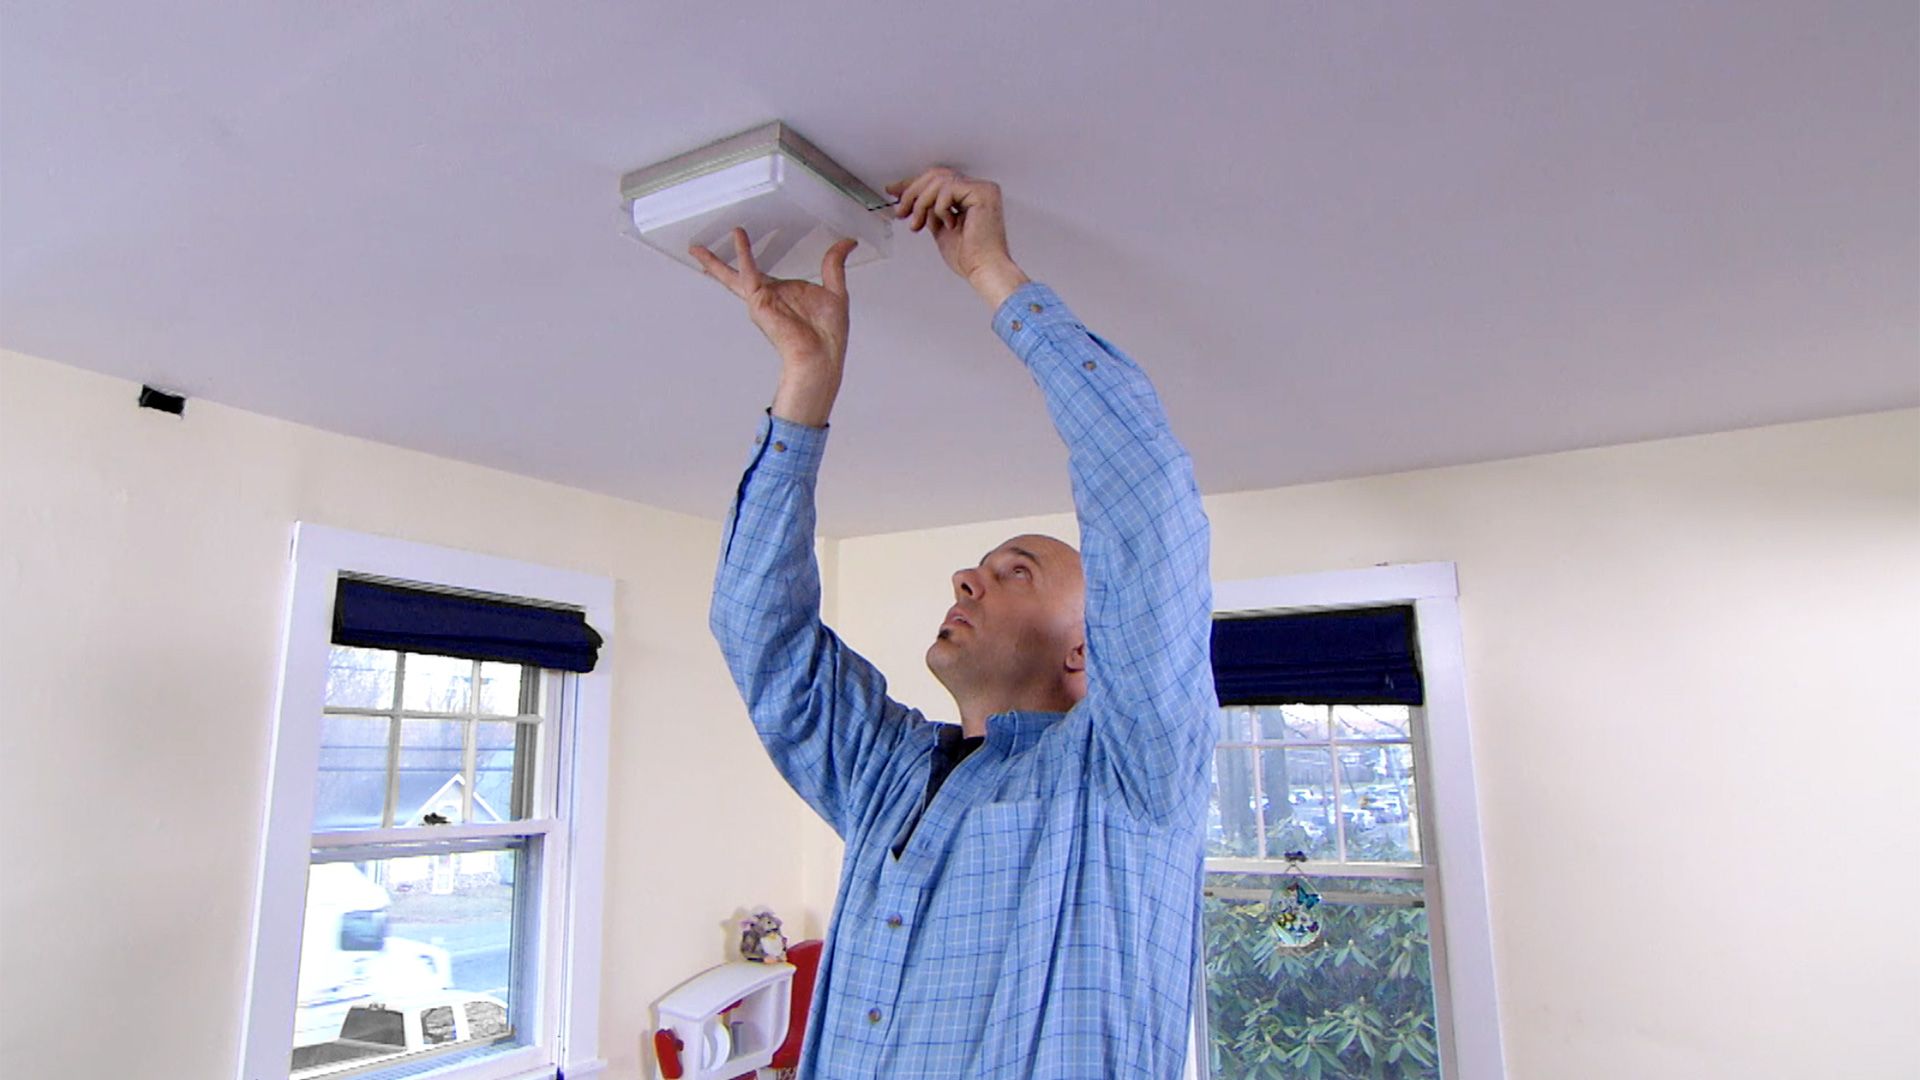
Step 7: Attach the new light socket
Now that the wires are securely connected, it’s time to attach the new light socket to the fixture. Follow these steps to properly attach the socket:
- Position the socket – Hold the new light socket in position, aligning the screw holes or slots with those on the fixture. Ensure that the wire connections are positioned in a way that they won’t interfere with the installation or get pinched.
- Insert and tighten the screws – Insert the screws provided with the new socket through the screw holes or slots and into the fixture. Use a screwdriver to tighten the screws, making sure that the socket is securely fastened.
- Attach any additional parts – If there are additional parts such as a shade ring or decorative cover that came with the new socket, attach them according to the manufacturer’s instructions. These parts add aesthetic value and may help secure the socket further.
It’s important to ensure that the new light socket is properly attached and stable. A loose socket can cause flickering lights or become a safety hazard. Take your time during this step and ensure that the socket is securely attached to the fixture.
Note: Be cautious not to overtighten the screws, as this can damage the socket or the fixture. Additionally, keep in mind any specific instructions provided by the manufacturer for your particular socket model.
With the new light socket attached, you’re almost done with the installation process. The next step is to test the newly wired socket before restoring the power.
Step 8: Test the light socket
Before restoring the power, it’s crucial to test the newly wired light socket to ensure it is functioning properly. Follow these steps to test the light socket:
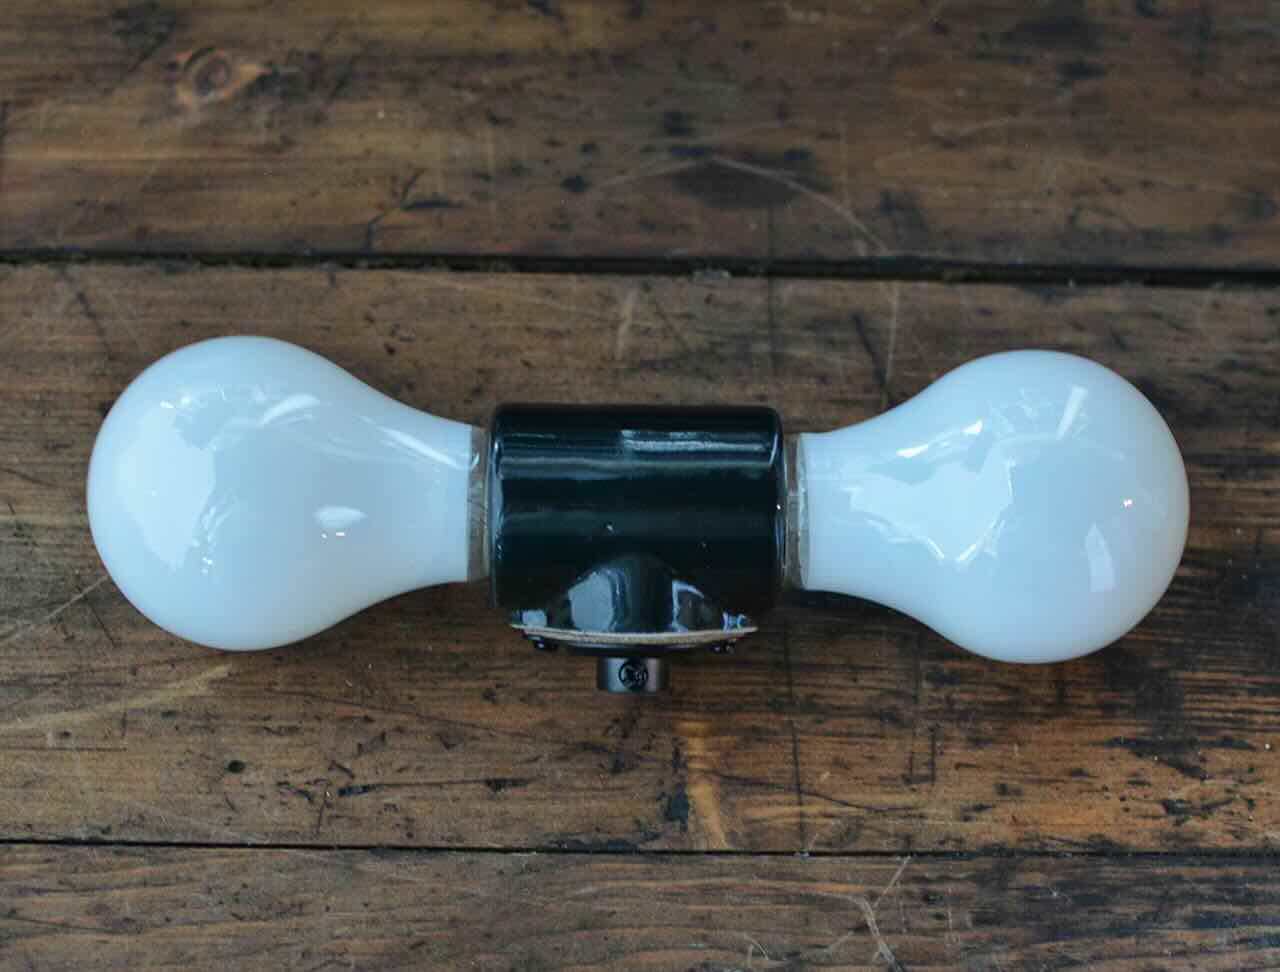
- Replace the light bulb – Screw in a light bulb of the appropriate type and wattage for your light socket. Make sure the bulb is securely in place.
- Turn on the power – Go back to the circuit breaker panel and switch the breaker for the light socket back to the “on” position. This will restore power to the socket.
- Flip the light switch – If your light socket is controlled by a switch, flip the switch to the “on” position. The light bulb should illuminate if the wiring is correct.
While testing the light socket, pay attention to any abnormalities. If the light bulb does not turn on, flickers, or produces a dim light, it may indicate an issue with the wiring. In such cases, turn off the power again and double-check the connections to ensure they are secure and properly attached.
It’s always a good practice to test the light socket before fully restoring power and completing the installation. This will help identify any potential issues early on, allowing you to address them promptly.
Once you’ve confirmed that the light socket is functioning correctly, you’re almost done. The final step is to restore power and enjoy your newly wired light socket.
Step 9: Restore power and enjoy your newly wired light socketCongratulations! You’re in the final step of wiring up your light socket. Now it’s time to restore power and enjoy your newly installed socket. Follow these steps to complete the process:
- Double-check the connections – Before restoring power, take a moment to double-check that all the connections are secure and properly attached. Ensure that there are no loose wires or exposed terminals.
- Turn on the power – Go back to the circuit breaker panel and switch the breaker for the light socket back to the “on” position. This will restore power to the socket.
- Test the light socket again – Once the power is restored, test the light socket by flipping the light switch or turning on the fixture. The light bulb should illuminate without any issues.
- Enjoy your newly wired light socket! – Congratulations on successfully wiring up your light socket! You can now enjoy the warmth and brightness of your newly installed light fixture.
Remember, if you notice any issues, such as flickering lights or unusual behavior, turn off the power immediately and inspect the connections. It’s always better to address any concerns promptly to ensure the safety and functionality of your lighting setup.
Note: If you’re uncertain about the installation process or encounter any difficulties along the way, it’s advisable to seek the assistance of a professional electrician.
By following these steps and taking the necessary precautions, you have successfully wired up your light socket. Sit back, relax, and enjoy the well-lit space that your new light socket brings!
Conclusion
Wiring up a light socket may seem like a daunting task, but with the right tools, knowledge, and precautions, it can be completed safely and efficiently. By following the step-by-step guide outlined in this article, you have learned how to wire up a light socket and successfully complete the installation process.
Remember, safety should always be the top priority when working with electricity. Before starting any electrical work, ensure that you have turned off the power to the area you’ll be working in. Take the time to gather all the necessary tools and materials, as well as double-check that you have the correct light socket for your bulb.
Each step of the process plays a crucial role in ensuring a properly functioning and secure light socket. From removing the old socket to preparing and connecting the wires, and finally attaching and testing the new socket, attention to detail is key. Double-check all the connections, tighten the screws securely, and wrap exposed wires with electrical tape for added insulation.
Once you have completed the installation and restored power, take a moment to appreciate your newly installed light socket. Bask in the renewed brightness and functionality it brings to your living space.
If at any point you feel uncertain or uncomfortable with the wiring process, don’t hesitate to seek assistance from a qualified electrician. It’s always better to ensure the job is done correctly and safely.
Now that you have the knowledge and confidence to wire up a light socket, you can tackle future electrical projects with ease. Remember to prioritize safety, and enjoy the satisfaction of a job well done!
Frequently Asked Questions about How To Wire Up A Light Socket
Was this page helpful?
At Storables.com, we guarantee accurate and reliable information. Our content, validated by Expert Board Contributors, is crafted following stringent Editorial Policies. We're committed to providing you with well-researched, expert-backed insights for all your informational needs.

0 thoughts on “How To Wire Up A Light Socket”