Articles
How To Make An Asphalt Driveway
Modified: February 23, 2024
Learn the step-by-step process of creating a durable and attractive asphalt driveway with our comprehensive articles. Enhance your home's curb appeal today!
(Many of the links in this article redirect to a specific reviewed product. Your purchase of these products through affiliate links helps to generate commission for Storables.com, at no extra cost. Learn more)
Introduction
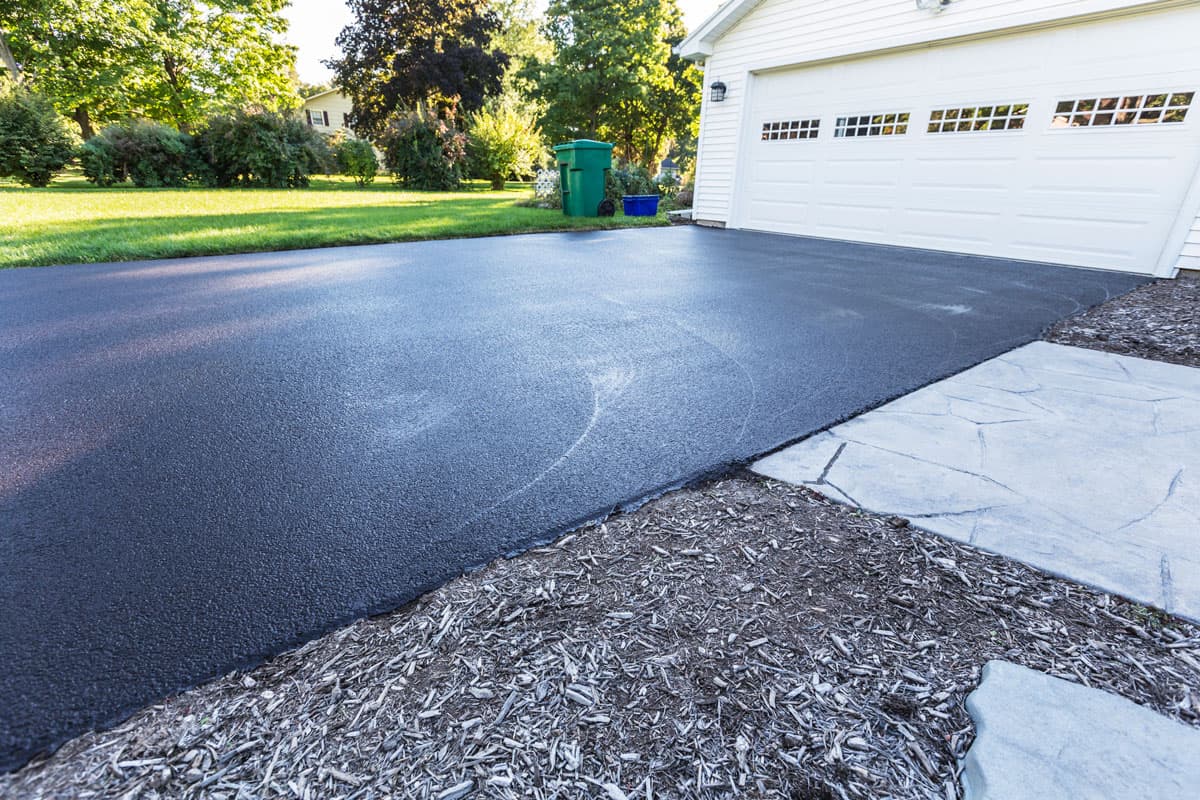
Having a well-constructed driveway not only enhances the curb appeal of your property but also provides a smooth and durable surface for vehicles. Among the various types of driveways, an asphalt driveway stands out as a popular choice due to its affordability, versatility, and resilience. If you’re looking to create an asphalt driveway on your property, this comprehensive guide will walk you through the step-by-step process.
An asphalt driveway is made up of a combination of aggregates and asphalt binder, which create a strong and durable surface. By following the proper installation techniques, you can ensure that your asphalt driveway withstands harsh weather conditions, heavy traffic, and lasts for years to come.
Before we delve into the details of constructing an asphalt driveway, it’s worth noting that this is not a DIY project for everyone. It requires specialized equipment, knowledge, and experience. Therefore, it is recommended to hire a professional asphalt contractor who can guarantee a high-quality installation.
However, if you are a seasoned DIY enthusiast or want to understand the process for informational purposes, this guide will provide valuable insights.
Now, let’s get started with the step-by-step process of making an asphalt driveway.
Key Takeaways:
- Proper preparation, compaction, and application of layers are crucial for a durable asphalt driveway. Hiring a professional contractor is recommended for optimal results.
- Applying a sealant and allowing sufficient curing time are essential for maintaining the integrity and longevity of your newly constructed asphalt driveway. Regular maintenance will ensure its long-lasting performance.
Read more: What Is An Asphalt Driveway
Step 1: Prepare the Ground
The first step in constructing an asphalt driveway is to prepare the ground properly. This involves clearing the area of any obstacles, such as rocks, debris, or vegetation, that may interfere with the installation process. It’s important to ensure that the surface is clean, smooth, and free from any loose materials.
Start by marking the boundaries of your driveway using stakes and strings. This will help you visualize the dimensions and layout of your driveway. You can adjust the shape and size as necessary to fit your needs and available space.
Next, remove any vegetation or grass from the area using a shovel or landscape fabric. Vegetation can disrupt the stability of the driveway and lead to cracks or uneven surfaces over time. It’s crucial to remove the roots as well to prevent any regrowth in the future.
Once the area is clear, inspect it for any low or high spots. Low spots can cause water pooling, while high spots can lead to uneven surfaces. Use a long 2×4 or a straight board to check for any irregularities. If you encounter any low spots or high spots, you can either add or remove soil as necessary to achieve a level surface.
Additionally, it’s important to take into account proper drainage when preparing the ground. Ensure that there are proper slopes and channels to direct water away from the driveway. Proper drainage will prevent water from pooling and causing damage to the asphalt.
Finally, compact the ground using a vibrating plate compactor or a roller. This will help in creating a stable and firm base for the driveway. Compacting the ground ensures that it can withstand the weight of vehicles without sinking or shifting.
With the ground prepared, you are now ready to move on to the next step of excavating the area for the driveway.
Step 2: Excavate the Area
Excavating the area is a crucial step in preparing the foundation for your asphalt driveway. Excavation involves removing the top layer of soil and creating a space for the sub-base and asphalt layers.
Start by marking the depth of the excavation. The ideal depth for an asphalt driveway is typically around 8 to 10 inches. However, this may vary depending on factors such as the soil type, climate, and anticipated traffic load. Consulting with a professional asphalt contractor can help you determine the optimal depth for your specific situation.
Next, use a shovel or an excavator to remove the top layer of soil within the marked area. It’s important to excavate evenly and maintain the same depth throughout the driveway to ensure a level base for the asphalt. Pay attention to any dips or humps and make the necessary adjustments to maintain a consistent depth.
As you excavate, keep in mind that the width of the driveway should be slightly wider than your intended finished size. This additional width is called the “shoulders” and allows for smoother transitions from the driveway to the surrounding area.
Once the excavation is complete, use a compactor to thoroughly compact the soil. This will help in creating a stable and firm foundation for the sub-base. Compacting the soil is crucial to prevent settling and future damage to the driveway.
Inspect the excavated area for any soft spots or areas that may require additional soil compaction. Make sure that the entire area is solid and free from any loose soil or debris. This will ensure a solid base for the upcoming layers of the driveway.
With the area excavated and compacted, you are now ready to move on to the next step of installing a sub-base for your asphalt driveway.
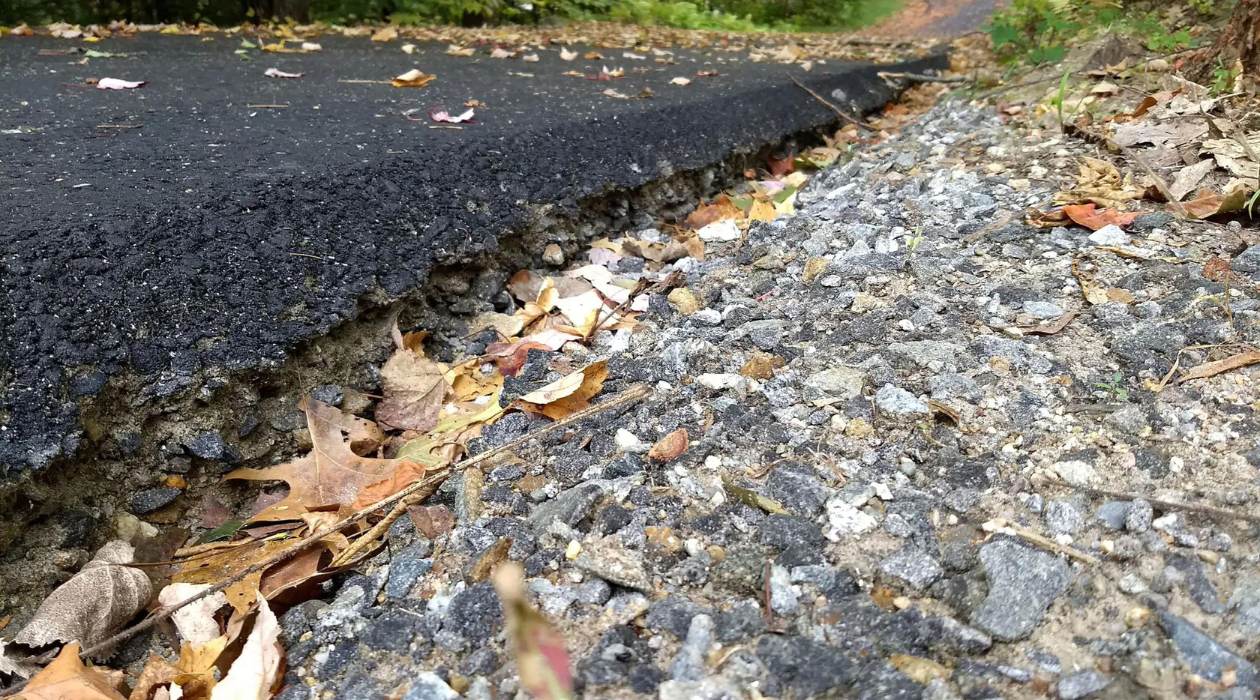
Step 3: Install a Sub-Base
Installing a sub-base is an essential part of constructing a durable and long-lasting asphalt driveway. The sub-base provides a stable foundation that helps distribute the weight of vehicles evenly and prevents the asphalt from cracking or sinking over time.
Start by applying a layer of crushed stone or aggregate to the excavated area. The size of the aggregate can vary, but it is typically recommended to use crushed stone ranging from 1 to 3 inches in diameter. This layer of aggregate acts as a base for supporting the asphalt and improving drainage.
Distribute the aggregate evenly across the excavated area, ensuring that it is slightly higher than the desired finished height of the driveway. Use a rake or shovel to spread it out and create a smooth and even surface.
Next, use a compactor to compact the sub-base layer. Compact the aggregate in small sections, moving the compactor in overlapping passes to ensure thorough compaction. Pay special attention to the edges and corners to ensure proper compaction throughout the entire area.
Continue compacting until the sub-base layer is dense and stable. You can test the compaction by walking on the surface. It should feel firm and not yield underfoot. If there are any areas that feel soft or uneven, add additional aggregate and compact again until the entire sub-base is uniformly compacted.
It is important to note that the thickness of the sub-base layer may vary depending on the specific circumstances and recommendations of the asphalt contractor. In some cases, a geotextile fabric may be used to help stabilize the sub-base and prevent the mixing of the subsoil with the aggregate.
By installing a well-compacted sub-base layer, you are creating a solid foundation for the asphalt to adhere to and ensuring the overall strength and durability of your driveway.
Now that the sub-base is in place, it’s time to move on to the next step of compacting the sub-base layer.
Step 4: Compact the Sub-Base
Compacting the sub-base is a critical step in the construction process of an asphalt driveway. The purpose of compacting is to ensure that the sub-base layer is well-settled and stable, providing a solid foundation for the subsequent layers of the driveway.
Begin by using a compactor, such as a vibrating plate compactor or a roller, to compact the sub-base. Start at one end of the driveway and work your way towards the other end in a systematic and overlapping pattern. This ensures that the entire sub-base is evenly compacted.
When using a vibrating plate compactor, guide it slowly over the sub-base, allowing the vibrations to settle the aggregate and eliminate any air pockets. Repeat this process multiple times, making several passes over the entire area to achieve optimal compaction.
If using a roller compactor, ensure that it is the appropriate size for the job and follow the manufacturer’s instructions for operating it. Roll the compactor over the sub-base in a back-and-forth motion, exerting sufficient pressure to compress the aggregate. Again, make multiple passes to ensure thorough compaction.
Pay close attention to the edges and corners of the driveway, as these areas can often be missed during compaction. Use hand tools, such as a hand tamper or a handheld compactor, to compact these areas effectively.
During the compaction process, periodically check the level of the sub-base to ensure that it is compacted evenly. If you notice any low or high spots, add or remove aggregate accordingly and re-compact the area until it is level.
Proper compaction of the sub-base is vital because it provides stability and prevents the driveway from settling or developing cracks over time. It also helps in achieving proper drainage, as a well-compacted sub-base facilitates water runoff and prevents pooling on the surface of the driveway.
Once you have thoroughly compacted the sub-base, you are now ready to move on to the next step of applying a base layer to your asphalt driveway.
Read more: How To Maintain Asphalt Driveway
Step 5: Apply a Base Layer
Applying a base layer is a crucial step in the construction of an asphalt driveway. The base layer adds strength, stability, and durability to the overall structure of the driveway. It serves as a foundation for the final asphalt layer, ensuring a smooth and long-lasting surface.
Start by spreading a layer of hot asphalt mix, also known as hot mix asphalt (HMA), over the compacted sub-base. The thickness of the base layer typically ranges from 2 to 4 inches, depending on the specific requirements of the project and the recommendations of the asphalt contractor.
Use shovels, rakes, or mechanical spreaders to evenly distribute the hot asphalt mix across the surface of the driveway. Make sure to overlap each pass by a few inches to ensure a consistent layer thickness. Aim for a smooth and uniform distribution of the material.
When applying the base layer, it is important to work quickly and efficiently to prevent the asphalt from cooling and becoming difficult to spread. As the asphalt mix cools, it becomes less workable and may result in a less uniform surface.
Once the base layer is spread, use a mechanical compactor, such as a vibratory plate compactor or a roller, to compact the asphalt. Start at one end of the driveway and work your way towards the other end, making multiple passes over the entire surface. This helps to eliminate air voids, achieve a denser base layer, and improve overall stability.
During the compaction process, periodically check the level of the base layer to ensure that it is smooth and even. If you notice any low or high spots, adjust the thickness of the asphalt mix accordingly and re-compact the area until it is level.
Remember to pay special attention to the edges and corners of the driveway, as they can be easily overlooked during compaction. Use hand tools, such as a hand tamper or a handheld compactor, to ensure that these areas are properly compacted.
By applying a well-compacted base layer, you are creating a solid foundation for the final asphalt layer. This will help ensure the longevity and durability of your asphalt driveway.
Now that the base layer is in place, you are ready to move on to the next step of compacting the base layer to further enhance its stability.
Regular maintenance is key to a long-lasting asphalt driveway. Fill in cracks and sealcoat every 2-3 years to prevent water damage and prolong its lifespan.
Step 6: Compact the Base Layer
Compacting the base layer is a crucial step to further enhance the stability and strength of your asphalt driveway. Proper compaction ensures that the base layer is densely packed and provides a solid foundation for the final asphalt surface.
Start by using a vibratory plate compactor or a roller to compact the base layer. Begin at one end of the driveway and work your way towards the other end, making multiple passes over the entire surface. This helps to eliminate any air voids and create a more stable and uniform base.
When using a vibratory plate compactor, guide it slowly over the base layer, ensuring that the entire surface is covered. Make overlapping passes to ensure thorough compaction. Pay close attention to the edges and corners of the driveway, as these areas can often be missed during compaction. Use hand tools, if necessary, to compact these areas effectively.
If using a roller, choose the appropriate size and weight for the job. Roll the compactor over the base layer in a back-and-forth motion, exerting enough pressure to achieve compaction. Again, make multiple passes to ensure thorough compaction.
As you compact, periodically check the surface of the base layer to ensure uniform compaction and a smooth finish. If you notice any low or high spots, add or remove asphalt material as needed and re-compact the area until it becomes level and even.
It’s essential to achieve proper compaction because it enhances the load-bearing capacity of the base layer and ensures that the final asphalt surface is stable and long-lasting. A well-compacted base layer provides better resistance to settlement and minimizes the risk of cracks or potholes.
During the compaction process, it’s important to ensure the safety of yourself and others. Wear appropriate protective gear, follow the manufacturer’s instructions for operating the compactor, and be mindful of any nearby obstacles or hazards.
Once you have thoroughly compacted the base layer, you are now ready to proceed to the next step of applying the asphalt mix to create the final surface of your driveway.
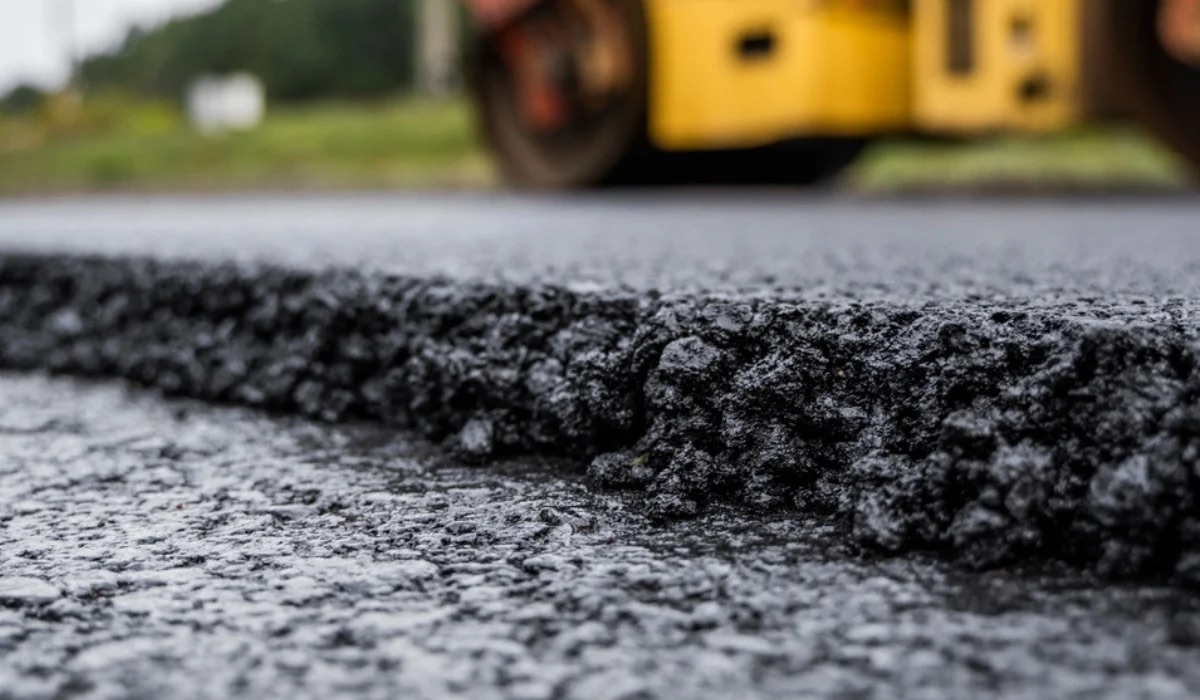
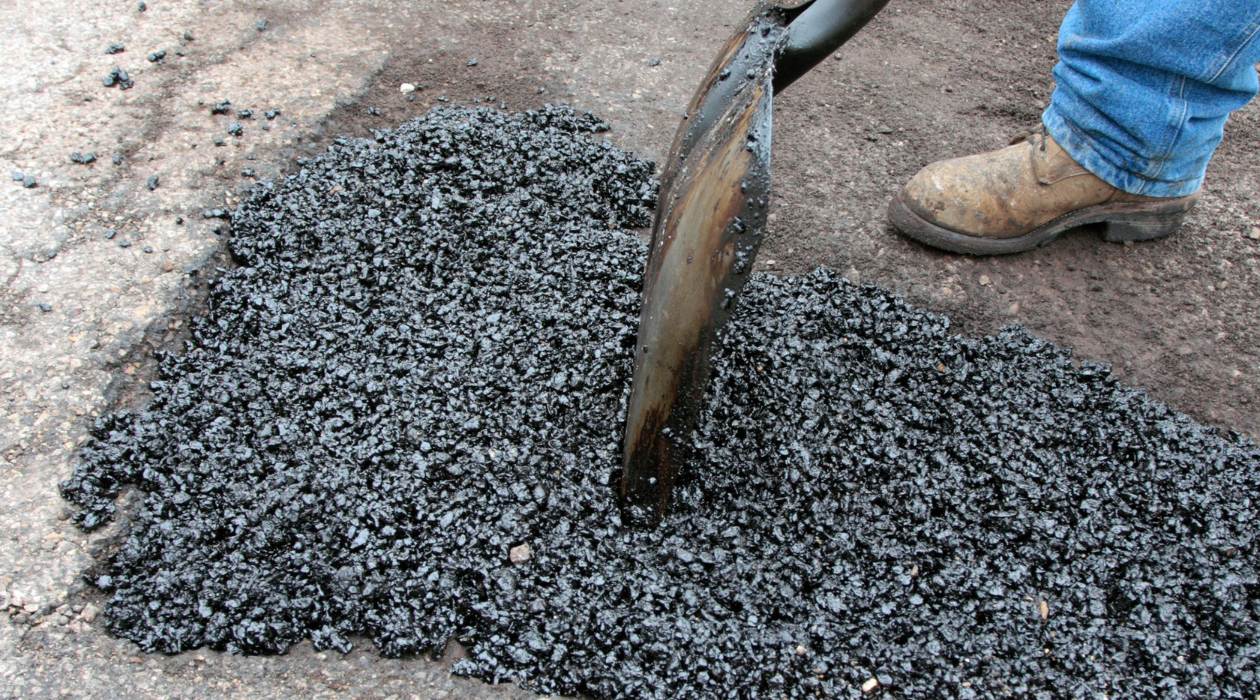
Step 7: Apply the Asphalt Mix
Applying the asphalt mix is a crucial step in creating the final surface of your driveway. The asphalt mix, also known as hot mix asphalt (HMA), is a combination of aggregates and asphalt binder that, when properly applied and compacted, forms a smooth and durable driving surface.
Start by heating the asphalt mix to the appropriate temperature. The exact temperature will vary depending on the specific mix and the ambient conditions. It’s important to follow the manufacturer’s guidelines or consult with an asphalt professional to ensure proper heating of the material.
Once the asphalt mix is heated to the correct temperature, it can be transported and applied to the driveway. Use shovels, rakes, or mechanical spreaders to evenly distribute the asphalt mix across the prepared base layer. Aim for a uniform thickness, typically around 2 to 3 inches, but this may vary depending on the specific project requirements.
Work quickly and efficiently to apply the asphalt mix, as it will begin to cool and become less workable over time. Smooth and level the asphalt using long-handled tools, such as a rake or lute, to achieve an even surface.
Pay special attention to the edges of the driveway, ensuring a smooth transition from the asphalt to the surrounding area. Use hand tools to help shape and blend the edges for a finished look.
It’s important to note that during the application of the asphalt mix, it’s recommended to work in sections. Apply the asphalt mix to one section of the driveway and then move on to the next, ensuring a continuous and seamless surface. This helps in achieving a consistent appearance and bonding between the sections.
Once the asphalt mix is applied, it’s time to compact the surface to ensure proper compaction and density. Proceed to the next step to learn more about compacting the asphalt and creating a smooth and solid driving surface.
Step 8: Compact the Asphalt
Compacting the asphalt is a crucial step that ensures a smooth, durable, and long-lasting driving surface for your driveway. Proper compaction helps to eliminate air voids and achieve a dense, solid pavement that can withstand the weight of vehicles and resist cracking or shifting.
Begin by using a vibratory plate compactor or a roller to compact the freshly laid asphalt. Start at one end of the driveway and work your way towards the other end, making multiple passes over the entire surface. This helps to ensure an even compaction and a uniform finish.
When using a vibratory plate compactor, guide it slowly over the surface of the asphalt. Make overlapping passes to ensure thorough compaction. Pay special attention to the edges and corners of the driveway, as these areas can be easily overlooked during compaction. Use hand tools, if necessary, to compact these areas effectively.
If using a roller, choose the appropriate size and weight for the job. Roll the compactor over the asphalt in a back-and-forth motion, exerting enough pressure to achieve compaction. Make several passes to ensure thorough compaction of the entire surface.
During the compaction process, periodically check the surface of the asphalt to ensure proper compaction and a smooth finish. Pay attention to any visible irregularities, such as low or high spots, and make the necessary adjustments as needed. Adding or removing asphalt material and recompacting can help achieve a more level and even surface.
It’s important to note that compaction should take place while the asphalt is still hot and workable. As the asphalt cools, it becomes less malleable, making it difficult to achieve thorough compaction.
Proper compaction of the asphalt is crucial because it enhances the structural integrity and load-bearing capacity of the driveway. It also helps to minimize the risk of developing cracks or potholes, ensuring a smoother and more durable driving surface.
Once you have thoroughly compacted the asphalt, the final step is to apply a sealant to protect the surface and enhance its longevity. Proceed to the next step to learn more about applying a sealant to your asphalt driveway.
Read more: How To Resurface An Asphalt Driveway
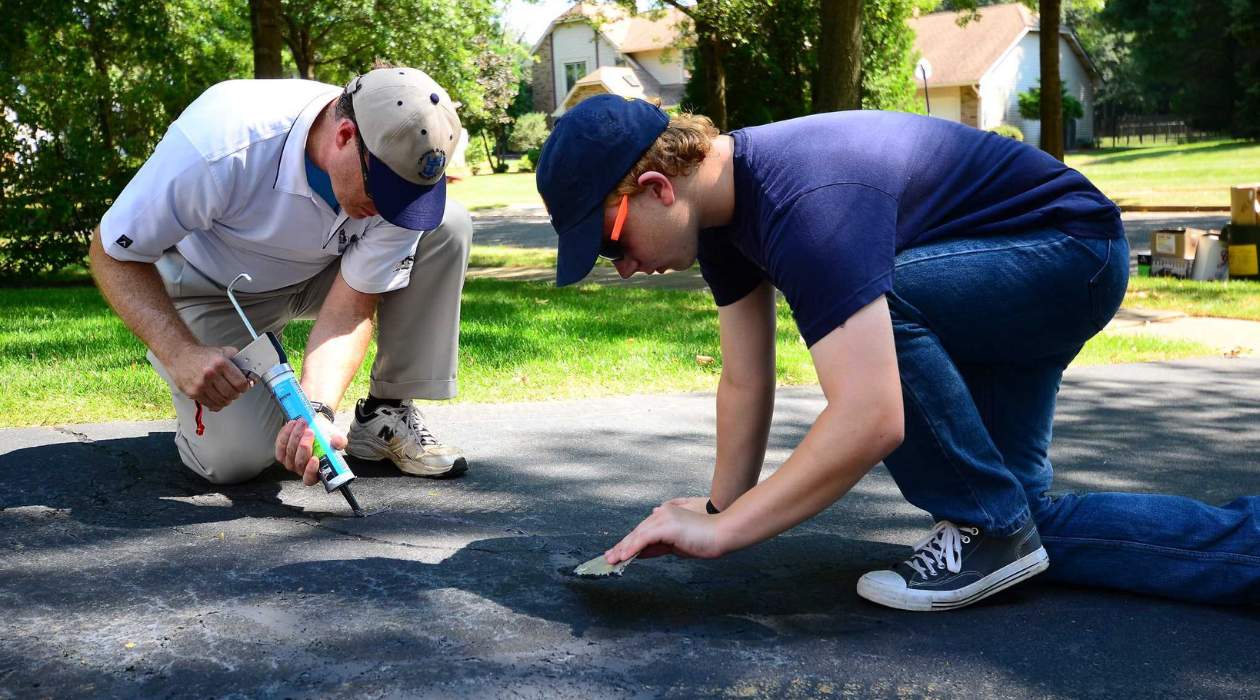
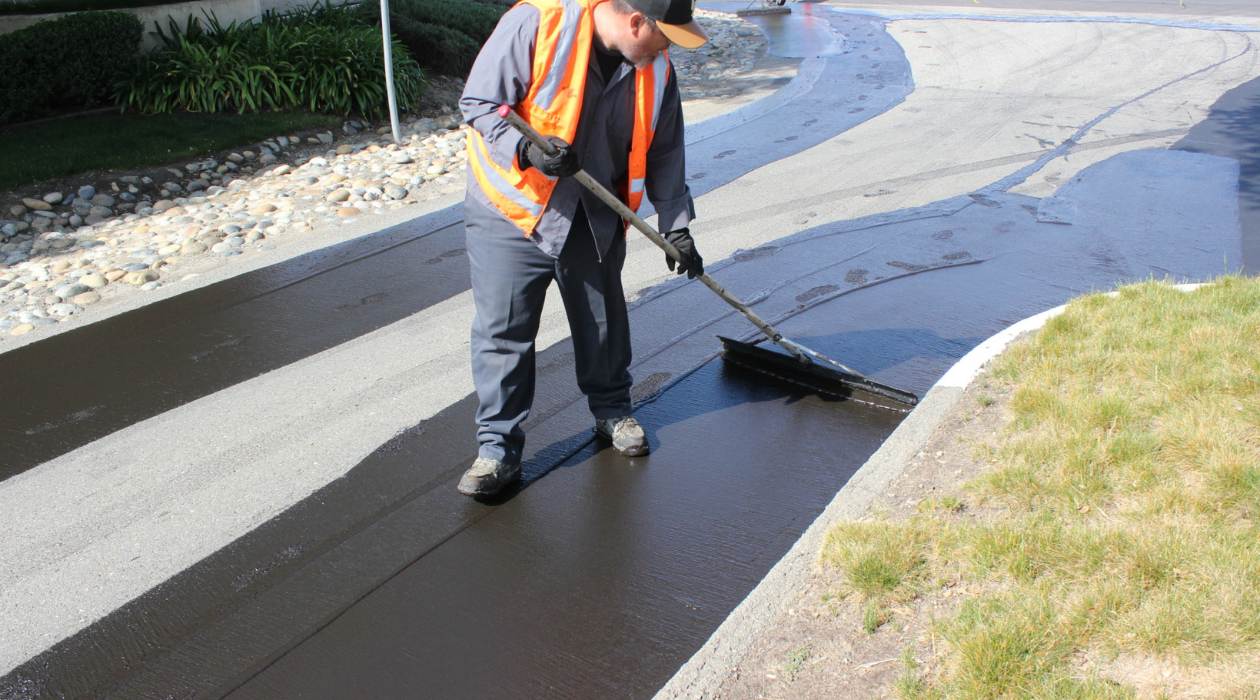
Step 9: Apply a Sealant
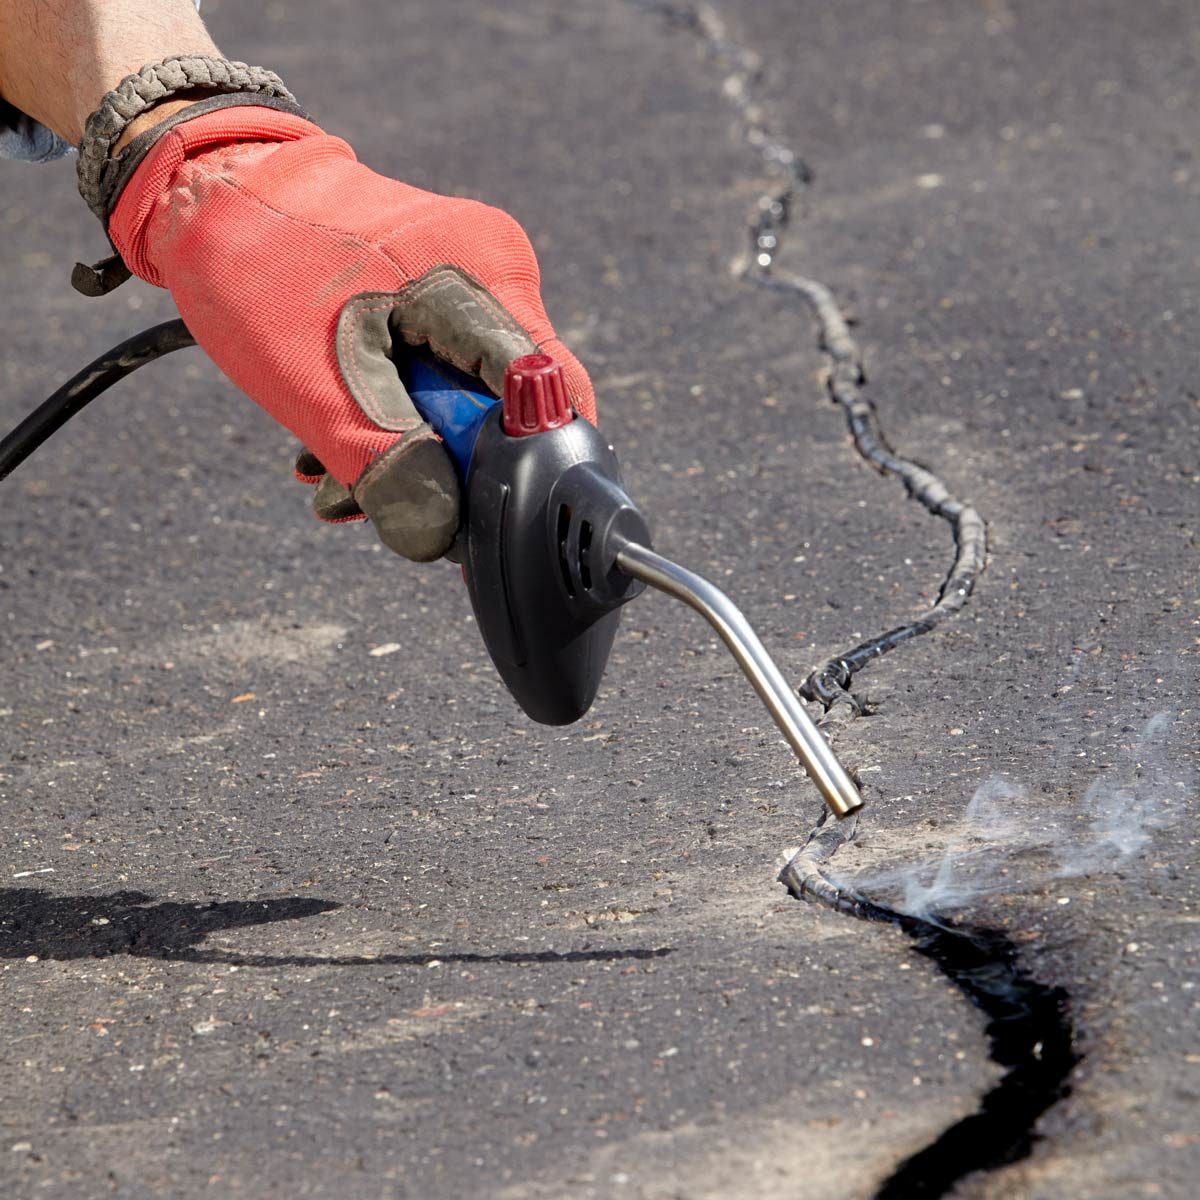
Applying a sealant is a crucial step in maintaining and protecting the surface of your newly installed asphalt driveway. A sealant acts as a protective barrier, shielding the asphalt from damage caused by UV rays, water, oil spills, and other external elements. It helps to prevent cracks, fading, and deterioration, ultimately extending the lifespan of your driveway.
Before applying the sealant, ensure that the asphalt has had enough time to cure. Typically, it is recommended to wait for at least 6 to 12 months after the installation of the asphalt before applying a sealant. Curing time may vary depending on the climate and the specific type of asphalt used, so it’s important to follow the manufacturer’s guidelines.
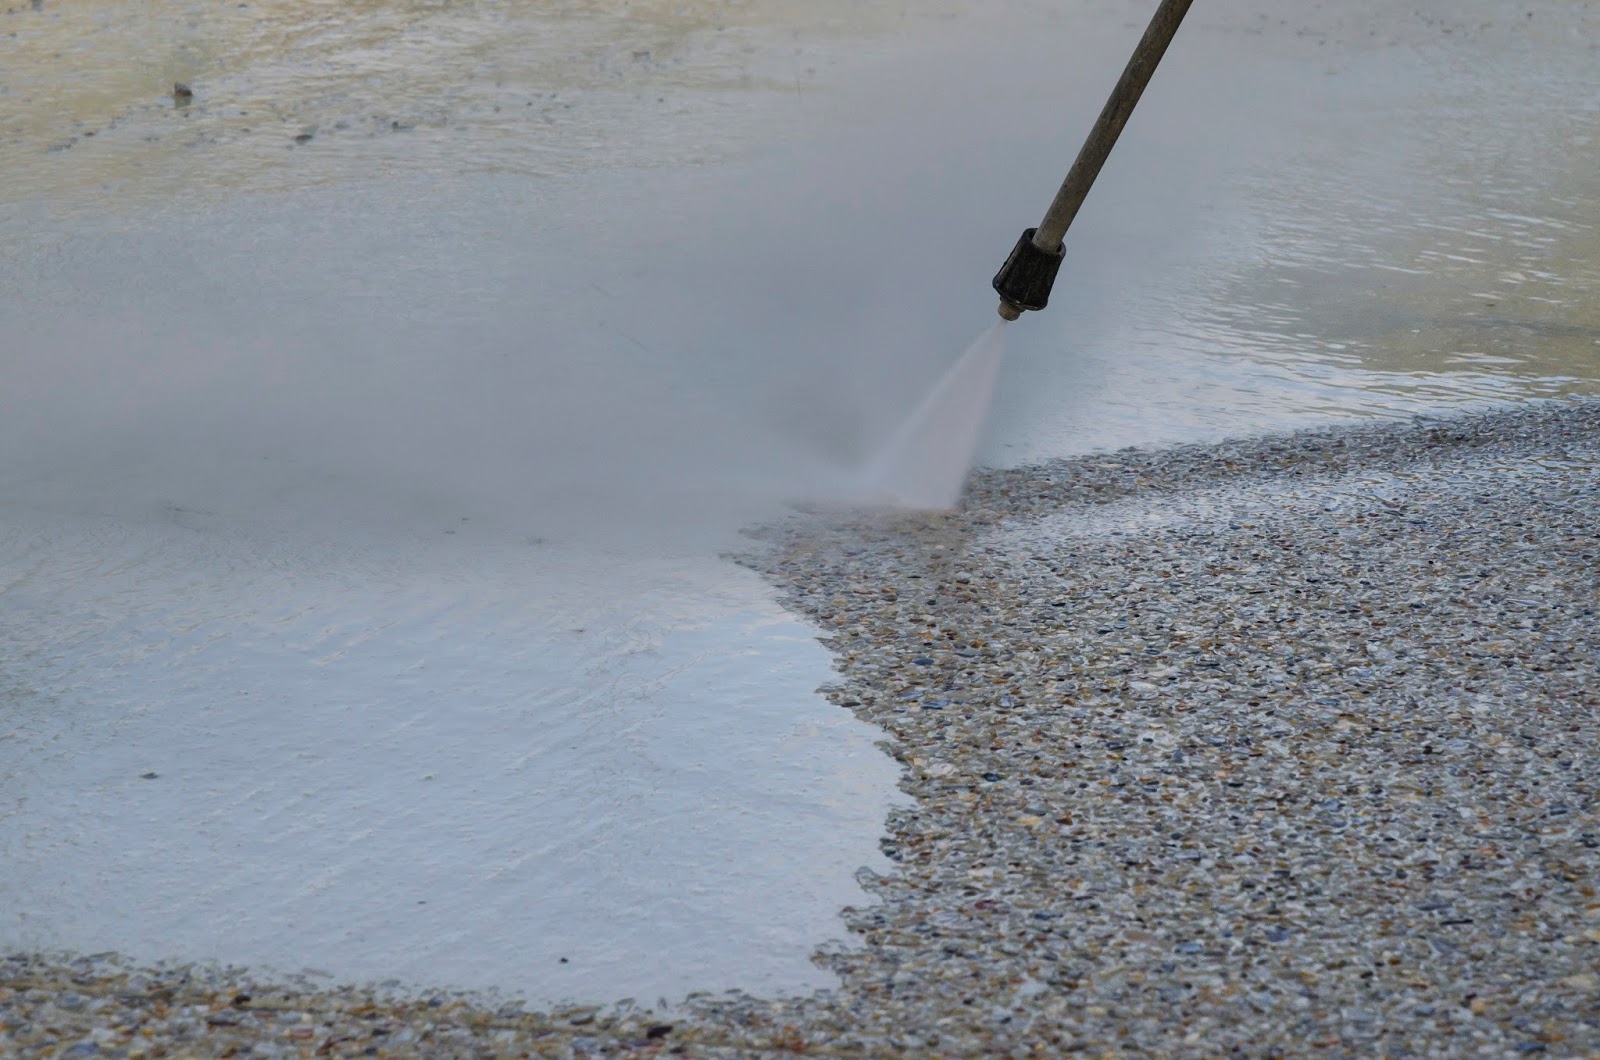
Start by cleaning the surface of the driveway to remove any debris, dirt, or oil spills. Use a broom, a pressure washer, or a scrub brush to thoroughly clean the entire area. Allow the driveway to dry completely before proceeding with the application of the sealant.
Choose a high-quality asphalt sealant that is suitable for your specific driveway and climate conditions. Follow the instructions provided by the manufacturer for the proper application process.
Using a brush, roller, or spray applicator, evenly apply the sealant to the surface of the asphalt. Work in small sections to ensure thorough coverage. Pay extra attention to any cracks or damaged areas, ensuring that the sealant fills in the gaps and provides an added layer of protection.
Allow the sealant to dry and cure according to the manufacturer’s instructions. This may typically take 24 to 48 hours, but it is essential to follow the specific recommendations for the sealant you are using.
Once the sealant has fully cured, your asphalt driveway will have an enhanced appearance and increased protection against the elements. Regularly inspect the surface of your driveway and apply a fresh coat of sealant every few years to maintain its integrity and longevity.
With the application of the sealant complete, your asphalt driveway is now fully constructed and protected. Proper maintenance and care will ensure that it continues to provide a durable and appealing surface for many years to come.
Step 10: Allow Time for Curing
After the completion of the asphalt driveway installation and the application of a sealant, it is crucial to allow sufficient time for the pavement to cure. Curing is the process by which the asphalt hardens, allowing it to reach its maximum strength and durability.
The curing time for an asphalt driveway can vary depending on various factors such as temperature, humidity, and the specific type of asphalt used. Typically, it is recommended to avoid any heavy traffic or parking on the newly installed driveway for at least 24 to 48 hours.
During the curing period, it’s essential to minimize any disturbances or activities that could potentially damage the surface. Avoid using sharp objects or heavy equipment on the asphalt, which may cause scratches or indentations. Also, be cautious when turning or maneuvering vehicles, as excessive turning can lead to premature wear and tear.
It is important to note that the full curing process can take several months or more. During this time, the asphalt will gradually harden and achieve its optimal strength. It’s crucial to be patient and allow the pavement to fully cure before subjecting it to heavy use or placing heavy objects on it.
While waiting for the asphalt to cure, it’s also a good opportunity to schedule regular maintenance for your driveway. This may include periodic cleaning to remove debris or dirt that could potentially harm the surface, and regular inspections for any signs of cracks or damage.
Proper maintenance and care over time will help to preserve the condition of your asphalt driveway and extend its lifespan. Regularly applying a sealant every few years and addressing any necessary repairs promptly will ensure that your driveway continues to provide a smooth and functional surface for years to come.
By allowing ample time for curing and implementing a proper maintenance routine, you can ensure that your asphalt driveway remains in excellent condition and stands the test of time.
With the final step of allowing time for curing complete, you can now enjoy your newly installed and fully cured asphalt driveway! Regular maintenance and care will keep it looking and functioning its best for many years ahead.
Conclusion
Congratulations on successfully completing the construction of your asphalt driveway! By following the step-by-step process outlined in this guide, you have created a durable, functional, and visually appealing surface for your property.
From preparing the ground and excavating the area to installing a sub-base, compacting the layers, and applying the asphalt mix, each step plays a vital role in ensuring the quality and longevity of your driveway.
Remember to allow sufficient time for the asphalt to cure and apply a sealant to protect the surface from damage caused by UV rays, water, and other elements. Regular maintenance and care, including periodic inspections and cleaning, will go a long way in preserving the strength and appearance of your driveway.
While this guide provides a comprehensive overview of the construction process, it’s important to note that hiring a professional asphalt contractor is highly recommended for optimal results. Experienced contractors have the necessary expertise, equipment, and knowledge to ensure a high-quality installation that meets your specific needs.
An asphalt driveway not only enhances the curb appeal of your property but also provides a smooth and functional surface for your vehicles. Proper construction and maintenance of your asphalt driveway will ensure its durability and long-lasting performance.
Now that you have completed the construction of your asphalt driveway, take pride in the beautiful and functional addition to your property. Enjoy the convenience and smooth driving experience it offers, while implementing the necessary maintenance to keep it in excellent condition for years to come.
Thank you for taking the time to follow this guide, and we wish you success with your newly constructed asphalt driveway!
Frequently Asked Questions about How To Make An Asphalt Driveway
Was this page helpful?
At Storables.com, we guarantee accurate and reliable information. Our content, validated by Expert Board Contributors, is crafted following stringent Editorial Policies. We're committed to providing you with well-researched, expert-backed insights for all your informational needs.


0 thoughts on “How To Make An Asphalt Driveway”