Home>Articles>How To Repair Crumbling Edges Of An Asphalt Driveway
Articles
How To Repair Crumbling Edges Of An Asphalt Driveway
Modified: December 7, 2023
Learn how to repair the crumbling edges of your asphalt driveway with our informative articles. Get expert tips and guidance for a long-lasting fix.
(Many of the links in this article redirect to a specific reviewed product. Your purchase of these products through affiliate links helps to generate commission for Storables.com, at no extra cost. Learn more)
Introduction
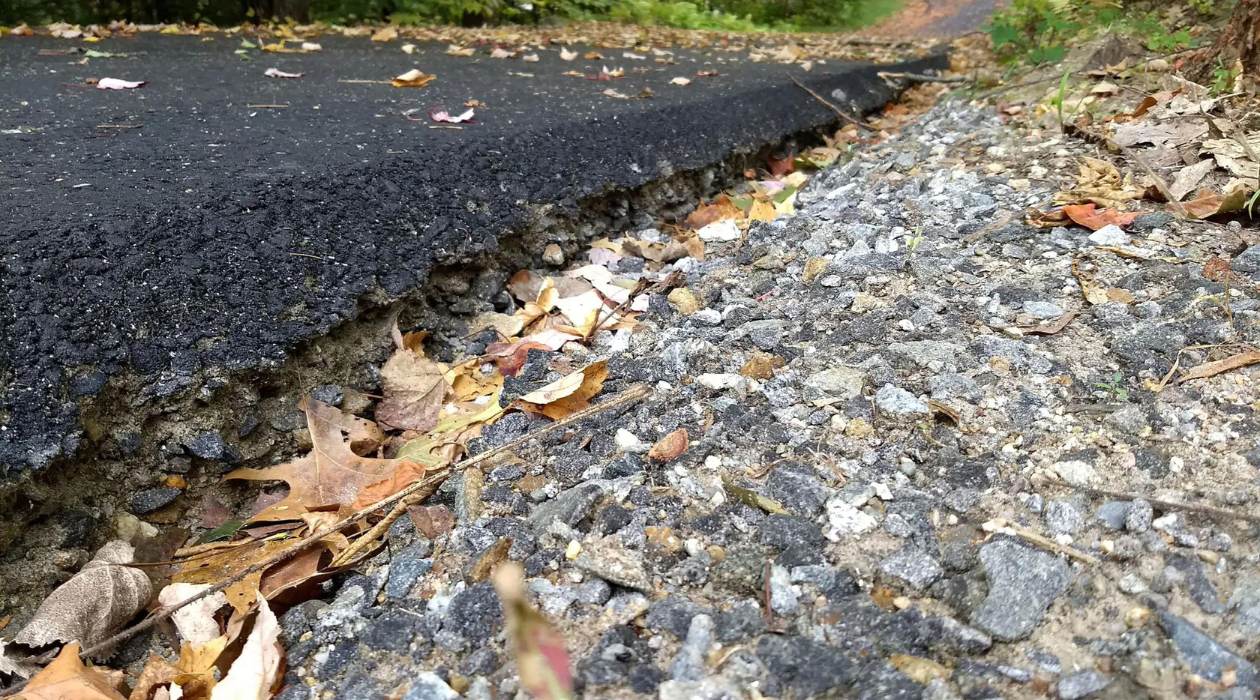
Having a well-maintained driveway not only enhances the curb appeal of your home but also ensures a smooth and safe experience for vehicles and pedestrians. However, over time, a common issue that many homeowners face is the crumbling edges of their asphalt driveway. This can be caused by various factors such as age, weather conditions, heavy traffic, or improper installation.
If you notice your asphalt driveway’s edges beginning to deteriorate, it’s essential to address the issue promptly to prevent further damage and potential safety hazards. In this article, we will guide you through the process of repairing the crumbling edges of your asphalt driveway, providing step-by-step instructions and useful tips to help you achieve a professional-looking result.
Key Takeaways:
- Address the issue of crumbling edges on your asphalt driveway promptly by understanding the causes, assessing the damage, and following a step-by-step repair process to achieve a professional-looking result.
- Regular maintenance, such as cleaning, sealing, and addressing cracks, is essential to prolong the lifespan of your asphalt driveway and prevent future damage, ensuring a safe and visually appealing entrance to your home.
Read more: How To Edge An Asphalt Driveway
Understanding the Cause of Crumbling Edges
Before diving into the repair process, it’s important to understand the underlying causes of the crumbling edges of your asphalt driveway. By identifying the root cause, you can take preventive measures to avoid future damage.
There are several factors that can contribute to the crumbling edges of an asphalt driveway:
- Age: As asphalt driveways age, they become more susceptible to wear and tear, including cracking and crumbling at the edges.
- Weather conditions: Extreme temperature fluctuations, frequent freeze-thaw cycles, and exposure to harsh weather elements can weaken the asphalt and lead to edge deterioration.
- Heavy traffic: If your driveway receives heavy vehicle traffic, such as large trucks or delivery vehicles, the constant weight and pressure can cause the edges to break and crumble over time.
- Improper installation: Poorly installed asphalt driveways, with inadequate compaction or insufficient edge support, are more likely to experience edge crumbling.
By understanding these causes, you can take preventive measures, such as regular maintenance and proper installation, to minimize the risk of future edge damage.
Additionally, it’s crucial to assess the severity of the crumbling edges before starting the repair process. If the damage is minor, you may be able to fix it yourself. However, if the damage is extensive or if you lack the necessary skills and tools, it’s advisable to seek professional assistance to ensure a long-lasting and effective repair.
Assessing the Damage
Before proceeding with any repairs, it’s essential to assess the extent of the damage to the crumbling edges of your asphalt driveway. This will help you determine the necessary steps and materials required to fix the problem effectively.
Here’s how you can assess the damage:
- Inspect the edges: Carefully examine the edges of your driveway to identify any signs of cracking, crumbling, or displacement. Pay close attention to the depth and width of the damage.
- Measure the affected area: Use a tape measure to determine the dimensions of the damaged section. This will help you estimate the amount of repair material you’ll need.
- Check for stability: Gently press down on the damaged edges to check for stability. If the edges feel loose or unstable, it may require additional steps, such as regrading or reinforcing with an edge support material.
- Consider the surrounding area: Take note of any nearby structures, such as flower beds or walls, that may be impacted by the repair process. Plan accordingly to protect these areas during the repair.
By thoroughly assessing the damage, you’ll have a better understanding of the scope of the repair and can proceed with the appropriate steps to restore the crumbling edges of your asphalt driveway.
Tools and Materials Needed
Repairing the crumbling edges of your asphalt driveway requires specific tools and materials to ensure a successful and long-lasting repair. Gathering the following items before you begin the repair process will help streamline the workflow and prevent any delays:
Tools:
- Protective gloves
- Safety goggles
- Chisel or pry bar
- Hammer
- Wire brush
- Asphalt crack filler or patching compound
- Trowel or putty knife
- Push broom or brush
- Compactor or tamper
- Sealant applicator or brush
Read more: How To Resurface An Asphalt Driveway
Materials:
- Clean water
- Asphalt edge support material (if necessary)
- Sand or gravel (for regrading)
- Asphalt sealant
Ensure that all your tools are in good condition and ready for use. Additionally, make sure to wear appropriate protective gear, such as gloves and goggles, to prevent injuries during the repair process.
Before purchasing any materials, take accurate measurements of the damaged area to estimate the quantity of asphalt crack filler, patching compound, or sealant needed. This will help you avoid shortages or excess materials.
By having all the necessary tools and materials at your disposal, you’ll be well-prepared to tackle the repair project efficiently and effectively.
Preparing the Driveway
Before you begin the actual repair process, it’s important to prepare the surface of your asphalt driveway. Proper preparation will ensure that the repair materials adhere securely and the repaired area blends seamlessly with the rest of the driveway. Follow these steps to prepare the driveway:
- Clean the area: Start by removing any debris, loose gravel, or vegetation from the damaged edges. Use a broom or brush to sweep away dirt and dust. For stubborn debris, use a wire brush to loosen it.
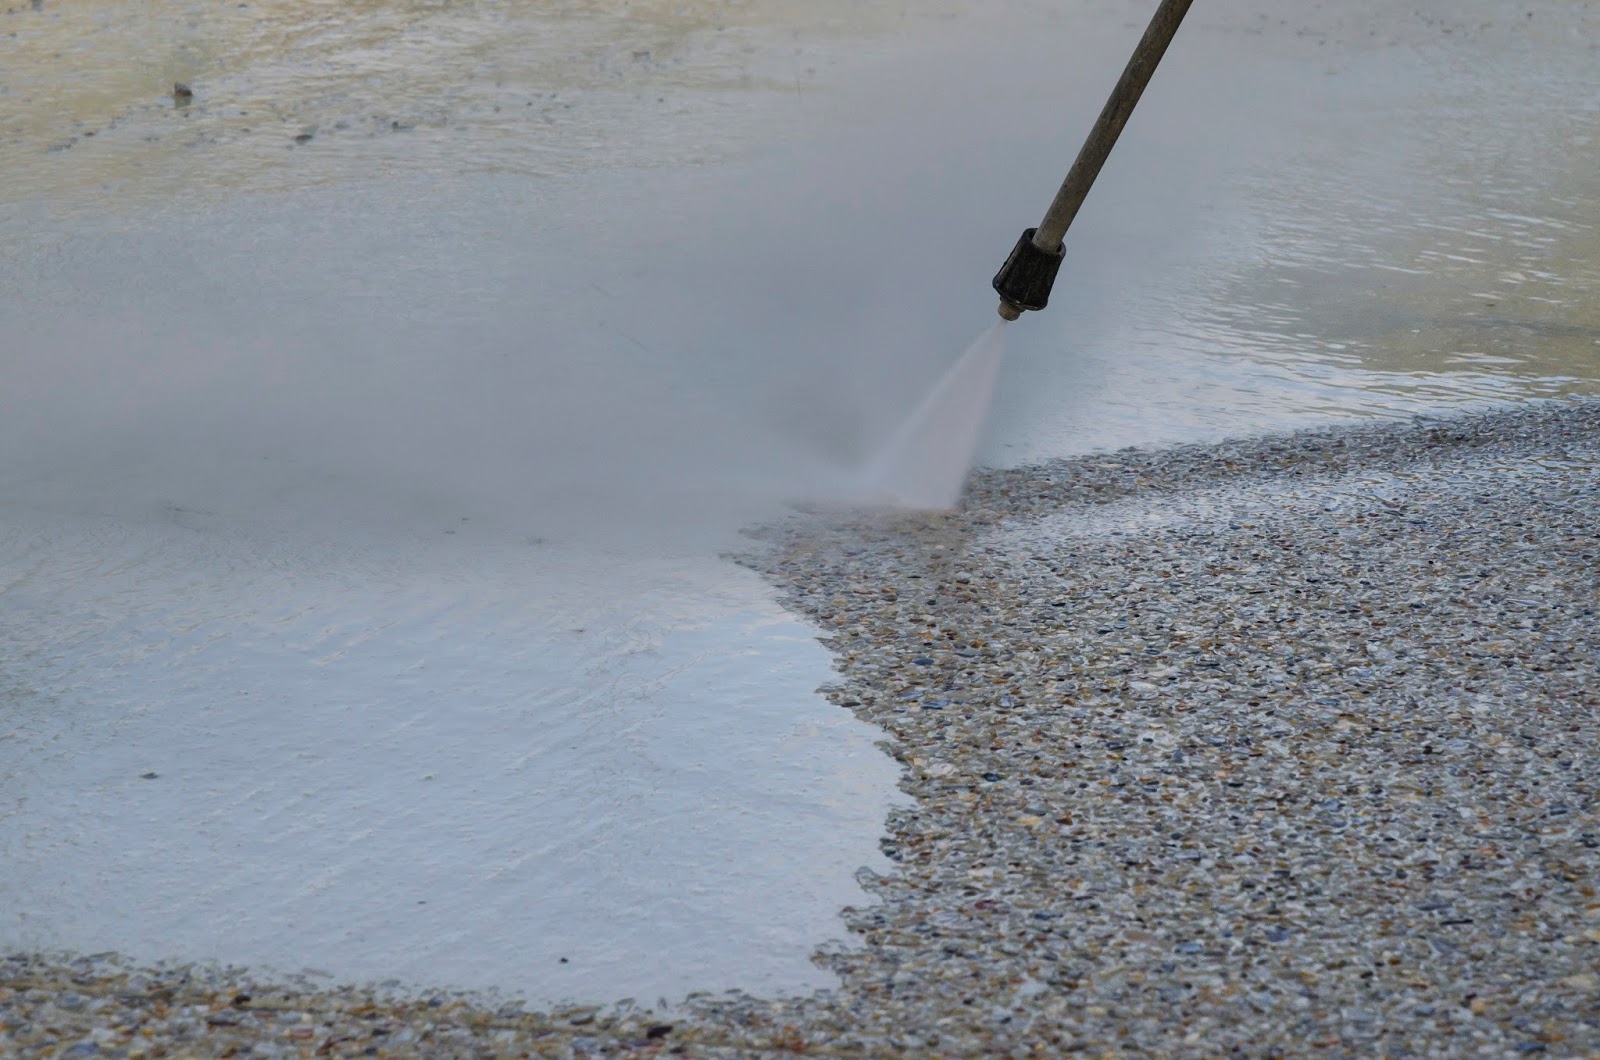
- Wash the surface: Thoroughly clean the entire driveway using a high-pressure washer or a hose with a spray nozzle attachment. This will remove any dirt, oil, or grease that may hinder the adhesion of the repair materials. Allow the driveway to fully dry before proceeding.
- Protect surrounding areas: If there are any nearby structures, such as flower beds or walls, that could be affected by the repair process, cover them with plastic sheets or drop cloths to prevent any accidental damage. Secure the covers with tape or weights.
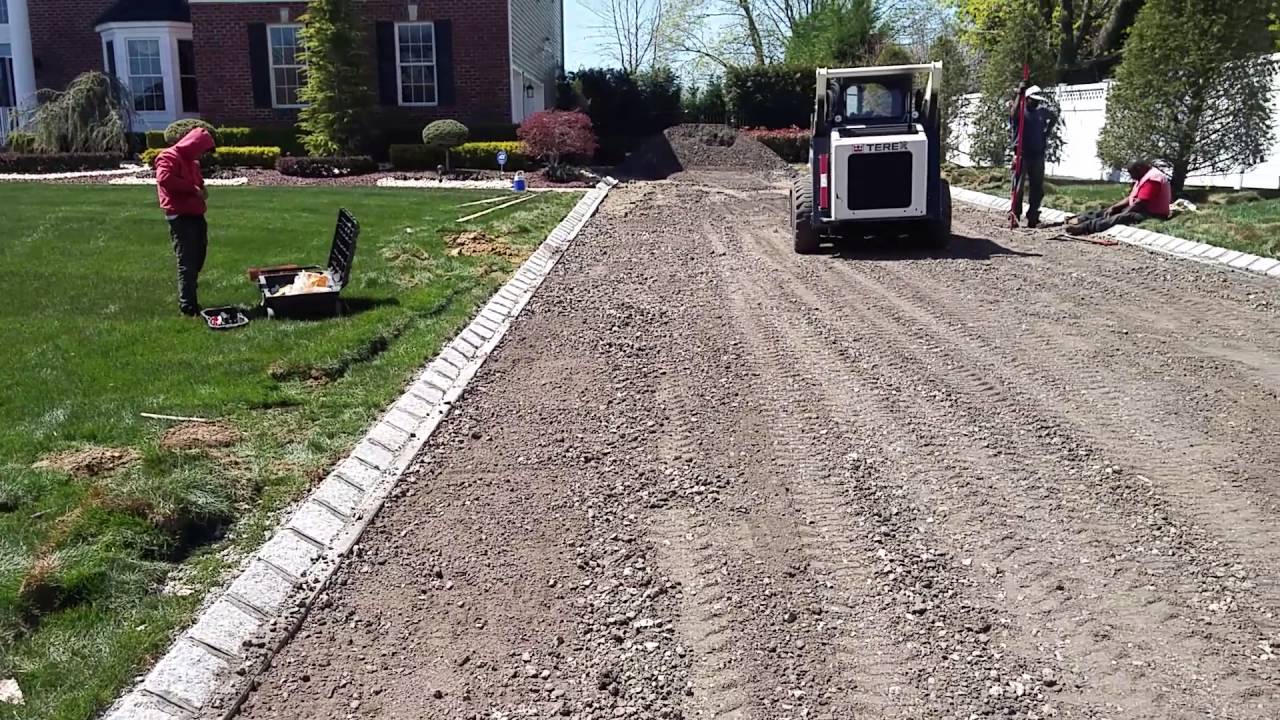
- Edge support (if required): If the edges of your driveway are significantly deteriorated and unstable, consider using an asphalt edge support material. This will provide extra stability and prevent future crumbling. Follow the manufacturer’s instructions to install the edge support material, ensuring it is properly secured.
- Regrade the edges (if needed): If the damaged area has caused an uneven slope or dip in your driveway, you may need to regrade the edges. Add sand or gravel to fill the low spots and create a smooth and even surface. Use a tamper or compactor to compact the material, ensuring it is level with the rest of the driveway.
By thoroughly cleaning the driveway, protecting surrounding areas, and addressing any instability or unevenness, you’ll create an optimal surface for the repair materials and set the stage for a successful repair of the crumbling edges of your asphalt driveway.
Removing Loose Asphalt
Once you have prepared the surface of your asphalt driveway, it’s time to remove any loose or damaged asphalt from the crumbling edges. This step is crucial to create a clean and stable base for the repair materials. Follow these steps to remove loose asphalt:
- Put on protective gear: Before you begin, ensure that you are wearing protective gloves and safety goggles to protect yourself from any flying debris.
- Inspect the damaged area: Carefully examine the crumbling edges and identify sections of loose or damaged asphalt. Pay close attention to any cracks or loose pieces that may need to be removed.
- Use a chisel or pry bar: Carefully insert a chisel or pry bar into the cracks or along the edges of the loose asphalt. Gently tap the tool with a hammer to loosen the asphalt pieces. Be cautious not to damage the surrounding area while doing this.
- Remove loose asphalt: Once loosened, use your hands or a gloved hand, to pry and remove the loose asphalt pieces. Dispose of the debris properly.
- Clean the area: After removing the loose asphalt, use a broom or brush to sweep away any remaining debris. If necessary, use a wire brush to clean any stubborn residue from the edges.
It’s important to remove all loose asphalt to ensure a strong bond between the repair materials and the existing asphalt. By taking the time to properly clean and clear away any loose or damaged asphalt, you’ll create a solid base for the next steps of the repair process.
Filling the Cracks
Once you have removed the loose asphalt from the crumbling edges of your driveway, the next step is to fill in the cracks to create a smooth and even surface. Filling the cracks will help prevent further deterioration and ensure a durable repair. Follow these steps to fill the cracks:
- Choose the right filler: Select a suitable asphalt crack filler or patching compound from your local hardware store. Make sure to choose a product that is specifically designed for asphalt repairs and compatible with the climate conditions in your area.
- Read the instructions: Carefully read and follow the manufacturer’s instructions for the specific crack filler you have chosen. This will ensure proper application and optimal performance.
- Clean the cracks: Use a wire brush or a high-pressure washer to clean out any debris or loose material from the cracks. Make sure the cracks are completely dry before proceeding.
- Apply the crack filler: Using a trowel or putty knife, apply the crack filler into the cracks. Push the filler deep into the cracks to ensure proper adhesion and compact it as you go. Smooth the surface of the filler to create a level finish.
- Allow drying time: Follow the manufacturer’s instructions regarding the recommended drying time for the crack filler. This will vary depending on the product and environmental conditions. Avoid walking or driving on the filled cracks until they are completely dry.
By filling the cracks with an appropriate crack filler, you’ll prevent the further spread of damage and create a smoother surface for the next steps of the repair process. Make sure to give ample time for the crack filler to dry before proceeding to the next steps.
Apply a liquid crack filler to the crumbling edges of the asphalt driveway to seal and repair the damaged areas. This will prevent further deterioration and extend the life of the driveway.
Read more: What Is An Asphalt Driveway
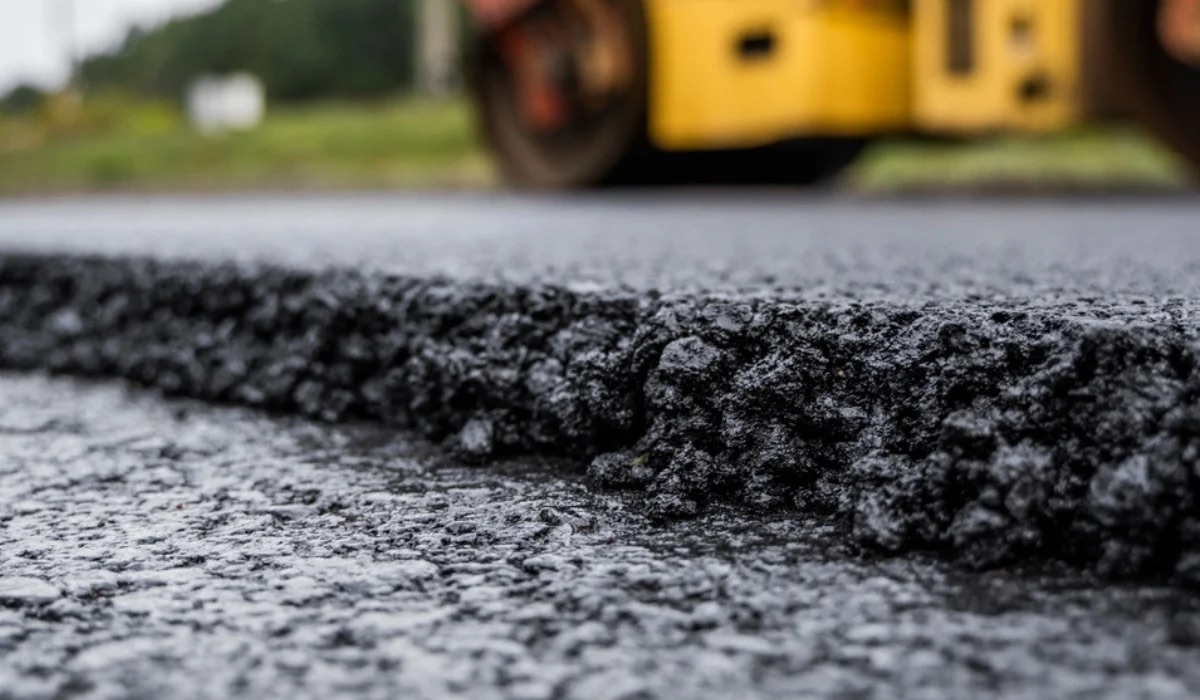
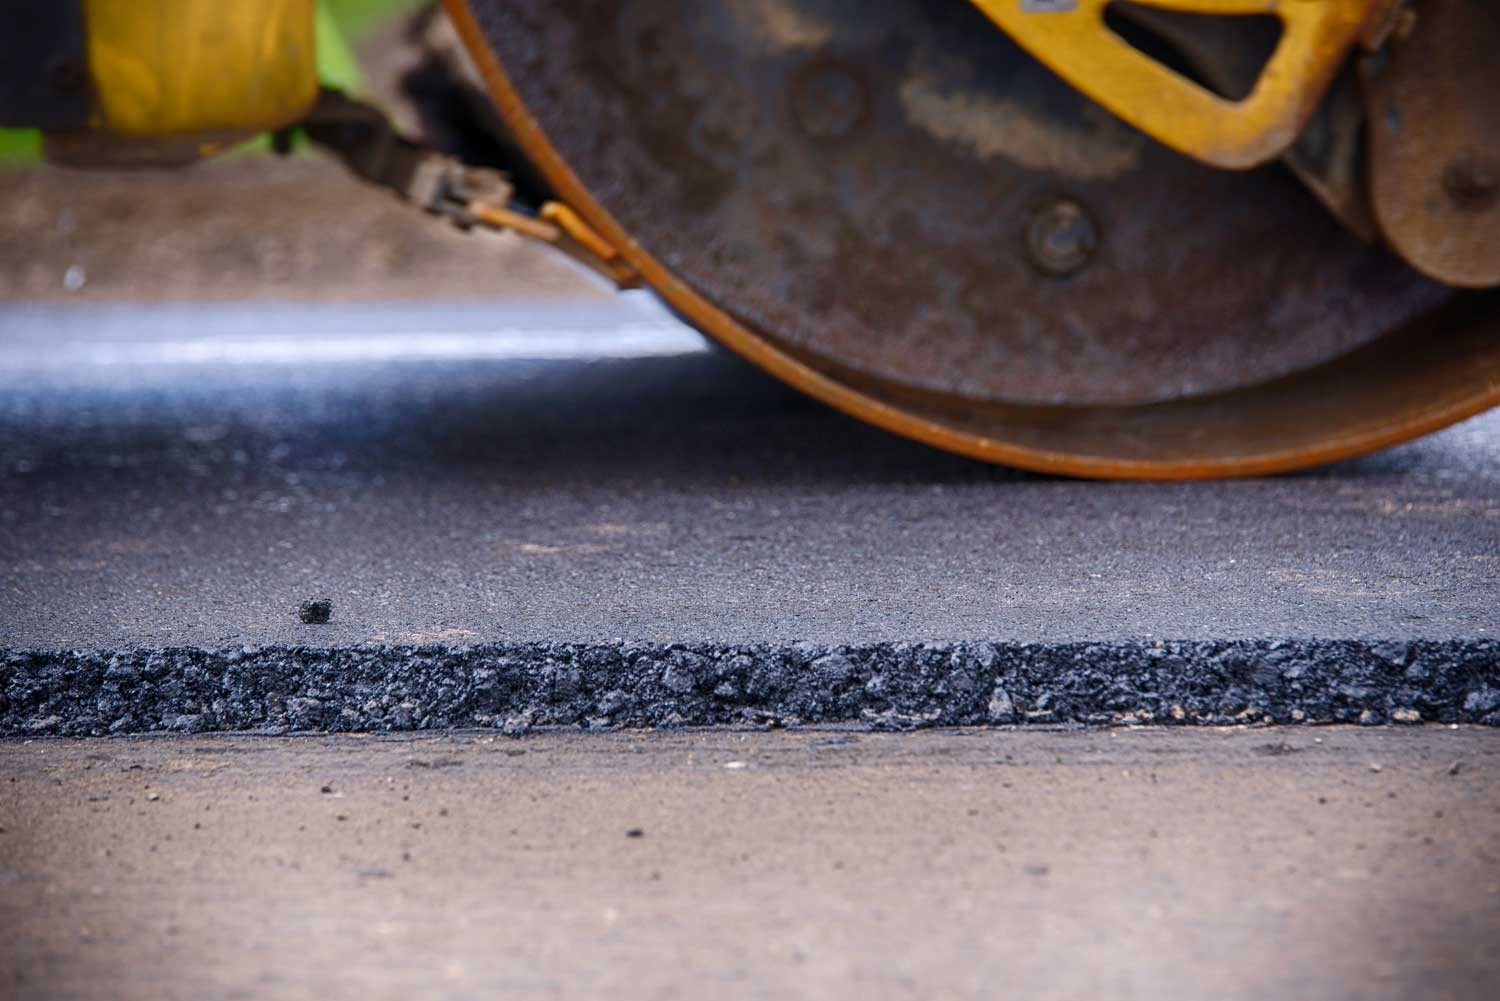
Compact and Level the Edges
After filling the cracks in the crumbling edges of your asphalt driveway, it’s crucial to compact and level the repaired area. This step ensures that the edges are sturdy, even, and well-integrated with the rest of the driveway. Follow these steps to compact and level the edges:
- Prepare the compactor or tamper: If you have a compactor or tamper, make sure it is in good working condition. Adjust the settings or attachments according to the manufacturer’s instructions for optimal performance.
- Start compacting: Begin compacting by gently tapping the compactor or tamper along the repaired edges. Work from the outer edges towards the center to evenly distribute pressure and ensure a consistent level. Continue compacting until the repaired edges feel stable and solid.
- Check for levelness: Use a level or straightedge to check the level of the repaired edges. Adjust as needed by adding or removing filler material. The repaired edges should be flush with the rest of the driveway to create a seamless appearance and a smooth surface for vehicles.
- Reapply filler if necessary: If there are any gaps or low spots in the repaired edges, reapply the crack filler or patching compound. Use a trowel or putty knife to fill in the gaps and create a level surface.
- Allot drying time: Once the compacting and leveling process is complete, allow the repaired edges to dry and cure fully. Refer to the manufacturer’s instructions for the recommended drying time.
By compacting and leveling the repaired edges of your asphalt driveway, you will ensure a stable and visually appealing surface that withstands the test of time. Take the time to check for levelness and make any necessary adjustments to achieve the desired result.
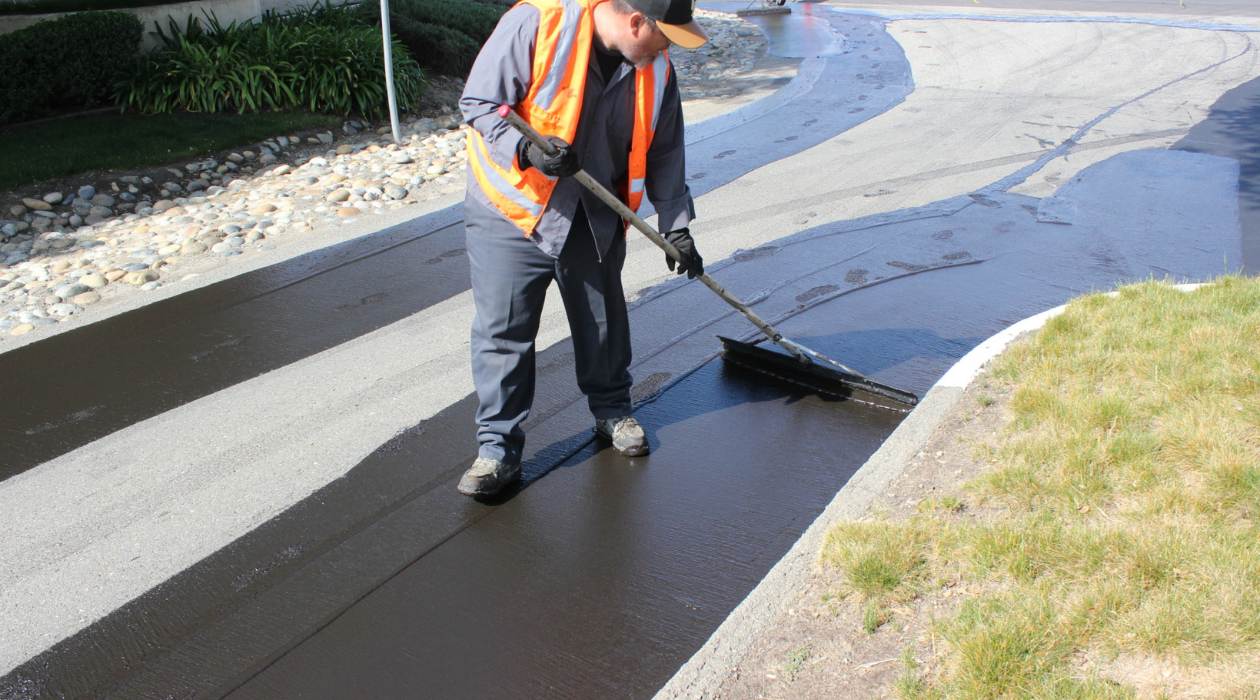
Sealing the Repaired Area
After completing the process of repairing the crumbling edges of your asphalt driveway, it’s important to seal the repaired area. Sealing helps protect the repaired edges from further damage caused by moisture, UV rays, and other environmental factors. Follow these steps to seal the repaired area:
- Select the right sealant: Choose a high-quality asphalt sealant that is suitable for your climate and driveway conditions. Look for a sealant that is specifically designed for asphalt surfaces.
- Read the instructions: Carefully read and follow the manufacturer’s instructions regarding the application of the sealant. Different sealants may have specific requirements, such as temperature, drying time, and application method.
- Prepare the area: Clean the repaired edges of any debris, dust, and loose materials. Use a broom or brush to sweep away any surface dirt or debris.
- Apply the sealant: Use an applicator brush or sealant applicator to apply a thin and even coat of sealant to the repaired edges. Start from one end and work your way towards the other, ensuring complete coverage. Avoid excessive application as it may lead to uneven drying and clumping.
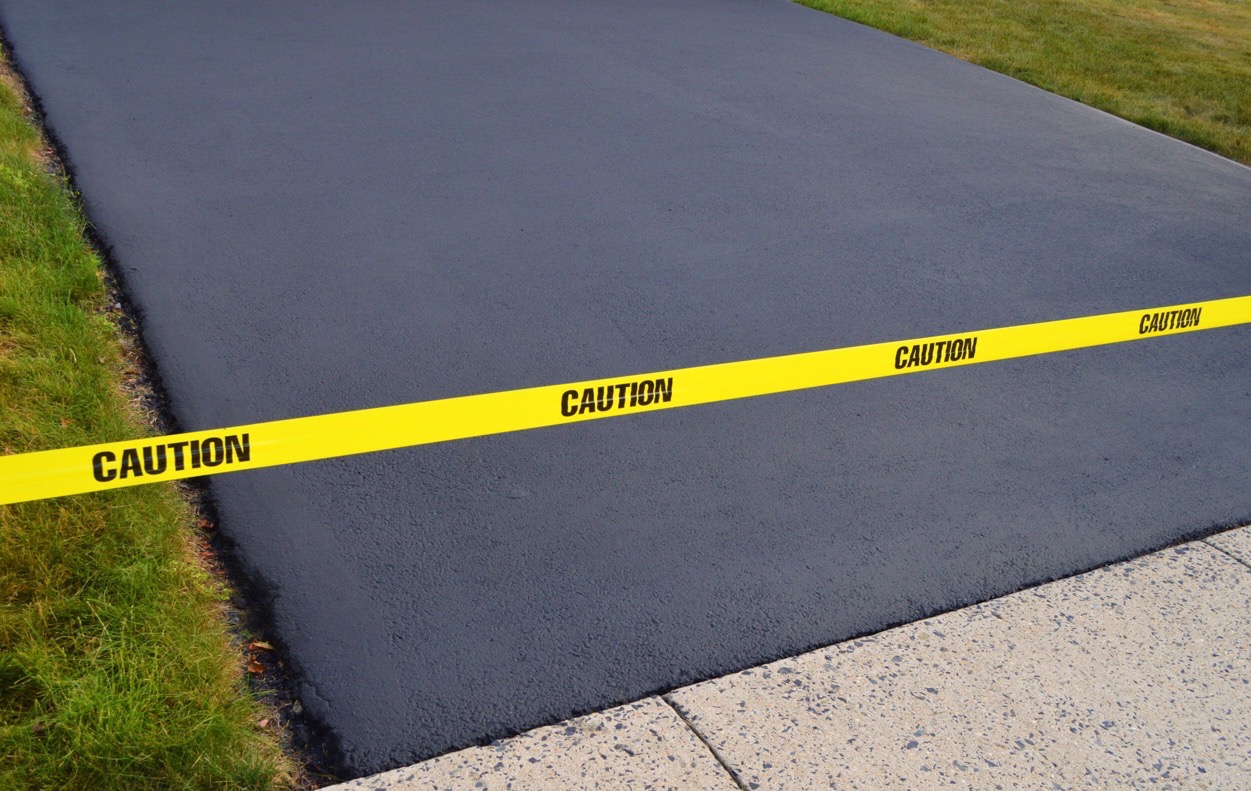
- Allow drying time: Follow the manufacturer’s instructions regarding the recommended drying time for the sealant. Typically, it may take a few hours to a day for the sealant to dry completely. During this time, avoid walking or driving over the sealed area.
- Apply a second coat (optional): Depending on the condition of your driveway, you may choose to apply a second coat of sealant for added protection. Follow the same application process as before, allowing sufficient drying time between coats.
- Maintain the sealed area: Regularly inspect the sealed area for any signs of wear or damage. Perform routine maintenance, such as cleaning, resealing, or filling any new cracks, to ensure the longevity of the repairs.
Sealing the repaired area of your asphalt driveway provides an extra layer of protection against future damage and helps maintain its appearance. Follow the manufacturer’s instructions and take the necessary precautions to ensure a successful and long-lasting sealant application.
Maintaining the Asphalt Driveway
Once you have successfully repaired the crumbling edges of your asphalt driveway, it’s important to implement regular maintenance practices to keep it in optimal condition. Proper maintenance will help prolong the lifespan of your driveway and prevent future issues. Here are some maintenance tips to follow:
- Clean regularly: Sweep or use a leaf blower to remove dirt, leaves, and debris from the surface of your driveway. Regular cleaning prevents the buildup of materials that can deteriorate the asphalt.
- Address spills immediately: If you notice any oil, gasoline, or other spills on your driveway, take immediate action to clean them up. Use a degreaser or detergent specifically designed for asphalt surfaces to remove the stains.
- Fill in cracks: Inspect your driveway regularly for any new cracks that may develop. Promptly fill in these cracks using an appropriate asphalt crack filler or patching compound to prevent them from expanding.
- Reapply sealant: Over time, the protective sealant on your driveway may wear off. Reapply a fresh coat of sealant every few years to maintain its effectiveness. Follow the manufacturer’s instructions for the recommended resealing frequency.
- Avoid heavy loads: Try to limit the parking of heavy vehicles, such as trucks or RVs, on your driveway. Heavy loads can cause stress and damage to the asphalt surface.
- Protect from sharp objects: Be mindful of sharp or heavy objects that may scratch or dent the asphalt surface. Avoid dragging metal equipment or tools across the driveway and place protective mats or boards under kickstands to distribute weight.
- Remove snow and ice carefully: When clearing snow or ice from your driveway, use a plastic shovel or snow blower with rubber blades to prevent damage to the asphalt surface. Avoid using metal shovels or ice chippers that can scrape and gouge the driveway.
- Inspect drainage: Ensure that water drains properly from your driveway. Clear any clogged or blocked drainage systems to prevent standing water, as it can damage the asphalt and contribute to cracking and deterioration.
- Professional inspections: Consider having your asphalt driveway inspected by a professional every few years. They can identify any underlying issues, recommend repairs, and provide guidance on maintenance practices.
By implementing these maintenance practices, you’ll extend the life of your asphalt driveway, preserve its appearance, and reduce the likelihood of encountering future problems. Regular care and attention will keep your driveway in excellent condition for years to come.
Conclusion
Repairing the crumbling edges of your asphalt driveway is a crucial step in maintaining its functionality and aesthetic appeal. By understanding the causes of the damage and assessing its extent, you can take the necessary steps to address the issue effectively. Through proper preparation, removing loose asphalt, filling cracks, compacting and leveling, and sealing the repaired area, you can achieve a professional-looking result.
However, the work does not end with the repair process. Regular maintenance is vital to ensure the longevity of your asphalt driveway. By regularly cleaning, addressing spills, filling cracks, reapplying sealant, and taking precautions to protect the surface, you can prolong the lifespan of your driveway and prevent future damage.
Remember, if the damage is extensive or if you’re unsure about the repair process, it’s always advisable to seek professional assistance. They can provide expert guidance, ensure proper repairs, and offer valuable advice on maintaining your asphalt driveway.
By investing time and effort into repairing and maintaining the crumbling edges of your asphalt driveway, you can enjoy a smooth, safe, and visually appealing driveway for years to come. So, take the necessary steps, follow the guidelines, and keep your driveway in optimal condition to enhance the curb appeal of your home and create a welcoming entrance for both vehicles and pedestrians.
Frequently Asked Questions about How To Repair Crumbling Edges Of An Asphalt Driveway
Was this page helpful?
At Storables.com, we guarantee accurate and reliable information. Our content, validated by Expert Board Contributors, is crafted following stringent Editorial Policies. We're committed to providing you with well-researched, expert-backed insights for all your informational needs.


0 thoughts on “How To Repair Crumbling Edges Of An Asphalt Driveway”