Articles
How To Resurface An Asphalt Driveway
Modified: January 18, 2024
Learn the step-by-step process of resurfacing your asphalt driveway with our informative articles. Increase curb appeal and extend the lifespan of your driveway.
(Many of the links in this article redirect to a specific reviewed product. Your purchase of these products through affiliate links helps to generate commission for Storables.com, at no extra cost. Learn more)
Introduction
An asphalt driveway is a great addition to any home, providing a smooth and durable surface for vehicles to drive and park on. However, over time, the constant exposure to elements such as sunlight, rain, and freezing temperatures can cause the asphalt to deteriorate. Cracks, potholes, and rough patches can appear, making your driveway not only unattractive but also potentially hazardous.
If your asphalt driveway is showing signs of wear and tear, resurfacing it can be a cost-effective solution to restore its appearance and functionality. By applying a fresh layer of asphalt, you can fill in any cracks or holes, level the surface, and provide a smooth and attractive finish.
In this article, we will guide you through the step-by-step process of resurfacing an asphalt driveway. Whether you are a DIY enthusiast looking to tackle a home improvement project or simply want to learn more about the resurfacing process, this guide will provide you with the information you need to get started.
Before you begin the resurfacing process, it’s important to assess the condition of your driveway and determine if resurfacing is the right solution. In some cases, a driveway may be beyond repair and require a complete replacement. However, if the damage is manageable and limited to surface issues, resurfacing can be a viable option.
So, grab your tools and let’s get started on giving your asphalt driveway a new lease on life!
Key Takeaways:
- Resurfacing an asphalt driveway involves evaluating, repairing, cleaning, and applying a new layer of asphalt. Proper curing and sealing are crucial for durability and longevity.
- By following the step-by-step guide, you can transform a worn-out asphalt driveway into a visually appealing and structurally sound space, enhancing the curb appeal of your home.
Read more: What Is An Asphalt Driveway
Step 1: Evaluate the Condition of Your Driveway
Before embarking on the resurfacing process, it’s crucial to evaluate the condition of your driveway. This will help you determine the extent of the damage and whether resurfacing is the appropriate solution. Here are a few key factors to consider:
- Cracks: Examine your driveway for any cracks. Small, hairline cracks may be superficial and can be easily filled during the resurfacing process. However, if there are larger cracks or multiple cracks throughout the surface, it could be an indication of deeper structural issues that may require professional repair.
- Potholes: Check for any potholes in your driveway. Potholes are not only unsightly but can also pose a safety risk. If there are extensive potholes or the depth of the potholes exceeds a few inches, it may require patching or repair before resurfacing.
- Surface damage: Assess the overall condition of the surface. Look for areas that are rough, uneven, or worn down. Surface damage can occur due to heavy traffic, harsh weather conditions, or simply the age of the driveway. Resurfacing can effectively address surface damage and create a smooth, uniform appearance.
- Drainage issues: Check if there are any drainage issues with your driveway. Poor drainage can lead to water pooling and further damage to the asphalt. Addressing drainage issues before resurfacing is essential to ensure the longevity of the new surface.
- Foundation stability: Evaluate the stability of the foundation beneath your driveway. If there are signs of sinking, shifting, or major cracks in the underlying surface, resurfacing may not be sufficient. In such cases, it’s advisable to consult a professional to evaluate and address any structural problems.
By thoroughly assessing the condition of your driveway, you can make an informed decision about whether resurfacing is the right approach or if additional repairs or a full replacement are necessary. It’s important to prioritize the long-term durability and safety of your driveway to avoid future issues.
Once you’ve evaluated the condition of your driveway and determined that resurfacing is the appropriate solution, you can move on to the next step of the process: clearing the driveway.
Step 2: Clear the Driveway
Now that you’ve assessed the condition of your driveway and confirmed that resurfacing is the right approach, it’s time to clear the area before starting the actual resurfacing process. Clearing the driveway ensures that there are no obstacles or debris that could interfere with the resurfacing and affect the final outcome.
Here are the steps to clear your driveway:
- Remove any vehicles: Park any vehicles that are on the driveway in an alternative location. This will provide you with ample space and accessibility to work on the resurfacing process without any hindrances.
- Clear loose debris: Use a broom or a leaf blower to remove any loose debris such as leaves, dirt, or gravel from the surface of the driveway. This will help create a clean working area and prevent any debris from being trapped under the new asphalt layer.
- Trim vegetation: If there are any bushes, plants, or overhanging branches along the edges of your driveway, trim them back to create clear boundaries. This will make it easier to apply the resurfacing layer evenly and avoid any unwanted interference.
- Repair or remove obstructions: Take a closer look at the driveway and identify any obstructions or obstacles that may need attention. This could include any loose pavers, stones, or edging materials that might interfere with the resurfacing process. Repair or remove these obstructions as necessary.
- Clean oil or grease stains: If there are any oil or grease stains on the driveway, it’s important to clean them before proceeding with the resurfacing. Use a degreaser or a detergent specifically designed for removing oil stains, and follow the instructions for best results.
Clearing the driveway sets the stage for a smooth and successful resurfacing process. It ensures that the new layer of asphalt adheres properly and results in a clean and professional finish. Once the driveway is cleared, you can move on to the next step: repairing cracks and holes.
Step 3: Repair Cracks and Holes
Before proceeding with the resurfacing process, it’s essential to repair any cracks and holes in your driveway. Filling these imperfections ensures a sturdy and smooth surface for the new layer of asphalt. Here are the steps to repair cracks and holes:
- Clean the damaged area: Start by thoroughly cleaning the cracks and holes using a stiff brush and a high-pressure hose. Remove any loose debris, dirt, or vegetation that may be present. This will create a clean surface for the repair material to adhere to.
- Fill small cracks: For hairline cracks or cracks that are less than a quarter-inch wide, use a crack filler or asphalt patching compound. Apply the filler using a trowel or putty knife, ensuring that it completely fills the crack and is level with the surrounding surface. Smooth out the filler and allow it to dry according to the manufacturer’s instructions.
- Repair larger cracks and holes: For wider cracks or holes, you may need to use a cold patch asphalt repair product. Follow the product instructions to prepare the cold patch and apply it to the damaged area. Use a tamper or a hand compactor to compact the patch and create a smooth and even surface. Allow the patch to cure according to the manufacturer’s recommendations.
- Ensure proper adhesion: To promote proper adhesion of the new asphalt layer, it’s recommended to apply a bonding agent to the repaired cracks and holes. The bonding agent helps to create a strong bond between the existing asphalt and the new layer, ensuring a seamless and durable surface.
- Inspect the repairs: After the repair work is complete, carefully inspect the repaired cracks and holes to ensure that they are level and well-filled. If necessary, add additional filler or cold patch to any areas that require further attention.
Repairing cracks and holes in your driveway is a crucial step in the resurfacing process. It helps to prevent further damage and ensures a smooth and level surface for the new layer of asphalt. Once the repairs have been made, you can move on to the next step: cleaning the surface.
Step 4: Clean the Surface
Properly cleaning the surface of your driveway is essential to ensure a successful resurfacing. Cleaning removes dirt, debris, and any lingering contaminants, allowing the new layer of asphalt to adhere properly. Here are the steps to clean the surface of your driveway:
- Sweep the driveway: Begin by sweeping the entire surface of the driveway with a broom or a leaf blower. This will remove loose dirt, leaves, and other debris. Pay special attention to corners and edges where debris may accumulate.
- Pressure wash: Use a pressure washer to thoroughly clean the surface of the driveway. Start from one end and work your way to the other, ensuring that you cover the entire area. Use a high-pressure setting to remove stubborn stains, dirt, and grime. Keep the nozzle at a safe distance to avoid damaging the existing asphalt.
- Remove oil stains: If there are any oil or grease stains on the driveway, apply an oil stain remover according to the product instructions. Scrub the stains using a stiff brush or a broom, focusing on the affected areas. Rinse off the stain remover thoroughly with clean water.
- Treat stubborn stains: For stubborn stains that are resistant to pressure washing alone, consider using a commercial degreaser or detergent specifically formulated for asphalt driveways. Follow the product instructions and scrub the stains using a brush or a broom. Rinse off the detergent thoroughly with clean water.
- Let the driveway dry: After cleaning, allow the driveway to dry completely. Depending on the weather conditions, this may take a few hours or even a full day. Ensure that the surface is completely dry before moving on to the next steps.
Cleaning the surface of your driveway ensures that the new layer of asphalt will adhere properly and result in a smooth and professional finish. It’s important to remove all dirt, debris, and stains to achieve optimal resurfacing results. Once the surface is clean and dry, you can proceed to the next step: applying a bonding agent.
Read more: How To Clean An Asphalt Driveway
Step 5: Apply a Bonding Agent
Applying a bonding agent to your driveway is an important step in the resurfacing process. The bonding agent helps create a strong bond between the existing asphalt and the new layer, ensuring better adhesion and durability. Here’s how to apply a bonding agent:
- Choose the right bonding agent: Select a high-quality bonding agent that is specifically designed for asphalt surfaces. Follow the manufacturer’s instructions and recommendations for the best results.
- Prepare the driveway: Before applying the bonding agent, make sure the surface of the driveway is clean and free from any dust or debris. If necessary, you can lightly wet the surface to remove any remaining particles and enhance the adhesion of the bonding agent.
- Mix the bonding agent: Follow the instructions provided by the manufacturer to mix the bonding agent properly. Some bonding agents may require dilution with water, while others can be used directly without any additional preparation.
- Apply the bonding agent: Using a brush or a roller, apply the bonding agent evenly to the entire surface of the driveway. Make sure to cover all areas, including cracks, edges, and corners. Apply a generous coat of the bonding agent to ensure proper adhesion.
- Allow the bonding agent to dry: After applying the bonding agent, let it dry according to the manufacturer’s instructions. The drying time can vary depending on the specific product and weather conditions. It’s essential to allow sufficient drying time to ensure maximum bonding effectiveness.
Applying a bonding agent creates a strong bond between the existing asphalt and the new layer, resulting in a more durable and long-lasting resurfacing. It provides a solid foundation for the next step in the process: applying the resurfacing layer to your driveway.
Regularly sealcoating your asphalt driveway can help to protect it from the elements and extend its lifespan. Make sure to follow the manufacturer’s recommendations for frequency of sealcoating.
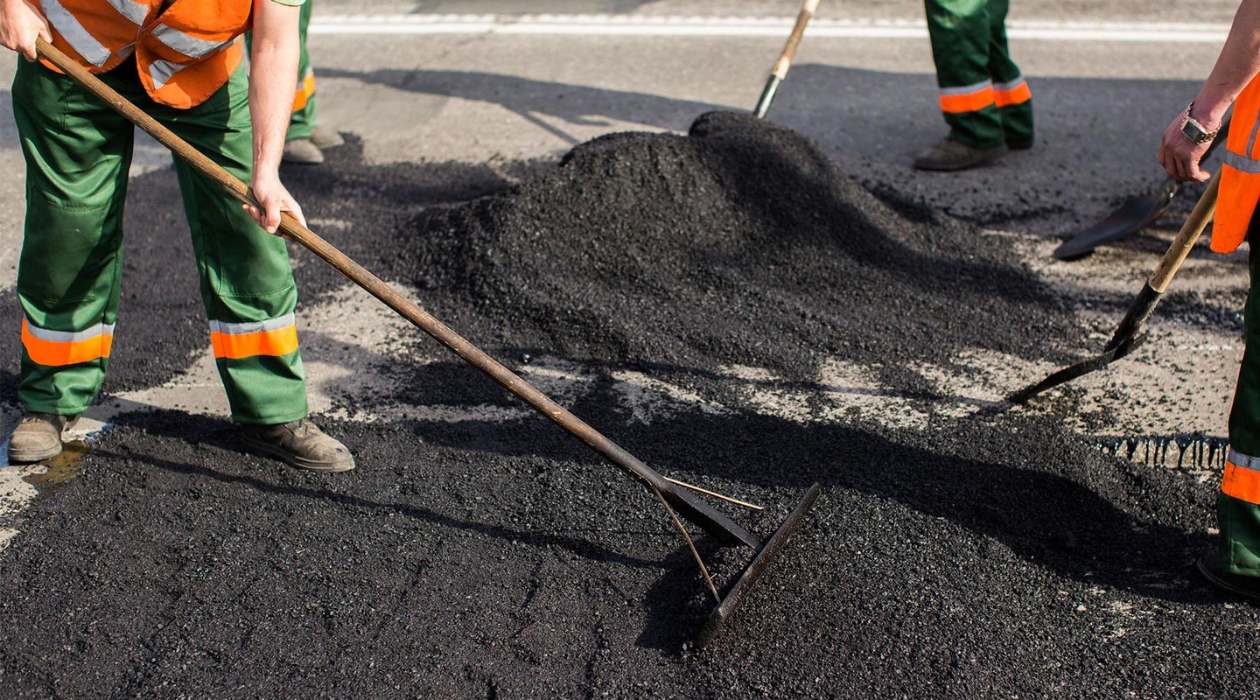
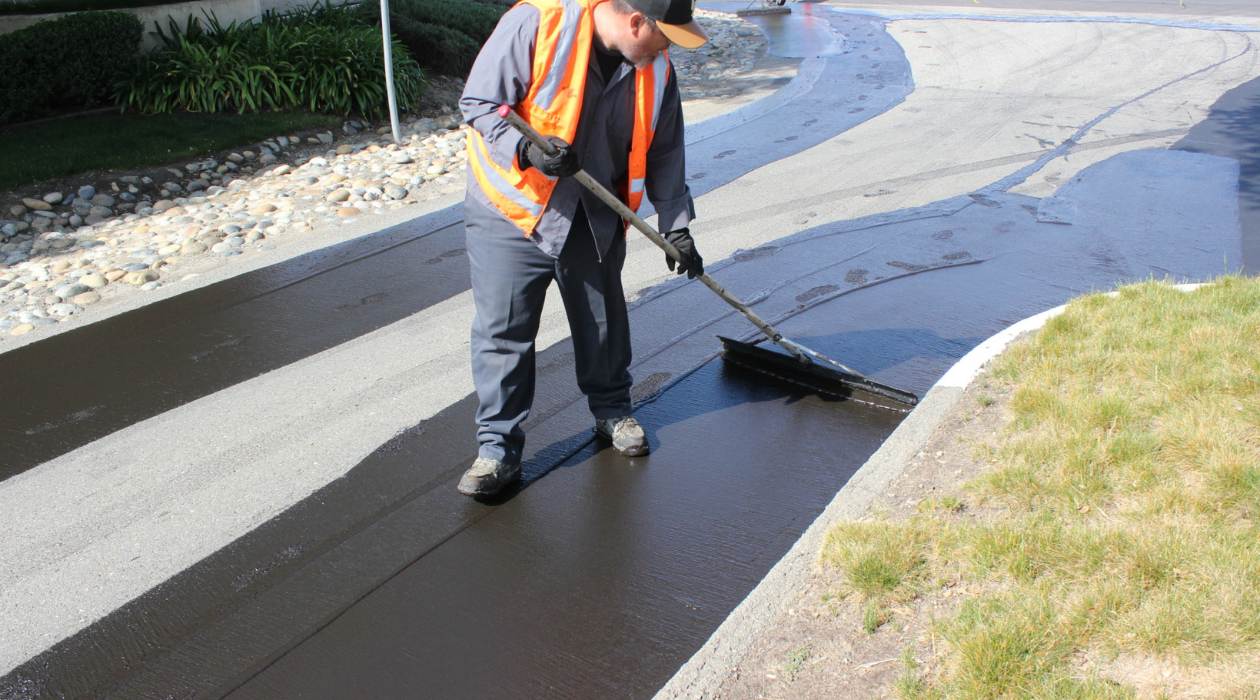
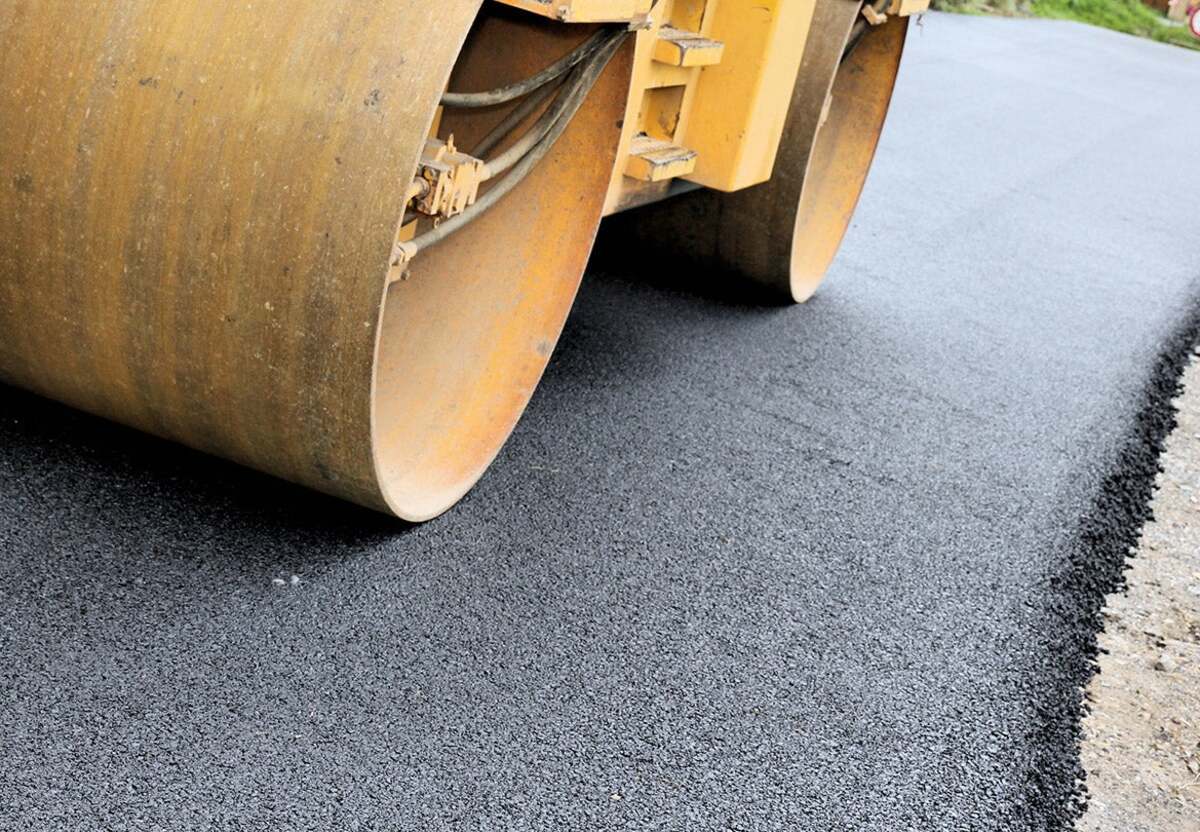
Step 6: Apply the Resurfacing Layer
Now that you’ve prepared the surface of your driveway and applied the bonding agent, it’s time to apply the resurfacing layer. This layer will give your driveway a fresh and attractive appearance while also providing a smooth and durable surface. Here’s how to apply the resurfacing layer:
- Choose the right resurfacing material: Select a high-quality asphalt resurfacing material that is specifically designed for driveways. Consider factors such as climate, traffic, and durability when making your choice.
- Mix the resurfacing material: Follow the manufacturer’s instructions to mix the resurfacing material properly. Some products may come pre-mixed, while others may require mixing with water or another additive. Ensure that the mixture is well-blended and free from any lumps or clumps.
- Apply the resurfacing material: Using a trowel or a squeegee, apply the resurfacing material to the driveway. Start from one end and work your way to the other, ensuring even coverage. Spread the material in a thin and consistent layer, taking care to fill in any cracks or depressions in the surface.
- Smooth the surface: Once you’ve applied the resurfacing material, use a long-handled squeegee or a broom to smooth out the surface. This will help to create an even and level finish. Pay close attention to any areas that may require additional smoothing or leveling.
- Allow the resurfacing layer to dry: The drying time for the resurfacing layer can vary depending on the specific product and weather conditions. Follow the manufacturer’s instructions for the recommended drying time. It’s important to allow sufficient drying time to ensure that the new layer sets and hardens properly.
Applying the resurfacing layer is a crucial step in the driveway resurfacing process. It provides a fresh surface that enhances the visual appeal of your driveway while also ensuring durability and longevity. Once the resurfacing layer has dried, you can move on to the next step: smoothing and leveling the surface.
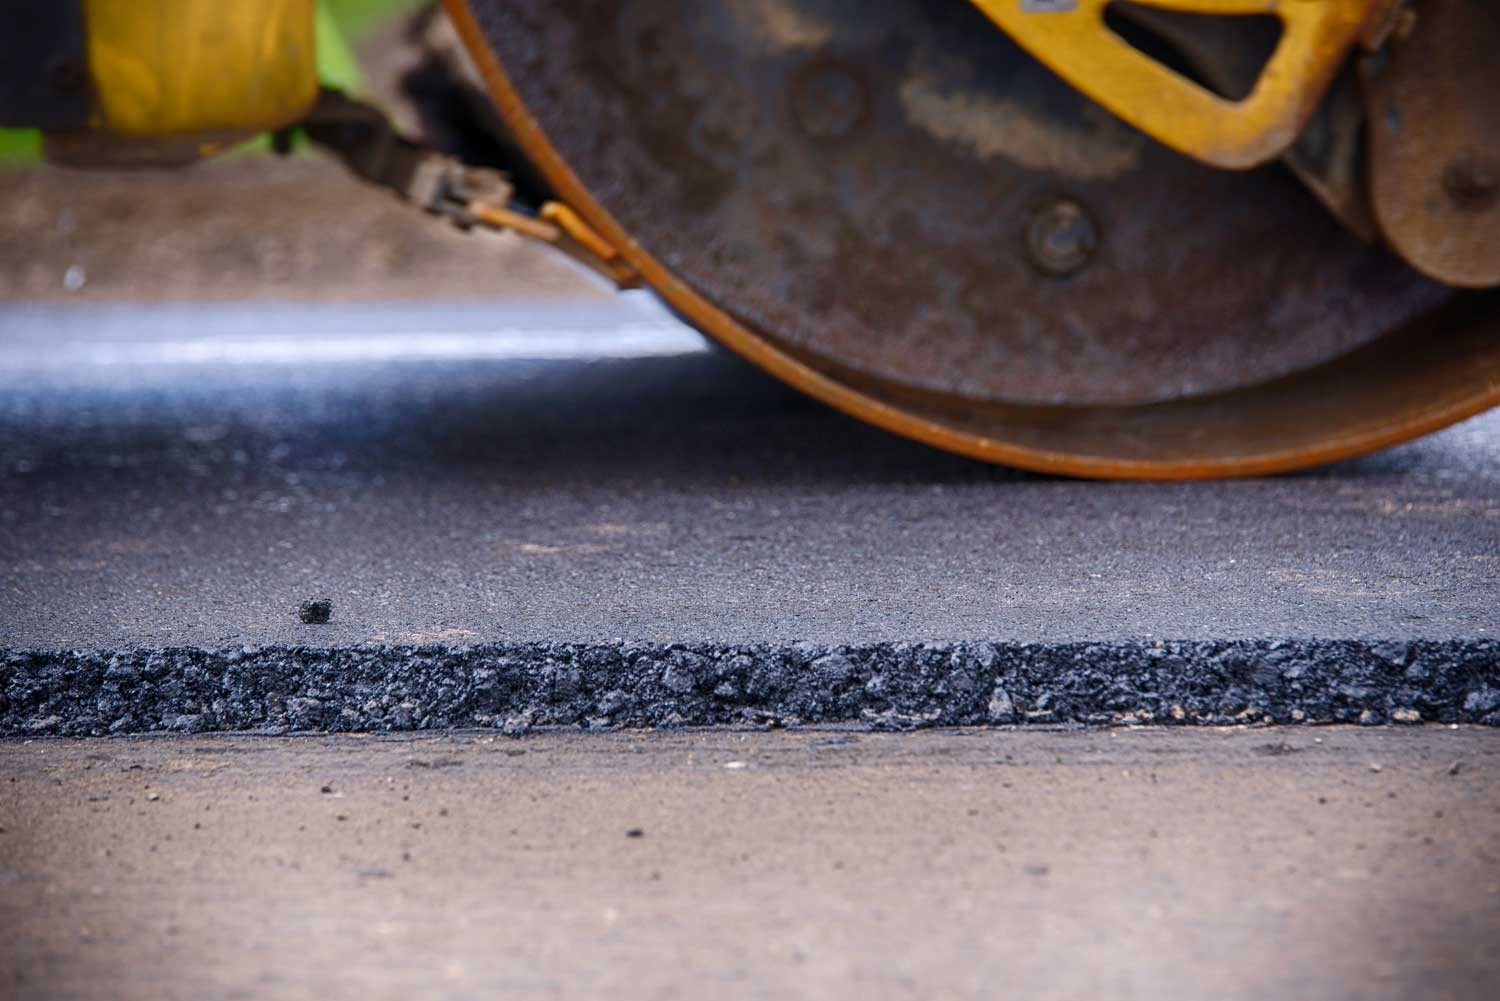
Step 7: Smooth and Level the Surface
After applying the resurfacing layer to your driveway, it’s important to smooth and level the surface to ensure a professional and seamless finish. This step will help create a smooth and even surface that is free from any imperfections. Here’s how to smooth and level the surface:
- Inspect the resurfaced area: Carefully examine the resurfaced area for any unevenness, bumps, or ridges. Identify any areas that require additional smoothing or leveling before proceeding.
- Use a hand tamper: For small areas or localized imperfections, use a hand tamper to compact and level the resurfacing material. Gently tamp down any high spots and fill in any low spots to create a more uniform surface.
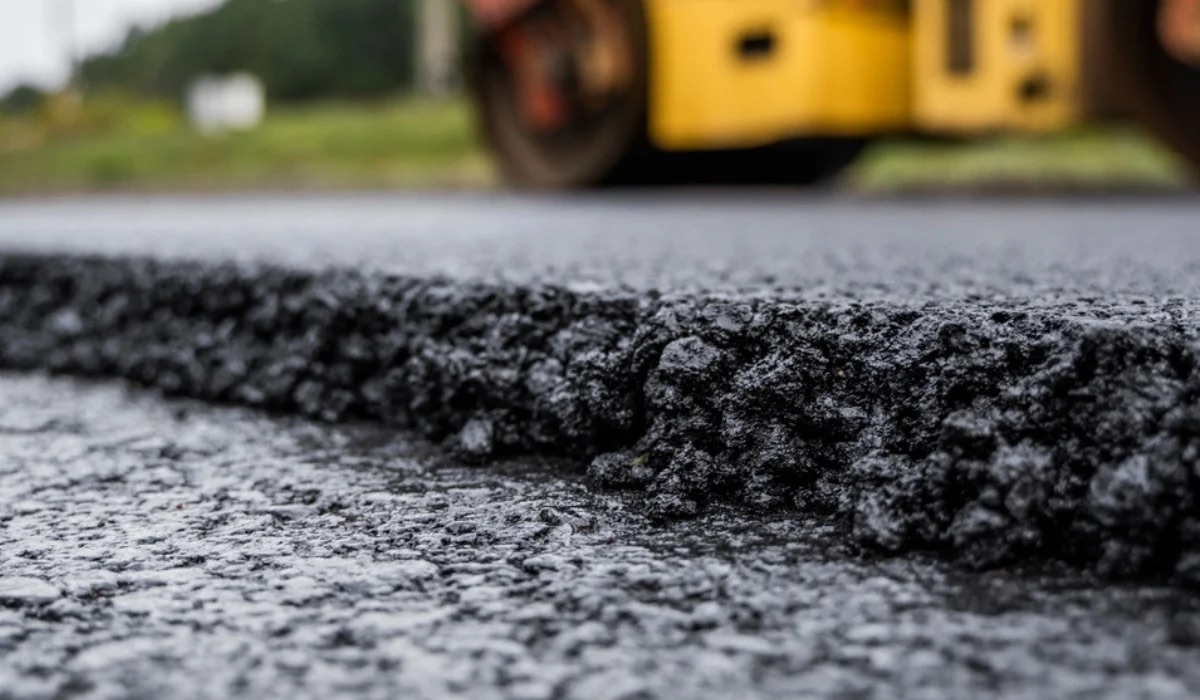
- Utilize a driveway roller: If you have a larger area to smooth and level, consider using a driveway roller. This equipment helps evenly distribute the weight and pressure, ensuring a more consistent surface. Roll over the resurfaced area at least two to three times, applying gentle pressure to achieve the desired levelness.
- Pay attention to edges and corners: Use a trowel or a hand tool to carefully smooth and level the edges and corners of your driveway. Pay close attention to these areas as they are prone to unevenness and require extra care to achieve a seamless finish.
- Perform a final inspection: After smoothing and leveling the surface, conduct a final inspection of your driveway. Check for any remaining imperfections or irregularities. Address any visible issues and make necessary adjustments to ensure a smooth and visually appealing result.
Smoothing and leveling the surface of your driveway is an essential step in the resurfacing process. It helps create a seamless and uniform appearance, enhancing the overall aesthetic appeal of your driveway. Once you’re satisfied with the smoothness and levelness of the surface, you can proceed to the next step: allowing for proper curing.
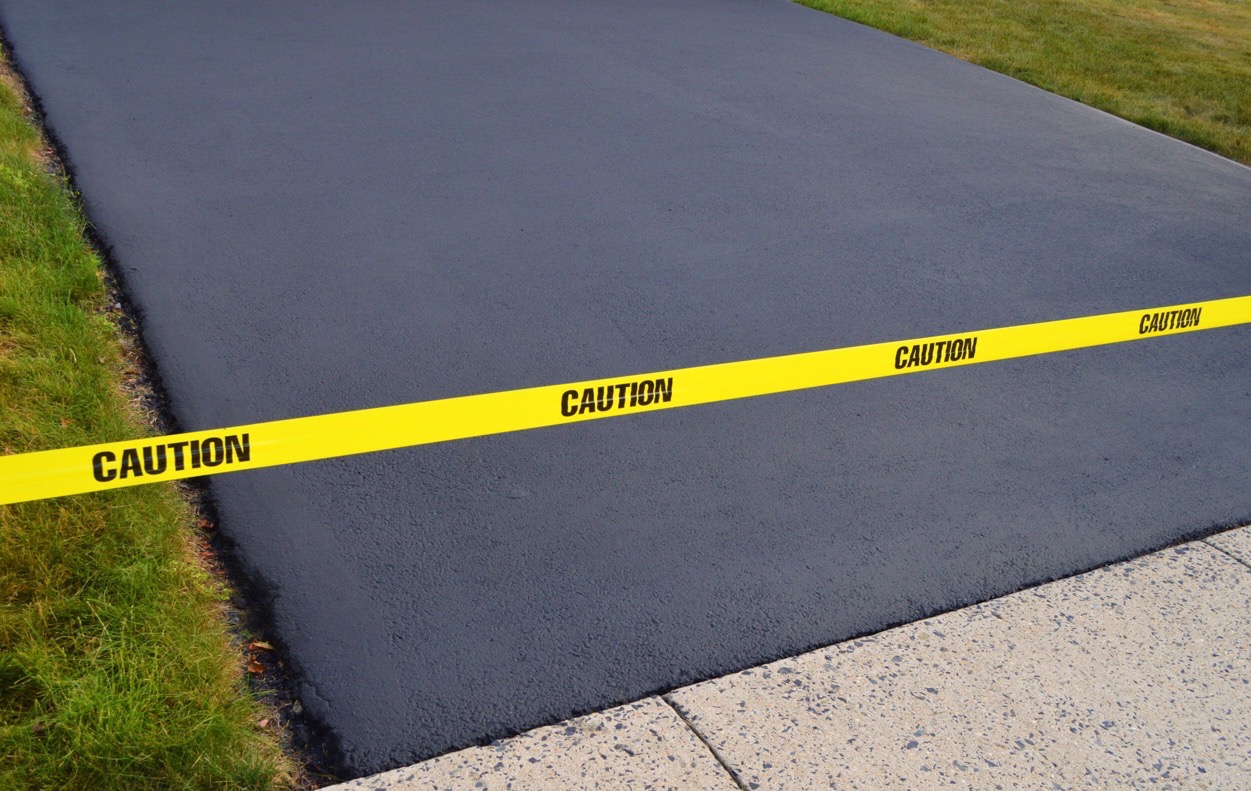
Step 8: Allow for Proper Curing
After resurfacing and smoothing your driveway, it’s crucial to allow sufficient time for the new layer to cure and harden. Proper curing is essential to ensure the longevity and durability of the resurfaced surface. Here’s how to allow for proper curing:
- Follow manufacturer’s instructions: Refer to the manufacturer’s recommendations for the specific resurfacing material you used. They will provide guidance on the ideal curing time. It’s important to follow these instructions closely to ensure optimal results.
- Avoid traffic: During the curing process, it’s important to keep vehicles and heavy traffic off the resurfaced area. Excessive weight and movement can damage the newly applied layer and prevent proper curing. Make necessary arrangements for alternative parking or access to avoid any premature wear and tear.
- Protect from moisture: While the resurfacing layer is curing, it’s essential to protect it from excessive moisture. Avoid watering or irrigating the area, and ensure that drainage is in place to prevent standing water. Moisture can weaken the curing process and lead to poor adhesion and durability.
- Allow adequate time: The curing time can vary depending on various factors such as weather conditions, humidity, and the type of resurfacing material used. In general, it’s recommended to allow at least 24 to 48 hours for the resurfacing layer to cure. However, in some cases, longer curing times may be required.
- Monitor weather conditions: Be mindful of weather conditions during the curing process. Extreme heat, heavy rain, or freezing temperatures can disrupt the curing process and affect the quality of the resurfaced surface. If necessary, make adjustments to your resurfacing schedule or take preventive measures to protect the curing layer.
Proper curing is crucial to ensure that the resurfaced driveway becomes strong, durable, and ready for regular use. By allowing sufficient time and taking necessary precautions, you can ensure that your resurfaced driveway will withstand the test of time. Once the curing process is complete, you can move on to the final step: sealing the driveway.
Read more: How To Resurface A Concrete Driveway
Step 9: Seal the Driveway
The final step in the driveway resurfacing process is to seal the newly resurfaced surface. Sealing the driveway not only enhances its appearance but also provides an extra layer of protection against elements such as UV rays, moisture, and automotive fluids. Here’s how to seal your driveway:
- Clean the surface: Before applying the sealer, ensure that the surface of the driveway is clean and free from debris. Sweep or use a leaf blower to remove any loose dirt or particles that may hinder the sealer’s effectiveness.
- Select the right sealer: Choose a high-quality driveway sealer that is suitable for the type of asphalt used in your driveway. Consider factors such as the climate in your area and the level of durability and protection required.
- Apply the sealer: Use a roller or a sprayer to apply an even and consistent layer of sealer to the entire surface of the driveway. Work in small sections, starting from one end and gradually moving towards the other. Take care to avoid over-application or pooling of the sealer.
- Follow manufacturer’s instructions: Follow the manufacturer’s recommendations for drying time and any specific instructions for the sealer product you’re using. Generally, it’s advisable to allow the sealer to dry for at least 24 hours or as directed by the manufacturer.
- Maintain the sealed driveway: Regular maintenance is essential to ensure the longevity of your sealed driveway. Avoid using harsh chemicals or abrasive cleaners that can damage the sealer. Clean any spills or stains promptly and inspect the driveway periodically for any signs of wear or damage.
Sealing your driveway provides an added layer of protection, giving it a fresh and new appearance while extending its lifespan. Regularly reapplying the sealer, based on the manufacturer’s recommendations, will help maintain the integrity and aesthetic appeal of your driveway for years to come.
With the completion of the sealing process, you have successfully completed the driveway resurfacing journey. Enjoy the beauty and functionality of your newly resurfaced driveway!
Conclusion
Resurfacing an asphalt driveway is a rewarding project that can revitalize the appearance and functionality of your outdoor space. By following the step-by-step guide outlined in this article, you can confidently tackle the resurfacing process and achieve professional results.
Throughout the journey, we have emphasized the importance of evaluating the condition of your driveway, clearing the area, repairing cracks and holes, cleaning the surface, applying a bonding agent, and applying the resurfacing layer. These steps ensure a smooth and even surface that is both visually appealing and structurally sound.
Additionally, we have highlighted the significance of allowing for proper curing and sealing the driveway. These final steps provide protection and longevity to your resurfaced driveway, ensuring that it withstands the test of time and remains a functional and attractive feature of your home.
Remember, safety is paramount throughout the process. Follow all safety guidelines and precautions while working with the necessary tools, materials, and equipment. If you are unsure or feel overwhelmed, it is always best to seek professional assistance to ensure the best outcome.
With proper maintenance and periodic inspections, your resurfaced driveway will serve you well for many years. Enjoy the smooth and inviting surface as you effortlessly navigate your vehicles and welcome guests to your home.
We hope this comprehensive guide has equipped you with the knowledge and confidence to embark on your driveway resurfacing project. Embrace the opportunity to transform your worn-out asphalt driveway into a stunning and functional space that enhances the curb appeal of your home.
Good luck, and may your resurfacing journey be a success!
Frequently Asked Questions about How To Resurface An Asphalt Driveway
Was this page helpful?
At Storables.com, we guarantee accurate and reliable information. Our content, validated by Expert Board Contributors, is crafted following stringent Editorial Policies. We're committed to providing you with well-researched, expert-backed insights for all your informational needs.


0 thoughts on “How To Resurface An Asphalt Driveway”