Articles
How To Make Your Own Bento Lunch Box
Modified: January 6, 2024
Learn how to make your own bento lunch box with this informative guide! Discover tips, tricks, and articles on creating delicious and nutritious meals for on-the-go convenience.
(Many of the links in this article redirect to a specific reviewed product. Your purchase of these products through affiliate links helps to generate commission for Storables.com, at no extra cost. Learn more)
Introduction
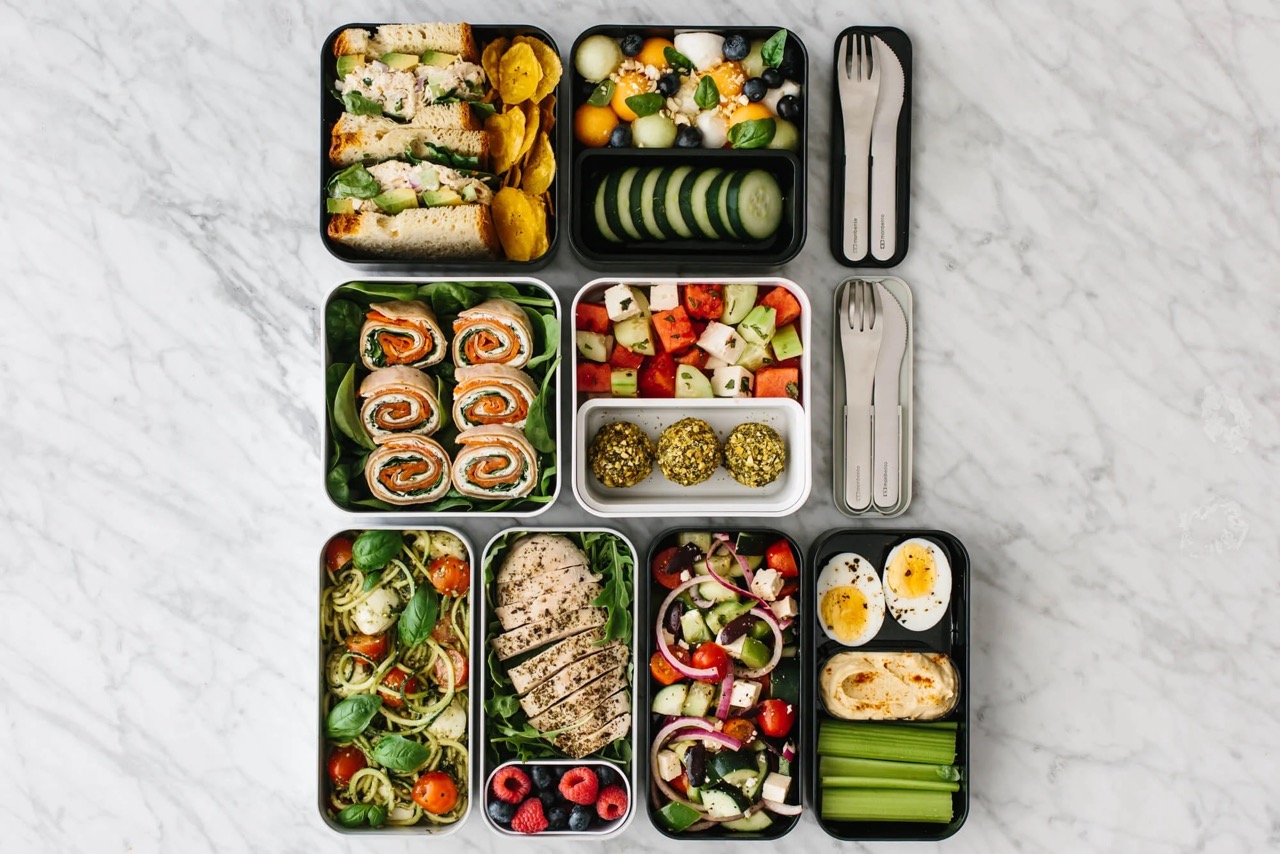
Are you tired of the same old lunch options? Looking for a way to spice up your mealtime routine? Why not try making your own bento lunch box? Bento is a traditional Japanese style of packed lunch that not only satisfies your hunger but also pleases your eyes with its beautifully arranged compartments of various foods.
By making your own bento, you can have full control over what goes into your meal, ensuring that it is nutritious, delicious, and tailored to your personal preferences. It’s a great way to incorporate a variety of food groups into your lunch, making it balanced and satisfying.
Creating your own bento lunch box may seem intimidating at first, but with the right tools and a little bit of creativity, you can become a bento master in no time. In this article, we will guide you through the process of making your own bento lunch box, step by step.
So, let’s gather our supplies and get ready to embark on a culinary adventure!
Key Takeaways:
- Elevate your lunch routine by creating a personalized bento lunch box, packed with nutritious and visually appealing components. Unleash your creativity and enjoy a balanced and flavorful meal that satisfies both your hunger and your eyes.
- With the right supplies and a touch of creativity, you can master the art of bento-making. Customize your bento with a variety of ingredients, decorations, and side dishes to create a visually stunning and delicious masterpiece.
Read more: How To Make Your Own Tool Box
Supplies Needed
Before we dive into the process of making a bento lunch box, let’s gather the supplies you will need:
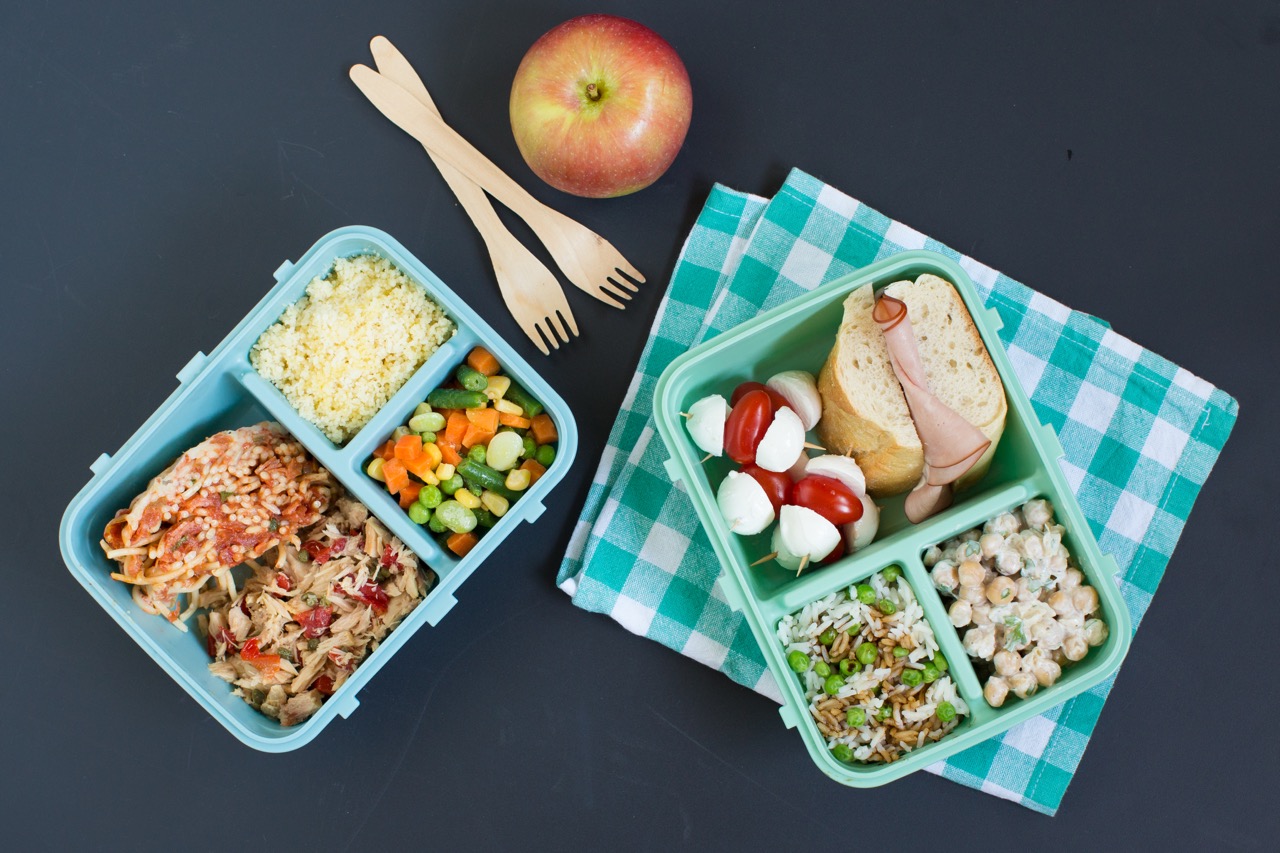
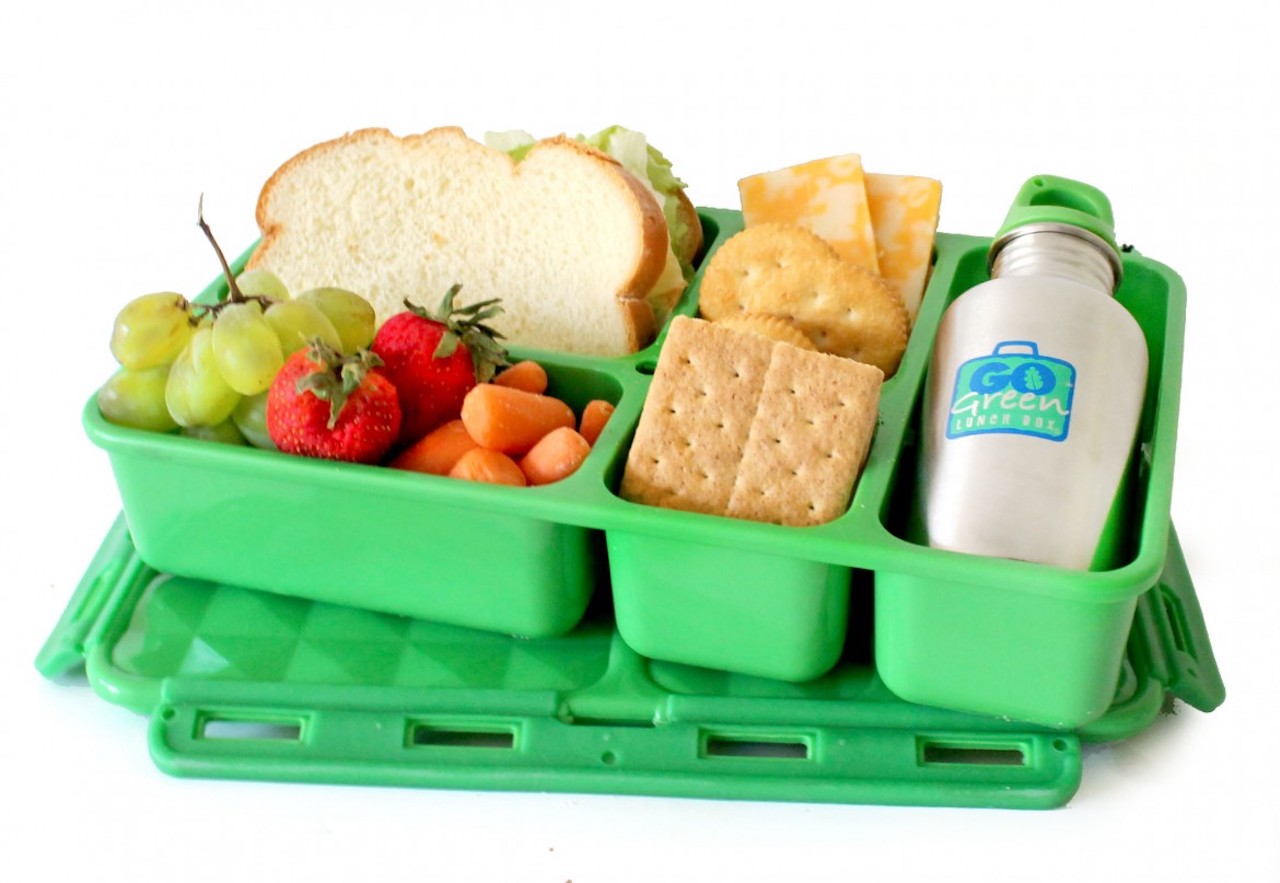
- A bento box: Look for a bento box with compartments, preferably with airtight lids to keep the food fresh.
- Food containers: Small, lidded containers that can fit into the compartments of the bento box.
- Cooking utensils: A rice cooker, a frying pan, a knife, and cutting boards for preparing ingredients.
- Food picks or toothpicks: These can be used for decoration and securing food items together.
- Plastic wrap or parchment paper: Useful for separating different food items.
- Decorative food dividers: Optional, but can add a touch of fun and creativity to your bento.
- Small condiment containers: For sauces and dressings.
- A lunch bag or insulated bag: To keep your bento lunch box fresh and portable.
Once you have these supplies ready, you are all set to start creating your own bento lunch box masterpiece!
Step 1: Choose the Right Container
The first step in making your own bento lunch box is to choose the right container. Bento boxes come in various shapes, sizes, and materials, so it’s important to consider your needs and preferences when making your selection.
Here are a few factors to keep in mind when choosing a bento box:
- Size: Consider how much food you usually eat for lunch and choose a bento box size accordingly. It should be large enough to fit your desired portions without being too bulky.
- Compartments: Look for a bento box with compartments to separate different food items and prevent them from mixing together. This allows for an organized and visually appealing presentation.
- Material: Bento boxes are typically made of plastic or stainless steel. Plastic bento boxes are lightweight and come in a variety of colors and designs. Stainless steel bento boxes are more durable and eco-friendly.
- Lid: Opt for a bento box with a secure and airtight lid to keep your food fresh and prevent any leaks or spills.
Remember, the container you choose will be the canvas for your bento artistry, so pick one that suits your style and needs. Once you have your bento box ready, it’s time to move on to the next step: preparing the rice!
Step 2: Prepare the Rice
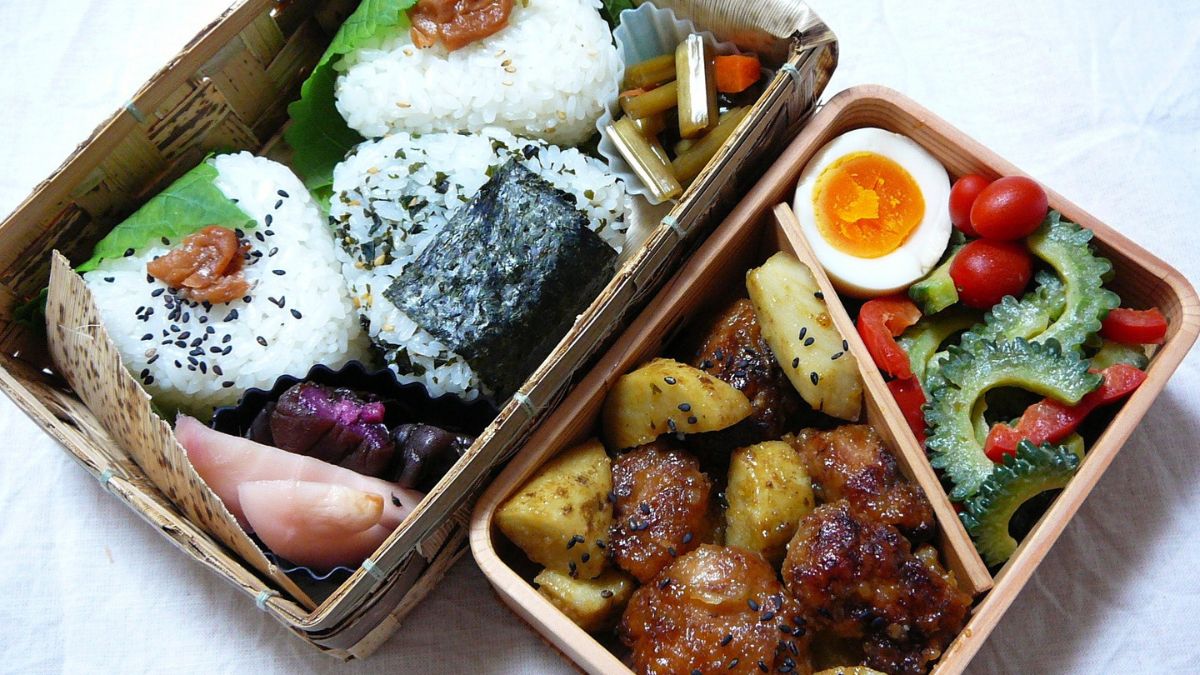
Rice is a staple component of a bento lunch box, so it’s important to prepare it properly for the best taste and texture. Here’s how to prepare the rice for your bento:
- Measure the desired amount of rice: The amount of rice you’ll need depends on your appetite and the size of your bento box compartments. A general rule of thumb is to use about 1 cup of uncooked rice for a single serving.
- Rinse the rice: Place the measured rice in a fine-mesh sieve or colander and rinse it under cold water until the water runs clear. This helps remove excess starch and improves the texture of the cooked rice.
- Soak the rice: After rinsing the rice, transfer it to a bowl and fill it with enough water to cover the rice. Let it soak for about 30 minutes to an hour. This step helps the rice absorb water evenly and cook more evenly.
- Drain the rice: After soaking, drain the rice using the sieve or colander to remove the excess water.
- Cook the rice: Transfer the drained rice to a rice cooker or a saucepan. Follow the instructions on your rice cooker or cook the rice on the stovetop according to the package instructions. Once cooked, let the rice sit for a few minutes to steam and fluff it up with a fork.
When cooking rice for your bento, aim for a slightly firmer texture as it will continue to steam and soften while packed in the bento box. Once your rice is cooked, you can move on to the next step: cooking the protein!
Step 3: Cook the Protein
Protein is an essential part of a balanced meal, and adding it to your bento lunch box will make it more satisfying and nutritious. Here are some ideas for cooking protein for your bento:
- Grilled chicken or fish: Marinate chicken or fish fillets with your favorite seasonings and grill them until cooked through. Let them cool before adding them to your bento.
- Teriyaki tofu: Slice tofu into cubes or rectangles, and sauté them in a pan with teriyaki sauce until golden brown. Allow them to cool before adding to your bento.
- Hard-boiled eggs: Boil eggs until they are cooked to your desired level of doneness. Allow them to cool, then peel and slice them before adding them to your bento.
- Shrimp tempura: Dip raw shrimp in tempura batter and deep-fry until crispy. Drain on paper towels and let them cool before adding them to your bento.
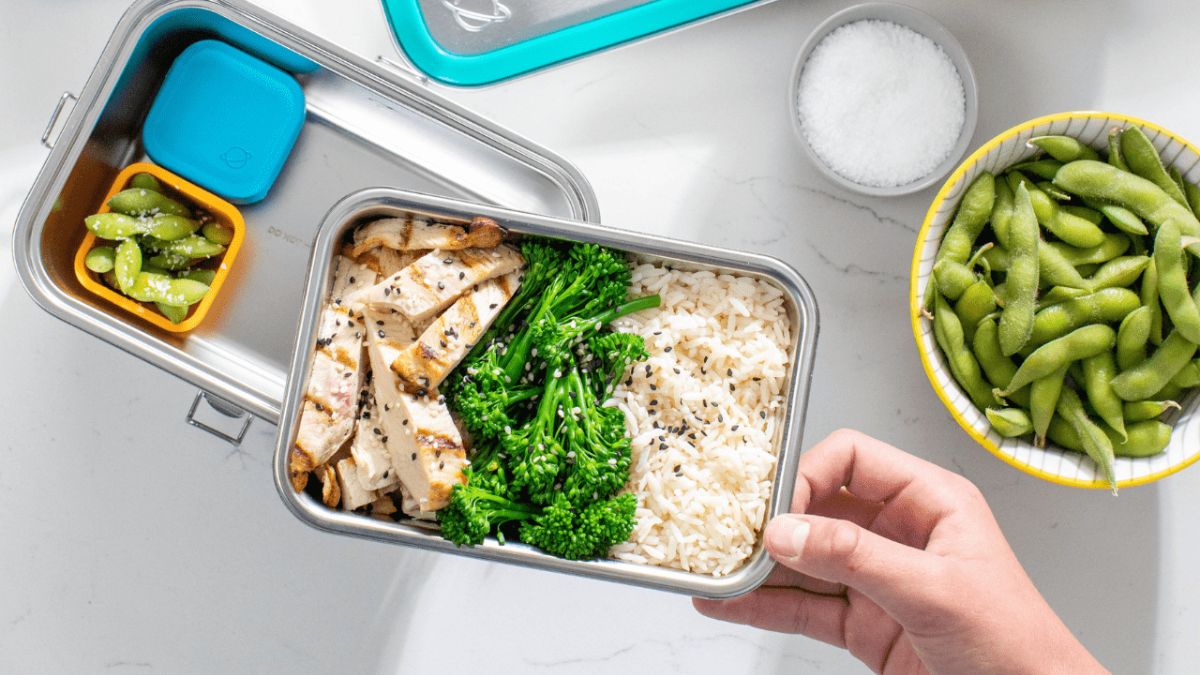
- Sautéed vegetables: If you prefer a vegetarian option, sauté a mix of colorful vegetables such as bell peppers, broccoli, and carrots in a bit of oil until tender. Season with salt and pepper, and let them cool before adding them to your bento.
Remember to let your cooked protein cool completely before packing it into the bento box to avoid condensation and moisture buildup. Once your protein is ready, it’s time to move on to the next step: cutting and arranging the vegetables!
When making your own bento lunch box, try to include a variety of colors, textures, and flavors to make the meal more visually appealing and satisfying. This can be achieved by incorporating different types of fruits, vegetables, proteins, and grains.
Read more: What Are Bento Lunch Boxes
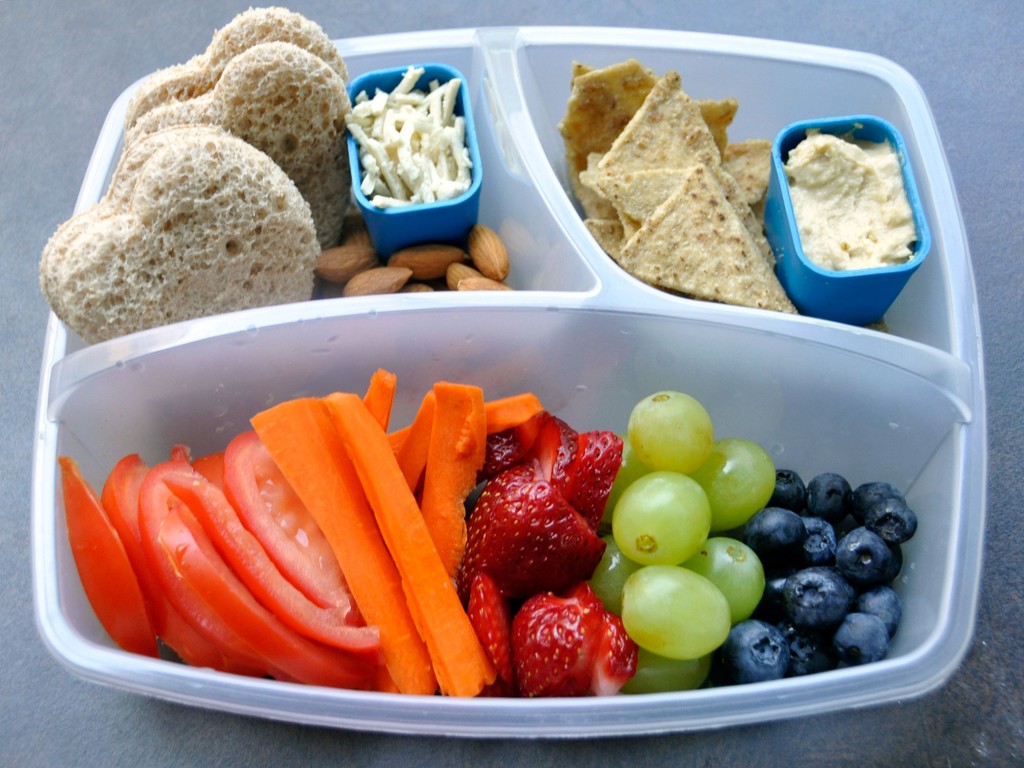
Step 4: Cut and Arrange Vegetables
Vegetables are a colorful and nutritious addition to your bento lunch box. Here’s how you can cut and arrange the vegetables:
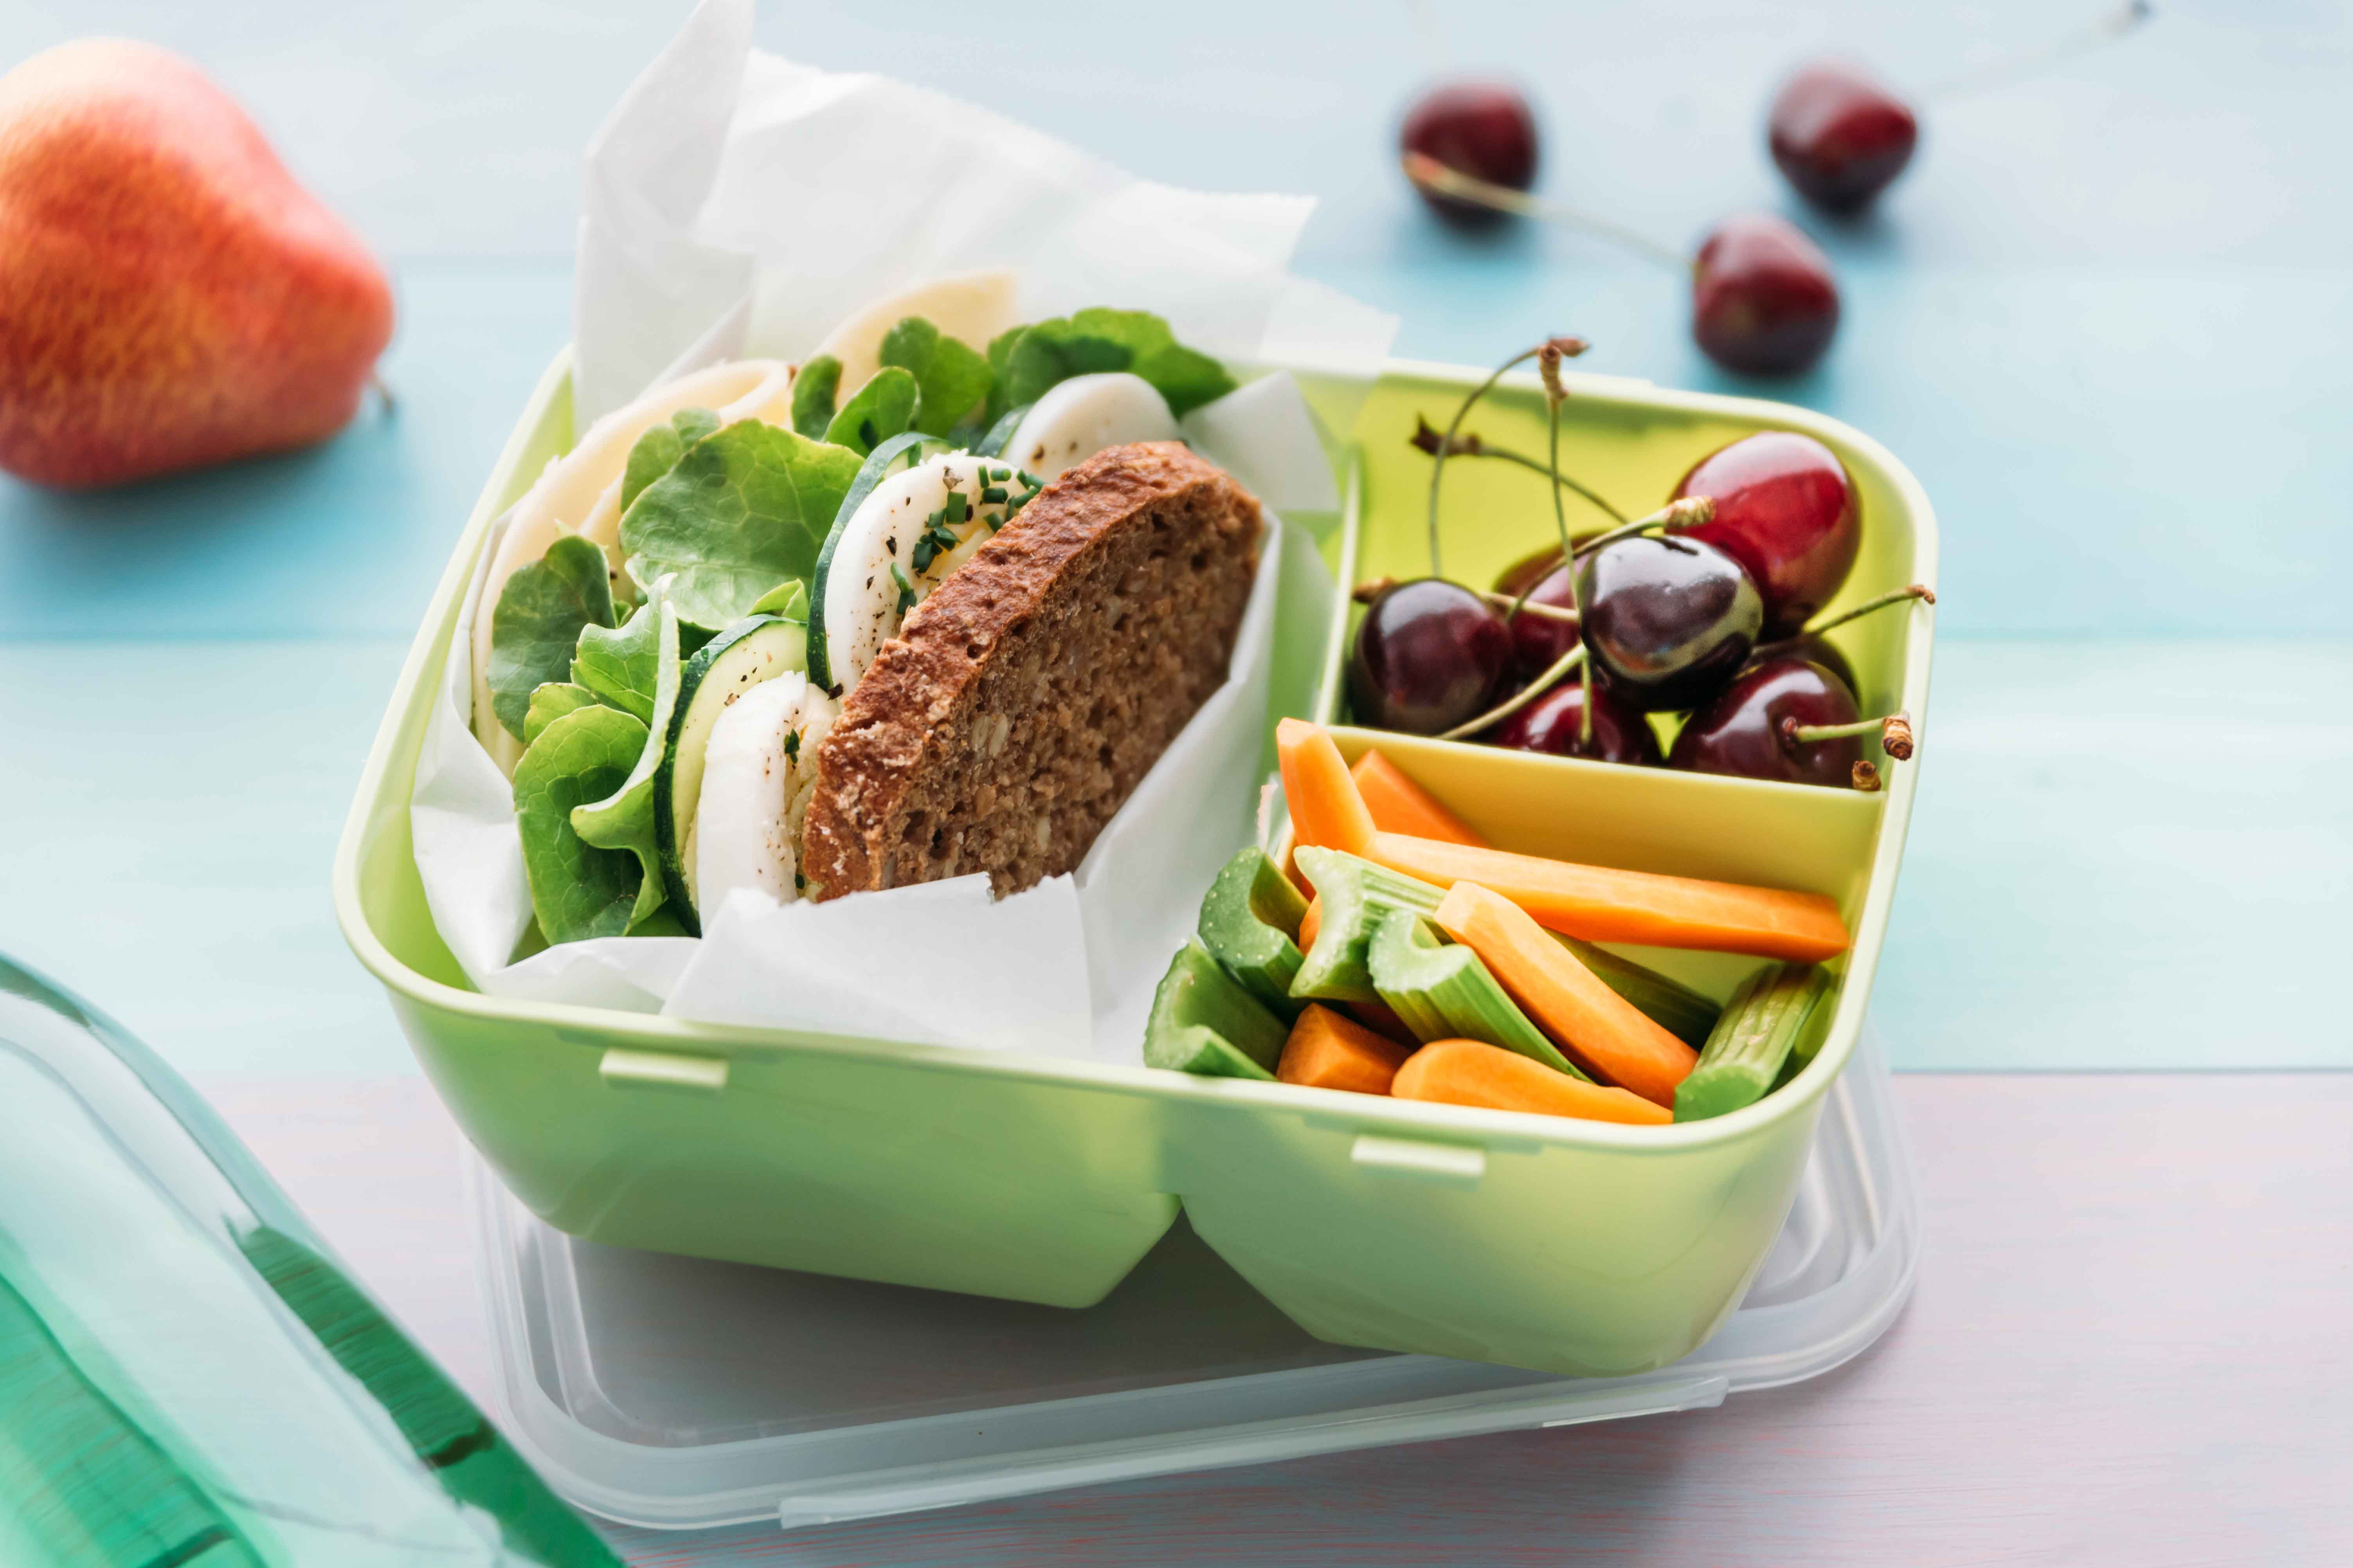
- Choose a variety of vegetables: Select a mix of vegetables that you enjoy and that provide different textures and flavors. Some popular options include cucumber, cherry tomatoes, carrots, bell peppers, and lettuce.
- Wash and clean the vegetables: Wash the vegetables thoroughly under running water and pat them dry with a clean kitchen towel or paper towel.
- Cut the vegetables into bite-sized pieces: Use a sharp knife to cut the vegetables into small, bite-sized pieces. You can slice them, dice them, julienne them, or even use cookie cutters to create fun shapes.
- Arrange the vegetables creatively: Place the cut vegetables in one or more compartments of your bento box. Get creative with the arrangement, making sure to use a variety of colors and textures to make your bento visually appealing.
- Separate the vegetables: To prevent the flavors from mixing, you can use small dividers made of plastic wrap, parchment paper, or even lettuce leaves to separate different vegetables. This helps maintain the freshness and prevents any potential sogginess.
Remember to choose fresh and crisp vegetables for the best taste and texture. Once you have cut and arranged the vegetables, it’s time to move on to the next step: adding side dishes to your bento box!
Step 5: Add Side Dishes
Side dishes add variety and flavor to your bento lunch box. Here are some ideas for tasty and easy-to-prepare side dishes:
- Seaweed salad: Purchase pre-made seaweed salad from a local Asian grocery store or make it at home by rehydrating dried seaweed and tossing it with a flavorful dressing.
- Pickled vegetables: Pickle your favorite vegetables like cucumbers, radishes, or carrots in a mixture of vinegar, sugar, and salt. Let them marinate for a few hours or overnight before adding them to your bento.
- Edamame beans: Steam or boil edamame beans until tender and sprinkle them with a pinch of salt. They make for a nutritious and protein-packed side dish.
- Gyoza or dumplings: Pan-fry or steam store-bought or homemade gyoza or dumplings until golden brown. Serve them alongside your bento for a delicious addition.
- Miso soup: Make a small portion of miso soup with tofu, seaweed, and vegetables. Pour it into a small thermos or heatproof container for a comforting and warming side dish.
When selecting side dishes for your bento, choose options that complement the flavors and textures of the other components. Aim for a balance of flavors, colors, and nutritional value. Once you have added your side dishes, it’s time to move on to the next step: packing and storage tips!
Step 6: Packing and Storage Tips
Proper packing and storage are essential to keep your bento lunch box fresh and appetizing. Follow these tips to ensure your bento stays delicious and appealing:
- Allow food to cool completely: Before packing your bento, make sure all the components, including rice, protein, vegetables, and side dishes, have cooled completely. Warm or hot food can create condensation and affect the freshness of the other items.
- Use small containers: Place different food items in separate small containers or compartments within the bento box. This prevents flavors from mixing and helps maintain the integrity of each dish.
- Wrap delicate items: If you have delicate or easily crushed items like sushi or delicate fruits, wrap them individually in plastic wrap to protect them from getting squished.
- Consider portion sizes: Adjust the portion sizes according to your appetite and the size of your bento box. Leave some space in the compartments for easier closing and to prevent the food from spilling into other sections.
- Refrigerate promptly: To ensure food safety and freshness, refrigerate your bento lunch box as soon as possible. Bacteria can multiply rapidly at room temperature, so it’s important to keep your bento chilled until you’re ready to eat.
- Invest in a lunch bag or insulated container: Use a lunch bag or an insulated bento container to keep your lunch cool and fresh throughout the day. This is especially important if you’re carrying your bento to work or school.
By following these packing and storage tips, you can enjoy a delicious and well-preserved bento lunch box. Now that your bento is ready, let’s move on to the final step: getting creative with decorations!
Step 7: Get Creative with Decorations
Adding decorative touches to your bento lunch box can make it even more visually appealing and fun to eat. Here are some creative decoration ideas to enhance the presentation of your bento:
- Food picks or toothpicks: Use colorful food picks or toothpicks to secure small pieces of food together or create decorative patterns. They can also be used to add a touch of whimsy to your bento.
- Food cutters and molds: Invest in food cutters and molds to shape your fruits, vegetables, or even rice into cute and fun designs. You can create flower shapes, animal shapes, or even character shapes using these tools.
- Food dividers: Use decorative dividers made of plastic or silicone to separate different sections of your bento box. These dividers come in various shapes and designs, such as flowers, animals, or geometric patterns.
- Nori seaweed cutouts: Cut nori seaweed into fun shapes like hearts, stars, or faces using small scissors or a craft knife. Place these cutouts on rice or other food items to add a playful touch.
- Colorful sauces and dressings: Drizzle colorful sauces or dressings over your vegetables or protein to make them visually appealing. You can use squeezable bottles or small condiment containers to control the amount and create decorative patterns.
- Vegetable garnishes: Use thinly sliced vegetables like radishes, carrots, or bell peppers to create decorative garnishes. You can shape them into flowers, butterflies, or other creative designs.
Remember, decorations are meant to enhance the visual appeal of your bento, so let your creativity flow and have fun with it. Experiment with different ideas and techniques to make your bento lunch box a work of art!
Now that you’ve mastered the art of creating a beautiful and delicious bento lunch box, it’s time to enjoy your masterpiece. Dig in, and savor the satisfaction of a balanced and flavorful meal!+
Read more: How To Make Your Own Cat Litter Box
Conclusion
Congratulations! You have learned how to make your own bento lunch box. By following the steps outlined in this article, you can create a nutritious, delicious, and visually appealing meal that will surely turn heads and satisfy your tastebuds.
Making your own bento gives you the freedom to customize your lunch exactly to your liking. You can choose a variety of ingredients, incorporate different flavors and textures, and even add your own personal touches through creative decorations.
Remember, bento-making is an art, so don’t be afraid to unleash your creativity and experiment with different combinations of protein, vegetables, side dishes, and decorations. The possibilities are endless!
Whether you’re preparing bento for yourself, your family, or even for a special occasion, the process can be both enjoyable and rewarding. It’s not just about the food but also about the experience of preparing and arranging everything in a way that is visually pleasing and appetizing.
So, the next time you find yourself feeling bored with your usual lunch options, why not break out of the routine and try creating your own bento lunch box? With a little planning, creativity, and the right supplies, you can elevate your lunchtime experience and fuel your body with a balanced and satisfying meal.
So, go ahead and give it a try! Start gathering your supplies, follow the steps we’ve outlined, and embark on a culinary adventure of bento-making. Your taste buds will thank you, and you’ll never look at lunchtime the same way again!
Frequently Asked Questions about How To Make Your Own Bento Lunch Box
Was this page helpful?
At Storables.com, we guarantee accurate and reliable information. Our content, validated by Expert Board Contributors, is crafted following stringent Editorial Policies. We're committed to providing you with well-researched, expert-backed insights for all your informational needs.


0 thoughts on “How To Make Your Own Bento Lunch Box”