Articles
How To Make Your Own Willow Arbor
Modified: September 1, 2024
Learn how to create a stunning willow arbor with our step-by-step articles. Enhance your outdoor space with this unique DIY project.
(Many of the links in this article redirect to a specific reviewed product. Your purchase of these products through affiliate links helps to generate commission for Storables.com, at no extra cost. Learn more)
Introduction
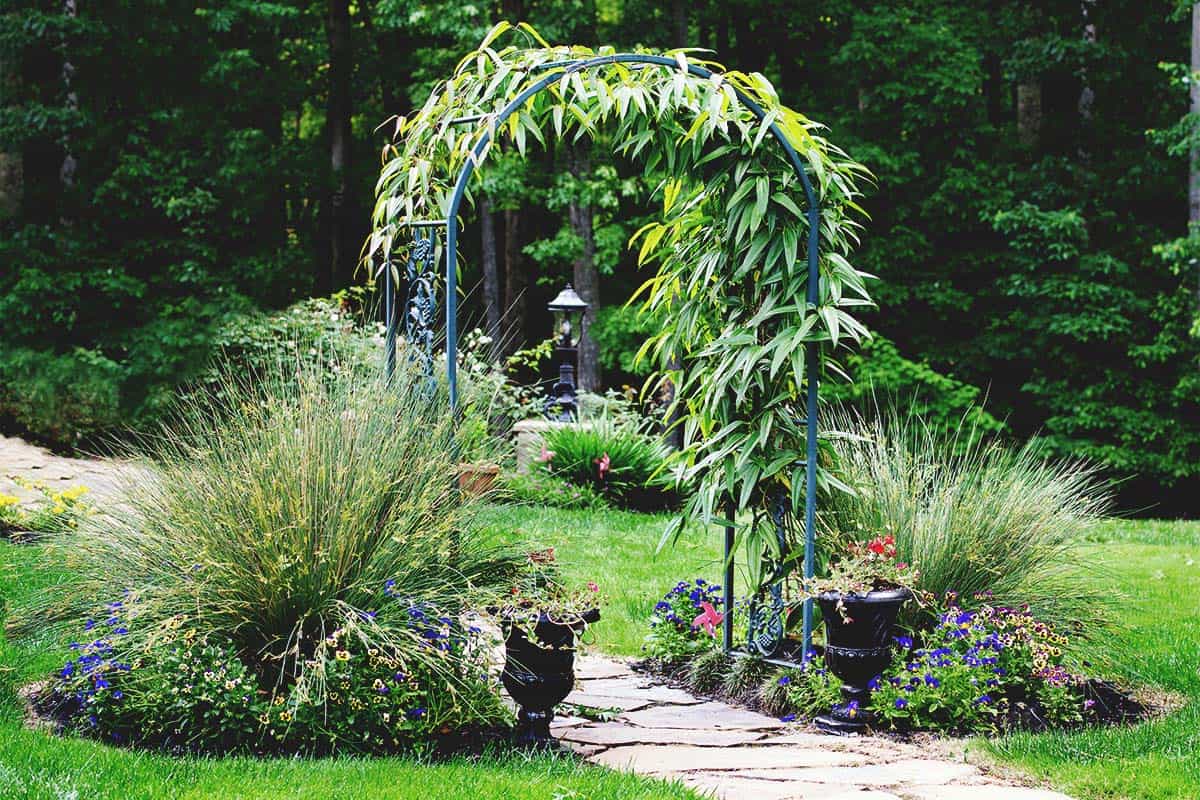
Creating a peaceful and enchanting outdoor space in your backyard doesn’t have to be a daunting task. One way to add beauty and functionality to your garden is by building a willow arbor. A willow arbor is a delightful natural structure made from woven willow branches. It can provide shade, support climbing plants, and create a cozy and romantic atmosphere.
In this guide, we will show you how to make your own willow arbor step by step. By following these instructions, you can enjoy the satisfaction of constructing a stunning focal point in your garden while immersing yourself in the art of willow weaving.
Before we dive into the process, let’s go over the materials you will need to gather.
Key Takeaways:
- Create a stunning willow arbor to add beauty and functionality to your garden. Choose the right willow variety, select a suitable location, and weave the branches with care to build a peaceful and enchanting outdoor space.
- Transform your garden into a captivating oasis with a DIY willow arbor. From planting and weaving to maintenance, infuse creativity and patience to construct a natural structure that provides shade, support for climbing plants, and a cozy retreat.
Read more: How To Make Your Own Blinds
Materials Needed
Before getting started on your willow arbor project, it’s important to gather the necessary materials. Here’s a list of what you will need:
- Willow cuttings: Choose willow branches that are long and flexible, ideally around 7-8 feet in length. You will need enough to create the structure of the arbor and to weave the branches together.
- Garden stakes: These will be used to anchor the arbor into the ground and provide stability.
- Garden twine or wire: This will be used to tie the willow branches together and secure them to the stakes.
- Garden tools: You will need a pair of pruning shears or a small saw to trim the willow branches.
- Mallet or hammer: This will be used to drive the stakes into the ground.
- Gloves: Willow branches can be sharp, so it’s a good idea to wear gloves to protect your hands while working.
Once you have gathered all the necessary materials, you’re ready to move on to the next step: choosing the right willow variety.
Step 1: Choosing the Right Willow Variety
When it comes to building a willow arbor, choosing the right variety of willow is crucial. Different varieties have different growth habits and characteristics, so it’s important to select one that suits your needs. Here are a few popular willow varieties that work well for arbors:
- Salix purpurea: Commonly known as purple willow, this variety has vibrant purple stems and leaves. It grows quickly and produces long, flexible branches that are perfect for weaving. Purple willow adds a touch of color to your arbor.
- Salix alba: Also known as white willow, this variety has graceful, silvery-green leaves and slender branches. White willow is a classic choice for arbors and its branches are easy to work with.
- Salix viminalis: Known as basket willow, this variety is often used for weaving baskets and other crafts. Its long, flexible branches make it an excellent choice for creating intricate patterns in your arbor.
Consider the overall look and feel you want for your garden when choosing a willow variety. The color and texture of the bark and leaves can add visual interest to your arbor. Additionally, make sure the variety you choose is well-suited to your climate and soil conditions.
Once you have selected the right willow variety, it’s time to move on to the next step: selecting a suitable location for your arbor.
Step 2: Selecting a Suitable Location
Choosing the right location for your willow arbor is essential for its growth and overall aesthetic appeal. Here are a few factors to consider when selecting a suitable location:
- Sunlight: Willows thrive in full sun, so choose a location that receives at least 6-8 hours of direct sunlight per day. This will ensure healthy growth and lush foliage.
- Soil Drainage: Willows prefer moist soil but can tolerate some degree of wetness. Avoid areas with poor drainage to prevent waterlogged roots, which can lead to root rot and other issues.
- Space: Consider the size of your arbor when selecting a location. Make sure there is enough space for the structure to grow and expand without overcrowding other plants or structures in your garden.
- Views and Privacy: Think about the views you want to enhance or block with your arbor. It can be used to create a secluded seating area or frame a beautiful view in your garden.
Take some time to observe your garden throughout the day to determine the best location for your willow arbor. Once you have chosen the perfect spot, it’s time to prepare the ground for planting.
Step 3: Preparing the Ground
Before planting your willow cuttings, it’s important to properly prepare the ground to ensure optimal growth. Follow these steps to prepare the ground for your willow arbor:
- Clear the area: Remove any weeds, rocks, or debris from the area where you plan to plant your arbor. This will provide a clean and healthy environment for your willow cuttings.
- Loosen the soil: Use a garden fork or a tiller to loosen the soil in the planting area. This will help improve drainage and allow the willow roots to penetrate more easily.
- Amend the soil: If your soil is heavy or lacks nutrients, consider adding organic matter such as compost or well-rotted manure. This will help enrich the soil and provide essential nutrients for your willow plants.
- Level the ground: Use a rake to level the ground and create a smooth surface for planting. This will help ensure that the arbor stands upright and stable once it’s established.
By properly preparing the ground, you are setting the stage for healthy growth and long-lasting beauty for your willow arbor. Now, it’s time to move on to the exciting part – planting the willow cuttings!
When selecting willow branches for your arbor, choose ones that are flexible and at least 1 inch in diameter for sturdiness.
Read more: How To Make Your Own Mattress
Step 4: Planting the Willow Cuttings
Now that you have prepared the ground, it’s time to plant your willow cuttings and start building your arbor. Follow these steps to plant the willow cuttings:
- Soak the cuttings: Before planting, soak the willow cuttings in a bucket of water for a few hours. This will help hydrate the branches and improve their chances of taking root.
- Measure and mark: Determine where you want to place your willow cuttings along the perimeter of the arbor. Measure equal distances between each cutting and mark the spots with a small stake or a piece of string.
- Make a hole: Use a garden spade or a dibber to create planting holes for the cuttings. The holes should be deep enough to accommodate at least half of the length of the cuttings.
- Plant the cuttings: Insert the bottom end of each cutting into the planting hole, making sure it is secure and upright. Gently press the soil around the base to hold it in place.
- Water and mulch: After planting, water the cuttings thoroughly to settle the soil and provide moisture. Apply a layer of organic mulch around the base of the cuttings to help retain moisture and suppress weed growth.
It’s important to note that willow cuttings are adaptable and can often be planted directly into the ground without the need for rooting hormone or special treatments. However, soaking the cuttings and taking care during the planting process will increase the likelihood of successful root formation.
With the willow cuttings planted, you’ve taken a significant step towards creating your own beautiful willow arbor. The next step is to create the structure of the arbor itself.
Step 5: Creating the Structure of the Arbor
Now that you have planted the willow cuttings, it’s time to start building the structure of your willow arbor. Follow these steps to create the framework:
- Insert garden stakes: Place garden stakes at each corner of the arbor, firmly anchoring them in the ground. Make sure the stakes are tall enough to support the desired height of your arbor.
- Tie the stakes together: Using garden twine or wire, connect the stakes at the top to form the outline of the arbor. This will provide the basic structure and stability for the willow branches.
- Create additional supports: Depending on the size and shape of your arbor, you may need to insert additional stakes or supports along the sides and top. These supports will provide additional strength and rigidity for the arbor.
- Space the supports: Make sure to space the supports evenly along the sides to create a visually pleasing and balanced structure. This will ensure that the willow branches can be woven securely.
The framework you create will serve as the foundation for weaving the willow branches and giving your arbor its distinctive shape. Take your time to ensure that the structure is sturdy and well-connected.
Now, you’re ready to move on to the next step: weaving the willow branches to complete the arbor!
Step 6: Weaving the Willow Branches
With the structure of your willow arbor in place, it’s time to start weaving the willow branches to create a beautiful, natural enclosure. Follow these steps to weave the branches together:
- Select long, flexible branches: Choose willow branches that are pliable and long enough to reach across the gaps between the supports. These branches will serve as the weavers for your arbor.
- Start weaving: Begin by inserting a willow branch at the base of the arbor and weave it in and out of the supports horizontally. Use gentle pressure to bend the branches and create a secure weave.
- Add additional branches: As you progress, continue adding more branches, weaving them in the same manner. Alternate between over and under, creating a crisscross pattern that strengthens the structure.
- Keep the weave tight: Make sure to keep the weave tight as you go, pushing the branches close together to eliminate gaps. The tighter the weave, the more stable and sturdy your arbor will be.
- Continue weaving: Work your way up the arbor, gradually moving higher with each row. As the arbor grows taller, you may need to use a ladder or step stool to reach the top.
- Trim excess branches: Once you’ve reached the desired height, trim any excess branches that extend beyond the top of the arbor. Use pruning shears or a small saw to trim them neatly.
Weaving the willow branches requires patience and attention to detail, but the end result will be a stunning, organic structure that adds character to your garden.
With the branches woven, you’re almost done. The final step is to maintain and prune your arbor for long-term health and beauty.
Step 7: Maintaining and Pruning the Arbor
Once your willow arbor is complete, it’s essential to provide proper maintenance and occasional pruning to ensure its longevity and health. Follow these steps to maintain and prune your arbor:
- Water regularly: Willows thrive in moist soil, so make sure to water your arbor regularly, especially during dry periods. Keep the soil consistently moist but not waterlogged.
- Remove competing vegetation: Regularly check for any weeds or other vegetation that may grow around or through your arbor. Remove them promptly to prevent competition for nutrients and water.
- Prune annually: Each year, during the dormant season, prune your willow arbor to remove any dead, damaged, or crossing branches. This will help maintain a tidy and healthy structure.
- Promote new growth: To encourage new growth and maintain the desired shape of your arbor, selectively prune branches that have become too long or dense. This will allow sunlight to penetrate and promote healthy growth throughout your arbor.
- Monitor for pests and diseases: Keep an eye out for any signs of pest infestations or diseases on your willow arbor. If detected, take appropriate measures such as using organic insecticides or consulting a professional arborist.
Regular maintenance and pruning will help your willow arbor to thrive and continue to enhance your garden space for years to come. Enjoy the beauty and tranquility it brings and take pride in your creation.
As we conclude this guide, we hope you feel confident and inspired to make your own willow arbor. By following these steps and infusing your creativity, you can create a stunning and enchanting outdoor space that truly reflects your personal style.
Happy weaving and gardening!
Read more: How To Make Your Own Security Camera
Conclusion
Building your own willow arbor is a rewarding and creative project that can transform your garden into a captivating oasis. By following the steps outlined in this guide, you can create a stunning natural structure that adds beauty, functionality, and a touch of whimsy to your outdoor space.
From choosing the right willow variety to weaving the branches together, each step of the process requires attention to detail and a bit of patience. But the result is well worth the effort. A well-maintained willow arbor will provide shade, support for climbing plants, and a peaceful retreat where you can relax and connect with nature.
Remember to select the appropriate location, prepare the ground, and plant your willow cuttings with care. As your arbor takes shape, focus on creating a stable and aesthetically pleasing structure by weaving the branches tightly and maintaining the arbor through regular pruning and watering.
As the seasons change, your willow arbor will evolve, showcasing the beauty of the natural materials and blending harmoniously with the surrounding landscape. It will become a focal point in your garden, enchanting visitors and providing you with a sense of pride and accomplishment.
So, roll up your sleeves, gather the materials, and embark on the journey of creating your own willow arbor. Let your creativity flow as you weave the branches and watch your garden transform into a magical space that brings joy and tranquility.
Now it’s time to get started and create your own little piece of paradise with a charming willow arbor!
Frequently Asked Questions about How To Make Your Own Willow Arbor
Was this page helpful?
At Storables.com, we guarantee accurate and reliable information. Our content, validated by Expert Board Contributors, is crafted following stringent Editorial Policies. We're committed to providing you with well-researched, expert-backed insights for all your informational needs.


0 thoughts on “How To Make Your Own Willow Arbor”