Home>Articles>How To Attach Lunch Box To Backpack Pottery Barn

Articles
How To Attach Lunch Box To Backpack Pottery Barn
Modified: January 5, 2024
Learn how to attach your lunch box to your Pottery Barn backpack with these helpful articles. Find step-by-step instructions and tips to keep your lunch secure while on the go.
(Many of the links in this article redirect to a specific reviewed product. Your purchase of these products through affiliate links helps to generate commission for Storables.com, at no extra cost. Learn more)
Introduction
Attaching a lunch box to your backpack can be a convenient and practical way to transport your meals while on the go. Whether you’re heading to school, the office, or embarking on an outdoor adventure, having your lunch box securely fastened to your backpack allows you to keep your hands free and ensures that your food stays intact and easily accessible.
In this article, we will guide you through the process of attaching a lunch box to a backpack. We’ll provide step-by-step instructions, along with tips and tricks to help you achieve a secure and reliable attachment. So, let’s dive in and learn how to make carrying your lunch a breeze!
Key Takeaways:
- Securely attach your lunch box to your backpack by following these simple steps, ensuring easy access to your meals while keeping your hands free for any adventure or activity.
- Gather the right materials, choose the ideal placement, prepare your backpack, and test the attachment to ensure a reliable and convenient way to transport your meals on the go.
Read more: How To Wash A Pottery Barn Lunch Box
Step 1: Gather your materials
The first step in attaching your lunch box to your backpack is gathering the necessary materials. Here’s what you’ll need:
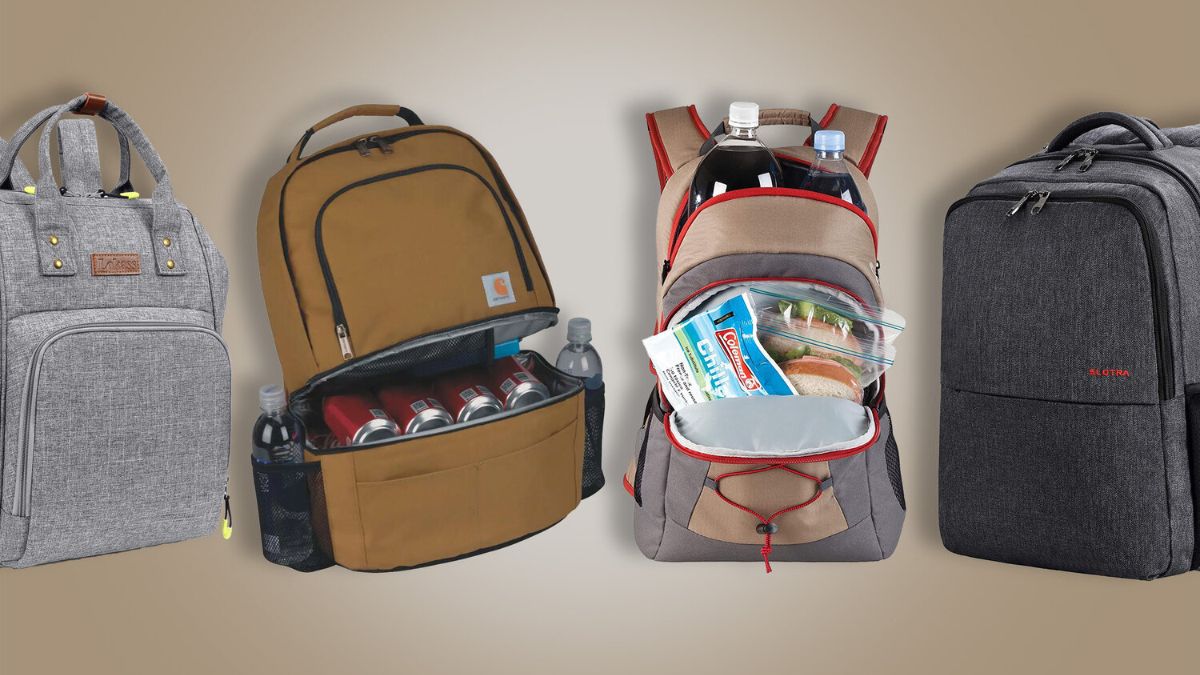
- Lunch box: Choose a lunch box that is suitable for your needs. Consider the size, shape, and insulation properties based on the type of food you’ll be carrying. Look for a lunch box that has straps or attachments for easy fastening.
- Backpack: Select a backpack that is spacious enough to accommodate your lunch box. Make sure it has external attachment points, such as straps or loops, where you can secure the lunch box. It’s also important to choose a backpack that is durable and well-constructed to ensure the safety of your lunch.
Once you have gathered these materials, you’re ready to move on to the next step.
Step 2: Determine the placement
After gathering your lunch box and backpack, the next step is to determine the ideal spot on the backpack to attach the lunch box. Here are some factors to consider:
- Accessibility: Choose a spot on the backpack that allows easy access to your lunch box. You don’t want it to be obstructed by other items or hard to reach when you need to grab your food.
- Balance: Look for a location that maintains the balance of your backpack. Placing the lunch box too high or too low may affect the overall stability of the backpack and cause discomfort while wearing it.
- Protection: Consider the protection of your lunch box. Avoid placing it in areas where it might get squished or damaged by other items in the backpack.
Take some time to assess the backpack and find a suitable spot that meets these criteria. It may be helpful to try different locations and see which feels most comfortable and secure.
Step 3: Prepare the backpack
Before attaching the lunch box to your backpack, it’s important to properly prepare the chosen spot. Here are two important steps to follow:
- Clearing any items from the chosen spot: Begin by removing any items that may hinder the attachment process. Clearing the chosen spot will provide a clean and unobstructed area to secure the lunch box.
- Making sure the area is clean and dry: Next, ensure that the surface of the backpack is clean and free from any debris. Use a damp cloth to wipe away any dirt or dust. It’s also essential to ensure that the area is dry to prevent any moisture from affecting the attachment of the lunch box.
By taking the time to prepare the backpack, you’ll create an optimal environment for attaching the lunch box securely.
Consider using carabiner clips to attach the lunch box to the backpack. This will keep the lunch box secure and easily accessible while leaving room inside the backpack for other items.
Step 4: Attach the lunch box
Now that you have prepared the backpack, it’s time to attach the lunch box. Follow these steps for a secure and reliable attachment:
- Using straps or clasps to secure the lunch box to the backpack: Most lunch boxes come with straps or clasps designed to attach the lunch box to a backpack. Locate these attachment points on your lunch box and align them with the corresponding attachment points on your backpack.
- Ensuring a tight and secure attachment: Once aligned, fasten the straps or clasps tightly to secure the lunch box to the backpack. Make sure there is no slack or looseness in the attachment. A tight and secure connection will prevent the lunch box from moving or falling off during transport.
Double-check the attachment to ensure it is secure before moving on to the next step.
Read also: 10 Amazing Pottery Barn Lunch Box for 2025
Step 5: Test the attachment
After attaching the lunch box to your backpack, it’s important to test the stability and security of the attachment. Follow these guidelines to ensure a reliable connection:
- Checking for stability and security: Gently shake or lightly tug on the lunch box to check if it stays securely attached to the backpack. Ensure that there is no excessive movement or wobbling. The lunch box should stay in place without any signs of coming loose.
- Making adjustments if necessary: If you find any issues with the attachment, such as looseness or instability, make the necessary adjustments. You may need to tighten the straps or clasps further, or reposition the lunch box to achieve a more secure fit. It’s crucial to address any concerns to prevent the lunch box from detaching during use.
Take the time to thoroughly test the attachment to ensure the lunch box is firmly secured to the backpack. By doing so, you can have peace of mind knowing that your lunch will stay in place during your travels.
Conclusion
Attaching a lunch box to your backpack is a practical and convenient way to transport your meals while on the go. By following the steps outlined in this article, you can ensure a secure and reliable attachment.
Remember to gather your materials, including a suitable lunch box and backpack with external attachment points. Take the time to determine the ideal spot on the backpack, considering accessibility, balance, and protection.
Before attaching the lunch box, prepare the backpack by clearing any items from the chosen spot and ensuring the area is clean and dry. Then, use straps or clasps to secure the lunch box, making sure the attachment is tight and secure.
Finally, test the attachment by checking for stability and security. Make any necessary adjustments to achieve a reliable connection between the lunch box and backpack.
By following these steps, you can successfully attach your lunch box to your backpack, allowing for easy access to your meals while keeping your hands free. Whether you’re heading to school, work, or an outdoor adventure, this simple method ensures your lunch stays secure and accessible throughout the day.
So, start attaching your lunch box to your backpack and enjoy the convenience of having your meals by your side wherever you go!
Frequently Asked Questions about How To Attach Lunch Box To Backpack Pottery Barn
Was this page helpful?
At Storables.com, we guarantee accurate and reliable information. Our content, validated by Expert Board Contributors, is crafted following stringent Editorial Policies. We're committed to providing you with well-researched, expert-backed insights for all your informational needs.


0 thoughts on “How To Attach Lunch Box To Backpack Pottery Barn”