Articles
How To Open A Kenmore Stove Top
Modified: August 16, 2024
Learn how to easily open a Kenmore stove top with our informative articles. Get step-by-step instructions and tips to safely access the cooktop for cleaning or repairs.
(Many of the links in this article redirect to a specific reviewed product. Your purchase of these products through affiliate links helps to generate commission for Storables.com, at no extra cost. Learn more)
Introduction
Welcome to this comprehensive guide on how to open a Kenmore stove top. If you own a Kenmore stove and need to access the components beneath the stove top for cleaning or repairs, this step-by-step article will guide you through the process. However, it is crucial to prioritize your safety before attempting any kind of maintenance on your stove.
Opening a stove top may seem like a daunting task, but by following the right steps and taking the necessary precautions, you can successfully access the components without any hassle. This guide will provide you with the necessary knowledge and tools required to perform this task effectively and safely.
Please note that it is important to consult your stove’s manual for specific instructions and safety guidelines related to your specific Kenmore model. Always follow the manufacturer’s guidelines to ensure proper handling and usage of the appliance.
Before diving into the process of opening the stove top, let’s take a look at some essential safety measures you need to adhere to.
Key Takeaways:
- Prioritize safety by disconnecting power, allowing the stove to cool, and using protective gear before opening a Kenmore stove top. Follow specific model guidelines for a smooth and secure process.
- Use the right tools, such as screwdrivers and pliers, to remove stove components for cleaning. Reassemble the stove top carefully, ensuring proper alignment and securing of components.
Read more: How To Open Hotpoint Stove Top
Safety Measures before Opening
Before you begin opening your Kenmore stove top, it is crucial to prioritize safety. By following these safety measures, you can minimize the risk of accidents and ensure a smooth and secure process:
- Disconnect the Power: Before starting any maintenance or repair work on your stove, disconnect the power supply. This can be done by unplugging the stove from the electrical outlet or by turning off the circuit breaker dedicated to the stove. This step will prevent any electrical accidents while working on the stove top.
- Allow the Stove to Cool: Stove tops can be extremely hot, especially if the stove has been recently used. Allow the stove to cool down completely before attempting to open the stove top. Hot surfaces can cause burns, so it is important to ensure that the stove is cool to the touch.
- Use Protective Gear: When working with appliances, it is always a good idea to wear protective gear. This includes heat-resistant gloves to protect your hands and safety goggles to shield your eyes from any debris or chemicals that may be present.
- Work in a Well-Ventilated Area: The process of opening the stove top may involve the use of cleaning agents or the release of gases. Make sure to work in a well-ventilated area to avoid the build-up of fumes. Open windows, turn on exhaust fans, or work near an open door to ensure proper ventilation.
- Follow Proper Lifting Techniques: Stove tops can be heavy and cumbersome to handle. When lifting any components or the stove top itself, make sure to use proper lifting techniques. Bend at the knees and use your leg muscles to lift, rather than straining your back.
- Read the Manual: Familiarize yourself with the Kenmore stove’s manual and carefully follow any specific safety guidelines provided by the manufacturer. Each stove model may have slight variations, so it is important to be well-informed before proceeding.
By adhering to these safety measures, you are taking the necessary precautions to protect yourself and ensure a safe working environment. Now that we have covered the safety aspects, let’s delve into the tools required for opening the Kenmore stove top.
Tools Required
Before you can start opening your Kenmore stove top, it’s important to have the right tools on hand. Here are some essential tools you will need:
- Screwdriver Set: A set of screwdrivers with different sizes and types of heads will be necessary for removing screws that secure the stove top.
- Needle-nose Pliers: These pliers with long and narrow jaws will come in handy for grasping and manipulating small components.
- Soft Cloth or Sponge: A soft cloth or sponge will be useful for cleaning the stove top components before and after opening.
- Mild Dish Soap or Stove Cleaner: To effectively clean the stove top and its components, you’ll need a mild dish soap or a specialized stove cleaner. Ensure that the cleaning agent is suitable for use on your particular stove model.
- Scrub Brush or Toothbrush: A scrub brush or an old toothbrush can be used to scrub away dirt and grime from hard-to-reach areas of the stove top.
- Clean, Dry Cloth or Towel: You’ll need a clean, dry cloth or towel to dry the stove top components after cleaning them.
- Vinegar or Ammonia (optional): If you encounter stubborn stains or grease, you may want to have vinegar or ammonia on hand as they can help loosen and remove tough residue.
Having these tools readily available will make the process of opening your Kenmore stove top more efficient and convenient. Now that we have the tools sorted, let’s proceed to the next step: disconnecting the stove from power.
Step 1: Disconnecting the Stove from Power
Before you start opening the Kenmore stove top, it is essential to disconnect the stove from power to ensure your safety. Follow these steps:
- Unplug the Stove: If your stove is plugged into an electrical outlet, unplug it from the wall. This will prevent any potential electrical accidents while working on the stove top.
- Turn off the Circuit Breaker: If your stove is hardwired or you’re unable to access the power cord, turn off the circuit breaker dedicated to the stove. Locate the corresponding circuit breaker switch in your electrical panel and flip it to the “Off” position.
It is crucial to ensure that the stove is completely disconnected from power before proceeding. Double-check that the stove is no longer receiving any electricity by attempting to turn on a burner or the oven. If there is no power, you can safely move on to the next step.
Now that you have successfully disconnected the stove from power, you can begin removing the stove grates in the next step.
Step 2: Removing the Stove Grates
Now that the stove is safely disconnected from power, it’s time to remove the stove grates. Follow these steps:
- Allow the Stove Grates to Cool: If you’ve recently used your stove, allow the grates to cool down before handling them. This will prevent any burns or injuries.
- Inspect the Grates: Take a moment to inspect the grates for any visible dirt, debris, or food particles. Use a clean cloth or sponge to wipe away any surface-level residue.
- Lift the Grates: Carefully lift each individual stove grate. Depending on your stove model, they may be connected or easily lift off the stove top. Lift them straight up to avoid any damage to the grates or the stove top.
- Set Aside the Grates: Once you have removed the grates, place them in a safe and clean area. You can set them on a towel or a designated grates’ holder if you have one. This will prevent any damage to the grates and keep them out of the way during the rest of the process.
By following these steps, you have successfully removed the stove grates. Next, we will proceed to removing the burner caps in Step 3.
Read more: How To Open Whirlpool Stove Top
Step 3: Removing the Burner Caps
With the stove grates out of the way, it’s time to remove the burner caps. Follow these steps:
- Inspect the Burner Caps: Take a moment to inspect the burner caps for any visible dirt, grease, or debris. Use a clean cloth or sponge to wipe away any surface-level residue.
- Identify the Burner Caps: Each burner on your Kenmore stove will have a corresponding burner cap. Identify which burner you want to remove the cap from, and locate the cap on top of that burner.
- Remove the Burner Cap: Depending on your stove model, the burner caps can either be lifted directly off the burner or may require a slight twist to unlock them. Follow the manufacturer’s guidelines for your specific stove model to safely remove the burner cap. Lift or twist the cap carefully to avoid any damage.
- Set Aside the Burner Cap: Once you have successfully removed the burner cap, set it aside in a safe place. You can place it on a towel or a designated burner cap holder if you have one. This will prevent any damage to the burner cap and keep it out of the way during the rest of the process.
- Repeat for Other Burners: If you have more burners with burner caps, repeat the above steps to remove the caps from each burner.
By following these steps, you have successfully removed the burner caps from your Kenmore stove. Next, we will proceed to removing the burner grates in Step 4.
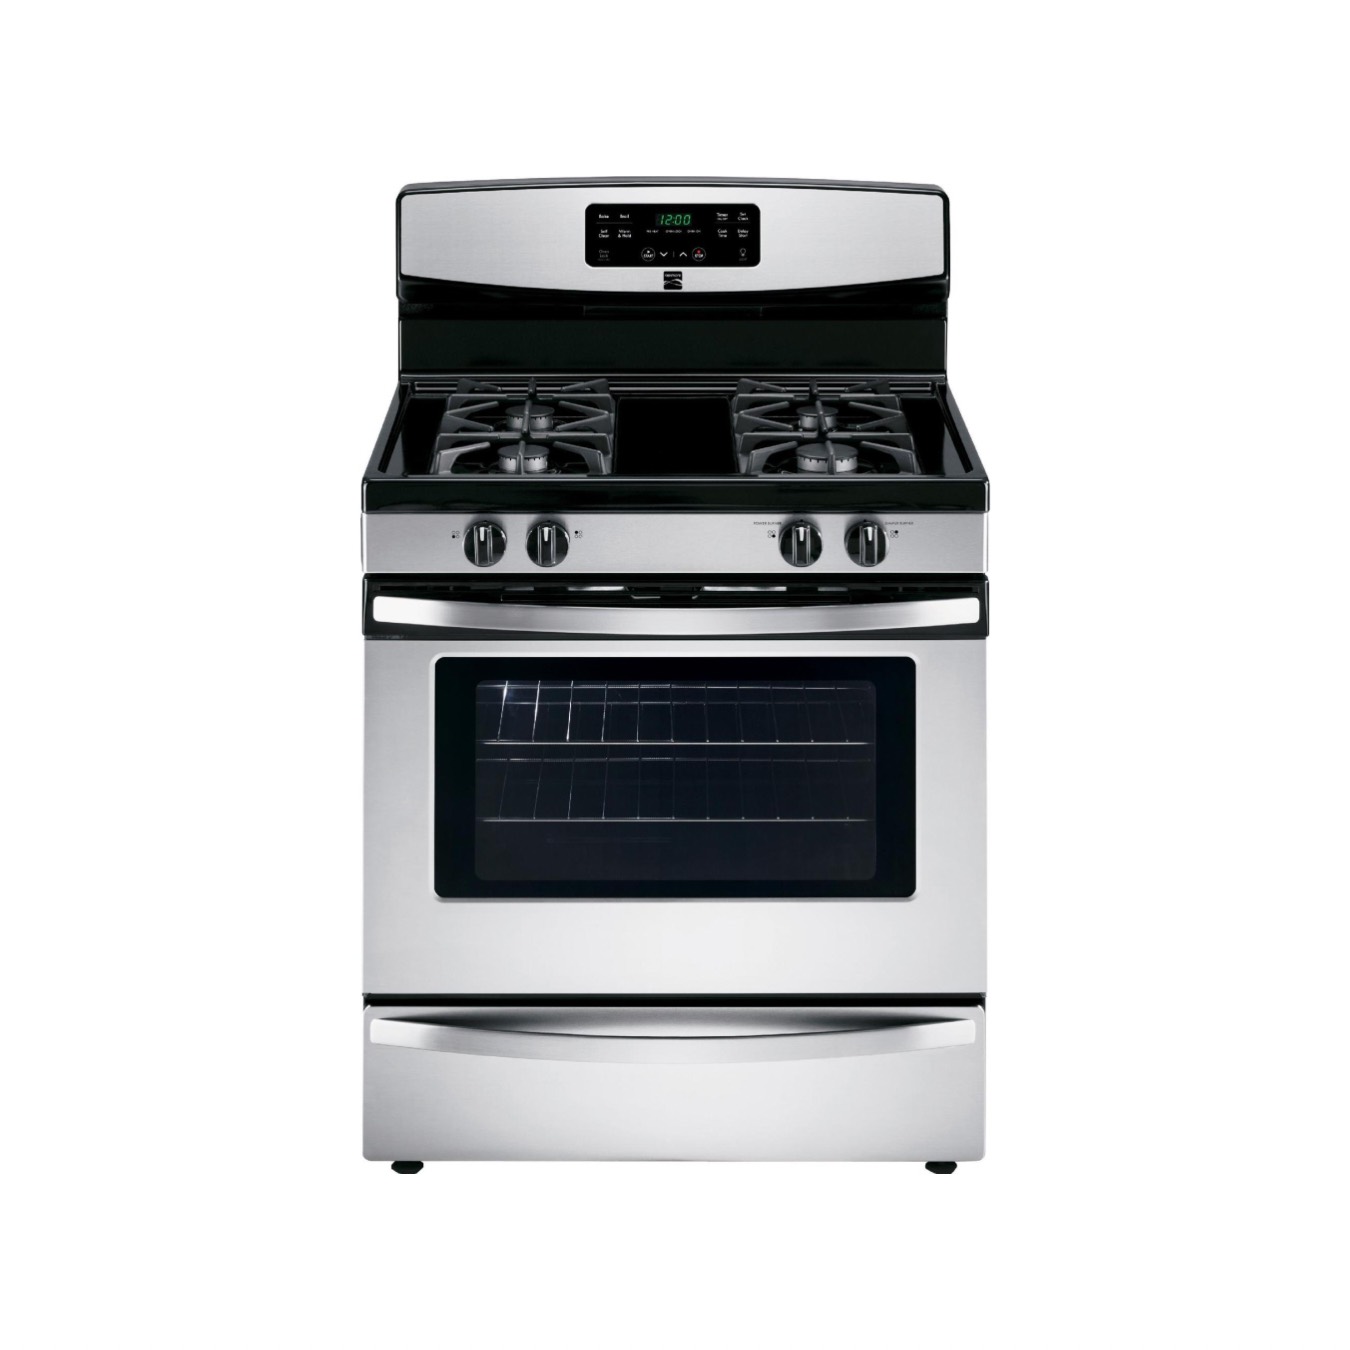
Before attempting to open a Kenmore stove top, make sure the stove is turned off and cool. Then, carefully lift the grates and remove any burner caps to access the burner assembly.
Step 4: Removing the Burner Grates
With the burner caps removed, it’s time to remove the burner grates. Follow these steps:
- Inspect the Burner Grates: Take a moment to inspect the burner grates for any visible dirt, grease, or debris. Use a clean cloth or sponge to wipe away any surface-level residue.
- Identify the Burner Grates: Each burner on your Kenmore stove will have a corresponding burner grate. Identify which burner you want to remove the grate from, and locate the grate around that burner.
- Remove the Burner Grate: Depending on your stove model, the burner grates can either be lifted directly off the stove top or may require a slight twist or unlock mechanism to remove them. Follow the manufacturer’s guidelines for your specific stove model to safely remove the burner grate. Lift, twist, or unlock the grate carefully to avoid any damage.
- Set Aside the Burner Grate: Once you have successfully removed the burner grate, set it aside in a safe place. You can place it on a towel or a designated grate holder if you have one. This will prevent any damage to the grate and keep it out of the way during the rest of the process.
- Repeat for Other Burners: If you have more burners with burner grates, repeat the above steps to remove the grates from each burner.
By following these steps, you have successfully removed the burner grates from your Kenmore stove. Next, we will proceed to accessing the stove top components in Step 5.
Step 5: Accessing the Stove Top Components
Now that you have removed the burner grates, you can start accessing the components beneath the stove top. Follow these steps:
- Locate the Fasteners: Look at the edges of the stove top to identify the fasteners. These may be screws, clips, or other types of fasteners that secure the stove top in place. Take note of their location as you will need to remove them to lift the stove top.
- Use the Screwdriver: Depending on your stove model, you may need to use a screwdriver to remove the fasteners. Use the appropriate size and type of screwdriver to unscrew the screws or release the clips that are holding the stove top.
- Keep the Fasteners Safe: As you remove the fasteners, make sure to keep them in a safe place. This will ensure that you don’t lose or misplace them when it comes time to reassemble the stove top.
- Lift the Stove Top: Once all the fasteners are removed, carefully lift the stove top straight up. Be cautious as it may still be connected to some wires or components. Lift it gently to avoid any damage or strain.
- Secure the Stove Top: Once the stove top is lifted, prop it up securely using a wooden block or any other sturdy object. This will allow you to access the components beneath without the risk of the stove top falling down.
With the stove top lifted, you have successfully accessed the components beneath. Now you can proceed to the next step: cleaning the stove top components.
Step 6: Cleaning the Stove Top Components
Now that you have accessed the components beneath the stove top, it’s time to clean them. Follow these steps:
- Inspect the Components: Take a close look at the components beneath the stove top. Check for any visible dirt, grease, or debris. Note any areas that require special attention when cleaning.
- Prepare the Cleaning Solution: Depending on the level of dirt and residue, prepare a solution of mild dish soap and warm water or use a specialized stove cleaner suitable for your particular stove model. Follow the manufacturer’s instructions on the cleaner to ensure proper usage.
- Dip a Cloth or Sponge: Dip a clean cloth or sponge into the cleaning solution. Wring out any excess liquid, ensuring the cloth or sponge is damp but not dripping.
- Clean the Components: Gently wipe down the stove top components, including the burners, igniters, and any visible surfaces beneath the stove top. Pay attention to remove any stubborn stains or greasy buildup. For hard-to-reach areas, use a scrub brush or an old toothbrush.
- Rinse and Dry: Once you have thoroughly cleaned the components, rinse them with clean water to remove any soap residue. Use a clean, dry cloth or towel to pat them dry.
- Clean the Stove Top: While the components are drying, take the opportunity to clean the stove top itself. Wipe down any visible surfaces, removing any dirt or debris. Use the appropriate cleaning agent for your stove model, ensuring it is safe for the surface.
- Allow Components to Completely Dry: Before reassembling the stove top, ensure that all the components, as well as the stove top itself, are completely dry. This will prevent any moisture-related issues when the stove is in use.
By following these steps, you have successfully cleaned the stove top components. Now it’s time to reassemble the stove top in the next step.
Read more: How To Open Frigidaire Gas Stove Top
Step 7: Reassembling the Stove Top
Now that you have cleaned the stove top components, it’s time to reassemble the stove top. Follow these steps:
- Ensure Components are Dry: Double-check that all the components, as well as the stove top itself, are completely dry. This will prevent any moisture-related issues and ensure a safe and functional stove.
- Lower the Stove Top: Carefully lower the stove top back into its original position. Make sure not to force it or damage any wires or connections beneath.
- Align the Stove Top: As you lower the stove top, align it properly with the burner openings and any other corresponding components. Ensure that it sits evenly and securely in place.
- Reattach the Fasteners: Using the same screws or clips you removed earlier, reattach the fasteners to secure the stove top in place. Use a screwdriver or the appropriate tool to tighten the screws or secure the clips.
- Reinstall the Burner Grates: Take the burner grates you set aside earlier and place them back on top of their respective burners. Ensure a proper fit and alignment, making sure they are secure and level.
- Replace the Burner Caps: Place the burner caps back onto their respective burners. Ensure they are aligned and seated properly to prevent any issues with burner performance.
- Plug in or Restore Power: Once you have reassembled the stove top, plug in the stove or restore power by turning on the circuit breaker dedicated to the stove. Double-check that the power is restored by testing the burners or the oven.
By following these steps, you have successfully reassembled the stove top. Take a moment to admire your clean and functional Kenmore stove. Now you can safely use your stove for cooking and enjoy the results!
Remember to consult your stove’s manual for any specific reassembly instructions or guidelines provided by the manufacturer. Following these instructions will ensure optimal performance and safety.
With the stove top reassembled and ready for use, you have completed the process of opening a Kenmore stove top. Congratulations on a job well done!
However, if you encounter any issues or are unsure about any steps, it is always best to consult a professional or the manufacturer for further assistance.
Thank you for using this comprehensive guide on how to open a Kenmore stove top. Happy cooking!
Conclusion
Congratulations on successfully learning how to open a Kenmore stove top! By following the steps outlined in this comprehensive guide, you have gained the knowledge and confidence to safely access the components beneath the stove top for cleaning or repairs. Prioritizing safety, using the necessary tools, and following proper procedures are essential in ensuring a smooth and hassle-free experience.
Remember to always disconnect the power before starting any maintenance work on your stove and to allow the stove to cool down completely to avoid any accidents. Use the appropriate tools, such as screwdrivers and pliers, to remove the stove grates, burner caps, and burner grates.
Once the components are accessible, take the time to inspect and clean them thoroughly, removing any dirt, grease, or debris. Using mild dish soap, stove cleaner, and the right cleaning tools will help restore the components to their optimal condition. Make sure to properly dry all the components before reassembling the stove top.
Reassembling the stove top involves aligning and securing the components, such as the burner grates and burner caps, and reconnecting the power source. Take care to follow the instructions provided in the stove’s manual and ensure that the stove top is properly aligned and secured in place.
As you use your clean and functional Kenmore stove, remember to prioritize safety, regularly clean the stove top, and perform routine maintenance to keep it in optimal condition. Consult the manufacturer’s guidelines for specific care and maintenance instructions for your particular stove model.
We hope this guide has been helpful in guiding you through the process of opening a Kenmore stove top. If you have any further questions or need additional assistance, do not hesitate to consult a professional or contact the manufacturer directly.
Thank you for choosing this guide, and happy cooking with your Kenmore stove!
Frequently Asked Questions about How To Open A Kenmore Stove Top
Was this page helpful?
At Storables.com, we guarantee accurate and reliable information. Our content, validated by Expert Board Contributors, is crafted following stringent Editorial Policies. We're committed to providing you with well-researched, expert-backed insights for all your informational needs.


0 thoughts on “How To Open A Kenmore Stove Top”