Articles
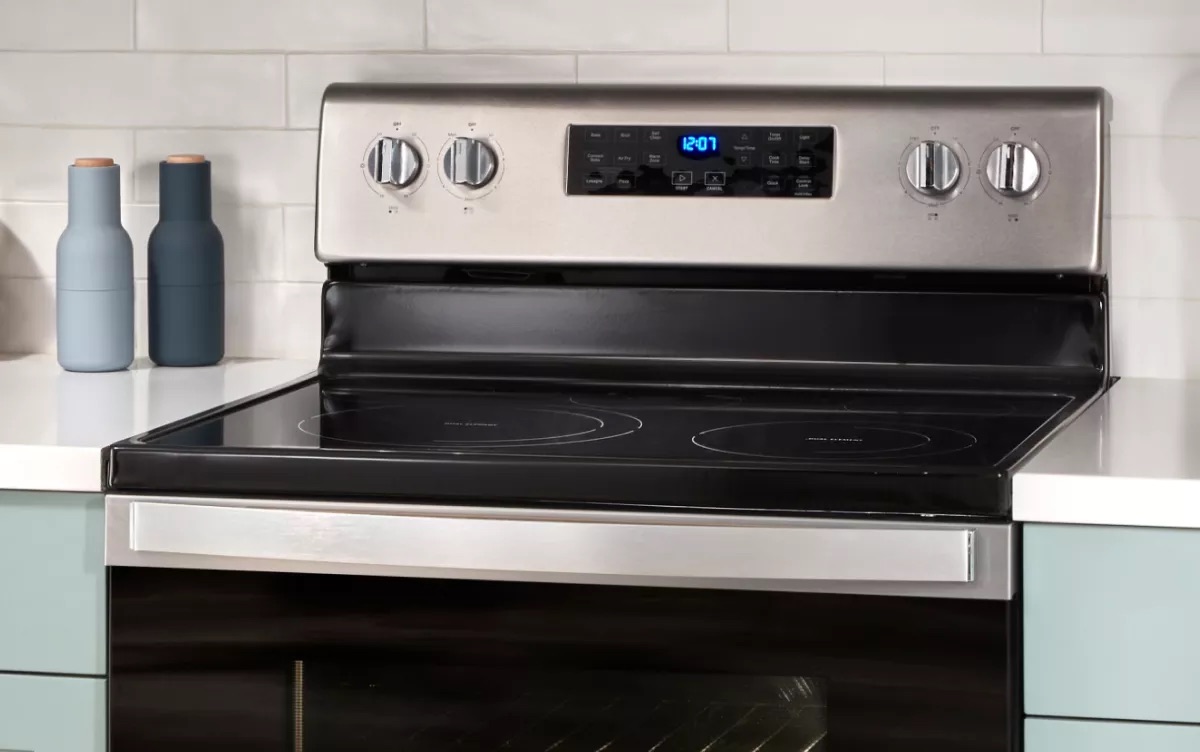
How To Open Whirlpool Stove Top
Modified: October 20, 2024
Learn how to easily open your Whirlpool stove top with our informative articles. Find step-by-step instructions and troubleshooting tips to get your stove top working again.
(Many of the links in this article redirect to a specific reviewed product. Your purchase of these products through affiliate links helps to generate commission for Storables.com, at no extra cost. Learn more)
Introduction
Opening the Whirlpool stove top may seem like a daunting task, but with the right knowledge and tools, it can be a straightforward process. Whether you need to clean the burners, replace a faulty part, or perform any other maintenance, knowing how to open your Whirlpool stove top is essential.
Before we dive into the step-by-step process, it’s important to note that safety should always be your top priority. Make sure to follow all safety precautions and guidelines provided by Whirlpool and consult your owner’s manual if needed.
This article will guide you through the process of opening your Whirlpool stove top, from turning off the power to reassembling the components. So, let’s get started!
Key Takeaways:
- Safety first! Always turn off the power, allow the stove to cool, and wear protective gear when opening your Whirlpool stove top. Following safety precautions is crucial to prevent accidents and ensure a safe environment.
- The step-by-step process of opening, replacing, and reassembling the Whirlpool stove top involves careful handling, proper disconnection and reconnection of igniter wires, and attention to detail. Following these steps will help maintain your stove in top working condition.
Read more: How To Open Hotpoint Stove Top
Safety Precautions
Before you begin opening your Whirlpool stove top, it’s crucial to take some safety precautions to prevent any accidents or injuries. Here are a few important guidelines to follow:
- Turn off the power: Start by switching off the power supply to the stove. This can typically be done by flipping the corresponding circuit breaker in your electrical panel. Double-check to ensure that the power is indeed off before proceeding.
- Allow time to cool down: Give your stove top some time to cool down before attempting to open it. The burners can remain hot for a while after they’ve been turned off, so it’s safer to wait until they are cool to the touch.
- Use protective gear: Wear appropriate protective gear, such as gloves and safety goggles, to protect yourself from any potential hazards during the process. This will help prevent injuries and ensure your safety.
- Follow Whirlpool’s guidelines: Consult your owner’s manual for specific safety instructions provided by Whirlpool. Different stove models may have unique safety measures, so it’s crucial to follow the manufacturer’s guidelines.
- Be cautious of gas lines: If you have a gas stove, exercise extra caution when opening the stove top. Make sure the gas supply is turned off properly and be mindful of any gas lines when handling the components.
- Keep children and pets away: It’s essential to maintain a safe and controlled environment while working on your stove top. Keep children and pets away from the area to prevent accidents and potential injuries.
- Ask for professional help if needed: If you’re unsure or uncomfortable with any step of the process, it’s always better to seek professional assistance. An experienced technician can handle the opening of your Whirlpool stove top and ensure everything is done safely and correctly.
By following these safety precautions, you can minimize the risk of accidents and ensure a safe environment while opening your Whirlpool stove top.
Tools and Materials Required
Before you begin opening your Whirlpool stove top, gather the following tools and materials to ensure a smooth and efficient process:
- Flathead screwdriver: You’ll need a flathead screwdriver to remove any screws or fasteners that are securing the stovetop in place.
- Needle-nose pliers: These pliers will come in handy for disconnecting and reattaching the igniter wires when removing and installing the stovetop.
- Clean cloth or sponge: It’s always a good idea to have a clean cloth or sponge nearby to wipe away any dirt, debris, or spills that you may encounter during the process.
- All-purpose cleaner: If your stovetop needs a thorough cleaning while it’s open, have an all-purpose cleaner handy to effectively remove stains, grease, and grime.
- Replacement parts (if necessary): If you’re opening the stove top to replace a specific component, make sure to have the new part readily available. This could include burner caps, igniter switches, or other related parts.
- Protective gloves: To protect your hands from any sharp edges or hot surfaces, wear protective gloves throughout the process. This will help prevent injuries and ensure your safety.
- Safety goggles: As a precautionary measure, wear safety goggles to protect your eyes from any debris or loose particles that could be released when opening the stove top.
By having these tools and materials prepared and within reach, you’ll be well-equipped to tackle the task of opening your Whirlpool stove top and completing any necessary maintenance or repairs.
Step 1: Turn off the Power
Before you begin opening your Whirlpool stove top, it’s crucial to disconnect the power supply to ensure your safety. Follow these steps:
- Locate the electrical panel: Find the electrical panel in your home, usually located in the basement, utility room, or garage. Open the cover to access the circuit breakers.
- Identify the stove circuit: Look for the circuit breaker that controls the power to your stove. It is typically labeled “Range” or “Stove” on the panel.
- Turn off the stove circuit: Flip the corresponding circuit breaker to the “Off” position. This will cut off the power supply to your stove and ensure that no electrical current is flowing through it.
- Verify the power is off: To double-check that the power is turned off, try turning on one of the stove burners or the oven. If the appliance remains unresponsive, you can be confident that the power has been successfully disconnected.
It’s essential to turn off the power before proceeding with opening the stove top to avoid any risk of electrical shock or injury. Remember, safety should always be a top priority when working with electrical appliances.
Step 2: Remove the Grates and Burner Caps
Once you’ve turned off the power and ensured your safety, it’s time to remove the grates and burner caps from your Whirlpool stove top. Follow these steps:
- Allow the stove top to cool down: Before you begin, make sure the stove top has had enough time to cool down. Touch the burners to ensure they are no longer hot to the touch.
- Grasp the grates: Starting from one corner, firmly grasp the grates and lift them off the stove top. Depending on your stove model, the grates may be connected as individual pieces or as a single unit.
- Remove the burner caps: Once the grates are removed, locate the burner caps. These are typically circular and sit on top of the burners. Gently lift them off and set them aside.
- Set the grates and burner caps aside: Place the grates and burner caps in a safe location, away from your work area. You may want to clean them separately or inspect them for any damage or wear.
Removing the grates and burner caps will allow you better access to the stove top and its components. Keep these parts carefully stored to prevent any damage or loss while you continue with the next steps of opening your Whirlpool stove top.
Read more: How To Open Frigidaire Gas Stove Top
Step 3: Lift the Stovetop
With the grates and burner caps safely removed, you can now proceed to lift the stovetop of your Whirlpool stove. Follow these steps:
- Locate the hinge or securing mechanism: Look for the hinge or securing mechanism at the back of the stovetop. This is typically located near the rear edge, connecting it to the body of the stove.
- Release the securing mechanism: Depending on your stove model, you may need to push or lift a latch, use a screwdriver to unscrew fasteners, or simply lift the stovetop off its hinges. Consult your owner’s manual if you’re unsure of the specific method for your stove.
- Gently lift the stovetop: Using both hands, carefully lift the front edge of the stovetop. Slowly raise it until it is at a comfortable angle and the hinge or securing mechanism is fully disengaged. Be mindful of any wires or connections that may be attached.
- Prop the stovetop open: Once the stovetop is lifted, you may find it helpful to use a sturdy object, such as a wooden block or a rolled-up towel, to prop it open. This will give you better access to the internal components.
By lifting the stovetop, you gain access to the inner workings of your Whirlpool stove. Take caution to avoid any unnecessary pressure or rough handling to prevent damage to the stove or any connected wires.
Step 4: Disconnect the Igniter Wires
Now that you have lifted the stovetop, the next step is to disconnect the igniter wires. These wires are responsible for igniting the burners on your Whirlpool stove. Follow these steps carefully:
- Locate the igniter wires: Look for a set of wires connected to each burner. These wires are usually thin and have a connector at the end.
- Identify the type of connector: There are different types of connectors used for igniter wires, including plug connectors, twist connectors, or quick-release connectors. Take note of the type of connector you have.
- Disconnect the wires: Depending on the type of connector, follow the appropriate method to disconnect the igniter wires. This may involve gently pulling on the connector, twisting it counterclockwise, or pressing a release button and pulling the wire out.
- Label the wires (optional): If you want to ensure that you reconnect the wires correctly later, you can use masking tape and a marker to label each wire with its corresponding burner position.
- Repeat for each igniter wire: Disconnect the igniter wires for each burner, taking care not to damage the wires or connectors.
By disconnecting the igniter wires, you are disconnecting the power supply to the burners. This allows you to safely proceed with removing the stovetop and accessing the internal components of your Whirlpool stove.
Before attempting to open a Whirlpool stove top, make sure the stove is turned off and cool. Then, carefully lift the stove top to access the burners and interior components. Always refer to the user manual for specific instructions.
Step 5: Remove the Old Stovetop
With the igniter wires safely disconnected, you are now ready to remove the old stovetop from your Whirlpool stove. Follow these steps to complete this process:
- Inspect for any additional fasteners: Before proceeding, check if there are any screws or fasteners securing the stovetop to the stove body. These may be located underneath the edge of the stovetop or near the burners. If present, use a screwdriver to remove them.
- Lift the stovetop: With the fasteners removed, carefully lift the stovetop from its position. Apply even pressure and lift from the front edge, keeping the stovetop level to avoid any damage or strain.
- Clear any obstacles: As you lift the stovetop, be mindful of any obstacles such as burner grates or other components that may be attached. Clear them out of the way to ensure a smooth removal.
- Set the old stovetop aside: Once the stovetop is completely lifted, find a safe and stable place to set it aside. Ensure that the surface is clean and protected to prevent any scratching or damage.
- Clean the surface: Take this opportunity to clean the area where the old stovetop was resting. Use a mild detergent and a clean cloth to remove any dirt, grease, or debris, ensuring a clean workspace for the installation of the new stovetop.
By following these steps, you have successfully removed the old stovetop from your Whirlpool stove, making way for the installation of a new one or the necessary maintenance and repairs.
Step 6: Install the New Stovetop
Now that the old stovetop has been removed, it’s time to install the new stovetop on your Whirlpool stove. Follow these steps to ensure a proper installation:
- Check for compatibility: Before proceeding, ensure that the new stovetop is compatible with your Whirlpool stove model. Refer to the manufacturer’s instructions or consult with a professional if you have any doubts.
- Position the new stovetop: Lift the new stovetop and carefully position it over the opening in the stove body. Align the burner openings with the corresponding burners beneath.
- Lower the stovetop in place: Gradually lower the stovetop onto the stove body, ensuring a snug and secure fit. Take care not to force it down, as this can cause damage to both the stovetop and the stove itself.
- Align any screw holes: If there were screws or fasteners that held the old stovetop in place, check if the new stovetop has corresponding holes. Align the holes correctly, if applicable, to prepare for securing the stovetop.
- Attach any necessary screws or fasteners: If required, use a screwdriver to attach the screws or fasteners to secure the new stovetop. Follow the manufacturer’s instructions or refer to the markings on the stovetop for guidance.
- Ensure a flush and level surface: Double-check that the stovetop is completely flush and level with the stove body. This helps to ensure optimal performance and prevent any issues with the burners or cooking surface.
By following these steps, you will successfully install the new stovetop on your Whirlpool stove, preparing it for future use and functionality.
Read more: How To Clean Whirlpool Stove Burners
Step 7: Reconnect the Igniter Wires
With the new stovetop securely in place, it’s time to reconnect the igniter wires to ensure proper functioning of the burners on your Whirlpool stove. Follow these steps to complete this process:
- Locate the igniter wires: Identify the igniter wires that you previously disconnected. These wires are typically thin and have connectors at the end.
- Inspect the connectors: Check the connectors on both the igniter wires and the corresponding terminals on the stovetop. Ensure they are clean, free of debris, and in good condition.
- Align the connectors: Align the connectors on the igniter wires with the corresponding terminals on the stovetop. Take care to match the correct wire to the appropriate burner position if you labeled them during disconnection.
- Push or twist to reconnect: Depending on the type of connector, gently push or twist the igniter wire connector onto the terminal until it clicks or locks into place. Make sure the connection is secure and snug.
- Repeat for each igniter wire: Reconnect the igniter wires for each burner, ensuring the proper alignment and secure connection for each wire.
By reconnecting the igniter wires, you are restoring the power supply to the burners and ensuring they can ignite properly. Pay attention to the connection quality and make any necessary adjustments to ensure a reliable and secure connection.
Step 8: Lower the Stovetop
After reconnecting the igniter wires, it’s time to lower the stovetop back into its original position on your Whirlpool stove. Follow these steps to complete this process:
- Ensure all wires are properly aligned: Check that all igniter wires are neatly tucked away and not in the way of the stovetop as you lower it.
- Hold the stovetop with both hands: Grasp the stovetop firmly with both hands, using one hand on each side of the stovetop.
- Slowly lower the stovetop: Gently lower the stovetop back onto the stove body, ensuring a level and flush fit. Take care not to disturb any of the wires or connections as you lower it.
- Make sure the stovetop is properly seated: Once the stovetop is in place, give it a slight push or jiggle to ensure it is properly seated and secure on the stove body.
- Check for any obstructions: Confirm that there are no obstructions preventing the stovetop from fully lowering. Ensure that all components, such as burners or grates, are in their correct positions and not interfering with the stovetop.
By following these steps, you will successfully lower the stovetop back into its original position on your Whirlpool stove, allowing for safe and proper functioning of your burners and cooking surface.
Step 9: Reinstall the Grates and Burner Caps
With the stovetop back in place, the final step is to reinstall the grates and burner caps to complete the reassembly of your Whirlpool stove. Follow these steps to properly reinstall the grates and burner caps:
- Retrieve the grates and burner caps: Gather the grates and burner caps that you set aside earlier.
- Position the burner caps: Place each burner cap onto its respective burner, ensuring proper alignment. The burner caps are typically circular in shape and serve as a protective cover for the burners.
- Place the grates over the burners: Take the grates and position them back onto the stovetop, aligning them with the burner caps. Depending on your stove model, the grates may attach individually or as a single unit.
- Ensure proper fit: Adjust the grates and burner caps as needed to achieve a secure and balanced fit. Make sure they are level and stable on the stovetop.
- Test the stability of the grates: Gently press on each grate to ensure it is securely in place. Make sure the grates do not wobble or move excessively, as this could pose a safety hazard during cooking.
By reinstalling the grates and burner caps, you are putting the finishing touches on the reassembly of your Whirlpool stove. This step completes the process, and your stove is now ready for use.
Conclusion
Congratulations! You have successfully learned how to open your Whirlpool stove top. By following the step-by-step guide and taking necessary safety precautions, you can now perform maintenance, cleaning, or repair tasks on your stove without difficulty.
Remember, when working with electrical appliances, safety should always be your top priority. Always disconnect the power and allow the stove top to cool down before proceeding. Additionally, if you feel uncertain about any step or encounter any complications, it’s best to seek professional assistance.
The process of opening your Whirlpool stove top involves turning off the power, removing the grates and burner caps, lifting the stovetop, disconnecting the igniter wires, removing the old stovetop, installing the new stovetop, reconnecting the igniter wires, lowering the stovetop back into place, and finally reinstalling the grates and burner caps.
By following these steps carefully, you can maintain and keep your Whirlpool stove in top working condition. Performing regular maintenance and cleaning can extend the lifespan of your stove and ensure optimal performance for all your cooking needs.
Thank you for taking the time to learn how to open your Whirlpool stove top. Now, you can confidently handle any necessary maintenance or repairs, saving time and money while enjoying a functional and efficient appliance.
Frequently Asked Questions about How To Open Whirlpool Stove Top
Was this page helpful?
At Storables.com, we guarantee accurate and reliable information. Our content, validated by Expert Board Contributors, is crafted following stringent Editorial Policies. We're committed to providing you with well-researched, expert-backed insights for all your informational needs.


0 thoughts on “How To Open Whirlpool Stove Top”