Articles
How To Paint Candles
Modified: October 20, 2024
Learn how to paint candles with these helpful articles. Find step-by-step guides and tips for creating beautiful, customized candles at home.
(Many of the links in this article redirect to a specific reviewed product. Your purchase of these products through affiliate links helps to generate commission for Storables.com, at no extra cost. Learn more)
Introduction
Welcome to the fascinating world of candle painting! If you are looking to add a personal touch to your candles or create unique and customized gifts, this article is just for you. Painting candles is a fun and creative activity that allows you to express your artistic talents and transform plain candles into eye-catching pieces of art.
Whether you are a seasoned artist or a beginner dipping your toes into the world of crafts, candle painting is a simple and enjoyable process that can yield stunning results. In this article, we will guide you through the steps and techniques involved in painting candles, from preparation to finishing touches.
Before we dive into the details, let’s take a moment to gather the materials you will need for this project:
Read more: What Size Candles For Candle Holders
Materials Needed
- Paint: Acrylic paints are a popular choice for candle painting due to their versatility and vibrant colors.
- Candles: Choose candles made of a material that is suitable for painting, such as pillar candles or taper candles.
- Brushes: A selection of different brush sizes and shapes will help you achieve various effects and details.
- Palette: A palette or a plastic paint tray will be useful for mixing and blending your paint colors.
- Newspaper or drop cloth: To protect your work area from spills and splatters.
Now that we have all the necessary materials, let’s move on to the first step in candle painting: preparing the candles.
Key Takeaways:
- Unleash your creativity and transform ordinary candles into personalized works of art with the right materials, techniques, and color choices. Enjoy the process and let your artistic expression shine through your designs.
- Ensure successful candle painting by understanding color theory, mastering painting techniques, and applying proper drying, curing, and sealing methods. Troubleshoot common painting mistakes to achieve professional and long-lasting results.
Materials Needed
Before you begin your candle painting adventure, it’s important to gather all the necessary materials. Here’s a list of the items you’ll need:
Paint
The first and most crucial item on your list is paint. Acrylic paint is commonly used for candle painting due to its vibrant colors, quick drying time, and versatility. You can find acrylic paint in an array of shades and finishes, such as matte, metallic, or glitter. Make sure to choose paint that is specifically labeled as suitable for use on candles.
Candles
The foundation of your candle painting project is, of course, the candles themselves. It’s essential to select candles that are made of a material suitable for painting. Pillar candles and taper candles are popular choices as their smooth surfaces provide ample canvas space for your designs to shine. Ensure that the candles are clean and free of any dust or debris before painting.
Read more: How To Clean Candles
Brushes
To bring your artistic vision to life, you’ll need a selection of brushes. Different brush sizes and shapes allow for greater versatility and precision while painting. Flat brushes are excellent for covering broad areas, while round brushes are perfect for adding intricate details. Make sure your brushes are clean and dry before dipping them into the paint.
Palette
A palette or a plastic paint tray will come in handy for mixing and blending your paint colors. It’s important to have a clean surface to mix your colors, ensuring that they are consistent and well-matched. Consider using a palette knife or a toothpick to mix your colors, making it easier to create different shades and tones.
Newspaper or Drop Cloth
Protecting your work area is essential to prevent any paint spills or splatters. Lay down a newspaper or a drop cloth on your table or any other surface where you’ll be working. This will make for easy cleanup and ensure that your workspace stays clean and tidy.
Now that you have all the necessary materials assembled, you’re ready to embark on your candle painting journey. The next step is preparing the candles for painting, which involves cleaning them and ensuring a smooth and even surface. Let’s dive into the details of preparing the candles in the next section.
Preparing the Candles
Before you begin painting your candles, it’s important to properly prepare them for the best painting results. This preparation process involves cleaning the candles, removing any labels or stickers, and preparing the surface for paint adhesion.
Read more: How To Care For Candles
Cleaning the Candles
The first step in preparing your candles is to ensure that they are clean. Even if they appear to be free of dirt or dust, it’s best to give them a quick wipe-down. Gently wipe the surface of the candles with a soft cloth or a paper towel to remove any residue or oils that may affect paint adhesion.
Removing Labels and Stickers
If your candles have any labels, stickers, or price tags, it’s important to remove them before painting. These labels can interfere with the paint application and may prevent the paint from properly adhering to the surface. Carefully peel off any labels or stickers, taking your time to avoid damaging the candle’s surface.
Preparing the Surface
To ensure that the paint adheres well to the candles, it’s essential to prepare the surface. If your candles have a glossy finish, lightly sand the surface using fine-grit sandpaper. This will create a slightly rough texture that allows the paint to adhere better. Be sure to wipe away any sanding dust after sanding to ensure a clean working surface.
If you’re working with wax candles, it’s beneficial to warm the surface slightly before painting. This can be done by using a hairdryer on a low heat setting or by placing the candles near a gentle heat source like a radiator. By warming the surface, the paint will adhere more effectively, resulting in a smoother and longer-lasting finish.
Once you have cleaned, removed any labels, and prepared the surface, your candles are now ready to be transformed into personalized works of art. In the next section, we will explore the different types of paint you can use for candle painting and consider the factors to keep in mind when choosing the right paint.
Choosing the Right Paint
When it comes to candle painting, selecting the right type of paint is crucial for achieving the desired results. Let’s explore the different types of paint you can use and consider the specific considerations for different candle materials.
Read more: How To Store Candles
Types of Paint to Use
Acrylic paint is the most commonly used paint for candle painting due to its versatility, vibrant colors, and quick drying time. It adheres well to different candle surfaces, providing excellent coverage and durability. Look for acrylic paint specifically labeled as suitable for use on candles.
Another option is enamel paint, which is known for its glossy finish and durability. Enamel paint is often used for painting glass or metal objects, but it can also be used on certain types of candles. Keep in mind that enamel paint may require longer drying times and additional precautions during the painting process.
Consider using fabric paint if you are working with fabric-wrapped candles or candles that have a fabric ribbon or bow. Fabric paint is designed to adhere well to textiles and can provide a more flexible finish, accommodating the movement of the fabric without cracking or peeling.
Gel wax paints are a unique option that allows you to create translucent or stained glass-like effects on candles. These paints are typically applied to the outside of the candle and can create beautiful, light-enhancing designs. Gel wax paints come in a range of vibrant colors and can be layered to achieve different effects.
Considerations for Different Candle Materials
When choosing paint for candle painting, you need to consider the type of candle material you are working with. Here are some important considerations based on different candle materials:
Regular Wax Candles: Acrylic paint is generally suitable for regular wax candles. The smooth surface of these candles allows for easy paint application and good adhesion. Ensure that the paint is heat-resistant and designed for use on candles to prevent melting or flaking when the candle is lit.
Pillar Candles: Pillar candles, with their larger surface area, provide ample space for intricate designs. Acrylic paint works well on pillar candles, allowing you to create stunning patterns and designs. Consider using a base coat of gesso or white acrylic paint on colored pillar candles to ensure that your colors remain vibrant and true.
Taper Candles: Taper candles, with their long and slender shape, offer a unique canvas for artistic expression. Acrylic paint is suitable for taper candles, but keep in mind that the paint should adhere well without cracking or flaking when the candle is lit and the wax begins to melt down the taper.
Fabric-Wrapped Candles: If you are working with fabric-wrapped candles or candles with fabric embellishments, fabric paint is the most suitable option. Fabric paint adheres well to textiles and allows for flexibility to accommodate any movement or stretching of the fabric.
By considering the type of paint you will use and the material of the candles, you can ensure a successful and long-lasting result. In the next section, we will dive into the creative aspect of candle painting and explore how to choose colors and designs that will make your painted candles truly stand out.
Selecting Colors and Designs
One of the most exciting aspects of candle painting is selecting the colors and designs that will bring your candles to life. Let’s explore how color theory comes into play in candle painting, how to choose complementary or contrasting colors, and how to plan your design for a visually appealing result.
Color Theory and Candle Painting
Understanding the basics of color theory can greatly enhance your candle painting experience. Color theory is the study of how colors interact with each other and how they can evoke different emotions and moods. By applying color theory principles, you can create harmonious and visually pleasing designs on your candles.
Consider utilizing the color wheel, a useful tool that showcases the relationship between different colors. Colors located next to each other on the color wheel, such as blue and green, are considered analogous and create a sense of harmony. On the other hand, colors located directly opposite each other, like red and green, are complementary and create a strong contrast.
Choosing Complementary or Contrasting Colors
When selecting colors for your candle designs, you can choose to use complementary or contrasting color schemes.
Complementary Colors: Complementary colors are directly opposite each other on the color wheel. They create a strong visual contrast and make each other appear more vibrant when used together. For example, pairing blue with orange or purple with yellow can result in striking candle designs that catch the eye.
Contrasting Colors: Contrasting colors are ones that are significantly different from each other. They create visual interest and can make your candle designs stand out. For example, using a combination of a warm color like red or orange with a cool color like blue or green can create a visually appealing contrast.
Planning Your Design
Before you start painting your candles, it’s helpful to plan out the design you want to achieve. Consider sketching your design on paper or creating a digital mockup to get a better idea of how it will look on your candles. This planning stage allows you to experiment with different color combinations and placements to ensure a visually appealing and balanced design.
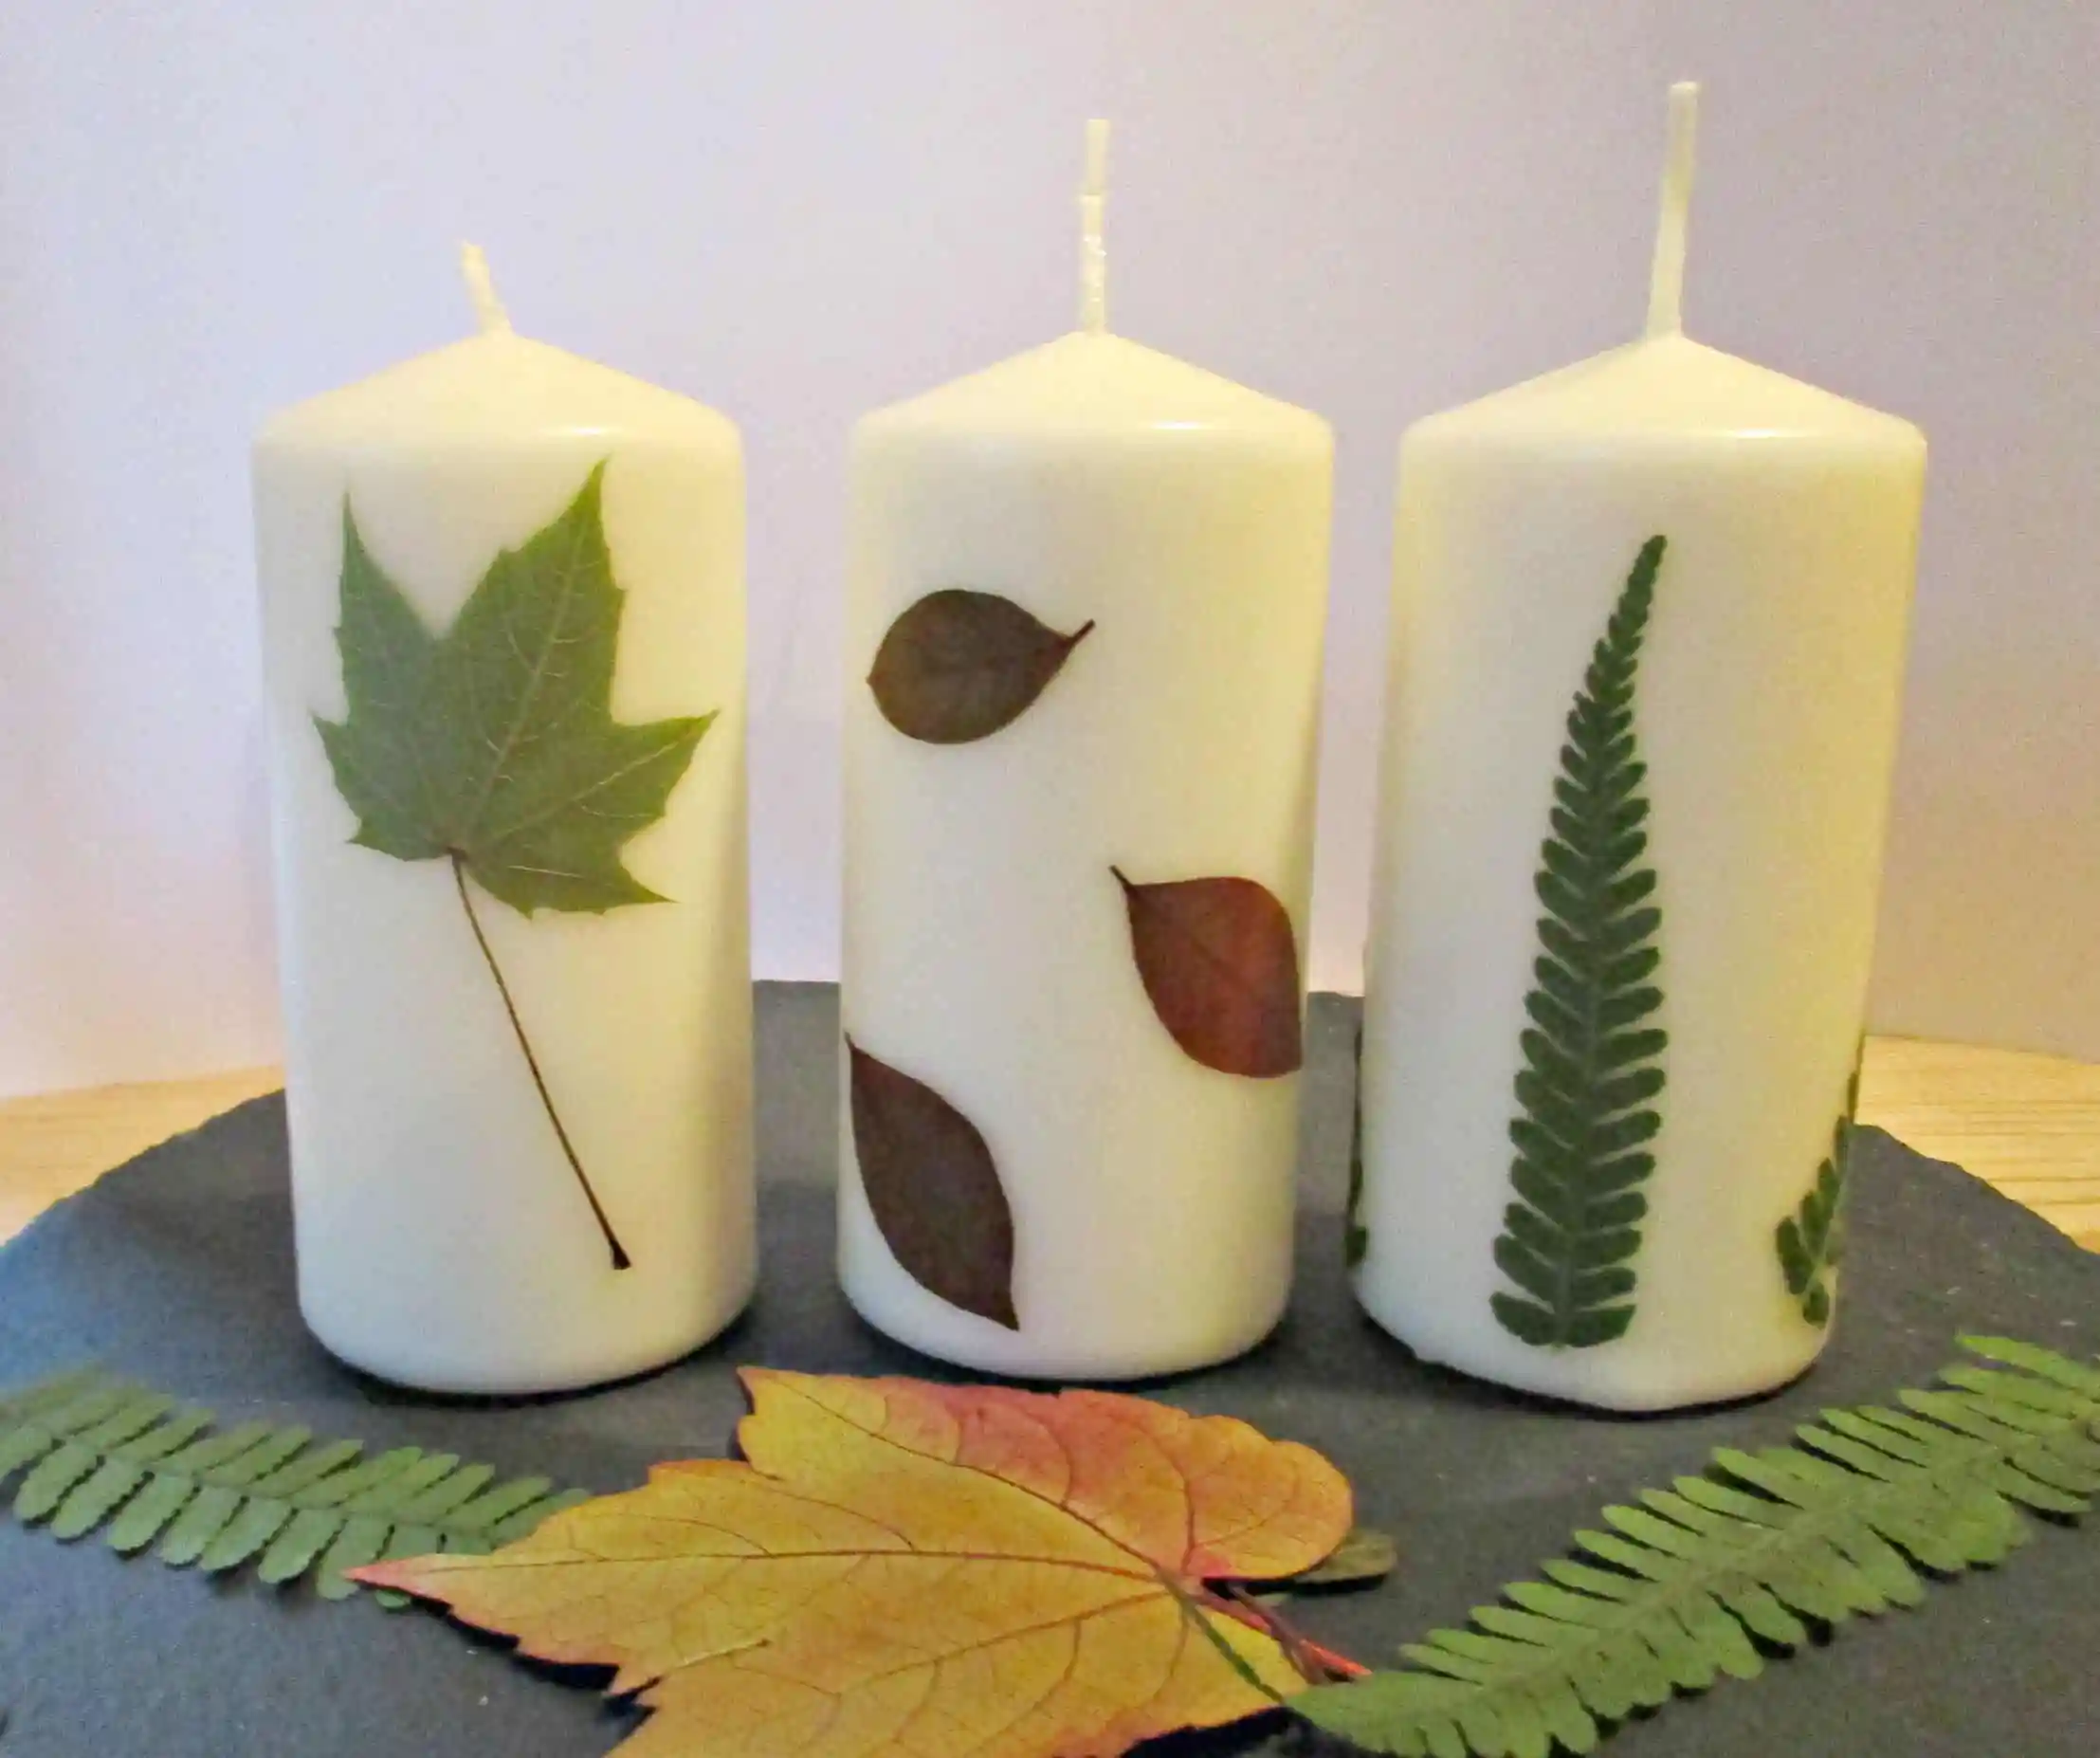
If you need some inspiration, you can look for candle painting ideas online or in craft magazines. Nature, abstract patterns, and geometric shapes are popular themes for candle designs, but feel free to get creative and make your designs unique.
Remember to take into account the shape and size of your candles when planning your design. Different candle shapes offer different areas for painting, and you can use this to your advantage in creating interesting and captivating designs.
By understanding color theory and selecting complementary or contrasting colors, as well as planning your design, you can create visually stunning and eye-catching candle designs. In the next section, we will explore the various painting techniques you can use to bring your designs to life on your candles.
Read more: How To Wholesale Candles
Painting Techniques
Now that you have your colors and designs ready, it’s time to dive into the painting process. Understanding and employing various painting techniques can help you achieve the desired effects and bring your candle designs to life. Let’s explore some essential techniques: basic brush strokes, layering colors, and adding texture or patterns.
Basic Brush Strokes
Mastering basic brush strokes is crucial for achieving precision and control in your candle painting. Here are some fundamental brush strokes to keep in mind:
- Flat Brush Strokes: Use a flat brush to create smooth and even strokes. This stroke is perfect for filling in larger areas or creating clean, straight lines.
- Round Brush Strokes: A round brush is ideal for adding fine details and intricate patterns. Use this brush for delicate brushwork and creating curves or smaller shapes.
- Dry Brush Strokes: Dip your brush lightly in paint and then remove excess paint by dabbing it on a paper towel. This technique creates a drier brush stroke with a more textured appearance, adding depth and dimension to your design.
- Blend Brush Strokes: Blend brush strokes are achieved by using two or more colors on the brush and applying them in a gentle, blending motion. This technique creates beautiful gradients and smooth transitions between colors.
Layering Colors
Layering colors can add richness and depth to your candle designs. Start by applying a base color on your candle surface and allow it to dry completely. Then, using a smaller brush, add additional colors on top of the base color, gradually building up the design and creating dimension. Layering colors allows for more intricate and detailed designs, giving your candles a professional and polished look.
Adding Texture or Patterns
To add visual interest and texture to your candle designs, consider incorporating various techniques to create patterns or add texture:
- Dry Brush Technique: Dip a dry brush into your paint and lightly brush it over the candle surface. This technique creates a rough, textured look that can resemble the texture of a canvas or give the impression of a weathered or aged surface.
- Sponging Technique: Dip a natural sea sponge or sponge brush into your paint and gently dab it onto the candle surface. This technique creates a mottled or speckled effect, adding texture and visual interest to your design.
- Stencil Technique: Use stencils to create patterns or designs on your candles. Secure the stencil onto the candle surface and then use a sponge or a stippling brush to apply the paint. Carefully remove the stencil to reveal your pattern.
- Freehand Technique: For those who are adept at painting, you can experiment with freehand techniques to create unique patterns or texture. Use small brushes and a steady hand to add intricate designs or fine details to your candles.
Using these painting techniques, you can elevate your candle designs and create visually stunning and textured surfaces. In the next section, we will explore different methods of applying the paint onto the candles, including painting with a brush and alternative methods.
Read more: How To Photograph Candles
Applying the Paint
Now that you have mastered the painting techniques, it’s time to explore the different methods of applying the paint onto your candles. Whether you prefer the traditional approach of using a brush or want to try alternative methods, there are various ways to achieve the desired effects on your candle designs.
Painting with a Brush
Using a brush is the most common and traditional method of applying paint to candles. Here are some tips for painting with a brush:
- Start by dipping your brush into the paint and remove any excess paint by wiping it gently on the side of the paint palette. This will prevent the paint from dripping excessively.
- Apply the paint onto your candles using the brush strokes and techniques discussed earlier. Ensure that the paint layer is even and covers the desired area.
- Allow the paint to dry completely before moving on to additional layers or colors. This will prevent smudging or mixing of the colors.
- If you want to add more details or layers, allow the previous layer to dry before applying the next layer. This will ensure crisp and clean lines.
- Lastly, clean your brushes thoroughly after each use to maintain their quality and extend their lifespan. Rinse them with water or a gentle brush cleaner until the water runs clear, then shape the bristles and let them air dry.
Dipping the Candles
Another method to apply paint to candles is through dipping. This technique works particularly well for tapered or cylindrical candles. Here’s how to dip your candles:
- Prepare a container of paint that is deep enough to fully submerge your candles. Ensure that the container is wide enough to accommodate the candle width.
- Heat the paint to a temperature that allows for easy dipping. Be careful not to overheat the paint, as it may affect the candle’s texture.
- Hold the candle by its wick and slowly dip it into the paint, ensuring that the entire area you want to paint is submerged. You can rotate the candle slightly to ensure even coverage.
- Once you have dipped the candle, gently lift it out of the paint and let the excess paint drip back into the container.
- Place the dipped candle on a drying rack or a newspaper to dry. Allow the paint to dry completely before handling or applying additional layers.
Alternative Methods
If you are looking to experiment with different techniques and create unique effects, consider these alternative methods:
- Splatter Painting: Dip a brush into the paint and flick it over the candle surface to create a splatter effect. This technique adds a playful and abstract element to your candle designs.
- Marbling: Use a toothpick or a thin tool to swirl different colored paints on the candle surface, creating a marbled effect. This technique adds a dynamic and eye-catching pattern to your candles.
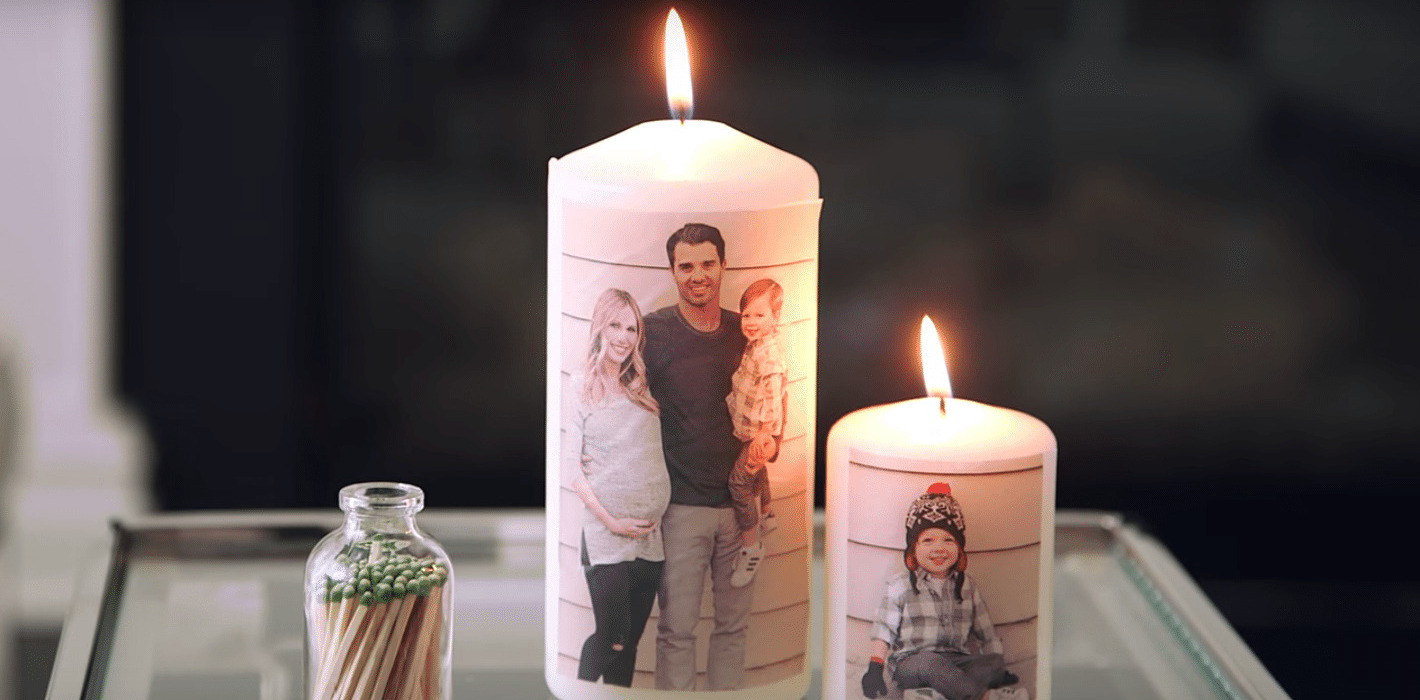
- Decoupage: Apply thin layers of specialized decoupage glue or Mod Podge to your candles and place cutouts from decorative napkins or tissue paper onto the glue. Smooth out any wrinkles or bubbles and let it dry. This technique allows you to add intricate designs or even images to your candles.
Feel free to experiment with different methods and techniques that suit your preferences and creative vision. Remember to allow ample drying time between layers and handle the candles with care to avoid smudging the paint.
In the next section, we will discuss the importance of drying and curing your painted candles to ensure a long-lasting and professionally finished result.
Read more: How To Label Candles
Drying and Curing
After you have applied the paint to your candles, it’s important to allow them to dry and cure properly. This step ensures that the paint adheres securely to the surface, giving you a long-lasting and professionally finished result. Let’s delve into the process of drying and curing your painted candles.
Allowing the Paint to Dry
The first step in the drying process is to allow the paint to dry completely. The drying time will depend on the type of paint used and the thickness of the applied layers. Here are some general tips for allowing the paint to dry:
- Place the painted candles on a flat surface and avoid touching or moving them until they are fully dry. This will prevent smudging or distorting the painted design.
- Provide adequate ventilation in the drying area to help expedite the drying process.
- Depending on the drying time specified on the paint label, it may take a few hours or even overnight for the paint to dry completely. Be patient and avoid rushing the process.
- Check for any areas that appear wet or sticky before considering the paint to be fully dry. If the paint is not completely dry, it may smear or transfer when touched.
Once the paint is dry to the touch, you can proceed to the next step of the process: curing the painted candles.
Curing the Painted Candles
Curing involves allowing the paint to fully harden and bond to the candle surface. This step ensures that the paint withstands heat, allows for safe burning (if applicable), and provides a durable finish. Here’s how to properly cure your painted candles:
- After the paint has dried, leave the painted candles undisturbed for an additional 24 to 48 hours to allow the paint to fully cure.
- During the curing process, keep the candles in a cool and dry area to prevent any unwanted moisture or humidity from affecting the paint’s integrity.
- Avoid placing the painted candles in direct sunlight or near sources of excessive heat, as this can cause the paint to melt or soften.
- If you plan on using the painted candles for decoration purposes only and not for burning, you can skip the curing process. However, if you intend to burn the candles, it is crucial to allow them to cure completely for the safety of the design and to prevent any fumes or color transfer.
By properly allowing the paint to dry and curing the painted candles, you ensure that your designs are well-preserved and have a long lifespan. Now that your candles are dried and cured, it’s time to add the finishing touches in the next section.
Sealing and Finishing
Once your painted candles have dried and cured, it’s time to seal and finish them to protect the paint and enhance the overall design. Sealing the paint will provide a protective layer and increase the longevity of your artwork. Additionally, you can add extra embellishments to further enhance the visual appeal of your painted candles. Let’s delve into the sealing and finishing process.
Read more: What Are Candles For
Applying a Sealant
To protect the painted surface of your candles and create a more durable finish, applying a sealant is highly recommended. Here are some steps to follow when applying a sealant:
- Ensure that the painted candles are clean and free from any dust or debris before applying the sealant.
- Select a sealant that is specifically formulated for use on painted candles. Look for sealants that are heat-resistant and provide a clear, glossy, or matte finish, depending on your preference.
- Using a clean brush, apply a thin and even layer of sealant over the entire painted surface of the candles. Take care not to brush too heavily, as this can disturb the painted design.
- Allow the sealant to dry completely according to the instructions provided on the sealant’s packaging. This will usually take a few hours.
- If desired, you can apply additional layers of sealant for added protection and depth of finish. Just make sure to let each layer dry completely before applying the next.
Applying a sealant not only protects your painted candles but also gives them a professional and finished look. It can enhance the colors and make them appear more vibrant, while also adding a layer of durability.
Enhancing the Design with Additional Embellishments
If you want to take your painted candles to the next level, you can further enhance the design by adding embellishments. Here are some ideas to consider:
- Rhinestones or Beads: Add a touch of sparkle and elegance by attaching rhinestones or beads to your painted candles using clear-drying adhesive. Place them strategically on your design to draw attention to specific areas.
- Ribbons or Fabric: Tie a decorative ribbon around the base or the middle of the painted candles to complement the design. You can also wrap fabric or lace around the candles for added texture and visual interest.
- Glitter or Metallic Accents: Apply a thin layer of clear-drying adhesive on specific areas of the painted candles and sprinkle glitter or metallic accents onto the adhesive. This will create a stunning shimmer effect.
- Stencils or Stamps: Use stencils or stamps to add additional designs or patterns to your painted candles. Apply paint over the stencil or stamp and carefully transfer it onto the candle surface for a unique and personalized touch.
- Embossing: Experiment with embossing powders to create raised designs or textures on your painted candles. Apply embossing ink or adhesive on selected areas, sprinkle embossing powder, and use a heat gun to melt and set the powder.
These additional embellishments can elevate your painted candles to a whole new level, adding dimension, texture, and a touch of personal flair.
With the sealing and finishing touches complete, your painted candles are now ready to be displayed or gifted. In the concluding section, we will share some helpful tips and troubleshooting advice to ensure a smooth and successful candle painting experience.
Tips and Troubleshooting
As you engage in the exciting process of candle painting, it’s helpful to keep a few tips and troubleshooting techniques in mind. By being aware of common painting mistakes and knowing how to troubleshoot any issues that may arise, you can ensure a smooth and successful candle painting experience. Let’s explore some helpful tips and troubleshoot common issues:
Common Painting Mistakes and How to Avoid Them
Here are some common painting mistakes that you may encounter while painting candles and tips on how to avoid them:
- Uneven Coverage: Apply paint in thin layers, allowing each layer to dry before applying the next. This helps ensure even coverage and prevents globs of paint on the candle surface.
- Paint Smudging: Avoid touching the painted areas of the candle until the paint is completely dry and cured. Place the candles on a flat surface and handle them with care to avoid smudging the design.
- Paint Bleeding: If you are layering colors, ensure that each layer is dry before applying the next. This prevents colors from mixing or bleeding into each other.
- Overloading the Brush: Avoid loading too much paint onto your brush as it can lead to drips and uneven application. Dab the brush on a paper towel to remove excess paint before applying it to the candle.
- Paint Fading: Use high-quality paints designed for candle painting and ensure that they are heat-resistant. This helps prevent the paint from fading or melting when the candle is lit.
Read more: How To Arrange Candles
Troubleshooting Issues with the Paint or Candle
While painting candles, you may encounter some issues related to the paint or the candles themselves. Here are some troubleshooting techniques:
- Poor Adhesion: Ensure that the candle surface is clean and free of any residue or oils before painting. If the paint is not adhering well, lightly sand the surface or warm it with a hairdryer before painting.
- Cracking or Peeling Paint: If the paint starts cracking or peeling after it has dried, it may be caused by low-quality or incompatible paints. Use paints specifically designed for candle painting and follow the instructions for proper drying and curing.
- Melting Paint: If the paint melts or softens when the candle is lit, it may not be heat-resistant or suitable for candle use. Use paints labeled as heat-resistant or designed for use on candles to prevent this issue.
- Uneven Burning: If you plan to burn your painted candles, ensure that the painted area is not in direct contact with the flame. This prevents uneven burning and helps maintain the design integrity.
- Changes in Candle Texture: If the texture of the candle changes after painting, such as becoming sticky or tacky, it may indicate an issue with the paint or improper drying and curing. Follow the manufacturer’s instructions for paint application and allow proper drying and curing time.
By keeping these tips and troubleshooting techniques in mind, you can navigate any challenges that may arise during your candle painting journey. Remember to have fun, be creative, and let your artistic imagination shine through your designs.
With the completion of these helpful tips and troubleshooting guidance, you are now equipped to embark on your candle painting adventure with confidence and skill. Enjoy the process of transforming plain candles into unique and beautiful works of art!
This concludes our comprehensive guide on how to paint candles. Happy painting!
Conclusion
Candle painting is a delightful and creative activity that allows you to transform ordinary candles into unique and personalized works of art. With the right materials, techniques, and a dash of creativity, you can bring your candle painting ideas to life and create stunning designs that will captivate and impress.
We started this guide by gathering the necessary materials, including paint, candles, brushes, palettes, and protective coverings for your work area. We then delved into the process of preparing the candles by ensuring they are clean, removing labels and stickers, and preparing the surface for paint adhesion.
Next, we explored the importance of choosing the right paint for candle painting, considering different paint types and specific considerations for various candle materials. Understanding color theory and selecting complementary or contrasting colors were discussed to help you create visually harmonious designs that stand out.
We then delved into various painting techniques, including basic brush strokes, layering colors, and adding texture or patterns to bring depth and dimension to your candle designs. We explored methods of applying the paint, such as painting with a brush, dipping the candles, and alternative techniques like splatter painting or marbling.
After exploring the painting process, we emphasized the significance of allowing the paint to dry properly and curing the painted candles to ensure lasting and durable designs. Sealing the paint with a suitable sealant was advised to protect your artwork, and additional embellishments were suggested to enhance the visual appeal of your painted candles.
Lastly, we provided helpful tips and troubleshooting advice to avoid common painting mistakes and tackle any issues that may arise during the candle painting process. By being aware of these tips and troubleshooting techniques, you can overcome challenges and achieve professional and eye-catching results.
Now, armed with the knowledge and guidance provided in this comprehensive guide, you are ready to embark on your exciting candle painting journey. Let your creativity soar as you explore different color palettes, experiment with techniques, and create beautiful designs on your candles.
Remember to enjoy the process and embrace your artistic expression. Each painted candle is a unique reflection of your creativity and personal style. Whether you keep them as decorative items or gift them to others, your painted candles are sure to bring joy and beauty wherever they are displayed or used.
So, gather your materials, unleash your artistic prowess, and let the magic of candle painting ignite your passion for creativity. Happy candle painting!
Now that you've mastered painting candles, why not extend your flair for unique home decor? If you're on the hunt for more inspiration, our guide on decorative candles showcases a variety of stunning options that can transform any room. These aren't just any candles; they are art pieces that reflect sophisticated taste and creativity. Whether you're planning a dinner party or just want to add a touch of elegance to your living space, check out our selected candles that promise to impress any visitor.
Frequently Asked Questions about How To Paint Candles
Was this page helpful?
At Storables.com, we guarantee accurate and reliable information. Our content, validated by Expert Board Contributors, is crafted following stringent Editorial Policies. We're committed to providing you with well-researched, expert-backed insights for all your informational needs.