Articles
How To Prime A Keurig Coffee Machine
Modified: October 19, 2024
Learn how to prime a Keurig coffee machine with these helpful articles.
(Many of the links in this article redirect to a specific reviewed product. Your purchase of these products through affiliate links helps to generate commission for Storables.com, at no extra cost. Learn more)
Introduction
Priming a Keurig coffee machine is an essential step in ensuring optimal performance and a delicious cup of coffee every time. Whether you’re a coffee connoisseur or simply want a quick and convenient way to brew your favorite beverage, understanding how to properly prime your machine is key. In this article, we will explore the benefits of priming a Keurig coffee machine, the step-by-step process to prime it, and troubleshoot common issues that may arise.
Keurig coffee machines have gained immense popularity for their convenience and ability to brew a single cup of coffee with the touch of a button. However, without proper priming, your machine may not deliver the exceptional coffee experience you desire. Priming helps to ensure that the internal components of the machine are clean, free from any residue, and ready to deliver the perfect cup of coffee.
One of the primary benefits of priming your Keurig coffee machine is that it allows for optimal water flow. During the priming process, any air bubbles or impurities trapped in the machine’s water lines are removed, ensuring a consistent flow of water. This is vital for extracting the full flavor of your coffee and achieving the perfect brew strength.
Another benefit of priming is that it helps to maintain the longevity of your Keurig coffee machine. By removing any buildup or residue that may accumulate over time, priming prevents clogs and blockages in the water lines and keeps your machine running smoothly. Regularly priming your machine can extend its lifespan and prevent the need for costly repairs or replacements down the line.
Now that we understand the importance of priming, let’s dive into the step-by-step process for priming your Keurig coffee machine. By following these simple instructions, you’ll be able to enjoy a consistently delicious cup of coffee with every brew.
Key Takeaways:
- Priming your Keurig coffee machine is essential for optimal flavor, brew strength control, and machine longevity. It ensures consistent water flow, prevents clogs, and extends the lifespan of your beloved coffee maker.
- By following the step-by-step priming process and troubleshooting common issues, you can confidently maintain your Keurig machine and enjoy a consistently exceptional cup of coffee. Regular cleaning and descaling are crucial for maintaining performance and quality.
Read more: How To Descale Keurig Coffee Machine
Benefits of Priming a Keurig Coffee Machine
Priming a Keurig coffee machine offers numerous benefits that contribute to a better coffee brewing experience. Let’s explore some of the key advantages:
- Improved Flavor and Taste: Priming helps to ensure that your Keurig machine delivers consistent water flow, allowing for better extraction of coffee flavors. By removing any air bubbles or impurities, priming creates a smooth and steady flow of water, resulting in a more flavorful and enjoyable cup of coffee.
- Enhanced Brew Strength Control: When a Keurig machine is not properly primed, the water flow can be inconsistent, leading to variations in brew strength. By priming your machine, you set a solid foundation for a consistent water flow, giving you better control over the strength of your brew. You can adjust the brew size and use a wider range of K-Cup pod options, knowing that the brewing process will be optimized.
- Prevention of Clogs and Blockages: Over time, mineral deposits, coffee grounds, and other debris can accumulate in the internal components of your Keurig machine. These deposits can cause clogs and blockages in the water lines, affecting the performance and efficiency of the machine. Regularly priming the machine helps to remove these deposits and prevent potential issues.
- Extended Lifespan of the Machine: By priming your Keurig coffee machine, you are taking proactive steps to maintain its longevity. Removing any buildup or residue from the water lines and internal components ensures that the machine operates at its best. This can minimize the risk of mechanical problems and help you avoid costly repairs or the need for a replacement.
- Consistent and Reliable Performance: A properly primed Keurig machine ensures that each cup of coffee is brewed consistently and reliably. You can trust that the machine will deliver the desired brew size, temperature, and flavor profile. This reliability is especially important for those who rely on their Keurig coffee machine for a quick and consistent morning coffee.
Overall, priming your Keurig coffee machine is crucial to achieve the best coffee brewing experience. From enhanced flavor to reliable performance, priming offers a range of benefits that ensure you can enjoy your favorite beverage to the fullest. Now, let’s delve into the step-by-step process of priming your Keurig coffee machine.
Understanding the Priming Process
Before diving into the step-by-step process of priming your Keurig coffee machine, it’s important to understand the priming process itself. Priming is the act of purging any air bubbles or impurities from the internal water lines of the machine, ensuring a smooth and consistent water flow for optimal brewing.
The priming process typically involves cleaning and descaling the machine, as well as performing specific actions to remove air from the water lines. By following these steps, you can ensure that your Keurig coffee machine is properly primed and ready to brew a perfect cup of coffee.
Cleaning and descaling the machine is an important part of priming, as it removes any residue or mineral deposits that may have accumulated over time. This helps to prevent clogs and other issues that could affect water flow and the overall performance of the machine.
Once the machine is cleaned, priming involves performing actions such as running water through the machine without a coffee pod and cycling through a brew cycle to ensure that the water lines are free from air bubbles. These actions help to establish a smooth and consistent water flow, ensuring that your coffee is brewed to perfection.
Understanding the priming process not only helps to ensure the effectiveness of the machine but also assists in troubleshooting any issues that may arise. If you encounter problems with your Keurig coffee machine, priming is often one of the first steps recommended by the manufacturer to resolve the issue. By understanding how and why priming works, you can confidently troubleshoot and resolve any problems that may occur.
Now that we have a clear understanding of the priming process, let’s move on to the step-by-step instructions to prime your Keurig coffee machine and enjoy a consistently delicious cup of coffee every time.
Step 1: Preparing the Keurig Coffee Machine
Before you begin the priming process, it’s essential to ensure that your Keurig coffee machine is properly prepared. This includes checking the power source, cleaning the external surfaces, and ensuring that the necessary tools and materials are readily available.
Here are the key steps to follow when preparing your Keurig coffee machine for priming:
- Check the power source: Ensure that your Keurig machine is securely plugged into a power outlet. This will ensure that the machine has the necessary power supply to perform the priming process.
- Clean the external surfaces: Before starting the priming process, wipe down the external surfaces of the machine using a soft, damp cloth. This will remove any dirt, dust, or residue that may have accumulated, ensuring a clean and hygienic brewing environment.
- Gather the necessary materials: Make sure you have the materials required for priming, including a clean, empty cup or container, and access to a sink with running water. You may also need a descaling solution if your machine requires it, as well as a cleaning brush or sponge for any necessary cleaning.
- Review the manufacturer’s instructions: Before proceeding, it’s always a good idea to review the user manual or instructions provided by the manufacturer. This will ensure that you are familiar with any specific priming requirements or recommendations for your particular Keurig coffee machine model.
By taking the time to properly prepare your Keurig coffee machine, you can ensure a smooth and successful priming process. Once you have completed these preparation steps, you are ready to move on to the next phase of priming, which involves checking the water reservoir. Let’s explore that in the next step.
Step 2: Checking the Water Reservoir
Once you have prepared your Keurig coffee machine, the next step in the priming process is to check the water reservoir. The water reservoir is where the machine stores the water used for brewing coffee, so it’s crucial to ensure that it is clean and filled with fresh water.
Follow these steps to check the water reservoir and ensure it is ready for priming:
- Empty and clean the water reservoir: Start by removing the water reservoir from the machine, if applicable. Pour out any leftover water from the previous use and rinse the reservoir with fresh water. Use a gentle dish soap if necessary, and then thoroughly rinse to remove any soap residue.
- Check for any debris or buildup: While the water reservoir is empty, inspect it for any debris, mineral deposits, or residue that may have accumulated. Use a cleaning brush or sponge to clean the inside of the reservoir if needed, paying close attention to the bottom and corners.
- Fill the water reservoir: Once the reservoir is clean, fill it with fresh, filtered water up to the desired level indicated by the machine. Avoid overfilling, as this can lead to spills or other issues during the priming process.
- Reattach the water reservoir: If you removed the water reservoir, securely reattach it to the machine, ensuring it is properly aligned and locked into place. This will prevent any water leakage and ensure a smooth priming process.
Checking the water reservoir is an essential step in the priming process as it ensures that the machine has an adequate supply of water to carry out the priming and brewing processes. By starting with a clean and filled reservoir, you can optimize the performance and efficiency of your Keurig coffee machine.
Now that the water reservoir is checked and filled, we are ready to move on to the next step: cleaning and descaling the Keurig coffee machine. This step is crucial for maintaining the internal components and ensuring optimal brewing conditions. Let’s proceed to the next step for detailed instructions.
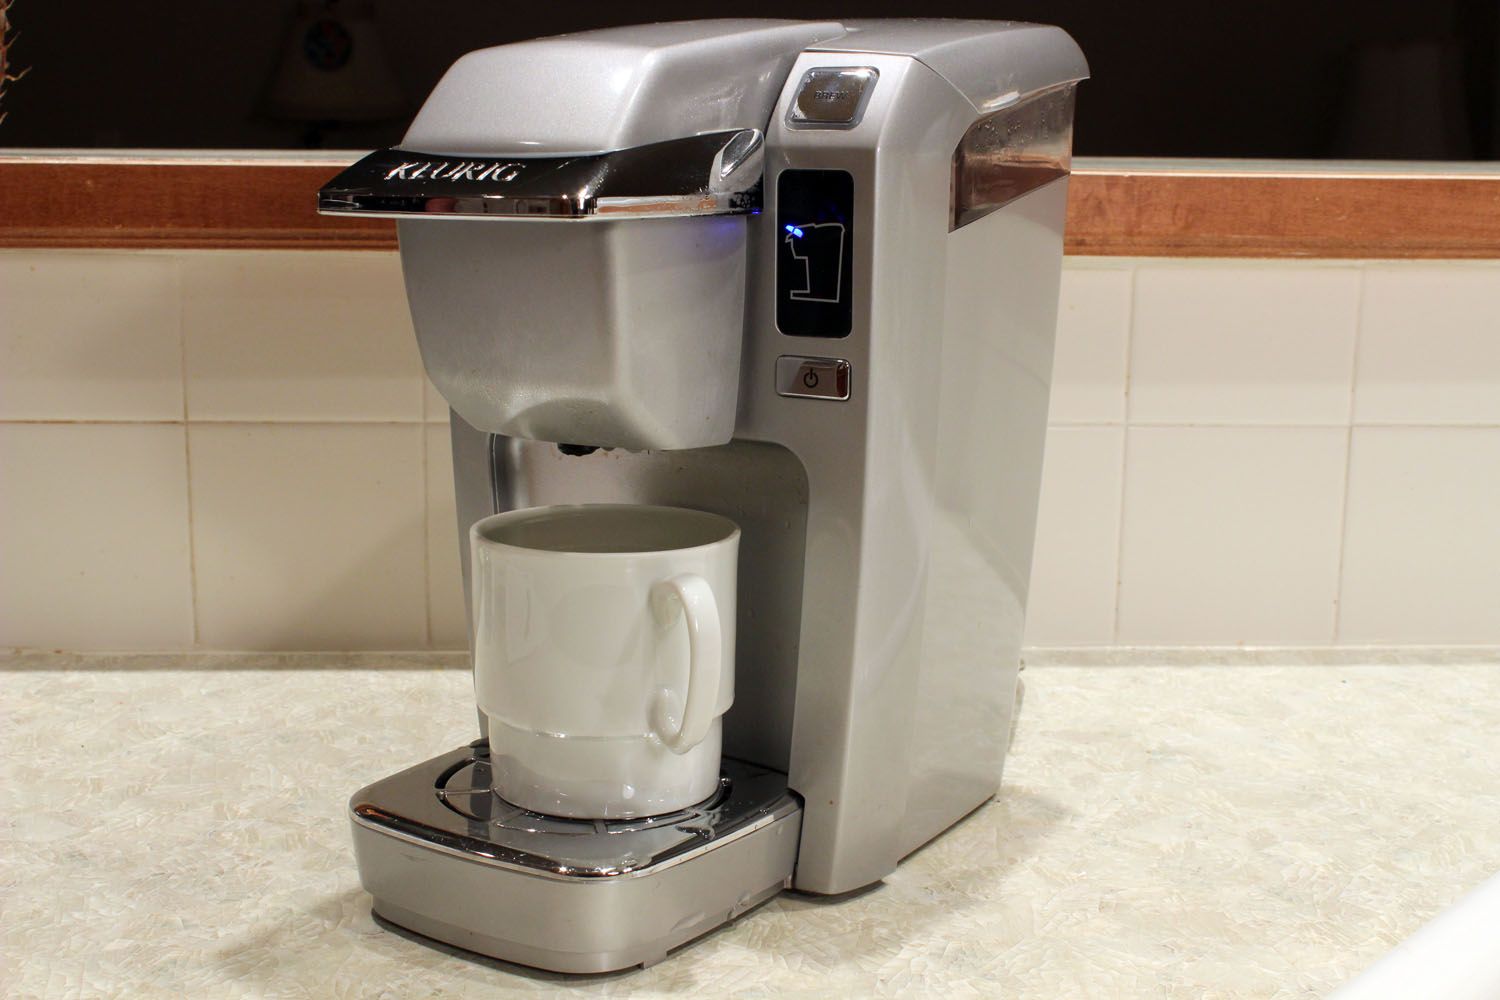
To prime a Keurig coffee machine, fill the water reservoir, place a mug on the drip tray, and run a cleansing brew without a K-cup. This will help remove any air bubbles and ensure proper functioning.
Read more: What Is The Newest Keurig Coffee Machine
Step 3: Cleaning and Descaling the Keurig Coffee Machine
Cleaning and descaling your Keurig coffee machine is an important step in the priming process as it removes any residue, mineral deposits, or buildup that may affect the performance and taste of your coffee. Regular cleaning and descaling help maintain the longevity of the machine and ensure it operates at its best.
Follow these steps to clean and descale your Keurig coffee machine:
- Prepare the cleaning solution: Check the manufacturer’s instructions for the recommended cleaning solution or descaling solution to use with your specific Keurig machine model. If a cleaning solution is not available, a mixture of water and vinegar can be used as an alternative. Dilute the solution according to the instructions provided.
- Empty and clean the drip tray and K-Cup holder: Remove the drip tray and K-Cup holder from the machine. Discard any remaining coffee grounds and rinse them with warm, soapy water. Use a cleaning brush or sponge to remove any residue or buildup. Rinse thoroughly and set them aside to dry.
- Run a cleaning cycle: Place a clean, empty cup or container on the drip tray. Start a cleaning cycle by selecting the appropriate setting on your Keurig machine. This will prompt the machine to run water through the internal components and flush out any residue or buildup. Follow the specific instructions provided by the manufacturer for your machine model.
- Perform a descaling cycle: If your machine requires descaling, follow the instructions provided by the manufacturer to initiate a descaling cycle. This process involves running the descaling solution or water and vinegar mixture through the machine to dissolve mineral deposits and remove any scale buildup. Allow the solution to sit in the machine for the recommended amount of time before proceeding.
- Rinse the machine: Once the cleaning or descaling cycle is complete, run multiple cycles of clean water through the machine to rinse out any remaining solution or residue. This will ensure that there are no lingering flavors or odors that may impact the taste of your coffee. Dispose of the water in the cup or container used during the rinsing process.
- Clean the external surfaces: Wipe down the external surfaces of the machine, including the housing, buttons, and display, with a clean, damp cloth. Dry with a soft towel to remove any moisture.
- Reassemble the machine: Once all components are clean and dry, reattach the drip tray and K-Cup holder to the machine. Ensure they are properly aligned and securely in place.
Cleaning and descaling your Keurig coffee machine should be done regularly to maintain its performance and ensure a delicious cup of coffee every time. By following these steps, you can remove any residue or buildup that may hinder the priming process and affect the quality of your brew.
Now that your Keurig coffee machine is cleaned and descaled, we can move on to the next crucial step: priming the machine. The priming process will ensure that the machine is ready to deliver the perfect cup of coffee. Let’s proceed to the next step for detailed instructions.
Step 4: Priming the Keurig Coffee Machine
Now that you have prepared your Keurig coffee machine and ensured that it is clean and descaled, it’s time to move on to the priming process. Priming your machine will help remove any air bubbles or impurities from the water lines, ensuring a smooth and consistent flow of water for optimal brewing.
- Place a clean, empty cup: Start by placing a clean, empty cup or container on the drip tray to catch the water that will be flushed through the machine during the priming process.
- Power on the machine: Turn on your Keurig coffee machine and allow it to go through the startup process. This may involve a warm-up period or other indicators that the machine is ready for operation.
- Select the priming option: Depending on your specific Keurig machine model, locate the priming or “flushing” option in the menu or control panel. This option is typically designed to flush water through the system without using a coffee pod.
- Start the priming process: Once you have found the priming option, follow the instructions displayed on the screen or provided in the user manual. This may involve pressing a button or selecting a specific brew size to initiate the priming cycle.
- Allow the machine to run: During the priming process, your Keurig coffee machine will pump water through the internal water lines, flushing out any air bubbles or impurities. You may hear noises or see water being dispensed into the cup below. Let the machine run until it completes the priming cycle.
- Dispose of the water: Once the priming cycle is complete, empty the cup or container that caught the flushed water. Take note of the water’s clarity and ensure that it appears clean and free from any debris or air bubbles.
- Repeat if necessary: In some cases, it may be advisable to repeat the priming process one or two more times to ensure thorough flushing of the water lines. Follow the manufacturer’s recommendations or personal preference.
By following these steps, you can effectively prime your Keurig coffee machine and ensure that it is ready to brew the perfect cup of coffee. The priming process helps to optimize water flow and prepare the machine for consistent and reliable brewing.
Now that you have successfully primed your Keurig coffee machine, it’s time to move on to the next step: troubleshooting common issues that may arise during the priming process. Let’s proceed to the next step for helpful tips and solutions.
Step 5: Troubleshooting Common Issues
While priming your Keurig coffee machine, you may encounter some common issues that can be easily resolved. By understanding these issues and their possible solutions, you can troubleshoot effectively and ensure a successful priming process.
Here are some common issues you may encounter during priming and their troubleshooting steps:
- No water flow: If you experience a lack of water flow during the priming process, make sure that the water reservoir is properly filled and seated in place. Check that the machine is not clogged with debris or mineral deposits by cleaning the needles located in the K-Cup holder and the bottom of the water reservoir.
- Irregular water flow: If the water flow is inconsistent or splattering during priming, try cleaning the exit needle, which is located on the underside of the K-Cup holder. A clogged or partially blocked needle can disrupt water flow. Also, check the water reservoir for any obstructions or debris that may be affecting the flow.
- Strange noises or odors: Unusual noises or odors during priming may indicate that the machine needs cleaning or descaling. Ensure that you have properly cleaned and descaled your Keurig coffee machine before starting the priming process. If the issue persists, refer to the manufacturer’s troubleshooting guide or contact customer support for further assistance.
- Water leaks: If you notice water leaking from your Keurig coffee machine during priming, double-check that all components, such as the water reservoir and drip tray, are securely in place. Clean any spilled water promptly to prevent damage to surrounding surfaces.
- Error messages or indicators: If your Keurig machine displays error messages or indicators during priming, consult the user manual or manufacturer’s website for specific instructions on how to address the issue. Common error messages may indicate a need to descale the machine or perform a specific troubleshooting step.
By following these troubleshooting steps, you can overcome common issues that may arise during the priming process. Remember to consult the user manual or manufacturer’s instructions for your specific machine model, as different models may have unique troubleshooting methods.
With these troubleshooting tips in mind, you are now equipped to effectively troubleshoot and resolve any common issues that may occur during the priming process. Once you have successfully addressed these issues, your Keurig coffee machine will be ready to deliver a perfect cup of coffee every time.
With the priming process complete and any issues resolved, you can now enjoy the full benefits and exceptional performance of your freshly primed Keurig coffee machine. Happy brewing!
Conclusion
Priming a Keurig coffee machine is a necessary step to ensure optimal performance, consistent water flow, and a delicious cup of coffee with every brew. By understanding the benefits of priming, the priming process itself, and troubleshooting common issues, you can maintain the longevity and efficiency of your machine while enjoying the perfect cup of coffee.
Through proper priming, you enhance the flavor and taste of your coffee, as well as have better control over brew strength. Priming also helps prevent clogs and blockages, prolongs the lifespan of the machine, and ensures reliable and consistent performance.
To prime your Keurig coffee machine, it is essential to prepare the machine, check the water reservoir, clean and descale the machine, and finally, perform the priming process itself. Along the way, troubleshooting common issues, such as water flow problems and leaks, can be easily addressed by following specific steps.
By following the step-by-step instructions outlined in this article, you can confidently prime your Keurig coffee machine and enjoy a consistently exceptional cup of coffee with every brew. Don’t forget to regularly clean and descale your machine to maintain its performance and quality.
Now that you have a comprehensive understanding of priming and have mastered the steps involved, it’s time to put your knowledge into action. Prepare, prime, and indulge in the delightful aroma and rich flavors of your favorite coffee with your properly primed Keurig coffee machine.
Happy brewing!
Frequently Asked Questions about How To Prime A Keurig Coffee Machine
Was this page helpful?
At Storables.com, we guarantee accurate and reliable information. Our content, validated by Expert Board Contributors, is crafted following stringent Editorial Policies. We're committed to providing you with well-researched, expert-backed insights for all your informational needs.


0 thoughts on “How To Prime A Keurig Coffee Machine”